1
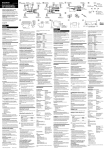
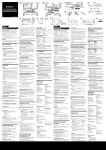
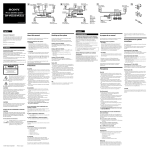
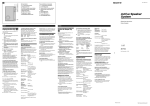
A Front (Right) Subwoofer Center Front (Left) B Front (Right) Ee Ee Ee Ee LINE IN Front (Left) Center Ee Subwoofer C Ee 3.5 m 3.5 m 3.5 m 3.5 m e Amplifier 2.5 m R FRONT E e R FRONT L E e eE Ee SA-VE325 L WOOFER OUT CENTER R 10 m R L eE Ee L CENTER REAR Ee R 3.5 m L e E E e 3.5 m Amplifier Micro Satellite System 2.5 m e E e E R SPEAKER SPEAKER IN OUT E L REAR 10 m 10 m 10 m Ee Ee 4-233-075-71(1) E e Rear (Right) Rear (Left) Ee Rear (Left) Rear (Right) English WARNING To prevent fire or shock hazard, do not expose the unit to rain or moisture. To prevent fire, do not Cover the ventilation of the apparatus with news papers, table-cloths, curtains, etc. And don’t place lighted candles on the apparatus. To prevent fire or shock hazard, do not place objects filled with liquids, such as vases, on the apparatus. To avoid electrical shock, do not open the cabinet. Refer servicing to qualified personnel only. Do not install the appliance in a confined space, such as a bookcase or built-in cabinet. About this manual The instructions in this manual are for SA-VE325, Sony Micro Satellite Systems. The SA-VE325 is a 5.1 channel speaker system consisting of two front speakers, two rear speakers, one center speaker, and one subwoofer. It supports Sony Digital Cinema Sound, Dolby* Pro Logic, and Dolby Digital (AC-3), and is thus geared towards the enjoyment of movies. * Manufactured under license from Dolby Laboratories. DOLBY, the double-D symbol ;, “PRO LOGIC” and “Dolby Digital (AC-3)” are trademarks of Dolby Laboratories. Precautions Hooking up the system On safety Connect the speaker system to the speaker output terminals of an amplifier. Make sure power to all components (included the subwoofer) is turned off before starting the hook-up. • Hookup A • • Before operating the system, be sure that the operating voltage of the system is identical with that of your local power supply. • The unit is not disconnected from the AC power source (mains) as long as it is connected to the wall outlet, even if the unit itself has been turned off. • Unplug the system from the wall outlet if it is not to be used for an extended period of time. To disconnect the cord, pull the cord by grasping the plug. Never pull the cord itself. • Should any liquid or solid object fall into the system, unplug the system’s power cord and have the system checked by qualified personnel before operating it any further. • AC power cord must be changed only at the qualified service shop. • This configuration is used when the amplifier is connected to a DVD player, LD player, VCR or other video devices. A • B • — — A Hookup B Try this configuration instead of “Hookup A” in the following situations: —When there are no jacks on the amplifier for a subwoofer. —When you want a stronger bass sound from the subwoofer. C • • • • On operation Notes (C) • Do not drive the speaker system with a continuous wattage exceeding the maximum input power of the system. • If the polarity of the speaker connections are not correct, the bass tones will be weak and the position of the various instruments obscure. • Contact between bare speaker wires at the speaker terminals may result in a short-circuit. • Before connecting, turn off the amplifier to avoid damaging the speaker system. • The speaker grille cannot be removed. Do not attempt to remove the grille on the speaker system. If you try to remove it, you may damage the speaker. • Make sure the plus (+) and the minus (–) terminals on the speakers are matched to the corresponding plus (+) and minus (–) terminals on the amplifier. • Be sure to tighten the screws of the speaker terminals securely as loose screws may become a source of noise. • Make sure all connections are firm. Contact between bare speaker wires at the speaker terminals may cause a short-circuit. • Do not connect the subwoofer to the amplifier’s CENTER output terminal (which is for Dolby Pro Logic or Dolby Digital (AC-3)). No bass sound will output from the subwoofer if you do. • For details regarding the connections on the amplifier side, refer to the manual that was provided with your amplifier. If you encounter color irregularity on a nearby TV screen This speaker system is magnetically shielded to allow it to be installed near a TV set. However, color irregularities may still be observed on certain types of TV sets. • • • ; • • • c c Tip All strired wires are minus (–) in polarity, and should be connected to the minus (–) speaker terminals. • • If color irregularity is observed... c Turn off the TV set once, then turn it on again after 15 to 30 minutes. — — — — — If color irregularity is observed again... c Place the speakers further away from the TV set. If howling occurs Reposition the speakers or turn down the volume on the amplifier. On placement • Do not set the speakers in an inclined position. • Do not place the speakers in locations that are: — Extremely hot or cold — Dusty or dirty — Very humid — Subject to vibrations — Subject to direct sunlight On cleaning Clean the speaker cabinets with a soft cloth lightly moistened with a mild detergent solution or water. Do not use any type of abrasive pad, scouring powder or solvent such as alcohol or benzine. The volume level should not be turned up to the point of distortion. If the volume level is too high, the speaker protection circuit activates, and the sound level drops suddenly. This is not a malfunction. In this case, lower the volume level and wait for a few moments until the unit resumes normal operation. If you have any questions or problems concerning your speaker system, please consult your nearest Sony dealer. 2001 Sony Corporation Printed in China Page 1 2001.2.28, 4:29 PM SA-VE325 (GB/CS) 4-233-075-71(1) D F E G Foot pads Center Subwoofer Front (Left) Front (Right) WS-WV10A (for rear speakers) Micro Satellite System Foot pads WS-FV10A SA-VE325 A WS-TV10A A I H J Rear (Right) Rear (Left) B AUTO B MOVIE ON / STANDBY MUSIC MIN OFF POWER SAVE MAX MODE LEVEL POWER LEVEL ON/STANDBY indicator MODE English Notes Positioning the speakers Location of each speaker (D) Each speaker should face the listening position. Better surround effect will result if all speakers are set at the same distance from the listening position. Place the front speakers at a suitable distance to the left and right of the television. Place the subwoofer on either side of the television. Place the center speaker on the top-center of the TV set. The placement of rear speakers greatly depends on the configuration of the room. The rear speakers may be placed on both sides of the listening position A or behind the listening position B. Tips • Movies are best enjoyed in a room that produces no echoes (as in one with surrounding curtains). • Music (especially classical music) is best enjoyed in a room that produces some echo. Setting the speakers To prevent speaker vibration or movement while listening, attach the supplied foot pads to the bottom four corners of the center speaker, front speakers, and rear speakers (E). Setting the center speaker (F) Set the center speaker firmly on top of the TV set, making sure it is completely level. • Some amplifier functions for enhancing the sound may cause distortion in the subwoofer. If such distortion occurs, turn off those functions. • To enjoy high-quality sound, do not turn the subwoofer volume too high. • To increase the bass sound from the subwoofer, connect the system using “Hookup B”. • The bass sound is enhanced in MOVIE mode rather than in MUSIC mode. Therefore, if you change the mode to MOVIE while listening to some sources that do not include the bass sound, you may not be able to get the effect. Setting amplifier to enjoy movies For the Dolby Digital (AC-3) If your amplifier is connected internally or externally with a Dolby Digital (AC-3) processor, you should use the setup menus for the amplifier to specify the parameters of your speaker system. See the table below for the proper settings. For details on the setting procedure, refer to the manual that was provided with your amplifier. Select Micro Satellite Position if a Sony amplifier provides it. When “Hookup A” is used (Speaker setup) For Specifications • Speaker system Speaker units Enclosure type Rated impedance Power handling capacity Maximum input power: Sensitivity level Frequency range Dimensions (w/h/d) Mass Speaker system Speaker units Enclosure type Rated impedance Power handling capacity Maximum input power: Sensitivity level Frequency range Dimensions (w/h/d) Set to SMALL Mass SMALL SA-WMS325 (subwoofer) Rear speakers SMALL Speaker system Subwoofer ON (or YES) First, turn down the volume on the amplifier. The volume should be set to minimum before you begin playing the program source. For LARGE Center speaker SMALL Rear speakers SMALL Subwoofer 1 2 Turn on the amplifier and select the program source. Press POWER on the subwoofer. The ON/STANDBY indicator on the subwoofer lights up green. 3 When the subwoofer is on (i.e, the ON/STANDBY indicator lights up green) and there is no signal input for a few minutes, the ON/STANDBY indicator changes to red and the subwoofer enters power saving mode. While in this mode a signal is input to the subwoofer, the subwoofer automatically turns on (auto power on/off function). To turn this feature off, slide the POWER SAVE switch on the rear panel to OFF. Note If you turn down the volume level of the amplifier too low, the auto power on/off function may activate, causing the subwoofer to enter power saving mode. Adjusting the sound Slight adjustments to the system can enhance your sound enjoyment. Adjusting the subwoofer (I) 2 OFF (or NO) For the Dolby Pro Logic If your amplifier is connected internally or externally with a Dolby Pro Logic processor, you should set the surround effect mode to “NORMAL” on the amplifier for your particular speaker system. For details on the setting procedure, refer to the manual that was provided with your amplifier. Play the program source. Power turns on and off automatically — Auto power on/off function (J) 1 Set to Front speakers Set MODE according to the program source as follows: Source MODE DVD, LD, video cassette or other video source MOVIE MD, CD, cassette tape or other audio source MUSIC Troubleshooting Should you encounter a problem with your speaker system, check the following list and take the indicated measures. If the problem persists, consult your nearest Sony dealer. There is no sound from the speaker system. •Make sure all the connections have been correctly made. •Make sure the volume on the amplifier has been turned up properly. •Make sure the program source selector on the amplifier is set to the proper source. •Check if headphones are connected. If they are, disconnect them. • Ω E A F 120 watts 89 dB (1 W, 1 m) 90 Hz - 20,000 Hz Approx. 300 × 78 × 126 mm, including front grille Approx. 1600 g Center speaker Listening to the sound (I) B • Full range × 2, magnetically shielded 5.5 × 11 cm, cone type Bass reflex 8 ohms For greater flexibility in the positioning of the speakers, use the optional WS-FV10A, WS-TV10A, or WS-WV10A speaker stand (available only in certain countries). When “Hookup B” is used (Speaker setup) Ω SS-CN325 (center speaker) Front speakers The height of the front speakers should be adjusted to about the center of the TV screen (H). • A 100 watts 87 dB (1 W, 1 m) 90 Hz - 20,000 Hz Approx. 70 × 152 × 126 mm, including front grille Approx. 830 g each B • Full range, magnetically shielded 5.5 × 11 cm, cone type Bass reflex 8 ohms Setting other speakers (G) Tip • D SS-V325 (front and rear speakers) G B H Active subwoofer, magnetically shielded Speaker unit Woofer: 16 cm, cone type Enclosure type Advanced SAW type Reproduction frequency range 28 Hz - 200 Hz Amplifier section Continuous RMS power output 75 W (8 ohms, 20 Hz 20 kHz, 0.8% THD) 1 Inputs 2 Ω I LINE IN (input pin jack) SPEAKER IN (input terminals) Outputs LINE OUT (output pin jack) SPEAKER OUT (output terminals) 3 General Power requirements Power consumptions Dimensions (w/h/d) Mass J 110 - 120 V/220-240 V AC, 50/60 Hz 70 W 1 W (standby mode) Approx. 205 × 385 × 389 mm, including front grille Approx. 10.3 kg • • • Supplied accessories • Foot pads (20) Audio connecting cord (1) Speaker connecting cords, 10 m (2) Speaker connecting cords, 3.5 m (3) Speaker connecting cords, 2.5 m (2) • • • Design and specifications are subject to change without notice. I I a • 1 There is distortion in the subwoofer sound output. •Check if any sound-enhancing functions have been activated on the amplifier. If they have, turn them off. There is hum or noise in the speaker output. •Make sure all the connections have been correctly made. •Make sure none of the audio components are positioned too close to the TV set. 2 The sound has suddenly stopped. •Make sure all the connections have been correctly made. Contact between bare speaker wires at the speaker terminals may cause a short-circuit. Rotate LEVEL to adjust the volume. Set the volume level to best suit your preference according to the program source. Page 2 2001.2.28, 4:30 PM SA-VE325 (GB/CS) 4-233-075-71(1)