1
INSTRUCTION MANUAL
SONANCE SYMPHONY® T
I N - WA L L S P E A K E R S
INTRODUCTION
Thank you for purchasing Sonance Symphony T-series in-wall speakers.
When properly installed your new speakers will give you years of entertainment
pleasure. This manual covers these speaker models: Symphony S625 T , Symphony
S624 T , Symphony S623 T , Symphony S622 T , Symphony S621 T .
®
SAFETY WARNING:
These speakers have FastMount ® tabs that prevent the speaker from falling out
of the mounting hole during the installation process.
The edges of the FastMount tabs are very sharp.
Use caution when handling the speaker.
BOX CONTENTS
Your Sonance Symphony speaker box should contain the following items:
(2) Symphony speakers, (2) Plastic paint plugs (installed on fronts of speakers);
(2) Paintable grilles; (1) Mounting cutout template (in packaging)
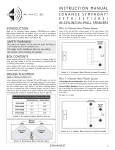
SPEAKER PLACEMENT
Surround Speakers
(5.1-Channel System)
Locate the surround channel
speakers on the side walls
approximately 2 – 6 feet
behind the listening position,
at least 5 feet from the floor.
Use Figure 2 as a guide.
2' – 6'
5' – 7'
Surround Speakers
(7.1-Channel System)
• Left & Right Surround
Speakers: Place the left
and right surround speakers
directly to the sides of the
listening position, at least 5
feet from the floor.
FIGURE 2:
SURROUND SPEAKER PLACEMENT
• Surround Back Speakers: Place the surround back speakers in the rear
wall, between 3 feet and 6 feet apart and at least 5 feet from the floor.
Use Figure 3 as a guide.
Home Theater Speaker Placement
Right Surround
Speaker
Left, Center & Right Channels
• Place the left & right speakers on either side of the video screen, anywhere from
6 feet to 10 feet apart and 38 – 42 inches from the floor.
• If possible, locate the left and right speakers at least 18 inches away from the
side walls.
• If possible, locate the center speaker at the same height as the left & right
channel speakers (38 – 42 inches from the floor).
• If you must place the center speaker above or below a video screen, place it
no more than 2 feet above or below the center of the left and right speakers.
This will maintain consistent tonality between all 3 front channel speakers.
• The main listening position should be between 8 and 12 feet away from the
speakers.
Use Figure 1 as a guide.
Right
Front
Speaker
Right
Surround Back
Speaker
Video
Screen
Center
Speaker
Left
Front
Speaker
FIGURE 3: SPEAKER PLACEMENT
Left
Surround Back
Speaker
Left Surround
Speaker
IN A
7.1-CHANNEL SYSTEM
Stereo (2-Channel) Placement
6' – 10'
Apart
18"
From Side
Wall
18"
From Side
Wall
2'
(max.)
• Place the left and right speakers anywhere from 6 feet to 10 feet apart, with
the main listening position as close to midway between the speakers as possible.
• The speakers should be at least 2 feet away from the side walls.
• The main listening position should be between 4 and 10 feet away from the
speakers.
• In most cases pivoting the tweeter of each speaker directly towards the main
listening position will help maximize the stereo soundstage.
Use the left and right speaker placement in Figure 1 as a guide.
FIGURE 1:
L E F T , C E N T E R & R I G H T H OM E T H E AT E R S P E A K E R P L A C E M E N T
1
SONANCE SYMPHONY ® T
INSTALLING THE SPEAKERS
Before Installation: IR Knockout
All Sonance Symphony T-series speakers have a plug for installing an IR receiver
into the speaker’s front baffle (see Figure 4 ). In systems where the electronics are
placed in an inconvenient location this allows remote controls to be aimed at the
front of the room instead of at the electronics.
The IR plug is in the form of a bolt and retaining nut. To remove the plug, unscrew
the nut (located behind the baffle, see Figure 5) and remove the bolt. The hole
is designed to receive a Sonance OptiLinQ ® SMR1 or SMR1P Surface-Mount IR
receiver. Insert the IR receiver through the front of the speaker baffle and use the
nut included with the receiver to secure it to the baffle.
Retaining Nut
IR Plug
FIGURE 4:
IR PLUG
FIGURE 5: IR PLUG
R E TA I N I N G N U T
5. Make sure all the RotoLock clamps
are in the full clockwise position
so that they are tucked within the
mounting hole’s border. Insert the
speaker into the hole in the wall
( Figure 6 ). The RotoLock system
can accommodate a maximum wall
material thickness of 1¼”.
• The FastMount tabs will prevent
the speaker from falling out of
the mounting hole, allowing the
installer to let go of the speaker
to pick-up tools or other items
( Figure 7 ).
FastMount®
Tabs
N OTE : T HE FAST M OUNT
TABS
FIGURE 6:
ARE DESIGNED FOR ONE I N S E RT I N G T H E S P E A K E R
TIME USE ONLY . I F THE
INTO THE MOUNTING HOLE
SPEAKER IS REMOVED FROM
THE MOUNTING HOLE THE
FAST M OUNT TABS WILL DISCONNECT AND REMAIN INSIDE THE WALL .
6. Tighten the four screws on the front of the speaker baffle. The RotoLock clamps will
automatically rotate into position and begin clamping the speaker (Figure 8).
Before Installation: Retrofit
1. Determine the location for the speaker (see Speaker Placement on page 1).
2. Perform an obstruction survey to be certain that there are no studs, conduit,
pipes, heating ducts, pocket doors or air returns in the wall cavity that will
interfere with the speaker.
3. The cutout for all Symphony T speakers is 10 5/8” (270mm) x 6¾” (171mm).
There must be at least 3 3/16” (86mm) depth within the wall cavity for the speaker.
4. Position the included cutout template where the speaker is to be located and
pencil an outline on the wall.
• If you are unsure about obstructions, drill a small hole in the center of
the outline and insert a coat hanger wire into the hole to feel-around for
possible obstructions.
5. Cut the mounting hole using a keyhole or drywall saw, and run the speaker
wires from the mounting hole to the amplifier location.
• Consult local building codes before running speaker wires through walls.
Installation
Sonance Symphony T speakers feature exclusive FastMount ® tabs and an integral
RotoLock ® mounting system for quick mounting directly into existing walls.
WARNING: THE EDGES OF FASTMOUNT TABS ARE VERY
SHARP. USE CAUTION WHEN HANDLING THE SPEAKER.
1. Remove the paint plug from the speaker.
2. Run speaker wire from each speaker to the amplifier location.
3. Strip ¼” – ½” of insulation from each speaker lead. Twist the strands or tin
the exposed wire with solder to ensure that there are no stray strands.
(Stray strands that touch each other can cause a short-circuit that can damage
the amplifier.)
4. The speaker’s connector posts are spring-loaded. Push the top of each connector
post down to open the connector and insert the exposed wires into the holes
in the posts.
• The speaker’s positive post is labeled with a red dot; the
negative post is labeled with a black dot. Double-check that you connected
amplifier “+” to speaker “+” and amplifier “–” to speaker “–”.
2
FastMount®
Tabs
FIGURE 7:
FA S T M O U N T ® TA B S
RotoLock®
Clamps
FIGURE 8:TIGHTENING
ROTO LO C K C L A M P S
THE
• When you notice resistance on the screws the speaker has been clamped
successfully.
Impor tant: Always use low-torque settings; NEVER
over-tighten.
N OTE : T HE SPEAKER FLANGE IS DESIGNED TO FLEX AND CONFORM TO
ANY SMALL IMPERFECTIONS IN THE WALL SURFACE . D O NOT TIGHTEN
THE SCREWS SO MUCH SO THAT THE FLANGE BOWS - OUT .
7. Attach the grille after the speaker has been installed. Insert about half of the
grille into the groove at the edge of the speaker. Gently fit the remaining half
of the grille by working around the speaker, fitting the grille into the groove
as you go.
N OTE : YOU
CAN ADJUST THE TORQUE APPLIED TO THE
SCREWS TO ACHIEVE A PROPER GRILLE FIT .
R OTO L OCK
SONANCE SYMPHONY ® T
PAINTING THE SPEAKERS
S624T
All Sonance Symphony speakers come from the factory fitted with a plastic ‘paint
plug’ that protects the speaker drivers while the mounting flange is being painted.
Paint the grille separately from the speaker. Before painting, carefully remove the
under-grille cloth. It is held in place with a light tacking glue that makes it easy
to remove. Spray the grilles with thinned paint (5 parts thinner to 1 part paint),
being careful not to plug the holes. Too heavy a coat of paint on the grille will
adversely affect the sound of the speaker.
Once the grilles and flange are painted and dry, replace the under-grille cloth,
remove the paint plug from the mounting flange and install the grille.
SPEAKER ADJUSTMENTS
All Symphony T-series speakers (except the S621T) have a pivoting tweeter that
allows you to direct sound towards or away from the listening area, depending on
how the speakers are being used:
• If you’re using the speakers in stereo or as the front left/center/right speakers
in a home theater, pivot the tweeter directly towards the listening area. This will
help the sound from the speakers blend into
a solid soundstage even if the speakers are
widely separated.
• If you’re using the speakers as surround
channel speakers in a home theater, you can
create a more diffuse, spacious surround
effect by pointing the tweeters towards a
wall or window, away from the listeners.
FIGURE 9:
P I VOT I N G T H E T W E E T E R
Apply light pressure to the plastic ring around
the outside edge of the tweeter dome, as
shown in Figure 9 . Do not touch or apply pressure to the tweeter dome.
Tweeter Level Control
The S625T, S624T and S623T have a tweeter level control switch (see Figure 10)
that lets you boost or cut the tweeter’s level by 3dB. This allows you to adjust the
speaker’s brightness to better match your listening room or personal taste.
Once you have installed the speakers, listen to a variety of music that you are
familiar with. If the music all tends to
sound too bright or dull, use the Tweeter
Level Control to compensate. If some
recordings sound dull and some sound
Tweeter
bright the speaker is accurately
Level
Control
reproducing differences in the recordings,
and you should leave the control in the
middle (0dB) position.
SPECIFICATIONS
FIGURE 10:
T W E E T E R L E V E L CO N T RO L
S625T
Tweeter:
Woofer:
Frequency Response:
Impedance:
Power Handling:
Sensitivity:
Adjustments:
Dimensions (W x H x D):
Cutout Dim. (W x H):
Shipping Weight:
1" (25mm) Aluminum dome, Ferrofluid-cooled, pivoting
6½" (165mm) Coated carbon fiber cone, rubber surround
43Hz – 20kHz ± 3dB
6 Ohms nominal; 4 Ohms minimum
5 watts minimum; 140 Watts maximum
90dB SPL (2.83V 1 meter)
±3dB Tweeter level
8¼” x 12 3/16" x 3 3/8" (210mm x 310mm x 86mm)
6¾" x 10 5/8" (171mm x 270mm)
11 lbs. (5.0kg) Pair
S623T
Pivoting Tweeter
To Pivot the Tweeter:
Tweeter:
Woofer:
Frequency Response:
Impedance:
Power Handling:
Sensitivity:
Adjustments:
Dimensions (W x H x D):
Cutout Dim. (W x H):
Shipping Weight:
1" (25mm) Beryllium dome, Ferrofluid-cooled, pivoting
6½" (165mm) Beryllium cone, rubber surround
40Hz – 20kHz ±3dB
6 Ohms nominal; 4 Ohms minimum
5 watts minimum; 150 Watts maximum
90dB SPL (2.83V 1 meter)
±3dB Tweeter level
8¼” x 12 3/16" x 3 3/8" (210mm x 310mm x 86mm)
6¾" x 10 5/8" (171mm x 270mm)
12 lbs. (5.45kg) Pair
Tweeter:
Woofer:
Frequency Response:
Impedance:
Power Handling:
Sensitivity:
Adjustments:
Dimensions (W x H x D):
Cutout Dim. (W x H):
Shipping Weight:
1" (25mm) Silk dome, Ferrofluid-cooled, pivoting
6½" (165mm) Carbon fiber cone, rubber surround
43Hz – 20kHz ±3dB
8 Ohms nominal; 6 Ohms minimum
5 watts minimum; 135 Watts maximum
90dB SPL (2.83V 1 meter)
±3dB Tweeter level
8¼” x 12 3/16" x 3 3/8" (210mm x 310mm x 86mm)
6¾" x 10 5/8" (171mm x 270mm)
10 lbs. (4.5kg) Pair
S622T
Tweeter:
Woofer:
Frequency Response:
Impedance:
Power Handling:
Sensitivity:
Adjustments:
Dimensions (W x H x D):
Cutout Dim. (W x H):
Shipping Weight:
1" (25mm) Silk dome, Ferrofluid-cooled, pivoting
6½" (165mm) Polypropylene cone, rubber surround
45Hz – 20kHz ±3dB
8 Ohms nominal; 6 Ohms minimum
5 watts minimum; 125 Watts maximum
89dB SPL (2.83V 1 meter)
None
8¼” x 12 3/16" x 3 3/8" (210mm x 310mm x 86mm)
6¾" x 10 5/8" (171mm x 270mm)
10 lbs. (4.5kg) Pair
S621T
Tweeter:
Woofer:
Frequency Response:
Impedance:
Power Handling:
Sensitivity:
Adjustments:
Dimensions (W x H x D):
Cutout Dim. (W x H):
Shipping Weight:
¾" (19mm) Silk dome, Ferrofluid-cooled
6½" (165mm) Polypropylene cone, rubber surround
50Hz – 20kHz ±3dB
8 Ohms nominal; 6 Ohms minimum
5 watts minimum; 100 Watts maximum
88dB SPL (2.83V 1 meter)
None
8¼” x 12 3/16" x 3 3/8" (210mm x 310mm x 86mm)
6¾" x 10 5/8" (171mm x 270mm)
9 lbs. (4.1kg) Pair
3
TECHNICAL ASSISTANCE AND SERVICE
If you any have questions about the operation or installation of this product, please call our Technical Assistance
Department on any business day at (800) 582-0772 or (949)
492-7777; from 7 a.m. to 5 p.m., PST.
If your speakers should need repair or service, contact your Sonance Authorized
Dealer for help, or use the following procedure:
1. Prior to calling, note the product’s model number, serial number, purchase date,
and the name and address of the dealer where you purchased the product.
2. Contact our Technical Assistance Department at the above number(s) and
describe the problem the unit is experiencing. If applicable, they will issue a
Return Authorization Number.
IMPORTANT: YOU MUST HAVE PRIOR AUTHORIZATION
TO RETURN YOUR SPEAKER TO SONANCE!
3. If you’re directed to return the unit to Sonance for repair, pack the unit in its
original shipping carton. If needed, you can obtain replacement packaging from
us for a small charge. Note: it is best if you place the box into an additional
outer “overcarton” before shipment to minimize a chance of theft in shipment.
Please include a copy of the original bill of sale inside the package.
4. Contact a package delivery company such as United Parcel Service or Federal
Express to arrange prepaid (not collect) shipping. Do not use the U.S. Postal
Service.
IMPORTANT: Freight collect shipments will be refused.
5. Write the Return Authorization Number on the outside of the
shipping carton.
6. Ship the packaged unit to:
Q UALITY A SSURANCE D EPARTMENT
S ONANCE
212 A VENIDA FABRICANTE
S AN C LEMENTE , CA 92672-7531
LIMITED LIFETIME WARRANTY COVERAGE
(U.S. ONLY)
S ONANCE WARRANTS TO THE ORIGINAL RETAIL PURCHASER ONLY THAT
THIS S ONANCE PRODUCT WILL BE FREE FROM DEFECTS IN MATERIALS
AND WORKMANSHIP, PROVIDED THE SPEAKER WAS PURCHASED FROM A
S ONANCE A UTHORIZED D EALER .
Defective products must be shipped, together with proof of purchase, prepaid
insured to the Authorized Sonance Dealer from whom they were purchased, or to
the Sonance factory at the address listed on this instruction manual.
Freight collect shipments will be refused. It is preferable to ship this product in
the original shipping container to lessen the chance of transit damage. In any case,
the risk or loss or damage in transit is to be borne by the purchaser. If upon
examination at the factory or Authorized Sonance Dealer it is determined that the
unit was defective in materials or workmanship at any time during this warranty
period, Sonance or the Authorized Sonance Dealer will, at its option, repair or
replace this product at no additional charge, except as set forth below. If this
model is no longer available and can not be repaired effectively, Sonance, at is
sole option, may replace the unit with a current model of equal or grater value.
In some cases where a new model is substituted, a modification to the mounting
surface may be required. If mounting surface modification is required, Sonance
assumes no responsibility or liability for such modification. All replaced parts and
product become the property of Sonance. Products replaced or repaired under this
warranty will be returned to the original retail purchaser, within a reasonable time,
freight prepaid.
This Warranty does not include service or parts to repair damage caused by accident, disaster, misuse, abuse, negligence, inadequate packing or shipping procedures,
commercial use, voltage inputs in excess of the rated maximum of the unit, or
service, repair or modification of the product which has not been authorized or
approved by Sonance. This Warranty also excludes normal cosmetic deterioration
caused by environmental conditions. This Warranty will be void if the Serial Number
on the product has been removed, tampered-with or defaced. This Warranty is in
lieu of all other expressed warranties. If the product is defective in materials or
workmanship as warranted above, the purchaser’s sole remedy shall be repair or
replacement as provided above. In no event will Sonance be liable for any incidental or consequential damages arising out of the use or inability to use the
product, even if Sonance or an Authorized Sonance Dealer has been advised of the
possibility of such damages, or for any claim by any other party.
Some states do not allow the exclusion or limitation of consequential damages, so
the above limitation and exclusion may not apply. All implied warranties on the
product are limited to the duration of this expressed Warranty. Some states do not
allow limitation on the length of an implied warranty. If the original retail purchaser resides in such a state, this limitation does not apply.
EXCLUSIONS AND LIMITATIONS
The warranty set forth above is in lieu of all other warranties, express or implied,
of merchantability, fitness for a particular purpose, or otherwise. The warranty is
limited to Sonance products registered herein and specifically excludes any damage to loudspeakers and other allied or associated equipment which may result for
any reason from use with this product. Sonance shall, in no event, be liable for
incidental or consequential damages arising from any breach of this warranty or
otherwise. This warranty gives you specific legal rights, and you may have other
rights which vary from state to state.
©2007 Sonance. All rights reserved. Sonance, Sonance Symphony, RotoLock and FastMount are registered trademarks of Dana Innovations.
Due to continuous product improvement, all features and specifications are subject to change without notice. For the latest Sonance product specification information visit
our website: www.sonance.com
212 Avenida Fabricante • San Clemente, CA 92672-7531 USA • (800) 582-7777 or (949) 492-7777 • FAX: (949) 361-5151 • Technical Support: (800) 582-0772
www.sonance .com
33-4338
06/07