1
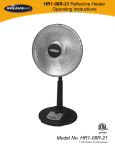
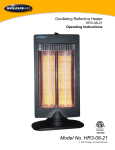
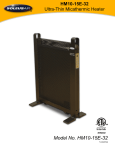
HR1-08R-21 Reflective Heater
Operating Instructions
3077997
Model No. HR1-08R-21
© 2007 Soleus Air International
Thank you for choosing a Soleus Air personal heater. This owner’s manual will provide you with
valuable information necessary for the proper care and maintenance of your new product. Please take
a few moments to thoroughly read the instructions and familiarize yourself with all the operational
aspects of your new Soleus Air personal heater.
For your own records, please attach a copy of your sales receipt to this manual. Also, write the store
name/location, date purchased, and serial number below:
Store Name: ____________________________________________________
Location: ______________________________________________________
Date Purchased: _________________________________________________
Serial Number (located on back of unit): ______________________________
IMPORTANT INSTRUCTIONS
Before using your Soleus Air personal heater, please read this owner’s manual carefully. Store this manual in a
safe place for future reference.
1. Read ALL instructions before using this unit.
2. CAUTION: Risk of Electric Shock. DO NOT open or try to repair the heater yourself.
3. This heater is hot when in use. To avoid burns, DO NOT let bare skin touch hot surfaces. If provided,
use handles when moving this heater.
4. Keep combustible materials, such as furniture, pillows, bedding, paper, clothes, and curtains at least 3
ft from the front of the heater and keep them away from the sides and rear. DO NOT place towels or
other objects on the heater.
5. Extreme caution is necessary when any heater is used by or near children or the disabled, or when the
heater is left operating and unattended.
6. DO NOT operate any heater with a damaged cord or after the heater malfunctions, has been dropped
or damaged in any manner. Return heater to authorized service facility for examination, electrical or
mechanical adjustment, or repair.
7. This heater is not intended for use in bathrooms, laundry areas and similar indoor locations. NEVER
locate heater where it may fall into a bathtub or other water container. To protect against electrical
hazards, DO NOT immerse in water or other liquids.
8. DO NOT touch the control panel or plug with a wet hand.
9. DO NOT run cord under carpeting. DO NOT cover cord with throw rugs, runners, or similar coverings. Arrange cord away from traffic area and where it will not be tripped over.
10. DO NOT insert or allow foreign objects to enter any ventilation or exhaust opening as this may cause
an electric shock or fire, or damage the heater.
11. To prevent a possible fire, DO NOT block air intakes or exhaust in any manner. DO NOT use on soft
surfaces, like a bed, where openings may become blocked.
2
12. A heater has hot and arcing or sparking parts inside. DO NOT use in areas where gasoline, paint, explosive and/or flammable liquids are used or stored. Keep unit away from heated surfaces and open
flames.
13. Avoid the use of an extension cord because the extension cord may overheat and cause a risk of fire.
However, if you have to use an extension cord, the cord shall be No16.AWG minimum size and rated
not less than 1500W.
14. To avoid fire or shock hazard, plug the unit directly into a 120 V AC electrical outlet.
15. To disconnect heater, turn controls to OFF, then remove plug from outlet. Pull firmly on the plug, DO
NOT unplug by pulling on the cord.
16. Always unplug the unit before moving or cleaning, or whenever the heater is not in use.
17. Use only for intended household use as described in this manual. Any other use not recommended by
the manufacturer may cause fire, electric shock, or injury to persons. The use of attachments not recommended or sold by unauthorized dealers may cause hazards.
18. Always use on a dry, level surface.
19. DO NOT use outdoors.
20. WARNING: To reduce the risk of fire or electric shock, DO NOT use this unit with any solid-state
speed control device.
21. DO NOT attempt to repair or adjust any electrical or mechanical functions on this unit. Doing so will
void your warranty. The inside of the unit contains no user serviceable parts. Qualified personnel
should perform all servicing only.
22. Connect to properly grounded outlets only.
23. SAVE THESE INSTRUCTIONS.
PRODUCT INFORMATION & SPECIFICATIONS
Reflective heating technology replicates the sun’s healthy rays, directly warming the object or person in front
of the heater. As the temperature of the heated surface rises, the warming effect is felt throughout the air and
surrounding areas. Reflective heaters are great for open or large rooms, and actually save you energy by warming objects and not the entire room.
Reflective heating is both safe and healthy– it produces no odors, chemicals, or fumes, and doesn’t stir up dust.
As a safety feature, the heater’s exterior does not get as warm to reduce the risk of burns from anyone or anything touching the heater while in use. Remarkably efficient, our heater uses less power to create the same
amount of heat as traditional heaters. Equipped with safety tip-over switch and overheat auto-off, our heater is
safe and reliable.
Voltage Rating
120 V (60Hz)
Power Consumption
800W on High, 400W on Low
Unit Size
15 in. (W) x 13.4 in. (D) x 33.5 in. (H)
Unit Weight
5.5 lbs
DISCLAIMER
ALL INFORMATION AND THE TECHNICAL SPECIFICATIONS PRESENTED IN THIS USER’S MANUAL ARE THE
PRESENTATION OF THE MANUFACTURER. SOLEUS INTERNATIONAL HAS NOT CONDUCTED INDEPENDENT
TEST TO THE INFORMATION AND THE SPECIFICATIONS PRESENTED HEREWITHIN.
3
SAFETY FEATURES
Tip-Over Safety Switch
This heater is equipped with a tip-over safety switch located underneath the base of the heater. This switch
must be pressed inward for the heater to function properly. Some soft surfaces such as carpet may not be able
to fully press in this switch. For some soft surfaces, a hard flat object will need to be placed underneath the
heater for it to function properly. PLEASE DO NOT TAPE OR GLUE THIS SWITCH.
BOTTOM OF THE
HEATER
SAFETY SWITCH
WARNING: This heater is for use on 120 volts. The
cord has a plug as shown in A. An adapter as shown in
C is available for connecting three-blade groundingtype plugs to two-slot receptacles. The grounding lug
extending from the adapter must be connected to a
permanent ground such as a properly grounded outlet
box. The adapter should not be used if a three-slot
grounded receptacle is available.
DO NOT DEFEAT THE SAFETY PURPOSE OF
THE GROUNDED PLUG.
PRODUCT DIAGRAM
4
ASSEMBLY
Remove the heater body and base from the
box. Remove the packaging materials and
keep for future storage.
Slide the neck of the heater head into the
column connected by the cord, so that the
holes in the neck align with the holes in the column.
Insert and tighten the screws with a Philips
screwdriver.
Slide the cord through the opening in the back
of the base.
Insert the lip near the control panel into the
opening in the front of the base. Push the body
and base together. The tip-over safety switch
should protrude out the bottom of the base.
Attach the base to the heater body by screwing
on the fastening screw.
5
OPERATING INSTRUCTIONS
Place the heater on a firm, level surface and plug into a grounded 120V 60Hz power outlet.
1. Press the POWER button on the heater control panel. Once the power buttons is pressed-in the red power
light will light up. To completely turn the heater off, press the POWER button again.
2. Press the HEAT button on the control panel or remote control to select the desired heating mode. Each
press of the HEAT button will select either the HIGH or LOW heat setting. Pressing the off button on the
remote control will turn off the heating mode, but still allow the unit to stay powered on (indicated by the
Red power light).
3. Press the SWING button on the control panel or remote control to select the oscillation function. Once the
SWING button is pressed, the heater head will oscillate back and forth spreading heat throughout the room.
To turn off the oscillation mode, press the SWING button again.
4. This heater is equipped with a half hour to 7.5 hour auto shut off timer. To operate the timer mode, press
the TIMER button on the control panel or remote control. Each press of the TIMER button will cycle between the times located on the control panel. If more than one blue timer light is lit, the operation time will
equal the sum of the corresponding numbers. For example: after pressing the TIMER button 3 times, the
0.5 hour timer light and the 1.0 hour timer light will both light up to equal a 1.5 hour time of operation.
5. To turn the unit completely off , press the POWER button on the control panel. The red POWER light will
turn off.
CONTROL PANEL
REMOTE CONTROL
6
OPERATING INSTRUCTIONS
HEIGHT ADJUSTMENT: Press in the height adjustment button and simultaneously pull the sliding
column up to the desired height. Release the height adjustment button to set. To reduce the height, press
in the height adjustment button and simultaneously push the sliding column down. Release the button to
set.
HEATER HEAD ADJUSTMENT: Grasp the reflection hood and gently tilt forward or backwards. The
unit will click into the different positions. (Notice: When adjusting the heater head, the heater must be
turned off to ensure safety.)
NOTE: A tip-over safety protection switch is installed at the bottom of the heater. When the heater is
placed horizontally, laid down or lifted up, it stops operating to ensure safety. After placing the heater
upright it will resume operation.
NOTE: For safety, if the heater’s internal temperature rises above a certain point, the heater is designed
to automatically shut off. To restart the heater in this situation:
1. Push the power button to OFF.
2. Unplug the power cord from the outlet and allow the heater to cool for at least 10 minutes.
3. Plug the power cord back into the outlet. Use the control panel to select the desired settings.
WARNING: It is normal for the power cord to feel warm to the touch;
however, a loose fit between the outlet and the plug may cause overheating
of the plug. If this occurs, try inserting the plug into a different outlet. Contact a qualified electrician to inspect the original outlet for damage.
7
MAINTENANCE
1. Unplug the unit and let it cool completely.
2. To keep the heater clean, the outer shell may be cleaned with a soft, damp cloth. You may use a mild
detergent if necessary. After cleaning, dry the unit with a soft cloth. CAUTION: DO NOT let liquid
enter the heater.
3. DO NOT use alcohol, gasoline, abrasive powders, furniture polish, or rough brushes to clean the
heater. This may cause damage or deterioration to the surface of the heater.
4. DO NOT immerse the heater in water.
5. Wait until the unit is completely dry before use.
STORAGE
Store the heater in a cool, dry location when not in use. Preferably, to prevent dust and dirt build-up, use the
old packaging to repack the unit.
TROUBLESHOOTING
If the heater will not operate, please check the following before seeking repair of service:
1. Check if the power cord is plugged into an electrical outlet, if not, plug in.
2. Check if electricity to the main fuse is working.
3. Check if the heater is set to ON by confirming the light on the control panel is lit. If not, press the
POWER button to turn on the unit.
4. Check if the heater is on a level surface. If the tip-over safety switch is not pushed in, the heater will
not run.
8
WARRANTY
One Year Limited Warranty
Soleus International Inc. warrants the accompanying Soleus Air heater to be free of defects in material and workmanship for the applications specified in its operation instruction for a period of ONE (1) year from the date of original retail purchase in the United States.
If the unit exhibits a defect in normal use, Soleus International Inc. will, at its option, either repair or replace it, free of
charge within a reasonable time after the unit is returned during the warranty period.
As a condition to any warranty service obligation, the consumer must present this Warranty Certificate along with a
copy of the original purchase invoice.
THIS WARRANTY DOES NOT COVER:
• Damage, accidental or otherwise, to the unit while in the possession of a consumer not caused by a defect in
material or workmanship.
• Damage caused by consumer misuse, tampering, or failure to follow the care and special handling provisions
in the instructions.
• Damage to the finish of the case, or other appearance parts caused by wear.
• Damage caused by repairs or alterations of the unit by anyone other than those authorized by Soleus International Inc.
• Freight and Insurance cost for the warranty service.
ALL WARRANTIES, INCLUDING ANY IMPLIED WARRANTY OF MERCHANT ABILITY ARE LIMITED TO
ONE-YEAR DURATION OF THIS EXPRESS LIMITED WARRANTY. SOLEUS INTERNATIONAL INC.
DISCLAIMS ANY LIABILITY FOR CONSEQUENTIAL OR INCIDENTAL DAMAGES AND IN NO EVENT
SHALL SOLEUS INTERNATIONAL INC’S LIABILITY EXCEED THE RETAIL VALUE OF THE UNIT FOR
BREACH OF ANY WRITTEN OR IMPLIED WARRANTY WITH RESPECT TO THIS UNIT.
This warranty covers only new products purchased from our authorized dealers or retailers. It does not cover used, salvaged, or refurbished products.
As some states do not allow the limitation or exclusion of incidental or consequential damages, or do not allow
limitation on implied warranties, the above limitations and exclusions may not apply to you. This warranty gives you
specific legal rights, and you may also have other rights that vary from state to state.
For Technical Support and Warranty Service
Please Call (888) 876-5387
Or Write To:
Soleus International Inc.
9451 Telstar Ave.
El Monte, CA 91731 USA
www.soleusair.com
9