1
SW ... F
UKInstructions for use
DEBedienungsanleitung
FR Mode d’emploi
NL Gebruiksaanwijzing
ES Instrucciones para el uso
GB
to the local distributor before the appliance
is put to use.
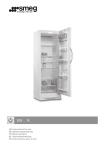
Thank you for purchasing your new freezer
from Smeg. Please note that these instructions apply to all freezers in the SW range.
Illustrations and fittings may therefore not
necessarily correspond exactly to your
model.
Remove the packaging. Clean the inside of
the cabinet using warm water with a mild
detergent. Rinse with clean water and dry
thoroughly (see cleaning instructions). Use
a soft cloth.
Warning
As the refrigerant used in this appliance is a
flammable gas (Isobutane R600a), special
care must be taken to prevent damage
to the refrigerant circuit and piping during
transport and installation.
If during transport the appliance has been
laid down, or if it has been stored in cold
surroundings (colder than +5°C), it must be
allowed to stabilise in an upright position for
at least an hour before being switched on.
If damage does occur, avoid sparks or
naked flame in the vicinity of the appliance,
ensure that the room is well ventilated,
disconnect the power supply, and contact
your supplier.
Contents
Get to know your freezer..................3
Installation and start-up....................4
Reversing the door(s).......................7
Electrical connection.........................8
Operation and function.....................9
Use.................................................10
Defrosting........................................11
Cleaning and maintenance.............12
Fault finding....................................13
Spare parts and service..................14
Disposal..........................................15
The unit must only be serviced by qualified technicians from an approved service
centre.
Old appliances
Old refrigerators and freezers are often
fitted with complicated latches that can
only be opened from the outside. If you
have one of these old units stored away
somewhere, or if you scrap one, remember
to destroy the latch first in order to prevent
children from being exposed to great danger by getting locked inside the unit.
Before use
Before operating your new appliance,
please read the following instructions carefully as they contain important information
on safety, installation, operation and maintenance. Keep the instructions for future
reference.
On receipt, check to ensure that the appliance has not been damaged during transport. Transport damage should be reported
2
GB
Get to know your freezer
Control panel
Lighting
Freezing tray
Freezer shelf
Nameplate
Sealing strip
Freezer drawers
Door handle
Defrost water drain
Kick plate
Adjustable feet
fig. 1
3
GB
Installation and start-up
600
Placement
600
600
600
For safety and operational reasons, the
appliance must not be installed outdoors.
The appliance should be placed on a level
surface in a dry, well ventilated room (max.
75% relative air humidity). Never place the
appliance close to sources of heat such as
cookers or radiators, and avoid placing it in
direct sunlight.
Room temperature
The climate class is stated on the
nameplate (see fig. 1 on page 3 and fig. 13
on page 14). This specifies the optimum
room temperature.
Climate class
Optimum room temperature
SN
+10 ºC to 600
+32 ºC
N
fig. 2
600
+16 ºC to +32 ºC
ST
+18 ºC to +38 ºC
T
+18 ºC to +43 ºC
Installation
The surface on which the appliance is to be
placed must be level. Do not use a frame or
similar.
The appliance can be installed as a freestanding unit against a wall, built into a
kitchen element, or lined up with other appliances (figs 2-3).
After installation, the plug should be
accessible.
fig. 3
4
GB
The appliance viewed from
above
Distance pieces
The distance pieces on the rear of the
appliance ensure sufficient air circulation.
Fit the two distance pieces supplied with the
appliance as shown in fig. 5.
If the appliance is placed beside a wall,
there must be sufficient room for its door
to be opened wide enough to allow the
drawers to be pulled out (fig. 4).
600
fig. 5
Ventilation
fig. 4
100
1560/1860
100
1650/1950
610
It is important that the appliance be
well ventilated and that air can circulate
unhindered above, below and around it. The
figures below illustrate how the necessary
air circulation can be ensured (figs 6-7).
fig. 6
5
fig. 7
GB
Reversing the door(s)
The door(s) can be changed from right-hinged to left-hinged and vice versa as follows:
1. Lay the appliance on its back with the
door uppermost.
2. Remove the upper hinge.
3. Move the plastic plugs to where the
upper hinge was fitted.
4. Lift off the door and lay it aside.
5. Remove the kick plate by pulling it
outwards and upwards.
6. Loosen lock nut with the fork wrench enclosed and move the pin.
7.Remove the lower hinge. Rotate the
hinge through 180° and refit it on the
opposite side of the appliance.
8. Refit the kick plate
9. Remove the door closer and refit it on
the opposite side.
10. Remember to pull the pin in the door
closer towards the side before fitting
the door..
11. Refit the door.
12. Fit the upper hinge.
13. Remove the door handle and refit it on
the opposite side. Refit the caps.
14. The appliance must be allowed to
stabilise in an upright position for at
least 1 hour before being switched on.
15. After reversing the door(s), it is important to check that the sealing strip provides a tight seal all the way round. If it does not, carefully
heat the strip all the way round using a hair dryer. Then ease the strip outwards slightly so that it forms a tight seal against the cabinet.
Be careful not to heat the strip so much that it melts!
7
GB
Setting up
Do not tilt the upright more than 7 degrees
to avoid damaging the floor
It is important that the appliance be
absolutely level. To level the appliance,
remove the kick plate below the door and
screw the adjustable feet up or down (figs 8
and 9). If necessary, it is possible to adjust
the rear feet before the upright is installed.
Use a spirit level to check that the appliance
is absolutely level.
If the appliance is to be placed on a soft
surface, e.g. floorboards or a carpet, it is
best to recheck whether the appliance is still
level after a period of time as the underlying
surface may give under the weight of the
appliance.
>7º
fig. 10
<7º
fig. 11
fig. 8
fig. 9
6
GB
Electrical connection
The appliance is intended for connection
to alternating current. The required voltage (V) and frequency (Hz) are stated on
the nameplate inside the appliance. Power
must be connected via an independent wall
socket outlet.
Technical data
This appliance complies with CE marking
regulations, directives and standards.
Low Voltage Directive 73/23/EEC.
EMC Directive 89/336/EEC.
Council Directive 92/75/EEC on the energy labelling of household appliances as
subsequently amended by 94/2/EC and
2003/66/EC. Directive 96/57/EC on energy
efficiency requirements, and subsequent
amendments.
8
GB
Operation and function
Control lamp
Thermometer
!
S
O
7
I
0
1
6
S
2
5
S = Super freeze
O = Alarm off / super freeze off
= Acoustic alarm
Lighting
Always maintain correct
storage temperature
The thermostat button can be set from 1
(min.) to 7 (max.). A temperature of -18°C
is recommended for items stored in a
freezer. (Maintaining a temperature lower
than this consumes additional energy.) The
temperature in the freezer is displayed on
the thermometer.
4
3
Thermostat button
fig. 10
It is quite normal that the indicator lamp
lights red when the freezer is started for the
first time. It will also occasionally light red
when large quantities of fresh material are
put in the freezer simultaneously.
The control lamp lights green when the
power supply is connected correctly.
The control lamp lights yellow when Super
Freeze is activated.
The indicator lamp lights red and the
acoustic alarm sounds if the temperature
in the freezer is too high. To switch off the
acoustic alarm, set the freeze button to O
(see fig. 10). The indicator lamp continues
to light red as long as the temperature in
the freezer remains too high.
When starting the freezer for the first time,
switch off the acoustic alarm by setting the
freeze button to O. Once the recommended
temperature (-18°C) has been achieved in
the freezer, set the freeze button to the .
This will allow the acoustic alarm to sound
if the temperature in the freezer becomes
too high.
9
GB
Use
Freezer
from freezing together. To ensure rapid
freezing, make sure, as far as possible,
that items placed in the freezer are not
touching. Ensure that there is as little air
in the packages as possible to prevent the
surfaces of the items from drying out.
The appliance is a four-star freezer
approved for freezing and storing frozen
items of food. With the exception of nofrost models, the freezer is equipped with a
practical tray for freezing loose berries, ice
cubes, etc.
Always remember to write the date, content
and quantity on the packages before
placing them in the appliance. It is a good
idea to group items within the freezer. Keep
vegetables in one drawer, meat in another,
and so on.
Freezing
To keep food at its best, items must be
frozen to -18°C as quickly as possible.
When the Super Freeze button is pressed,
the compressor runs continuously, thus
reducing the temperature as far as possible.
If items weighing 3 kg or more are to be
frozen, the Super Freeze button should be
activated about 24 hours in advance.
Thawing
Frozen vegetables and fruit require no
thawing before use and can be immersed in
boiling water direct from the freezer.
To thaw meat, it is advisable to take it out
of the freezer the day before it is to be used
and place it in a refrigerator to defrost. This
ensures the best hygiene and maintains
meat quality as much as possible.
There is no need to use Super Freeze when
pre-frozen items are placed in the freezer or
when small, single items are involved.
The control lamp lights yellow as long
as the Super Freeze function is active.
Remember to switch the Super Freeze
function off again approx. 24 hours after
placing items in the freezer. Otherwise,
the appliance will use more electricity than
necessary.
Refreezing
If purchased items of frozen food thaw
before reaching home, they must not be
refrozen but should be consumed within
24 hours or cooked immediately and then
frozen.
Only freeze fresh high-quality products.
Meat, poultry, fish, vegetables, fruit, dairy
products and ready-made meals are
suitable for freezing. Items with a high water
content, e.g. lettuce, radishes, grapes,
apples, pears and cucumbers, are not
suitable for freezing.
Frozen items that have been placed in a
refrigerator for thawing may be refrozen
without risk if they have only just thawed.
Note:
Glass bottles or cans containing
carbonated (fizzy) drinks must never
be placed in the freezer as they may
explode.
Pack items to be frozen in airtight
containers, freezer bags or similar. Freeze
items in suitable portions. Do not freeze
vegetables in portions larger than 2.5 kg.
Do not freeze meat in portions larger than
2.5 kg. Keep packages dry to prevent them
10
GB
Defrosting
Defrosting the freezer
during defrosting, check progress from
time to time and lay towels around the
bowl on the floor to protect against ice and
splashes. When all the frost and ice have
melted, clean the inside of the cabinet with
a mild detergent solution. Dry the freezer
with a soft cloth.
The items stored and the humidity of the
air gradually cause frost and ice to form
in the freezer. A thin layer of frost or ice
does not affect freezer performance, but
the thicker the layer, the higher the energy
consumption. Loose frost can be removed
using a plastic or wooden scraper.
7. Restart the freezer by turning the
thermostat button to the required setting.
If many items are to be returned to the
freezer, activate the Super Freeze button.
Remember to switch Super Freeze off
again.
Never use a knife or other sharp implement
that might damage the inside of the freezer.
When the layer of frost and ice exceeds
4-5 mm the freezer should be completely
defrosted.
8. Return items to the freezer approx. 5
minutes after having switched it on.
Proceed as follows:.
1. Press the Super Freeze button 4-5
hours before defrosting. This lowers the
temperature of the items stored to approx.
-25°C, thus prolonging the length of time
they remain frozen after having been
removed from the freezer (see step 4
below).
2. Switch the freezer off by turning the
thermostat button to 0 (min.).
fig. 11
3. Pull out the drain spout at the bottom
of the cabinet and place a bowl under it to
collect defrost water (fig. 11). If the spout
is frozen in place, lay a cloth which has
been soaked in hot water over it for a few
minutes.
4. Remove the items of food. Place them in
a refrigerator or wrap them in newspaper to
keep them as cold as possible.
5. Place a bowl of hot (but not boiling) water
in the freezer.
6. To prevent the floor from becoming wet
11
GB
Cleaning and maintenance
Cleaning
Replacing the light bulb
Disconnect the power supply at the mains
socket before cleaning the inside of the
cabinet.
The cabinet is best cleaned using warm
water (max. 65°C) with a little mild
detergent. Never use cleaning agents that
scour. Use a soft cloth. Rinse with clean
water and dry thoroughly. It is important
to prevent water from entering the control
panel.
Max. 12 W
fig. 12
Unscrew the bulb without removing the
shade.
Bulbs with an output of more than 12 W
must not be used.
The sealing strip around the door must be
cleaned regularly to prevent discolouration
and prolong service life. Use clean water.
After cleaning the sealing strip, check that it
continues to provide a tight seal.
Save energy
- Cool hot food and beverages before
placing them in the appliance.
- Thaw frozen items in a refrigerator.
- Keep the door(s) closed as much as
possible
- Ensure that the door(s) is(are) not
prevented from closing tightly.
Dust collecting on the compressor and
in the compressor compartment is best
removed using a vacuum cleaner. It is
possible to clean beneath the appliance by
removing the kick plate.
Stainless steel or aluminium doors are best
cleaned using a care spray and soft cloth.
Various suitable products are available from
most household appliance distributors.
If the appliance is not to be used for any
length of time, switch it off, empty it, clean
the cabinet and fittings, and leave the
door(s) slightly open to allow air circulation
and prevent smells.
12
GB
Fault finding
Fault
Possible cause
Remedy
The control lamp is
not lit.
Power failure; the fuse is blown;
the appliance is not plugged in
correctly.
Check that power is connected.
Reset the fuse.
Vibration or
bothersome noise.
The appliance is not level.
Level the appliance using a spirit
level.
The appliance is resting against
other kitchen elements.
Move the appliance away from
the kitchen elements or appliances it is in contact with.
Compressor runs
continuously.
Temperature setting too low.
Raise the temperature setting.
High room temperature.
Ensure adequate ventilation.
Temperature in
freezer too high.
Temperature setting too high.
Lower the temperature setting.
The quantity of fresh items
placed in the freezer at a time is
greater than the capacity of the
appliance.
Wait a few hours and then recheck the temperature.
13
GB
Spare parts and service
Spare parts
When ordering spare parts, please state the
type, serial and production numbers of your
appliance (see fig. 1 on page 3 and fig. 13).
This information is given on the nameplate
on the rear of the appliance. The nameplate
contains various technical information,
including type and serial numbers.
Important
Please note that changes to the
construction of the appliance or changes to
the component equipment of the appliance
will invalidate Smegs warranty and product
liability, and the appliance cannot be used
lawfully. The approval stated on Smegs
rating plate will also be invalidated.
XXXXXXXX
Model.. XXXX
Serial nr. XXXXXXXXX
Basic. Type No. XXXX
fig. 13
Note: Always use approved service centres
when your appliance is to be repaired or
replaced!
14
GB
Disposal
Environmental regulations on disposal must
also be observed. When disposing of the
appliance you should contact your local
authority technical department who will
inform you of how collection and recycling
of such units take place in your area.
This appliance is marked according to
the European directive 2002/96/EC on
Waste Electrical and Electronic Equipment
(WEEE).
By ensuring this product is disposed of
correctly, you will help prevent potential
negative consequences for the environment
and human health, which could otherwise
be caused by inappropriate waste handling
of this product.
The symbol
on the product, or on the
documents accompanying the product,
indicates that this appliance may not be
treated as household waste. Instead it shall
be handed over to the
applicable collection point for the recycling
of electrical and electronic
equipment.
Disposal must be carried out in accordance
with local environmental regulations for
waste disposal.
For more detailed information about
treatment, recovery and recycling of this
product, please contact your local city
office, your household waste disposal
service or the shop where you purchased
the product.
15