1
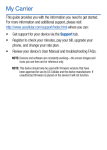
QUICK REFERENCE MANUAL
My Carrier
This guide provides you with the information you need to get started.
For more information and additional support, please visit your carrier’s
support page:
•
•
•
Get support for your device online.
Review your device’s User Manual and troubleshooting FAQs.
Review troubleshooting solutions.
NOTE: Devices and software are constantly evolving—the screen images and
icons you see here are for reference only.
NOTE: This device should only be used with firmware versions that have
been approved for use by the carrier and the device manufacturer. If
unauthorized firmware is placed on the device it will not function.
Device Functions
Headset
IR blaster
jack
Power/lock
Front
facing
camera
Volume
Menu* Home
Back*
*Menu and Back illuminates when navigating through the device.
Camera lens
Flash
Speaker
Charging port
WARNING: Please use only an approved charging accessory
to charge your device. Improper handling of the
charging port, as well as the use of an incompatible
charger, may cause damage to your device and void
the warranty.
Setting Up Your Device
Step 1. Remove the Back Cover
• Place your fingernail in the groove and firmly “pop” the cover
off the device.
Step 2. Install the SIM Card
• Slide the SIM card into the SIM card slot until it “clicks” into
place.
Step 3. Install the optional microSD card
• Slide the memory card into the card slot until it “clicks” into
place.
Step 4. Insert the Battery
• Insert the battery, making sure to align the gold contacts.
Press down gently to secure the battery.
Step 5. Replace the Back Cover
• Position the battery cover over the battery compartment and
press down firmly along the edges of the cover.
Step 6. Charging the Phone
• Before turning on your phone, charge it fully. Be sure to use
the charger that came with the device.
Turning Your Phone On and Off
1. To turn ON, press and hold the Power/Lock key.
2. To turn OFF, press and hold Power/Lock key and follow the
prompts.
Locking and Unlocking Screen
1. To Lock, press the Power/Lock key.
2. To Unlock, press the Power/Lock key then swipe your finger
across the screen.
Signing into Your Google Account
1. Launch an application that requires a Google account (such as
Play Store or Gmail).
2. Tap Existing.
3. Tap the Email and Password fields and enter your information.
4. Tap
(Next) and follow the on-screen prompts.
Calling Features
Making a Call
1. From the Home screen, tap
(Phone).
2. Enter the number you wish to call and tap
•
If you make a mistake while dialing, tap
digit. Touch and hold
to place a call.
to clear the last
to clear the entire sequence.
Ending a Call
¬
From within an active call, tap
(End Call).
Answering a Call
¬
At the incoming call screen, touch and slide
any direction to answer the call.
(Answer) in
Rejecting a Call
¬
At the incoming call screen, touch and slide
(Reject) in
any direction to route the call to your voicemail system.
Set Up Voicemail
1. From the Home screen, tap
(Phone) and then touch and
hold
until the device dials your voicemail.
2. Follow the prompts in the new user tutorial to set up your mail
box.
Access Voicemail
1. From the Home screen, tap
(Phone) and then touch and
hold
. After connection, you will hear your voice greeting.
2. When connected, follow the voice prompts from your voicemail
center.
NOTE: Your voice mailbox is not password protected until you create a password
by following the setup tutorial.
Contacts
Creating a New Contact
1. From the Home screen, tap
(Phone).
2. Enter a phone number using the on-screen dialpad.
3. Tap Add to contacts g Create contact or select the Contact
entry from the on-screen list.
4. Select OK (to save new contact in your “my device contacts
area”) or Add new account to select a different destination type
(Google, or Microsoft Exchange ActiveSync) (depending on
where you want to save the new contact information).
5. Enter the desired information into the appropriate fields.
6. Tap Save to store the new entry.
Deleting an Existing Contact
1. From the Home screen, tap
(Contacts).
2. Touch and hold a contact name from the list and select
Delete g OK.
Connections
Connecting to Bluetooth
1. From the Home screen, tap
(Menu) g Settings g
Connections tab g Bluetooth.
2. In a single motion touch and slide the Bluetooth slider to the
ON ).
right to turn it on (
3. If necessary, tap Scan. Review the list of discovered in-range
Bluetooth® devices.
4. Tap a device from the list to initiate pairing.
5. Enter the passkey/PIN code, if needed, and tap OK.
6. he external device will then have to also accept the connection
and enter your device’s PIN code. Once successfully paired to an
external device,
appears within the Status area.
Connecting to Wi-Fi
1. From the Home screen, tap
(Menu) g Settings g
Connections tab g Wi-Fi.
2. In a single motion touch and slide the Wi-Fi slider to the right to
ON ).
turn it on (
3. If necessary, tap Scan to display a list of Wi-Fi networks
in-range.
4. Tap a network to connect and enter the password if prompted.
When connected you will see
in the status bar.
Messaging
Create and Send a Message
1. From the Home screen, tap
(Compose).
(Messaging) g
2. Enter either the recipient’s phone number or e-mail address.
NOTE: If adding a recipient from among Logs, Contacts, or Group, tap the
contact to place a checkmark alongside the entry and tap Done. The
contact will be placed in the recipient field.
3. Tap the Enter message field and use the on-screen keypad to
enter a message.
4. Add more recipients by tapping the recipient field.
5. Tap
(Attach) to insert various file types to your message
(such as images, videos, or audio).
6. Select the file and complete the on-screen instructions to insert it
to the current message.
7. Review your message and tap Send.
Apps & More
Installing Apps
More than hundreds of thousands of apps available to download from
Google Play™.
1. From the Home screen, tap
(Play Store).
2. If prompted, follow the on-screen prompts to add an existing
Google account.
Setting Up Your Email Accounts
Check email on the go with popular Internet-based email accounts,
including Yahoo!® Mail, Hotmail®, etc..
1. From the Home screen, tap
(Apps) g
(Email).
2. Enter your email address and password into the appropriate
fields and tap Next.
3. At the Account options screen, select the frequency which the
device should check for new email on the server and tap Next.
4. At the Set up email screen, name the account and enter a screen
name to identify yourself on this account.
5. Tap Done to store the new account.
NOTE: Record your email account information. Please keep this document in
a safe place.
Internet
Take the Internet on the go. You can reach the latest news, get the
weather and follow your stocks.
¬ From the Home screen, tap
To enter a URL:
(Internet).
You can access a website quickly by entering the URL. Websites are
optimized for viewing on your device.
¬
From the homepage tap the URL field at the top of the screen,
enter the URL and tap
.
To add a new window:
1. From your browser window, tap
(Window) g
(New window). A new browser window displays.
NOTE: The number of currently open windows is displayed at the bottom of the
Windows screen.
2. Scroll across the screen to view the currently active windows and
tap an entry to launch the selected Internet window.
Multi Window
Run multiple applications on the current screen at the same time.
NOTE: Only applications found within the Multi window panel can be active atop
another current application on the screen.
NOTE: This feature can be activated by using the Back key when the
Multi window option is enabled within the Settings g My device tab
g Display screen.
1. To display the Multi window tab, press and hold the
(Back key).
2. The (Multi window tab) appears on the left side of the
screen.
3. Tap the tab to open the application panel.
4. To hide the Multi window tab. Press and hold the
(Back
key).
Camera
The Samsung Galaxy S® 4 gives you the magic of professional digital
photography. With stunning photographic output and a range of
exceptionally rich professional shooting modes, editing features and
various apps. Going pro has never been this easy or this fun.
¬
From the Home screen, tap
(Camera).
S Beam
Share large video files, photos, documents and music with S Beam by
touching two compatible device back-to-back.
1. From the Home screen, press
(Menu) and then tap
Settings g Connections tab g S Beam.
2. Touch and slide the S Beam slider to the right to turn it on.
Samsung Smart Switch
Now you have nothing to lose. Upgrade to the Samsung Galaxy S 4
and easily move over your photos, videos, music, apps and more with
Samsung Smart Switch™.
Get started today at www.samsungsmartswitch.com
Lock Screen
This menu contains features that allows you to configure the device’s
security parameters.
To secure data and limit phone access, set the phone to require a
screen unlock pattern each time you turn on the device, or every time
the phone wakes up from sleep mode (when the screen automatically
turns off).
¬
From the Home screen, press
(Menu) and then tap
Settings g My device tab g Lock screen g Screen lock.
The Screen lock menu allows to choose from a variety of locking
features.
Notes
________________________________________________
________________________________________________
________________________________________________
________________________________________________
________________________________________________
________________________________________________
________________________________________________
________________________________________________
________________________________________________
________________________________________________
________________________________________________
________________________________________________
________________________________________________
________________________________________________
________________________________________________
________________________________________________
________________________________________________
SAMSUNG TELECOMMUNICATIONS AMERICA
1301 E. Lookout Drive | Richardson, TX 75082
1.800.SAMSUNG
www.samsung.com/mobile
©2013 Samsung Telecommunications America, LLC. Samsung and Galaxy S are both
registered trademarks of Samsung Electronics Co., Ltd. Android, Google Play, Gmail and Google
are trademarks of Google, Inc. Other company and product names mentioned herein may be
trademarks of their respective owners. Screen images simulated. Appearance of phone may
vary.
Printed in China | 11/2013 | GH68-39265B Rev 1.1