1
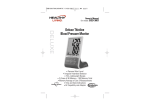
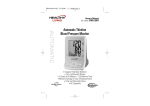
Owner’s Manual
for model: BVM-1007
MANUAL
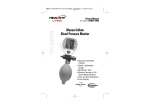
Manual Thinline
Blood Pressure Monitor
• Manually Controlled Inflation
• Thin, Lightweight Design
• 2 Zones of 60 Memory - 120 Memory Total
• Memory Average of Last 3 Measurements
• Time and Date Indications
• Pulse Display
Important Warnings/Medical
Disclaimer
Before using your blood pressure monitor, you should read
and understand all instructions and follow all warnings.
Information in this manual is provided for informational purposes only. This product and manual are not meant to be a
substitute for the advice provided by your own physician or
other medical professional. You should not use this product,
or the information contained herein, for diagnosing or treating a health problem, disease, or prescribing any medication. If you have or suspect that you have a medical problem,
promptly contact your medical provider.
Important Warnings/Medical Disclaimer
1
Table of Contents
Important Warnings/Medical Disclaimer ________________1
Healthy Living _________________________________3-4
Commonly Asked Questions About Blood Pressure________5-8
Intended Use _____________________________________8
Measurement Method ______________________________9
Important information before using the unit ____________10-11
Main Unit and Accessories __________________________12
Special Features __________________________________13
Accuracy _______________________________________14
Special Conditions ________________________________14
Battery Installation________________________________14
Digital Display Symbols _____________________________15
Setting Date and Time______________________________16
Applying the Cuff _________________________________17
Taking a Blood Pressure Measurement ________________18-19
Storing, recalling, and erasing measurement data ________20-21
2 Zones of 60 Memory _____________________________21
Taking Care of Your Blood Pressure Monitor ____________22-23
Troubleshooting ________________________________24-25
Limited Lifetime Warranty_________________________26-27
Specifications____________________________________28
Blood Pressure Diary_____________________________29-32
2
Table of Contents
Copyright © 2006 Samsung America, Inc. All rights reserved.
Healthy Living
Purchasing this blood pressure monitor is your first step in living
a healthier life, but it is only the beginning. It is also important
to:
STAY ACTIVE - Start out by taking just a short walk each
day. Over time you'll begin to feel more energetic. Walking is a
fun, easy way to help lose weight and also aids in building
stronger bones and a healthier heart!
EAT HEALTHY - Adding more fruits and vegetables to your
diet is a great way to start. Also, look at incorporating more
whole grains, fish and low fat dairy products and keep a check
on your sodium intake. If you're using a blood pressure monitor,
you should already be aware of how sodium can affect your
blood pressure. You may want to explore the potential benefits
of certain botanicals such as onion and garlic. As always, consult your physician before beginning any dietary changes.
Healthy Living
3
Healthy Living
STAY POSITIVE - A healthy mind goes hand in hand with a
healthy body. Daily relaxation techniques such as meditation and
yoga may be just what you need to alleviate stress. Keep your
mind focused on the positive things in life. Start out by giving
yourself a pat on the back for those walks you are now taking or
that apple you just ate!
WATCH YOUR WEIGHT - Sometimes just a small amount
of weight loss may have a positive effect on your blood pressure.
If you have already started exercising and eating healthier, the
weight loss may just happen on its own!
REMEMBER: Consult your physician before you start or
change your exercise routine, diet, vitamin/supplement intake
and/or blood pressure monitoring.
4
Healthy Living
Commonly Asked Questions
About Blood Pressure
Why Should I Monitor My Blood Pressure At Home?
By monitoring at home you can manage your health care between
visits to the doctor. Also, you now have the means to keep a record
of your blood pressure measurements, a valuable tool for both you
and your healthcare provider.
Home monitoring may help alleviate White Coat Hypertension.
This term refers to what may cause a person's blood pressure to
be higher when taken in a medical setting. At times the stress of
just being in a doctor's office may cause blood pressure to rise.
When monitoring at home you may get a truer indication of your
blood pressure because you are in a relaxed, comfortable space.
What is Blood Pressure?
The term "blood pressure" refers to the force or pressure that is
exerted on the body's arteries as blood flows through them. Each
time the heart beats or contracts, it produces pressure in the arteries. This blood pressure is what moves blood through the body,
supplying oxygen and nutrients to every organ.
Commonly Asked Questions About Blood Pressure
5
Commonly Asked Questions
About Blood Pressure
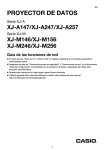
When the heart contracts it sends blood out into
the body. This pressure is referred to as systolic.
The pressure that is created as
the heart pulls blood back thorough is called diastolic.
Blood Pressure is recorded as
systolic over diastolic.
What is considered Normal Blood Pressure?
The Seventh Report of the Joint National Committee on
Prevention, Detection, Evaluation, and Treatment of High Blood
Pressure from the National Heart, Lung and Blood Institute has
set forth the following guidelines regarding high blood pressure.
Guidelines provided are for information purposes only. Please
consult with your physician for proper diagnosis.
6
Commonly Asked Questions About Blood Pressure
Commonly Asked Questions
About Blood Pressure
Why Does My Blood Pressure Fluctuate?
Blood pressure changes with every beat of the heart and is in
constant fluctuation throughout the day. In addition to natural
changes, other factors that may affect blood pressure are:
• Temperature
(too hot or cold)
• Humidity
• Restlessness
• Lack of sleep
• Physical exercise
• Constipation
• Fear
• Anger
• Anxiety
• Food / beverage
consumption
• Your physical
condition
• Stress
Be sure to speak with your healthcare professional to determine
what is affecting your blood pressure.
How Do I Know If I Have High Blood Pressure?
People have the misconception that they can "feel" their blood
pressure rise. In reality it is nearly impossible to tell if your pressure is elevated without having it checked. This is why hypertension has been named "the silent killer". Start monitoring your
blood pressure today and discuss the results with your healthcare
professional.
Commonly Asked Questions About Blood Pressure
7
Commonly Asked Questions
About Blood Pressure
Why Is It Important To Control My Blood Pressure?
Left uncontrolled hypertension can place an incredible amount of
stress on your heart and arteries. They are both forced to work
harder to keep blood flowing through your body. Over time this
stress may result in health related problems including enlargement
of the heart, loss of artery elasticity, heart disease, stroke or death.
Making simple lifestyle changes now may help you stay healthy in
the future.
Intended Use
Healthy Living blood pressure monitors are designed for home
use. They are noninvasive; no part enters your body, and provide
systolic, diastolic and pulse rate measurements. These monitors
are recommended for use by people over 18 years of age and are
not suitable for clinical use.
8
Commonly Asked Questions About Blood Pressure/Intended Use
Measurement Method
Healthy Living monitors measure blood pressure and pulse rate
by using an oscillometric method, meaning the fluctuations in
pressure are measured. Once the cuff is wrapped around the
upper arm, turn the monitor on and you begin to inflate the cuff.
The inflation of the cuff creates pressure around the arteries
inside the arm. Within the cuff is a gauge which senses the
fluctuations (oscillations) in pressure. The fluctuations measured are the arteries contracting with each heart beat as a
result of the pressure the cuff has placed on the arm. The monitor measures these contractions and converts the information
to a digital value. That is the result displayed on the monitor
screen.
Measurement Method
9
Important information before
using the unit
• Blood pressure measurements should be interpreted by a physician
or trained health professional who is familiar with one's medical
history. By using the unit regularly and recording the results for the
physician to interpret, one can keep the physician informed of the
continuing trends in one's blood pressure.
• Sit quietly for about 10 minutes. This will allow your body to return
to its normal resting state.
• Wrap the cuff snug around your upper arm and lay your arm on a
flat surface at the same level as your heart. Your feet should be flat
on the floor.
• Do not move the device during the taking of a measurement; this
may cause an inaccurate measurement.
• Perform the measurement in a quiet environment, in a relaxed position at room temperature. For consistency, we recommend using
the same arm (left arm if possible) and testing around the same
time each day.
10
Important information before using the unit
Important information before
using the unit
• If taking multiple measurements, please allow 10 minutes
between measurements. This will allow your blood vessels to return to their normal state.
• If you have consumed beverages containing caffeine or
have smoked, please allow 30 - 45 minutes before taking
your measurement.
• Do not place the cuff over a jacket
or sweater sleeve; it must be
wrapped around your exposed
upper arm.
• Keep in mind that blood pressure
naturally varies from time to time
throughout the day and is affected
by many different factors, such as
smoking, alcohol consumption,
medication, and physical activity.
• Blood pressure measurements taken with this unit are
equivalent to those obtained by a trained observer using
the cuff/stethoscope auscultation method within the limits
prescribed by the American National Standard for
Electronic or Automated Sphygmomanometers.
• Make sure the cuff plug is attached to the monitor as
shown above.
Important information before using the unit
11
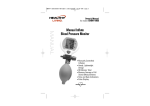
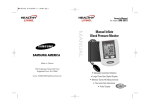
Main Unit and
Accessories
Main Unit
(See page 15
for descriptions
of screen
icons.)
Cuff
Inflation
bulb
Accessories
• 4 AA Alkaline Batteries
• 1 Storage/Travel Pouch
• 9 " ~ 13 " Regular Cuff
12
Main Unit and Accessories
Up button
Start/Stop
button
Down
button
Memory
button
Mode
button
Special Features
Heart Sense
The Heart Sense Inflation System senses your
blood pressure before the measurement is
complete, signaling the monitor to adjust the
air pressure amount. The result is a quick, comfortable measurement each time you check your blood pressure.
Large 3 Row Display Screen
To make reading your result easier, the monitor comes with a
large 3 row LCD display screen.
Memory Feature
Your Healthy Living Manual Inflate Monitor features memory capability of up to 120 measurements and provides the
average of the 3 most recent readings!
Time and Date
The monitor will automatically keep track of the time and
date.
Special Features
13
Accuracy
Healthy Living monitors have been clinically tested against a
scientific device called a sphygmomanometer, considered the
gold standard in blood pressure measurement. All Healthy Living
monitors have performed equivalent to measurements taken
with this scientific device and are within the accuracy limits prescribed by the American National Standard for Electronic or
Automated Sphygmomanometers.
Special Conditions
All Healthy Living blood pressure monitors are safe and accurate to use with arrhythmias such as atrial or ventricular premature beats and atrial fibrillation.
Battery Installation
Using the 4 AA Alkaline batteries included, locate
the detachable battery pack on the back of the
monitor. Remove the battery pack and insert the
batteries, making sure the polarities (+/-) are correct. Put the feet of battery pack into the holes on
back case and snap the battery pack back into
place.
When the display screen shows “
” it is time
to replace with 4 new AA batteries.
* To make the batteries last longer, you may want to remove them if you
are not using your monitor for an extended period of time.
14
Accuracy/Special Conditions/Battery Installation
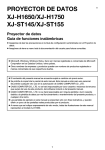
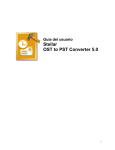
Digital Display Symbols
Mesurement Reading Screen
Low Battery Display
Error Symbol
Systolic Rate
Inflation /Depress
Symbol
Blood Pressure Unit
Diastolic Rate
Hour /Minute
Pulse Rate
Date
Pulse Symbol
Month Memory Set
Digital Display Symbols
15
Setting Date and Time
a. Press "MODE" button ("month" starts flashing)
Press "[ ]" and "[ ]" button to set and adjust the correct
month (1, 2, 3 ....12)
b. Press "MODE" button again ("date" starts flashing)
Press "[ ]" and "[ ]" button to set and adjust the correct
date
c. Press "MODE" button again ("hour" starts flashing)
Press "[ ]" and "[ ]" button to set and adjust the correct
hour in 12-hour format. A "PM" will appear for PM and disappear for AM.
d. Press "MODE" button again ("minute" starts flashing)
Press "[ ]" and "[ ]" button to set and adjust the correct
minute (00, 01, 02 ...59)
After entering these settings you will be returned to the
Rest mode and can take a measurement by pressing
START/STOP.
16
Setting Date and Time
Applying the Cuff
• Insert the Cuff Plug into the Cuff Plug Jack
on the Monitor.
•Pull the Velcro tab so the cuff is laying flat
with the Velcro facing up at you.
•Pull the cuff to the left of the metal ring to
form an opening for your arm.
your left arm through the cuff loop.
The bottom of the cuff should be approx.
0.5 inch above elbow. The cuff tube
should lie over the brachial artery on the
inside of the arm.
•If the cuff is properly positioned the tube
should be running down your arm as in the
illustration to the right.
•Pull the cuff so that the top and bottom
edges are snug around your arm. Do not
tighten to the point of being uncomfortable.
•When the cuff is positioned properly,
press the Velcro firmly against the pile
side of the cuff.
•Sit in a chair and place your arm on the
table so that the cuff is at the same level
as your heart.
•Relax your arm and sit with your palm facing
upward.
•Assure there are no kinks in the air tube.
•Put
Applying the Cuff
17
Taking a Blood Pressure
Measurement
1.Once the cuff is properly applied and you are seated with
your feet flat on the floor, you are ready to take a
measurement.
2.Press the "START/STOP" button, the "
"
icon in the upper left will guide you to depress
the air release knob at the base of the Pump
Bulb to release any trapped air.
3.When the "
" icon begins flashing start squeezing the
Pump Bulb. This will start to inflate the cuff and you will
feel the cuff get tighter.
4.The cuff should not inflate to the point of discomfort, if this
happens the cuffed is wrapped to tightly. Depress the air
release knob at the base of the Pump Bulb to release the air
and press the "START/STOP" button to stop the measurement.
Rewrap the cuff leaving more room between your arm and
the cuff.
5.Continue to squeeze the Pump Bulb until you hear a beep. This
is your signal to STOP squeezing and the "
" icon will be
displayed, sit still and quite while measuring. A flashing " "
appears as your measurement is being taken (Do not inflate the
monitor higher than 240mmHg) and the bulb symbol will stop
flashing.
18
Taking a Blood Pressure Measurement
Taking a Blood Pressure
Measurement
*If the bulb symbol again begins to flash, that is an
indication that more air is needed and you should resume
pumping until the flashing stops.
6.As the monitor determines your blood
pressure, numbers will appear and change
on the display screen until your reading is
complete.
7.When your measurement is complete the
"
" icon will appear. This is your signal
to deflate the cuff by depressing the Air
Release knob.
8.The process should take less than a
minute and once the measurement is
complete your blood pressure and pulse
rate will be displayed. The monitor will
turn itself off approximately 1 minute
after completing a reading.
Inflation
Deflation
Taking a Blood Pressure Measurement
19
Storing, recalling, and erasing
measurement data
• Storing data
*After each measurement, the systolic and diastolic rates,
pulse rate and the time & date will be automatically stored.
The memory holds data for the latest 60 measurements in
each of 2 memory zones. If more than 60 measurements are
entered, the memory will automatically clear out the oldest
data.
• Recalling data
*Press the " " or " " button to select the memory zone.
*Press the "MEMORY" button to get your stored memory
data. If there is no data in the memory nothing will appear.
*If there is data in the memory, the first reading
will be an average of the last three recorded set
of measurements (systolic and diastolic pressure
and pulse rate).
*Press the "MEMORY" button again and the latest recorded set of measurements will appear
along with the recording time and date.
*Press the " " button to read the next set of stored data.
The data displayed starts with the most recent reading and
continues backwards to the oldest.
20
Storing, recalling, and erasing measurement data
Storing, recalling, and erasing
measurement data
• Erasing data
*Press "MEMORY" into Memory mode.
*Press and hold on "MODE" button and then press " " button, all
measurement data will be erased.
*To confirm the data has been erased, press the "MEMORY" button
and no data should appear.
2 Zones of 60 Memory
When you take a measurement, the monitor automatically stores it in
memory space number one. As you continue to take measurements, the
monitor will push the previous measurement back one space. In other
words, the value in space one will always be the most recent blood pressure measurement taken.
Your monitor features a 2 party memory capability or 2 "zones" - each
zone stores 60 measurements each for a total capacity of 120 measurements. This feature is useful for a user to track their blood pressure
throughout the various periods of the day: morning, afternoon, or night.
Press the " " button to toggle between memory zone No.1, and 2.
Once you select a zone that you want to view the measurements in,
press the "MEMORY" button once to view the most recent measurement along with the time and date that it was taken. Press the "MEMORY" button again in succession and you will see all of the measurements registered to that zone. You can then press the " " button to
switch to the next zone to view measurements. The monitor will automatically power off after about one minute of inactivity.
*When taking measurements, be sure and select the correct zone
number using the " " or " " button so that the measurement is
registered to the appropriate zone.
Storing, recalling, and erasing measurement data/2 Zones of 60 Memory
21
Taking Care of Your
Blood Pressure Monitor
Maintenance
* Lose of Power
If your monitor has lost power, your stored data will not be
affected. You will have to reset the time and date once
power is restored, but the data in the memory zones will
remain.
* Use a damp cloth to wipe the monitor and dry immediately
with a dry cloth.
* Use only a dry cloth to wipe the cuff.
* Do not use strong cleaning agents for cleaning.
* When the unit is not to be used for a long time, it is best to
remove the battery.
Safe Keeping
Always keep the unit in the carrying case after its use.
Do not store the monitor in direct sunlight, high temperatures, or in humid or dusty places.
Do not store in extremely low (less than -4 °F / -20 °C) or high
(more than 122 °F / 50 °C) temperatures.
22
Taking Care of Your Blood Pressure Monitor
Taking Care of Your
Blood Pressure Monitor
To prevent malfunctions
Use the cuff only as instructed and be careful not to twist it.
Do not inflate the cuff when it is not wrapped around the
arm.
Do not attempt to disassemble or change any monitor parts,
including the cuff.
Treat the monitor with care, do not drop it and prevent all
strong impacts.
Warnings
The cuff size is suitable for adult arms 9 ~ 13 inches around.
The device is not to be used if your arm has a wound or
injury.
In the case that the cuff does not stop inflating, remove the
cuff at once.
Do not disassemble or modify the device in any way. This
could result in inaccurate readings and voids the device warranty.
Do not use the cuff on any body part except your upper arm.
Keep out of reach of children.
Taking Care of Your Blood Pressure Monitor
23
Troubleshooting
Error/Symbol What Does It Mean?
How To Fix It
Monitor may have been Read page 17 (Applying
inflated without the cuff the Cuff).
around the arm OR Cuff
may not be positioned
correctly on the arm.
The cuff tube may be folded Read pages 10 & 11
OR You may have moved (Important information
while the cuff was inflating. before using the unit).
You may have moved or Remember that it is
spoken during the mea- important not to move
and speak as it may
surement process.
elevate measurements.
Make sure you are in a
You may have been
quiet and comfortable
startled by a noise or
vibration while measuring. place when taking a
measurement.
24
Troubleshooting
Troubleshooting
Error/Symbol What Does It Mean?
The monitor is inflated
higher than 300 mmHg
Deflate the monitor by
depressing the Air
Release Knob.
The batteries have
run down.
Replace with 4 AA
batteries.
Cuff may not be
aligned correctly
Read page 17
(Applying the Cuff).
Circuitry locked.
Remove and reinsert
the batteries and then
proceed to take measurement again.
continue “Beep”
sound
Blood pressure
value seems too
high or too low
Unable to take a
measurement after
receiving an error
symbol.
How To Fix It
The cuff may not be
positioned correctly.
Read page 17
(Applying the Cuff).
Troubleshooting
25
Limited Lifetime Warranty
This Blood Pressure Monitor is warranted to be free from defects in material
and workmanship for the life of the original purchaser under normal household
use. In the event of a defect in materials or workmanship occurring during normal household use, Samsung America, Inc. ("Samsung America") will, at its
option, repair or replace your monitor, including the cuff, with the same or comparable model free of charge (except you must pay for shipping charges) for the
lifetime of the original owner. This product is for home use only and is not
intended for commercial or clinical use. This warranty only extends to the original retail purchaser. Purchase receipt or other proof of original purchase is
required before warranty performance.
This warranty extends solely to failures due to defects in materials or workmanship occurring during normal use. It does not cover normal wear of the product. This warranty is void if: the product housing has been removed, if the product's label, logo or serial number have been removed or if the product fails to
function properly as a result of accident, misuse, abuse, neglect, mishandling,
misapplication, defective batteries, faulty installation, setup, adjustments,
improper maintenance, alteration, maladjustment of controls, modification,
power surges, commercial or clinical use of the product, improper or incorrectly performed service, or acts beyond the manufacturer's or Samsung America's
control.
The warranty and remedy provided herein are exclusive and in lieu of all other
express and implied warranties and unless stated herein, any statements or
representations made by any other person or entity are void. NEITHER THE
MANUFACTURER, SAMSUNG AMERICA, NOR THEIR AFFILIATES SHALL BE
LIABLE FOR ANY LOSS, INCONVENIENCE, INJURY, OR DAMAGE INCLUDING
DIRECT, SPECIAL, INCIDENTAL, OR CONSEQUENTIAL DAMAGES RESULTING
FROM THE USE,IMPROPER USE, FAILURE TO HEED ANY WARNING, DISCLAIMER OR INSTRUCTION OR INABILITY TO USE THIS PRODUCT, WHETHER
ARISING OUT OF ANY BREACH OF THIS WARRANTY OR ANY OTHER LEGAL
THEORY. ALL EXPRESS AND IMPLIED WARRANTIES, INCLUDING THE
26
Limited Lifetime Warranty
Limited Lifetime Warranty
WARRANTIES OF MERCHANTABILITY, ARE LIMITED TO THE APPLICABLE
WARRANTY PERIOD SET FORTH ABOVE. Manufacturer and Samsung America
assume no responsibility for injuries, damages or penalties incurred or suffered
resulting from the use of this product in an improper manner or manner or location other than for that for which it is intended, or from failure to heed any warning, disclaimer or instruction.
Some states do not allow the exclusion or limitation of incidental or consequential damages, or limitations on how long an implied warranty lasts, so the
above exclusions or limitations may not apply to you. This warranty gives you
specific legal rights and you may also have other rights which vary from state to
state.
Should your product prove defective during this warranty period, please return
the product in the original carton prepaid to:
SAMSUNG AMERICA, INC.
c/o Healthy Living Division
105 Challenger Road, 6th Floor
Ridgefield Park, NJ 07660
Attn: Customer Service
Include $11.95 for return shipping & insurance within the continental U.S.
(CHECK OR MONEY ORDER ONLY PLEASE, NON-REFUNDABLE). If you are
not the original purchaser of the unit with proof of purchase, the price for
repairing or replacing may vary. Sorry, we cannot deliver to P.O. Boxes or outside the U.S. Please allow 6-8 weeks for delivery.
Include with your monitor a letter stating: your name, street address, day-time
phone number, detailed description of the problem, a copy of your dated cash
register receipt or other proof of purchase.
This warranty applies only to products purchased in the U.S. For products purchased in, but used outside, the U.S., this warranty covers only warranty services within the U.S. (and does not include shipping outside the U.S.). For
questions regarding purchases from Samsung America affiliates outside the
U.S., please click here to be redirected. Thank you.
Limited Lifetime Warranty 27
Specifications
Model
BVM-1007
Monitor
Manual Inflate
Measurement Method
Oscillometric
Display
Liquid crystal digital display
Measurement Range
Pressure: 0 ~ 300 mmHg
Pulse: 40 ~ 199 beats/Minute
Accuracy
Pressure: within ± 3 mmHg
Pulse: within ± 5%
Memory
Stores up to 60 measurements for each
zone
Automatic Power Off
Approximately 1 minute after measurement
is complete
Battery Type
4 AA batteries (Alkaline)
Battery Life
Approximately 6 months when used once a
day
Storage Temperature
Temperature: -4 °F ~ 122 °F/-20 °C ~ 50 °C
Relative Humidity: 10 ~ 85% R.H.
Operating Temperature
Temperature: 50 °F ~ 104 °F/10 °C ~ 40 °C
Relative Humidity: 30 ~ 85% R.H.
Dimensions (approx.)
Monitor: 6 5/8 " (L) x 4 5/8 " (W) x 3 11/16 " (H)
Standard Cuff: fits arms 9 " ~ 13 " around
Weight (approx.)
13.2 oz (including batteries)
For purposes of improvement, specifications are subject to change without notice.
28
Specifications
Blood Pressure Diary
Date
Time
Systolic/Diastolic
Pulse
/
/
/
/
/
/
/
/
/
/
/
/
/
/
/
/
/
Blood Pressure Diary
29
Blood Pressure Diary
Date
Time
Systolic/Diastolic
/
/
/
/
/
/
/
/
/
/
/
/
/
/
/
/
/
30
Blood Pressure Diary
Pulse
Blood Pressure Diary
Date
Time
Systolic/Diastolic
Pulse
/
/
/
/
/
/
/
/
/
/
/
/
/
/
/
/
/
Blood Pressure Diary
31
Blood Pressure Diary
Date
Time
Systolic/Diastolic
/
/
/
/
/
/
/
/
/
/
/
/
/
/
/
/
/
32
Blood Pressure Diary
Pulse
Advertencias importantes/Descargo
de responsabilidad médica
Debe leer y entender todas las instrucciones y observar
todas las advertencias antes de usar el monitor de presión
arterial.
La información se presenta en este manual solamente con
fines informativos. Ni el producto ni el manual están previstos como sustituto de los consejos que pudiera darle su
médico de cabecera u otro médico. No debe utilizar el
monitor ni la información contenida en el presente para
fines de diagnóstico o tratamiento de una enfermedad o
problema de salud ni para recetar ningún medicamento.
Si padece o sospecha que padece algún problema
médico, comuníquese con su médico a la brevedad.
Advertencias importantes/Descargo de responsabilidad médica
1
Índice de materias
Advertencias importantes/Descargo de responsabilidad médica
_____________________________________________1
Healthy Living __________________________________3-4
Preguntas frecuentes sobre la presión arterial __________5-8
Uso previsto ____________________________________8
Método de medición ______________________________9
Información importante que debe saber antes de usar la unidad
__________________________________________10-11
Unidad principal y accesorios _______________________12
Funciones especiales _____________________________13
Exactitud ______________________________________14
Situaciones especiales ____________________________14
Instalación de las pilas ____________________________15
Símbolos de la pantalla digital ______________________15
Configuración de la fecha y hora _____________________16
Aplicación del manguito ___________________________17
Medición de la presión arterial ____________________18-19
Almacenamiento, consulta y eliminación de los datos de las
mediciones __________________________________20-21
Memoria de 2 zonas de 60 lecturas ___________________21
Cuidado del monitor de presión arterial ______________22-23
Problemas y soluciones posibles ___________________24-25
Garantía limitada de por vida _____________________26-27
Especificaciones_________________________________28
Diario para anotar la presión arterial________________29-32
Copyright © 2006 Samsung America, Inc. Todos los derechos reservados.
2
Índice de materias
Healthy Living
Usted ya tomó su primer paso hacia la vida sana con la compra
de este monitor de presión arterial, pero eso es tan sólo el
comienzo. También es importante:
MANTENERSE ACTIVO - Comience por caminar un poco
todos los días. Con el tiempo se empezará a sentir lleno de
energía. Caminar es una manera divertida y fácil de facilitar la
disminución de peso y también ayuda a fortalecer los huesos y
el corazón.
COMER ALIMENTOS SALUDABLES - Un muy buen
punto de partida es incorporar más frutas y verduras a su dieta.
También debería incluir más granos integrales, pescado y productos lácteos de bajo contenido graso y controlar su consumo
de sodio. Si está usando un monitor de presión arterial, probablemente ya sabe el efecto que el sodio puede tener sobre la
presión arterial. También sería conveniente que explore los beneficios potenciales de ciertos productos botánicos como la
cebolla y el ajo. Como siempre, consulte a su médico antes de
hacer cambios en su dieta.
Healthy Living
3
Healthy Living
MANTENER UNA ACTITUD POSITIVA - Una mente
sana es el mejor compañero del cuerpo sano. Practicar técnicas
de relajación, como yoga y meditación todos los días, podría ser
exactamente lo que necesita para aliviar el estrés. Mantenga la
mente enfocada en todo lo positivo de la vida. Comience por felicitarse por sus paseos diarios y por la manzana que se acaba de
comer.
CUIDAR SU PESO - Algunas veces tan sólo un poco de peso
menos puede producir un efecto positivo sobre la presión arterial. Si ya comenzó a hacer ejercicio y a comer alimentos más
saludables es muy probable que comience a observar que
también está bajando de peso.
RECUERDE: Consulte a su médico antes de comenzar o cambiar
su rutina de ejercicio, dieta, consumo de vitaminas/suplementos
y uso del monitor de presión arterial.
4
Healthy Living
Preguntas frecuentes sobre
la presión arterial
¿Por qué me conviene medirme la presión arterial en
casa?
Medirse la presión arterial en casa le permite controlar su salud
entre consultas con el médico. Además, ahora cuenta con los
medios para llevar un control de las mediciones de su presión
arterial y esto constituye una valiosa herramienta para usted y
para su proveedor de atención médica.
Controlarse la presión en casa puede ayudar a aliviar la
“hipertensión de consultorio”. Ese término se refiere a lo que
puede causar que las cifras de presión arterial de una persona
se eleven cuando se realiza la medición en el consultorio. A
veces tan sólo el estrés de estar en el consultorio puede causar
un aumento de la presión arterial. Una posible ventaja de
medirse la presión arterial en casa es que puede obtener una
indicación más precisa de su presión arterial porque se encuentra en un lugar donde está relajado y cómodo.
¿Qué es la presión arterial?
El término “presión arterial” se refiere a la fuerza o presión que
la sangre ejerce sobre las arterias del cuerpo al fluir por ellas.
Cada vez que el corazón late o se contrae, produce presión o
tensión en las arterias. Esa presión sanguínea es lo que impulsa la sangre a través del organismo, llevando oxígeno y nutrientes a todos los órganos.
Preguntas frecuentes sobre la presión arterial
5
Preguntas frecuentes sobre
la presión arterial
Cuando el corazón se contrae envía la sangre
al organismo. Esa presión se denomina
sistólica.
La presión que se crea cuando la
sangre penetra las cavidades del
corazón, se llama diastólica.
La presión arterial se registra con los valores de
presión sistólica sobre presión diastólica.
¿Qué se considera una presión arterial normal?
En el Séptimo informe del Comité Nacional Conjunto sobre
Prevención, Detección, Evaluación y Tratamiento de la
Presión Arterial Elevada del Instituto Nacional del Corazón,
los Pulmones y la Sangre se dispusieron las siguientes pautas referentes a la presión arterial. Las pautas se reproducen
únicamente con fines informativos. Le rogamos que consulte
a su médico para obtener un diagnóstico apropiado.
6
Preguntas frecuentes sobre la presión arterial
Preguntas frecuentes sobre
la presión arterial
¿Por qué fluctúa mi presión arterial?
La presión arterial cambia con cada latido del corazón y fluctúa
constantemente a lo largo del día. Además de los cambios naturales, otros factores que pueden afectar la presión arterial son:
• Temperatura
(demasiado frío o
calor)
• Humedad
• Agitación
• Falta de sueño
• Ejercicio físico
• Estreñimiento
• Temor
• Ira
• Ansiedad
• Consumo de
alimentos o
bebidas
• Su condición física
• Estrés
Hable con su profesional de atención médica para determinar
qué está afectando su presión arterial.
¿Cómo puedo saber si tengo la presión arterial elevada?
La gente cree incorrectamente que pueden “sentir” cuando les
aumenta la presión. En realidad es prácticamente imposible
detectar si tiene la presión elevada sin medírsela. Por esta razón
la hipertensión ha recibido el nombre de “asesino silencioso”.
Comience a vigilar su presión arterial hoy mismo y converse
sobre los resultados con su médico.
Preguntas frecuentes sobre la presión arterial
7
Preguntas frecuentes sobre
la presión arterial
¿Por qué es importante que me controle la presión arterial?
Si la hipertensión no está controlada, puede causarle una gran
cantidad de sobrecarga al corazón y a las arterias. Ambos tienen
que trabajar mucho más para mantener el flujo de sangre a
través del organismo. Con el tiempo, esa sobrecarga puede
causar problemas de salud, entre los que se incluye el
agrandamiento del corazón, la pérdida de la elasticidad de las
arterias, las cardiopatías, los accidentes cerebrovasculares o la
muerte. La incorporación de algunos cambios sencillos en su
estilo de vida puede ayudarle a mantenerse sano en el futuro.
Uso previsto
Los monitores de presión arterial Healthy Living han sido
diseñados para uso en el hogar. Son atraumáticos; eso quiere
decir que no es necesario introducir nada en el cuerpo, y facilitan mediciones de la presión sistólica, diastólica y del pulso.
Estos monitores se recomiendan para las personas mayores de
18 años de edad y no son adecuados para uso clínico.
8
Preguntas frecuentes sobre la presión arterial/Uso previsto
Método de medición
Los monitores Healthy Living miden la presión arterial y el
pulso mediante un método oscilométrico, lo cual significa que se
miden las fluctuaciones en la presión. Una vez que se coloca el
manguito en la parte superior del brazo, se enciende el monitor
y el manguito se infla. El manguito al inflarse crea presión
alrededor de las arterias que se encuentran en el brazo. Dentro
del manguito hay un medidor que detecta las fluctuaciones
(oscilaciones) de la presión. Las fluctuaciones medidas corresponden a la contracción que se produce en las arterias con
cada latido del corazón como resultado de la presión que el
manguito ejerce sobre el brazo. El monitor mide esas contracciones y convierte la información en un valor digital. Ese es el
resultado que se muestra en la pantalla del monitor. Una vez
completada la medición, el manguito se desinfla automáticamente.
Método de medición
9
Información importante que debe
saber antes de usar la unidad
• Las mediciones de la presión arterial deben ser interpretadas
por un médico o profesional médico debidamente capacitado
y familiarizado con los antecedentes médicos. Al usar la
unidad periódicamente y anotar los resultados para que el
médico los pueda interpretar, usted podrá mantener informado al médico de las tendencias de su presión arterial.
• Siéntese relajado por unos 10 minutos. De esta manera el
organismo retornará a su estado de reposo normal.
• Envuelva el manguito alrededor de su brazo y coloque el
brazo sobre una superficie plana a la misma altura que el
corazón. Las plantas de los pies deben apoyar sobre el piso.
• No mueva el dispositivo mientras se está midiendo la
presión; eso podría causar una lectura incorrecta.
• Realice la medición en un lugar tranquilo, en una posición
relajada y a temperatura ambiente. A fin de asegurar la consistencia de los resultados, le recomendamos medirse la
presión en el mismo brazo (el izquierdo de ser posible) y a la
misma hora cada día.
10
Información importante que debe saber antes de usar la unidad
Información importante que debe
saber antes de usar la unidad
• Si se va medir la presión varias veces, espere 10 minutos entre cada medición. Eso permitirá que los vasos
sanguíneos retornen a su estado natural.
• Si bebió alguna bebida con cafeína o fumó, espere 30 a
45 minutos antes de tomarse la presión.
• No se ponga el manguito sobre la
manga de la chaqueta o del suéter;
debe envolverse sobre la piel desnuda de la parte superior del brazo.
• Tenga presente que la presión arterial varía naturalmente a diferentes
horas del día y está sujeta a muchos
factores, como el tabaquismo, el
consumo de alcohol, las medicinas y
la actividad física.
• Las mediciones de la presión que se hagan con esta
unidad equivalen a las obtenidas por un observador
capacitado usando el método de auscultación con manguito y estetoscopio dentro de los límites prescritos por
la Norma Nacional Americana para Esfigmomanómetros
Electrónicos o Automáticos.
• Verifique que el enchufe del manguito esté conectado al
monitor, como se muestra arriba.
Información importante que debe saber antes de usar la unidad
11
Unidad principal y accesorios
Unidad principal
(Consulte la
página 15 para
las descripciones de los
iconos que
aparecen en la
pantalla.)
Manguito
Perilla
para inflado
Accesorios
Botón Arriba
Botón
Start/Stop
(Inicio/Fin)
Botón Abajo
Botón Memory
(Memoria)
Botón Mode
(Modo)
• 4 Pilas alcalinas tipo “AA”
• 1 Estuche para almacenamiento/transporte
• Manguito flexible regular de 9 pulg.
(228 mm) ~ 13 pulg. (330 mm)
12
Unidad principal y accesorios
Funciones especiales
Heart Sense
El sistema de inflado Heart Sense detecta
la presión arterial antes que se complete la
medición, indicándole al monitor que ajuste
la cantidad de la presión de aire. El resultado es una medición rápida y cómoda cada vez que se mide la
presión arterial.
Pantalla grande de 3 hileras
El monitor cuenta con una pantalla de cristal líquido de tres
hileras para facilitar la lectura de sus resultados.
Función de memoria
El monitor de presión arterial de lujo súper esbelto Healthy
Living cuenta con una memoria con capacidad de hasta 240
mediciones y proporciona el promedio de las tres lecturas más
recientes.
Fecha y hora
El monitor registra automáticamente la hora y la fecha.
Funciones especiales
13
Exactitud
Los monitores Healthy Living se han sometido a pruebas
clínicas frente a un dispositivo científico que se llama esfigmomanómetro y que se considera el patrón de oro en
medición de la presión arterial. Todos los monitores Healthy
Living toman mediciones equivalentes a las que se obtienen
con este dispositivo científico y se encuentran dentro de los
límites de precisión recomendados por la Norma Nacional
Americana para Esfigmomanómetros Electrónicos o
Automáticos.
Situaciones especiales
Todos los monitores de presión arterial Healthy Living
pueden usarse con precisión y sin correr riesgo en la presencia de arritmias, como los latidos auriculares o ventriculares
prematuros y fibrilación auricular.
14
Exactitud/Situaciones especiales
Instalación de las pilas
Localice el paquete de pilas desmontable situado en la parte posterior del monitor para instalar
las 4 pilas alcalinas tipo “AA” incluidas. Retire
el paquete de pilas e instale las pilas,
asegurándose de que las polaridades (+/-) estén
orientadas correctamente. Instale el paquete de
pilas alineando los orificios de la parte trasera
hasta que encajen a presión.
Cuando se muestre “
”en la pantalla, significa que hay que instalar 4 pilas AA nuevas.
* Para que las pilas duren más, las puede retirar si no va a usar el monitor por mucho tiempo.
Símbolos de la pantalla digital
Pantalla de lectura de las mediciones
Indicación de pila baja
Símbolo de error
Ritmo sistólico
Símbolo Inflar/Desinflar
Ritmo diastólico
Unidades de presión
arterial
Hora/minuto
Pulso
Fecha Símbolo de pulso
Mes Valor de memoria
Instalación de las pilas/Símbolos de la pantalla digital
15
Configuración de la fecha
y hora
a. Oprima el botón “MODE” (el “mes” comienza a parpadear)
Oprima el botón " " y " " para ajustar y elegir el mes correspondiente (1, 2, 3 ....12)
b. Oprima el botón “MODE” (la “fecha” comienza a parpadear)
Oprima el botón " " y " " para ajustar y elegir la fecha correspondiente
c. Oprima el botón “MODE” otra vez (la “hora” comienza a
parpadear)
Oprima el botón " " y " " para ajustar y elegir la hora correspondiente en el formato de 12 horas Se indica “PM” para
las horas después del mediodía y desaparece para las horas
de la mañana.
d. Oprima el botón “MODE” otra vez (el “minuto” comienza a
parpadear)
Oprima el botón " " y " " para ajustar y elegir el minuto
correspondiente (00, 01, 02 ...59)
Después de establecer estas configuraciones, volverá al
modo de reposo y podrá medirse la presión pulsando el
botón START/STOP.
16
Configuración de la fecha y hora
Aplicación del manguito
•IInserte el enchufe del manguito en la toma
correspondiente del monitor.
•Extienda la pestaña de Velcro de tal forma
que quede plana, con el Velcro hacia usted.
•Tire del manguito hacia la izquierda del aro de
metal para formar una abertura para el brazo.
•Meta el brazo izquierdo a través del
manguito. La parte inferior del manguito debe
quedar aproximadamente 0.5 pulg. (13 mm)
por arriba del codo. El tubo del manguito debe
quedar sobre la arteria braquial (humeral) de
la parte interna del brazo.
•Cuando el manguito está bien puesto, el tubo
debe extenderse a lo largo del brazo como se
muestra en la ilustración de la derecha.
•Tire del manguito de tal forma que las orillas
superior e inferior queden bien ajustadas
alrededor del brazo. No se lo apriete tanto que
le que quede incómodo.
•Una vez ajustado correctamente el manguito,
alise el Velcro con firmeza sobre el lado de los
bucles del manguito.
•Siéntese en una silla y ponga el brazo sobre la
mesa, de tal forma que el manguito esté a la
misma altura que el corazón.
•Relaje el brazo y siéntese con la palma de la
mano hacia arriba.
•Verifique que la manguera de aire no esté
doblada en ningún punto.
Aplicación del manguito
17
Medición de la presión
arterial
1. Cuando tenga el manguito situado correcta mente y esté sentado con los pies apoyados sobre el piso, estará listo para
medirse la presión.
2. Oprima el botón “START/STOP”; el icono “
”
situado en la parte superior izquierda le indicará
que oprima la perilla de desinflado aire situada
en la base de la bomba para dejar salir el aire
atrapado.
3. Cuando el icono “
” comience a parpadear, comience a
accionar la bomba. Esto hará que el manguito comience a
inflarse y usted sentirá que se ciñe.
4. El manguito no se debe inflar tanto que le quede incómodo; si
esto ocurre, significa que se lo puso demasiado apretado.
Oprima la perilla de desinflado situada en la base de la bomba
para que salga el aire y oprima el botón “START/STOP” para
detener la medición. Vuelva a colocarse el manguito dejando
más espacio entre el brazo y el manguito.
5. Continúe accionando la bomba hasta que escuche un tono.
Esta es su señal de DETENERSE y dejar de accionar la bomba.
Aparecerá el icono “
”; siéntese tranquilo y en silencio
mientras se hace la medición. A medida que se mide la presión
aparece el icono “ ” parpadeante (no infle el manguito más
de 240 mmHG) y el símbolo de la bomba dejará de parpadear.
18
Medición de la presión arterial
Medición de la presión
arterial
*Si el símbolo de la bomba comienza a parpadear otra vez
eso significa que se requiere más aire; reanude el bombeo
hasta que el símbolo deje de parpadear.
6. A medida que el monitor determina su
presión arterial, aparecerán números que
cambiarán en la pantalla hasta que se
logre la lectura final.
7. Cuando se haya completado la medición
de la presión, aparecerá el icono “
”.
Esto indica que usted debe desinflar el
manguito oprimiendo la perilla de desinflado.
8. Este proceso generalmente tarda menos
de un minuto y una vez que haya completado la medición, su presión arterial y
pulso aparecerán en la pantalla. El monitor se apaga solo aproximadamente 1
minuto después de completar la lectura.
Inflado
Desinflado
Medición de la Presión Arterial
19
Almacenamiento, consulta y eliminación
de los datos de las mediciones
• Almacenamiento de datos
*Después de cada medición, los ritmos sistólico y
diastólico, el pulso y la información de hora y fecha se almacenarán automáticamente. La memoria tiene capacidad
para guardar las últimas 60 medicines en cada una de las 2
zonas de memoria. Si las mediciones superan el número de
60, la memoria borrará automáticamente los datos más
antiguos.
• Consulta de los datos
* Oprima el botón " " o " " para seleccionar la zona de
memoria.
*Oprima el botón “MEMORY” para consultar los datos
almacenados en la memoria. Si no hay datos en la
memoria, no se mostrará nada.
*Si hay datos en la memoria, la primera lectura
corresponderá a un promedio del conjunto de las
últimas tres mediciones (presión sistólica y
diastólica y pulso).
*Oprima el botón “MEMORY” otra vez y aparecerá
el último conjunto de mediciones registradas junto
con la hora y la fecha en que se tomó la medida.
*Oprima el botón " " para leer el siguiente conjunto de
datos almacenados. Los datos mostrados comienzan con la
lectura más reciente y continúan regresivamente hasta la
más antigua.
20
Almacenamiento, consulta y eliminación de los datos de las mediciones
Almacenamiento, consulta y eliminación
de los datos de las mediciones
• Eliminación de datos
*Oprima “MEMORY” para entrar al modo de memoria.
*Oprima sin soltar el botón “MODE” y luego el botón " " para
borrar todos los datos.
*Para confirmar que se eliminaron todos los datos, oprima el
botón “MEMORY”; no debe aparecer ningún dato.
Memoria de 2 zonas de 60 lecturas
Cuando toma una medición, el monitor la almacena automáticamente en la memoria en el espacio número uno. A medida que continúa tomando mediciones, el monitor empujará la medición anterior un espacio hacia atrás. En otras palabras, el valor que se encuentra en el espacio uno será la medición de presión arterial más
reciente.
El monitor cuenta con una capacidad de memoria en 2 partes o 2
“zonas”. Cada zona almacena 60 mediciones, con lo que en total la
memoria tiene una capacidad de 120 mediciones. Esto resulta útil
para que el usuario haga un seguimiento de su presión arterial a lo
largo de los diferentes periodos del día: mañana, tarde y noche.
Oprima el botón " " para alternar entre la zona de memoria 1 y 2.
Cuando haya seleccionado la zona cuyas mediciones desea ver,
oprima el botón “MEMORY” una vez para ver la medición más
reciente junto con la hora y la fecha en que se hizo. Oprima el botón
“MEMORY” otra vez y verá todas las mediciones registradas en esa
zona. Si desea pasar a la siguiente zona para ver esas mediciones,
oprima el botón " ". El monitor se apaga automáticamente
después de aproximadamente un minuto de inactividad.
*Cuando tome mediciones, no se olvide de seleccionar el
número de zona correcto mediante el botón " " o " " para que
la medición se registre en la zona apropiada.
Almacenamiento, consulta y eliminación de los datos de las mediciones/Memoria de 2 zonas de 60 lecturas
21
Cuidado del monitor de
presión arterial
Mantenimiento
* Apagón
Si se produce un corte de luz no perderá los datos almacenados. Tendrá que volver a configurar la hora y la fecha cuando
regrese la luz, pero los datos permanecerán en las zonas de
memoria.
* Use un paño húmedo para limpiar el monitor y séquelo
inmediatamente con un paño seco.
* El manguito se debe limpiar únicamente con un paño seco.
* No use productos de limpieza concentrados.
* Si no va a usar la unidad por mucho tiempo o sólo la usa con
el adaptador de CA, lo mejor es quitarle las pilas.
Almacenamiento
Siempre guarde la unidad en el estuche de transporte
después de usarla.
No guarde el monitor bajo la luz solar directa, en lugares de
alta temperatura ni en lugares húmedos o con mucho polvo.
No guarde la unidad en temperaturas extremadamente bajas
(menos de -4 °F / -20 °C) o altas (más de 122 °F / 50 °C).
22
Cuidado del monitor de presión arterial
Cuidado del monitor de
presión arterial
Para prevenir desperfectos
Utilice el manguito sólo de la manera indicada y tenga cuidado de no retorcerlo.
No infle el manguito cuando no lo tenga sobre el brazo.
No intente desarmar ni cambiar ninguna pieza del monitor ni
del manguito.
Manipule el monitor con cuidado; no lo deje caer y protéjalo
contra los impactos fuertes.
Advertencias
El manguito de tamaño regular es apropiado para brazos de
personas adultas de 9 pulg. (228 mm) a 13 pulg. (330 mm).
No debe usar el dispositivo si tiene alguna lesión en el brazo.
Si el manguito continúa inflándose sin parar, quíteselo de
inmediato.
No desarme ni modifique el dispositivo de ninguna manera.
Eso podría resultar en lecturas imprecisas y anulará la
garantía del dispositivo.
No use el manguito en ninguna parte del cuerpo que no sea
el brazo.
Mantenga fuera del alcance de los niños.
Cuidado del monitor de presión arterial
23
Problemas y soluciones
posibles
Error/Símbolo
¿Qué significa?
Cómo resolverlo
El monitor puede Consulte la página 17
haberse inflado sin (Aplicación del mantener el manguito guito).
puesto en el brazo O
posiblemente el manguito no esté bien colocado sobre el brazo.
24
El tubo del manguito
podría estar doblado O
posiblemente se haya
movido mientras se
inflaba el manguito.
Consulte las páginas
10 y 11 (Información
importante que debe
saber antes de usar la
unidad).
Es posible que se haya
movido o que haya
hablado durante el proceso de medición.
Recuerde que es
importante
no
moverse ni hablar ya
que eso puede aumentar el valor de la
medición.
Posiblemente lo haya
sobresaltado un ruido o
vibración durante la
medición.
Recuerde que debe
estar en un lugar tranquilo y cómodo cuando
se tome la presión.
Problemas y soluciones posibles
Problemas y soluciones
posibles
Error/Símbolo
continúa el tono
¿Qué significa?
Cómo resolverlo
l monitor se ha inflado Desinfle el monitor
por encima de los 300 oprimiendo la perilla de
mmHg
desinflado.
Las pilas están ago- Repóngalas con cuatadas.
tro pilas tipo “AA”
nuevas.
El valor de la
presión arterial
parece demasiado alto o demasiado bajo.
Posiblemente el man- Consulte la página 17
guito no esté bien alin- (Aplicación del maneado.
guito).
El circuito electrónico Saque las pilas y vuelestá bloqueado.
va a instalarlas y
luego intente medirse
la presión otra vez.
No
puede Posiblemente el man- Consulte la página 17
medirse
la guito no esté bien (Aplicación del manpresión después puesto.
guito).
de que aparece
un símbolo de
error.
Problemas y soluciones posibles
25
La vida Limitó la Garantía
Samsung América, S.a. hace, en su opción, repara o reemplaza su monitor,
inclusive el puño, con el mismo o comparable modelo libre de la carga
(menos usted debe pagar por el envío las cargas exponen abajo) para la vida
del dueño original de la fecha de la compra original en caso de un defecto en
las materias o la habilidad que ocurren durante el uso normal. Este producto
es para en casa uso sólo y no es pensado para la propaganda ni el uso clínico.
Esta garantía sólo extiende al comprador original de la venta al por menor.
Compre recibo u otra prueba de la fecha de la compra original son requeridos
antes del desempeño de la garantía.
Esta garantía no cubre el desgaste y los rasgones del producto dado a su uso.
La garantía se anulará si el producto: se ha desmontado de la carcasa, si se
ha quitado la etiqueta del fabricante, el logotipo el número de serie o si el
producto no funciona bien por accidente, mal uso, abuso, negligencia, mal
trato, mala colocación, pilas defectuosas, una mala instalación, configuración, ajuste, mal mantenimiento, alteración, mal ajuste de los controles,
modificación, cambios de tensión eléctrica, uso clínico o comercial del producto, intento de arreglo por un servicio no autorizado o actos fuera del control del fabricante o distribuidor.
La garantía y el remedio incluidos aquí son exclusivos y están ligados a otras
garantías expresas e implícitas y a menos que se especifiqué queda anulada
cualquier afirmación o representación realizada por otra persona o entidad.
NI EL FABRICANTE, EL DISTRIBUIDOR NI SUS AFILIADOS SE HARAN
RESPONSABLES POR LA PERDIDA, MOLESTIA, LESION O DAÑO, INCLUYENDO DAÑOS DIRECTOS, ESPECIALES, INCIDENTALES O CONSECUENTES QUE
RESULTEN DEL, USO, USO IMPROPIO, FALTA DE ATENCIÓN A UN AVISO,
UNA NEGATIVA O UNA INSTUCCIÓN O POR NO PODER ULTILIZAR ESTE PRODUCTO POR INFRINGIR CUALQUIER PARTE DE ESTA GARANTÍA O POR
CUALQUIER OTRO MOTIVO LEGAL. TODAS LAS GARANTÍAS EXPRESAS E
26
La vida Limitó la Garantía
La vida Limitó la Garantía
IMPLÍCITAS, INCLUYENDO LAS DE MERCANTIBILIDAD, ESTÁN LIMITADAS
AL PERIODO DE GARANTÍA APLICABLE ESTABLECIDO PREVIAMENTE. El fabricante y el distribuidor no asumen responsabilidad alguna por lesiones,
daños o penas provocadas o sufridas como resultado del uso de este producto de manera inapropiada o de manera o en lugar distinto para la cual fue
diseñado o por no seguir los avisos negaciones o instrucciones. Algunos
estados no permiten la exclusión o limitación de daños consecuentes o incidentales a las limitaciones sobre la duración de una garantía implícita, por lo
que puede que en su caso las exclusiones o limitaciones anteriores no se le
apliquen a usted. Esta garantía le ofrece sus derechos legales específicos y
tal vez posea otros derechos que pueden variar de estado en estado.
Si su producto presenta defectos durante su periodo de garantía, devuélvalo
en su embalaje original franqueado a:
SAMSUNG AMERICA, INC.
c/o Healthy Living Division
105 Challenger Road, 6th Floor
Ridgefield Park, NJ 07660
Attn: Customer Service
Incluya $11,95 para el envío del regreso & el seguro. (CHEQUE O GIRO
POSTAL SOLO COMPLACEN, NO REEMBOLSABLE). Arrepentido, nosotros no
podemos entregar a P.O. Las cajas o fuera de los EE.UU. Permita por favor 68 semanas para la entrega. Incluya con su monitor que una carta que indica:
su nombre, la dirección de la calle, el número de teléfono del día, la descripción detallada del problema, una copia de
su fechó recibo de caja registradora u otro comprobante de compra. Esta
garantía aplica sólo a productos comprados en los EE.UU. Para productos
comprados en, pero utilizado afuera, los EE.UU., esta garantía cubre sólo servicios de garantía dentro de los EE.UU. (Y no incluye el envío fuera del U.S.).
La vida Limitó la Garantía
27
Especificaciones
28
Modelo
BVM-1007
Monitor
Inflado manual
Método de medición
Oscilométrico
Pantalla
Pantalla digital de cristal líquido
Margen de medición
Presión: 0 ~ 300 mmHg
Pulso: 40 ~ 199 latidos/minuto
Exactitud
Presión: margen de ± 3 mmHg
Pulso: margen de ± 5%
Memoria
Almacena hasta 60 mediciones en cada zona
Apagado automático
Aproximadamente 1 minuto después de
completar la medición
Tipo de pilas
4 pilas alcalinas tipo “AA”
Duración de las pilas
Aproximadamente 6 meses cuando la unidad
se usa una vez al día.
Temperatura de
almacenamiento
Temperatura: -4 °F ~ 122 °F/-20 °C ~ 50 °C
Humedad relativa: 10 ~ 85%
Temperatura de
funcionamiento
Temperatura: 50 °F ~ 104 °F/10 °C ~ 40 °C
Humedad relativa: 30 ~ 85%
Dimensiones (aprox.)
Monitor: 6 5/8 pulg. (168 mm) (L) x 4 5/8 pulg.
(117 mm) (A) x 3 11/16 pulg. (94 mm) (H)
Manguito estándar: para brazos de 9 pulg.
(228 mm) ~ 13 pulg. (431 mm) de
circunferencia
Peso (aprox.)
13.2 oz (374.21 g), pilas incluidas
Para fines de mejora, las especificaciones están sujetas a cambio sin previo aviso.
Especificaciones
Diario para anotar la
presión arterial
Fecha
Hora
Sistólica/Diastólica
Pulso
/
/
/
/
/
/
/
/
/
/
/
/
/
/
/
/
/
Diario para anotar la presión arterial
29
Diario de Presión Arterial
Fecha
Hora
Sistólica/Diastólica
/
/
/
/
/
/
/
/
/
/
/
/
/
/
/
/
/
30
Diario para anotar la presión arterial
Pulso
Diario de Presión Arterial
Fecha
Hora
Sistólica/Diastólica
Pulso
/
/
/
/
/
/
/
/
/
/
/
/
/
/
/
/
/
Diario para anotar la presión arterial
31
Diario de Presión Arterial
Fecha
Hora
Sistólica/Diastólica
/
/
/
/
/
/
/
/
/
/
/
/
/
/
/
/
/
32
Diario para anotar la presión arterial
Pulso
Made in China
105 Challenger Road, 6th Floor
Ridgefield Park, NJ 07660
www. SAMSUNGHealthyLiving.com