1
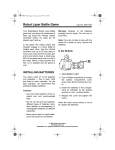
26-446.fm Page 1 Friday, July 9, 1999 9:45 AM Cat. No. 26-446 8 Fire Button Digital/Analog Gamepad Your RadioShack 8 Fire Button Digital/Analog Gamepad lets you take control of the latest MS-DOS and Windows computer games! The gamepad’s advanced features include: Analog/Digital Control — lets you switch between analog and digital control for different types of games. Analog control provides better response for driving and flight simulation games, while digital control provides better performance for action and fighting games. Analog Throttle — lets you easily control throttle functions in many driving and flight simulation games. Dual Triggers and 6 Control Buttons — give you the flexibility you need to play games with multiple controls. You can disable individual pairs of control buttons, letting you use an additional gamepad or joystick in some 2-player games. Analog Joystick — allows precise control in an almost infinite number of directions. Thumb-Control Pad — allows precise control in eight directions. Independent/Automatic Fire Selectors — let you fire a continuous or single high-speed blast from one button while manually controlling the others. COMPATIBILITY Hardware — Your gamepad works with IBM® and compatible PCs equipped with a joystick port, using the industry-standard 15-pin D subminiature connector. Joystick ports are also available on game cards and enhanced sound cards. designed to run two 2-button joysticks or gamepads at the same time using a Yconnector). • Make sure you have only one game card (such as a sound card or multi I/O card with a built-in game port) enabled at once. If you have multiple game cards enabled, they might conflict with one another, causing your gamepad to operate erratically. If you have a dedicated game card, you must disable your sound card’s or multi I/O card’s game port. Check your computer’s documentation or contact your computer dealer for more information, if necessary. • You must have DirectX® 5.0 or above installed on your computer to properly test the gamepad with the included driver. If necessary, you can download DirectX at www.microsoft.com/directx/default.asp. Software — You can use your gamepad with any PC-compatible software that supports a gamepad. Note: The function of each of the gamepad’s buttons depends on the game you are playing. Consult your game’s owner’s manual for more information. INSTALLING THE SUPPLIED DRIVER If you are using Windows 95 or 98 and want to set up all 8 of your gamepad’s fire buttons for one player, you must install the driver from the supplied diskette. 1. Close all programs in use, then insert the supplied diskette into your computer’s floppy disk drive. 2. Set the A, B, C, D, R1/R2, and T1/T2 switches to NORMAL. 3. From the Start Menu, select Settings, then click on Control Panel. Important Notes: • To take advantage of all of your gamepad’s features, you must have a game card with a single dual port installed in your computer. (A dual-port game card is 4. Double click Add/Remove Programs. 5. Click Install, then follow the instructions that appear. © 1999 Tandy Corporation. All Rights Reserved. RadioShack is a registered trademark used by Tandy Corporation. 26-446.fm Page 2 Friday, July 9, 1999 9:45 AM USING THE GAMEPAD Cautions: • Always turn off your computer before connecting or disconnecting the gamepad from the game port. • When disconnecting the gamepad from the computer, hold and gently pull on the connector plug. Do not pull the cable. Your gamepad has two triggers (A and B) and six buttons (R1, R2, T1, T2, C, and D). It also has two turbo/auto firing control switches (marked A and B) which correspond to the A and B triggers, and four turbo control switches (marked R1/R2, C, D, and T1/T2) which correspond to the buttons of the same name. R1/R2 B C D T1/T2 A A B C D TTLE THRO AUTO NORMAL TURBO T1 R2 R1 R1/R2 T1/T2 OFF NORMAL TURBO T2 D C ANALOG THROTTLE DIGITAL T1/T2 Notes: • If you are playing a 2-player game and you get unexpected results when you press your gamepad’s buttons, try setting the C, D, T1/T2, and R1/R2 switches to OFF. Some 2-player games use these controls for the second player. • In many games, you can use the R1 and R2 buttons for rudder control and the T1 and T2 buttons for throttle control. Follow these steps to use the gamepad. 1. Turn off the computer. 2. Insert the gamepad’s connector into game port A on your computer, then turn on the computer. 3. For R1/R2, T1/T2, C, and D, set OFF/NORMAL/TURBO to OFF (if your game does not use the button), NORMAL (for normal fire), or TURBO (for high or low-speed turbo fire when you hold down the button). 2 For A and B, set AUTO/NORMAL/TURBO to AUTO (for automatic fire), NORMAL (for normal fire), or TURBO (for high or lowspeed turbo fire when you hold down the button). Notes: • You can set the turbo speed by setting the speed selector on the back of the gamepad to 1 (high) or 2 (low). However, turbo speed works only with games that support it. If your game does not support turbo speed, set any buttons you use in the game to NORMAL. • Depending on the game you are playing, auto fire and turbo fire might work differently. Try each game with and without them to determine what works best. 4. If you are using Windows 95 or 98, configure the gamepad, calibrate the gamepad, then load the game software according to the game owner’s manual. See “Configuring the Gamepad in Windows 95/98 (Without the Supplied Driver)” on Page 3 and “Calibrating the Gamepad Using the Supplied Driver” on Page 3). 5. Set the gamepad to the mode specified for your game: • To set the gamepad to analog mode, set ANALOG/DIGITAL to ANALOG and set THROTTLE/T1/T2 to THROTTLE. • To set the gamepad to digital mode, set ANALOG/DIGITAL to DIGITAL and set THROTTLE/T1/T2 to T1/T2. 6. Hold the gamepad in both hands. • If the gamepad is set to analog mode, press the R1, R2, C, or D buttons and slide the THROTTLE control with your right thumb, then press the B trigger with your right index finger. Press the joystick with your left thumb while pressing the A trigger with your left index finger. • If the gamepad is set to digital mode, press the R1, R2, T1, T2, C, or D buttons with your right thumb and press the B trigger with your right index finger. Press the thumb-control pad with your left thumb and press the A trigger with your left index finger. 26-446.fm Page 3 Friday, July 9, 1999 9:45 AM For maximum comfort, keep your elbows close to your sides and rest your forearms on your lap if you play for a long time. Notes: • You cannot use the thumb-control pad when the gamepad is set to analog mode. You cannot use the joystick when the gamepad is set to digital mode. • In either mode, you can use either thumb to set the A, B, R1/R2, C, D, T1/ T2, ANALOG/DIGITAL, or THROTTLE/T1/ T2 switches. Using the Joystick The joystick works when the gamepad is set to analog mode (see Step 5 under “Using the Gamepad” on Page 2). Using the Analog Throttle The analog throttle (marked THROTTLE) works when the gamepad is set to analog or digital mode (see “Using the Gamepad” on Page 2). To use the analog throttle, set THROTTLE/T1/ T2 to THROTTLE. This disables the T1 and T2 buttons. Then slide the THROTTLE switch to the desired level. To disable the analog throttle, set THROTTLE/T1/T2 to T1/T2. This activates the T1 and T2 buttons. Note: The analog throttle works only with games that support analog mode. CONFIGURING THE GAMEPAD IN WINDOWS 95/98 (WITHOUT THE SUPPLIED DRIVER) 1. Set the R1/R2 and T1/T2 switches to NORMAL. 2. If you want to use the gamepad’s throttle, set the THROTTLE/T1/T2 switch to THROTTLE. 3. From the Start Menu, select Settings, then click on Control Panel. 4. Double-click the Game Controllers icon. 5. Remove any previously selected controller drivers. 6. Click on Add. 7. Select Custom under Joystick Selection. 8. Enter a name for the controller, select 4 Axes and 4 Buttons, then click OK. 9. Select the mode you want to use (Analog or Digital), then click on Properties. 10. Highlight the name of the controller you entered in Step 8, then click on Properties. 11. Click on Calibrate then press the controller’s buttons to calibrate it. 12. If your game uses a throttle control, calibrate it by alternately pressing T1 and T2 several times (if you set THROTTLE/T1/T2 to T1/T2), or slide THROTTLE back and forth several times (if you set THROTTLE/ T1/T2 to THROTTLE). If your game uses a rudder control, calibrate it by alternately pressing R1 and R2 several times. 13. When you have finished calibrating the gamepad, click FINISH then click TEST. Press the gamepad’s buttons to test it. Note: During the test, the throttle and rudder indicators should appear in the center of the two vertical bars. These indicators move up when you press T1 or R1 and move down when you press T2 or R2. Do not press T1 and T2 or R1 and R2 at the same time. CALIBRATING THE GAMEPAD USING THE SUPPLIED DRIVER Important: • If you install a game card that works at a different speed after you calibrate your gamepad, you must re-calibrate the gamepad. • The supplied driver works only with 1player 8-button configuration. Note: Make sure the gamepad is set to the mode you want (digital or analog) before you calibrate it. See Step 5 under “Using the Gamepad” on Page 2. 3 26-446.fm Page 4 Friday, July 9, 1999 9:45 AM Follow these steps to calibrate the gamepad. 1. Turn off the computer. 2. Insert the gamepad’s connector into game port A on your computer, then turn on the computer. 3. Set the A, B, C, D, R1/R2, and T1/T2 switches to NORMAL. 4. If you want to use the gamepad’s throttle, set THROTTLE/T1/T2 to THROTTLE. 5. From the Start Menu, select Settings, then click on Control Panel. 13. When you finish, click Apply then click OK. CARE To enjoy your gamepad for a long time: • Keep the gamepad dry. If it gets wet, wipe it dry immediately. • Use and store the gamepad only in normal temperature environments. 6. Double-click the Game Controllers icon. • Handle the gamepad gently and carefully. Don’t drop it. 7. Remove any previously-selected controller drivers. • Keep the gamepad away from dust and dirt. 8. Click Add. • Wipe the gamepad with a damp cloth occasionally to keep it looking new. 9. Click 6-Fire Button Analog and Digital Gamepad with Throttle (for throttle mode) or 8-Fire Button Analog and Digital Gamepad (for T1/T2 mode), then click OK. The controller status shown on the screen should be OK. If not, delete the gamepad’s driver then reinstall it. Modifying or tampering with the gamepad’s internal components can cause a malfunction and invalidate its warranty. If your gamepad is not performing as it should, take it to your local RadioShack store for assistance. 10. Click Properties then click Calibrate. 11. Click Test. The test page appears. 12. Press the gamepad’s buttons to test it, then adjust the trimmers on the sides of the joystick to center it (if necessary). Limited Ninety-Day Warranty This product is warranted by RadioShack against manufacturing defects in material and workmanship under normal use for ninety (90) days from the date of purchase from RadioShack company-owned stores and authorized RadioShack franchisees and dealers. EXCEPT AS PROVIDED HEREIN, RadioShack MAKES NO EXPRESS WARRANTIES AND ANY IMPLIED WARRANTIES, INCLUDING THOSE OF MERCHANTABILITY AND FITNESS FOR A PARTICULAR PURPOSE, ARE LIMITED IN DURATION TO THE DURATION OF THE WRITTEN LIMITED WARRANTIES CONTAINED HEREIN. EXCEPT AS PROVIDED HEREIN, RadioShack SHALL HAVE NO LIABILITY OR RESPONSIBILITY TO CUSTOMER OR ANY OTHER PERSON OR ENTITY WITH RESPECT TO ANY LIABILITY, LOSS OR DAMAGE CAUSED DIRECTLY OR INDIRECTLY BY USE OR PERFORMANCE OF THE PRODUCT OR ARISING OUT OF ANY BREACH OF THIS WARRANTY, INCLUDING, BUT NOT LIMITED TO, ANY DAMAGES RESULTING FROM INCONVENIENCE, LOSS OF TIME, DATA, PROPERTY, REVENUE, OR PROFIT OR ANY INDIRECT, SPECIAL, INCIDENTAL, OR CONSEQUENTIAL DAMAGES, EVEN IF RadioShack HAS BEEN ADVISED OF THE POSSIBILITY OF SUCH DAMAGES. Some states do not allow the limitations on how long an implied warranty lasts or the exclusion of incidental or consequential damages, so the above limitations or exclusions may not apply to you. In the event of a product defect during the warranty period, take the product and the RadioShack sales receipt as proof of purchase date to any RadioShack store. RadioShack will, at its option, unless otherwise provided by law: (a) correct the defect by product repair without charge for parts and labor; (b) replace the product with one of the same or similar design; or (c) refund the purchase price. All replaced parts and products, and products on which a refund is made, become the property of RadioShack. New or reconditioned parts and products may be used in the performance of warranty service. Repaired or replaced parts and products are warranted for the remainder of the original warranty period. You will be charged for repair or replacement of the product made after the expiration of the warranty period. This warranty does not cover: (a) damage or failure caused by or attributable to acts of God, abuse, accident, misuse, improper or abnormal usage, failure to follow instructions, improper installation or maintenance, alteration, lightning or other incidence of excess voltage or current; (b) any repairs other than those provided by a RadioShack Authorized Service Facility; (c) consumables such as fuses or batteries; (d) cosmetic damage; (e) transportation, shipping or insurance costs; or (f) costs of product removal, installation, set-up service adjustment or reinstallation. This warranty gives you specific legal rights, and you may also have other rights which vary from state to state. RadioShack Customer Relations, 200 Taylor Street, 6th Floor, Fort Worth, TX 76102 We Service What We Sell 07A99 04/99 Printed in Hong Kong4