1
www.regency-fire.com
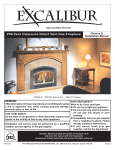
P48-2 Gas Fireplace
Owners &
Installation Manual
MODELS: P48-NG2 Natural Gas P48-LP2 Propane
WARNING:
FOR YOUR SAFETY
If the information in these instructions are not followed exactly, What to do if you smell gas:
a fire or explosion may result causing property damage,
Do not try to light any appliance
personal injury or loss of life.
Do not touch any electrical switch:
do not use any phone in your
FOR YOUR SAFETY
building.
Do not store or use gasoline or other flammable vapors and
Immediately call your gas supplier
liquids in the vicinity of this or any other appliance.
from a neighbour's phone. Follow
the gas supplier's instructions.
Installation and service must be performed by a qualified
If you cannot reach your gas
installer, service agency or the gas supplier.
supplier, call the fire department.
Tested by:
Installer: Please complete the details on the back cover
and leave this manual with the homeowner.
Homeowner: Please keep these instructions for future reference.
918-524a
FPI FIREPLACE PRODUCTS INTERNATIONAL LTD. 6988 Venture St., Delta, BC Canada, V4G 1H4
03/05/08
To the New Owner:
Congratulations!
You are the owner of a state-of-the-art Gas Fireplace by REGENCY®. The P48-2 has been
designed to provide you with all the warmth and charm of a wood fireplace at the flick of
a switch. The model P48-2 has been approved by Warnock Hersey for both safety and
efficiency. As it also bears our own mark, it promises to provide you with economy, comfort
and security for many trouble free years to follow. Please take a moment now to acquaint
yourself with these instructions and the many features of your Regency® Fireplace.
MANUFACTURED MOBILE HOME REQUIREMENTS
INFORMATION FOR MOBILE/MANUFACTURED HOMES AFTER FIRST SALE
This Regency® product has been tested and listed by Warnock Hersey as a Direct Vent Wall Furnace to the following standards:
VENTED GAS FIREPLACE HEATERS ANSI Z21.88b-2003/CSA 2.33b-2003 and GAS-FIRED APPLIANCES FOR USE AT HIGH
ALTITUDES CAN/CGA 2.17-M91.
This Direct Vent System Appliance must be installed in accordance with the manufacturer's installation instructions and the
Manufactured Home Construction and Safety Standard, Title 24 CFR, Part 3280, or the current Standard of Fire Safety Criteria for
Manufactured Home Installations, Sites, and Communities ANSI/NFPA 501A, and with CAN/CSA Z240-MH Mobile Home Standard
in Canada.
This appliance installation must comply with the manufacturer's installation instructions and local codes, if any. In the absence of
local codes follow the current National Fuel Gas Code, ANSI Z223.1 and the current National Electrical Code ANSI/NFPA 70 in the
U.S.A., and the current CAN/CGA B149 Gas Installation Code and the current Canadian Electrical Code CSA C22.1 in Canada.
This appliance comes equipped with a dedicated #8 Ground Lug for attachment of the ground wire to the steel chassis as applicable
to local codes.
The appliance, when installed, must be electrically grounded in accordance with local codes or, in the absence of local codes, with
the National Electrical Code, ANSI/NFPA 70, or the Canadian Electrical Code, CSA C22.1.
This appliance may only be installed in an aftermarket permanently located, manufactured (U.S.A only) or mobile home, where not
prohibited by local codes.
This appliance can only be used with the type of gas indicated on the rating plate. This appliance is not convertible for use with
other gases, unless a certified kit is used.
Ensure that structural members are not cut or weakened during installation.
2
Regency® P48-2 Zero Clearance Direct Vent Gas Fireplace
TABLE OF CONTENTS
SAFETY LABEL
Copy of Safety Decal .....................................................4
REQUIREMENTS
MA Code - CO Detector
(for the State of Massachusetts only) ............................5
INSTALLATION
Important Message ......................................................6
Before You Start ............................................................6
General Safety Information ...........................................6
Installation Checklist ......................................................6
Manufactured Mobile Home Additional Requirements ..7
Locating Your Gas Fireplace .........................................7
Unit Specifications .........................................................7
Heatwave Optional Duct System Kit .............................7
Optional Heat Release Kit ............................................7
Hearth ............................................................................7
Clearances ....................................................................8
Mantels ..........................................................................9
Mantel Leg Clearances .................................................9
Framing & Finishing ....................................................10
Unit Assembly Prior To Installation .............................. 11
Top Standoff Assembly ........................................ 11
Top Facing Support and Side Nailing Strips ........ 11
Venting Introduction ..................................................... 11
Exterior Vent Termination Requirements .....................12
Venting Arrangements ................................................13
Horizontal Termination .........................................13
Simpson Dura-vent Venting .................................14
Simpson Dura-vent Venting Components List .....14
5” x 8” Rigid Pipe Cross Reference Chart ...................15
Vertical Terminations...........................................21
Unit Installation with Horizontal Termination ................23
Unit Installation with Vertical Termination ....................24
System Data ...............................................................26
High Elevation .............................................................26
Gas Line Installation ....................................................26
Pilot Adjustment ...........................................................26
Gas Pipe Pressure Testing ..........................................26
S.I.T. Valve Description................................................26
Conversion Kit from NG to LPG Part #372-969 .........27
Brick Panels Installation ..............................................30
Log Set Installation ......................................................31
Standard Flush Door ...................................................34
Flush Louvers ..............................................................34
Optional Flush Trim .....................................................34
Regency® P48-2 Zero Clearance Direct Vent Gas Fireplace
Optional Bay Door .......................................................35
Optional Bay Trim ........................................................35
Bay Louvers ................................................................35
Optional Finishing Trim ................................................36
Double Screen Door ...................................................36
Optional Remote Control .............................................37
Optional Wall Switch ....................................................37
Optional Wall Thermostat ...........................................37
Wiring Diagrams .........................................................38
Installing The Optional Fan..........................................40
To Remove the Fan .............................................40
OPERATING INSTRUCTIONS
Operating Instructions .................................................41
Shutdown Procedure ...................................................41
First Fire ......................................................................41
Lighting Procedure ......................................................41
Aeration Adjustment ....................................................41
Normal Operating Sounds of Gas Appliances .............42
MAINTENANCE
Maintenance Instructions ............................................43
General Vent Maintenance ..........................................43
Log Replacement ........................................................43
Thermopile / Thermocouple.........................................43
Glass Gasket ...............................................................43
Gold-Plated Louvers & Trim ........................................43
Door Glass ..................................................................44
Glass Replacement .............................................44
Bay Glass Replacement ......................................44
Installing Valve.............................................................44
Removing Valve...........................................................45
PARTS LIST
Main Assembly ............................................................46
Burner & Log Assembly ...............................................48
Flush Door & Louvers ..................................................49
Bay Front & Louvers ....................................................50
WARRANTY
Warranty ......................................................................51
3
SAFETY LABEL
This is a copy of the label that accompanies each
P48-NG2 and P48-LP2 Zero Clearance Direct
Vent Gas Fireplace. We have printed a copy of
the contents here for your review. The safety
label is located on the front inside base of the
unit, visible when the bottom louver is open.
COPY OF SAFETY DECAL
NOTE: Regency® units are constantly being
improved. Check the label on the unit and if
there is a difference, the label on the unit is
the correct one.
For the State of Massachusetts, installation
and repair must be done by a plumber or
gasfitter licensed in the Commonwealth of
Massachusetts.
For the State of Massachusetts, flexible
connectors shall not exceed 36 inches in
length.
For the State of Massachusetts, the appliances individual manual shut-off must be a
t-handle type valve.
The State of Massachusetts requires the
installation of a carbon monoxide alarm in
accordance with NFPA 720 and a CO alarm
with battery back up in the same room where
the gas appliance is installed.
4
Regency® P48-2 Zero Clearance Direct Vent Gas Fireplace
REQUIREMENTS
MA Code - CO Detector
(for the State of Massachusetts only)
5.08: Modifications to NFPA-54, Chapter 10
(2) Revise 10.8.3 by adding the following additional requirements:
(a) For all side wall horizontally vented gas fueled equipment installed in every dwelling, building or structure used in whole or in part for
residential purposes, including those owned or operated by the Commonwealth and where the side wall exhaust vent termination is less than
seven (7) feet above finished grade in the area of the venting, including but not limited to decks and porches, the following requirements shall
be satisfied:
1. INSTALLATION OF CARBON MONOXIDE DETECTORS. At the time of installation of the side wall horizontal vented gas fueled
equipment, the installing plumber or gasfitter shall observe that a hard wired carbon monoxide detector with an alarm and battery back-up is
installed on the floor level where the gas equipment is to be installed. In addition, the installing plumber or gasfitter shall observe that a battery
operated or hard wired carbon monoxide detector with an alarm is installed on each additional level of the dwelling, building or structure
served by the side wall horizontal vented gas fueled equipment. It shall be the responsibility of the property owner to secure the services of
qualified licensed professionals for the installation of hard wired carbon monoxide detectors
a. In the event that the side wall horizontally vented gas fueled equipment is installed in a crawl space or an attic, the hard wired carbon
monoxide detector with alarm and battery back-up may be installed on the next adjacent floor level.
b. In the event that the requirements of this subdivision can not be met at the time of completion of installation, the owner shall have a period of
thirty (30) days to comply with the above requirements; provided, however, that during said thirty (30) day period, a battery operated carbon
monoxide detector with an alarm shall be installed.
2. APPROVED CARBON MONOXIDE DETECTORS. Each carbon monoxide detector as required in accordance with the above provisions
shall comply with NFPA 720 and be ANSI/UL 2034 listed and IAS certified.
3. SIGNAGE. A metal or plastic identification plate shall be permanently mounted to the exterior of the building at a minimum height of eight
(8) feet above grade directly in line with the exhaust vent terminal for the horizontally vented gas fueled heating appliance or equipment. The
sign shall read, in print size no less than one-half (1/2) inch in size, "GAS VENT DIRECTLY BELOW. KEEP CLEAR OF ALL
OBSTRUCTIONS".
4. INSPECTION. The state or local gas inspector of the side wall horizontally vented gas fueled equipment shall not approve the installation
unless, upon inspection, the inspector observes carbon monoxide detectors and signage installed in accordance with the provisions of 248 CMR
5.08(2)(a)1 through 4.
(b) EXEMPTIONS: The following equipment is exempt from 248 CMR 5.08(2)(a)1 through 4:
1. The equipment listed in Chapter 10 entitled "Equipment Not Required To Be Vented" in the most current edition of NFPA 54 as adopted by
the Board; and
2. Product Approved side wall horizontally vented gas fueled equipment installed in a room or structure separate from the dwelling, building or
structure used in whole or in part for residential purposes.
(c) MANUFACTURER REQUIREMENTS - GAS EQUIPMENT VENTING SYSTEM PROVIDED. When the manufacturer of Product
Approved side wall horizontally vented gas equipment provides a venting system design or venting system components with the equipment, the
instructions provided by the manufacturer for installation of the equipment and the venting system shall include:
1. Detailed instructions for the installation of the venting system design or the venting system components; and
2. A complete parts list for the venting system design or venting system.
(d) MANUFACTURER REQUIREMENTS - GAS EQUIPMENT VENTING SYSTEM NOT PROVIDED. When the manufacturer of a
Product Approved side wall horizontally vented gas fueled equipment does not provide the parts for venting the flue gases, but identifies
"special venting systems", the following requirements shall be satisfied by the manufacturer:
1. The referenced "special venting system" instructions shall be included with the appliance or equipment installation instructions; and
2. The "special venting systems" shall be Product Approved by the Board, and the instructions for that system shall include a parts list and
detailed installation instructions.
(e) A copy of all installation instructions for all Product Approved side wall horizontally vented gas fueled equipment, all venting instructions,
all parts lists for venting instructions, and/or all venting design instructions shall remain with the appliance or equipment at the completion of
the installation.
Regency® P48-2 Zero Clearance Direct Vent Gas Fireplace
5
INSTALLATION
IMPORTANT MESSAGE
SAVE THESE
INSTRUCTIONS
YOUNG CHILDREN SHOULD BE
CAREFULLY SUPERVISED WHEN
THEY ARE IN THE SAME ROOM AS
THE APPLIANCE.
12) Installation and any repairs to this appliance
should be done by an authorized service
person. A professional service person should
be called to inspect this appliance annually.
Make it a practice to have all of your gas
appliances checked annually.
The P48-NG2/P48-LP2 Direct Vent Fireplace
must be installed in accordance with these
instructions. Carefully read all the instructions
in this manual first. Consult the "authority
having jurisdiction" to determine the need for
a permit prior to starting the installation. It is
the responsibility of the installer to ensure
this fireplace is installed in compliance with
manufacturers instructions and all applicable
codes.
CLOTHING OR OTHER FLAMMABLE
MATERIAL SHOULD NOT BE PLACED
ON OR NEAR THE APPLIANCE.
13) Do not slam shut or strike the glass door.
GENERAL SAFETY
INFORMATION
15) The appliance area must be kept clear and
free of combustible materials, (gases and
other flammable vapours and liquids).
1) The appliance installation must conform
with local codes or, in the absence of local
codes, with the current Canadian or National
Gas Codes, CAN1-B149 or ANSI Z223.1
Installation Codes.
Emissions from burning wood or gas could
contain chemicals known to the State of
California to cause cancer, birth defects or
other reproductive harm.
BEFORE YOU START
Safe installation and operation of this appliance
requires common sense, however, we are
required by the Canadian Safety Standards
and ANSI Standards to make you aware of
the following:
INSTALLATION AND REPAIR SHOULD
BE DONE BY AN AUTHORIZED
SERVICE PERSON. THE APPLIANCE
SHOULD BE INSPECTED BEFORE
USE AND AT LEAST ANNUALLY BY A
PROFESSIONAL SERVICE PERSON.
MORE FREQUENT CLEANING MAY
BE REQUIRED DUE TO EXCESSIVE
LINT FROM CARPETING, BEDDING
MATERIAL, ETC. IT IS IMPERATIVE
THAT CONTROL COMPARTMENTS,
BURNERS AND CIRCULATING AIR
PASSAGEWAYS OF THE APPLIANCE
BE KEPT CLEAN.
DUE TO HIGH TEMPERATURES, THE
APPLIANCE SHOULD BE LOCATED
OUT OF TRAFFIC AND AWAY FROM
FURNITURE AND DRAPERIES.
WARNING: FAILURE TO INSTALL THIS
APPLIANCE CORRECTLY WILL VOID
YOUR WARRANTY AND MAY CAUSE
A SERIOUS HOUSE FIRE.
CHILDREN AND ADULTS SHOULD BE
ALERTED TO THE HAZARDS OF HIGH
SURFACE TEMPERATURES, ESPECIALLY THE FIREPLACE GLASS, AND
SHOULD STAY AWAY TO AVOID BURNS
OR CLOTHING IGNITION.
6
2) The appliance when installed, must be
electrically grounded in accordance with
local codes, or in the absence of local codes
with the current National Electrical Code,
ANSI/NFPA 70 or CSA C22.1 Canadian
Electrical Code.
3) See general construction and assembly
instructions. The appliance and vent should
be enclosed.
4) This appliance must be connected to the
specified vent and termination cap to the
outside of the building envelope. Never vent
to another room or inside a building. Make
sure that the vent is fitted as per Venting
instructions.
5) Inspect the venting system annually for
blockage and any signs of deterioration.
6) Venting terminals shall not be recessed into
a wall or siding.
14) Under no circumstances should any solid
fuels (wood, paper, cardboard, coal, etc.)
be used in this appliance.
INSTALLATION
CHECKLIST
1) Locate appliance
a) Room location (Refer to "Locating Your
Gas fireplace" section)
b) Clearances to Combustibles (Refer to
"Clearances" section)
c) MantleClearances(Referto"Combustible
Mantel Clearances" section)
d) Framing & Finishing Requirements (Refer
to "Framing & Finishing" section)
e) Venting Requirements (Refer to
"Venting" section)
2) Assemble Top Standoffs and Top Facing
Support and Side Nailing Strips (Refer to
"Unit Assembly Prior to Installation). NOTE:
Must be done before installing unit into
place.
7) Any safety glass removed for servicing
must be replaced prior to operating the
appliance.
3) Install vent (Refer to "Venting Arrangement"
sections).
8) To prevent injury, do not allow anyone who
is unfamiliar with the operation to use the
fireplace.
4) Make gas and electrical connections. Test
the pilot. Must be as per diagram (Refer to
"Pilot Adjustment " section).
9) Wear gloves and safety glasses for protection
while doing required maintenance.
Convert to propane if desired (Refer to
"Conversion from NG to LPG" section).
10) Be aware of electrical wiring locations in
walls and ceilings when cutting holes for
termination.
5) Test Gas Pressure. (Refer to "Gas Pipe
Pressure Testing" section)
11) Under no circumstances should this
appliance be modified. Parts that have to be
removed for servicing should be replaced
prior to operating this appliance.
Regency® P48-2 Zero Clearance Direct Vent Gas Fireplace
INSTALLATION
6) Install standard and optional features. Refer
to the following sections:
a)
b)
c)
d)
e)
f)
g)
h)
i)
j)
k)
l)
m)
n)
UNIT SPECIFICATIONS
Brick Panels Installation
Log Set Installation
Standard Flush Door
Flush Louvers
Flush Trim
Bay Door
Bay Trim
Bay Louvers
Finishing trim
Double Screen Door
Remote Control
Wall Switch
Wall Thermostat
Installing the Fan
5) This appliance is Listed for bedroom
installations when used with a Listed Millivolt
Thermostat. Some areas may have further
requirements, check local codes before
installation.
6) The P48-2 Direct Vent Gas Fireplace is
approved for alcove installations, which meet
the clearances listed on this page.
7) We recommend that you plan your installation
on paper using exact measurements for
clearances and floor protection before
actually installing this appliance. Have an
authorized inspector, dealer, or installer
review your plans before installation.
Note: For vent terminations see "Exterior
Ve n t Te r m i n a t i o n L o c a t i o n s "
section.
11) Final check.
Before leaving this unit with the customer, the
installer must ensure that the appliance is firing
correctly and operation fully explained to
customer.
This includes:
1) Clocking the appliance to ensure the correct
firing rate (rate noted on label 51,000 (NG)
Btu/h, 48,000 (LP) Btu/h) after burning
appliance for 15 minutes.
2) If required, adjusting the primary air to ensure
that the flame does not carbon. First allow
the unit to burn for 15-20 min. to stabilize.
CAUTION: Any alteration to the product that
causes sooting or carboning that results
in damage is not the responsibility of the
manufacturer.
MANUFACTURED
MOBILE HOME
ADDITIONAL
REQUIREMENTS
1) Ensure that structural members are not cut
or weakened during installation.
2) Ensure proper grounding using the #8
ground lug provided. See "Wiring Diagram"
section.
LOCATING YOUR
GAS FIREPLACE
1) When selecting a location for your fireplace,
ensure that the clearances outlined on this
page are met.
2) Provide adequate clearances for
servicing.
3) The appliance must be installed on a flat,
solid, continuous surface (e.g. wood, metal,
concrete). This may be the floor, or raised up
on a platform to enhance its visual impact.
If the appliance is going to be installed
on carpeting, combustible linoleum tile or
other combustible material other than wood
flooring, the appliance must be installed on
a metal or wood panel extending the full
width and depth of the appliance.
4) The P48-2 Direct Vent Gas Fireplace
can be installed in a recessed position or
framed out into the room as in A, B, C, D.
See Diagram 1.
Diagram 1
A)
B)
C)
D)
Regency® P48-2 Zero Clearance Direct Vent Gas Fireplace
Flat on Wall
Flat on Wall Corner
Recessed into
Wall/Alcove
Corner
HEATWAVE
OPTIONAL
DUCT SYSTEM KIT
#946-556
The HeatWave Air Duct Kit increases the
effectiveness of your fireplace by dispersing
warm air from the fireplace to remote locations in
the same room or other rooms in your home.
Up to two kits may be installed on the fireplace.
Please Note: Only 1 HeatWave kit may be
operated at one time. This includes the internal
blower option as well.
OPTIONAL
HEAT RELEASE KIT
#946-570
The Heat Release Kit expels warm air from
the fireplace to the outside of the building,
allowing the fireplace to be operated with less
heat entering the room. The kit may be used on
either the left or right side.
HEARTH
A hearth is not mandatory, but is recommended
for aesthetics and for added safety.
7
INSTALLATION
CLEARANCES
The clearances listed below are Minimum distances unless otherwise stated:
A major cause of chimney related fires is failure to maintain required clearances (air space) to combustible materials. It is of the greatest
importance that this fireplace and vent system be installed only in accordance with these instructions.
Clearance to Combustibles from:
Back
Side
Floor
0"
0"
0"
Caution Requirements
The top, back and sides of the fireplace are defined by
standoffs. The metal ends of the standoff may NOT be
recessed into combustible construction.
(0mm)
(0mm)
(0mm)
Minimum Clearance from Top of Front Facing:
Mantel
Ceiling
min. 8"
39"
(203mm)
(990mm) from top of front facing
above louvers.
6"
(152mm)
Side Wall:
Horizontal Vent Clearances:
Top
Side
Bottom
2-1/2"
1-1/2"
1-1/2"
(64mm)
(38mm)
(38mm)
Vertical Vent Clearances:
1-1/4"
(32mm)
Alcove Clearances:
Max. Depth
Min. Width
Min. Height
36"
60"
80"
(914mm)
(1524mm)
(2032mm)
WARNING
Fire hazard is an extreme risk
if these clearances (air space) to combustible materials
are not adhered to. It is of greatest importance that this
fireplace and vent system be installed only in
accordance with these instructions.
Heat Release Kit
8
The HeatWave Duct Kit
and the Heat Release Kit
have different clearance
and framin requirements,
check the HeatWave and
Heat Release manual for
details.
Regency® P48-2 Zero Clearance Direct Vent Gas Fireplace
INSTALLATION
MANTELS
Because of the extreme heat this fireplace emits, the mantel clearances are critical. Combustible mantel clearances from louver are shown
in the diagram below.
Note: A non-combustible mantel may be installed at a lower height if the framing is made of metal studs covered with a non-combustible
board.
This drawing is to scale at 1:6 (one inch = 6
inches)
Mantel can be installed anywhere in shaded area
using the above scale for units with the Flush
Front and with the optional Bay Front.
Note: Ensure the paint that is used
on the mantel and the facing is
"heat resistant" or the paint may
discolour.
MANTEL LEG CLEARANCES
Combustible mantel leg clearances as per diagram:
Maximum
1-1/2" projection at 3"
minimum clearance.
Regency® P48-2 Zero Clearance Direct Vent Gas Fireplace
9
INSTALLATION
FRAMING & FINISHING
1) Determine the total thickness of facing material (eg. drywall plus
ceramic tiles) to allow the finished surface to be flush with the front
of the unit. Total facing thickness can vary from 1/2" (13mm) to
1-1/4" (32mm) thick.
2) Frame in the enclosure for the unit with framing material. The framed
opening for the assembled kit is 47-1/2" high x 48-1/2" wide x 26-1/4"
deep (1207mm H x 1232mm W x 667mm D). See Diagram 1. See
important note below when installing with any veritical venting off of
the top.
Diagram 1
Note: 43" (1092mm) is the minimum height for flex termination and
Simpson Dura-Vent terminations.
3) For exterior walls, insulate the enclosure to the same degree as
the rest of the house, apply vapour barrier and drywall, as per local
installation codes. (Do not insulate the fireplace itself.)
4) The unit does not have to be completely enclosed in a chase. The
clearance on top of the unit from the top standoffs is 0" so combustible
building materials can be laid directly on top of the standoffs. You
must maintain clearances from the vent to combustible materials: See
"Clearances" section. Combustible materials can be laid against the
side and back standoffs and the stove base.
The HeatWave Duct Kit has different
clearance and framing requirements,
check the HeatWave manual for details.
IMPORTANT
When installing the unit with any vertical venting off the top of the
unit as shown, the minimum framing depth changes accordingly.
10
Regency® P48-2 Zero Clearance Direct Vent Gas Fireplace
INSTALLATION
UNIT ASSEMBLY
PRIOR TO
INSTALLATION
The Top Facing Support, the Side Nailing Strips
and the 2 Top Standoffs must be correctly
positioned and attached to the top before unit
is slipped into position.
TOP STANDOFF ASSEMBLY
TOP FACING SUPPORT AND
SIDE NAILING STRIPS
Determine the total thickness of facing material
(e.g. drywall plus ceramic tiles) to allow the
finished surface to be flush with the front of the
unit. Total facing thickness can vary from 1/2"
(13mm) to 1-1/4" (32mm) thick.
"C" Screw Position:
For a facing material depth of 1-1/4" (32mm),
the top facing support must be reversed.
The Top Facing Support & Side Nailing Strips can
be mounted in 3 different positions depending
on the thickness of the facing material.
The top standoffs are shipped in a flat position
and must be folded into shape and attached.
1) Remove the standoffs from the fireplace
top.
2) Take each standoff and bend into the correct
shape. Bend up at the bend lines until the
screw holes in the standoff and the prepunched screw holes on the fireplace top
line up.
3) Attach the standoff securely to the top
with 2 screws per standoff (on opposite
corners).
Screw
Position
Facing Material Depth
A
1/2" / 13mm
B
7/8" / 22mm
C*
1-1/4" / 32mm
* For "C" screw position the top facing support
is reversed.
1) Mount Top Facing Support using the 3
supplied screws into the three pre-punched
screw holes on the top front of the unit. Use
hole positions A, B, or C depending on your
facing depth.
2) Use the same screw hole position for the
Side Nailing Strips as was used for the Top
Facing Support. Attach each side nailing
strip using 3 screws.
VENTING
INTRODUCTION
The P48-2 uses the "balanced flue" technology
Co Axial system. The inner liner vents products
of combustion to the outside while the outer
liner draws outside combustion air into the
combustion chamber thereby eliminating the
need to use heated room air for combustion and
losing warm room air up the chimney.
Note: These flue pipes must not be
connected to any other appliance.
The gas appliance and vent system must be
vented directly to the outside of the building,
and never be attached to a chimney serving a
separate solid fuel or gas burning appliance.
Each direct vent gas appliance must use it's own
separate vent system. Common vent systems
are prohibited.
Regency® P48-2 Zero Clearance Direct Vent Gas Fireplace
11
12
H= Not to be installed above a meter/regulator assembly within (3'/90cm) horizontally
from the centerline of the regulator.
J= Clearance to service regulator vent outlet *(min 36"/90cm)
K= Clearance to non-mechanical air supply inlet to building or the combustion air inlet to
any other appliance *(12"/30cm)
L= Clearance to a mechanical air supply inlet *(min. 72"/1.8m)
M= Clearance above paved sidewalk or a paved driveway located on public property
*(min. 84"/2.1m)
N= Clearance under veranda, porch, deck, or balcony *(min. 23"/58cm)
Notes:
- A vent shall not terminate directly above a sidewalk or paved driveway which is located between two single family dwellings and serves both dwellings.
- Only permitted if veranda, porch, deck, or balcony is fully open on a minimum of two sides beneath the floor.
- If the vent termination is accessible, a certified guard shall be installed.
* As specified in CGA B149 Installation Code. Note: Local codes or regulations may require different clearances.
Clearance above grade, veranda, porch, deck, or balcony *(min. 12"/30cm)
Clearance to window or door that may be opened *(12"/30cm)
Clearance to permanently closed window *(min. 12"/30cm)
Vertical clearance to ventilated soffit located above the terminal within a horizontal
distance of 24"/60cm (min. 23"/58cm) (32"/81cm with vinyl siding)
E= Clearance to unventilated soffit (min. 23"/58cm) (32"/81cm with vinyl siding)
F= Clearance to outside corner: (13"/33cm)
G= Clearance to inside corner: (13"/33cm)
A=
B=
C=
D=
INSTALLATION
EXTERIOR VENT TERMINATION REQUIREMENTS
Regency® P48-2 Zero Clearance Direct Vent Gas Fireplace
INSTALLATION
VENTING ARRANGEMENTS
HORIZONTAL TERMINATION
Regency® Direct Vent System (Flex)
These venting systems, in combination with the P48-2 Direct Vent Gas Fireplace, have been tested and listed as a direct vent heater system by
Warnock Hersey. The location of the termination cap must conform to the requirements in the Vent Terminal Locations diagram in "Exterior Vent
Termination Locations" section.
Regency ® Direct Vent (Flex) System
Termination Kit (Part# 946-618) includes all
the parts needed to install the P48-2 with a
maximum run of 4 feet.
1)
2)
3)
4)
5)
6)
7)
8)
9)
8" dia. flexible liner (6 ft. length)
5" dia. flexible liner (6 ft. length)
spring spacers (4)
thimble (2)
AstroCap XL termination cap (1)
screws (12)
tube of Mill Pac (1)
plated screws (8)
screws #8 x 1-1/2" Drill Point,
Stainless Steel (4)
10) vinyl siding standoff
If longer runs are needed, the Regency® Direct
Vent system (Flex) Part# 946-616 includes all
the parts needed to install the P48-2 with a
maximum 10' run.
1)
2)
3)
4)
5)
6)
7)
8)
9)
8" dia. flexible liner (10 ft. length)
5" dia. flexible liner (10 ft. length)
spring spacers (7)
thimble (2)
AstroCap XL termination cap (1)
screws (12)
tube of Mill Pac (1)
plated screws (8)
screws #8 x 1-1/2" Drill Point,
Stainless Steel (4)
10) vinyl siding standoff
Notes:
1) Liner sections should be continuous without any joints or seams.
2) Only Flex pipe purchased from Regency® may be used for Flex installations.
3) If you are installing the P48-2 into a Regency® Mantel Kit, use the minimum horizontal vent height (centre-line of 43"). Remember to
include the mantel base in your calculations and to maintain the 2-1/2" clearance to the underside of the mantel top.
Regency® P48-2 Zero Clearance Direct Vent Gas Fireplace
13
INSTALLATION
SIMPSON DURA-VENT VENTING
Horizontal or Vertical Terminations
The Simpson Dura-Vent Direct Vent System offers a complete line of component parts for installation of both horizontal and vertical installations. Many
items are offered in decorative black, as well as galvanized finish. We recommend using the galvanized finish for installation with the P48-2.
The minimum components required for a basic
horizontal termination are:
1
1
1
1
1
Horizontal Termination Cap
45o Elbow
Flue Adaptor
Wall Thimble
Length of pipe to suit wall thickness
(see chart)
Wall thickness is measured from the back
standoffs to the inside mounting surface of
termination cap. For siding other than vinyl
furring strips may be used, instead of the vinyl
siding standoff, to create a level surface to
mount the vent terminal. The Terminal must
not be recessed into siding. Measure the wall
thickness including furring strips.
If a Vinyl Siding Standoff is required (it must
be used with vinyl siding), measure to outside
surface of wall without siding and add 2
inches.
Flat Wall Installation
Alternate
Horizontal Termination
Caps
Wall Thickness
(inches)
Vent Length
Required (in.)
4" - 5-1/2"
none
7" - 8-1/2"
6"
10" - 1-1/2"
9"
9" - 14-1/2"
12"
15" - 23-1/2"
11" - 14-5/8" Adj.
Pipe
SIMPSON DURA-VENT VENTING
COMPONENTS LIST
Part # Description
Part # Description
1208B
1207B
1206
1206B
1204
1204B
1203
1203B
1202
1202B
1211B
1217B
1245
1245B
1245G
1245BG
1290
1290B
1290G
1290BG
6" Pipe Length-Black
9" Pipe Length-Black
12" Pipe Length Galv.
12" Pipe Length-Black
24" Pipe Length Galv.
24" Pipe Length-Black
36" Pipe Length Galv.
36" Pipe Length-Black
48" Pipe Length Galv.
48" Pipe Length-Black
11"-14 5/8" Adj./P/L-Black
17"- 24" Adj. Length Black
1291
1285
1282
Part # Description
45O Elbow Galv.
45O Elbow-Black
45O Elbow-Swivel Galv.
45O Elbow-Swivel-Black
90O Elbow Galv.
90O Elbow-Black
90O Elbow-Swivel Galv.
90O Elbow-Swivel-Black
1281
1240
1241
3951
High Wind Term. Cap (Vertical Only)
Horiz.Sq.HighWind Trm.Cap (Only)
Snorkel-14" Rise Term.Cap
Snorkel-36" Rise Term.Cap
Wall Thimble-Suprt/Box
Cathdrl/Clng-Sprt/Box
Brass Trim for Wall Thimble/
Ceiling Support
1263 Firestop Spacer
1243 Flashing 0/12-6/12
1243S Flashing 7/12-12/12
1253 Storm Collar
1250 Vinyl Siding Standoff
1288 Wall Strap
1247 Wall Thimble
Parts not supplied by Dura-Vent
770-994 Rigid Pipe Adaptor
14
Regency® P48-2 Zero Clearance Direct Vent Gas Fireplace
INSTALLATION
5” X 8” RIGID PIPE CROSS REFERENCE CHART
Components from different Manufacturers may not be mixed. Not All Rigid Pipe components are available directly from FPI.
Simpson
Simpson
Description
Direct Vent GS®
Direct Vent Pro®
Discontinued
Selkirk
Metal-Fab®
Direct-Temp™
Sure Seal
6” Pipe Length, Galvanized
58DVA-06
1208
5DT-6
5D6
6” Pipe Length, Black
58DVA-06B
1208B
5DT-6B
5D6B
9” Pipe Length, Galvanized
58DVA-09
1207
5DT-9
N/A
9” Pipe Length, Black
58DVA-09B
1207B
5DT-9B
N/A
12” Pipe Length, Galvanized
58DVA-12
1206
5DT-12
5D12
12” Pipe Length, Black
58DVA-12B
1206B
5DT-12B
5D12B
18” Pipe Length, Galvanized
58DVA-18
58DVA-18
5DT-18
5D18
18” Pipe Length, Black
58DVA-18B - N/A from FPI
58DVA-18B - N/A from FPI
5DT-18B
5D18B
24” Pipe Length, Galvanized
58DVA-24
1204
5DT-24
5D24
24” Pipe Length, Black
58DVA-24B
1204B
5DT-24B
5D24B
36” Pipe Length, Galvanized
58DVA-36
1203
5DT-36
5D36
36” Pipe Length, Black
58DVA-36B
1203B
5DT-36B
5D36B
48” Pipe Length, Galvanized
58DVA-48
1202
5DT-48
5D48
48” Pipe Length, Black
58DVA-48B
1202B
5DT-48B
5D48B
60” Pipe Length, Galvanized
58DVA-60
58DVA-60
N/A
N/A
60” Pipe Length, Black
58DVA-60B - N/A from FPI
58DVA-60B - N/A from FPI
N/A
N/A
Adjustable Length 3”-10”, Galvanized
N/A
N/A
N/A
5DAL
Adjustable Length 3”-10”, Black
N/A
N/A
N/A
5DALB
Adjustable Length 11”-14”, Galvanized
Disc - See 58DV-08A
Disc - See 58DV-08A
5DT-AJ
N/A
Adjustable Length 11”-14”, Black
Disc - See 58DV-08AB
Disc - See 58DV-08AB
5DT-AJB
N/A
Adjustable Length 17”-24”, Galvanized
Disc - See 58DV-16A
Disc - See 58DV-16A
N/A
N/A
Adjustable Length 17”-24”, Black
Disc - See 58DV-16AB
Disc - See 58DV-16AB
N/A
N/A
Extension Pipe 8-1/2”, Galvanized
58DVA-08A - N/A from FPI
58DVA-08A - N/A from FPI
N/A
N/A
Extension Pipe 8-1/2”, Black
58DVA-08AB
58DVA-08AB
N/A
N/A
Extension Pipe 16”, Galvanized
58DVA-16A - N/A from FPI
58DVA-16A - N/A from FPI
N/A
N/A
Extension Pipe 16”, Black
58DVA-16AB
58DVA-16AB
N/A
N/A
45º Elbow, Galvanized
58DVA-E45
1245
5DT-EL45
N/A
45º Elbow, Black
58DVA-E45B
1245B
5DT-EL45B
N/A
45º Elbow, Swivel, Galvanized
Disc - See 58DVA-E45
1245G
N/A
5D45L
45º Elbow, Swivel, Black
Disc - See 58DVA-E45B
1245BG
N/A
5D45LB
90º Elbow, Galvanized
58DVA-E90
58DVA-E90
5DT-EL90S
N/A
90º Elbow, Black
58DVA-E90B
58DVA-E90B
5DT-EL90SB
N/A
90º Elbow, Swivel, Galvanized
Disc - See 58DVA-E90
Disc - See 58DVA-E90
N/A
5D90L
90º Elbow, Swivel, Black
Disc - See 58DVA-E90B
Disc - See 58DVA-E90B
N/A
5D90LB
90º Starter Elbow, Swivel, Galvanized*
N/A
N/A
N/A
5D90A
Adaptor*
N/A
N/A
N/A
5DDA
Ceiling Support
58DVA-DC
1240
5DT-CS
5DSP
Cathedral Support Box
58DVA-CS
1241
5DT-CSS
5DRS
Wall Support/Band
58DVA-WS
1288
5DT-WS/B
5DWS
Offset Support
58DVA-ES - N/A from FPI
N/A
5DT-OS
N/A
Wall Thimble, Black
58DVA-WT
1247
5DT-WT
5DWT
Wall Thimble Support Box/Ceiling Support 58DVA-DC - N/A from FPI
N/A
N/A
N/A
Firestop Spacer
58DVA-FS
1263
5DT-FS
5DFS
Trim Plate, Black
58DAV-WFS
1242
5DT-TP
5DCP
Regency® P48-2 Zero Clearance Direct Vent Gas Fireplace
15
INSTALLATION
Components from different Manufacturers may not be mixed. Not All Rigid Pipe components are available directly from FPI.
Simpson
Simpson
Description
Direct Vent GS®
Direct Vent Pro®
Discontinued
Selkirk
Metal-Fab®
Direct-Temp™
Sure Seal
Round Support / Radiation Sheild
N/A
N/A
N/A
N/A
Flat Flashing
N/A
N/A
N/A
N/A
Attic Insulation Shield 12”
58DVA-IS - N/A from FPI
58DVA-IS - N/A from FPI
N/A
N/A
Basic Horizontal Termination Kit (A)
N/A
N/A
5DT-HKA
N/A
Horizontal Termination Kit (B)
58DVA-KHA
N/A
5DT-HKB
N/A
Vertical Termination Kit
58DVA-VCH
1291
5DT-VKC
N/A
High Wind Vertical Cap
N/A
N/A
N/A
N/A
High Wind Horizontal Cap
DISC.
1285
N/A
N/A
Horizontal Square Termination Cap
N/A
1284
5DT-HHC
5DHT
Vertical Termination Cap
N/A
N/A
5DT-HVC
5DVT
Storm Collar
58DVA-SC
1253
5DT-SC
5DSC
Adjustable Flashing, 0/12-6/12
58DVA-F6
1243
5DT-AF6
5DF
Adjustable Flashing, 6/12-12/12
58DVA-F12
1243S
5DT-AF12
5DF-12
Vinyl Siding Standoff
58DVA-VSS
1250
5DT-VS
5DVS
Vinyl Siding Shield Plate
N/A
N/A
5DT-VSP
N/A
Snorkel Termination 14”
58DVA-SNK14
1282
5DT-ST14
5DST14
Snorkel Termination 36”
N/A
1281
5DT-ST36
5DST36
Restrictor Disk
58DVA-RD
N/A
N/A
N/A
Colinear Flex Liner Adapter (3” Ø)
N/A
N/A
N/A
N/A
FPI
946-604/P
Simpson Direct Vent Vent Guard (Optional)
946-623/P
AstroCap XL Horizontal Cap
770-994
Rigid Pipe Adapter (Must use with all Rigid Piping)
946-506/P
Vent Guard (Optional)
946-625
Vinyl Siding Standoff - AstroCap XL
*NOTE: When using Metal-Fab Sure Seal Rigid Piping please note that either the Adaptor (5DDA) or 90º Starter Elbow
(5D90A) must be used in conjunction with FPI Rigid Pipe Adaptor (770-994).
L676 & L900 Direct Vent Fireplace
IMPORTANT NOTE
• A Vent Guard is required when the AstroCap is installed above grade at 7 feet or lower.
• The Simpson Dura-Vent and Selkirk Direct Temp horizontal termination caps cannot be used in any applications.
• Only the AstroCap XL and Snorkels are certified for horizontal terminations.
Offset Pipe Selection:
Use this table to determine offset pipe lengths.
Pipe Length
For specific instructions or details on particular
venting components please visit the following
websites:
5” x 8” Venting
Run (X)
Rise (Y)
0”(0mm)
5-11/16”(144mm)
15-5/16”(389mm)
6”(152mm)
8-13/16”(224mm)
18-7/16”(468mm)
9”(229mm)
10-15/16”(278mm)
20-9/16”(522mm)
12”(305mm)
13”(330mm)
22-11/16”(576mm)
24”(610mm)
21-7/16”(697mm)
31-1/16”(789mm)
36”(914mm)
29-13/16”(757mm)
39-7/16”(1002mm)
48”(1219mm)
38-1/4”(972mm)
47-7/8”(1216mm)
Simpson Direct Vent Pro: www.duravent.com
Selkirk Direct-Temp: www.selkirkcorp.com
Metal-Fab Sure Seal: www.mtlfab.com
L
Y
X
NOTE: Horizontal runs of vent must be level, or have a 1/4 inch rise for every 1 foot of run towards
the termination. Never allow the vent to run downward. This could cause high temperatures and
may present a possible fire hazard.
16
Regency® P48-2 Zero Clearance Direct Vent Gas Fireplace
INSTALLATION
SIMPSON DURA-VENT DIRECT VENT GS SYSTEM and
Regency® DIRECT VENT SYSTEM (FLEX)
(Propane & Natural Gas)
The diagram shows all allowable combinations of vertical runs with horizontal terminations, using one 45o and one 90o elbow (two 45o elbows equal
one 90o elbow).
Note: Must use optional rigid pipe adapter (Part # 770-994) when using Simpson Dura-Vent pipe (Refer to "Simpson Dura-Vent Venting"
section).
Simpson Dura-Vent
5" inner diameter
8" outer diameter
Regency® Flex Vent
5" inner diameter
8" outer diameter
A vent guard should be used
whenever the termination is lower
than the specified minimum or as
per local codes.
Note: Regency® Direct Vent System
(Flex) is only approved for
horizontal terminations.
•
•
•
Maintain clearances to combustibles as listed in "Clearances" section
Horizontal vent must be supported every 3 feet.
Firestops are required at each floor level and whenever passing through a wall.
Regency® P48-2 Zero Clearance Direct Vent Gas Fireplace
17
INSTALLATION
Horizontal Venting with Two (2) 90o Elbows
Horizontal Venting with Three (3) 90o Elbows
One 90o elbow = Two 45o elbows.
One 90o elbow = Two 45o elbows.
Option
V
H + H1
A)
1' Min.
3' Max.
B)
2' Min.
4' Max.
C)
3' Min.
5' Max.
D)
4' Min.
6' Max.
E)
5' Min.
7' Max.
F)
6' Min.
8' Max.
With these options, maximum
total pipe length is 30 feet
with minimum of 6 feet total
vertical and maximum 8 feet
total horizontal.
Please note minimum 1
foot between 90o elbows is
required.
Option
H
V
H+H1+H2
A)
1' Max.
1' Min.
3' Max.
B)
2' Max.
3' Min.
5' Max.
C)
3' Max.
5' Min.
6' Max.
D)
4' Max.
7' Min.
7' Max.
E)
5' Max.
9' Min.
8' Max.
F)
6' Max. 11' Min.
9' Max.
With these options, max.
total pipe length is 30 feet
with min. of 11 feet total
vertical and max. 9 feet
total horizontal.
Please note min. 1 foot
between 90o elbows is
required.
Horizontal Venting with Two (2) 90o Elbows
One 90o elbow = Two 45o elbows.
Option
H
V
H + H1
A)
1' Max.
1' Min.
3' Max.
18
B)
2' Max.
2' Min.
5' Max.
C)
3' Max.
4' Min.
6' Max.
D)
4' Max.
6' Min.
7' Max.
E)
5' Max.
8' Min.
8' Max.
With these options,
max. total pipe length is
30 feet with min. of 8 feet
total vertical and max. 8
feet total horizontal.
Please note min. 1 foot
between 90o elbows is
required.
Regency® P48-2 Zero Clearance Direct Vent Gas Fireplace
INSTALLATION
Horizontal Venting with Three (3) 90o Elbows
One 90o elbow = Two 45o elbows.
Option
V
H
V + V1
H + H1
A)
2' Min. 1' Max.
3' Min.
4' Max.
B)
3' Min. 2' Max.
4' Min.
5' Max.
C)
4' Min. 3' Max.
6' Min.
6' Max.
D)
5' Min. 4' Max.
8' Min.
7' Max.
E)
6' Min. 5' Max. 10' Min.
8' Max.
F)
7' Min. 6' Max. 12' Min.
9' Max.
With these options,
max. total pipe length
is 30 feet with min. of
12 feet total vertical
and max. 9 feet total
horizontal.
Please note min.
1 foot between
90o elbows is
required.
Vertical Venting with Two (2) 90o Elbows
Vertical Venting with Two (2) 90o Elbows
One 90o elbow = Two 45o elbows.
One 90o elbow = Two 45o elbows.
Option
V
H
V + V1
A)
1' Min.
4' Max.
2' Min.
B)
2' Min.
5' Max.
3' Min.
C)
3' Min.
6' Max.
4' Min.
D)
4' Min.
7' Max.
5' Min.
E)
5' Min.
8' Max.
6' Min.
With these options,
max. total pipe length is
30 feet with min. of 6 feet
total vertical and max. 8
feet total horizontal.
Please note min. 1 foot
between 90o elbows is
required.
Regency® P48-2 Zero Clearance Direct Vent Gas Fireplace
Option
H + H1
V
A)
2' Max.
2' Min.
B)
3' Max.
3' Min.
C)
4' Max.
4' Min.
D)
5' Max.
5' Min.
E)
6' Max.
6' Min.
With these options, max. total
pipe length is 30 feet with min.
of 6 feet total vertical and max.
6 feet total horizontal.
Please note min. 1 foot
between 90 o elbows is
required.
19
INSTALLATION
Vertical Venting with Three (3) 90o Elbows
One 90o elbow = Two 45o elbows.
Option
H
V
H + H1
V + V1
A)
1' Max.
1' Min.
3' Max.
3' Min.
B)
2' Max.
2' Min.
4' Max.
5' Min.
C)
3' Max.
3' Min.
5' Max.
7' Min.
D)
4' Max.
4' Min.
6' Max.
9' Min.
E)
5' Max.
5' Min.
7' Max.
11' Min.
With these options,
max. total pipe length
is 30 feet with min. of
11 feet total vertical
and max. 7 feet total
horizontal.
Please note min. 1 foot
between 90o elbows is
required.
Vertical Venting with Three (3) 90o Elbows
One 90o elbow = Two 45o elbows.
Option
V
H + H1
V + V1
A)
2' Min.
3' Max.
4' Min.
B)
3' Min.
4' Max.
6' Min.
C)
4' Min.
5' Max.
7' Min.
D)
5' Min.
6' Max.
8' Min.
E)
6' Min.
7' Max.
9' Min.
F)
7' Min.
8' Max.
10' Min.
20
With these options, max.
total pipe length is 30 feet
with min. of 10 feet total
vertical and max. 8 feet
total horizontal.
Please note min. 1 foot
between 90o elbows is
required.
Regency® P48-2 Zero Clearance Direct Vent Gas Fireplace
INSTALLATION
VENTING ARRANGEMENTS
VERTICAL TERMINATIONS
SIMPSON DURA-VENT DIRECT VENT GS SYSTEM
(Propane & Natural Gas)
The shaded area in the diagram shows all allowable combinations of straight vertical and offset to vertical terminations, using one 90o elbow and
one 45o elbow, with Simpson Dura-Vent Direct Vent GS vent systems for Propane and Natural Gas.
•
•
•
Vent must be supported at offsets.
Firestops are required at each floor level and whenever passing through a wall.
Maintain clearances to combustibles.
Note: Must use optional rigid pipe adapter when using Simpson Dura-Vent pipe (Part # 510-994).
Regency® P48-2 Zero Clearance Direct Vent Gas Fireplace
21
INSTALLATION
The P48-2 is approved for a maximum 40 ft. straight vertical, with
Simpson Dura-Vent Direct Vent GS vent systems for Propane and
Natural Gas, as per diagram.
The shaded area in the diagram shows all allowable combinations
of straight vertical and offset to vertical terminations with Simpson
Dura-Vent Direct Vent GS vent systems for Propane and Natural Gas.
Maximum two 45o elbows allowed.
•
Vent must be supported at offsets
•
Firestops are required at each floor level and whenever passing
through a wall.
•
Maintain clearances to combustibles as listed in the "Clearances"
section.
22
Regency® P48-2 Zero Clearance Direct Vent Gas Fireplace
INSTALLATION
UNIT INSTALLATION
WITH HORIZONTAL
TERMINATION
Install the vent system according to the
manufacturer's instructions included with the
components.
1) Set the unit in its desired location. Check
to determine if wall studs or roof rafters
are in the way when the venting system is
attached. If this is the case, you may want
to adjust the location of the unit. Rough in
the gas preferably on the right side of the
unit and the electrical (junction block is on
the left side) on the left.
2) Direct Vent pipe and fittings are designed with
special twist-lock connections to connect the
venting system to the appliance flue outlet. A
twist-lock appliance adaptor is an available
option that must be used in conjunction with
the Simpson Dura-Vent Direct Vent GS
system. Install the adaptor after the unit is
set in its desired location otherwise the unit
will not fit through the
36-5/8" (930mm) high frame opening.
Note: For best results and optimum
performance with each approved
venting system, it is highly
recommended to apply “Mill-Pac”
sealant (supplied) to every inner
pipe connection. Failure to do so
may result in drafting or performance
issues not covered under warranty.
Silicone (red RTV) is optional.
b) Horizontal runs of vent must be
supported every 3 feet (0.9meter). Wall
straps are available for this purpose.
5) Mark the wall for a 11" x 11" (279mm x
279mm) square hole. The center of the
square hole should line up with the centerline of the horizontal pipe. Cut and frame the
11 inch (279mm) square hole in the exterior
wall where the vent will be terminated.
If the wall being penetrated is constructed
of non-combustible material, i.e. masonry
block or concrete, a 8" (203mm) diameter
hole is acceptable.
4) Assemble the desired combination of pipe
and elbows to the appliance adaptor and
twist-lock for a solid connection.
Diagram 1
The four wood screws provided should
be replaced with appropriate fasteners for
stucco, brick, concrete, or other types of
sidings.
7) Before connecting the horizontal run of vent
pipe to the vent termination, slide the Wall
Thimble (Part # 1247) over the vent pipe.
8) Slide the appliance and vent assembly
towards the wall carefully inserting the
vent pipe into the vent cap assembly. It is
important that the vent pipe extends into the
vent cap sufficient distance so as to result
in a minimum pipe overlap of 1-1/4 inches
(32mm). Secure the connection between the
vent pipe and the vent cap by attaching the
two sheet metal strips extending from the
vent cap assembly into the outer wall of the
vent pipe. Use the two sheet metal screws
provided to connect the strips to the pipe
section. See Diagram 6.
3) Put a bead of silicone inside the outer
section of the adapter and a bead of Stove
Mate on the inner collar. Slip the adapter
over the existing inner and outer flue collar
and fasten to the outer collar only with the
3 supplied screws (drilling pilot holes will
make this easier). Level the fireplace and
fasten it to the framing using nails or screws
through the nailing strips.
Note:
a) Twist-lock procedure: Four indentations,
located on the female ends of pipes and
fittings, are designed to slide straight
onto the male ends of adjacent pipes
and fittings, by orienting the four pipe
indentations so they match and slide in
to the four entry slots on the male ends.
(Diagram 1) Push the pipe sections
completely together, then twist-lock
one section clockwise approximately
one-quarter turn, until the two sections
are fully locked. The female locking lugs
will not be visible from the outside, on
the Black Pipe or fittings. They may be
located by examining the inside of the
female ends.
Diagram 5
Diagram 2
Note:
a) The horizontal run of vent must be level,
or have a 1/4 inch rise for every 1 foot
of run towards the termination. Never
allow the vent to run downward. This
could cause high temperatures and may
present the possibility of a fire.
b) The location of the horizontal vent
termination on an exterior wall must meet
all local and national building codes, and
must not be blocked or obstructed. For
External Vent Terminal Locations, see
diagram in "Exterior Vent Termination
Locations" section.
6) The arrow on the vent cap should be
pointing up. Insure that the 1-1/4"(32mm)
clearances to combustible materials
are maintained (Diagram 5). Install the
termination cap.
Note: If installing termination on a siding
covered wall, a vinyl siding standoff
or furring strips must be used to
ensure that the termination is not
recessed into the siding.
Regency® P48-2 Zero Clearance Direct Vent Gas Fireplace
Diagram 6
9) Install wall thimble in the center of the 11"
(279mm) square and attach with wood
screws (Diagram 7).
Diagram 7
23
INSTALLATION
UNIT INSTALLATION
WITH VERTICAL
TERMINATION
1) Maintain the 1-1/4"
(32mm) clearances
(air spaces) t o
combustibles when
passing through ceilings,
walls, roofs, enclosures,
attic rafter, or other
nearby combustible
surfaces. Do not pack air
spaces with insulation.
Check "Venting
Arrangemnt - Vertical
Termination" section for
the maximum vertical
rise of the venting
system and the
maximum horizontal
offset limitations.
2) Set the gas appliance
in its desired location.
Diagram 1
Drop a plumb bob down from the ceiling
to the position of the appliance flue exit,
and mark the location where the vent will
penetrate the ceiling. Drill a small hole at his
point. Next, drop a plumb bob from the roof
to the hole previously drilled in the ceiling,
and mark the spot where the vent
will penetrate the
roof.
Determine if ceiling
joists, roof rafters
or other framing will
obstruct the venting
system. You may
wish to relocate
the appliance
or to offset, as
shown in Diagram
2 to avoid cutting
load bearing
members.
Diagram 2
3) A Firestop spacer must be installed in the
floor or ceiling of every level. To install the
Firestop spacer in a flat ceiling or wall, cut
a 11 inch (279mm) square hole. Frame the
hole as shown in Diagram 3 and install the
firestop.
4) Assemble the desired lengths of pipe and
elbows. Ensure that all pipes and elbow
connections are in the fully twist-locked
position and sealed.
NOTE:
For best results and optimum performance
with each approved venting system, it is
highly recommended to apply “Mill-Pac”
sealant (supplied) to every inner pipe connection. Failure to do so may result in drafting
or performance issues not covered under
warranty. Silicone (red RTV) is optional.
5) Cut a hole in the roof centered on the small
drilled hole placed in the roof in Step 2. The
hole should be of sufficient size to meet
the minimum requirements for clearance
to combustibles of 1-1/4"(32mm). Slip the
flashing under the shingles (shingles should
overlap half the flashing) as per Diagram 4.
Diagram 5
Roof Pitch
Minimum Vent
Height
Feet
Meters
flat to 7/12
2
0.61
over 7/12 to 8/12
2
0.61
over 8/12 to 9/12
2
0.61
over 9/12 to 10/12
2.5
0.76
over 10/12 to 11/12
3.25
0.99
over 11/12 to 12/12
4
1.22
over 12/12 to 14/12
5
1.52
over 14/12 to 16/12
6
1.83
over 16/12 to 18/12
7
2.13
over 18/12 to 20/12
7.5
2.29
over 20/12 to 21/12
8
2.44
A poor draft, or down drafting can result from
high wind conditions near big trees or adjoining
roof lines, in these cases, increasing the vent
height may solve the problem.
7) Ensure vent is vertical and secure the base
of the flashing to the roof with roofing rails,
slide storm collar over the pipe section and
seal with a mastic.
8) Install the vertical termination cap by twistlocking it.
Diagram 4: The upper half of the flashing is
installed under the roofing material and not
nailed down until the chimney is installed.
This allows for small adjustments.
Note: Any closets or storage spaces, which
the vent passes through must be
enclosed.
6) Continue to assemble pipe lengths.
Note: If an offset is necessary in the attic
to avoid obstructions, it is important
to support the vent pipe every 3
feet (0.9 meter), to avoid excessive
stress on the elbows, and possible
separation. Wall straps are available
for this purpose
(Diagram 2).
Galvanized pipe is desirable above the roofline
due to its higher corrosion resistance. Continue
to add pipe sections through the flashing until
the height of the vent cap meets the minimum
height requirements specified in Diagram 5 or
local codes. Note that for steep roof pitches,
the vertical height must be increased.
Diagram 3
24
Regency® P48-2 Zero Clearance Direct Vent Gas Fireplace
INSTALLATION
UNIT
INSTALLATION
with Regency® Direct Vent
System (Flex)
1) Locate the unit in the framing, rough in the
gas (preferably on the right side of the unit)
and the electrical (Junction block is on the
left side) on the left. Locate the centerline of
the termination and mark wall accordingly.
Cut a 11"(279mm) hole in the wall (inside
dimension).
Note: A top clearance of 2-1/2"(64mm)
and side & bottom clearance of
1-1/2"(38mm) must be maintained
except that only a 1" (25mm) clearance
is needed at the termination end. We
recommend framing a 11"(279mm) x
11"(279mm) (inside dimensions) hole
to give structural rigidity for mounting
the termination.
4) Separate the 2 halves of the wall thimble and
securely fasten the one with the tabs to the
outside wall making sure that the tabs are
on top and bottom. Fasten the other thimble
half to the inside wall. The thimble halves
slip inside each other and can be adjusted
for 2 x 4 or 2 x 6 walls. The liners must slip
over the collars a minimum of 1-3/8".
5) Slip the assembled liner and termination
assembly through the thimble making sure
the termination cap faces up (there are
markings on the cap that show which way
is up). This will position the termination cap
with proper down slope for draining water.
Fasten the cap to the outer wall with the 4
supplied screws.
IMPORTANT: Do not locate termination
hood where excessive snow or ice
buildup may occur. Be sure to check vent
termination area after snow falls, and clear
to prevent accidental blockage of venting
system. When using snow blowers, make
sure snow is not directed towards vent
termination area.
ASTROCAP XL
DIMENSIONS
6) Pull the centre 5"(127mm) liner and outer
8"(203mm) liner out enough to slip over
the flue collars of the fireplace. (You may
wish to cut the liner shorter to make it more
workable.) Do not bend liner more than
90o.
7) Apply Mill Pac over the fireplace inner collar
and slip the 5"(127mm) liner down over it
and attach with 3 supplied screws.
N o t e : To m a k e
the installation
more aesthetically
pleasing,
we
recommend framing
out a square to mount
the terminal to.
8) Do the same with the 8"(203mm) liner.
9) Apply a bead of silicone between the thimble
and termination and around the outer edge
of the terminal at the wall in order to keep
the water out.
Note: If installing termination on a siding
covered wall, furring strips must be
used to ensure that the termination
is not recessed into the siding.
2) Level the fireplace and fasten it to the framing using nails or screws through the nailing
strips.
3) Assemble the vent assembly by applying
Mill Pac to the 5"(127mm) inner collar of
the termination and slipping the 5"(127mm)
liner over it at least 1-3/8" (35mm). Fasten
with the 3 screws (drilling pilot holes will
make this easier). Apply Mill Pac or high
temperature silicone to the 8"(203mm) flex
pipe and slip it over the 8" outer collar of
the vent terminal at least 1-3/8"(35mm) and
fasten with the 3 screws.
NOTE: Horizontal sections must be supported at intervals not exceeding 3
feet (0.9 meter). (Flame picture and
performance will be affected by sags
in the liner).
Regency® P48-2 Zero Clearance Direct Vent Gas Fireplace
25
INSTALLATION
P48-NG2 SYSTEM DATA
For 0 to 4500 feet altitude
Burner Inlet Orifice Sizes:
#27
Max. Input Rating
Min. Input Rating
51,000 Btu/h
29,000 Btu/h
Supply Pressure
min.5.0" w.c.
Manifold Pressure
(High)
3.8"+/- 0.2"w.c.
Log Set: Ceramic fibre, 8 per set.
Vent System: Simpson Dura-Vent Direct
Vent System, Regency® Flex Kit
For USA installations follow local codes and/or
the current National Fuel Gas Code, ANSI
Z223.1.
The manifold pressure is controlled by a regulator
built into the gas control, and should be checked
at the pressure test point.
When using copper or flex connectors use only
approved fittings. Always provide a union so
that gas lines can be easily disconnected for
servicing. Flare nuts for copper lines and flex
connectors are usually considered to meet this
requirement.
Note: To properly check gas pressure, both
inlet and manifold pressures should
be checked using the valve pressure
ports on the valve.
Important: Always check for gas leaks with a
soap and water solution or gas leak detector.
Do not use open flame for leak testing.
PILOT ADJUSTMENT
P48-LP2 SYSTEM DATA
min.12.0" w.c.
Log Set: Ceramic fibre, 8 per set.
Vent System: Simpson Dura-Vent Direct
Vent System, Regency® Flex Kit
Periodically check the pilot flames. Correct
flame pattern has three strong blue flames:
1 flowing around the thermopile, 1 around
the thermocouple and 1 flowing across the
burner (it does not have to be touching the
burner).
Note: If you have an incorrect flame pattern,
contact your Regency® dealer for
further instructions.
HIGH ELEVATION
This unit is approved in Canada for altitude 0
to 4500 ft. (CAN1 2.17-M91).
3) Attach manometer to "IN" and/or "OUT"
pressure tap(s) using a 5/16" ID hose.
5) The pressure check should be carried out
with the unit burning and the setting should
be within the limits specified on the safety
label.
For 0 to 4500 feet altitude
Burner Inlet Orifice Sizes:
#47
Max. Input Rating 48,000 Btu/h
Min. Input Rating 26,000 Btu/h
Manifold Pressure
(High)
11"+/- 0.2" w.c.
2) Loosen the "IN" and/or "OUT" pressure
tap(s), turning counterclockwise with a
1/8" wide flat screwdriver.
4) Light the pilot and turn the valve to "ON"
position.
Conversion Kit# 372-969
Supply Pressure
1) Make sure the valve is in the "OFF"
position.
Incorrect flame pattern will have small,
probably yellow flames, not coming into
proper contact with the rear burner or
thermopile or thermocouple.
6) When finished reading manometer, turn
off the gas valve, disconnect the hose and
tighten the screw (clockwise) with a 1/8" flat
screwdriver. Note: Screw should be snug,
but do not over tighten.
S.I.T. VALVE DESCRIPTION
1)
2)
3)
4)
5)
6)
7)
8)
9)
Gas on/off knob
Manual high/low adjustment
Pilot Adjustment
Thermocouple Connection - option
Outlet Pressure Tap
Inlet Pressure Tap
Pilot Outlet
Main Gas Outlet
Alternative TC Connection
Point
GAS LINE
INSTALLATION
The gas line can be brought through either
the right, the left side or the bottom of the
appliance. The gas valve is situated on the
bottom of the unit.
The gas line connection may be made of rigid
pipe, copper pipe or an approved flex connector.
(If you are using rigid pipe, ensure that the valve
can be removed for servicing.) Since some
municipalities have additional local codes it is
always best to consult with your local authorities
and the CAN/CGA B149 installation code.
26
GAS PIPE PRESSURE
TESTING
The appliance must be isolated from the gas
supply piping system by closing its individual
manual shut-off valve during any pressure
testing of the gas supply piping system at
test pressures equal to or less than 1/2 psig.
(3.45 kPa). Disconnect piping from valve at
pressures over 1/2 psig.
Regency® P48-2 Zero Clearance Direct Vent Gas Fireplace
INSTALLATION
CONVERSION KIT FROM NG TO LPG PART #372-969
for P48-2 SIT 820 NOVA Gas Valve
THIS CONVERSION MUST BE DONE BY A QUALIFIED GAS FITTER
IF IN DOUBT DO NOT DO THIS CONVERSION !!
Each Kit contains one LPG
Conversion Kit and one DC
Sparker Kit.
4)
Remove the burner assembly by removing the 1 Phillips head screw and then
slide the burner assembly away from the
orifice and lift out.
7)
Remove burner orifice with a 1/2"
wrench and discard. Use another
wrench to hold on to the elbow behind
the orifice.
LPG Conversion Kit Contains:
Qty. Part #
Description
1
904-434
Burner Orifice #47
1
918-590
Decal "Converted to
Propane"
1
908-529
5/32" Allen Key
1
910-037
LP Injector (Pilot Orifice)
1
918-478
Instruction Sheet
DC Sparker Kit Contains:
Qty. Part #
Description
1
820-475
Bracket DC Sparker
1
820-476
Bracket DC Sparker
1
904-153
Washer #8 External Star
1
904-330
Nut 8-32 Hex
2
904-531
Bushing Split Plastic
0.500 in.
1
904-543
Screw 8-32 x 3/4 Pan
Head
2
904-553
Screw #8 x 1/2 Type "B",
Black Oxide
1
910-073
Spark Generator
Battery Holder
1
910-074
Spark Generator
Switch C/W Wire
1
910-078
Battery Size AA
Energizer En91
1
910-199
Clip Wire Holder
1
910-903
Wire Fan To Power Cord
Ground 30 in.
1
918-478
Instruction Sheet
904-781
Velcro Hook, Black
904-782
Velcro Hook, Black
Burner Orifice
Diagram 1:
Remove the left screw and then slide the
burner assembly away from the orifice and
lift out.
5)
2)
Remove the logs, embers.
3)
Remove the grate by lifting straight up.
9)
Turn control knob to the “OFF” position.
Pull off the pilot
cap to expose
the pilot orifice.
Fig. 1
6)
Remove the louvers and trim kit. Remove the front door.
Reinstall new burner orifice LP stamped
#47 and tighten.
10) Remove the black protection cap by
hand from the high-low knob (Fig.1).
Installation of LPG
Conversion Kit:
1)
8)
Unscrew the pilot orifice with the allen
key and replace with the LP pilot orifice
in the kit and replace pilot cap.
Regency® P48-2 Zero Clearance Direct Vent Gas Fireplace
27
INSTALLATION
11) Insert a 5/32” or 4mm Allen wrench into
the hexagonal key-way of the screw
(Fig. 2), rotate it counter-clockwise until
it is free and extract it.
15) Verify that if the conversion is from NG to
LPG, the screw must be re-assembled
with the red o-ring visible (Fig. 5).
Red o-ring visible
Installation of the DC Sparker:
24) Locate the Piezo Ignitor situated at the
side of the valve.
LPG Configuration
Piezo
Ignitor
Fig.5
Fig.2
16) Re-assemble the black protection cap
(Fig. 6).
25) Remove the Piezo Ignitor by unscrewing the
nut at the back of the mounting bracket.
Ignitor
Wire
12) Check that the screw is clean and if
necessary remove dirt.
13) Flip the screw (Fig. 3).
Piezo
Ignitor
26) Disconnect the ignitor wire from the Piezo
Ignitor and connect it to the DC Sparker.
Fig. 6
DC
Sparker
Fig.3
14) Using the Allen wrench as shown in
Fig.4, rotate the screw clockwise until
snug, do not overtighten.
WARNING!
Also check that the pilot
and main burner injectors are
appropriate for the gas type.
17) Reverse steps 4) to 1).
18) Attach the label "This unit has been
converted to LPG" near or on top of the
serial # decal.
Ignitor
Wire
27) Connect the DC spark generator wires
to the SIT Valve with the screw, which is
provided in the kit.
19) Replace yellow "Natural Gas" label with
red "Propane" label
Fig.4
20) Check for gas leaks.
21) Check inlet and outlet pressures.
WARNING!
Do not overtighten the screw.
Recommended to
grip the wrench by the short side.
28
22) Check operation of flame control.
23) Check for proper flame appearance and
glow on logs.
Regency® P48-2 Zero Clearance Direct Vent Gas Fireplace
INSTALLATION
28) Locate the ground lug at the receptical box,
left of the unit.
29) Connect one end of the supplied green
ground wire to the lug with the nut and
washer from the kit.
32) Plug the DC spark generator wires to the
DC Sparker.
33) Connect the ground wire to the DC Sparker
mounting bracket.
35) Mount the heat shield to the DC Sparker.
Secure into place with the velcro, which is
provided in the kit.
36) Find a location which is not too hot and
is easy to reach for changing the battery.
Note: It should be kept away from the
chain.
Chain
Ground
wire from
kit
30) Install the 1/2" bushing to the heat
shield.
37) Tie up the loose wire with the wire clip.
34) Install the supplied battery into the DC
Sparker Box by opening the battery
compartment.
NOTE: The battery in the DC Sparker Box
will need to be replaced annually.
Battery
Compartment
31) Run the other end of the ground wire and
DC spark generator wires through the
bushing on the heat shield.
Heat Shield
Regency® P48-2 Zero Clearance Direct Vent Gas Fireplace
29
INSTALLATION
BRICK PANELS INSTALLATION
1) Unhook the 2 spring loaded hooks from the bottom of the flush door
and lift the Flush Front off the unit.
5) Place the top bracket onto the front edge of the top panel (refer to
Diagram 5).
2) Unwrap the brick pattern panels from the protective wrapping.
Top Bracket
Note: The logs must not be in the unit.
a) Loosen the two screws from the bottom of the baffle plate. Install
the bottom clips onto the baffle plate (refer to Diagram 1).
Diagram 5
Bottom Clips
6) Slide the top panel and bracket assembly carefully onto the baffle
plate ensuring the panel is centered. Make sure the tabs of the top
bracket fit into the baffle openings (refer to Diagrams 6 & 7). The
back of the top brick panel sits on top of the bottom clips.
Tabs
Diagram 1
Diagram 6
3) Insert the back brick panel first by carefully slipping it between the
back wall of the firebox and the rear log bracket (refer to Diagram 2).
Diagram 2
Diagram 7
4) Put the side panels in next. Tilt them in towards the middle of the
firebox and put the bottom front corner in first. Be very careful not
to scratch them on the firebox hardware. Place them flat up against
the wall, they should fit snugly against the top of the firebox (refer to
Diagrams 3 & 4).
NOTE:
If the bottom brick panel must be removed: Remove the
grate, then remove the Burner Tray. See "Removing
Valve" section.
IMPORTANT
Dangerous operating conditions may
occur if the panels are broken.
Diagrams 3 & 4
30
Regency® P48-2 Zero Clearance Direct Vent Gas Fireplace
INSTALLATION
LOG SET INSTALLATION
Read the instructions below carefully and refer to the diagrams. If logs are broken do not use the unit until they are
replaced. Broken logs can interfere with the pilot operation.
The gas log kit (Part # 370-930) contains the following pieces:
a) 02-83
Center Cross Log
b) 02-84
Right Side Cross Log
c) 02-85
Front Left Side Log
d) 02-86
Front Right Side Log
e) 02-87
Left Side End Log
f) 02-88
Rear Log
g) 02-89
Middle Right Side Log
h) 02-90
Right Side End Log
i) 902-154 Embers (Lava)
j) 902-179 Vermiculite
k) 946-669 Platinum Embers (supplied with packaged manual)
02-88
4) Place Log 02-85 on the front left side of the burner.
Position the right end of the log into the pin on the
burner and rest the left end of the log between the 1st
grate post and the front tab.
If you will be installing the optional brick panels, install them
prior to installing the logs.
02-90
02-88
02-88
02-85
02-87
02-89
02-86
1st Grate Post
02-85
02-83
Tab
Pin
02-84
The "02" reference numbers (i.e. 02-83)
are molded into the rear of each log.
1) Carefully remove the logs from the box and unwrap
them. The logs are fragile, handle with care - do not
force into position.
5) Line up the two holes on the underside of Log 02-86
with the 2 pins on the right side of the burner and position into place.
02-88
2) Sprinkle the vermiculite all over the top of the base
brick panel.
02-86
3) Line up the two holes on the underside of Log 02-88
with the 2 pins at the rear of the grate and position
into place.
02-85
Pins
Pins
®
Regency P48-2 Zero Clearance Direct Vent Gas Fireplace
31
INSTALLATION
6) Embers should be placed in front of Log 02-85 and
Log 02-86.
Separate platinum embers and place around the embers at the front of the burner. Avoid stacking platinum
embers.
8) Line up the hole on the underside of Log 02-84 with
the pin on Log 02-86 and position the notch on the
bottom of the log into the last grate post.
02-88
02-84
02-86
02-86
02-85
02-83
Last Grate Post
Pin in Log
Embers
CAUTION: DO NOT cover burner ports with embers.
9) Place Log 02-89 against the notch in Log 02-84. Rest
the notch at the end of the log against the grate.
7) Place Log 02-83 onto the pin in Log 02-88 and position
the notch on the bottom of the log into the 4th grate
post.
02-88
02-88
02-89
02-83
02-84
02-86
02-85
Notch
Rest log onto the pin
in Log 02-88.
02-83
Rest notch at the end of
the log against the grate.
02-86
02-85
4th Grate Post
Position the notch on the bottom of
the log into the 4th grate post.
32
Regency® P48-2 Zero Clearance Direct Vent Gas Fireplace
INSTALLATION
10) Place Log 02-90 onto the right side of the grate. Position the cut-out on the underside of the log onto the
grate bar.
11) Place Log 02-87 on the middle left side of the burner.
Position the bottom rear of the log against the rear
tab on the left side of the grate. Rest the front edge
of the log in the notches on Log 02-85.
02-87
02-90
Tab
Cut-out
on the underside
of the log.
02-85
02-90
02-83
02-88
02-89
02-87
02-84
02-85
Position the cut-out onto
the grate bar.
Notches
02-87
02-89
02-88
02-85
Regency® P48-2 Zero Clearance Direct Vent Gas Fireplace
02-83
02-86
02-90
02-84
33
INSTALLATION
STANDARD
FLUSH DOOR
The standard flush door comes with a black
frame. To install the frame, simply hook the top
door flange onto the top of the unit and swing
the door towards the unit, diagram 1.
FLUSH LOUVERS
1) Install the top louver by sliding the two
bracket clips into the brackets located
underneath the top of the firebox.
2) Install the bottom louver by folding the louver
down and then sliding the Bottom Louver
bracket down onto the 2 pins on the base
of the unit (diagram 1). Secure with 1 screw
as per diagram 2.
Burner ON/OFF control box attached to
bottom flush louver.
OPTIONAL FLUSH TRIM
Diagram 1
Diagram 2
Attach the round magnets to the back of the
top trim piece and to the bottom trim piece,
then attach trim to the top and bottom of Flush
door.
Diagram 1
Be careful that the glass gasket does not roll up;
there must be a gap between the gasket and the
door lip to ensure that the door sits securely on
the unit. Diagram 2.
Note: Top and
bottom louvers
are different.
Diagram 2
3) Open the bottom louver. Pull the Burner
ON/OFF control box from inside the bottom
of the fireplace. Using the 2 screws on the
louver, secure the control box in place.
Use the hook to pull the spring out until you
can put the hook into the slot on the bottom
door bracket. Repeat for 2nd and 3rd spring.
See diagram 3.
Diagram 3
NOTE: Springs must always be OVER
not under the gas line.
Screws on
louver bracket
Burner ON/OFF
control box
To remove the flush door, reverse the above
steps.
34
Regency® P48-2 Zero Clearance Direct Vent Gas Fireplace
INSTALLATION
OPTIONAL BAY DOOR
The Bay louvers MUST be used
with the Bay glass option.
4) Reconnect the 2 spring hooks securing the
flush door.
5) Slide the valve extension knobs onto the
valve knobs.
The optional Bay door is an overlay on the
flush front. The standard flush door and glass
must remain on the unit.
BAY LOUVERS
1) Install top louver by sliding the two bracket
clips into the brackets located on top of the
bay door. See below. The fitted louver leaves
a small gap between faceplate bottom and
louver top.
1) Unhook the 2 spring loaded hooks from the
bottom of the flush door.
Note: If any maintenance etc. must be
done in the firebox, first remove the
Bay louvers and door.
2) Hook the top of the bay door over the flush
door flange and swing the bottom against
the bottom flange of the flush door.
OPTIONAL BAY TRIM
Note: Top and bottom louvers and
brackets are different.
Attach the supplied magnets each to the back
of the top and bottom trim pieces, and attach
trim to the top and bottom of Bay door. See
diagrams 3 and 4.
2) Install bottom louver by sliding the two
bracket clips into the brackets located
underneath the bay door. Install bottom
louver by sliding the two bracket clips into the
brackets located underneath the bay door
and secure with 1 screw on each end.
Diagram 3
3) Open the bottom louver. Pull the Burner
ON/OFF control box from inside the bottom
of the fireplace. Using the 2 screws on the
louver, secure the control box in place.
3) Secure to the flush door bottom bracket with
2 screws provided.
Screws
on louver
bracket
Burner
ON/OFF
control box
Diagram 4
Regency® P48-2 Zero Clearance Direct Vent Gas Fireplace
35
INSTALLATION
OPTIONAL FINISHING TRIM
NOTE: Remove both the Flush Louvers or Bay Louvers and the Flush Front or Bay Front prior
to installing the Finishing Trim.
1) Install the Finishing Trim sides as shown in the diagram, line up the holes in the side trim with
the holes in the firebox side.
DOUBLE SCREEN
DOOR
1) Pull out the top louver.
2) Center the screen door and hook over the
flush door.
2) Secure with 2 screws per side.
3) Loosen the 3 screws in the top inside edge of the firebox.
4) Slide the Finishing Trim Top over the Side Trim pieces and fit the bottom bracket slots over
the screws. Tighten the 3 screws to secure.
3) Open the screen door(s) and secure the
screen door to the flush door front with 2
clips on the bottom left and right side.
Clip locations
Clip installed on right side.
36
Regency® P48-2 Zero Clearance Direct Vent Gas Fireplace
INSTALLATION
OPTIONAL
REMOTE CONTROL
OPTIONAL
WALL SWITCH
Can be used with Option 2 or 3
but not both.
Can be used with Option 1 or 3
but not both.
Use the Regency® Remote Control Kit approved
for this unit. Use of other systems may void
your warranty.
1) Run the supplied 15' of wire through the
back gas inlet opening. Be careful not to
damage wire.
The remote control kit comes with a hand held
transmitter, a receiver and a wall mounting
plate.
Note: We recommend a maximum of 15'
of wire but if you wish to go with a
longer run, use the Thermostat Wire
Table.
1) Choose a convenient location on the wall
to install the receiver and the receptacle
box (protection from extreme heat is very
important). Run wires from the fireplace
to that location. Use the Thermostat Wire
Table.
2) Connect the two wires to the gas valve. See
diagram.
2) Connect the wire to the supplied wall switch
and install into the receptacle box.
CAUTION
Do not connect millivolt
wall switch wire to a 120V wire.
OPTIONAL
WALL THERMOSTAT
Can be used with Option 1 or 2
but not both.
A wall thermostat may be installed if desired,
connect the wires as per the wiring diagram in
"Wiring Diagram" section. Use the table below
to determine the maximum wire length.
Note: Preferable if the thermostat is installed
on an interior wall.
Regency® offers an optional programmable
thermostat but any 250-750 millivolt rated nonanticipator type thermostat that is CSA, ULC or
UL approved may be used.
CAUTION
Do not connect millivolt
wall thermostat wires
to a 120V wire.
Thermostat Wire Table
Recommended Maximum Lead Length
(Two-Wire) When Using Wall
Thermostat (CP-2 System)
Wire Size
CAUTION
Do not connect millivolt
remote control wires to a
120V wire.
14 GA.
16 GA.
18 GA.
20 GA.
22 GA.
Max. Length
50 Ft.
32 Ft.
20 Ft.
12 Ft.
9 Ft.
3) Install 3 AAA alkaline batteries in transmitter
and 4 AA alkaline batteries in the receiver.
Install the receiver and its cover in the wall.
Switch the remote receiver to "remote"
mode. The remote control is now ready for
operation.
Regency® P48-2 Zero Clearance Direct Vent Gas Fireplace
37
INSTALLATION
WIRING DIAGRAMS
No electrical power supply is required for the
gas control to operate. 120 Volt AC power is
needed for the fan switch and blower. The fan
can be hard wired if desired. A terminal block is
provided on the left hand side of the unit. A three
wire power cord can also be used and plugged
into a suitable receptacle.
(Do not cut the ground terminal off under
any circumstances.)
NOTE: Even if the fan is not purchased with
the unit, it is still a good idea to hardwire the
terminal block in case the fan is installed at a
later date.
** However DO NOT leave this connection
live until the fan is installed.**
For NATURAL GAS Units and Units NOT Equipped with DC Spark Boxes
Caution: Ensure that the wires do
not touch any hot surfaces and are
away from sharp edges.
38
CAUTION: Label all wires
prior to disconnection
when servicing controls.
Wiring errors can cause
improper and dangerous
operation.
Regency® P48-2 Zero Clearance Direct Vent Gas Fireplace
INSTALLATION
For PROPANE Units and Units Equipped with DC Spark Boxes*
*For installation of the DC Spark Box refer to the LP Conversion instructions in this manual.
Regency® P48-2 Zero Clearance Direct Vent Gas Fireplace
39
INSTALLATION
INSTALLING THE OPTIONAL FAN
120 Volt AC power is needed for the fan switch
and blower. The fan can be hard wired if desired.
The receptacle box should be installed on the left
hand side of the unit by a qualified electrician. The
neutral (wider) slot of the polarized receptacle
should be at the top.
6) Slide the thermodisc/cover assembly into
the bracket clip on the underside of the
firebox. Check that no wire will touch the
hot surfaces. Diagram 2.
9) Attach the two control boxes to the bottom
louver and tighten the 2 screws on the left
side and 2 screws on the right side.
Unit must be grounded at all times. Do
not cut the ground terminal off under any
circumstances.
1) Shut the power off.
2) Remove the standard flush door and the
optional bay door, if installed. Open the
bottom louver door.
3) Remove the 2 screws holding the Burner
ON/OFF switch and bracket to the bottom
louver and lift the assembly out.
Secure left side with 2 screws.
Diagram 2
7) Attach the Fan control box to the Burner
ON/OFF control box. Diagram 3.
Secure right side with 2 screws.
Diagram 3: Use the clip & hook on the side of
the control boxes to join them together.
4) Turn the fan base on its side (with the base
facing towards you) and then slide the fan
in towards the rear of the unit. Turn the fan
upright and slip it over the two mounting
studs. Take care not to damage the insulation
on the fan base. Ensure that the fan blades
do not rub against the valve tubing.
Diagram 1.
8) Secure the two boxes together with one
screw.
10) Secure the fan wires and power cord by
attaching one of the adhesive backed wire
holder clips (Part #910-199) onto the stove
base. Use the second clip to bundle up the
wires approximately 4" from the control box.
Ensure that there is no interference with the
wires when the louver is closed and that
no wire will touch the hot metal surfaces
or sharp edges.
11) Plug the fan power cord into the rear end of
the receptacle box to provide the maximum
clearance from the louvers.
TO REMOVE THE FAN
1) Shut the power off.
Secure the 2 boxes together
with one screw.
Diagram 1
2) Reverse the above instructions.
NOTE:
The bearings are lubricated for life. Do not
lubricate them. Make sure you vacuum the
fan area on a regular basis.
IMPORTANT:
These fans collect a lot of dust from within
your home. Ensure you maintain these fan
motors on a regular basis by vacuuming
out the fan blades and housing using a soft
brush nozzle.
5) Connect fan ground cable to ground lug.
Refer to wiring diagram.
40
Regency® P48-2 Zero Clearance Direct Vent Gas Fireplace
OPERATING INSTRUCTIONS
OPERATING
INSTRUCTIONS
1) Read and understand these instructions
before operating this appliance.
2) Check to see that all wiring is correct and
enclosed to prevent possible shock.
3) Check to ensure there are no gas leaks.
4) Make sure the glass in the door frame is
properly positioned. Never operate the
appliance with the glass removed.
5) Verify that the venting and cap are
unobstructed.
2) Turn gas control knob so indicator points
to "OFF" position and allow 5 minutes for
any gas in the combustion chamber to
escape.
3) Turn gas control knob counterclockwise
so indicator points to the "PILOT" position.
Depress the gas control knob fully. Depress
the igniter button several times until the
pilot lights. After approximately one minute,
release the gas control knob. The pilot flame
should continue to burn. If the pilot does not
remain lit, repeat operation allowing a longer
period before releasing gas control knob.
4) When the pilot stays lit, turn the gas knob
further counterclockwise to the "ON"
position.
6) Ensure that the brick panels are installed.
7) Verify log placement. If the pilot cannot be
seen when lighting the unit, the logs have
been incorrectly positioned.
5) Use the wall switch, thermostat or remote
control to turn on the unit.
6) Rotate the flame height regulator to adjust
the flame height higher or lower.
8) The unit should never be turned off, and on
again without a minimum of a 60 second
wait.
SHUTDOWN
PROCEDURE
1) Use the wall switch, thermostat or remote
control to turn off the main burner.
2) Turn the main gas control clockwise to the
"OFF" position to turn off the pilot.
During the first few fires, a white film
may develop on the glass front as part of
the curing process. The glass should be
cleaned after the unit has cooled down
or the film will bake on and become very
difficult to remove. Use a non-abrasive
cleaner and DO NOT ATTEMPT TO CLEAN
THE GLASS WHILE IT IS HOT.
AERATION
ADJUSTMENT
The air shutter can be adjusted by moving the
adjusting wire up or down. The wire is accessed
through the bottom louver opening. Open the
air shutter for a blue flame or close for a more
yellow flame. The burner aeration is factory set
but may need adjusting due to either the local
gas supply or altitude.
Minimum Air Shutter Opening:
3/16"
Natural Gas
Fully Open
Propane
CAUTION: Carbon will be produced if air shutter
is closed too much.
Note: Any damage due to carboning
resulting from improperly setting
the aeration controls is NOT covered
under warranty.
3) Turn off all electric power to appliance if
service is to be performed.
LIGHTING
PROCEDURE
IMPORTANT
To ignite or reignite the pilot,
you must first release the
tension springs below the door.
Only when the pilot holds, without pressure
being applied to the control knob, reapply the
tension springs to the door. The unit must
not be operated with the tension springs
unattached.
NOTE: For all propane units and units
equipped with electric spark boxes,
see "Copy of Lighting Plate Instructions" section for more details.
IMPORTANT Gas on/off knob cannot be
turned from "PILOT" to "OFF" unless it is
partially depressed.
FIRST FIRE
DO NOT BURN THE APPLIANCE
WITHOUT THE GLASS FRONT IN
PLACE.
The first fire in your stove is part of the paint
curing process. To ensure that the paint is
properly cured, it is recommended that you burn
your fireplace for at least four (4) hours the first
time before you use it with the fan on.
When first operated, the unit will release an odour
caused by the curing of the paint, the burning
off of any oils remaining from manufacturing.
Smoke detectors in the house may go off at
this time. Open a few windows to ventilate the
room for a couple of hours.
Adjustment Wire - Pull down to open or
push up to close aeration cap.
Closed - Tall yellow
Open - Short Blue
Note: Aeration Adjustment should only be
performed by an authorized Regency®
Installer at the time of installation or
service.
Note: When the glass is cold and the
appliance is lit, it may cause
condensation and fog the glass.
This condensation is normal and
will disappear in a few minutes as
the glass heats up.
1) Turn burner OFF using "ON/OFF" switch.
Regency® P48-2 Zero Clearance Direct Vent Gas Fireplace
41
OPERATING INSTRUCTIONS
NORMAL OPERATING
SOUNDS OF
GAS APPLIANCES
Copy of the Lighting Plate Instructions
It is possible that you will hear some sounds
from your gas appliance. This is perfectly normal
due to the fact that there are various gauges
and types of steel used within your appliance.
Listed below are some examples. All are normal
operating sounds and should not be considered
as defects in your appliance.
Blower:
Regency® gas appliances use high tech blowers
to push heated air farther into the room. It is not
unusual for the fan to make a "whirring" sound
when ON. This sound will increase or decrease
in volume depending on the speed setting of
your fan speed control.
Burner Tray:
The burner tray is positioned directly under the
burner tube and logs and is made of a different
gauge material from the rest of the firebox and
body. Therefore, the varying thicknesses of steel
will expand and contract at slightly different
rates which can cause "ticking" and "cracking"
sounds. You should also be aware that as there
are temperature changes within the unit these
sounds will likely re-occur. Again, this is normal
for steel fireboxes.
Blower Thermodisc:
When this thermally activated switch turns ON
it will create a small "clicking" sound. This is the
switch contacts closing and is normal.
OFF
Gas Inlet
Pilot Flame:
While the pilot flame is on it can make a very
slight "whisper" sound.
Gas Control Valve:
As the gas control valve turns ON and OFF, a
dull clicking sound may be audible, this is normal
operation of a gas regulator or valve.
Unit Body/Firebox:
Different types and thicknesses of steel will
expand and contract at different rates resulting
in some "cracking" and "ticking" sounds will be
heard throughout the cycling process.
42
Gas Inlet
Regency® P48-2 Zero Clearance Direct Vent Gas Fireplace
MAINTENANCE
MAINTENANCE
INSTRUCTIONS
GENERAL VENT
MAINTENANCE
THERMOPILE /
THERMOCOUPLE
1) Always turn off the gas valve before cleaning.
For relighting, refer to lighting instructions.
Keep the burner and control compartment
clean by brushing and vacuuming at least
once a year. When cleaning the logs, use a
soft clean paint brush as the logs are fragile
and easily damaged.
Conduct an inspection of the venting system
semiannually. Recommended areas to inspect
as follows:
1) Open the Bottom Louvers or Grills. Remove
the Top Louver or Grill.
2) Clean appliance and door with a damp
cloth (never when unit is hot). Never use
an abrasive cleaner. The glass should be
cleaned with a gas fireplace glass cleaner.
The glass should be cleaned when it
starts looking cloudy.
3) The heater is finished in a heat resistant
paint and should only be refinished with heat
resistant paint. Regency® uses StoveBright
Paint - Metallic Black #6309.
4) Make a periodic check of burner for proper
position and condition. Visually check the
flame of the burner periodically, making sure
the flames are steady; not lifting or floating.
If there is a problem, call a qualified service
person.
5) The appliance and venting system must be
inspected before use, and at least annually,
by a qualified field service person, to ensure
that the flow of combustion and ventilation
air is not obstructed.
Note: Never operate the appliance without
the glass properly secured in place.
6) Do not use this appliance if any part has been
under water. Immediately call a qualified
service technician to inspect the appliance
and to replace nay part of the control system
and any gas control which has been under
water.
7) In the event this appliance has been
serviced check that the vent-air system
has been properly resealed & reinstalled
in accordance with the manufacturer's
instructions.
8) Verify operation after servicing.
1) Check the Venting System for corrosion in
areas that are exposed to the elements.
These will appear as rust spots or
streaks, and in extreme cases, holes.
These components should be replaced
immediately.
2) Remove the Cap, and shine a flashlight
down the Vent. Remove any bird nests, or
other foreign material.
3) Check for evidences of excessive
condensation, such as water droplets forming
in the inner liner, and subsequently dripping
out the joints, Continuous condensation can
cause corrosion of caps, pipe, and fittings.
It may be caused by having excessive
lateral runs, too many elbows, and exterior
portions of the system being exposed to
cold weather.
4) Inspect joints, to verify that no pipe
sections or fittings have been disturbed,
and consequently loosened. Also check
mechanical supports such as Wall Straps,
or plumbers' tape for rigidity.
2) Open and remove door.
3) Remove log set and embers.
4) Remove grate and burner.
5) Disconnect thermocouple by loosening
nut from the valve with a 9mm wrench.
Disconnect thermopile by loosening 2
screws marked TP on the valve.
6) Remove 2 screws from the pilot assembly
and pull up far enough to be able to loosen
the thermocouple or thermopile with a 7/16"
wrench. NOTE: the pilot line is very fragile,
use caution when pulling it up.
7) Drop the thermocouple or thermopile down
through the extrusion and pull it out of the
unit.
8) Reinstall the new ones in reverse order.
GLASS GASKET
If the glass gasket requires replacement use a
tadpole glass gasket (Part # 936-155).
LOG REPLACEMENT
The unit should never be used with broken logs.
Turn off the gas valve and allow the unit to cool
before opening door and carefully remove the
logs. (The pilot light generates enough heat to
burn someone.) If for any reason a log should
need replacement, you must use the proper
replacement log. The position of these logs
must be as shown in the diagrams under Log
Installation.
Note: Improper positioning of logs may
create carbon build-up and will
severely alter the unit's performance
which is not covered under
warranty.
Regency® P48-2 Zero Clearance Direct Vent Gas Fireplace
GOLD-PLATED
LOUVERS & TRIM
The 24 carat gold-plated finish on the louvers
and trim requires little maintenance, and need
only be cleaned with a damp cloth.
DO NOT use abrasive materials or chemical
cleaners, as they may harm the finish and void
the warranty.
Clean any fingerprints off before turning
the unit on.
43
MAINTENANCE
DOOR GLASS
BAY GLASS REPLACEMENT
Your Regency® fireplace is supplied with high
temperature 5mm-Ceramic glass. If your glass
requires cleaning, we recommend using an
approved glass cleaner available at all authorized
dealers. Do not use abrasive materials.
1) Remove the door from the unit and place on
a soft surface to prevent scratching.
CAUTION & WARNINGS:
3) Replace the glass. The glass must have
gasketing around it.
2) Remove the nuts holding the glass clips in
place and remove.
* Do not clean when the glass is hot.
* The use of substitute glass will void all product
warranties.
* Care must be taken to avoid breakage of the
glass.
* Do not strike or abuse the glass.
* Do not operate this fireplace without the
glass front or with a cracked or broken glass
front.
* Wear gloves when removing damaged or
broken glass.
* Replacement of the glass panel(s) should be
done by a licensed or qualified service per
son.
2) Reconnect the "gas out" flare fitting with an
11/16" wrench.
3) Reconnect the "gas out" flare nut with a
13/16" wrench.
5) Reconnect the quick drop out thermocouple
nut with a 9mm wrench.
6) Reconnect the pilot tube nut with a 7/16"
wrench.
7) Scrape off the old gasket from the floor of the
firebox and from the valve tray assembly.
8) Install a new gasket and reinstall the valve
tray assembly.
Note:
In the event that you break your glass by impact,
purchase your replacement from an authorized
Regency® dealer only.
Failure to install a new gasket
may severely affect the appliance
performance.
9) Reinstall the 10 hold down screws.
Replacement glass is shipped already installed
into the door frame. Reinstall as per Glass Door
Installation in "Standard Flush Door" section.
WARNING: Do not operate the
appliance with the glass panels
removed, cracked or broken.
Replacement of the glass panels
should be done by a licensed or
qualified service person.
1) Attach the valve to the valve bracket with
the 4 (m5x8 metric) screws provided.
4) Install piezo ignitor push button assembly
and reconnect wire.
GLASS REPLACEMENT
CAUTION: Wear gloves when
removing damaged or broken
glass.
INSTALLING VALVE
10) Hook up the 2 TP and 2 TH wires to the
appropriate connections on the valve.
11) Reinstall the two bottom deflectors and brick
panels.
4) Reverse the previous steps, replace the glass
clips and fasten with the nuts but do not over
tighten, as this can break the glass.
5) Replace door on the stove and check the
seal.
12) Install burner and grate assembly.
13) Hook up the gas line and check for gas
leaks with a soap and water solution or a
gas leak detector. (Do not use open flame
for leak testing.)
14) Fire up the unit temporarily.
15) Check the manifold pressure.
16) Reinstall the logs and brick panels as
needed.
17) Close the door and replace the louvers.
18) Fire up the unit again and check for proper
flame appearance and glow on logs.
44
Regency® P48-2 Zero Clearance Direct Vent Gas Fireplace
MAINTENANCE
REMOVING VALVE
7) Remove the right and left side deflectors by
removing the 2 screws on each deflector.
1) Shut off the gas supply.
2) Remove the louvers (and bay door if it has
been installed).
3) Open the flush door and remove the door.
4) Remove the logs and side brick panels, if
installed.
Lift entire valve tray
assembly out.
5) Remove the grate by lifting up and out.
11) Disconnect the 2 TP wires and the 2 TH
wires from the valve.
Right Side
Deflector
12) Undo the pilot tube from the valve with a
7/16" wrench.
13) Undo the quick drop out thermocouple nut
on the valve with a 9mm (metric) wrench.
14) Remove the Piezo igniter wire and push
button assembly.
Grate
6) Remove the burner by removing the screw
on the left side and then slide the burner to
the left and lift out.
Left Side
Deflector
8) Remove the base brick panels.
9) Disconnect the inlet gas line.
10) Remove the 10 Phillips head screws securing
the valve tray assembly in place and then
lift the entire assembly out.
Thermopile
Wire
Thermocouple
Wire
Pilot Nut
15) Undo the "gas out" flare nut with a 13/16"
wrench.
Remove the screw on the left
side of the burner.
16) Undo the "gas out" flare fitting with an 11/16"
wrench.
17) Remove the 4 Phillips head screws from
the sides of the valve bracket and remove
valve.
Hint:
Slide the burner to the left and lift out.
If you are using black pipe, ensure
that there is a union by the valve,
otherwise removal will be almost
impossible.
Valve Tray
Assembly
Regency® P48-2 Zero Clearance Direct Vent Gas Fireplace
45
PARTS LIST
MAIN ASSEMBLY
Part #
1)
3)
4)
6)
7)
8)
9)
10)
948-259
948-046
948-115
430-129
910-429
910-428
910-430
904-687
Description
Door Handle
Chain
Spring
Receptacle Box Mount
Box - Receptacle
Duplex Receptacle
Cover - Receptacle
Clamp Connector
20) 370-037
21) 370-038
Top Nailing Strip
Side Nailing Strip
22) 370-015
Baffle Plate
23) 780-011
24) 780-013
Standoff - Top
Standoff - Side/Back
27)
28)
29)
30)
Outer Flue Collar
Inner Flue Collar Assy
Flue Mounting Plate
Gasket for Flue Collar
*
*
*
*
35) *
Thermodisc Bracket
38) 910-241
910-899
Switch - Burner ON/OFF(3-way)
Wire Harness-Valve to Burner
432-917
Fan & Speed Control Assy (120 Volts) Optional
42) 910-331/P Fan Motor
432-966 Fan Switch Assy (120 Volts) Optional
43)
46)
47)
48)
49)
910-813
910-330
904-586
910-199
910-142
910-845
50) 770-994
46
Power Cord (120 Volts)
Fan Speed Control Switch
Knob - Speed Control
Wire Holder Clip
Thermodisc - Fan (Auto ON/OFF)
Wire Harness - Plug In Fan
Optional Rigid Pipe Adaptor
Part #
51) 902-331
52) 902-332
53) 902-333
Description
Brick Panel - Base Center
Brick Panel - Base Left
Brick Panel - Base Right
370-901
370-902
370-903
Brick Panel Set - Standard Brown
Brick Panel Set - Standard Red
Brick Panel Set - Herringbone Brown
54)
55)
56)
57)
*
*
*
*
Brick Panel - Back
Brick Panel - Left
Brick Panel - Right
Brick Panel - Top
89)
90)
91)
92)
93)
94)
95)
96)
97)
98)
99)
946-556 Optional Heat Wave Duct Kit
946-004 Junction Box
946-000 Round Duct Adaptor
946-002 Round to Oval Adaptor
946-001 Oval Duct Adaptor
946-007 Angle Bracket
946-517/P Fan Assembly - HeatWave Option
946-006 Grill Plate - White
946-005/01 Wall Adaptor Plate - White
910-417 Knob - White
910-366 Switch Cover Plate - White
910-412 Fan Speed Controller
100) 910-367
101) 690-022
102) 946-010
946-011
Box - Plastic Switch Receptacle
Cover Plate - Outer Box Side
Flexible Air Duct
Insulation 6" dia. x 24"
946-570
105) 910-165
106) 946-000
Heat Release Duct Kit (Optional)
Fan (120 Volts)
Flexible Air Release Duct
372-969
Conversion Kit - NG to LP
918-524
Manual
*Not available as a replacement part.
Regency® P48-2 Zero Clearance Direct Vent Gas Fireplace
PARTS LIST
30
28
89
50
93
94
20
93
29
27
21
92
95
30
23
22
91
96
23
99
97
102
100
24
98
21
90
HEAT WAVE DUCT KIT
DOORS & LOUVERS PLEASE
REFER SEPARATE SECTION
10
6
55
57
101
7
8
4
9
1
3
35
24
42
54
106
56
38
43
47
52
48
49
46
105
51
53
Regency® P48-2 Zero Clearance Direct Vent Gas Fireplace
HEAT RELEASE DUCT KIT
47
PARTS LIST
BURNER & LOG ASSEMBLY
Part #
Description
52)
370-574/P
370-576/P
*
Valve Assembly - Natural Gas
Valve Assembly - Propane
Gasket - Valve Access Plate
56)
57)
910-190
910-478
Piezo Ignitor & Nut
Valve S.I.T. - Natural Gas / Propane
66)
67)
68)
69)
910-038
910-039
*
W840470
904-662
904-434
936-170
Pilot Assy - S.I.T. - 3 Flame NG
Pilot Assy - S.I.T. - 3 Flame LP
Pilot Holder
Pilot Assembly Gasket
#27 Orifice - N.G.
#47 Orifice - Propane
Orifice Gasket
75)
79)
82)
*
370-535
370-019
Valve Access Plate
Burner Assembly
Burner/Grate Assembly
90)
910-421
91)
910-422
Pilot ON/OFF Extension Knob
(with Bay Front)
HI/LOW Extension Knob
(with Bay Front)
93)
94)
95)
96)
97)
98)
100)
101)
370-930
*
*
*
*
*
*
*
*
P48-2 Log Set
Center Cross Log
Right Side Cross Log
Front Left Side Log
Front Right Side Log
Left Side End Log
Rear Log
Middle Right Side Log
Right Side End Log
*Not available as a replacement part.
48
Regency® P48-2 Zero Clearance Direct Vent Gas Fireplace
PARTS LIST
FLUSH DOOR & LOUVERS
Part #
Description
370-925
370-924
370-926
133) *
134) *
Flush Louvers (Set) - Steel/Black
Flush Louvers (Set) - Black
Flush Louvers (Set) - Gold/Black
Flush Louver Assembly - Top
Flush Louver Assembly - Bottom
370-518/P
135) 940-335/P
138) *
139) 936-155
Flush Door Assembly Complete
Glass (Flush)
Flush Door Frame
Glass Gasket (Tadpole)
140) 948-042
Spring Hinge
370-944
370-946
141) *
142) *
143) *
Finishing Trim - Black
Finishing Trim - Steel
Trim Side Left
Trim Side Right
Trim Top
Part #
150) *
904-196
171)
172)
174)
178)
180)
370-933
*
*
511-085
948-257
512-546
188) 948-216
Description
Flush Glass Trim
Magnet
Double Screen Door (Complete)
Door Frame Assembly - Left
Door Frame Assembly - Right
Handle
Lift Hinge on Door
Door Latch Assembly
Regency® Logo Plate
*Not available as a replacement part.
Regency® P48-2 Zero Clearance Direct Vent Gas Fireplace
49
PARTS LIST
BAY FRONT & LOUVERS
106)
107)
108)
111)
112)
Part #
Description
940-337/P
936-243
940-336/P
*
*
Side Glass
Glass Gasket
Center Glass
Brick Panel - Left Side Bay
Brick Panel - Right Side Bay
113) 370-086
Bay Door Trim (Each) -Black
115)
116)
117)
119)
120)
Bay Louver Assembly - Top
Bay Louver Assembly - Bottom
Magnet (1" round)
Bay Door Baffle
Flush Glass Retainer Bracket
*
*
904-196
370-093
400-189
122) 948-216
Regency® Logo Plate
*Not available as a replacement part.
50
Regency® P48-2 Zero Clearance Direct Vent Gas Fireplace
WARRANTY
Regency Fireplace Products are designed with reliability and simplicity in mind. In addition, our internal Quality Assurance Team carefully inspects each unit
thoroughly before it leaves our facility. FPI Fireplace Products International Ltd. is pleased to extend this limited lifetime warranty to the original purchaser of a
Excalibur Product. This warranty is not transferable.
The Warranty: Limited Lifetime
The combustion chamber, heat exchanger, burner tubes/pans, logs, brick panels and gold plating (against defective manufacture only) are covered under the Limited Lifetime
Warranty for five (5) years for parts and subsidized labour* and parts only thereafter.
Glass is covered for lifetime against thermal breakage only, parts and subsidized labour* for five (5) years and parts only thereafter from date of purchase.
External casting, surrounds and grills are covered against cracks and warps resulting from manufacturer defects, parts and subsidized labour* for three (3) years from the date
of purchase and parts only thereafter.
Special Finishes - One year on brushed nickel and antique copper full screens and doors. You can expect some changes in color as the product "ages" with constant heating
and cooling. FPI warranties the product for any manufacturing defects on the original product. However, the manufacturers warranty does not cover changing colors and marks,
ie. finger prints, etc applied after the purchase of the product. Damage from the use of abrasive cleaners is not covered by warranty.
Electrical and mechanical components such as blowers, switches, wiring, thermodiscs, FPI remote controls, spill switches, thermopiles, thermocouples, pilot assembly components,
and gas valves are covered for two years parts and one year subsidized labour* from the date of purchase. Blowers and valves replaced under warranty are considered repairs and
continue as if new with appliance. ie. twelve (12) months from original purchase date of appliance with a minimum of three (3) months coverage from date of replacement.
FPI venting components are covered parts and subsidized labour* for three (3) years from date of purchase.
Simpson Dura-Vent venting components (Direct Vent units) are covered by Simpson Dura-Vent Inc. warranty.
Repair/replacement parts purchased by the consumer from FPI after the original coverage has expired on the unit will carry a 90 day warranty, valid with a receipt only. Any
item shown to be defective will be repaired or replaced at our discretion. No labor coverage is included with these parts.
Conditions:
Any part or parts of this unit which in our judgement show evidence of such defects will be repaired or replaced at FPI's option, through an accredited distributor or agent provided
that the defective part be returned to the distributor or agent Transportation Prepaid, if requested.
Porcelain/Enamel - Absolute perfection is either guaranteed nor commercially possible. Any chips must be reported and inspected by an authorized dealer within three days of
installation. Reported damage after this time will be subject to rejection.
It is the general practice of FPI to charge for larger, higher priced replacement parts and issue credit once the replaced component has been returned to FPI and evaluated
for manufacturer defect.
The authorized selling dealer is responsible for all in-field service work carried out on your Regency product. FPI will not be liable for results or costs of workmanship from
unauthorized service persons or dealers.
At all times FPI reserves the right to inspect product in the field which is claimed to be defective.
All claims must be submitted to FPI by authorized selling dealers. It is essential that all submitted claims provide all of the necessary information including customer name,
purchase date, serial #, type of unit, problem, and part or parts requested, without this information the warranty will be invalid.
Exclusions:
This limited Lifetime Warranty does not extend to or include paint, door or glass gasketing or trim.
At no time will FPI be liable for any consequential damages which exceed the purchase price of the unit. FPI has no obligation to enhance or modify any unit once manufactured.
ie. as products evolve, field modifications or upgrades will not be performed.
FPI will not be liable for travel costs for service work.
Installation and environmental problems are not the responsibility of the manufacturer and therefore are not covered under the terms of this warranty policy.
Embers, rockwool, gaskets, door handles and paint are not covered under the terms of this warranty policy.
Any unit which shows signs of neglect or misuse is not covered under the terms of this warranty policy.
The warranty will not extend to any part which has been tampered with or altered in any way, or in our judgment has been subject to misuse, improper installation, negligence
or accident, spillage or downdrafts caused by environmental or geographical conditions, inadequate ventilation, excessive offsets, negative air pressure caused by mechanical
systems such as furnaces, fans, clothes dryer, etc.
Freight damage to stoves and replacement parts is not covered by warranty and is subject to a claim against the freight carrier by the dealer.
FPI will not be liable for acts of God, or acts of terrorism, which cause malfunction of the appliance.
Performance problems due to operator error will not be covered by this warranty policy.
Products made or provided by other manufacturers and used in conjunction with the operation of this appliance without prior authorization from FPI, may nullify your warranty
on this product.
Any alteration to the unit which causes sooting or carboning that results in damage to the interior / exterior facia is not the responsibility of FPI.
* Subsidy according to job scale as predetermined by FPI.
Regency® P48-2 Zero Clearance Direct Vent Gas Fireplace
51
FPI fireplaces are designed with reliability and simplicity
in mind. In addition, our internal Quality Assurance Team
carefully inspects each unit thoroughly before it leaves
our door.
FPI Fireplace Products International Ltd. is pleased to extend
this Limited Lifetime Warranty to the original purchaser of
a FPI Product.
See the inside back cover for details.
Register your Regency® online at
http://www.regency-fire.com
Installer: Please complete the following information
Dealer Name & Address: ______________________________________________
___________________________________________________________________
Installer: ___________________________________________________________
Phone #: ___________________________________________________________
Date Installed: ______________________________________________________
Serial No.: __________________________________________________________
Regency® and Panorama® are trademarks of FPI Fireplace Products International Ltd.
© Copyright
2008, FPI Fireplace Products International Ltd. All rights reserved.
52
Printed in Canada
Regency® P48-2 Zero Clearance Direct Vent Gas Fireplace