1
portable cd system
Before you begin
Using the Radio
understanding The Display
Care and Maintenance
Cleaning the Exterior
with am/fm stereo tuner
and dual cassette recorder
REPEAT 1 ALL
PROGRAM
•
MEMORY
AC
TRACK
PROG
M U LT I F U N C T I O N D I S P L A Y
PLAY•PAUSE
SEARCH
FM
STEREO
PWR ON
FM 8 8
92
AM
600
530
96
700
100
102
104
800 1000 1200 1400
108
1700
CD
Play/Pause
indicator
STOP
TUNING
BASS BOOST
STEREO WIDE
BAND switch
FM STEREO
indicator
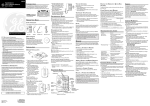
Speaker Hookup
+ RIGHT –
For each speaker:
– LEFT +
MAX
AM FM FM STEREO
HIGH SPEED TAPE CD RADIO
DUB
BASS BOOST
button
Insert 8 D-sized batteries (not supplied) and you can take your stereo just about anywhere. Open
the battery compartment door on the back of the unit by pressing down on the two tabs and
pulling out the cover. Insert batteries as shown on the back of the unit.
MIN
BAND
FUNCTION
SPEAKER
8 OHM
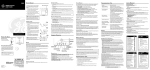
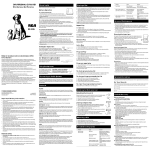
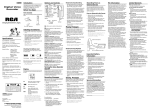
The display tells you what your unit is doing. The following list is presented in alphabetical order
and corresponds to the items in the graphic above.
•
When finished playing discs, store them in their case, not in the CD player.
03:15
The elapsed playing time in minutes and seconds of the CD track that is playing.
07
The track on the CD that is selected (in play mode, the track that is playing; in
program mode, the track that you are programming into memory).
Cleaning CDs
MEMORY
Displayed when you are entering a program into memory.
PROGRAM
Displayed when you are in program play mode.
VOLUME control
REPEAT 1 ALL
Displayed when you have activated repeat feature.
•
•
Tape Care
Tuning In Radio Stations
Choose the radio feature by sliding the FUNCTION control to TUNER.
•
Using the CD Player
Slide the band switch to listen to AM, FM, or FM stereo.
•
Turn the TUNING dial to change the radio station.
•
Adjust the VOLUME and BASS BOOST settings as desired.
Cleaning the Tape Heads
Iron oxide particles from the magnetic tape can build up on the parts that come in contact with the
tape. These deposits can cause incomplete erasure, muffled playback sound, and might prevent
automatic stop.
Using the dual Cassette Deck
TRACK
PROG
M U LT I F U N C T I O N D I S P L A Y
PLAY•PAUSE
SEARCH
FM
STEREO
PWR ON
FM 8 8
92
AM
600
530
96
700
100
102
STOP
CD door
OPEN/CLOSE
CD buttons
1 0 8 MHz
104
800 1000 1200 1400
REPEAT
1700
kHz
VOLUME
FCC INFORMATION
TAPE
2
1
In accordance with FCC requirements, changes or modifications not expressly approved by Thomson
Consumer Electronics could void the user’s authority to operate this product.
Plug the male end of the AC line cord into the AC jack located on the
back of the cabinet. Then plug the other end of the power cord into an
AC power outlet that accepts the polarized plug, which has one blade
wider than the other.
DUBBING • AUTO STOP
ONE TOUCH RECORD • CD
BASS BOOST
STEREO WIDE
Loading and Playing cds
C O N T I N U O U S P L AY 2 - 1 • TA P E D U B B
ING 2-1
RECORD
PLAY
REWIND
F FWD
STOP/EJECT
PAUSE
PLAY
REWIND
F FWD
STOP/EJECT
3. Place a CD into the compartment with the label side up and close the CD door.
If this equipment does cause interference to radio or television reception (which you can determine by
turning the equipment off and on), try to correct the interference by one or more of the following measures:
•
The AM antenna is built in.
5. Use the TRACK
•
The FM wire antenna is attached. Extend it to its full length and adjust its position to improve FM
reception.
6. Press STOP
•
Move the unit away from the equipment that is receiving interference.
•
Plug the unit into a different wall outlet so that the unit and the equipment receiving interference are
on different branch circuits.
If these measures do not eliminate the interference, please consult your dealer or an experienced radio/
television technician for additional suggestions. Also, the Federal Communications Commission has prepared
a helpful booklet, “How To Identify and Resolve Radio TV Interference Problems.” This booklet is available
from the U.S. Government Printing Office, Washington, DC 20402. Please specify stock number 004-00000345-4 when ordering copies.
4. Press PLAY•PAUSE
Headphones
To listen to your stereo with headphones (not included), use the 3.5 mm PHONES jack on the
front of the unit.
Do not play your headset at a high volume. Hearing experts advise against continuous extended
play.
•
If you experience a ringing in your ears, reduce volume or discontinue use.
•
You should use extreme caution or temporarily discontinue use in potentially hazardous situations.
•
Even if your headset is an open-air type designed to let you hear outside sounds, don't turn up the
volume so high that you can't hear what's around you.
RECORD
— Press to record from the radio or CDs. (Button on tape deck 1 only.)
Press PLAY•PAUSE
PROG
PLAY•PAUSE
FM
STEREO
PWR ON
FM 8 8
92
AM
600
530
96
700
100
102
104
800 1000 1200 1400
108
1700
REPEAT
STOP
POWER
When the tape deck is operating in play or record mode and the end of the tape is reached, the
unit automatically shuts itself off and returns all buttons to the off position. In rewind or fast
forward mode, you must turn off the unit manually by pressing STOP/EJECT.
STEREO WIDE
RIGHT
2. Press STOP/EJECT to open the cassette compartment door.
PHONES
BAND
FUNCTION
HIGH SPEED TAPE
DUB
P.O. Box 1976, Indianapolis, IN 46206
© 1996 Thomson Consumer Electronics, Inc.
Trademark(s) ® Registered
Marca(s) Registrada(s)
POWER
button
PHONES
jack
FUNCTION
control
BALANCE
control
MIN
MAX
AM FM FM STEREO
CD RADIO
STEREO WIDE
button
VOLUME
control
BASS BOOST
button
•
•
4. Close the door securely.
5. Press REWIND
6. Press PLAY
or F FWD
POWER ON/OFF
Press and release the POWER button to turn power on and off.
This Compact Disc Player uses a laser to read the music on the disc. The laser mechanism corresponds to
the cartridge and stylus of a traditional record player. Although this product incorporates a laser pick-up
lens, it is completely safe when operated according to directions.
Function control
Use the FUNCTION control to switch between the available sources of sound: TUNER (radio), CD,
or TAPE.
The AC power plug is polarized (one blade is wider than the other) and only fits into AC
power outlets one way. If the plug won’t go into the outlet completely, turn the plug over and
try to insert it the other way. If it still won’t fit, contact a qualified electrician to change the
outlet, or use a different one. Do not attempt to bypass this safety feature.
Important Battery Information
to begin playing the tape.
Continuous Tape play
Volume
Use the VOLUME control to increase or decrease the volume.
If you’re not going to use your unit for a month or more, be sure to remove batteries because they can
leak and cause damage.
balance
•
Dispose of batteries in the proper manner, according to federal, state, and local regulations.
Use the BALANCE knob to control the amount of sound coming from the left and right speakers.
•
Any battery may leak electrolyte if mixed with a different battery type, if inserted incorrectly, if all
batteries are not replaced at the same time, if disposed of in fire, or if an attempt is made to charge a
battery not intended to be recharged.
Service Information
This product should be serviced only by those specially trained in appropriate servicing techniques.
For Your Records
In the event that service should be required, you may need both the Model number and the serial number.
In the space below, record the date and place of purchase, and the serial number:
Date of Purchase _______________________
Bass Boost
Turn on BASS BOOST to enhance bass frequencies at low-volume levels. The amount of boost is
decreased as the volume is increased.
Phones Jack
Use the stereo headphone jack to listen privately to your favorite radio station, tapes, or CDs.
2. Press PLAY
3. Press PLAY
on tape deck 2.
and then PAUSE
4. When tape deck 2 finishes playing (reaches the end of the tape), then tape deck 1 pause will
release and automatically begin playing the second tape.
Recording from Radio
WARNING: TO PREVENT FIRE
OR ELECTRICAL SHOCK HAZARD,
DO NOT EXPOSE THIS PRODUCT
TO RAIN OR MOISTURE.
THE LIGHTNING
FLASH AND ARROWHEAD WITHIN THE
TRIANGLE IS A
WA R N I N G S I G N
ALERTING YOU OF
"DANGEROUS
VOLTAGE" INSIDE
THE PRODUCT.
CAUTION: TO REDUCE THE
RISK OF ELECTRIC SHOCK,
DO NOT REMOVE COVER
(OR BACK). NO USERS E RV I C E A B L E PA R T S I N SIDE. REFER SERVICING
TO QUALIFIED SERVICE
PERSONNEL.
SEE MARKING ON BOTTOM / BACK OF PRODUCT
• Adjust volume setting.
• Check for proper connection of speaker wires.
• When TAPE or CD function is selected, make sure PAUSE is not
engaged.
• Make sure you’ve selected the correct function: TUNER,
TAPE, or CD.
• Check for proper connection of speaker wires on the channel
(Left or Right).
• Make sure the balance control is set at mid-range.
During disc play, press and hold SEARCH
or
to speed forward or backward to any point on
the CD. The disc material will be audible, allowing you to scan for a favorite segment or skip a
segment. Release the button and normal play resumes.
CD sound skips
• Clean the CD (as explained in “Care and Maintenance”).
• Check CD for warping, scratches, or other damage.
• Check for vibration or shock that may affect the unit; move
system if necessary.
Repeating Play
Distorted or noisy recordings
• Inspect the recording head and clean it if necessary.
• Demagnetize recording head (as explained in “Care and
Maintenance”).
Searching a cd
The REPEAT button allows you to repeat one track or all tracks while playing a CD. To scroll
through the choices (REPEAT ONE, REPEAT ALL, and OFF), continually press the REPEAT button
and check the display to see which choice you've selected.
•
Press REPEAT once while the program is playing to repeat the current track.
•
Press REPEAT again to repeat the entire program.
or
to choose the track you want to store in the first memory location.
2. Press TRACK
(MEMORY appears in the display.)
5. Press PLAY/PAUSE
. The tracks play in the programmed order. PROGRAM, the current
track number, and the track’s elapsed time appear in the display.
button to begin recording.
5. Press STOP/EJECT to end recording.
Note: During play, you can press TRACK
Recording from the CD player (Synchro-dub)
2. Slide the FUNCTION control to CD.
or
While the CD is stopped, repeatedly press PROGRAM to step through the program in memory.
Editing the program
4. Press RECORD
To replace one of the tracks in your program:
on tape deck 1. The CD begins playing automatically.
Recording from another Cassette
2. Insert a blank cassette tape into tape deck 1. Press PAUSE
, then RECORD
to move through the programmed sequence.
Checking the Program
3. Insert a CD and select the first track you want to record.
•
Repeatedly press PROGRAM while the CD is stopped until the track you want to replace
appears in the display.
•
Press TRACK
or
until the desired track appears in the display, and press PROGRAM.
To add a track to the end of your program:
•
.
or
until you reach the end of the program. Then follow Steps
Repeatedly press TRACK
2 and 3 in “Programming Play Order.”
3. Insert a pre-recorded tape into tape deck 2.
4. Press PLAY
Clearing the Program from memory
on tape deck 2. Pause will release on tape deck 1 and recording will begin.
2. Follow steps 2 - 5 above.
THE EXCLAMATION
POINT WITHIN THE
TRIANGLE IS A
WARNING
SIGN
ALERTING YOU OF
I M P O R T A N T
INSTRUCTIONS
A C C O M PA N Y I N G
T H E P R O D U C T.
No sound
•
•
•
•
Note: When all 21 memory locations have been used, the first programmed track reappears on
the display. When this happens, any track you enter replaces the displayed track.
3. Select a radio station.
1. Slide the FUNCTION control to HIGH SPEED DUB.
RISK OF ELECTRIC SHOCK
DO NOT OPEN
• Make sure power cord is securely plugged into the AC power
outlet or that the batteries are fresh.
• Unplug the unit for a moment, and then plug it back in.
• Check the outlet by plugging in another device.
CD doesn’t play
button on deck 1. Press PAUSE
again to
To cancel the program, press STOP
and OPEN/CLOSE when you are in program mode.
You can record a cassette in half the time by using the high speed tape dubbing feature.
CAUTION
System doesn’t turn on
Momentarily press TRACK
or
to move to the beginning of a track on the CD. To switch
to another track on the CD, repeatedly press and release the buttons.
4. Repeat Steps 2 and 3 to store additional tracks in memory.
1. Insert a blank cassette tape into tape deck 1.
4. Press the RECORD
Solution
• Adjust the FM antenna wire for better FM reception .
• Rotate the unit to achieve better AM reception.
• Try turning off electrical appliances near the unit, such as hair
dryers, vacuum cleaners, or fluorescent lights.
3. Press PROGRAM to enter the track into memory.
5. To stop recording on tape deck 1, just press the PAUSE
resume recording.
Serial No. _______________________________
Troubleshooting Tips
Poor radio reception
1. Press PROGRAM to enter Program mode.
on tape deck 1.
1. Select the TAPE function.
Turn on STEREO WIDE to expand the stereo image.
Place of Purchase _______________________
During disc play, or in the Pause or Stop modes, you can skip forward or backward to the
beginning of any selection on the disc by using the TRACK
and
buttons.
You can program up to 21 tracks on a CD to play in the order you choose. The CD player must be
stopped before you program tracks.
1. Insert a blank cassette tape into tape deck 1.
STEREO WIDE CONTROL
Model No. RP-7953
Do not allow any cleaning material to fall into the tape assembly.
No sound from one channel
Programming Play Order
2. Slide the FUNCTION control to TUNER.
•
Discard leaky batteries immediately. Leaking batteries can cause skin burns or other personal injury.
•
Make sure the tray contains a CD.
Make sure that CD’s label is facing up.
Make sure that Pause mode is not activated.
Make sure CD function is selected.
The Repeat feature can also be used in the CD program mode.
to move the tape to the desired starting point.
1. Insert pre-recorded cassette tapes into tape deck 1 and 2. Close both tape deck doors.
Do not touch the player with wet hands. If any liquid enters the player cabinet, take the player to a
trained service technician for inspection.
For Your Safety
•
3. Insert a cassette by gently sliding it into the cassette carry compartment in the door with the
exposed tape downward. Note that an internal interlock prevents the cassette door from opening
unless all controls are in their off (up) position.
You can play two different cassette tapes.
Precautions
Never open the cabinet under any circumstances. Never operate this product with the cabinet removed.
Any repairs or internal adjustments should be made only by a trained service technician.
Never use any metal objects on or near the tape heads.
You can play cassettes from either of the two tape decks.
1. Slide the FUNCTION control to TAPE.
TUNING
BASS BOOST
LEFT
•
again to resume play.
Switching Tracks
— From stop mode, press to advance the tape toward the end.
Playing Cassette Tapes
kHz
BALANCE
Demagnetize the head occasionally with a head demagnetizing cassette (available from many audio
equipment stores).
— From stop mode, press to rewind the tape toward the beginning.
MHz
VOLUME
•
.
Automatic Stop Feature
M U LT I F U N C T I O N D I S P L A Y
•
— Press to play cassettes.
PAUSE — Press to interrupt tape play or record mode. Press a second time to resume tape play
or tape record mode.
TRACK
Clean heads after every 25 hours of use.
Problem
to stop disc play.
To temporarily stop playing a CD, press PLAY•PAUSE
STOP/EJECT — Press to stop current tape activity, or to open the cassette compartment door when
no buttons are active.
SEARCH
Model RP-7953
347A8208-0001 (E/S Rev. 0)
96-30
Printed in China
buttons to choose a track.
If you know what each button does, it’s easy to figure out how to operate the tape deck.
F FWD
Headset Safety
and
Pausing Disc Play
REWIND
General Controls
to begin play.
Understanding the Buttons
PLAY
This product complies with DHHS Rules 21 CFR Subchapter J. Applicable at the date of manufacture.
•
Clean these parts
2. Press the OPEN/CLOSE button to open the CD door.
PAUSE
Antennas
Reorient the receiving antenna (that is, the antenna for the radio or television that is “receiving” the
interference).
To clean the cassette tape deck, open the
compartment door, push the PLAY button and
gently clean the heads, capstan, and pinch wheel
with a head cleaner.
1. Slide the FUNCTION control to CD.
This device generates and uses radio frequency (RF) energy, and if not installed and used properly, this
equipment may cause interference to radio and television reception.
•
Always unplug the power cord before cleaning, and
allow 30 minutes drying time when using a liquid
cleaner.
TAPE
P L AY B A C K
R E C / P L AY
This device complies with Part 15 of the FCC Rules. Operation is subject to the following two conditions: (1)
This device may not cause harmful interference, and (2) this device must accept any interference received,
including interference that may cause undesired operation.
TUNING
BALANCE
POWER
Powering Up
Don’t expose tapes to sunlight or store in hot places. High temperatures may warp the shell or damage
the tape itself.
Keep cassettes in their boxes when not in use.
Cassette tapes can be erased by magnetic fields produced by magnets, electric motors, electrical
transformers, and other devices. Keep tapes away from magnets and magnetic fields.
•
•
RP-7953
WARNING: Follow instructions carefully.
System can be damaged if speakers are
improperly connected.
Dirty discs can cause poor sound quality. Always keep discs clean by wiping them gently with a soft
cloth from the inner edge toward the outer perimeter.
If a disc becomes dirty, wet a soft cloth in water, wring it out well, wipe the dirt away gently, and
then remove any water drops with a dry cloth.
Do not use record cleaning sprays or antistatic agents on discs. Also, never clean discs with
benzene, thinner, or other volatile solvents which may cause damage to the disc surface.
TUNING dial
Note that AM stations are broadcast in mono only, and that the FM radio station must be
transmitting in stereo for you to receive it in stereo.
Black
wires
•
•
1. Press in on the tab␣ to open the red terminal and
insert the red wire (+) into the terminal.
2. Press in on the tab␣ to open the black terminal and
insert the black wire (–) into the terminal.
•
•
RIGHT
PHONES
battery power
•
Do not touch the signal surfaces. Hold by the edges, or by one edge and the hole.
Do not affix labels or adhesive tape to the label surfaces. Also, do not scratch or damage
the label.
Discs rotate at high speeds inside the player. Do not use damaged (cracked or warped) discs.
MHz
BALANCE
LEFT
07
03 : 15
kHz
VOLUME
POWER
Handling Cds
REPEAT
AC power
cord jack
Disconnect the system from AC power before cleaning the exterior of the unit with a soft
dust cloth.
Note: For best results, use normal bias tapes.
Using the Stop Button
Press the STOP
button once to terminate CD play.
LIMITED WARRANTY
What your warranty covers:
• Any defect in materials or workmanship.
For how long after your purchase:
• One year.
(The warranty period for rental units begins with the first rental or 45 days from date of
shipment to the rental firm, whichever comes first.)
What we will do:
• Provide you with a new, or at our option, a refurbished unit.
•
The exchange unit is under warranty for the remainder of the original product’s warranty
period.
How to make a warranty claim:
• Properly pack your unit. Include any cables, etc., which were originally provided with the
product. We recommend using the original carton and packing materials.
• Include in the package evidence of purchase date such as the bill of sale. Also print your name
and address and a description of the defect. Send standard UPS or its equivalent to:
Thomson Consumer Electronics, Inc.
Product Exchange Center
32 Spur Drive
El Paso, Texas 79906
• Pay any charges billed to you by the Exchange Center for service not covered by the warranty.
• A new or refurbished unit will be shipped to you prepaid freight.
What your warranty does not cover:
• Customer instruction. (Your Owner’s Manual provides information regarding operating
instructions and user controls. For additional information, ask your dealer.)
• Installation and set-up service adjustments.
• Batteries.
• Damage from misuse or neglect.
• Products which have been modified or incorporated into other products.
• Products purchased or serviced outside the USA.
• Acts of God, such as but not limited to lightning damage.
Product Registration:
• Please complete and mail the Product Registration Card packed with your unit. It will make it
easier to contact you should it ever be necessary. The return of the card is not required for
warranty coverage.
How state law relates to this warranty:
• This warranty gives you specific legal rights, and you may have other rights which vary from
state to state.
If you purchased your product outside the USA:
• This warranty does not apply. Contact your dealer for warranty information.
Lector portátil para DC
Introducción
Utilización de la radio
Comprensión del visor
con dos casetes y sintonizador
digital para AM/FM/FM estéreo
REPEAT 1 ALL
TRACK
PROG
M U LT I F U N C T I O N D I S P L A Y
PLAY•PAUSE
SEARCH
FM
STEREO
PWR ON
FM 8 8
92
AM
600
530
96
700
100
102
104
800 1000 1200 1400
108
1700
STOP
MHz
TUNING
BALANCE
POWER
BASS BOOST
LEFT
STEREO WIDE
RIGHT
PHONES
Conmutador
de bandas
Indicador de
FM estéreo
Tecla del
reforzador de
graves
Para llevar su estéreo a cualquier parte, coloque ocho (8) pilas alcalinas “D” (no suministradas)
en el compartimiento de pilas. Abra la tapa del compartimiento presionando las dos lengüetas y
sáquela. Coloque las pilas como aparece en la parte posterior de la unidad.
Control de
volumen
Perilla de sintonía
Sintonización de las emisoras radiofónicas
SPEAKER
8 OHM
Conexión de los altavoces
+ RIGHT –
Para cada uno de los altavoces:
Deslice el control de funciones a TUNER
•
– LEFT +
1. Oprima la lengüeta para abrir el terminal rojo y
coloque el cable rojo (+) en el terminal.
2. Oprima la lengüeta para abrir el terminal negro y
coloque el cable negro (-) en el terminal.
•
Haga girar la perilla de sintonía para cambiar de emisora.
•
Coloque el volumen y el reforzador de graves en el nivel preferido.
Cambie la posición de la unidad con respecto al equipo de radio o televisión receptor de interferencia.
•
Aleje la unidad del equipo receptor de interferencia.
•
Enchufe la unidad a un tomacorriente de otra pared para que así la unidad y el equipo receptor de interferencia e stén
en circuitos diferentes.
Si oye un zumbido en los oídos, baje el volume o deje de usar el producto.
•
En situaciones potencialmente peligrosas sea extremadamente cuidadoso o deje de utilizar el producto.
•
Si su modelo de audífonos está diseñado para escuchar los ruidos del entorno, no suba en volumen hasta un nivel que
elimine esos ruidos.
PLAY
REWIND
F FWD
STOP/EJECT
PAUSE
PLAY
REWIND
F FWD
STOP/EJECT
PAUSE
Antenas
•
La antena AM está integrada.
•
El cable de la antena de FM está conectado al aparato. Extiéndalo completamente y hágalo girar
hasta obtener una mejor recepción en esa banda.
Audífonos
Teclas
Si usted sabe para qué sirven las teclas, le resultará fácil hacer funcionar el grabador.
Controles generales
PROG
M U LT I F U N C T I O N D I S P L A Y
PLAY•PAUSE
SEARCH
FM 8 8
92
AM
600
530
96
700
100
102
104
800 1000 1200 1400
108
1700
REPEAT
STOP
STEREO WIDE
BAND
FUNCTION
Control de
funciones
Control del
equilibrio
MIN
MAX
AM FM FM STEREO
HIGH SPEED TAPE CD RADIO
DUB
Tecla de
STEREO WIDE
Control del
volumen
Tecla del
reforzador de
graves
Precauciones
Tecla de encendido
Oprima y suelte la tecla POWER (ENCENDIDO) para encender y apagar el aparato.
•
No toque el reproductor con sus manos mojadas. Si algún líquido entra en la caja, lleve el reproductor para inspección
a un técnico entrenado.
Para su seguridad
El enchufe de alimentación eléctrica de corriente alterna está polarizado (una punta del enchufe es más
ancha que la otra) y sólo entra en las tomas de corriente alterna de una sola manera. Si el enchufe no entra
en la toma completamente, déle la vuelta al enchufe e intente insertarlo de la otra manera. Si tampoco
entra en la toma de esa otra manera, solicite los servicios de un electricista cualificado que le cambie la
toma o use otra toma diferente en otro lugar de la casa.
No intente saltarse esta importante característica de seguridad.
REWIND (REBOBINADO)
comienzo.
- Oprima para reproducir casetes.
- Desde el modo de parada, oprima para rebobinar hacia el
- Desde el modo de parada, oprima para avanzar la cinta
•
Si no va a usar su reproductor por un mes o más tiempo, asegúrese de sacar las baterías porque pueden derramar y
dañar la unidad.
•
Disponga de las baterías en la manera apropiada, según las leyes federales, estatales y locales.
•
Cualquier batería puede derramar electrólito si se mezcla con otro tipo de batería, si se inserta incorrectamente, si
todas las baterías no se cambian al mismo tiempo, si se bota en el fuego, o si se trata de recargar una batería que no es
recargable.
•
Descarte inmediatamente las baterías derramadas. La baterías derramadas pueden causar quemaduras en la piel u otros
daños físicos.
Control de funciones
Utilice el control de funciones para pasar de una fuente de sonido otra: TUNER (radio), DC (disco)
o TAPE (cinta).
Cuando el grabador funciona en el modo de reproducción o grabación y la cinta llega al final, el
aparato se detendrá automáticamente y todas las teclas volverán a su posición original. En el
modo de rebobinado y avance rápido, será necesario que usted apague el aparato manualmente,
oprimiendo STOP/EJECT (parada/eyección).
Reproducción de los casetes
Este producto sólo debe ser reparado por un personal especialmente adiestrado en técnicas apropiadas de reparación. Las
instrucciones sobre cómo tener acceso a los servicios de reparación vienen en la garantía incluida en esta guía.
Según algunas leyes estatales y en el caso de que se requieran servicios de reparación, puede ser necesario indicar tanto el
número del modelo como el número del serial. En los siguientes espacios en blanco, anote la fecha y el lugar en que efectuó
la compra y el número de serial de su unidad:
Modélo No. RP-7953
ATTENTION:
Serial No. _____________________________________
ADVERTENCIA: PARA
PREVENIR EL RIESGO DE UNFUEGO O DE
UNA SACUDIDA ELECTRICA, NO EXPONGA
ESTE APARATO A LA LLUVIA O A LA HUMEDAD.
RIESGO DE SACUDIDA
ELÉCTRICA NO ABRA
EL RELÁMPAGO Y LA
PUNTA DE FLECHA
DENTRO DEL TRIÁNGULO ES UNA SEÑAL
DE ADVERTENCIA,
ALERTÁNDOLE
A
UD. DE QUE HAY
"VOLTAJE
PELIGROSO" DENTRO
DEL PRODUCTO.
CUIDADO: PARA REDUCIR
EL RIESGO DE UNA SACUDIDA
ELÉCTRICA,
NO
QUITE
LA
CUBIERTA
(O PARTE POSTERIOR) NO
USE PARTES DE REPUESTO DENTRO. CONSULTE A
ALGUNA PERSONA CALIFICADA DEL SERVICIO DE
REPARACIONES.
EL SIGNO DE EXCLAMACIÓN DENTRO
DEL TRIÁNGULO ES
UNA SEÑAL DE
ADVERTENCIA,
ALTERTÁNDOLE A
UD. DE QUE EL
PRODUCTO, TRAE
INCLUCIDO,
IN
STRUCTIONES MUY
IMPORTANTES.
VEA ADVERTENCIA EN LA PARTE POSTERIOR/BASE DEL PRODUCTO.
TUNING
BALANCE
BASS BOOST
COMO LIMPIAR LOS CABEZALES DE LA CINTA
Las partículas de óxido de hierro de la cinta magnética pueden acumularse en los componentes
que entran en contacto con ella. Estos depósitos de
óxido de hierro pueden causar borraduras
incompletas, sonidos apagados al reproducir las
cintas y pueden impedir efectuar la parada
automática de la cinta.
Limpia estas partes
Para limpiar los cabezales, abre la puertecilla del compartimiento, oprime el botón PLAY y limpia
suavemente los cabezales, el cabrestante y la ruedecilla de deslizamiento de la cinta con un
limpiador de cabezales.
Desconecta siempre el enchufe antes de limpiar la cassettera y permite que transcurran 30
minutos de tiempo de secado cuando utilices un limpiador líquido.
3. Coloque un disco en el compartimiento con la etiqueta hacia arriba y cierre la puerta.
Es preciso limpiar los cabezales cada 25 horas de uso.
para empezar la reproducción.
y
Las cintas contenidas en los cassettes pueden borrarse por la acción de campos magnéticos
producidos por imanes permanentes, motores eléctricos, transformadores eléctricos y otros
artefactos eléctricos. Mantén las cintas lejos de imanes y campos magnéticos.
STEREO WIDE
para seleccionar una pista.
para parar la reproducción del disco.
•
Desmagnetiza el cabezal ocasionalmente con un cassette desmagnetizador de cabezales (que
puedes adquirir en cualquier tienda de equipos de sonido).
•
Nunca utilices objetos metálicos sobre o cerca de los cabezales de la cinta. No permitas que ningún
material de limpieza caiga dentro de los componentes de la cinta.
Detección de fallas
.
Para continuar escuchando el disco, vuelva a oprimir la misma tecla.
Problema
Sistema no se enciende
y
para pasar al comienzo de una pista del DC. Para
Oprima momentánamente TRACK
pasar a otra pista del mismo disco, siga oprimiendo y soltando las teclas.
Durante la reproducción, oprima y mantenga oprimida la tecla SEARCH (búsqueda)
o
para acelerar el desplazamiento hacia adelante o hacia atrás hasta llegar a cualquier punto del
disco que desee encontrar. El sonido podrá escucharse, lo que le permitirá encontrar el segmento
que busca o saltar los que no quiere escuchar. Suelte la tecla y el aparato seguirá reproduciendo
el sonido normalmente.
• Verifique el tomacorriente enchufando otro aparato.
No hay sonido
La tecla REPEAT (repetición) le permite volver a escuchar una sola pista o el disco completo. Para
determinar el modo que desea (repetición de una pista, de todas las pistas o apagado) oprima
continuamente la tecla y controle en el visor el modo seleccionado.
5. Oprima
o F FWD
para poner la cinta en el punto donde quiera comenzar.
6. Oprima PLAY
para comenzar la reproducción de la cinta.
Es posible programar hasta 21 pistas de un disco en el orden que desee. El lector deberá estar
parado antes de programar las pistas.
• Verifique si está bien hecha la conexión de los cables de los altavoces.
• Asegúrese de que seleccionó la función correcta: DISCO, CINTA o
RADIO.
No sale sonido de un canal
• Asegúrese de que el control de equilibrio acústico está en el medio.
Mala recepción de la radio
El disco no se reproduce
2. Oprima TRACK
Volumen
Oprima VOLUME (volumen) para aumentar o disminuir el nivel de volumen.
Equilibrio
Utilice este control para graduar la cantidad de sonido que sale de cada uno de los altavoces.
o
• Asegúrese de que el modo de pausa no está activado.
4. Cuando termine la cinta del compartimiento 2 (fin de la cinta), la cinta en el compartimiento 1
empezará automáticamente a reproducirse.
OBSERVACION: cuando todas las pistas se han guardado en la memoria, la primera pista
programada aparecerá en el visor. Si usted vuelve a programar otra pista, ésta ocupará
el lugar de la que aparece en el visor.
OBSERVACION: durante la reproducción, usted puede oprimir TRACK
pasar de una pista programada a otra.
3. Seleccione la emisora.
para empezar la grabación.
o
para
Verificación del programa
Grabación desde el lector de discos compactos
(Copia sincronizada)
2. Deslice el conmutador de funciones a CD.
Para cambiar una de las pistas de su programación:
Active el reforzador de graves para mejorar las frecuencias graves cuando el volumen está bajo.
El refuerzo de los graves disminuye a medida que va subiendo el volumen.
3. Coloque el disco que quiere grabar y seleccione la primera pista que desea grabar.
•
del compartimiento de casetes. El disco comenzará a reproducirse
•
Grabación desde otro casete
Active esta función para amplificar el efecto de estéreo.
4. Oprima PLAY
grabación.
o ruidosas
• Desmagnetice los cabezales de grabación (tal como se indica en
“Cuidados y mantenimiento”).
Su garantía cubre:
•
Todo defecto de materiales o mano de obra
Vigencia de la garantía:
•
Un año a partir de la fecha de compra
(El período de la garantía para los aparatos de alquiler comienza el primer día de alquiler 0 45 días a
partir de la fecha de envío a la empresa de alquiler, cualquiera sea la fecha que cae primero.)
y luego RECORD
.
en el compartimiento 2. PAUSE se desactivará en la cinta 1 y empezará la
•
Brindarle un aparato nuevo o, si lo consideramos necesario, un aparato reacondicionado.
•
El aparato que se entrega en este caso estará cubierto hasta que termine la garantía del aparato
original.
•
Embalar el aparato como corresponde, incluyendo los cables y otros accesorios que se suministraron con
el producto. Recomendamos utilizar la caja y el material de embalaje que vinieron de fábrica.
•
Colocar en el paquete una prueba de compra que contenga la fecha, como la factura. Además, escribir
en letra de imprenta el nombre y la dirección del remitente y la descripción de la falla. Enviar el
paquete por un servicio de mensajería corriente, como UPS u otro similar a la dirección siguiente:
32 Spur Drive
Oprima varias veces PROGRAM mientras el lector de discos está parado hasta que la pista que desea
cambiar aparezca en el visor.
Oprima TRACK
o
Thomson Consumer Electronics, Inc.
Product Exchange Center
hasta que la pista deseada aparece en el visor y luego oprima PROGRAM.
El Paso, Texas 79906
•
Pagar todos los cargos que le cobre el Centro de Canjes por los servicios no cubiertos por la garantía.
•
Se le enviará un aparato nuevo o reacondicionado con porte pagado.
Para agregar una pista al final de la programación:
Aspectos no cubiertos por la garantía:
•
•
Instrucción a los clientes. (Su Manual de Instrucciones le brinda información sobre el funcionamiento del
aparato y de los controles. Para más detalles, póngase en contacto con su representante).
•
Instalación y ajustes de configuración
•
Pilas
•
Daños debidos al abuso o descuido.
•
Productos que han sido modificados o incorporados en otros productos.
•
Productos adquiridos o reparados fuera de los EE.UU.
•
Casos fortuitos, como daños por descargas eléctricas, etc.
Oprima varias veces TRACK
o
hasta que llegue a la última pista programada. Siga los
pasos 2 y 3 en la sección “Programación del orden de reproducción”.
1. Seleccione la función TAPE.
3. Coloque una cinta grabada en el compartimiento 2.
• Inspeccione el cabezal de grabación y límpielo, si es necesario.
Modificación de la programación
Reforzador de graves
Control de STEREO WIDE
Grabaciones distorsionadas
Reclamo por garantía:
Mientras está parado el lector, oprima varias veces PROGRAM para verificar una por una las pistas
grabadas.
1. Coloque una cinta virgen en el compartimiento 1.
Utilice la entrada de los audífonos estéreo para escuchar solitariamente su emisora de radio,
cinta o disco favoritos.
• Verifique que no haya vibraciones o choques que puedan afectar el
aparato; mueva el aparato si es necesario.
Responsabilidad de la compañía:
1. Coloque una cinta virgen en el compartimiento 1.
4. Oprima la tecla RECORD
automáticamente.
• Limpie el disco (como se explica en “Cuidados y mantenimiento”).
Garantía limitada
5. Oprima PLAY/PAUSE
Las pistas se escucharán en el orden programado. En el visor aparecerá
PROGRAM, el número de la pista que se reproduce y el tiempo transcurrido.
Grabación desde la radio
4. Oprima la tecla RECORD
• Asegúrese de que se ha seleccionado la función DISCO.
El sonido del disco salta
para elegir la pista que quiere guardar en el primer lugar de la memoria.
4. Repita los pasos 2 y 3 para programar las pistas adicionales.
en el compartimiento de la Cinta 1.
• Asegúrese de que la bandeja tiene un disco.
• Asegúrese de que la etiqueta del disco está hacia arriba.
1. Oprima la tecla PROGRAM (programación) para entrar en el modo de programación.
1. Coloque una cinta en cada uno de los compartimientos y ciérrelos.
y luego PAUSE
• Ajuste el cable de la antena de FM para una mejor recepción en esa
banda.
• Apague los aparatos eléctricos que estén cerca del aparato,
especialmente los que tengan motores (p.ej. secadores de pelo y
aspiradoras o tubos fluorescentes).
Programación del orden de reproducción
3. Oprima PROGRAM para guardar la pista en la memoria.
en el compartimiento de la Cinta 2.
• Verifique si está bien hecha la conexión de los cables de los altavoces
en el canal (derecho o izquierdo).
• Verifique que el disco no esté doblado, rayado o tenga otro daño.
Usted podrá escuchar dos casetes diferentes:
2. Oprima PLAY
• Ajuste el volumen.
• Haga girar el aparato para una mejor recepción en AM.
Oprima una segunda vez REPEAT para repetir la programación completa.
3. Oprima PLAY
• Asegúrese de que el cable de alimentación está bien enchufado en un
tomacorriente CA o que las pilas están cargadas.
• Desconecte el aparato por un momento y luego vuelva a enchufarlo.
Repetición
•
Reproducción continua de la cinta
Solucion
• Cuando se ha seleccionado CINTA o DISCO, asegúrese de que no está
activada la pausa.
Oprima una vez REPEAT para repetir la pista actual.
Es posible grabar una cinta en la mitad del tiempo, utilizando la función de copia a alta
velocidad.
Lugar de compra ______________________________
kHz
•
5. Para detener la grabación en el compartimiento 1, oprima PAUSE en dicho compartimiento y
luego vuelva a oprimir la misma tecla para que continue la grabación.
Fecha de compra ______________________________
1700
1. Deslice el control de funciones a TAPE.
2. Oprima STOP/EJECT para abrir una de las puertas de compartimiento del casete.
3. Coloque suavemente una cinta en la puerta, haciendo que la parte superior de la cinta entre
primero. Note que una traba interna impide que la puerta se abra a menos que los controles estén
en la posición desactivada (arriba).
4. Cierre bien la puerta.
2. Coloque la cinta virgen en el compartimiento 1. Oprima PAUSE
Para sus archivos
800 1000 1200 1400
1 0 8 MHz
Mantén los cassettes en sus cajas cuando no los estés utilizando.
•
En el modo de reproducción de piezas de DC programadas en memoria también puede utilizarse
la función de repetición.
2. Deslice el conmutador de funciones a TUNER.
Entrada de audífonos
Información de servicio
104
•
Búsqueda dentro de un disco
5. Oprima STOP/EJECT para terminar la grabación.
Informacion Importante para la bateria
700
102
No expongas las cintas a la luz solar ni las almacenes en lugares calientes. Las temperaturas
elevadas pueden deformar la cubierta de la cinta o dañar la cinta directamente.
RIGHT
PHONES
Advertencia: Este producto no debe funcionar con la caja removida.
600
530
100
Teclas del
lector de
discos
PLAY (REPRODUCCIÓN)
Usted puede reproducir casetes desde uno o desde los dos compartimientos.
TUNING
BASS BOOST
LEFT
Entrada de
audífonos
AM
96
STOP
Durante la reproducción de un disco, o en los modos de pausa o parada, es posible saltar hacia
adelante o hacia atrás hasta el comienzo de cualquier pieza utilizando las teclas TRACK (pistas)
y
.
MHz
kHz
BALANCE
POWER
Tecla de
encendido
92
PLAY•PAUSE
ABRIR/CERRAR
puerta de los
discos
Para cambiar de pista
PAUSE (PAUSA)
- Oprima para interrumpir la reproducción de la cinta o el modo de grabación.
Oprima una segunda vez para volver a reproducir la cinta o para pasar al modo de grabación.
P.O. Box 1976, Indianapolis, IN 46206
© 1996 Thomson Consumer Electronics, Inc.
Trademark(s) ® Registered
Marca(s) Registrada(s)
FM 8 8
REPEAT
RECORD (GRABAR)
- Oprima para grabar desde la radio o el lector de discos. (Tecla en el
compartimiento 1 solamente).
STOP/EJECT (PARADA/EYECCIÓN) - Oprima para parar la cinta actual o para abrir el
compartimiento del casete, cuando las teclas no están activadas.
VOLUME
•
SEARCH
PROG
Para detener momentáneamente la reproducción de un DC, oprima PLAY*PAUSE
FAST FORWARD (AVANCE RÁPIDO)
hacia el final.
TRACK
Bajo ninguna circunstancia debe abrir la caja. Cualquier reparación o ajuste interno debe efectuarse por un técnico
entrenado
M U LT I F U N C T I O N D I S P L A Y
•
Para detener la reproducción
FM
STEREO
•
Utilización del lector de DC
6. Oprima STOP
PWR ON
Modelo RP-7953
347A8208-0001 (E/S Rév. 0)
96-30
Impreso en China
EL CUIDADO DE LAS CINTAS
C O N T I N U O U S P L AY 2 - 1 • TA P E D U B B
ING 2-1
Parada automática
•
No utilices sprays limpiadores o agentes antiestática en el disco. De igual manera, nunca limpies los
discos con benceno, disolventes u otros solventes volátiles que podrían dañar la superficie del disco.
5. Utilice TRACK
Seguridad de audífono
No use los audífonos con el volumen alto. Los expertos en audición desaconsejan el uso continuo de los audífonos.
Aparece cuando la función de repetición está activada.
4. Oprima PLAY/PAUSE
Este producto cumple con la Regla 21 del DHHS Subcapitulo J. Aplicable en la fecha de fabricación.
•
•
REPEAT 1 ALL
2. Oprima OPEN/CLOSE (ABRIR/CERRAR) para abrir la puerta donde van los discos.
RECORD
COMO LIMPIAR LOS DISCOS COMPACTOS
Aparece cuando el aparato está en modo de reproducción de piezas programadas
en memoria.
1. Deslice el control de funciones a CD.
Enchufe el cable de alimentación en la entrada CA de la parte posterior
del aparato y el otro extremo en un tomacorriente que acepte una
clavija polarizada (una clavija más ancha que la otra).
Los discos giran a alta velocidad dentro del reproductor. No utilices discos dañados (con grietas,
deformes o combados).
PROGRAM
Carga y reproducción de discos compactos
Corriente alterna CA
•
Si un disco se ensucia excesivamente, humedécelo con un paño suave empapado en agua. Luego de
exprimir bien el paño, elimina el sucio frotando el disco suavemente y entonces elimina las gotas
de agua sobre el disco con un pañito seco.
TAPE
P L AY B A C K
No adhieras otras etiquetas o cintas adhesivas a las superficies de la etiqueta. De igual modo, no
rayes o dañes la etiqueta original en forma alguna.
•
POWER
2
•
Aparece cuando se hace una programación en memoria.
PWR ON
1
Al sostener los discos, no toques las superficies que contienen señales acústicas. Sosténlos sólo por
los bordes o por un borde y el orificio central.
La presencia de huellas digitales o manchas en la superficie del disco puede causar una pobre
calidad del sonido. Mantén siempre tus discos limpios frotándolos suavemente con un paño suave
desde el borde interno hacia el perímetro exterior, en otras palabras, del centro hacia los bordes.
VOLUME
Para poder escuchar su sistema de estéreo con audífonos (no incluidos) utilice la entrada PHONES
(audífonos) de 3,5 mm, situada en la parte delantera del aparato.
Si estas medidas no eliminan la interferencia, favor de consultar al distribudor o un técnico experto en radio/televisión para
sugerencias adicionales. También, la Comision Federal de Comunicaciones ha preparado un manual útil, “Como Identificar y
Resolver los Problemas de Interferencia Radio/Televisión” (“How to Identify and Resolve Radio TV Interference Problems”).
Este manual puede obtenerse en: U.S. Government Printing Office, Washington, D.C. 20402. Favor de especificar el número
004-000-00345-4 al pedir las copias.
MEMORY
•
•
FM
STEREO
De acuerdo con los requisitos de la Comisión Federal de Comunicaciones (FCC), cambios o modificaciones no aprobadas
explicitamente por Thomsom Consumer Electronics, podrían anular el derecho del usuario para operar este producto.
Reoriente la antena receptora (esto es, la antena de la radio o televisión que esta “recibiendo” la interferencia).
La pista seleccionada del DC (en el modo de reproducción, la pista que se
escucha; en el modo de programación, la que se está programando en la
memoria).
Cables
negros
D DUBBING • AUTO STOP
ONE TOUCH RECORD • C
•
07
Note que las emisoras de AM transmiten en mono solamente y que las emisoras de radio de FM
deben transmitir en estéreo para que usted lo reciba de esa manera.
R E C / P L AY
•
Los minutos y segundos transcurridos de la pista del DC que está escuchando.
Deslice el conmutador de bandas para cambiar la banda de la radio a AM, FM o FM estéreo.
TAPE
Si este equipo causa interferencia a la recepción de radio o televisión (lo cual puede comprobarse desenchufando la
unidad), trate de corregir la interferencia mediante una o más de las siguientes medidas:
03:15
Utilización del grabador para dos casetes
ADVERTENCIA: siga todas las instrucciones
cuidadosamente; el sistema puede
dañarse si los altavoces están conectados
de manera incorrecta.
03 : 15
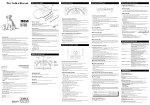
La lista siguiente de la información que aparece en el visor se presenta en orden alfabético y
corresponde a los términos que aparecen en el gráfico precedente.
TRACK
RP-7953
Este equipo ha tenido prueba-tipo y cumple con los límites para un Aparato Computacional Clase B de acuerdo con las
especific aciones del Inciso J de la Parte 15 de los Reglamentos FCC. Estos reglamentos estan diseñados para proveer la
protección razona ble contra la interferencia de radio y televisión en una instalación residencial. De cualquier modo, no
existe garantía de que la interferencia no se produzca en una instalación particular.
Desconecta el sistema de su fuente de alimentación eléctrica de corriente alterna antes de proceder
a limpiar la unidad con la finalidad de prevenir riesgos de incendio o descargas eléctricas.
EL MANEJO DE LOS DISCOS COMPACTOS
MAX
AM FM FM STEREO
HIGH SPEED TAPE CD RADIO
DUB
Pilas
MIN
BAND
FUNCTION
07
Indicador de DC,
REPRODUCCION/
PAUSA
kHz
VOLUME
Este aparato genera y usa energía en radio frecuencia (RF) y si no se instala y usa adecuadamente este equipo puede causa r
interferencia a la recepción de radio y televisión.
•
REPEAT
jack para el
cable de CA
Este dispositivo cumple con la Parte 15 de las reglas de la Comisión Federal de Comunicaciones (FCC). El funcionamiento está
sujeto a las dos condiciones siguientes: (1) Este dispositivo no debe causar interferencia perjudicial, y (2) este dispositivo
tiene que aceptar cualquier interferencia recibida incluyendo interferencia que pueda causar un funcionamiento no
deseado.
COMO LIMPIAR LA PARTE EXTERNA DEL SISTEMA ESTEREO
PROGRAM
MEMORY
AC
Informacion requerida por la comision federal de comunicaciones
CUIDADO Y MANTENIMIENTO
Borrado de la programación
Para borrar la programación de la memoria, oprima STOP
en el modo de programación.
y la tecla OPEN/CLOSE, cuando esté
Tecla de parada
Oprima una vez la tecla STOP
para poner fin a la reproducción del disco.
Registro del producto:
•
1. Deslice el control de funciones a HIGH SPEED DUB (copia a alta velocidad)
2. Siga los pasos 2-5 anteriores.
OBSERVACION: para obtener los mejores resultados, utilice cintas casetes con frecuencia
y polarización normales.
Sírvase completar y enviar la tarjeta de registro del producto, que viene con su aparato. El registro
facilitará el contacto, si fuera necesario. El retorno de la tarjeta no se requiere para la aplicación de la
garantía.
Leyes estatales que se aplican a la garantía:
•
Esta garantía cubre sus derechos legales específicos, pero es posible que usted tenga otros derechos si
cambia de estado.
En caso de comprar el producto fuera de los Estados Unidos:
•
Esta garantía no se aplica. Solicite a su distribuidor información sobre la garantía.