1
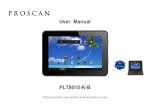
User Manual PLT7810K 8VHU0DQXDO Key points喚 This manual includes security measures and correct operating methods. For personal safety, please make sure to read this manual before using. Thank you! The machine adopts capacitive touch screen, you can just touch it by finger or click with capacitive pen for operation. (Never use the sharp objects to click the screen, or the touch screen may be damaged). Do not put the device at any high temperature, high humidity or dusty place. Do not drop or crash the device to prevent the violent impacting between the display and the capacitive touch screen. Or the customers have to take the consequence by themselves. Please choose the suitable volume and never make the too loud volume .If you feel uncomfortable please turn down the volume or stop to use the device soon. Please charge if you meet those situations as below: AǃLow battery on the battery icon. BǃThe system turns off automatically. CǃThe keys do not work. Dǃ“ ” is battery charging. ǏNoteǐ:Don’t use the different type charger or it may make the device burned. We assume no liability for the damage. Please contact with our agent if you need the original adaptor. In the charging processˈthe device may be warning up a little (not too hot), this is normal, and it won’t effect functions. Do not disconnect the device while formatting, downloading or uploading, or it may make the error. Our company won’t bear the duty for the loss of the memory erasing on account of the damage, repair or some other reason. Please operate the device according to the user manual rightly and backup the important data in time. Do not dismantle this device by yourself, and do not polish it with alcohol, dilution, or benzene. Do not use this device where electronics is forbidden, such as on the airplane. Do not use this device while walking and driving, avoiding traffic accident. USB is for transferring data but NOT for charging. Virus can damage this device. So please use proper computer antivirus and keep it updated. For any support needed for this device please contact the company or the authorized distributor. Any unauthorized dismantling of the device will make the warranty null and void. We reserve the right to keep the change of the products, the specification and design is subject to change without notice! Packing List: Please check box for the following items 1. Device 2. User Manual 3. Product Warranty 4. Power Adaptor 5. USB Cable 6. OTG Cable 7. Keyboard & Case Included Other accessories can be purchased at local retailers The accessories may not be compatible with other devices Power Adaptor Specification: INPUT: AC 100-240V 50/60Hz 0.4A OUTPUT: 5.0V 1.5A Device description 1 Camera You can take photos and videos etc.. 2 Touch screen You can click and drag in the touch screen. 3 POWER Keep pressing button over 2 seconds for power on/ off, press button once to turn on screen from sleep mode . 4 Earphone jack: 3.5mm standard earphone jack. 5 Micro USB: Micro-5pin connector 6 DC jack: Connect the power cable to charge to the device. 7 Volume + Turn up the volume. - Turn down the volume. 8 microSD card microSD card slot. 9 RESET: Reset the device. 1 2 3 4 5 6 7 8 8 9 TIPS Note 1. When the battery is low, it will power off automatically. 2. Shutdown illegally, when you restart, device would scan and repair the disk. The screen will stay at the progress bar for a long time . The pictures in the user manual are just for your reference, about the “ ” item, please according to the real products. Setting up for the first time Charging your device For first-time use, you need to charge the device for ten hours. After that you can recharge the device as needed. Connect the DC-in jack to your device and plug the AC adapter into any AC outlet. TIPS : 1. This device adopts built-in polymer battery. Only the specified charger should be used. 2. It is normal for the device s surface to become warm during charging or long periods of use. All devices are factory tested before release. 3. If you do not use this set for a long time, please charge/release it once one month to avoid deep discharge. The damage caused by battery over-consuming is not included in the warranty. Battery Saving To save battery running life, please see below key points. With below suggestions, battery can run longer time after fully charged each time. 1. When device is not in use, press power button once to go to sleep mode. 2. Shut down the applications when not in use. 3. Turn off WLAN when not in use 4. Shut off application sync selection 5. Set a shorter time for display backlight 6. Reduce brightness of display Power On Keep pressing power button over 2 seconds, device will start up opening screen, Android system is activating and enter the main screen. Sleep Mode After devise is on, press power button once and it goes to sleep mode. The screen is now on standby and under low battery consumption. To wake up device, press one more time power button. Power off and Forced Shut down When you are not using the device, keep pressing power button over 2 seconds, the screen will display “shut down”, select “Yes” to power off unit completely. If device is hanging, use a small pin to press Reset hole, it will forced shut down and the device will power on again. Operation of Touch Panel Click -- Use finger or capacity panel pen to touch once, so as to select or activate function, or select menu or turn on applications. 8VHU0DQXDO Tap and hold -- Tap over 2 seconds, it will turn on option list Slide -- Slide up, down, left or right for fast scrolling browsing page and display screen Drag – drag an icon and relocate the position 8VHU0DQXDO Double Click – Double click to enlarge or shrink the display size of picture or under browsing webpage. Shut --Use two fingers at same time on touch panel, to enlarge or to shrink the display scale. Home Screen Google Search List of last running applications Back to Home screen Back to previous screen Display of icons and device status, click to turn on notification screen Shortcut to application Enter applications page 8VHU0DQXDO Home screen with a set of 5 screens, slide left/ right to view individual screen ¾ Change of Wallpaper 1. Tag home screen, it will pop-up wallpaper selection 2. Select preloaded wallpapers or picture as wallpaper 3. Click “setup” to confirm ¾ Add shortcut on Home screen 1. Enter in application page, tag the icon of application 2. Locate the icon to designated position or locate it in another screen ¾ Add Widget in Home Screen 1. Enter application page and slide to Widget page 2. Slide left / right to select widget 3. ag designated widget and locate it in home screen Remark :˖Some widgets is linked to internet service, be careful it will occur data cost Some widgets might only be used in certain countries or under assigned service providers ¾ Relocate the shortcut on Home screen 1. Tag the application icon and move 2. Move icon to the designated position ¾ Cancel shortcut on Home screen 1. Tag the application icon, recycle bin displays on upper screen 2. Drag icon to recycle bin 3. When icon changes to red, let go 8VHU0DQXDO ¾ Notification screen In home screen or under running application, select right side notification screen, check device status and set up below options˖ Icon Icon Description WiFi signal Wifi connection, icon is full under strong signal Battery Status of battery or if device is being charged USB Connection To show if USB port is connected Soft keyboard Turn on soft keyboard, for word typing Screen shot Press power button with volume down simultaneously to take screen shot Applications Internet Browsing Browse internet and bookmark the website Remark ˖Web browser and bookmark might be different in different countries or different service providers 8VHU0DQXDO ¾ Browsing webpage 1. Enter application page, select ”Browser” Icon 2. To brows certain webpage, select URL and input website address, and select “confirm” 3. See below browsing options˖ ķ ĸ Ĺ ĺ Ļ ļ Ľ ľ Ŀ ŀ Open new window Shut down current webpage Go to Next or Previous webpage Accessing webpage, icon becomes “X” when webpage shows Detail message of webpage Enter webpage address or related words Bookmark current page Search message Open bookmark and current visited webpage Option list of browser 8VHU0DQXDO ¾ Browser setting When browsing webpageˈclick upper right cornerĀ āˈadjust setting in the option menu ¾ Current visited webpage 1. Enter application page, click ”Browser” 2. Select bookmark Æ current visited history 3. Select webpage Email Send and Receive email ¾ Setting of email account 1. Enter application page and click ”Email” 2. Enter email address and password 3. Select next step ( for personal email account) or manual setting (for commercial email account) 4. Follow and input the requested setting 5. For setting more than one email account, select Æ setting Æ add email account, repeat steps 2-4. After email account setting, message will be received in device. For more than one email account, switch email account for operation, to receive and send out message. 8VHU0DQXDO ¾ Sending outgoing message 1. Enter application page and select “Email”Æ 2. Type in Recipients ˗Manual input email addressˈuse “ ;” or “,” to separate more than one recipients 3. Type in Subject 4. Type in message in content 5. Select 6. Select for attachments and send out message Remark ˖If user is offlineˈmessage cannot be sent out ¾ Check email message In email account, user can check downloaded message, go online to check new messages. 8VHU0DQXDO Audio player Click “Musicāin application page Music will be categorized by artists, album, and play list. It will display all music insideĀSongsā. Click the song and it will play automatically. 8VHU0DQXDO ¾ Lyrics Sync Lyrics Sync is available in audio player. 1. Copy the LRC file of song in Memoryˈthe lyric file must be same as song name. e.g, “Rolling In The Deep.mp3”ˈthe lyric file must be ”Rolling In The Deep.lrc” 2. When playing songˈclick to turn on Lyrics Sync. Video player Click “Videoāin application page. Video player will search for all supported video files in the device, click the designated video file to play. Camera The built-in front camera can take picture and video file. ¾ Take picture 1. ClickĀCameraāin application page, device is default at picture taking, icon isĀ 2. To take pictureˈclick Ā ā ¾ Video shooting 1. Select recording in video fileˈclickĀ 2. Click Ā āto record video file. 3. Click Ā āagain to stop recording ā ā Camera Setting In camera mode click for set up File Explorer Go to application page and click click to select set up options Explorer Check file user can check and manage files in SD Card In Explorer Internal Memory and USB Connect USB port with OTG cable it shall detect USB device such as memory stick, click Explorer to check files File operation 1. Go to application page and click Explorer 2. Select file or file path 3. Press file or folder over 2 seconds user can operate it through options 4. Select Multi select file or folder select Editor perform function in option list it can manage files under option list. Management of application files Installation of applications In Android system all application files and game files are in APK format APK files can be installed through TF card, internal memory or download from SlideMe and similar third party providers. 1. APK installation from device download APK file from computer, saved it in TF card or in device through OTG cable. Click the APK file under ApkInstaller in application page complete installation. The application icon will be shown in application page. 2. Installation through App stores Connect device with WiFi Click App stores icon select APK file for installation. Uninstall APK file 1. Go to application page and click 2. Select “Manage” 3. Click APK file to uninstall. ApkInstaller Shut down running application 1. Click to have all the running applications. 2. Finger across the special application you want to shut down. Or you may shut down all of them one by one. Connecting to a PC: • You can connect with PC by USB cable attached with the device. You can transfer your personal data to the PC. • Connect the PC and the device, it will change to the USB mode, in this state, realize the files transfer function between the PC and the device. Connecting a USB device: • USB devices are supported, such as a keyboard, mouse through the USB port. • View media files on USB storage with installed photo, music or video applications. Caution : Before removing this USB storage, make sure your device is not accessing data from the USB storage. Inserting the Micro SD card: You may install a Micro SD card to expand your device’s storage space. 1. This device supports Micro SD card up to 32GB capacity. 2. Insert the Micro SD card as shown. Note : Ensure that the Micro SD card is inserted all the way into the card slot. Caution : Before removing this card, make sure your device is not accessing data on the card. Connecting to the Network: Wi-Fi wireless setup: Enter the setting interface, and turn on the Wi-Fi item. The device will automatically search any accessible nearby wireless networks. microSD Commonly used settings Press the setup icon to enter the setting. Wi-Fi: Click ON or OFF to open or close Wi-Fi. When open Wi-Fi the system will scan the wifi signal around automatically. Meanwhile, users could add network manually as well. More: 1. VPN: The users can connect to some special websites by VPN setting. 2. Portable hotspot: You must connect the cable to network (by RJ45 connector) then you can enter the option to open or close the Portable Wi-Fi hotspot , you can also take this device as a Wi-Fi Router. 3. Mobile networks: Connect a USB 3G Dongle setting To insert a USB 3G dongle, the device will connect the Internet automatically. A 3G icon will be displayed on the screen. (Please make sure the 3G SIM card is matching with the 3G dongle well) Remark1 Remark2 After turning on Portable Wi-Fi hotspot Wi-Fi will close automatically. When you use 3G to connect internet you must shut off Wi-Fi first. 8VHU0DQXDO Language & input: 1. Language: Users can choose OSD Languages. 2. KEYBOARD & INPUT METHODS: select language method. 澬Remark澭In this stateͫusers can switch the input method . Date & time: when the internet is connected , turn on “Automatic date & time”ͫ the device can obtain the real date and time from the internet. Accessibility: Rotate screen setting: Enter setting menuAccessibility Æ Auto-rotate screenͫ you can open /close the screen autorotation function. ǏCaution noteǐ USERS are solely responsible for the apps they download, and to ensure that the apps are from an entrusted sources prior to downloading, and the Curtis International Ltd is not liable for any shape or form should the tablet be damaged for something they download. 8VHU0DQXDO Trouble shooting • Can not power on: --Connect the power cable to charge to the device, after a while and then check again. --If it still can not power on, please contact with our distributor or service centre. • Serious noise: --Check if the music file is damaged. --If the music files are damaged, it may cause serious noise and jumping sound. • Can not download or copy: --Check if it is connecting correctly between the device and PC. --Check the spare space of the memory. --Check the USB cable. • USB connect is fail˖ --Make sure that the USB device is securely connected to the USB jack. --Check if the USB device or a cable is damaged. --If the USB device is connected via a USB hub, connect the USB device directly to the device. • Cannot connect the device to the wireless LAN router˖ --Check if the wireless LAN router is on. --Depending on the surrounding environment, such as the wall material, radio wave receiving condition, or obstacles between the device and the wireless LAN router, the communication distance may be shortened. Move the device and the wireless LAN router closer to each other. --Devices that use a 2.4GHz frequency band, such as a microwave, Bluetooth, or digital cordless device, may interrupt the communication. Move the device away from such devices, or turn off such devices. Product OS CPU System RAM Memory LCD Touch Panel WIFI Ethernet LAN Camer(front) Gravity Music format Video format Picture format Battery Specification Google Android 4.1.1 CPU Type: RK2926 512MB DDRIII 4GB NAND Flash 7" LCD 800x 480 5 Point Capacitive touch screen 802.11 b/g/n Yes RJ45 dongle 0.3-megapixel 3D gravity sensor MP3,WMA,FLAC,AAC,OGG,WAV,APE AVI, WMV, MP4, MKV, RM, RMVB, FLV, MOV, 3GP...etc JPEG, JPG, BMP, GIF,PNG 2200mAh / 3.7V Specifications are for reference, to prevail in kind FCC Statement This device complies with Part 15 of the FCC Rules. Operation is subject to the following two conditions: (1) This device may not cause harmful interference. (2) This device must accept any interference received, including interference that may cause undesired operation. Note: The manufacturer is not responsible for any interference, for example RADIO or TV interference, caused by unauthorized modifications to this equipment. Such modifications could void the user's authority to operate the equipment. PLT7810K 0DQXHOGHO XWLOLVDWHXU Information importante Ce manuel comprend des mesures de sécurité et des méthodes d'exploitation appropriées. Pour votre sécurité personnelle, s'il vous plaît lisez ce manuel avant d'utiliser cet appareil. Je vous remercie! L’appareil a un écran tactile capacitif, il vous suffit de toucher avec le doigt ou cliquez avec le stylo capacitif pour faire les opérations. (Ne jamais utiliser les objets pointus pour cliquer sur l'écran, ou l'écran tactile peut être endommagé). N’utilisez pas l’appareil dans un milieu àtempérature et humidité élevée, ou endroit poussiéreux. Ne laissez pas tomber ou écraser l'appareil, éviter de violents contact entre l'écran et l'écran tactile capacitif. S'il vous plaît choisissez le volume adéquat et éviter d’utiliser un volume élevé. Si vous vous sentez mal à l'aise, s'il vous plaît baissez le volume ou arrêtez d'utiliser l'appareil le plus tôt possible. S'il vous plaît mettez l’appareil au chargeur dans les cas suivant: AǃL'icône de la batterie s’affiche. BǃLe système s’éteint automatiquement. CǃLes touches ne fonctionnent pas. Dǃ“ ”la batterie est en charge. ǏRemarqueǐ:Il ne faut pas utiliser le chargeur de type différent car il peut brûler l’appareil . Nous n’assumons aucune responsabilité pour ces dommages. S’il vous plaît contacter un agent local si vous avez besoin d’un adaptateur original. Lors de la mise en charge, l’appareil peut chauffé un peu (pas trop),ce qui est normal, et il n’affectera pas les bons fonctionnements. Il ne faut pas débrancher l’appareil pendant le formatage, ou le téléchargement, ou il peut donner des erreurs. Notre entreprise n’assume aucune responsabilité quand vous perdez l’efficacité des mémoires dues aux dommages, réparation ou toute autre raison. S'il vous plaît utiliser l'appareil conformément au manuel d’utilisation et sauvegarder les données importantes à temps. Il ne faut pas démonter cet appareil vous-même, et ne pas le nettoyer avec l’alcool, la dilution, ou le benzène. Il ne faut pas utiliser cet appareil où les équipements l'électronique sont interdits, comme dans l'avion. Il ne faut pas utiliser cet appareil en marchant ou dans la voiture, pour éviter les accidents. La clé USB est utilisée pour le transfert des données mais PAS pour charger l’appareil. Le virus peut endommager cet appareil. Alors s'il vous plaît utilisez un antivirus approprié et faire la mise à jour Le Système Android occupera l'espace de mémoire flash NAND, il occupe un espace dans «Total espace / espace disponible », l’installation Apps par défaut est stocké ici. En cas d’absence de l’espace, il est recommandé à l’utilisateur d’installer les applications dans le Mini SD (Exclu). Si plusieurs programmes sont en cours d'exécution simultanément, le système devient lent, donc, s il vous plaît fermer quelques unes des applications, dans les Paramètres Apps. Pour toute autre aide nécessaire pour le fonctionnement de cet appareil s il vous plaît contacter la société ou le distributeur agréé. Tout démontage non autorisée de l appareil annulera la garantie. Nous nous réservons le droit de changer les produits, la spécification et la conception sont sujettes à modification sans préavis! Packing List S'il vous plaît case à cocher pour les éléments suivants 1. Device 2. Manuel de l'utilisateur, 3. Product garantie 4. Adaptateur, 5. Câble USB 6. Câble OTG 7. Clavier et étui inclus D'autres accessoires peuvent être achetés au niveau local détaillants . Les accessoires peuvent ne pas être compatibles avec d'autres appareils Spécification Adaptateur: Entrée: AC 100-240V 50/60Hz 0.4A MAX SORTIE: 5.0V 1.5A 1 1 2 2 3 3 4 5 6 7 4 5 6 7 + - 8 MicroSD card slot. 9 Réinitialiser: Réinitialise l'appareil. 8 9 8 0DQXHOGHO XWLOLVDWHXU Allumer Appuyez sur le bouton Power pendant 2 secondes, l’appareil est allumé avec l’écran de OPENING, le système Androit est activé et entre le menu principal. Mode de veille Après avoir allumé l’appareil, appuyez sur le bouton OFF une fois et il entre le mode de veille. L'écran est maintenante en attente et en mode de sous-consommation de batterie. Pour réveiller l’appareil, appuyez encore une fois le bouton Power. Éteinte et fermeture forcée Quand vous n’utilisez pas l’appareil, appuyez sur le bouton Power pendant 2 secondes, l’écran affiche “Éteindre”, sélectionnez “Oui” pour éteindre complètement l’appareil. Fonctionnement de l’écran tactile Cliquez - Utilisez doigt ou le stylet de capacité à toucher l’écran une fois, en vue de sélectionner ou activer une fonction ou sélectionner le menu ou activer des applications. 0DQXHOGHO XWLOLVDWHXU Appuyer et maintenir - Appuyez plus de 2 secondes, il affiche la liste des options Glisser - Faites glisser en haut, en bas, à la gauche ou à la droite pour faire défiler rapidement la page de navigation et l’ écran d'affichage Traîner- déplacez une icône et changez la position 0DQXHOGHO XWLOLVDWHXU Double Click – Double cliquez pour agrandir ou réduire la taille d'affichage de l'image ou la page Web au cours de navigation. Shut - Utilisez deux doigts en même temps sur l'écran tactile, d'agrandir ou de rétrécir l'échelle d'affichage Manuel de l'utilisateur Écran d’accueil Google Recherche Liste des dernières applications en cours d'exécution Retour à l'écran d'accueil Revenir à l'écran précédent Affichage des icônes et des état de l'appareil, cliquer pour allumer l'écran de notification Raccourci de l'application Entrez page des applications 0DQXHOGHO XWLOLVDWHXU Écran d'accueil avec un ensemble de 5 écrans, glissez vers la gauche / droite pour afficher l'écran individuel ¾ Changement du fond d’écran 1. Sur l'écran d'accueil, faitez afficher la sélection de fond d’écran 2. sélectionnez les papiers de fond préchargés ou une image comme fond d'écran 3. Cliquez sur "Définition" pour confirmer ¾ Ajouter les icones de raccourci sur l’écran d’accueil 1. Entrez la page de l'application et faites glisser sur la page Widget 2. Faites glisser vers la gauche / droite pour sélectionner widget 3. Traînez le widget désigné et le situez dans l'écran d'accueil Remarque : Certains widgets sont liés au service internet, attention qu’il se produira le coût des données Certains widgets peuvent être utilisés que dans certains pays ou dans les fournisseurs de services attribués ¾ Relocaliser le raccourci sur l’écran d’accueil 1. Traînez l'icône de l'application et la corbeille s'affiche sur l'écran supérieur 2. Faites glisser l'icône vers la corbeille 3. Quand l’icône se transforme en rouge, relâchez 0DQXHOGHO XWLOLVDWHXU ¾ Notification de l’écran Dans l'écran d'accueil ou sous l'application, sélectionnez à la côté droite la notification de l'écran, vous pouvez consulter l'état du dispositif et mettre en place des options ci-dessous Icon Icon Description WiFi signal Wifi connection, icon is full under strong signal Battery Status of battery or if device is being charged USB Connection To show if USB port is connected Soft keyboard Turn on soft keyboard, for word typing Screen shot Press power button with volume down simultaneously to take screen shot Applications Navigation Internet Naviguer sur Internet et mettre en favoris le site Remarque: le navigateur Web et le favoris peut être différent selon les pays ou les fournisseurs de services différent 0DQXHOGHO XWLOLVDWHXU ¾ Page de navigation 1. Entrez la page de l'application, sélectionnez l’icône "Navigateur" 2. Pour naviguer sur un certain webpage, sélectionnez URL et tappez le site Web, puis sélectionnez "confirmer" 3. Ci-dessous les options de navigation: ķ ĸ Ĺ ĺ Ļ ļ Ľ ľ Ŀ ŀ Ouvrir une nouvelle fenêtre Arrêter la page Web en cours Aller à la page Web suivante ou précédente Accès à la page Web, l'icône devient "X" lorsque la page Web s’affiche Détail de message de la page Web Entrer l'adresse Web ou mots liés Liste des options du navigateur Ouvrir le favoris et la page web en cours Message de chercher Mettre en favoris la page en cours 0DQXHOGHO XWLOLVDWHXU ¾ Configuration de navigateur Lors de la navigation, cliquez sur le coin supérieur droit " ", ajustez la configuration dans le menu d'options ¾ La webpage en cours de visite 1. Entrez la page de l'application, cliquez "Navigateur" 2. Selectionnez le favoris Æ histoire de visite en cours 3. Sélectionnez la webpage Email Envoyer et recevoir émail ¾ Paramétrage du compte émail 1. Entrez la page de l'application et cliquez sur "Envoyer" 2. Entrez l'adresse e-mail et mot de passe 3. Sélectionnez l'étape suivante (pour le compte émail personnel) ou paramétrage manuelle (pour le compte émail commercial) 4. Suivez et entrez la paramétrage souhaitée 5, pour définir plus d'un compte émail, sélectionnez Æ paramètrage Æ ajouter le compte émail, répétez les étapes 2-4. Après la configuration du compte e-mail, un message sera reçu dans l'appareil. Pour plus d'un compte émail, changez le compte pour l’opération, de recevoir et d'envoyer un message. 0DQXHOGHO XWLOLVDWHXU ¾ Envoi du message sortant 1. Entrez la page de l'application et sélectionnez "E-mail"Æ 2. Tappez le destinaire;ajoutez manuellement l’adresse émail, utilisez :ou, pour séparer plusieurs destinataires 3. Tappez le sujet 4. Tappez le message dans le contenu 5. Sélectionnez pour les pièces jointes 6. Sélectionnez et envoyez un message Remarque: Si l'utilisateur est déconnecté, le message ne peut pas être envoyé ¾ Vérifiez l’émail Dans le compte e-mail, l'utilisateur peut vérifier le message téléchargé, connectez-vous en ligne pour vérifier les nouveaux messages. 0DQXHOGHO XWLOLVDWHXU Lecteur Audio Cliquez sur "Musique" dans la page de l'application Les musiques seront classés par artistes, album, et liste de lecture. Il permet d'afficher toutes les musiques à l'intérieur de "Songs". Cliquez sur la chanson et il va jouer automatiquement. 0DQXHOGHO XWLOLVDWHXU ¾ Sync Lyrics Synchronisation des paroles est disponible en lecteur audio. 1. Copiez le fichier LRC de la chanson dans la mémoire, le fichier des paroles doit avoir le même nom que celui de la chanson par exemple, "Rolling In The Deep.mp3", le fichier des paroles doit être nommé "Rolling In The Deep.lrc" 2. Lors de la lecture de chanson, cliquez pour mettre la synchronisation des paroles. Lecteur Video Cliquez sur "Vidéo" dans la page de l'application. Le lecteur vidéo va rechercher tous les fichiers vidéo dans l’appareil, cliquez sur le fichier vidéo désigné pour jouer. Caméra La caméra intégrée à l'avant pouvant prendre des photos et de fichiers vidéo. ¾ Prendre les photos 1. Cliquez sur "Camera" dans la page de l'application, l'appareil est par défaut à la prise de photo, l'icône est " 2. Pour prendre une photo, cliquez sur " " " 0DQXHOGHO XWLOLVDWHXU ¾ Filmage de vidéo 1. Sélectionnez l'enregistrement dans le fichier vidéo, cliquez sur " 2. Cliquez sur " " " pour enregistrer le fichier vidéo. " pour arrêter l'enregistrement 3. Cliquez encore sur " ¾ Paramétrage de caméra ¾ En mode d’appareil photo, cliquez sur " " pour la configuration, cliquez sur " " pour sélectionner les options mises en place Fichier Explorateur Allez à la page de l’application et cliquez sur ĀExplorerā ¾ Vérifier le fichier Dans "Explorer", l'utilisateur peut vérifier et gérer les fichiers de la carte SD, de la mémoire interne et dans la clé USB. Connectez le port USB avec la câble OTG, il doit détecter un périphérique USB comme une clé USB, cliquez sur "Explorer" pour vérifier les fichiers ¾ Opération de fichier 1. Allez à la page de l’application et cliquez sur "Explorer". 2. Sélectionnez le fichier ou le chemin du fichier 3. Appuyez sur un fichier ou un dossier pendant plus de 2 secondes, l'utilisateur peut le faire fonctionner par les options 4. Sélectionnez Multi, sélectionnez un fichier ou un dossier, sélectionnez Editeur, effectuez la fonction dans la liste des options, il peut gérer les fichiers dans la liste des options. 2.Installation par “App stores”: Connectez l’appareil avec Wi-Fi, cliquez sur l’icone “App stores”, selectionnez le fichier APK pour ACliquezpour avoir toutes les applications en cours d'exécution. Doigt sur la demande spéciale que vous voulez fermer down.Or vous pouvez éteindre tous les un par un. Réinitialisation de l’appareil: Vous devez faire une réinitialisation si votre appareil ne répond pas lorsque les touches sont pressées ou l'écran est touché ou ne répond pas aux entrées de l’écran. Pour réinitialiser votre appareil, utilisez un petit objet mince (comme un trombone) pour appuyer sur le bouton de réinitialisation encastré. Connexion au réseau: 1. Configuration Wi-Fi sans fil: Entrez l'interface réglage, et activer la connexion Wi-Fi. L’appareil va automatiquement rechercher les réseaux sans fil à proximité accessibles . Paramètres couramment utilisés Appuyez sur l'icône d'installation pour entrer le réglage. Wi-Fi: Cliquez sur ON ou OFF pour ouvrir ou fermer la connexion Wi-Fi. Lorsque Wi-Fi est ouvert, le système va scanner le signal wifi automatiquement. Pendant ce temps, les utilisateurs peuvent ajouter manuellement le réseau . En savoir plus ...: 1.VPN : Les utilisateurs peuvent se connecter à certains sites particuliers en fixant VPN. 2. Hotspot portable: Vous devez connecter le câble au réseau (par le connecteur RJ45), vous pouvez accéder à l'option ouvrir ou fermer le "Portable Wi-Fi", vous pouvez aussi prendre cet appareil comme un routeur Wi-Fi. 3. Réseaux mobiles: Branchez une clé USB 3G: Pour insérer une clé USB 3G, l'appareil se connectera automatiquement à 'internet. Une icône 3G est affichée sur l'écran. (S'il vous plaît assurez-vous que la carte SIM 3G assorti bien avec la clé 3G ) Remarque 1 Remarque 2 : Après avoir allumé "Portable Wi-Fi", une connexion Wi-Fi se fermera automatiquement. : lorsque vous utilisez 3G pour se connecter à Internet, vous devez couper Wi-Fi. 0DQXHOGHO XWLOLVDWHXU Langue & entrée: 1. Langue: Les utilisateurs peuvent choisir les langues OSD. 2. MÉTHODES DE CLAVIER & ENTRÉE: Sélectionner la méthode de la langue d'entrée. 澬Remarque澭 : Dans cet état, les utilisateurs peuvent commuter entre les méthodes. Date & heure: quand l'internet est connecté, mettez sur " date &l'heure automatique", l'appareil peut obtenir la date et l'heure réelle de l'Internet Accessibilité Réglage de l'écran tournant : Entrer dans le menu de réglage: Accessibilité Æ rotation Automatique de l'écran, vous pouvez activer / désactiver la rotation Automatique l'écran . UTILISATEURS sont uniquement responsables pour les apps qu'ils téléchargent et afin que les applications soient d'une sources visées par une stipulation avant de télécharger. Curtis International Ltd décline toute responsabilité pour toute forme si la tablette est endommagé à cause de quelque chose que vous avez télécharger. 0DQXHOGHO XWLOLVDWHXU Dépannage • Impossible de s'allumer: - Branchez le câble d' pour recharger l'appareil, vérifier encore après un certain temps. - Si l’alimentation échoués après la mise en charge, s’il vous plaît télécharger le firmware et améliorer le dispositif sur www.curtisint.com en utilisant un PC. - Si elle ne peut pas toujours s’allume, s'il vous plaît contactez votre distributeur local ou centre de service. • le bruit grave: - Vérifiez si le fichier de musique est endommagé. - Si les fichiers de musique sont endommagés, il peut provoquer du bruit grave et son interrompu. • Impossible de télécharger ou copier: - Vérifier si la connexion est correctement entre l’appareil et le PC. - Vérifiez l'espace libre de la mémoire. - Vérifiez le câble USB. • La Connexion USB échouée. - Assurez-vous que le périphérique USB est correctement connecté à la prise USB. - Vérifiez si le périphérique USB ou le câble est endommagé. - Si le périphérique USB est connecté via un hub USB, connectez le périphérique USB directement sur le périphérique. • Impossible de se connecter au routeur LAN sans fil - Vérifiez si le routeur LAN sans fil est activée. - En se basant sur le milieu environnant, tels que le matériau du mur, des ondes radio, les conditions de réception, ou des obstacles entre l'appareil et le routeur LAN sans fil, la distance de communication peut être court. Mettez l’appareil et le routeur sans fil plus proche l’un de l'autre. - Les appareils qui utilisent une bande de fréquence de 2,4 GHz, par exemple un micro-ondes, Bluetooth ou un dispositif numérique de fil, peuvent interrompre la communication. Eloignez l'appareil de ces dispositifs, ou de désactiver ces dispositifs. Spécifications du produit OS CPU RAM du Système Mémoire LCD Ecran tactile Google Android 4.1.1 CPU Type: RK2926 512MB DDRIII 4GB NAND Flash 7 " LCD 800 x 480 Écran tactile capacitif WIFI 802.11 b/g/n Ethernet LAN Appareil photo Gravité Format de musique Format vidéo Format de l'image Batterie Oui ( clé USB ) 0.3 méga pixels 3D capteur de gravité MP3,WMA,FLAC,AAC,OGG,WAV,APE AVI, WMV, MP4, MKV, RM, RMVB, FLV, MOV, 3GP...etc JPEG, JPG, BMP, GIF,PNG 2200mAh / 3.7V Les spécifications sont à titre de référence seulement FCC Statement Cet appareil est conforme à la partie 15 des règles FCC. Opération est soumis à deux conditions suivantes : (1) Cet appareil peut causer pas de brouillage préjudiciable. (2) Cet appareil doit accepter toute interférence reçue, y compris les interférences pouvant causer l'opération indésirable. Note : Le fabricant n'est pas responsable de toute interférence, d'interférence RADIO ou TV exemple, causée par modifications non autorisées à cet équipement. Ces modifications pourraient annuler l'utilisateur ' autorisation d'exploiter le matériel.