1
903090 - 06-30-01.qxd
9/25/02
1:52 PM
Page 1
ESPAÑOL: PÁGINA 13
FRANÇAISE : PAGE 23
Instruction
manual
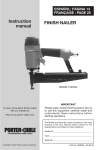
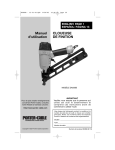
FINISH NAILER
MODEL DA250A
To learn more about Porter-Cable
visit our website at:
http://www.porter-cable.com
IMPORTANT
Please make certain that the person who is
to use this equipment carefully reads and
understands these instructions before
starting operations.
The Model and Serial No. plate is located on the main
housing of the tool. Record these numbers in the
spaces below and retain for future reference.
Model No. ______________________________________
Type ___________________________________________
Serial No. _______________________________________
Copyright © 2001 Porter-Cable Corporation
Part No. 903090 (016)
903090 - 06-30-01.qxd
9/25/02
1:52 PM
Page 2
PORTER✦CABLE
Porter-Cable Corporation
4825 Highway 45 North
Jackson, TN 38305
Matthew G. Popik
Vice President of Engineering
Date of Manufacture:___________________________
Fecha de fabricación:, Date de fabrication:
Serial No:______________________________________
Número de serie:, Nombre d'ordre
2
903090 - 06-30-01.qxd
9/25/02
1:52 PM
Page 3
GENERAL SAFETY RULES
WARNING: When using pneumatic tools, basic safety precautions
should always be followed to reduce the risk of personal injury, including the
following:
READ AND FOLLOW ALL INSTRUCTIONS.
There are certain applications for which this tool was designed. Porter-Cable
strongly recommends that this tool NOT be modified and/or used for any
application other than for which it was designed. If you have any questions
relative to its application DO NOT use the tool until you have written PorterCable and we have advised you.
Technical Service Manager
Porter-Cable Corporation
4825 Highway 45 North
Jackson, TN 38305
1. USE SAFETY GLASSES. To prevent
eye injuries, the tool operator and all
persons in the work area must wear safety
glasses with permanently attached, rigid,
plastic side shields. These safety glasses
must conform to ANSI Z87.1 requirements
(approved glasses have “Z87” printed or
stamped on them). Fig. 1.
2. WEAR EAR PROTECTION to safeguard against possible hearing loss. Fig. 1.
Fig. 1
Fig. 2
3. OPERATOR AND BYSTANDERS WEAR
HARD HAT to safeguard against possible
injuries. Fig. 1.
4. USE CLEAN, DRY, REGULATED compressed air at 70 to 120 PSI, (4.8 to 8.3 BAR).
Fig. 2.
5. DO NOT CONNECT TOOL to pressure
which potentially exceeds 200 PSI (13.7
BAR).
Fig. 3
6. ONLY USE AIR HOSE THAT IS RATED
for a maximum working pressure of at least
150 PSI (10.3 BAR) or 150% of the maximum
system pressure, which ever is greater.
7. NEVER USE OXYGEN, CARBON
DIOXIDE, combustible gases or any other
bottled gas as a power source for this tool:
explosion and serious personal injury could
result. Fig. 3.
8. CONNECT TOOL TO AIR SUPPLY
HOSE with a coupling that automatically
removes all pressure from the tool when the
coupling is disconnected. Fig. 4.
3
Fig. 4
903090 - 06-30-01.qxd
9/25/02
1:52 PM
Page 4
9. D I S C O N N E C T T O O L F R O M A I R
S U P P LY H O S E b e f o r e d o i n g t o o l
maintenance, clearing a jammed fastener,
leaving work area, moving tool to another
location, handing the tool to another person,
or making adjustments. Fig. 4.
Fig. 5
10. NEVER USE A TOOL that is leaking air,
has missing or damaged parts, or requires
repair. Make sure all screws and caps are
securely tightened. Fig. 5.
11. NEVER USE TOOL IF SAFETY, trigger
or springs are inoperable, missing or
damaged. Do not alter or remove safety,
trigger, or springs. Make daily inspections for
free movement of trigger and safety
mechanism. Fig. 5.
12. D O N O T U S E T O O L W I T H O U T
SAFETY WARNING LABEL. If label is
missing, damaged or unreadable, contact
your Porter-Cable Service Center for a
replacement. Fig. 6.
Fig. 6
Fig. 7
13. ONLY USE PARTS, FASTENERS, AND
ACCESSORIES recommended by PorterCable.
14. REMOVE ALL FASTENERS from tool
before connecting to air supply. The tool’s
driving mechanism may cycle when tool is
connected to the air supply. Fig. 7.
15. ALWAYS
ASSUME
THE
TOOL
CONTAINS FASTENERS. Keep the tool
pointed away from yourself and others at all
times. No horseplay. Respect the tool as a
working implement. Fig. 8.
Fig. 8
16. DO NOT LOAD FASTENERS with
trigger or safety depressed, to prevent
unintentional firing of a fastener. Fig. 9.
17. REMOVE FINGER FROM TRIGGER
when not driving fasteners. Never carry tool
with finger on trigger. Tool will fire a fastener
if safety is bumped while trigger is
depressed. Fig. 10.
18. DON’T OVERREACH. Keep proper
footing and balance at all times when using
or handling the tool.
4
Fig. 9
903090 - 06-30-01.qxd
9/25/02
1:53 PM
Page 5
Fig. 10
Fig. 11
19. FIRE FASTENERS INTO WORK
SURFACE ONLY, never into materials too
hard to penetrate. Fig. 11.
Fig. 12
20. GRIP TOOL FIRMLY TO MAINTAIN
CONTROL WHILE allowing tool to recoil
away from work surface as fastener is
driven. If safety element is allowed to
recontact work surface before trigger is
released an unwanted fastener will be fired.
21. DO NOT DRIVE FASTENERS on top of
other fasteners, or with the tool at too steep
an angle: the fasteners can ricochet causing
personal injury. Fig. 12.
Fig. 13A
22. DO NOT DRIVE FASTENERS CLOSE
to the edge of the workpiece. The workpiece
is likely to split allowing the fastener to fly
free or ricochet causing personal injury. Fig.
12.
23. KEEP HANDS AND BODY PARTS
away from area shown in Fig. 13A, to avoid
injury.
Fig. 13B
24. DO NOT USE ON SCAFFOLDINGS
OR LADDERS or for tasks in which
changing location involves the use of
scaffoldings, stairs, ladders, and the like. Do
not use for specific tasks such as closing
boxes or crates or fitting transportation
safety systems on vehicles and wagons.
Fig. 13B.
TECHNICAL SPECIFICATIONS
Noise level . . . . . . . . . . . . . . . . .
A - Weighted sound impulse . .
power level . . . . . 95.1 dBA
P - Emission sound pressure
pressure level . . . 86.3 dBA
Typical Mean
effective Acceleration . . .3.91 m/s2
5
903090 - 06-30-01.qxd
9/25/02
1:53 PM
Page 6
EMPLOYER’S RESPONSIBILITIES
WARNING: Employer must enforce compliance with the safety warnings
and all other instructions contained in this manual.
Keep this manual available for use by all people assigned to use this tool.
For personal safety and proper operation of this tool, read and follow all of
these instructions carefully.
OPERATING INSTRUCTIONS
FOREWORD
Porter-Cable Model DA250A is a heavy duty pneumatic finish nailer. It is
designed to install 15 ga. finish nails of various lengths (from 11/4" to 21/2" long),
see ACCESSORIES Listing in back of this manual.
CAUTION: Use approved Porter-Cable finish nails only (see
ACCESSORIES Listing in back of this manual).
POWER SOURCE
This tool is designed to operate on clean, dry, compressed air at regulated
pressures between 70 and 120 PSI (Pounds per Square Inch)(4.8 to 8.3 BAR).
The preferred system would include a filter, a pressure regulator, and an
automatic oiler located as close to the tool as possible (within 15 ft/4.6 m is
ideal).
All compressed air contains moisture and other contaminates that are
detrimental to internal components of the tool. An air line filter will remove
most of these contaminates and significantly prolong the life of the tool. If an
in-line oiler is not available: place five or six drops of Porter-Cable Air Tool Oil
(see ACCESSORIES), into the tool’s air inlet at the beginning of each workday.
The tool is equipped with a 1/4" male “quick connector”. A 3/8" male “quick
connector” is available from Porter-Cable and may be used in situations where
a 1/4" supply line is not available. A 3/8" supply line (and fittings) are required for
maximum tool performance. The tool must always be connected to the air
supply with a coupling such that all pressure is removed from the tool when the
coupling is disconnected.
WARNING: All air line components (hoses, connectors, filters,
regulators, etc.) must have a minimum working pressure rating of at
least 150 PSI (10.3 BAR) or 150% of maximum system potential,
whichever is higher.
Do not connect this tool to a system with maximum potential
pressure greater than 200 PSI (13.7 BAR).
Only connect tool to air supply with a coupling that will automatically
release all pressure from the tool when disconnected.
Disconnect tool from air supply before performing maintenance,
clearing a jammed fastener, leaving work area, moving tool to another
location, or handing the tool to another person.
6
903090 - 06-30-01.qxd
9/25/02
1:53 PM
Page 7
PREPARING THE TOOL
1. After reading and understanding this entire manual, connect tool to
air supply.
WARNING: Keep tool pointed away from yourself and others at all
times.
Always connect tool to air supply before loading fasteners.(see Fig.
14).
Do not load fasteners with trigger or safety depressed.
Only use approved Porter-Cable fasteners (see ACCESSORIES).
Always wear ANSI Z87.1 approved safety glasses, and hearing
protection when preparing or operating the tool.
Never use a tool that leaks air or needs repair.
2. Orient a strip of nails with points down (see Fig. 15), and align with the
magazine “T” slot.
Fig. 15
Fig. 14
←
←
B
A
←
←
Fig. 16
3. Feed the strip of nails into the magazine
(“T” slot), until they are past the stop (A) Fig. 16.
4. Pull the follower (B) Fig. 17, all the way to
the rear of the magazine and release. The
follower will apply pressure to the strip of nails
to feed it into the driving mechanism.
5. Adjust directional exhaust deflector (A) Fig.
18, so that the exhaust air blast will be directed
away from the operator. The exhaust deflector
provides seven detented positions for directing
the exhaust blast away from the operator.
Grasp the deflector and rotate it to the desired
position for the current application.
7
Fig. 17
A
Fig. 18
903090 - 06-30-01.qxd
9/25/02
1:53 PM
Page 8
USING THE TOOL
Complete all steps of PREPARING THE TOOL before using the tool.
To fire, grip tool firmly, position nose of tool onto work surface, push forward
on tool to depress safety, and squeeze trigger to fire a fastener. This “trigger
fire” method provides the most accurate fastener placement. This tool is
shipped from the factory with a “restrictive fire trigger” that only allows the tool
to be fired this way and is less likely to fire an unwanted fastener.
An alternate “bottom fire trigger” is available. The “bottom fire” trigger allows
the tool to be fired in two different ways.
1. The tool can be fired using the “trigger fire” method described above.
OR
2. Grip tool firmly, depress and hold trigger while pushing the tool firmly
against work surface. The tool will fire a fastener each time the safety is
depressed. This method is known as “bottom fire” and allows very fast
repetitive fastener placement.
The “bottom fire trigger” is available free-of-charge by calling 1-800-321-9443
in the United States and Canada or 001-731-660-9374 outside the United
States and Canada, and providing tool model and serial number. For
identification purposes: the Bottom Fire Trigger is black and the Restrictive Fire
Trigger is red.
WARNING: Remove finger from trigger when not driving fasteners.
Never carry tool with finger on trigger: tool will fire a fastener if safety
is bumped.
WARNING: Keep tool pointed in a safe direction at all times.
WARNING: Never attempt to drive a fastener into material that is too
hard, or at too steep an angle, or near the edge of the workpiece. The
fastener can ricochet causing personal injury.
WARNING: Disconnect tool from air supply before performing
maintenance, clearing a jammed fastener, leaving work area, moving
tool to another location, or handing the tool to another person.
WARNING: Clean and inspect tool daily. Carefully check for proper
operation of trigger and safety mechanism. Do Not use the tool unless
both the trigger and the safety mechanism are functional, or if the tool
is leaking air or needs any other repair.
The depth to which a fastener is driven is controlled by the depth adjustment
knob (A) Fig. 19. The depth of drive is factory adjusted to a nominal setting.
Test fire a fastener and check depth. If a change is desired, rotate the
adjustment knob (A) Fig. 19: the
adjustment knob has detents every 1/4
turn. Rotate the knob clockwise (see
Fig. 19), to increase the depth of
drive, rotate the knob counterclockwise to decrease the depth of drive.
A
Test fire another fastener and check
depth. Repeat as necessary to
achieve desired results. The amount
of air pressure required will vary
depending on the size of the fastener
Fig. 19
and the material being fastened.
8
903090 - 06-30-01.qxd
9/25/02
1:53 PM
Page 9
Experiment with the air pressure setting to determine the lowest setting that
will consistently perform the job at hand. Air pressure in excess of that
required can cause premature wear and/or damage to the tool.
A rubber nose cushion (A) Fig. 22, is provided to reduce marring of the work
surface. The rubber cushion can be pulled off to provide increased depth-ofdrive for toe-nailing applications.
WARNING: Disconnect tool from air supply before removing or reinstalling rubber cushion.
CLEARING A JAMMED FASTENER
1.
WARNING: Disconnect tool from air supply.
2. Remove any remaining fasteners from the nailer.
A. Place finger through hole (A) Fig. 20, and push lever to release follower
mechanism.
B. Slide the follower to the left end of the magazine.
C. Depress the stop (B) Fig. 21, and slide all remaining fasteners out of the
magazine.
3. Open the quick release latch and hinge the fastener guide plate open (B)
Fig. 22.
4. Remove the jammed fastener (see Fig. 23).
5. Close the fastener guide plate and secure with the quick release latch.
Fig. 21
Fig. 20
←
A
Fig. 23
Fig. 22
B
A
9
B
903090 - 06-30-01.qxd
9/25/02
1:53 PM
Page 10
MAINTENANCE
CLEAN AND INSPECT DAILY
WARNING: Disconnect tool from air supply before cleaning and
inspection. Correct all problems before placing the tool back in use.
Wipe tool clean and inspect for wear or damage. Use non-flammable cleaning
solutions to wipe exterior of tool only if necessary. DO NOT SOAK tool with
cleaning solutions. Such solutions can damage internal parts.
Inspect trigger and safety mechanism to assure system is complete and
functional: no loose or missing parts, no binding or sticking parts.
Keep all screws tight. Loose screws can cause personal injury or damage tool.
If tool is used without an in-line oiler: place 5 or 6 drops of Porter-Cable Air
Tool Oil into the air inlet of the tool at the beginning of each workday.
SERVICE AND REPAIRS
All quality tools will eventually require servicing or replacement of parts due to
wear from normal use. These operations should ONLY be performed by either
an AUTHORIZED PORTER-CABLE SERVICE STATION or a PORTERCABLE/DELTA FACTORY SERVICE CENTER. All repairs made by these
agencies are fully guaranteed against defective material and workmanship.
We cannot guarantee repairs made or attempted by anyone other than these
agencies.
Should you have any questions about your tool, feel free to write us at any
time. In any communications, please give all information shown on the
nameplate of your tool (model number, type, serial number, etc.).
TROUBLESHOOTING
WARNING: Disconnect tool from air supply before performing any
Service Procedure.
SYMPTOM
1. Air leak near top of
tool or in trigger area.
PROBLEMS
Loose screws.
Worn or damaged
o-rings or seals.
SOLUTIONS
Tighten screws.
Install Overhaul Kit.
2. Tool does nothing or
operates sluggishly.
Inadequate air supply.
Inadequate lubrication.
Worn or damaged
o-rings or seals.
Verify adequate air supply.
Put 5 or 6 drops of oil into air inlet.
Install Overhaul Kit.
3. Air leak near bottom
of tool.
Loose screws.
Worn or damaged
o-rings or bumper.
Tighten screws.
Install Overhaul Kit.
4. Tool jams frequently.
Incorrect fasteners.
Verify approved fasteners of
correct size.
Replace w/undamaged fasteners.
Tighten screws.
Damaged fasteners.
Magazine or nose
screws loose.
Magazine is dirty.
Driver is worn or damaged.
5. Other.
Clean magazine.
Install “DRIVER” Maintenance Kit.
Contact a Porter-Cable
Service Facility.
10
903090 - 06-30-01.qxd
9/25/02
1:53 PM
Page 11
ACCESSORIES
A complete line of accessories is available from your Porter-Cable • Delta
Supplier, Porter-Cable • Delta Factory Service Centers, and Porter-Cable
Authorized Service Stations. Please visit our Web Site www.porter-cable.com
for a catalog or for the name of your nearest supplier.
WARNING: Since accessories other than those offered by Porter-Cable
• Delta have not been tested with this product, use of such accessories
could be hazardous. For safest operation, only Porter-Cable • Delta
recommended accessories should be used with this product.
CATALOG
NUMBER
DA15125
DA15125-1
DA15150
DA15150-1
DA15175
DA15175-1
DA15200
DA15200-1
DA15250
DA15200G
DA15250G
DA15250G-1
60014
60073
884293
883763
893077
893930
DESCRIPTION
LENGTH
16 Ga. D/A Nail, 11/4"
1000 Pk. of DA15125
15 Ga. D/A Nail, 11/2"
1000 Pk. of DA15150
15 Ga. D/A Nail, 13/4"
1000 Pk. of DA15175
15 Ga. D/A Nail, 2"
1000 Pk. of DA15200
15 Ga. D/A Nail, 21/2"
15 Ga. D/A Nail, 2" (Galvanized)
15 Ga. D/A Nail, 21/2" (Galvanized)
1000 Pk of DA15250G
Driver Maintenance Kit
Overhaul Kit
Oil (for Air Tools)
Safety Glasses
Restrictive Fire Trigger
Bottom Fire Trigger
11
11/4"
11/2"
13/4"
2"
21/2"
2"
21/2"
GAUGE
15
15
15
15
15
15
15
15
15
15
15
15
QTY/
BOX
4000
1000
4000
1000
4000
1000
4000
1000
4000
4000
4000
1000
903090 - 06-30-01.qxd
9/25/02
1:53 PM
Page 12
PORTER-CABLE LIMITED
ONE YEAR WARRANTY
Porter-Cable warrants its nailing and stapling tools for a period of one year from the date of original
purchase. We will repair or replace at our option, any part or parts of the product and accessories
covered under this warranty which, after examination, proves to be defective in workmanship or
material during the warranty period. For repair or replacement return the complete tool or accessory,
transportation prepaid, to your nearest Porter-Cable Service Center or Authorized Service Station.
Proof of purchase may be required. This warranty does not apply to O-rings and Driver Blades or to
repair or replacement required due to misuse, abuse, normal wear and tear or repairs attempted or
made by other than our Service Centers or Authorized Service Stations.
ANY IMPLIED WARRANTY, INCLUDING THE IMPLIED WARRANTIES OF MERCHANTABILITY AND
FITNESS FOR A PARTICULAR PURPOSE, WILL LAST ONLY FOR ONE (1) YEAR FROM THE DATE
OF PURCHASE.
To obtain information on warranty performance please write to: PORTER-CABLE CORPORATION,
4825 Highway 45 North, Jackson, Tennessee 38305; Attention: Product Service. THE FOREGOING
OBLIGATION IS PORTER-CABLE’S SOLE LIABILITY UNDER THIS OR ANY IMPLIED WARRANTY
AND UNDER NO CIRCUMSTANCES SHALL PORTER-CABLE BE LIABLE FOR ANY INCIDENTAL OR
CONSEQUENTIAL DAMAGES. Some states do not allow limitations on how long an implied warranty
lasts or the exclusion or limitation of incidental or consequential damages, so the above limitation or
exclusion may not apply to you.
This warranty gives you specific legal rights and you may also have other legal rights which vary from
state to state.
12
903090 - 06-30-01.qxd
9/25/02
1:53 PM
Page 36
PORTER-CABLE • DELTA SERVICE CENTERS
(CENTROS DE SERVICIO DE PORTER-CABLE • DELTA)
(CENTRE DE SERVICE PORTER-CABLE • DELTA)
Parts and Repair Service for Porter-Cable • Delta Power Tools are Available at These Locations
(Obtenga Refaccion de Partes o Servicio para su Herramienta en los Siguientes Centros de Porter-Cable • Delta)
(Locations où vous trouverez les pièces de rechange nécessaires ainsi qu’un service d’entretien)
ARIZONA
Tempe 85282 (Phoenix)
2400 West Southern Avenue
Suite 105
Phone: (602) 437-1200
Fax: (602) 437-2200
CALIFORNIA
Ontario 91761 (Los Angeles)
3949A East Guasti Road
Phone: (909) 390-5555
Fax: (909) 390-5554
San Leandro 94577 (Oakland)
3039 Teagarden Street
Phone: (510) 357-9762
Fax: (510) 357-7939
FLORIDA
Davie 33314 (Miami)
4343 South State Rd. 7 (441)
Unit #107
Phone: (954) 321-6635
Fax: (954) 321-6638
Tampa 33609
4538 W. Kennedy Boulevard
Phone: (813) 877-9585
Fax: (813) 289-7948
GEORGIA
Forest Park 30297 (Atlanta)
5442 Frontage Road, Suite 112
Phone: (404) 608-0006
Fax: (404) 608-1123
ILLINOIS
Addison 60101 (Chicago)
311 Laura Drive
Phone: (630) 628-6100
Fax: (630) 628-0023
MINNESOTA
Minneapolis 55429
4315 68th Avenue North
Phone: (763) 561-9080
Fax: (763) 561-0653
Woodridge 60517 (Chicago)
2033 West 75th Street
Phone: (630) 910-9200
Fax: (630) 910-0360
MISSOURI
North Kansas City 64116
1141 Swift Avenue
P.O. Box 12393
Phone: (816) 221-2070
Fax: (816) 221-2897
MARYLAND
Elkridge 21075 (Baltimore)
7397-102 Washington Blvd.
Phone: (410) 799-9394
Fax: (410) 799-9398
MASSACHUSETTS
Braintree 02185 (Boston)
719 Granite Street
Phone: (781) 848-9810
Fax: (781) 848-6759
Cleveland 44125
8001 Sweet Valley Drive Unit #19
Phone: (216) 447-9030
Fax: (216) 447-3097
St. Louis 63119
7574 Watson Road
Phone: (314) 968-8950
Fax: (314) 968-2790
NEW YORK
Flushing 11365-1595 (N.Y.C.)
175-25 Horace Harding Expwy.
Phone: (718) 225-2040
Fax: (718) 423-9619
Franklin 02038 (Boston)
Franklin Industrial Park
101E Constitution Blvd.
Phone: (508) 520-8802
Fax: (508) 528-8089
NORTH CAROLINA
Charlotte 28270
9129 Monroe Road, Suite 115
Phone: (704) 841-1176
Fax: (704) 708-4625
MICHIGAN
Madison Heights 48071 (Detroit)
30475 Stephenson Highway
Phone: (248) 597-5000
Fax: (248) 597-5004
OHIO
Columbus 43214
4560 Indianola Avenue
Phone: (614) 263-0929
Fax: (614) 263-1238
OREGON
Portland 97230
4916 NE 122 nd Ave.
Phone: (503) 252-0107
Fax: (503) 252-2123
PENNSYLVANIA
Willow Grove 19090
520 North York Road
Phone: (215) 658-1430
Fax: (215) 658-1433
TEXAS
Carrollton 75006 (Dallas)
1300 Interstate 35 N, Suite 112
Phone: (972) 446-2996
Fax: (972) 446-8157
Houston 77055
West 10 Business Center
1008 Wirt Road, Suite 120
Phone: (713) 682-0334
Fax: (713) 682-4867
WASHINGTON
Renton 98055 (Seattle)
268 Southwest 43rd Street
Phone: (425) 251-6680
Fax: (425) 251-9337
Authorized Service Stations are located in many large cities. Telephone 800-487-8665 or 731-541-6042 for assistance locating one. Parts
and accessories for Porter-Cable • Delta products should be obtained by contacting any Porter-Cable • Delta Distributor, Authorized
Service Center, or Porter-Cable • Delta Factory Service Center. If you do not have access to any of these, call 888-848-5175 and you will
be directed to the nearest Porter-Cable • Delta Factory Service Center. Las Estaciones de Servicio Autorizadas están ubicadas en
muchas grandes ciudades. Llame al 800-487-8665 ó al 731-541-6042 para obtener asistencia a fin de localizar una. Las piezas y los
accesorios para los productos Porter-Cable • Delta deben obtenerse poniéndose en contacto con cualquier distribuidor Porter-Cable •
Delta, Centro de Servicio Autorizado o Centro de Servicio de Fábrica Porter-Cable • Delta. Si no tiene acceso a ninguna de estas
opciones, llame al 888-848-5175 y le dirigirán al Centro de Servicio de Fábrica Porter-Cable • Delta más cercano. Des centres de service
agréés sont situés dans beaucoup de grandes villes. Appelez au 800-487-8665 ou au 731-541-6042 pour obtenir de l’aide pour en
repérer un. Pour obtenir des pièces et accessoires pour les produits Porter-Cable • Delta, s’adresser à tout distributeur Porter-Cable •
Delta, centre de service agréé ou centre de service d’usine Porter-Cable • Delta. Si vous n’avez accès à aucun de ces centres, appeler
le 888-848-5175 et on vous dirigera vers le centre de service d’usine Porter-Cable • Delta le plus proche.
CANADIAN PORTER-CABLE • DELTA SERVICE CENTERS
ALBERTA
Bay 6, 2520-23rd St. N.E.
Calgary, Alberta
T2E 8L2
Phone: (403) 735-6166
Fax: (403) 735-6144
MANITOBA
1699 Dublin Avenue
Winnipeg, Manitoba
R3H 0H2
Phone: (204) 633-9259
Fax: (204) 632-1976
QUÉBEC
1515 Avenue
St-Jean Baptiste, Québec, Québec
G2E 5E2
Phone: (418) 877-7112
Fax: (418) 877-7123
BRITISH COLUMBIA
8520 Baxter Place
Burnaby, B.C.
V5A 4T8
Phone: (604) 420-0102
Fax: (604) 420-3522
ONTARIO
505 Southgate Drive
Guelph, Ontario
N1H 6M7
Phone: (519) 836-2840
Fax: (519) 767-4131
1447, Begin
St-Laurent, (Montréal), Québec
H4R 1V8
Phone: (514) 336-8772
Fax: (514) 336-3505
The following are trademarks of PORTER-CABLE • DELTA (Las siguientes son marcas registradas de PORTER-CABLE • DELTA S.A.) (Les
marques suivantes sont des marques de fabriquant de la PORTER-CABLE • DELTA): BAMMER®, LASERLOC®, OMNIJIG®, POCKET CUTTER®,
PORTA-BAND®, PORTA-PLANE®, PORTER-CABLE®, QUICKSAND®, SANDTRAP®, SAW BOSS®, SPEED-BLOC®, SPEEDMATIC®,
SPEEDTRONIC®, STAIR-EASE®, THE PROFESSIONAL EDGE®, THE PROFESSIONAL SELECT®, TIGER CUB®, TIGER SAW®, TORQ-BUSTER®,
VERSA-PLANE®, WHISPER SERIES®, DURATRONIC™, FRAME SAW™, INNOVATION THAT WORKS™, JETSTREAM™, MICRO-SET™,
MORTEN™, NETWORK™, RIPTIDE™, TRU-MATCH™, WOODWORKER’S CHOICE™, THE AMERICAN WOOD SHOP™ (design) , AUTOSET™, B.O.S.S.™, BUILDER’S SAW™, CONTRACTOR’S SAW™, DELTA™, DELTACRAFT™, HOMECRAFT™, JET-LOCK™, KICKSTAND™,
THE LUMBER COMPANY™ (design). MICRO-SET™, Q3™, QUICKSET II™, QUICKSET PLUS™, SAFEGUARD II™, SANDING CENTER™,
SIDEKICK™, UNIFENCE™, UNIGUARD™, UNIRIP™, UNISAW™, VERSA-FEEDER™ .
Trademarks noted with ™ and ® are registered in the United States Patent and Trademark Office and may also be registered in other countries.
Las Marcas Registradas con el signo de ™ y ® son registradas por la Oficina de Registros y Patentes de los Estados Unidos y también pueden
estar registradas en otros países. Marques déposées, indiquées par la lettre ™ et ®, sont déposées au Bureau des brevets d’invention et
marques déposées aux Etats-Unis et pourraient être déposées aux autres pays.
Printed in U.S.A.