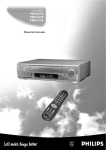
1
TABLE
OF
CONTENTS
Safety Precautions
WARNING
Any unauthorized changes or
modifications to this equipment void
the user’s authority to operate it.
WARNING: DANGEROUS
VOLTAGE INSIDE
WARNING: TO PREVENT FIRE OR SHOCK
HAZARD, DO NOT EXPOSE THIS UNIT
TO RAIN OR MOISTURE.
•
•
The POWER button does not completely shut off the mains power from the
unit, but switches operating current on or off only.
The rating plate is on the rear of the unit.
Introduction
NTSC
Congratulations on purchasing your
new VCR.
Table of Contents
Description of Controls .........................................................................................
Front Panel ........................................
Remote Control (For VR588/55) ......
Remote Control (For VR388/55) ......
Rear Panel .........................................
Display Window ................................
On-Screen Display ............................
3
3
4
6
7
8
8
Getting Connected Up ........................................................................................... 9
VCR to TV Connection .................... 9
VCR to AV TV Connection Using
SCART Cable .................................... 9
Setting Up .............................................................................................................
Setting the Video Channel ...............
Menu Operations .............................
Initial Setup .....................................
Manual Channel Setting ..................
Selecting Colour Mode ...................
10
10
11
11
13
13
Basic Operations ..................................................................................................
Playback ..........................................
Recording ........................................
One Touch Recording (OTR) ..........
Index Search ....................................
Automatic Operations .....................
14
14
14
15
15
15
Advanced Operations ..........................................................................................
Using On-Screen Display ...............
Picture Control ................................
Special Effect Playbacks .................
Tracking Adjustments .....................
Timer Recording .............................
Tape Duplication .............................
16
16
16
16
17
17
19
Before Requesting Service .................................................................................. 20
Specifications ........................................................................................................ 21
You can’t wait to get it working, but
before you do, spare a few moments to
read this brief introduction to the world
of video recording. It may repay you
handsomely in terms of improved
results, and avoiding of costly mistakes.
Positioning
Do not place the VCR directly on top
of, or underneath, your TV set. Ensure
that there is at least 20 cm between the
VCR and the TV set, and that air can
circulate freely through the ventilation
openings of the VCR.
IMPORTANT
Audio-Visual material may consist
of copyrighted works which must
not be recorded without the
authority of the owner of the
copyright.
Please refer to relevant laws in your
country.
—2—
VR388/588-55 EN (N)
PAL
2
6/1/99, 9:01 AM
DESCRIPTION
CONTROLS
OF
Front Panel
6 STOP/EJECT 7 / 0 button
VR588/55
Stops the tape when the tape is running.
(✈P.14)
Press again to eject the cassette when
the tape is not running. (✈P.14)
2
1
4
3
5 6
7
7 PLAY 3 button
Starts normal playback. (✈P.14)
8 AUDIO/VIDEO input jacks
For connecting another VCR or a
portable video camera. (✈P.19)
PLAY
POWER
9 COLOUR MODE button
STOP/EJECT
STILL/PAUSE
/
REW
/ OK
VIDEO
FF
Selects the colour mode both for
playback and recording. (✈P.13)
REC / OTR
AUDIO
COLOUR
MODE
SP SLP
PAL
MENU/EXIT
NTSC
CHANNEL
10 Display window
See page 8.
8
10
9
11
12
13
11 IR (infrared) remote sensor
14 15
Receives the signal from the (IR)
remote control.
VR388/55
2
1
4
3
5 6
12 MENU/EXIT button
7
Display the main menu.
Press again to exit from the menu
operations. (✈P.11)
13 CHANNEL ∞ /5 buttons
• Changes the channels on the VCR.
Release at a desired channel.
• Moves the cursor up and down when
using the menus. (✈P.11)
• Adjusts the tracking during playback,
still picture, and slow motion picture.
(✈P.17)
PLAY
POWER
STOP/EJECT
STILL/PAUSE
/
REW
/ OK
VIDEO
FF
REC / OTR
AUDIO
COLOUR
MODE
SP SLP
PAL
MENU/EXIT
8
10
9
1 POWER button
11
12
NTSC
CHANNEL
13
14 REW (Rewind) 1 button
14 15
• Rewinds the tape when the tape is not
running. (✈P.14)
• Starts reverse rapid visual search
during playback. (✈P.14)
15 FF (Fast forward) ¡ button
3 Cassette Compartment
• Turns the VCR on or off.
• Sets the VCR for an unattended
recording (timer recording) after
timer settings are completed. (✈P.18)
2 STILL/PAUSE 8 button
Stops the tape during recording (pause)
or playback (still picture). (✈P.14, P.16)
Press again to resume normal recording.
Press PLAY 3 to resume normal
playback. Activates slow motion picture
when pressed for more than 2 seconds
during playback.
• Fast forwards the tape when the tape
is not running. (✈P.14)
• Starts forward rapid visual search
during playback. (✈P.14)
Where a video cassette is inserted.
4 3/OK button
Changes the selection when using the
menus. (✈P.11)
5 REC (record)/OTR ¶ button
• Starts recording when pressed once.
(✈P.14)
• Starts a recording for 30 minutes to 9
hours long when pressed more than
once. The shut-off time increases in
30 minute intervals. (✈P.15)
—3—
VR388/588-55 EN (N)
3
6/1/99, 9:01 AM
DESCRIPTION
OF
CONTROLS
(CONTINUED)
Remote Control (For VR588/55)
1 CBL/DBS button
9 EXIT/STATUS button
Does not function for this model.
12
1
2
3
4
CBL / DBS
VCR
TV
13
VCR/TV
POWER
EJECT
14
VOL
CH
SKIP SEARCH
STILL/SLOW
5
6
15
16
/OK
PLAY
17
18
19
20
7
STOP
8
9
SLOW/BACK
SLOW/
FORWARD
-
+
MENU
EXIT/STATUS
TIMER
21
QUICK PROGRAMMING
1
+
4
10
REC
+
2
STOP
START
-
5
3
DATE
-
DAILY
WEEKLY
7
8
9
SPEED
0
CLEAR
/OTR
INDEX
22
6
DBS
23
2 POWER button
Before using this button, press VCR or
TV to select your target component.
• After pressing VCR:
– Turns the VCR on or off.
– Sets the VCR for an unattended
recording (timer recording) after
timer settings are completed.
(✈P.18)
For some Philips TV only:
• After pressing TV, turns the TV on or
off.
3 VCR/TV button
24
25
Using this remote control to
operate other components
You can use this remote control to
operate some of the PHILIPS TVs.
Selects the tape speed for recording (SP,
LP or SLP). During playback, the tape
speed is automatically selected (SP, LP,
or SLP). (✈P.14, P.17)
SP, LP : For PAL signal.
SP, SLP : For NTSC signal.
• Start recording when pressed once.
(✈P.14)
• Starts a recording for 30 minutes to 9
hours long. When pressed more than
once, the shut-off time increases in
30-minute intervals. (✈P.15)
4 SKIP SEARCH button
Skips playback for 30 seconds by time
counter reading.
When pressed more than once up to 4
times, the search time increases in 30second intervals up to 2 minutes.
(✈P.16)
12 TV button
Makes the remote control ready for
operating the TV.
5 VOL (volume) 5 / ∞ buttons
For some Philips TV only:
Changes the TV volume.
Release at desired volume.
6 STILL/SLOW
10 SPEED button
11 REC (record)/OTR button
Does not function for this model.
AUDIO/MUTE
11
Before using this button, press VCR.
• After pressing VCR:
– Displays the time counter, present
time, channel number, and
remaining tape length. (✈P.16)
– Exits from menu operations when
using the menus. (✈P.11)
13 VCR button
Makes the remote control ready for
operating the VCR.
button
Stops the tape during recording (pause)
or playback (still picture) temporarily.
(✈P.14, P.16)
Press again to resume normal recording.
Press PLAY 3 to resume normal
playback. Activates slow motion picture
when pressed for more than 2 seconds
during playback.
7 1 (Rewind) / 2 button
Before using this button, press VCR.
• After pressing VCR:
– Rewinds the tape. Also, during
playback, starts rapid reverse
visual search. (✈P.14)
– Goes back to the previous menu
screen when using the menus.
(✈P.11)
14 EJECT 0 button
Ejects the cassette. (✈P.14)
15 CH (channel) 5 / ∞ button
Before using this button, press VCR or
TV.
• After pressing VCR, changes the
channels on the VCR. Release at a
desired channel.
For some Philips TV only:
• After pressing TV, changes the
channels on the TV. Release at a
desired channel.
16 PLAY 3 / 5 button
Before using this button, press VCR.
• After pressing VCR:
– Starts normal playback. (✈P.14)
– Moves up the cursor when using
the menus. (✈P.11)
8 SLOW/BACK – button
During a slow motion picture, adjust the
playback speed in the reverse direction.
(✈P.16)
—4—
VR388/588-55 EN (N)
4
6/1/99, 9:01 AM
17 ¡ (Fast forward) / 3/OK
button
Before using this button, press VCR.
• After pressing VCR:
– Fast forwards the tape. Also during
playback, starts rapid forward
visual search. (✈P.14)
– Selects the items on the menus or
goes to the next menu screen when
using the menus. (✈P.11)
18 STOP 7 / ∞ button
• Stops the tape. (✈P.14)
• Moves down the cursor when using
the menus. (✈P.11)
19 SLOW/FORWARD + button
During a slow motion picture, adjust the
playback speed in the forward direction.
(✈P.16)
20 MENU button
23 CLEAR button
Before using this button, press VCR.
• After pressing VCR, calls up the
main menu. (✈P.11)
Erases unwanted timer programmes.
(✈P.18)
24 AUDIO/MUTE button
21 TIMER button
For some Philips TV only:
Turns off the TV sound.
Display the Timer Recording menu.
(✈P.17)
25 INDEX 4 / ¢ buttons
22 Number buttons
(0, 1, 2, 3, 4, 5, 6, 7, 8 and
9)
Locates an index marked at the
beginning of every recording. (✈P.15)
Before using these buttons, press VCR.
• Press to select a channel on the VCR.
To select channels 1 to 9, press 0
then the channel you want. For
example, for channel 4, press 0 then
4.
• Also used to programme the Timer
Recordings. (✈P.17)
To insert the batteries:
1
Remove the battery compartment lid
from the bottom of the remote
control.
2
Install two batteries —R6(SUM3)/AA — matching polarity
indicated inside the battery
compartment.
3
Note:
This remote control and batteries are
supplied accessories.
Check to make sure they are included.
Also, check “Specifications” to see what
other accessories are included.
CAUTION
On Battery Replacement
Do not mix old and new batteries.
(Also never mix alkaline batteries
with manganese batteries.)
Replace the lid.
—5—
VR388/588-55 EN (N)
5
6/1/99, 9:01 AM
DESCRIPTION
OF
CONTROLS
(CONTINUED)
Remote Control (For VR388/55)
4 MENU button
1
2
3
4
5
6
7
8
TV
VCR
–
CBL/DBS
EXIT/STATUS
1
+
4
9
11
12
2
+
STOP
PLAY
3
7
STOP
FF /OK
18
19
20
¡
S.SEARCH
3
DATE
5
–
15
16
17
POWER
0EJECT
REW
¶REC/OTR
TIMER
START
10
+
MENU STILL/SLOW
1
13
14
21
CH
6
–
DBS
DAILY
WEEKLY
7
8
9
22
VOL
SPEED
0
CLEAR
23
QUICK PROGRAMMING
VCR/TV
4INDEX ¢ AUDIO/MUTE
24
11 VCR/TV button
Before using this button, press VCR.
• After pressing VCR, calls up the
main menu. (✈P.11)
Does not function for this VCR.
12 INDEX 4 / ¢ buttons
Locates an index marked at the
beginning of every recording. (✈P.15)
5 EXIT/STATUS button
Before using this button, press VCR.
• After pressing VCR:
– Displays the time counter, present
time, channel number, and
remaining tape length. (✈P.16)
– Exits from menu operations when
using the menus. (✈P.11)
13 STILL/SLOW +/– button
• +: During a slow motion picture,
adjust the playback speed in the
forward direction. (✈P.16)
• –: During a slow motion picture,
adjust the playback speed in the
reverse direction. (✈P.16)
6 1 (Rewind) / 2 button
14 VCR button
Before using this button, press VCR.
• After pressing VCR:
– Rewinds the tape. Also, during
playback, starts rapid reverse
visual search. (✈P.14)
– Goes back to the previous menu
screen when using the menus.
(✈P.11)
Makes the remote control ready for
operating the VCR.
15 POWER button
7 TIMER button
Display the Timer Recording menu.
(✈P.17)
8 REC (record)/OTR ¶ button
Using this remote control to
operate PHILIPS TV
You can use this remote control to
operate some of the PHILIPS TVs.
1 TV button
Makes the remote control ready for
operating the TV.
2 CBL/DBS button
Does not function for this VCR.
3 STILL/SLOW button
Stops the tape during recording (pause)
or playback (still picture) temporarily.
(✈P.14, P.16)
Press again to resume normal recording.
Press PLAY 3 to resume normal
playback. Activates slow motion picture
when pressed for more than 2 seconds
during playback.
• Starts recording when pressed once.
(✈P.14)
• Starts a recording for 30 minutes to 9
hours long. When pressed more than
once, the shut-off time increases in
30-minute intervals. (✈P.15)
9 Number buttons
(0, 1, 2, 3, 4, 5, 6, 7, 8 and
9)
Before using these buttons, press VCR.
• Press to select a channel on the VCR.
To select channels 1 to 9, press 0
then the channel you want. For
example, for channel 4, press 0 then
4.
• Also used to programme the Timer
Recordings. (✈P.17)
10 SPEED button
Selects the tape speed for recording (SP,
LP, or SLP).
During playback, the tape speed is
automatically selected (SP, LP, or SLP).
(✈P.14, P.17)
SP, LP : For PAL signal.
SP, SLP : For NTSC signal.
Before using this button, press VCR or
TV to select your target component.
• After pressing VCR:
– Turns the VCR on or off.
– Sets the VCR for an unattended
recording (timer recording) after
timer settings are completed.
(✈P.18)
For some Philips TV only:
• After pressing TV, turns the TV on or
off.
16 PLAY 3 / 5 button
Before using this button, press VCR.
• After pressing VCR:
– Starts normal playback. (✈P.14)
– Moves up the cursor when using
the menus. (✈P.11)
17 EJECT 0 button
Ejects the cassette. (✈P.14)
18 ¡ (Fast forward) / 3/OK
button
Before using this button, press VCR.
• After pressing VCR:
– Fast forwards the tape. Also during
playback, starts rapid forward
visual search. (✈P.14)
– Selects the items on the menus or
goes to the next menu screen when
using the menus. (✈P.11)
19 S. (Skip) SEARCH button
Skips playback for 30 seconds by time
counter reading.
When pressed more than once up to 4
times, the search time increases in 30second intervals up to 2 minutes.
(✈P.16)
—6—
VR388/588-55 EN (N)
6
6/1/99, 9:01 AM
20 STOP 7 / ∞ button
• Stops the tape. (✈P.14)
• Moves down the cursor when using
the menus. (✈P.11)
To insert the batteries:
1
Remove the battery compartment lid
from the bottom of the remote
control.
2
Install two batteries —R6(SUM3)/AA — matching polarity
indicated inside the battery
compartment.
21 CH (channel) 5 / ∞ button
Before using this button, press VCR or
TV.
• After pressing VCR, changes the
channels on the VCR. Release at a
desired channel.
For some Philips TV only:
• After pressing TV, changes the
channels on the TV. Release at a
desired channel.
22 VOL (volume) 5 / ∞ buttons
For some Philips TV only:
Changes the TV volume.
Release at desired volume.
23 CLEAR button
Note:
This remote control and batteries are
supplied accessories.
Check to make sure they are included.
Also, check “Specifications” to see what
other accessories are included.
Erases unwanted timer programmes.
(✈P.18)
24 AUDIO/MUTE button
CAUTION
On Battery Replacement
Do not mix old and new batteries.
(Also never mix alkaline batteries
with manganese batteries.)
For some Philips TV only:
Turns off the TV sound.
3
Replace the lid.
Rear Panel
1
2
3 AV1 IN/OUT terminal
(SCART)
For connecting to the SCART terminal
(21-pin SCART connector) on TV or
another VCR. (✈P.9. P.19.)
ENTREE
ANT.IN
AV1 ENTREE/SORTIE
IN/OUT
ANTENNE
SORTIE
RF. OUT
002
3
1 AC (alternating current)
power cord
Connect the AC power cord to an AC
outlet.
4 RF OUT (output) terminal (to
TV)
Use the supplied RF coaxial cable to
connect this terminal on the TV. (✈P.9)
4
2 ANT. (antenna) IN (input)
terminal (from Antenna)
Connect your antenna or Cable to this
terminal. (✈P.9)
—7—
VR388/588-55 EN (N)
7
6/1/99, 9:01 AM
DESCRIPTION
OF
CONTROLS
(CONTINUED)
Display
Rear Panel
Window
1
2
3
4
SP SLP
5
1 Operation mode indicators
6
3
‡: Lights up during recording.
#: Lights up during playback.
*: Lights up during a pause.
2 Speed indicator
(timer) indicator
5
Lights up when the VCR is set for an
unattended recording (timer recording).
(✈P.18)
6 Digital clock/counter
4 Channel indicator
Indicates the tape speed.
SP – Standard Play
LP – Long Play
SLP – Super Long Play
(For NTSC signal only).
(Cassette-in) indicator
Lights up when there is a cassette in the
VCR.
A channel number selected with the TV
tuner built-in the VCR appears.
When the external line input is selected:
“L-F” appears for the front panel
connectors or “L-1” appears for the rear
panel connectors.
• Normally the present time appears.
• When a tape is inserted, the time
counter appears (and is reset to
0:00:00).
If you always rewind your tapes
completely, you can use this counter
reading as an index to find where a
programme starts.
On-Screen Display
The following information (VCR operating status) appears on the TV screen. (✈P.16)
Operation mode
STOP
15:00
Current time
CH 12
Channel no.
Time Counter
Colour mode
Remaining tape length
Tape speed
AUTO
REMAIN 10:59
SP
0:00:00
INDEX -1
Index no.
Note on the displayed information
• The time counter and remaining tape
length will not be correct when playing
back an NTSC tape.
• When you playback a thin tape like an E160 cassette tape or compact video
cassette tape (VHS-C), the remaining
tape length will flash.
—8—
VR388/588-55 EN (N)
8
6/1/99, 9:02 AM
GETTING CONNECTED UP
VCR to TV Connection
Connection
Diagram
Outdoor antenna
1 Disconnect the antenna or Cable from the TV and the AC power
cord of the TV from the AC outlet.
2 Connect the antenna or Cable to the VCR.
3 Connect the VCR to the TV using the RF coaxial cable.
4 Plug the AC power cords of the VCR and TV into the AC outlets.
Indoor antenna
ANT. IN
Back of TV
ENTREE
ANT.IN
ANTENNE
SORTIE
RF. OUT
AV1 ENTREE/SORTIE
IN/OUT
VHF
002
UHF
Cable
Back of VCR
RF coaxial cable
(supplied)
RF OUT
CAUTION
Do not plug the AC power cords until all
connections are completed.
To watch a picture from this VCR on the TV, select UHF E36
channel (video channel of this VCR when shipped from the factory).
If you want to change video channel, see “Setting the Video Channel” (✈.P10).
VCR to AV TV Connection Using SCART Cable
With this connection, you can get better pictures and sounds when playing back a tape.
To watch a picture from this VCR on the
TV, select the video input on the TV, to which
this VCR is connected.
Use the appropriate SCART cable depending
on the TV’s AV terminal.
Back of TV
Back of VCR
ENTREE
ANT.IN
AV1 ENTREE/SORTIE
IN/OUT
ANTENNE
SORTIE
RF. OUT
002
To AV1 IN/OUT terminal
To AV
terminal
SCART cable
OUT
IN: (Not used)
—9—
VR388/588-55 EN (N)
9
6/1/99, 9:02 AM
SETTING UP
Setting the Video Channel
This VCR is designed to send picture and sound signal on UHF channel E36 to the TV, through the RF coaxial cable.
If you want to change this video channel (E36) to another channel (between E28 to E60), follow the procedure below
before turning on the VCR for the first time.
1 Make sure the VCR is turned off and no cassette is inserted.
2 Turn on the TV, and tune it to any channel (UHF E28 to E60) you want to use as the video channel on the TV.
• Select a channel not used in your area.
3 Press STOP/EJECT 7 /0 on the front panel for more than 5 seconds.
The following indication appears on the display.
TV system number starts flashing.
4 Press CH 5 / ∞ to select an appropriate TV system number for your area.
1: For B/G (West Europe, ASEAN Countries, Australia, New Zealand).
2: For D/K (China, Russia, East Europe).
3: For I (Hong Kong, South Africa, United Kingdom).
5 Press 3/OK.
The channel number starts flashing on the display.
Channel number starts flashing.
6 Press CH 5 / ∞ to select the channel you have tuned on the TV as the video channel in step 2.
A test signal (two vertical white bars) appears on the TV.
Test signal
(two vertical white bars)
If you use only external video input (AV) mode to
watch the picture from this VCR
You can turn off the video channel output. To turn off
the video output channel, press CH ∞ until “– –”
appears on the channel number position.
7 Press 3/OK to finish the video channel setting.
Now you will enter the Initial Setup mode explained on page 11.
To watch a picture from this VCR on the TV, select the same channel you have selected as the video channel (in step 2
above) on the TV.
— 10 —
VR388/588-55 EN (N)
10
6/1/99, 9:02 AM
Operations hereafter are described
using the buttons on the remote
control unless mentioned otherwise.
The buttons on the front panel having
the same (or nearly same) name or
same (or nearly same) mark function
exactly the same as those on the remote
control.
3 Press 5 or ∞ to set the month and
day, then press 3/OK.
IMPORTANT
The setup and adjustment procedures explained hereafter are written
under the following conditions:
• You have turned on the TV and
selected the video channel (or
external video input).
• You have turned on the VCR.
• Each time you press 5 or ∞, the set
date changes by 1-day intervals. If you
hold the button, the set time changes
by 15-day intervals.
4 Press 5 or ∞ to set
the year, then press
3/OK.
Initial Setup
1 Press VCR on the remote control.
• When using the buttons on front
panel, skip this step.
2 Press MENU
SELECT
CHOOSE /OK
(or MENU/
VCR SET UP
TUNER SET UP
INITIAL SET UP
EXIT on the
front panel) to
TO END PUSH EXIT
display the
main menu screen.
3 Press 5 or ∞ (or CHANNEL 5/
∞ on the front panel) to select a
desired feature on the menu, then
press 3/OK.
4 When you select a feature, go to
the section in this manual and
follow the instructions described
there.
To go back to the previous menu
screen, press 2.
To exit from the menu operations,
press EXIT/STATUS (or MENU/
EXIT on the front panel again).
Note:
Menu operating buttons function only
when a menu is on the TV screen. When
no menus is on the TV screen, they
function differently.
For the first time you turn on the VCR,
the VCR automatically enters the Initial
Setup mode unless you have set it.
This mode asks you to set the following
items:
• Selecting the language.
• Setting the clock.
• Selecting the TV system.
• Setting the channels.
Make sure....
• Your VCR, TV, and antenna are
connected correctly.
• The remote control operation mode
is set correctly for operating your
target component.
– Press VCR to operate the VCR.
– Press TV to operate the TV.
1 Select the Language
1 Press VCR.
• When using the buttons on front panel,
skip this step.
SELECT
2 Press POWER.
ENGLISH
The VCR turns
on, then the menu
for selecting the
MAKE SELECTION OR
PUSH /OK TO CONTINUE
language appears.
3 Press 5 or ∞ to select either
” (Chinese), or
“ENGLISH,” “
” (Russian) whichever you
“
want to use on the TV screen.
5 Press EXIT/STATUS to exit from the
menu operations.
The following message appears on
the TV screen.
CONNECT ANTENNA OR CABLE
TO VCR
THEN PUSH
3 Select TV System
1 Press 3/OK.
SELECT
CHOOSE /OK
SYS COUNTRY
B/G W.EUR. ASEAN AUST.
The TV system
NZ
D/K CHINA RUS. E.EUR.
selecting menu
I
HK S.AF. UK
appears on the TV.
TO END PUSH EXIT
2 Press 5 or ∞ to
select the appropriate TV system of
your residential area.
B/G: For West Europe, ASEAN
countries, Australia, New
Zealand.
D/K: For China, Russia, East Europe.
I: For Hong Kong, South Africa,
United Kingdom.
4 Start Auto Programming
Press 3/OK.
Auto programming starts, and the
following message appears on the TV.
AUTO CH.SET PROCEEDING
PLEASE WAIT
START
TIME - - : - DATE 01/01/98
TO SET PUSH
THEN
TO END PUSH EXIT
/OK
• Each time you press 5 or ∞, the set
time changes by 1-minute intervals. If
you hold the button, the set time
changes by 30-minute intervals.
11
FINISH
The local channels receivable in your
area are automatically programmed in
the VCR tuner.
• If “NO TV SIGNALS” appears on the TV
screen, the TV or an antenna is not
connected correctly. Check the connection and press 3/OK again.
To be continued on the next page
— 11 —
VR388/588-55 EN (N)
/OK KEY
OR...
FOR PLAY ONLY–PUSH STOP
2 Set Clock
1 Press 3/OK.
The clock setting
menu appears.
2 Press 5 or ∞ to
set the time, then
press 3/OK.
DATE 21/06/98
• Each time you
TO SET PUSH
THEN /OK
press 5 or ∞, the TO END PUSH EXIT
set date changes by 1-year intervals. If
you hold the button, the set time
changes rapidly.
Menu Operations
Before operating the VCR, be
familiar with the menu operations
first because most of the features
built into the VCR can be available
only on the menus.
TIME 15 : 25
6/1/99, 9:02 AM
SETTING UP
When the auto programming is
completed
The following message appears on the
TV, and the lowest channel will be
tuned in.
AUTO CH.SET COMPLETED
Now you have finished the initial set up
procedure.
If you stop the initial setup procedure while
it is proceeding:
The VCR enters the initial setup mode again
the next time your turn on the VCR.
Initial setup will not start in the following
cases:
• If there is a tape inserted.
• If any one of the initial setup procedures
is finished manually.
To reset the clock manually
You can also reset or correct the clock
manually.
1 Press VCR.
2 Press MENU.
3 Press 5 or ∞ to select “INITIAL
SET UP” then press 3.
The Initial Set Up menu appears.
4 Press 5 or ∞ to select “SET
CLOCK” then press 3/OK.
5 Press 5 or ∞ to set the time, then
press 3/OK.
• Each time you press 5 or ∞, the set
time changes by 1-minute intervals. If
you hold the button, the set time
changes by 30-minute intervals.
6 Press 5 or ∞ to set the month and
day, then press 3/OK.
• Each time you press 5 or ∞, the set
date changes by 1-day intervals. If you
hold the button, the set date changes by
15-day intervals.
7 Press 5 or ∞ to set the year, then
press 3/OK.
• Each time you press 5 or ∞, the set
date changes by 1-year intervals. If you
hold the button, the set year changes
rapidly.
8 Press EXIT/STATUS to exit from
the menu operations.
Note:
If a power failure occurs, clock will lose its
setting.
(CONTINUED)
To change the language
manually
If you want to exchange the
channel positions
You can also change the language
manually.
You can also replace the channel
position numbers.
1 Press VCR.
2 Press MENU.
3 Press 5 or ∞ to select “INITIAL
SET UP” then press 3.
The Initial Set Up menu appears.
4 Press 5 or ∞ to select
“LANGUAGE.”
5 Press 3/OK to select the language
on the TV screen.
Each time you press the button, the
language changes as follows:
EX. Replace channel 9 and channel 3
=English=
=
6 Press EXIT/STATUS to exit from the
menu operations.
1 Press VCR.
2 Press MENU.
3 Press 5 or ∞ to select “TUNER SET
UP” then press 3/OK.
4 Press 5 or ∞ to select “CHANGING
TUNER SET UP” then press 3/OK.
5 Press 5 or ∞ until information for
channel 3 flashes.
6 Press 3/OK once.
Only channel indication for channel
3 starts flashing.
7 Press 0 then 9.
The channel settings for channel 3
and 9 are exchanged.
• If you have accidentally deleted a
channel, press 2.
If you want to delete
unwanted channels
8 Press 3/OK to store the setting.
9 Press EXIT/STATUS to exit from the
menu operations.
You can delete channels manually.
After you have deleted the channels,
they will be not selected by pressing
CH 5/∞.
If the picture is not clear
1 Press VCR.
2 Press MENU.
3 Press 5 or ∞ to select “TUNER SET
UP” then press 3/OK.
4 Press 5 or ∞ to
FRQ SYS CH FRQ SYS
select “CHANG- CH
01 150 BG
07 229 BG
02 165 BG
08 237 BG
195 BG
09 355 BG
ING TUNER SET 03
04 205 BG
10 365 BG
05 213 BG
11 374 BG
UP” then press
06 221 BG
12 384 BG
SELECT=5∞ DELETE=CLEAR
TO
CHANGE
CH
PUSH 3/OK
3/OK.
TO END PUSH EXIT
The programmed
channel information list appears with
the settings of the tuned channel
flashing. (You can also watch the
picture of the tuned channel since the
list and the picture alternates on the
TV.)
5 Press 5 or ∞ until an unwanted
channel setting flashes.
6 Press CLEAR to delete the unwanted
channel.
You need to fine-tune this particular
channel.
EX. Fine-tune channel 3
1 Press VCR.
2 Press MENU.
3 Press 5 or ∞ to select “TUNER SET
UP” then press 3/OK.
4 Press 5 or ∞ to select “CHANGING
TUNER SET UP” then press 3/OK.
5 Press 5 or ∞ until information for
channel 3 flashes.
6 Press 3/OK twice.
Only frequency indication for
channel 3 starts flashing.
7 Press 5 or ∞ to fine-tune the station
until you get the best possible
picture.
8 Press 3/OK to store the setting.
9 Press EXIT/STATUS to exit from the
menu operations.
• If you have accidentally deleted a
channel, press 2.
7 Repeat steps 5 and 6 until you delete
all unwanted channels.
8 Press EXIT/STATUS to exit from the
menu operations.
— 12 —
VR388/588-55 EN (N)
12
6/1/99, 9:02 AM
If no sound comes out
You need to change the TV system for
this particular channel.
EX. Change the TV system for
channel 3
1 Press VCR.
2 Press MENU.
3 Press 5 or ∞ to select “TUNER SET
UP” then press 3/OK.
4 Press 5 or ∞ to select “CHANGING
TUNER SET UP” then press 3/OK.
5 Press 5 or ∞ until information for
channel 3 flashes.
6 Press 3/OK three times.
Only TV system indication for
channel 3 starts flashing.
7 Press 5 or ∞ to select the appropriate TV system (BG, DK, I) so that
sound comes out.
8 Press 3/OK to store the setting.
9 Press EXIT/STATUS to exit from the
menu operations.
If you need to do the auto
programming again
If you move to another place, you may
need to tune the VCR tuner again for
your new residential area.
1 Press VCR.
2 Press MENU.
3 Press 5 or ∞ to select “TUNER SET
UP” then press 3/OK.
4 Press 5 or ∞ to select “AUTO
TUNER SET UP” then 3/OK.
5 Press 5 or ∞ to select the appropriate TV system (B/G, D/K, I) of your
residential area.
6 Press 3/OK.
Auto programming starts.
When it ends, programmed channels,
frequencies, and TV systems are
shown on the display.
7 Press EXIT/STATUS to exit from
the menu operations.
4 Press 5 or ∞ to select “CHANGING
TUNER SET UP” then press 3/OK.
The programmed channel information list appears with the settings of
the tuned channel flashing. (You can
also watch the picture of the tuned
channel since the list and the picture
alternates on the TV.)
2 Select Station
1 Press 5 or ∞ until SELECT CHOOSE
VHF L
an open channel in
VHF H
UHF
which you want to
store a channel
TO END PUSH EXIT
starts flashing,
then press 3/OK.
2 Press 5 or ∞ to select the search
starting band.
VHF L: Starts searching from the
VHF L band.
VHF H: Starts searching from the
VHF H band.
UHF: Starts searching from UHF
band.
3 Press 3/OK.
Searching starts, and when a station
is tuned in, searching stops and the
tuned frequency is shown on the TV.
Then the following menu appears.
SELECT
CHOOSE /OK
STORE CHANNEL
CONTINUE SEARCH
TO END PUSH EXIT
3 Store Channel
Press 5 or ∞ to select “STORE
CHANNEL” then press 3/OK.
The programmed channel information
list appears again with the settings of
the newly tuned channel flashing.
• If you do not want to store this station,
select “CONTINUE SEARCH” then
press 3/OK, searching starts again.
4 Finish Setting
Manual Channel Setting
When you want to do channel setting
manually, follow this procedure.
/OK
Press EXIT/STATUS.
1 Select Tuner Set Up Mode
1 Press VCR.
2 Press MENU.
3 Press 5 or ∞ to select “TUNER SET
UP” then press 3/OK.
The Tuner Set Up menu appears.
Selecting Colour Mode
Before using the VCR, you need to set
the colour mode both for recording and
playback.
Press COLOUR MODE on the front
panel to change the colour system.
For recording:
AUTO: Normally select this mode.
The colour system is
automatically detected.
NTSC3.58: Select this mode if
“AUTO” does not work well
when recording the NTSC
signals. (For playback on an
NTSC TV)
NTSC4.43: Select this mode if
“AUTO” does not work well
when recording the NTSC
signals on the PAL TV. (For
playback on a PAL TV)
PAL: Select this mode if “AUTO”
does not work well when
recording the PAL signals.
MESECAM: Select this mode if
“AUTO” does not work well
when recording the SECAM
signals.
For playback:
AUTO: Normally select this mode.
When you watch a PAL,
NTSC or MESECAM tape,
the colour system is
automatically detected.
NTSC3.58: Select this mode when
you watch an NTSC3.58
tape on an NTSC TV.
NTSC4.43: Select this mode when
you watch an NTSC4.43
tape on a PAL TV.
=PAL TV : Select this mode
NTSC=
when you watch an
NTSC3.58 tape on a PAL
TV.
PAL: Select this mode if “AUTO”
does not work well when
playing back a PAL tape.
MESECAM: Select this mode if
“AUTO” does not work well
when playing back a
MESECAM tape.
When playing back an NTSC tape with
“AUTO” mode selected
The tape is played back using “NTSC3.58”
mode.
— 13 —
VR388/588-55 EN (N)
13
6/1/99, 9:03 AM
BASIC OPERATIONS
To pause recording
Recording
Playback
1 On TV
1 Turn on the TV.
2 Select the video channel (or external
video input).
2 On VCR
When using this VCR, an index mark is
always marked at the beginning of
every recording. This index marks
make it easier for you to search for the
beginning of the recordings (see “Index
Search” (✈P.15). )
• If the record tab on a cassette is removed,
playback will start automatically.
• If a cassette is already in the VCR, turn
on the VCR.
3 Start Playback
• When you want to play back the same
tape repeatedly, press and hold PLAY 3
for more than 5 seconds. (See “Repeat
playback” on page 15.)
To rapidly locate a particular
scene
Press FF ¡ or REW 1 during
playback. (No sound comes out.)
To resume playback, press PLAY 3
again.
• If FF ¡ or REW 1 is held down for
more than 2 seconds, simply releasing it
will cancel the search.
To stop playback
Press STOP 7.
To rewind the tape
Press REW 1 when the tape is not
running.
To fast forward the tape
Press FF ¡ when the tape is not
running.
Press STOP 7.
Select a different channel you want to
watch on the TV.
1 On TV
You can watch the programme of the
selected channel on the TV, without
affecting recording on the VCR.
1 Turn on the TV.
2 Select the video channel (or external
video input).
Press PLAY 3.
To stop recording
To watch another TV
programme while recording
Make sure....
• The record tab on the cassette is not
removed.
Insert a cassette.
The VCR turns on.
Press STILL/SLOW
briefly (or
STILL/PAUSE 8 on the front panel).
To resume recording, press the same
button again.
Erase protection
2 On VCR
Cassettes have the record tab to ensure
that recordings are not accidentally
erased.
Insert a cassette with the record tab in
place.
The VCR turns on.
To prevent accidental erasure:
Break off the record tab with a
screwdriver.
• If a cassette is already in the VCR, turn
on the VCR.
To rewind the tape, press REW 1 .
3 Select Tape Speed
Press SPEED until the desired tape
speed (SP, LP, or SLP) appears on the
display.
SP, LP : For PAL signal.
SP, SLP : For NTSC signal.
To record again:
Cover the opening with adhesive tape.
4 Select a Channel
Press CH 5 / ∞ or Number buttons to
select the channel to record.
5 Start Recording
Adhesive tape
Press REC/OTR ¶.
To eject the tape
Press EJECT 0.
To turn off the VCR
Press POWER.
When playing back an NTSC tape on a
PAL TV
• Some TVs shrink the picture vertically
and place black bars at the top and the
bottom of the TV screen.
• The time counter and remaining tape
length will not be correct.
— 14 —
VR388/588-55 EN (N)
14
6/1/99, 9:03 AM
To check time remaining
during an OTR
One Touch Recording (OTR)
The OTR function lets you quickly
specify how long you want a recording
to continue. You do not have to
programme the timer.
Make sure....
• The record tab on the cassette is not
removed.
1 On TV
1 Turn on the TV.
2 Select the video channel (or external
video input).
2 On VCR
Insert a cassette with the record tab in
place.
The VCR turns on.
• If a cassette is already in the VCR, turn
on the VCR.
Automatic Operations
Press EXIT/STATUS.
Auto playback
To change the recording
length during an OTR
When a tape is inserted, the VCR turns
on. If the record tab is removed,
playback begins.
Press REC/OTR ¶ until the desired
length appears.
Repeat playback
To cancel an OTR
Press STOP 7 to stop recording before
the preset recording length is reached.
If you want to cancel the OTR mode
but continue recording, press REC/
OTR ¶ several times until “OTR”
changes to “REC” on the TV screen.
Auto rewind
Notes on the indications on the display
while an OTR operation
• During recording, the displayed time
counts down. When “0:00” is reached,
recording stops and the VCR turns off
automatically.
• If an OTR is engaged during pause, the
displayed time counts down normally, but
recording does not begin until you cancel
the pause.
To rewind the tape, press REW 1 .
3 Select Channel
Press CH 5 / ∞ or Number buttons to
select the channel to record.
4 Start OTR
Press REC/OTR ¶ twice.
Recording starts immediately, and the
‡ (Record) indicator lights up on the
display.
OTR(0:30)
CH12
This indicates that the
VCR will
automatically shut off
after 30 minutes of
recording.
SP
5 Select Recording Length
Press REC/OTR ¶ repeatedly until the
desired recording length appears.
Each time you press the button,
recording length increases in 30-minute
intervals.
When you press and hold PLAY 3 for
more than 5 seconds, you can play back
the same tape repeatedly (50 times).
When the tape runs to its end, the VCR
automatically rewinds the tape, and
starts playback.
When a tape reaches its end during
playback, fast forwarding, or manual
recording, the VCR rewinds the tape
and stops.
Memory rewind power off
When you press POWER during
rewinding, the VCR turns off after
rewinding is completed.
Eject cassette
Index Search
You can eject the tape simply by
pressing EJECT 0 even while the
VCR is turned off.
When you press EJECT 0, the VCR
automatically turns on, ejects the tape,
then turns off.
You can locate an index marked at the
beginning of each recording on a tape
recorded on this VCR (or an indexed
tape).
Press INDEX ¢ or INDEX 4
repeatedly until the appropriate number
is displayed on the TV screen before
starting play. Rapid forward or reverse
search begins.When it finds the
designated index, playback starts
automatically.
• Locate an index number by pressing the
button repeatedly, indicating how many
index marks ahead of or behind that
recording you want is from the tape’s
current position.
• Up to ±9th index mark from the current
position on the tape can be located.
=0:30=1:00=1:30 .....8:30=9:00
+
REC (Normal recording)+
— 15 —
VR388/588-55 EN (N)
15
6/1/99, 9:03 AM
ADVANCED OPERATIONS
Using On-Screen Display
You can display the VCR operating
status on the TV screen.
For the information about what you can
see on the TV screen, see page 8.
1 Select VCR Set Up Mode
1 Press VCR.
SELECT
CHOOSE /OK
ON SCREEN MODE
ON
2 Press MENU.
TIMER REC SPEED MANUAL
PICTURE
NORMAL
3 Press 5 or ∞ to
select “VCR SET
TO END PUSH EXIT
UP” then press
3/OK.
The VCR Set Up menu appears.
2 Select On-Screen Mode
1 Press 5 or ∞ to select “ON
SCREEN MODE.”
2 Press 3/OK.
Each time you press the button, the
setting changes.
ON:
When you press a tape running
button (Stop, Play, etc.), the VCR
status appears for 5 seconds.
COUNTER:
When you press a tape running
button, the VCR operating status
appears for 5 seconds.
After 5 seconds, the VCR status
disappears except the time counter.
OFF:
The VCR operating status does not
appear even if you press a tape
running button.
Picture Control
Special Effect Playbacks
To get a better picture when viewing
tapes with noise such as rental tapes.
Are you familiar with tape playback? If
so, you are ready to enjoy the special
effect playback features described
below.
1 Select VCR Set Up Mode
SELECT
CHOOSE /OK
1 Press VCR.
ON SCREEN MODE
ON
2 Press MENU.
TIMER REC SPEED MANUAL
PICTURE
NORMAL
3 Press 5 or ∞ to
select “VCR SET
TO END PUSH EXIT
UP” then press
3/OK.
The VCR Set Up menu appears.
2 Select Picture Control Mode
1 Press 5 or ∞ to select “PICTURE.”
2 Press 3/OK.
Each time you press the button, the
setting changes.
NORMAL:
Select this when you play back a
tape with no picture adjustments.
ENHANCER:
Select this when you want to make
a playback picture softer.
INCREDIBLE:
Select this when you want to make
a playback picture sharper.
3 Finish Setting
Press EXIT/STATUS.
To skip playback for a certain
period
Press SKIP SEARCH (For VR588/55)
or S. SEARCH (For VR388/55) during
playback to search forward for 30
seconds by the time counter reading.
Each time you press the button, the
search time increases as follows:
30=60=90=120 sec.
The VCR automatically resumes normal
playback after searching for the
specified period.
To view a still picture
Press STILL/SLOW
briefly (or
STILL/PAUSE 8 on the front panel)
during playback.
Playback is freezed and a still picture
appears.
To resume playback, press PLAY 3.
To view a slow motion picture
Press STILL/SLOW
(or STILL/
PAUSE 8 on the front panel) for more
than 2 seconds during playback.
To decrease the slow motion speed
(and reverse the slow motion playback), press SLOW/BACK – (for
VR588/55) or STILL/SLOW – (for
VR388/55).
3 Finish Setting
Press EXIT/STATUS.
To increase the slow motion speed
(and forward the slow motion
playback), and press SLOW/
FORWARD + (for VR588/55) or
STILL/SLOW + (for VR388/55).
To display the VCR status on the TV
screen manually, press EXIT/
STATUS. The VCR status appears for
about 5 seconds.
To resume playback, press PLAY 3.
• If “ON SCREEN MODE” is set to
“OFF,” no VCR status appears though
you press EXIT/STATUS.
Notes:
• No sound comes out during special effect
playbacks.
• If you keep viewing slow motion and still
pictures for 5 minutes, the VCR
automatically stops to protect the tape and
video heads.
• During special effect playbacks, some
noise bars will appear on the TV screen.
— 16 —
VR388/588-55 EN (N)
16
6/1/99, 9:03 AM
Tracking Adjustments
3 Select Channel
Timer Recording
Auto tracking
Each time a tape is inserted, auto
tracking starts working and
continuously analyses the signal to
adjust for optimum picture quality
during playback. So, there is no need
for you to minimize noises in most
tapes during playback.
Manual tracking
• During normal playback:
If auto tracking cannot eliminate
noises well during playback, press
CHANNEL 5 or ∞.
• During a slow motion picture:
Press CHANNEL 5 or ∞ to
minimize noises in the slow motion
picture.
• During a still picture:
Press CHANNEL 5 or ∞ to reduce
jitter in the still picture.
FOR EACH STEP BELOW, YOU
NEED TO FINISH WITHIN 60
SECONDS; OTHERWISE,
PROGRAMMING WILL HAVE TO
BE RESTARTED FROM STEP 1.
CHOOSE
4 Select Start Time
Press START + or –
(Number button 1 or
4).
ONE TIME PROGRAM
PROGRAM 1
CHANNEL+/– 12
START +/– 08 : 30
STOP +/–
– –:– –
REC SPEED SP
DATE +/–
– –/– –/– –
• Each time you press SET DAILY=8 OR WEEKLY=9
TO END PUSH EXIT
the button, the set
time changes by 1-minute intervals. If
you hold the button, the set time changes
by 30-minute intervals.
5 Select Stop Time
Press STOP + or –
(Number button 2 or
5).
1 Select Timer Mode
SELECT
ONE TIME PROGRAM
PROGRAM 1
CHANNEL+/– 12
START +/– – –:– –
STOP +/–
– –:– –
REC SPEED SP
DATE +/–
– –/– –/– –
• To record from
external line input,
SET DAILY=8 OR WEEKLY=9
TO END PUSH EXIT
press CH 5 or ∞
until “A/V REAR” or “A/V FRONT”
appears on the TV screen.
Make sure....
• The clock is set to the correct time
before setting timer recording.
• A cassette is inserted in the VCR and
the record tab of the cassette must
not be removed.
Press TIMER.
The Timer Recording
menu appears.
/OK
QUICK PROGRAMMING
PROGRAM REVIEW
TO END PUSH EXIT
2 Select Programme mode
To cancel manual tracking, stop the
tape, eject the tape, then re-insert it.
Press CH 5 or ∞ to
enter the TV channel.
To record while you’re away, follow
step 1 — 10 below. For each
programme you set, the VCR will turn
on, start recording, and turn off
automatically. You can store up to 8
programmes.
ONE TIME PROGRAM
1 Press 5 or ∞ to
PROGRAM 1
CHANNEL+/– – –
select “QUICK
START +/–
– –:– –
STOP +/–
– –:– –
REC SPEED SP
PROGRAMDATE +/–
– –/– –/– –
MING” then press SET DAILY=8 OR WEEKLY=9
TO END PUSH EXIT
3/OK.
The Quick Programming menu
appears.
• If you have already made 8 programmes, “ALL PROGRAMS IN
USE” appears and goes back to the
Timer Recording menu. If this
happens, delete unwanted programmes
(✈P.18).
ONE TIME PROGRAM
PROGRAM 1
CHANNEL+/– 12
START +/– 08 : 30
STOP +/–
09 : 30
REC SPEED SP
DATE +/–
– –/– –/– –
• Each time you press SET DAILY=8 OR WEEKLY=9
TO END PUSH EXIT
the button, the set
time changes by 1-minute intervals. If
you hold the button, the set time changes
by 30-minute intervals.
6 Select Tape Speed
Press SPEED.
• Each time you press
the button, the tape
speed alternates
between “LP” and
“SP.”
ONE TIME PROGRAM
PROGRAM 1
CHANNEL+/– 12
START +/– 08 : 30
STOP +/–
09 : 30
REC SPEED LP
DATE +/–
– –/– –/– –
SET DAILY=8 OR WEEKLY=9
TO END PUSH EXIT
7 Select Start Date
Press DATE + or –
(Number button 3 or
6).
• The year and day of
the week is displayed
automatically.
ONE TIME PROGRAM
PROGRAM 1
CHANNEL+/– 12
START +/– 08 : 30
STOP +/–
09 : 30
REC SPEED LP
DATE +/–
07/04/98
FRIDAY
SET DAILY=8 OR WEEKLY=9
TO END PUSH EXIT
To be continued on the next page
— 17 —
VR388/588-55 EN (N)
17
6/1/99, 9:04 AM
ADVANCED OPERATIONS
(CONTINUED)
8 Select Recording Type
To stop a started timer
recording
If you want to record the same
programme daily, press DAILY
(Number button 8).
The VCR will record a TV programme
every day (Monday through Friday) at
the same time and length. (Daily
Recording)
Press POWER.
Recording stops and the VCR turns off.
If it is a Daily or Weekly Recording,
future recordings will be carried out as
programmed.
If you want to record the same
programme weekly, press WEEKLY
(Number button 9).
The VCR will record a TV programme
once a week at the same day, time, and
length. (Weekly Recording)
If you want to cancel the currently
set programme, press CLEAR.
9 Confirm Programme
Press EXIT/STATUS.
“PROGRAM WAS COMPLETED”
appears on the TV screen.
After 5 seconds, the above message
disappears, and the normal TV picture
(Timer) indicator
resumes. The
lights up on the display.
• If “PROGRAM NOT COMPLETED”
appears, try again from step 1.
• If PROGRAM NOT COMPLETED/
CLASH appears, the timer recording you
just programmed overlaps another timer
recording. The timer recording you just
programmed will not take place. The
timer recording menu will reappear. To
cancel a
(Timer) recording, see next
column.
If you want to store other
programmes, repeat steps 1 to 9.
10 Finish Settings
Press POWER to turn off the VCR.
The VCR must be turned off for a timer
recording to take place. If you forget to
turn off the VCR, “PLEASE TURN
OFF VCR FOR TIMER
RECORDING” flashes on your TV
screen two minutes before a timer
recording starts. To remove the
message, press the CLEAR button.
After a timer recording has
taken place
Press POWER to turn on the VCR.
You can operate your VCR normally.
Useful function for Timer
Recording: Auto Tape Speed
6 If you want to change the
programme setting shown on the
TV screen, press the following
buttons:
CH 5/∞: Changes the channel.
START +/– : Changes the start time.
STOP +/– : Changes the stop time.
SPEED : Changes the tape speed.
DATE +/– : Changes the date.
If you want to erase the
programme setting shown on the
TV screen, press CLEAR. The
detailed information of the next
programme appears.
With this function activated, the VCR
can change the tape speed and record
the programme in LP or SLP mode
unless enough tape remains for
recording in SP mode.
1 Press VCR.
2 Press MENU.
3 Press 5 or ∞ to select “VCR SET
UP” then 3.
4 Press 5 or ∞ to select “TIMER REC
SPEED.”
5 Press 3/OK.
Each time you press the button, the
setting changes.
AUTO:
Select this to allow the VCR to
change the tape speed from SP to
LP or SLP when there is not
enough tape length remaining.
MANUAL:
Select this not to allow the VCR to
change the tape speed.
6 Press EXIT/STATUS to exit from
the menu operations.
To check, edit or erase the
programmes
1
2
3
4
Turn on the VCR and TV.
Press VCR.
Press TIMER.
PR CH START STOP DATE
Press 5 or ∞ to
1 L–F 08:00 10:00 D06/10
2 L–1 10:00 10:45
MON
3 10 11:30 12:00 DAILY
select
4 45 15:00 15:15 W10/16
5
“PROGRAM
6
7
REVIEW” then
8
NEXT=
END=EXIT
press 3/OK.
The list of the timer recording
programmes appears.
ONE TIME PROGRAM
5 Press 3/OK
PROGRAM 1
12
repeatedly to view CHANNEL+/–
START +/– 08 : 30
STOP +/–
09 : 30
the more detailed
REC SPEED LP
DATE +/–
07/04/98
programme
FRIDAY
SET DAILY=8 OR WEEKLY=9
TO END PUSH EXIT
information.
• When you press the button for the first
time, the detailed programme
information for Programme 1 appears.
By pressing this button repeatedly, you
can review the detailed information of
all other programmes.
7 Press EXIT/STATUS to exit from the
menu operations.
Note:
This function does not work for OTR (One
Touch Recording).
How to see the programme
list
12 3 4
PR CH
1 12
2 13
3 10
4 45
5
6
7
8
NEXT=
1
2
3
4
5
18
STOP
09:30
10:45
12:00
15:15
5
DATE
D07/31
MON
DAILY
W06/16
END=EXIT
Programme numbers
Preset channel numbers
Start time
Stop time
Start date
“D” stands for “DAILY,” and “W”
stands for “WEEKLY.”
• If the programme has worked
once for the Daily recording,
“DAILY” will be shown instead
of the start date.
• If the programme has worked
once for the Weekly recording,
the day of the week (in this
example, “MON”) will be shown
instead of the start date.
• 07/31
“07” stands for month and “31”
stands for day.
— 18 —
VR388/588-55 EN (N)
START
08:30
10:00
11:30
15:00
6/1/99, 9:04 AM
Tape Duplication
Connection
Diagram
1 Connect the recording VCR (this VCR) and the playing
VCR.
2 Connect the recording VCR (this VCR) to the TV.
Playing VCR
Recording VCR (this VCR)
TV
ENTREE
ANT.IN
ENTREE
ANT.IN
ANTENNE
SORTIE
RF. OUT
AV1 ENTREE/SORTIE
IN/OUT
ANTENNE
SORTIE
RF. OUT
AV1 ENTREE/SORTIE
IN/OUT
002
To RF OUT
002
To AV1 IN/OUT terminal
IN
To AV1 IN/OUT Terminal
SCART cable
4 Select Tape Speed
Dubbing from any VHS VCR (or video
camera) to another is simple.
Explanations on this page uses this
VCR as the recording VCR.
Refer also to the manual supplied with
the other VCR (for playback).
Make sure....
• Use the appropriate SCART cable
depending on the other VCR’s AV
terminal.
• You can also use the AUDIO/VIDEO
input jacks on the front panel to
connect another VCR or video
camera.
Insert a source tape in the playing VCR
and a blank tape in the recording VCR.
1 At VCRs
• If a tape without the record tab is inserted
in the playing VCR, playback automatically starts. In this case, press the STOP
button.
Turn the channel on the TV to your
video channel.
3 Select Line Input
POWER
Press CH 5 or ∞, pointing the remote
control at this VCR, to select the
external line input.
• For rear jacks, select “L-1” on the
display.
• For front jacks, select “L-F” on the
display.
STILL/PAUSE
VIDEO
AUDIO
COLOUR
MODE
SP SLP
5 Play Back Tape
Press the PLAY 3 button on the
playing VCR.
6 Record (Copy) Tape
2 At TV
To audio
To video output
output
Press SPEED, pointing the remote
control at this VCR, until the desired
tape speed (SP, LP, or SLP) appears on
the display.
SP, LP : For PAL signal.
SP, SLP : For NTSC signal.
Press REC/OTR, pointing the remote
control at this VCR.
Remember: press the buttons in steps 5
and 6 simultaneously to avoid missing
any of the recording.
— 19 —
VR388/588-55 EN (N)
19
6/1/99, 9:04 AM
BEFORE REQUESTING SERVICE
Check the following points once again if you are having some difficulties with your VCR.
IMPORTANT
Periodic maintenance is required in order to maintain the VCR’s continuous excellent performance. After a period of time
the video heads will require replacement. If cleaning or replacement of the video heads is required, this service should be
performed at an authorized video system service center.
Power
Correction
No power.
• Check that the AC power cord is correctly connected to
an AC outlet.
• Check that the VCR is turned on.
Recording & Playback
Correction
TV programme cannot be recorded.
• Check the connections between the VCR, the antenna,
and the TV.
• Make sure that the record tab on the back of the cassette
is not removed. (✈P.14)
Timer recording cannot be performed.
• Set the timer on-time and timer off-time correctly.
(✈P.17)
• Make sure that the VCR is turned off after setting is
made. (✈P.18)
• Timer recording may not be performed or stopped if a
power interruption occurs before or during timer recording. If the power resumes within one minute, timer
recording will also resume.
There is no playback picture, or the playback picture is
noisy or contains streaks.
• Select your video channel correctly.
• Adjust the tracking slowly in either direction. (✈P.17)
During a still or slow motion picture, the picture
may contain some vertical jitter when using
a TV which has an automatic vertical hold control.
• Adjust the vertical hold control manually on the TV, if
available.
If the top of your playback picture waves
back and forth excessively.
• Because the VCR playback signal is not as stable as an
off-the-air TV signal, the top of your TV screen may be
bent or unstable during playback. To solve this problem,
slowly turn the horizontal hold control on your TV to
correct the wavy picture. If your TV does not have the
horizontal hold control or adjusting the control does not
help, contact your local TV service center.
Remote Control
Correction
The remote control cannot work.
• Aim the remote control directly at the remote sensor on
the VCR.
• Avoid all obstacles which may interfere with the signal
path.
• Inspect or replace the batteries. (✈P.5,7)
• Make sure batteries are inserted correctly. (✈P.5,7)
— 20 —
VR388/588-55 EN (N)
20
6/1/99, 9:05 AM
Miscellaneous
Correction
A cassette cannot be inserted.
• Insert the cassette with the window side up and the record
tab facing you.
• Check that a cassette tape is not already inserted. Press
EJECT 0.
The cassette does not eject.
• Check that the AC power cord is correctly connected to
an AC outlet.
(Timer) indicator is lit on the display, press
• If the
POWER to cancel timer recording, then press EJECT
0.
The cassette ejects when you press REC/OTR ¶, or when
you press POWER to set timer recording.
• Check that the record tab on the back of the cassette is
not removed. (✈P.14)
SPECIFICATIONS
Design and specifications are subject to change without notice.
General
Mains voltage
Mains frequency
Power consumption
Ambient temperature
Relative humidity
Dimensions
Mass
Position for use
Video output channel
Possible number of TV channel
Number of pre-programmable memory blocks
Number of days in advance
AC 110 – 240V
50/60Hz
Approx. 18 watts
+5°C to +40°C
10% to 80%
Approx. 400(W) x 94(H) x 272(D) mm
Approx. 3.1kg
Horizontal
UHF E36 (adjustable between E28 — E60)
99
8
365 or every day, or every week
Tuner
Aerial input
VHF L:
VHF H:
UHF:
B/G, D/K, I, SECAM K1
42 — 175 MHz
175 — 470 MHz
470 — 870 MHz
CATV
Video
Input (VIDEO IN)
Output (VIDEO OUT)
Resolution
Signal/noise ratio
0.5 to 2.0 Vp-p, 75 ohms
1.0±0.2 Vp-p, 75 ohms
Better than 240 lines
Better than 43 dB
Audio
Input (AUDIO IN)
Output (AUDIO OUT)
Accessories supplied
–8 dBs, 50k ohms (0dBs=0.775 Vrms) – for RCA connector
–8 dBs, 10k ohms (0dBs=0.775 Vrms) – for SCART connector
–6 dBs, 1k ohms (0dBs=0.775 Vrms)
Remote control unit
RF coaxial cable
Batteries – R6(SUM-3)/AA (only for checking operations)
SCART cable – RCA type (for VR388/55 only)
— 21 —
VR388/588-55 EN (N)
21
6/1/99, 9:05 AM