1
English
IMPORTANT
SAFETY
INSTRUCTIONS
When using an electrical appliance, basic safety
precautions should always be followed,
including the following:
Read all instructions before using this
appliance.
Charging
◗
◗
◗
◗
1. Do not reach for a Trimmer that has fallen
into water. Unplug immediately.
2. Do not use while bathing or in a shower.
3. Do not place or store Trimmer where it
can fall or be pulled into a tub or sink. Do
not place in or drop into water or other
liquid.
4. Always unplug this Trimmer from the
electrical outlet immediately after
(re)charging.
5. Unplug Trimmer before cleaning.
6. When discarding Trimmer, unplug
Trimmer to remove rechargeable battery.
See Battery Removal instruction sheet.
◗
shock or injury to persons:
1. Close supervision is necessary when this
appliance is used by, on, or near children or
invalids.
2. Use this Trimmer for its intended
household use as described in this manual.
Do not use attachments not recommended
by the Philips Electronics North America
Corporation.
3. Never operate this Trimmer if it has a
damaged cord or plug, if it is not working
properly, if it has been dropped, damaged,
or dropped into water. Return the
Trimmer to an Authorized Norelco Service
Location for examination and repair.
4. Keep the Trimmer and cord away from
heated surfaces.
5. Never drop or insert any object into any
opening. Keep air openings free of lint,
hair, etc.
6. Do not charge or plug in Trimmer
outdoors or where aerosol (spray)
products are being used or where oxygen is
being administered.
7. Do not use this Trimmer with a damaged
or broken cutter, as facial injury may occur.
8. Do not operate Trimmer with the hair
collection chamber removed.
9. Always attach plug to Trimmer first, then
into outlet. To disconnect, turn ON/OFF
switch “OFF” then remove plug from
outlet.
10. To prevent possible damage to the cord, do
not wrap cord around the Trimmer.
11. Never put Trimmer in direct sunlight or
store in a pouch at a temperature above
140˚F.
12. This Trimmer is for use on human facial
hair only. Do not use this Trimmer for any
other purpose.
SAVE THESE
INSTRUCTIONS
IMPORTANT: YOUR TRIMMER
CONTAINS A NICKEL-CADMIUM
RECHARGEABLE BATTERY.
See Battery Removal instruction sheet.
(Re)charging requires 10 full hours.
Use only the cord provided.
Battery performance is best if you recharge
only when the battery is (almost)
completely empty.
Charging or recharging at temperatures
below 40°F or higher than 95°F adversely
affects lifetime of battery.
Continuously recharging will reduce life of
battery.
1 Be certain Trimmer is OFF.
2 Connect cord to Trimmer. Plug into any
120V AC outlet only. Use only the
cord provided.
◗
◗
The green Charging Indicator light will go
on to indicate the Trimmer is charging
(fig.2).
An adaptor plug may be necessary for cord
usage in some foreign countries. Use an
attachment plug adaptor of the proper
configuration for power outlet.
Do not charge Trimmer for more than 24 hours.
◗
It requires 10 hours to fully charge the
battery.
◗ A fully charged Trimmer has a cordless
trimming time of up to 40 minutes.
3 Disconnect the cord and unplug from
electrical outlet.
Optimize The Working Life
Of The Battery
◗
◗
◗
◗
◗
After Trimmer has been charged for the
first time, do not recharge Trimmer
between trimming sessions. Continue using
it until the battery is completely empty.
Discharge the battery completely twice a
year by letting the motor run until it stops.
Do not charge for more than 24 hours.
Do not keep cord permanently plugged in.
If Trimmer hasn’t been used for a long
period of time, Trimmer must be recharged
for 10 full hours.
Trimming For “Stubble” Look
Like many new products, your Norelco
AccuVac Trimmer may take a little getting used
to. If you are using an electric Trimmer for the
first time, or if you’ve been using a different
brand, take the time to acquaint yourself with
your new Trimmer.
Never pull off the Guide Comb Attachment by
grasping the flexible top portion. Always pull off by
the bottom part of attachment.
G
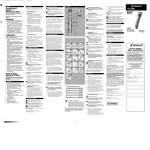
Fig. 1
Replacing Guide Comb Attachment
On Trimmer
I
1 Be certain Trimmer is in OFF position.
2 Replace Guide Comb Attachment until it
“clicks” into position. The Guide Comb
Attachment can be placed on Trimmer
only one way by properly aligning it to
slide into the tracks on sides of Trimmer
head. If it does not fit properly, reverse it.
J
The patented Acu•Control System puts you in
complete control while trimming your facial
hairs with no prior experience needed. The
flexing Guide Comb adjusts automatically to
hug the contours of your face for a trim that is
both even and accurate. And, it’s easy to
maneuver over those hard-to-reach areas such
as the throat and chin. The patented Zoom
Lock Hair Length Selector allows you to choose
among 9 preset hair lengths and locks into
position so you can control the exact hair
length you desire or vary the length of your
facial hair. The Patented Acu•Control System
and Zoom Lock Hair Length Selector for
professional, goof-proof results every time.
2
Trimming
◗
◗
◗
Use this Trimmer for its intended
household use as described in this manual.
Always comb your beard and/or moustache
with a fine comb before you start trimming.
If you are trimming for the first time, be
careful. Do not move the Trimmer too fast.
Make smooth and gentle movements.
Trimming With ACU•CONTROL
Guide Comb Attachment
◗
Guide Comb Attachment must be on
Trimmer in order to use the Zoom Lock.
1 Turn the Zoom Lock to the desired
trimming length setting (see table). The
setting will appear in the window below
the Zoom Lock (fig. 3).
◗
If you are trimming for the first time, start
by using the maximum trimming length
setting #9 to prevent accidentally trimming
hairs too short. As you become familiar
with the settings, adjust Zoom Lock to
desired trimming length. Zoom Lock will
“click” into position at each setting.
3
4
5
6
5
7
NOTE: The Zoom Lock can be on any setting
when removing or replacing Attachment.
◗
5
1
◗
◗
1
8
5
9
10
◗
◗
◗
◗
◗
11
13
12
Always switch Trimmer OFF before
cleaning.
Do not use abrasive, scourers or liquids
such as alcohol, benzene, bleach or acetone
to clean the Trimmer.
Never clean, remove or replace Guide
Comb Attachment with motor ON.
Do not apply pressure to cutters.
Do not touch cutters with hard objects as
this may damage them.
Do not use while bathing, showering or
immerse the Trimmer in water or other
liquids as damage to Trimmer may occur.
Never use sharp or hard objects to clean
the filter to avoid damaging it.
If cut hairs have accumulated in the Guide
Comb area, turn Trimmer off, pull Guide
Comb Attachment off Trimmer and remove
hairs by shaking and/or blowing.
Hair Collection Chamber
1 Switch the Trimmer off.
2 Remove the Clear View Hair Collection
chamber and remove the hairs by shaking
or brushing them out (fig. 8).
Trimming Length Settings Table
#1
Stubble Length or Closely Cropped
#2
Short
#3
.22 in./5.5 mm
Medium
.38 in./9.5 mm
#7
.48 in./12 mm
#8
.6 in./15 mm
Long
4 ...and carefully clean the Clear View Hair
Collection Chamber and the filter with the
brush supplied (fig. 10).
.3 in./7.5 mm
#6
#9
3 For extra thorough cleaning and to
maintain optimal suction performance,
detach the filter... (fig. 9).
.1 in./2.5 mm
.16 in./4 mm
#4
#5
.06 in./1.5 mm
◗
.72 in./18 mm
2 Switch the Trimmer ON.
3 To trim in the most effective way, move the
Trimmer against the direction of hair
growth. Do not move the trimmer too fast.
Make smooth and gentle movements and
make sure the surface of the Guide Comb
always stays in contact with the skin (fig. 4).
NOTE: Since all hairs do not grow in the same direction,
you may want to try different trimming positions (i.e.,
upwards, downwards, or across). Practice is best for
optimum results.
◗
When trimming extremely long, dense
beards, it may be necessary to empty the
Hair Collection Chamber during the
trimming session in order to maintain
optimal suction performance.
If suction performance is not as strong as
usual, Hair Collection Chamber may require
emptying to restore optimal performance.
This Trimmer has no other user-serviceable
parts. Any other service should be performed
by an Authorized Norelco Service Location.
Assistance
T770
Rechargeable
Cordless
4203 000 5333.2
For Assistance or the Authorized Norelco
Service Location nearest you, call toll free:
1-800-243-3050
or visit our website: www.norelco.com
Authorized Norelco Service Location
information is available 24 hours a day, 7 days a
week.
Storage
◗
◗
◗
◗
Be sure Trimmer is turned off and remove
cord from outlet and Trimmer before
storing in a safe, dry location where it will
not be crushed, banged, or subject to
damage.
Do not wrap cord around Trimmer when
storing.
Store Cord in a safe location where it will
not be cut or damaged.
Do not place or store Trimmer where it
can fall or be pulled into a tub or sink,
water or other liquid.
Battery Removal
◗
◗
◗
This Trimmer contains rechargeable NickelCadmium batteries, which must be disposed
of properly.
Batteries should only be removed when
Trimmer is to be discarded.
Refer to Battery Removal instruction sheet
for directions on removing the rechargeable
batteries.
FULL TWO-YEAR WARRANTY
Philips Electronics North America Corporation warrants each new
Norelco product, Model T-770 against defects in materials or
workmanship for a period of two years (cutters for up to seven
years) from the date of purchase, and agrees to repair or replace any
defective product without charge.
IMPORTANT: This warranty does not cover damage resulting
from accident, misuse or abuse, lack of reasonable care, the affixing
of any attachment not provided with the product or loss of parts or
subjecting the product to any but the specific voltage.* Use of
unauthorized replacement parts will void this warranty.
PHILIPS
ELECTRONICS
NORTH
AMERICA
CORPORATION WILL NOT PAY FOR WARRANTY
SERVICE PERFORMED BY A NON-AUTHORIZED
REPAIR SERVICE AND WILL NOT REIMBURSE THE
CONSUMER FOR DAMAGE RESULTING FROM
WARRANTY SERVICE PERFORMED BY A NONAUTHORIZED REPAIR SERVICE.
NO RESPONSIBILITY IS ASSUMED FOR ANY
SPECIAL, INCIDENTAL OR CONSEQUENTIAL
DAMAGES.
In order to obtain warranty service, simply take or ship the product
postage prepaid to the nearest Authorized Norelco Service
Location. It is suggested that for your protection you return
shipments of product by insured mail, insurance prepaid. Damage
occurring during shipment is not covered by this warranty. NOTE:
No other warranty, written or oral, is authorized by Philips
Electronics North America Corporation. This warranty gives you
specific legal rights, and you may also have other rights which vary
from state to state. Some states do not allow the exclusion or
limitation of incidental or consequential damages, so the above
exclusion and limitations may not apply to you.
*Read enclosed instructions carefully.
Manufactured for: Norelco Consumer Products Company
A Division of Philips Electronics North America Corporation
1010 Washington Blvd., Stamford, CT 06912-0015
MADE IN AUSTRIA.
This symbol on the product’s nameplate means it is
listed by Underwriters Laboratories, Inc.
Norelco and ACU•CONTROL are Registered Trademarks of Philips Electronics
North America Corporation.
AccuVac, Clear View, and Zoom Lock are Trademarks of Philips Electronics
North America Corporation.
PHILIPS is a Registered Trademark of Koninklijke
Philips Electronics N.V.
© 2003 Philips Electronics North America Corporation. All Rights Reserved.
ULTRA PRECISE, ULTRA CONVENIENT...GUARANTEED!
Downloaded from www.Manualslib.com manuals search engine
Beard and
Moustache
Trimmer
Replacing The Cutting Unit
If your cutters and filter become damaged or
worn, do not continue using the Trimmer.
Replace cutters and/or filter immediately.
Cleaning
1
The AccuVac System is activated automatically
as soon as you switch the trimmer on. It
collects cut hairs during every kind of use, i.e.
trimming with or without comb attachment and
contouring. The flexible hair guide follows the
contours of the face and the Flexi-Guard Hair
Deflector directs cut hairs towards the nozzle
of the vacuum mechanism.
It is recommended that you empty the HairCollection Chamber after each trimming
session. When trimming long, dense beards it
may also be necessary to empty the HairCollection Chamber during the trimming
session in order to maintain optimal suction
performance (also see 'Cleaning' section, 'HairCollection Chamber').
To ensure optimal functioning of the
AccuVac System, do not cut off more than
approx. 7mm of your overall beard length
at a time. If you want to cut your beard
shorter, repeat the process one or more
times.
3 Switch the Trimmer on.
4 Make well-controlled movements. Touch
the hair lightly with the Trimmer (fig. 7).
L
H
Acu•Control System
◗
1 Be certain Trimmer is in the OFF position.
2 Remove the Guide Comb Attachment by
pulling it off the Trimmer (fig. 6).
E
F
Your AccuVac Trimmer features the Patented
Acu•Control System combined with an
adjustable Zoom Lock to make trimming facial
hairs goof-proof. The integrated AccuVac
System collects cut-off hairs during use.
AccuVac System
Trimmer:
Remove Guide Comb Attachment if you are:
◗ Defining hair lines
◗ Trimming nape of neck
◗ Removing single, unwanted hairs
B
C
It is recommended that the Hair Collection
Chamber be emptied and cleaned out after
each use.
Do not operate the Trimmer with the Hair
Collection Chamber removed.
1 Make sure the Trimmer is switched OFF
and disconnected from the electrical
outlet.
2 Remove the Guide Comb Attachment.
3 Remove the cutting unit (fig. 11).
4 Clean the cutting unit and the inside of the
Trimmer with the brush supplied (fig. 12).
5 Re-attach the cutting unit and the Guide
Comb into place on the Trimmer (fig. 13).
Trimming Without
Guide Comb Attachment
D
Throw your scissors away and put your new
AccuVac Trimmer to the test. We guarantee
precise, professional, results or Norelco will
refund you the full purchase price, guaranteed!
1 Be certain Guide Comb is on Trimmer
and use setting #1 to result in a “stubble”
look. (fig. 5).
K
◗
A
Put It To The Test
Features
A Patented Acu•Control System with
Removable Guide Comb Attachment
B Detachable Cutting Unit with 3-Dimensional
Rounded Stainless Steel Cutter Blades.
C Flexi-Guard Hair Deflector
D Clear View Hair Collection Chamber
E Filter
F Precision Zoom Lock Hair Length Selector
with 9 Pre-select Settings
G Selected Hair Length Setting Window
H ON/Off Button
I Charging Indicator Light
J Power Cord Socket
K Cord
L Cleaning Brush
M Full Two-Year Warranty
N 60-Day Money-Back Guarantee
◗
Features
1 Charge according to directions.
Unplug Trimmer from outlet and remove
cord.
2 Turn Trimmer ON to begin trimming.
3 If the battery is empty and you want to
trim your beard, charge the Trimmer for
at east 90 minutes and you will have
enough power for one use.
To Charge / Recharge
DANGER
To reduce the risk of electric shock:
WARNING
To reduce the risk of burns, fire, electric
Cordless Trimming
Charge the Trimmer fully before you start using
it for the first time or after a long period of
disuse. This Trimmer will not operate corded
directly from the electrical outlet.
60-DAY MONEYBACK GUARANTEE
If you are not fully satisfied with your Norelco Beard
and Moustache Trimmer, send the product back and
we’ll refund you the full purchase price.
The Trimmer must be shipped prepaid by insured
mail, insurance prepaid, and have the sales
receipt, indicating purchase price and the date of
purchase, enclosed. The Trimmer must be
postmarked no later than 60 days after the date
of purchase. Norelco reserves the right to verify
the purchase price of the Trimmer and limit
refunds not to exceed suggested retail price.
Send dated sales receipt, your complete name and
address as indicated below, and the Trimmer, prepaid
to:
Norelco Consumer Products Company
A Division of Philips Electronics North
America Corporation
450 North Medinah Road, Dock 16
Roselle, IL 60172-2329
Please allow 4-6 weeks for delivery of check.
(Please Print)
Name________________________________________
Address______________________________________
City__________________________________________
State ______________Zip_______________________
Daytime Telephone No. (____ )__________________
AREA CODE
Email Address:_________________________________
REASON FOR RETURNING:___________________
______________________________________________
______________________________________________
______________________________________________
______________________________________________
______________________________________________
______________________________________________
______________________________________________
______________________________________________
______________________________________________
______________________________________________
______________________________________________
______________________________________________
Carga
ESPAÑOL
INSTRUCCIONES
IMPORTANTES DE
SEGURIDAD
Al utilizar un aparato eléctrico, se deben tomar
siempre medidas de seguridad básicas,
incluyendo las siguientes:
Lea todas las instrucciones antes de
utilizar el aparato.
PELIGRO
Para reducir el riesgo de una descarga
◗
◗
◗
◗
(Re)cargar lleva diez horas completa.
Use sólo el cable de red que se suministra.
El rendimiento de la batería será mejor si la
recarga sólo cuando la batería esté (casi)
descargada.
Cargar o recargar a temperaturas inferiores
a 4,5ºC (40F) o superiores a 35ºC (95F)
afecta negativamente a la vida útil de la
batería.
El recargarla continuamente reducirá la vida
útil de la batería.
◗
ADVERTENCIA
Para reducir el riesgo de quemaduras,
No cargue el barbero durante más de 24 horas.
CONSERVE ESTAS
INSTRUCCIONES
IMPORTANTE: Su barbero contiene
UNA BATERÍA RECARGABLE DE
NÍQUEL-CADMIO.
Consulte las instrucciones sobre Cómo quitar
las baterías.
Características
A Sistema patentado Acu Control con
accesorio de peine guía extraíble.
B Unidad de corte desmontable con cuchillas
redondeadas de 3 dimensiones de acero
C Deflector de pelo flexible
D Cámara de recogida de pelo Clear View
E Filtro
F Sistema de ajuste Zoom Lock con 9
posiciones predeterminadas.
G Ventana de la posición de altura de corte
seleccionada
H Botón de marcha/parada (ON/OFF)
I Luz verde indicadora de carga
J Toma para el cable de alimentación
K Cable
L Cepillo de limpieza
M Dos años de garantía total
N Garantía de 60 días de devolución del
importe
1 Asegúrese de que el barbero está en OFF.
2 Conecte el cable al barbero. Enchúfelo a
una toma de corriente de entre 120V.
Utilice únicamente el cable que se
suministra.
◗ La verde del indicador de carga se
encenderá para indicar que el barbero está
cargando. La carga completa, de el barbero
demora approximadamente diez horas.
◗
Puede que sea necesario un adaptador si se
utiliza el cable en otros países. Utilice un
accesorio adaptador apropiado a la
configuración de la toma de corriente.
◗
La batería tardará diez horas
aproximadamente en cargarse
completamente.
Un aparato completamente cargado
proporcionará un tiempo de
funcionamiento sin cable de hasta 40
minutos.
◗
3 Desconecte el cable y desenchúfelo de la
toma de corriente eléctrica.
Cómo Aprovechar Al Máximo La Vida
Útil De La Batería
◗
◗
◗
◗
◗
Después de cargar el aparato por primera
vez, no recargue el barbero entre sesiones.
Utilícelo hasta que la batería se descargue
completamente.
Descargue totalmente la batería dos veces
al año, dejando que funcione el motor hasta
que se pare.
No cargue la batería durante más de 24
horas.
No mantenga el aparato enchufado siempre
a la red.
Si no ha utilizado el barbero durante un
periodo largo, debe recargarlo durante diez
horas.
Characterísticas
Cómo Recortar Con La Posición 'Look
Desarreglado'
1 Cargue según las instrucciones.
Desenchufe el barbero de la toma de
corriente y saque el cable.
2 Coloque el barbero en la posición ON
antes de empezar a usarlo.
3 Si la batería está descargada y usted desea
recortar su barba, carque el barbero por
un minimo de 90 minutos y tendrá
suficiente energia para usarla una verz.
Cargar / Recargar
eléctrica:
1. No intente coger un barbero que se ha
caído al agua. Desenchúfelo
inmediatamente.
2. No lo utilice mientras se baña o se ducha.
3. No coloque o guarde el barbero en un
lugar donde se pueda caer a la bañera o el
lavabo. No lo coloque sobre agua u otro
líquido, ni tampoco lo sumerja.
4. Desenchufe siempre el barbero de la toma
de corriente nada más terminar de usarlo,
excepto cuando el barbero se esté
(re)cargando.
5. Desenchufe el barbero antes de limpiarlo.
6. Cuando se deshaga del barbero,
desenchúfelo para quitar la batería
recargable. Consulte las instrucciones sobre
Cómo quitar las baterías.
incendio, descarga eléctrica o daños
físicos:
1. Es necesaria una atenta supervisión si niños
o inválidos manejan este aparato o si se
utiliza con ellos.
2. Utilice este barbero para uso doméstico tal
y como se indica en este manual. No utilice
accesorios no recomendados por Philips
Electronics North America Corporation.
3. Nunca utilice el aparato si el cable o la
clavija están dañados, si no funciona
correctamente, si se ha caído, dañado o si
ha entrado en contacto con agua. Lleve el
barbero al Servicio Técnico Autorizado
Norelco para que lo examinen y lo reparen.
4. Mantenga el barbero y el cable de red
alejados de superficies calientes.
5. No inserte objetos en ningún orificio. No
deje que las aberturas de aire se obstruyan
con pelusas, pelos, etc.
6. No cargue ni enchufe el barbero al aire
libre, ni en lugares donde se hayan utilizado
aerosoles (spray), ni donde se haya
administrado oxígeno.
7. No utilice este barbero si la cuchilla está
dañada o rota, ya que se puede hacer
heridas en la cara.
8. No utilice el barbero si ha quitado la
cámara de recogida de pelo.
9. Siempre inserte primero la clavija en el
aparato y luego en la toma de corriente.
Para desconectarlo, coloque el interruptor
de marcha/parada (ON/OFF) en OFF y
luego saque la clavija de la toma de
corriente.
10. Para evitar que se dañe el cable, no lo
enrolle alrededor del barbero.
11. Nunca coloque el barbero bajo la luz
directa del sol ni lo guarde en una funda a
temperatura superior a los 60ºC (140 F).
12. Este barbero está indicado exclusivamente
para uso facial en personas. No lo utilice
para otros fines.
Tiempo De Autonomía Sin Cable
Cargue completamente el aparato antes de
empezar a usarlo por primera vez o tras un
largo periodo sin usarlo.
K
A
D
C
Como otros muchos productos nuevos, es
necesario algo de tiempo para acostumbrarse al
barbero Norelco AccuVac. Si es la primera vez
que utiliza un barbero eléctrico o si ha estado
utilizando uno de otra marca, tómese su tiempo
para familiarizarse con su nuevo barbero.
1 Asegúrese de que el peine guía está
colocado en el barbero y utilice la
posición 1 para conseguir un 'look
desarreglado' (fig. 5).
3 Quite la unidad de corte (fig. 11).
◗
◗
◗
4 Limpie la unidad de corte y el interior del
barbero con el cepillo que se suministra
(fig. 12).
2 Saque el accesorio peine guía tirando de él
y sacándolo del barbero (fig. 6).
Fig. 1
3 Conecte el barbero.
4 Haga movimientos bien controlados.
Toque ligeramente el pelo con el barbero
(fig. 7).
I
Cómo Volver A Colocar El Accesorio
Peine Guía En El Barbero
3
2
4
5
1
5
7
6
5
◗
◗
8
5
9
10
◗
11
13
12
◗
◗
Cámara De Recogida De Pelo
1 Desconecte el barbero.
#3
.16 in./4 mm
#4
.22 in./5.5 mm
◗
Antes de comenzar a recortar, peine
siempre la barba o el bigote con un peine
fino.
◗
Si hace esto por primera vez, tenga cuidado.
No mueva el barbero demasiado rápido.
Haga movimientos suaves y lentos.
3 Para recortar más eficazmente, desplace el
barbero en la dirección contraria al
crecimiento del pelo. No mueva el
barbero demasiado rápido. Haga
movimientos suaves y lentos y asegúrese
de que la superficie del peine guía está
siempre en contacto con la piel (fig. 4).
Downloaded from www.Manualslib.com manuals search engine
Siempre desconecte el barbero antes de
limpiarlo.
No use abrasivos ni líquidos tales como
alcohol, gasolina, lejía o acetona para limpiar
el aparato.
Nunca limpie, quite o coloque el accesorio
peine guía si el motor está funcionando.
No ejerza presión sobre las cuchillas.
No toque las cuchillas con objetos duros, ya
que las podría dañar.
No lo utilice mientras se baña o se ducha,
ni lo sumerja en agua u otros líquidos, ya
que puede dañar el barbero.
Nunca utilice objetos duros o punzantes
para limpiar el filtro, de lo contrario lo
dañaría.
Si se han acumulado pelos en el peine guía,
desconecte el barbero, saque el accesorio
peine guía y quite los pelos sacudiendo y/o
soplando.
Tabla De Posiciones De Largo De Corte
Cómo Recortar
2 Coloque el barbero en la posición ON.
◗
◗
◗
Use este barbero para uso doméstico tal y
como se describe en este manual.
Si va a usar el aparato por primera vez,
comience con la posición de longitud de
corte máxima, la 9, para evitar que
accidentalmente corte demasiado los pelos.
A medida que se vaya familiarizando con las
posiciones, ajuste el Zoom Lock a la
longitud de corte deseada. El Zoom Lock
encajará con un 'clic' en cada posición.
Si las cuchillas y el filtro se dañan o se
desgastan, no siga usando el barbero. Sustituya
inmediatamente las cuchillas y/o el filtro.
Este barbero no tiene más partes que sean
usadas por el usuario para ser reparadas.
Cualquier otro servicio debe ser realizado por
un Servicio de Asistencia Técnica Norelco.
Largo de un par de días o muy carto .06 in./1.5 mm
#2
Corto
#5
Mediano
#6
.3 in./7.5 mm
.38 in./9.5 mm
#7
.48 in./12 mm
#8
#9
.1 in./2.5 mm
.6 in./15 mm
Largo
.72 in./18 mm
NOTA: Puesto que no todos los pelos crecen en la
misma dirección, puede probar diferentes posiciones de
corte (es decir, hacia arriba, hacia abajo o en diagonal).
La práctica es lo mejor para obtener buenos resultados.
2 Retire la cámara de recogida de pelo Clear
View y quite los pelos sacudiéndolos o
soplando sobre ellos (fig. 8).
3 Para limpiar más profundamente y
mantener un rendimiento de succión
óptimo, quite el filtro... (fig. 9).
4 ...y limpie con cuidado la cámara de
recogida de pelo Clear View y el filtro con
el cepillo que se suministra (fig. 10).
Cuando lo utilice sobre barbas muy largas o
densas, puede que también sea necesario
vaciar la cámara de recogida de pelo
durante la misma sesión para mantener la
potencia de succión óptima.
◗ Si la potencia de succión no es tan fuerte
como de costumbre, se debe vaciar la
cámara de recogida de pelo para restaurara
la potencia óptima.
◗
GARANTÍA COMPLETA DURANTE DE DOS AÑOS
Philips Electronics North America Corporation garantiza cada nuevo
producto Norelco Modelo T770 contra defectos de los materiales o de
fabricación durante un período de dos años (cuchillas hasta siete años)
desde la fecha de compra, y está de acuerdo en reparar o sustituir sin cargo
cualquier producto defectuoso.
IMPORTANTE: Esta garantía no cubre deterioros producidos por
accidente, mal uso o abuso, falta de un cuidado razonable, la fijación de
cualquier accesorio no suministrado con el producto, o la pérdida de piezas
o el sometimiento del producto a cualquier voltaje diferente a los
especificados.* El uso de piezas de sustitución no autorizadas anulará esta
garantía.
PHILIPS ELECTRONICS NORTH AMERICA CORPORATION NO
PAGARÁ SERVICIOS DE GARANTÍA LLEVADOS A CABO POR
SERVICIOS DE REPARACIÓN NO AUTORIZADOS, Y NO
INDEMNIZARÁ
AL
CONSUMIDOR
POR
DETERIOROS
RESULTANTES DEL SERVICIO DE GARANTIA LLEVADO A
CABO POR SERVICIOS DE REPARACIÓN NO AUTORIZADOS.
NO SE ASUME LA RESPONSABILIDAD POR CUALESQUIERA
DETERIOROS
ESPECIALES,
INCIDENTALES
O
CONSECUENCIALES.
A fin de obtener el servicio de garantía, simplemente lleve o envíe el
producto (a portes pagados) al más cercano Servicio de Asistencia Técnica
de Norelco. Le sugerimos que, para mayor seguridad, haga los envíos por
correo certificado (con la certificación pagada). Los deterioros producidos
durante el envío no están cubiertos por esta garantía.
NOTA: Ninguna otra garantía, escrita o de palabra, está autorizada por
Philips Electronics North America Corporation. Esta garantía le da derechos
legales específicos y también puede tener otros derechos que varían de un
estado a otro. Algunos estados no permiten la exclusión o limitación de los
deterioros incidentales o consecuenciales, por lo cual las anteriores
exclusiones y limitaciones pueden no ser de aplicación en su caso.
* Lea cuidadosamente las instrucciones que se incluyen
Fabricado por:
Norelco Consumer Products Company
A Division of Philips Electronics North America Corporation
1010 Washington Blvd., Stamford, CT 06912-0015
FABRICADO EN AUSTRIA
Este símbolo colocado en la placa de caracteristicas del producto
significa que está registrado por Underwriters Laboratories, Inc.
Asistencia
◗
Para asistencia o para hallar el Servicio de
Asistencia Técnica Norelco más cercano,
llame (sin cargo) al teléfono:
1-800-243-3050 o visite nuestra página
web: www.norelco.com
◗
La información sobre los Servicio de
Asistencia Técnica Norelco está disponible
24 horas al día, 7 días a la semana.
◗
Sea seguro que el barbero de ajuste está
dado vuelta apagado y que quita la cuerda
del enchufe y del barbero de ajuste antes
de almacenar en una localización segura,
seca en donde no será machacado,
golpeado, o conforme a daño.
No lo enrolle alrededor del barbero de
ajuste al almacenar.
Almacene la cuerda en una localización
segura en donde no será cortada ni será
dañada.
No coloque o almacene el barbero en un
lugar donde se pueda caer a la bañera o el
lavabo, el agua o el otro líquido.
Almacenamiento
Limpieza
1
◗
◗
2 Coloque el accesorio peine guía hasta que
encaje en su sitio con un clic. El accesorio
peine guía sólo encaja en el barbero de
una manera: alineándolo correctamente
para que se deslice en las guías laterales de
la cabeza del barbero. Si no encaja bien,
déle la vuelta.
NOTA: El Zoom Lock puede estar en cualquier
posición cuando quite o ponga el accesorio.
#1
1 Gire el Zoom Lock hasta la posición de
longitud de corte deseada (consulte la
tabla). La posición aparecerá en la ventana
situada debajo del Zoom Lock (fig. 5).
Cómo Sustituir La Unidad De Corte
1 Asegúrese de que el barbero está en la
posición OFF.
1
El accesorio de peine guía debe estar en el
barbero para poder usar el Zoom Lock.
5 Vuelva a colocar en el barbero la unidad
de corte y el peine guía (fig. 13).
J
Sistema AccuVac
◗
Definir las líneas del pelo
Recortar la nuca
Eliminar pelos sueltos
Nunca saque el accesorio peine guía tirando la
zona flexible de la parte superior, siempre tire
de la parte inferior del accesorio.
L
El sistema AccuVac se activa automáticamente
cuando conecta el barbero. Recoge los pelos
mientras se usa el aparato de la forma que sea,
es decir, con o sin accesorio de peine y
contorno. La guía flexible sigue el contorno del
rostro y el deflector dirige los pelos cortados
hacia la boquilla del mecanismo de succión. Se
recomienda que vacíe la cámara de recogida de
pelo después de cada sesión. Cuando lo utilice
sobre barbas largas o densas, puede que
también sea necesario vaciar la cámara de
recogida de pelo durante la misma sesión para
mantener la potencia de succión óptima
(consulte también en el capítulo 'Limpieza', la
sección 'Cámara de recogida de pelo').
Recorte Con El Accesorio De Peine
Guía ACU•CONTROL.
2 Quite el accesorio peine guía.
Retire el accesorio peine guía si va a:
Sistema Acu•Control
Para garantizar el óptimo funcionamiento
del sistema AccuVac, no corte más de 7
mm de la longitud total de su barba de una
vez. Si quiere una barba más corta, repita el
procedimiento una o más veces.
Barbero:
G
H
◗
Se recomienda vaciar y limpiar la cámara de
recogida de pelo después de cada uso.
El barbero no debe funcionar sin la cámara
de recogida de pelo.
1 Asegúrese de que el barbero está
desconectado y desenchúfelo de la toma
de corriente eléctrica.
1 Asegúrese de que el barbero está en la
posición OFF.
E
F
El barbero AccuVac incorpora el sistema
patentado AcuControl combinado con un
sistema de ajuste Zoom Lock para facilitar el
corte de los pelos del rostro. El sistema
integrado AccuVac recoge los pelos cortados.
El sistema patentado Acu•Control le da todo el
control cuando utiliza el barbero sobre su
rostro, sin necesidad de tener experiencia
previa. El peine guía flexible se ajusta
automáticamente para adaptarse al contorno de
su rostro y conseguir así un resultado uniforme
y apurado. Es fácil de manejar en las zonas de
difícil acceso, como el cuello o la barbilla. El
selector de longitud de corte patentado Zoom
Lock le permite elegir entre 9 longitudes de
corte preseleccionadas y queda encajado en la
posición para que pueda controlar la longitud
exacta que desea o variar la longitud de los
pelos de su rostro. El sistema patentado
Acu•Control y el selector de longitud de corte
Zoom Lock le proporcionarán siempre
resultados fiables y profesionales.
◗
Cómo Recortar Sin El Accesorio Peine
Guía
B
Póngalo A Prueba
Tire las tijeras y pruebe el nuevo barbero
AccuVac. Le garantizamos un resultado preciso,
profesional, de lo contrario, Norelco le
reembolsará el precio total de su compra,
¡garantizado!
◗
◗
◗
◗
Cómo Quitar Las Baterías
◗
◗
◗
Este barbero Norelco lleva baterías
recargables de Niquel-Cadmio que deben
ser deschadas adequamente.
Las baterías sólo deben quitarse cuando el
barbero vaya a ser desechanda.
Consulte la hoja de instrucciones “Cómo
Quitar Las Baterías Recargables”.
Norelco y ACU•CONTROL son marcas registradas de Philips Electronics North
America Corporation.
AccuVac, Clear View y Zoom Lock son marcas de fábrica de Philips
Electronics North America Corporation.
PHILIPS es una marca registrada de Koninklijke Philips Electronics N.V.
© 2003 Philips Electronics North America Corporation. Reservados todos los
derechos.
ULTRA PRECISE, ULTRA CONVENIENT...GUARANTEED!
60 DÍAS DE
GARANTIA DE
DEVOLUCÍON DEL
DINERO
Si no está completamente satisfecho con su barbero Norelco
para bigote y barba, remítanos el producto y le devolveremos
el precio total de su compra. El barbero se debe enviar
mediante correo certificado con franqueo pagado, adjuntando
el recibo de compra, indicando el precio y la fecha de
compra.
La fecha del matasellos debe estar dentro de los 60 días
a partir de la fecha de compra. Norelco se reserva el
derecho de verificar el precio de compra del barbero y
limitar el reembolso para no superar el precio de compra
sugerido para los consumidores.
Envíe el recibo de compra con la fecha, su nombre completo
y dirección tal y como se indica más adelante y el barbero,
todo con franqueo pagado a:
Norelco Consumer Products Company
A Division of Philips Electronics North
America Corporation
450 North Medinah Road, Dock 16
Roselle, IL 60172-2329
El envío del cheque se demora de 4 a 6 semanas.
(Escriba sus datos en letra de imprenta)
Nombre_______________________________________
Dirección______________________________________
Ciudad________________________________________
Estado _____________Código Postal________________
Número de teléfono de dias.(______ )________________
Código de área
Direccion de email:_____________________________
MOTIVO DE LA DEVOLUCIÓN____________________
______________________________________________
______________________________________________
______________________________________________
______________________________________________
______________________________________________
______________________________________________
______________________________________________
______________________________________________
______________________________________________
______________________________________________
______________________________________________
______________________________________________