1
5U000271C0A REV.00
PANTECH Link User Guide
Some of the contents in this manual may differ from your phone
depending on the software of the phone or your service provider.
© 2010 AT&T Knowledge Ventures. All rights reserved. Subsidiaries and
affiliates of AT&T Inc. provide products and services under the AT&T brand.
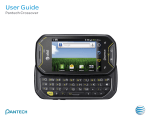
User Guide
Guía del usuario
Alguna de los contenidos de este manual puede tener variaciones
con el telefono dependiendo del software o de proveedor de servicio.
© 2010 AT&T Knowledge Ventures. Las empresas subsidiarias y afiliadas
de AT&T Inc. proporcionan productos y servicios utilizando la marca de AT&T.
5U000271C0A REV.00
Your phone is designed to make it easy for you to access a wide variety of content. For your protection, we want you to be aware that
some applications that you enable may involve the location of your phone being shared. For applications available through AT&T, we
offer privacy controls that let you decide how an application may use the location of your phone and other phones on your account.
However, the AT&T privacy tools do not apply to applications available outside of AT&T. Please review the terms and conditions and
the associated privacy policy for each location-based service to learn how location information will be used and protected. In addition,
your AT&T phone may be used to access the Internet and to download, and/or purchase goods, applications, and services from AT&T or
elsewhere from third parties. AT&T provides tools for you to control access to the Internet and certain Internet content. These controls
may not be available for certain devices which bypass AT&T controls.
Su teléfono está diseñado para hacerlo fácil para acceder a una amplia variedad de contenido. Para su protección, queremos que usted
esté enterado que algunas aplicaciones que le permite puede implicar la ubicación de su teléfono para ser compartida. Para aplicaciones
disponibles a través de AT&T, ofrecemos controles de privacidad que le permiten decidir cómo una aplicación puede utilizar la ubicación
de su teléfono y otros teléfonos en su cuenta. Sin embargo, el AT&T herramientas de privacidad no se aplican a las aplicaciones
disponibles fuera de AT&T. Por favor, revise los términos y condiciones asociadas y la política de privacidad para cada lugar de servicio
para saber cómo la información sobre la localización serán utilizados y protegidos. Además, su AT&T teléfono puede ser usado para
acceder a Internet y para descargar, y / o la adquisición de bienes, aplicaciones y servicios de AT&T o en otra parte de terceros. AT&T
proporciona herramientas para que usted controle el acceso a Internet ya determinados contenidos de Internet. Estos controles pueden
no estar disponibles para ciertos dispositivos de bypass que AT&T controles.
User Guide
Thank you for choosing the Pantech Link, our latest 3G mobile
phone.
The Pantech Link has many features designed to enhance
your mobile experience. From its unique, stylish design and
QWERTY keypad, we know you will enjoy the entire Link
experience.
This User Guide contains important and useful information
that will maximize your familiarity with all that the Pantech
Link has to offer.
Specifications
Design
QWERTY bar
Displays
• 262k colors TFT LCD with 2.4” display
• 320*240 resolution
• 5 lines for text in basic mode with 16-point font
• Two soft keys and four-way scroll and selection O keys
Melodies
.mp3, .midi, .mid, .iMelody, .wav, .mmf, .wma, .3gpa
Camera
Integrated 1.3M CMOS Camera
• Resolution up to 1280 x 1024 (1,310,720 pixels)
• Mpeg4 Video recording/playing up to 15f/s (QVGA size)
• Self-timer function (5 seconds or 10 seconds)
• Photo album and video album
Dimensions & Weight
• Weight: 91 g/3.2 oz (with standard battery)
2
• Dimensions: 115.20 mm x 60.90 mm x 9.9 mm
4.5” x 2.4” x 0.39”
Phone overview
Power Management (Performance)
Navigation
Up: Write New SMS
Down: Contact List
Left: Mobile Email
Right: IM
Center: OK / Mobile Web
Battery Type Capacity
Standard
Lithium-Ion
(Li-ion)
930 mAh
Operating Frequency
Standby Time
Talk Time
Minimum
10 days (250 hrs)
Minimum
3 hrs
• GSM 850Mhz, GSM 900Mhz, GSM 1800Mhz, GSM 1900Mhz,
UMTS 850Mhz and UMTS 1900Mhz networks in North America,
South America, Europe, Africa, and Asia-Pacific where these
networks are supported.
• Automatic band switching.
Receiver
Display
Left/Right Soft key
Perform the functions shown at the bottom
line of the display.
Speaker Phone Key
Send Key
CAPS/Shift key
To type a single uppercase letter,
press this key then a letter.
Function key
To enter a number or a symbol,
press the function key, and
press the corresponding key.
Clear key
Return to previous screen or
delete characters in text mode.
Power on&off / Menu exit key / End key
Turn phone on/off, end calls, exit menus.
Delete key
Press to delete a number or letter.
Enter key
Press to move to the next row.
Space key
Press to enter a space.
3
Left Side key
Volume up and down
Speaker
Camera
Charger slot / Ear mic
microSD Slot
Camera key
Internal antenna area
note: Holding the device by the internal antenna area might affect the quality of all calls.
4
Using shortcuts
Menu overview
Example: Accessing the Language menu.
Address Book
My settings
All Contacts
Favorites
Groups
Numbered menu items, such as menus, sub-menus, and options
can be quickly accessed by using their shortcut numbers. In Menu
mode, Main Menus can be accessed by pressing the number keys
(1 to 0, *, #) corresponding to their location on the screen.
1. Press Menu.
2. Press the # for Settings.
3. Press the 4 for Phone.
4. Press the 1 for Language.
5. Press Select for Screen Text.
6. Press the U or D scroll key to display the list of available
languages.
note: In main menu screen the number keypad is matched with the
menus as follows.
1
2
3
4
Address Book
Messaging
IM
Mobile Email
5
6
7
8
Mobile Web
AppCenter
AT&T GPS
YPmobile
9
9
*
#
My Stuff
Online Locker
AT&T Music
Settings
Messaging
Conversations
Create Message
Mobile Email
IM
Outbox
Drafts
Voice Mail
Settings
Templates
Used Space
5
IM
Mobile Email
Mobile Web
AppCenter
S
6
My Stuff
Applications
Audio
Games
Online Locker
Picture
Video
Tools
Other Files
Used Space
YPmobile
AT&T GPS
AT&T Navigator
Where
AllSport GPS
Loopt
AT&T Family Map
SIM dependent
N
AT&T Music
Music Player
Shop Music
AT&T Radio
Shazam
Music Videos
Make-UR-Tones
Community
Music Apps
Online Locker
Settings
Profiles
Display
Call
Phone
Network Connections
Connectivity
Security S
AT&T Software Update
Reset
TTY
Phone Information
Network dependent
7
Quick & Easy
Keys
Functions
<> Perform the functions shown at the bottom line of the display by using these soft keys.
O
8
Scroll through the menu options in Menu mode. In standby mode,
Left:AccessMobile Email menu
Right:AccessIM menu
Up:AccessCreate Message menu
Down:AccessContacts menu
Work in Word search mode if pressed in the Predictive text input mode.
Selectamenufunctionorstoreuser-inputinformation,suchasnames.Alsousethiskeyforconfirmationasthe
O key.
Launch the Mobile Web directly if pressed in standby mode.
N
Turn on the speaker mode.
C
Delete characters from the display, or return to previous menu.
S
Send or receive a call. Show the recent call list in standby mode.
E
Complete the current call. Turn on/off the phone if pressed and held.
Cancel user input and return to main screen while in Menu mode.
Keys
Functions
1
Quickly connect to the voice mail server if pressed and held in standby mode.
0~9
B
Enter numbers, letters or special characters. Go to the dial screen if pressed in standby mode.
Enter or exit from vibrate mode if pressed and held in standby mode.
q
Enteraninternationaldialingprefixifpressedandheldinstandbymode.
m
Changevarioustextinputmodesifpressedatthetext-editingscreen.
Q
Adjusttheearpiecevolumewhilemakingacall.
Control the Ringtone volume, vibrate mode and silent all mode in standby.
Mute the ringtone of an incoming call.
Turn camera capture mode on.
Work as a camera shutter in capture mode.
9
Contents
Specifications.............................2
Phone overview.........................3
Using shortcuts...........................5
Menu overview..........................5
Quick & Easy...............................8
1. Getting Started
SIM card and battery.....................14
Turning the phone on/off . ...........15
Keypad unlock...............................16
Essential display indications..........16
Memory card ................................17
Assigning the menu .....................18
Updating software........................18
Using the QWERTY keypad............18
Using the multitask menu............19
2. Calls and address book
Making, receiving and ending
calls................................................22
Using video share..........................23
Options during a call.....................24
Call settings ..................................25
Checking all calls...........................26
Speed dialing.................................27
Using the address book.................27
10
Address book settings ..................28
Caller identification.......................29
Using your headset........................29
Service numbers and fixed dialing...29
3. Messaging
Entering text..................................32
Receiving messages......................32
Creating and sending text
messages.......................................33
Creating multimedia messages....34
Message templates.......................36
Message settings ..........................37
Managing memory.......................38
Email..............................................38
Using instant messenger..............38
4. Multimedia
Camera..........................................42
Photo album..................................44
Video album..................................46
Audio album..................................47
Music player...................................48
Music player settings.....................50
Media player..................................51
Other files......................................52
Managing memory ......................52
Playing games ..............................52
5. Useful Features
Alarm.............................................56
Calendar.........................................56
Notepad and voice memo.............56
World time.....................................57
Calculator, tip calculator and
converter . .....................................58
Stop watch and timer....................58
Business card.................................59
Memory information....................59
6. Connectivity
Bluetooth.......................................62
Using mobile web . .......................63
Using the browser.........................63
Profile settings . ............................64
7. Settings
Safety precautions.........................76
About the battery usage...............76
FCC Hearing-Aid Compatibility (HAC)
Regulations for Wireless Devices...77
FCC Regulatory Compliance..........79
Warranty........................................80
Language.......................................68
Time and date................................68
Ring tones . ...................................68
Display...........................................68
Security..........................................69
Reset..............................................70
TTY.................................................70
8. Appendix
Alert message................................74
Troubleshooting checklist.............74
Safety information........................75
11
P7040
1
Getting Started
SIM card and battery
Turning the phone on/off
Keypad unlock
Essential display indications
Memory card
Assigningthemenu
Updating software
Using the QWERTY key pad
Using the Multitask menu
SIM card and battery
About your SIM card
When you subscribe to your network operator, you receive a SIM
(Subscriber Identity Module) card containing your registration
information, PIN code, etc.
Like a credit card, it should be kept secure and handled carefully.
Do not bend, scratch or expose it to moisture. Avoid static
electricity.
To avoid corrupting your SIM card’s memory, always switch off
your phone before removing or inserting your SIM card.
About your battery
Your phone uses a Li-Ion battery. Make sure to use an authorized
battery and charger only. For more details, please inquire at your
nearest dealer.
note: Your phone is powered by a Lithium Ion (Li-Ion) battery. Unlike
other forms of battery technology, you can recharge your battery while
some charge remains without reducing your phone’s autonomy due to the
“battery memory effect” inherent in those technologies.
Installing/removing SIM card and battery
1.Remove the battery cover from the unit.
2.To fit the battery cover, put it on the
guide rail and push up.
3.Insert the SIM card into the slot. The
gold contacts of the SIM card should go
against the metal contacts of the phone.
Put the contacts of the battery into the
hole located at the bottom of the unit
insert and press the upper side of the
battery until you hear the “click”. Make
sure you align the gold contacts at the
battery end with contacts on the phone.
If the contacts at the battery are not
properly aligned, damage could occur to
the phone and the battery.
4.To remove the battery push the bottom
of the battery to upwards (1) and
remove (2) the battery. Push the SIM
card in the direction of the arrow as
shown.
01
02
Charging your battery
Correct
1.To charge, open the protective cover
on the top right side and connect the
charger adapter.
Make sure you align the connector
as shown in the image. If not, it will
damage the charging connector on
the phone and will not charge.
2.To remove the adapter connection
press the adapter’s side buttons (1)
and pull the adapter away (2).
Incorrect
03
04
05
06
07
Correct
Incorrect
08
Turning the phone on/off
To turn on
1.Press and hold E.
To turn off
1.Press and hold E.
14
15
Keypad unlock
Received one or more configuration messages.
Unlocking the keypad
Received one or more voice messages.
1.Press Unlock > Yes.
Call forwardingN is active.
Incoming calls set to ring only (Normal).
Browser is Active, Secured and being downloaded.
Bluetooth is active.
Bluetooth hands-free + A2DP headset is connected.
Incoming calls set to Silent.
Data transfer via Bluetooth.
Flight Mode is active.
Headset is connected.
USB is connected.
TTY is active.
A GPRS signal is available. It is displayed when there is an active
GPRS session.
N
1.Open the memory card slot.
2.Insert the card. The icon will be displayed.
3.Press the card to remove.
Using a memory card
Online, Away, Busy, Offline Status of MSN.
Available, Busy, Invisible Status of YAHOO.
Resetting a memory card
You have received one or more IM messages.
Bluetooth hands-free headset is connected.
is
Inserting and removing a memory card
You can save, move and delete the files between your phone and
external memory card. You can also move and copy the files to
computer from your phone.
Available, Away, Invisible Status of AIM.
Schedule Alarm is set.
Incoming calls set to Vibrate Only.
Received one or more WAP push messages.
16
An alarm is set.
Bluetooth A2DP headset is connected.
Received one or more multimedia messages.
Battery strength. When the battery charge is low,
displayed.
A message is being received.
Incoming calls set to Vibrate and Ring.
Received one or more text messages.
microSD card is inserted.
A message is being sent.
Essential display indications
Signal strength. The greater the number of bars, the stronger
is displayed.
the signal. When network is in searching mode
A call is being made. When you are in no service area is
displayed.
An EDGE signal is available. It is displayed when there is an
active EDGE session.
BGM is play, pause and being stopped.
Network dependent
Memory card
You can use a microSD card as a memory card.
It gives you more space to save pictures, videos,
music, etc.
1.Press Menu > Settings > Reset.
2.Enter the password > External Memory Reset > Yes.
note: The default password is ‘1234’.
01
02
03
04
05
06
07
08
To copy a file to the card
1.Select the file > Options > Copy to External Memory.
2.To copy the file back to phone, press Options > Copy to
Phone.
To move a file to the card
1.Select the file > Options > Move to External Memory.
2.To move the file back to phone, press Options > Move to
Phone.
17
To delete a file from the card
1.Selectthefilefromthecard>Options > Delete.
To move a file from the card to the computer
1.Connectthedatacablewithmobileandthecomputer.
2.PressMenu > Settings > Connectivity.
3. Press Select USB Mode.
4.SelectMusic Player, Mass Storage or Ask on Connection.
5.Followtheinstructions on your computer screen.
note: Select Music Player when you want to add music to the playlist in
your device. When you select AskonConnection, it will ask you to select
either the Music Player or Mass Storage every time you connect your
device with your computer.
Assigning the menu
You can set the most commonly used menu in Options in standby
mode.
1.PressShortcuts in standby mode > select Unassigned.
2.PressAdd.
3. Select the menu and sub menu.
18
Updating software
You can update your software without visiting your nearest dealer.
To update the software
1.PressMenu > Settings > AT&T Software Update.
2.PressCheck for Update > Yes to check whether or not you
need to update the software.
note:Afterdownloadingthesoftware,thedevicewillaskyouwhether
to update the software now or later. If you choose to update the software
now, it will restart the handset. If you postpone updating the software,
youcanselectbetween30mins,1houror4hoursintheOptions. After
selecting the updating time, you will be sent back to standby mode. If
you go to Software Update while you are in postponing, press Continue
Update.
To view the version of software
1.PressMenu > Settings > Phone Information.
2.PressU/D to view Software Version.
Using the QWERTY keypad
Your phone has a QWERTY keypad which provides a superior
typing experience on a small handheld for easy and comfortable
texting. You can use all of the phone functions with the QWERTY
keypad.
Key
</>
m
F
w
T
C
l
Function
Perform the functions shown at the bottom line of the
display by using these soft keys.
Press to change text input mode.
Press to type a special character or number. To enter
symbols and numbers continually, press until h
displays.
Enter the space character in text input mode.
Insert a carriage return in text input mode.
Delete a character to the left of the text cursor in text
editing screen.
Press to type a special character that is not placed on
the keypad.
Using the Multitask menu
Press and hold to launch the Multitask menu that can be
accessed from any active window or page on the phone. There
is no need to stop what you are doing, if you want to jump out
and activate another common feature. The idea is to allow you to
temporarily exit from your current location to access a group of
common functions such as: Call, Messaging, Mobile Web, Music
playerandGames&Apps.Thiskeykeepsyoufromhavingto
completely exit from your current task or window, whether that be
a text message, a web page, or an active call, to do something else.
01
02
03
04
Multitask functions
To use the multitask function, press and hold . You can choose
from one of the following functions:
• C all: Make a voice call while using the handset for other tasks.
If Music Player is active, it is muted during the call.
• M
essaging: Send a text or multimedia message while using
the handset for other tasks.
• M
obile Web: Launch the browser while using the handset for
other tasks.
• M
usic Player: Launch the Music Player while using the handset
for other tasks. If an incoming call is received or you want to
make a call, the Music Player is muted.
• Games & Apps:AccessGamesandApplicationswhileusing
the handset for other tasks.
05
06
07
08
19
2
Calls and address book
P7040
Making, receiving and ending calls
Using video share
Options during a call
Call settings
Checking all calls
Speed dialing
Using the address book
Addressbooksettings
Calleridentification
Using your headset
Servicenumbersandfixeddialing
Making, receiving and ending calls
Making a call
1.Enter the area code and phone number.
2.Press S.
Answering a call
1.Press S.
Ending a call
1.Press E.
Once the call is complete, a call summary is displayed.
Rejecting a call
1.Press E or Ignore.
Making a call using the call list
Your phone logs up to 20 dialed, received and missed call
numbers.
1.Press S to display the Recent Calls list.
2.Select All Calls, Missed Calls, Received Calls, or Dialed
Calls pressing the L/R.
3.Select a number.
4.Press S to dial the selected number.
note: To redial the last number in the Recent Calls list, press S.
22
Making a call during a call
1.Enter the phone number or look it up in Address Book.
2.Press S to dial the second call. The first call is
automatically put on hold.
Switching between two calls
1.Press Swap.
Making an international call
1.Press and hold q for the international prefix until the ‘+’
character appears.
2.Type the country code, area code, and phone number.
3.Press S.
Making an emergency call
You can make emergency calls even if your phone does not have
a SIM card.
1.Press Emergency Number, or press SOS if your phone does
not have a SIM card.
2.Press S.
Replying to a missed call
1.Press View to display the list of missed calls.
2.Select a number to call by pressing the U/D.
3.Press S.
Making video share call
Answering a second call N
1.Press S. The first call is automatically put on hold.
2.Press E to end the second call.
The call on hold is automatically reconnected.
Using video share
note: To use video share in the Recent Calls, press Options > Video Share.
Turning off the speakerphone
You can share live or recorded video while on a call. You can send
or receive video.
note: Video Share is not available in all markets. Both parties must be in
a 3G service area – a 3G icon must appear by the signal bars prior to a call
being placed, and both parties must remain in the 3G coverage area for
the duration of the Video Share.
<Call mode>
1.Enter the area code and phone number > S.
2.Press Options > Video Share.
3.Select Live or Recorded.
<Video Share Mode>
1.Press N or press Options > Speakerphone Off during
video share mode.
2.Press Options > Mute to mute the sound.
Increasing or decreasing the brightness
1.Press Options > Brightness.
2.Adjust the brightness by pressing L/R.
01
02
03
04
05
06
07
08
Zooming in and out
1.Press Options > Zoom. It ranges from 1x to 4x.
Stopping the recording
1.Press Options > Stop Record.
Stopping or ending video share
1.Press Stop to end the video share.
23
2.It will ask you whether you will stop video share > Yes to
stop.
note: The recorded video will be saved in My Stuff > Video.
Receiving video share
1.After receiving video share, it will ask you whether to accept
or reject the video share > Yes to accept and No for reject.
2.Press Options > Full Screen to enlarge the video to fill the
entire screen.
Options during a call
Microphone off and on
Switching your phone’s microphone off
1.Press Options > Mute.
Switching your phone’s microphone back on
1.Press Options > Unmute.
Talking on speaker
1.Press Speaker Phone
24
.
Putting a call on hold and returning N
Putting a call on hold
1.Press Options > Hold or press S.
Returning to a held call
1.Press Options > Unhold or press S again.
Multi-party calls
N
You can talk with more than one person or have conference call.
Making a multi-party call
1.Call the first participant.
2.Call the second participant. The first call is automatically put
on hold.
3.Press Options > Join.
Having a private conversation with one participant
1.Press Options > Split.
2.Select the participant and press Select.
All of the multi-party call participants can now hear each other.
Removing one participant from a multi-party call
1.Press Options > End.
2.Select the participant and press Select.
The call ends with that participant, but you can continue to talk
to the other participants.
Searching for a number in the address book during
a call
1.Press D and press Select or press Options > View Contacts
> All Contacts.
2.Select a number > S.
Searching for a name or group in the address book
Enter the first letters of the name for Name Search. The entries
are displayed starting with the first entry matching your input.
Finding a name manually in the address book
1.Press the U/D.
Viewing the details of the highlighted entry in the
address book
1.Press Select.
For details on address book, see page 27.
Reading a message during a call
1.Press Options > View Message.
2.Select a message > View.
01
Sending a message during a call
02
1.Press Options > Send Message.
For details on creating a text message, see page 33.
Viewing the calendar during a call
1.Press Options > View Calendar.
Making a note during a call
1.Press Options > Notepad.
Voice recording
1.Press Options > Voice Recording.
03
04
05
06
07
08
Call settings
Setting auto redial
1.Press Menu > Settings > Call > Auto Redial.
2.Select On or Off.
25
Answering by pressing any key
1.Press Menu > Settings > Call > Any Key Answer.
2.Select Answer with Any Key.
note: You can answer with any key except E and Ignore.
Answering by pressing send key
1.Press Menu > Settings > Call > Any Key Answer.
2.Select Answer with Send Key.
Checking all calls
You can view information about all Recent Calls. For more
options for all, missed, received and dialed calls press Options.
You can also view the call history simply by pressing S.
Viewing missed calls
1.Press Shortcuts in standby mode or press Menu > My Stuff
> Tools Press Recent Calls > Missed Calls.
Viewing received calls
1.Press Shortcuts in standby mode or press Menu > My Stuff
> Tools
2.Press Recent Calls > Received Calls.
26
Viewing dialed calls
1.Press Shortcuts in standby mode or press Menu > My Stuff
> Tools.
2.Press Recent Calls > Dialed Calls.
Viewing call rankings
1.Press Shortcuts in standby mode or press Menu > My Stuff
> Tools.
2.Press Recent Calls >Call Ranking.
Deleting call logs
1.Press Shortcuts in standby mode or press Menu > My Stuff
> Tools Press Recent Calls > Delete Call Logs.
2.Select All Calls > Yes.
Viewing call time
1.Press Shortcuts in standby mode or press Menu > My Stuff
> Tools Press Recent Calls > Call Time.
2.Press U/D to view Last Call, Received Calls, Dialed Calls
and Total Calls.
Resetting all call times
1.Press Shortcuts in standby mode or press Menu > My Stuff
> Tools Press Recent Calls > Call Time.
2.Press Reset > Yes.
3.Enter password > OK.
note: The default password is ‘1234’.
Viewing data transmitted information
1.Press Shortcuts in standby mode or press Menu > My Stuff
> Tools Press Recent Calls > Packet Counter.
• Current Info: You can view transmitted data in the
current session, in kilobytes. Sent, Received and Total
information are also available.
• Last Info: You can view Sent, Received, Total and
Duration information of the previous session’s transmitted
in kilobytes.
• Total Info: You can view all the Sent, Received, Total and
Duration transmitted data in kilobytes.
• Clear Logs: The default password is ‘1234’.
Speed dialing
You can dial quickly using speed dialing. Up to 8 phone numbers
can be programmed using numbers 2 to 9.
1 : Voice mail
q : Prefix for international call
Setting speed dial
1.Press Menu > Address Book > My Settings > Speed Dial.
2.Select an empty entry and press Add.
3.Select a person and press Select.
Changing speed dial contact
1.Press Menu > Address Book > My Settings > Speed Dial.
2.Select a number > Change.
3.Select a person > Select > Yes.
Removing from speed dial
1.Press Menu > Address Book > My Settings > Speed Dial.
2.Select a number > Remove.
Using the address book
01
02
03
04
05
06
07
08
You can save names, phone numbers, and information on the
SIM or phone. Number of entries can depend on the capacity of
the SIM card.
Viewing the contact list
1.Press D or press Menu > Address Book > All Contacts.
Searching for a phone number
1.Press D or press Menu > Address Book > All Contacts.
27
2.Input the first letter or two of the person’s name and scroll
with U/D.
3.Press Select to view the detailed information.
4.To update information, press Options > Edit Contact.
Calling from the contact list
1.Press D or press Menu > Address Book > All Contacts.
2.Select a person to call.
3.Press S.
Forwarding contact details
1.Press D or press Menu > Address Book > All Contacts.
2.Select a contact > Options > Send Contact.
3.You can send the information using Multimedia Message
or Bluetooth.
Deleting a contact
1.Press D or press Menu > Address Book > All Contacts.
2.Select a contact > Options > Delete Contact.
Adding a contact
1.Press Menu > Address Book > All Contacts > Options >
Add New Contact.
2.Input the fields.
28
3.Press Save.
Making & Editing groups
1.Press Menu > Address Book > Groups.
2.To add new group, press Options > Create New Group.
3.To edit group, press Options >Edit Group > Add Members,
Edit Members or Remove Members.
4.To rename group, press Options > Rename Group.
5.To delete group, press Options > Delete Group.
Address book settings
Managing my info
1.Press Menu > Address Book > My settings > My Info.
Setting the sort order
1.Press Menu > Address Book > My settings > Sort by.
2.Select First Name or Last Name.
Setting Sync settings
1.Press Menu > Address Book > My settings > AT&T
Address Book.
2.Select Auto Sync On or Auto Sync Off.
Setting SIM management
1. Press Menu > Address Book > My settings > SIM
Management.
Caller identification
Caller identification N
1.Press Menu > Settings > Call > Display My Number.
2.Select Network Default, Show or Hide.
Service numbers and fixed dialing
Calling your service numbers S
You can see the service number to reach the service provider.
1.Press Menu > Address Book > My Settings > Service
Numbers.
2.Select a number > press S.
Viewing the fixed dialing list
Using your headset
Fixed dialing is a service that limits your access to specific
numbers in the address book list recorded on the SIM. Input the
PIN2 to set up or cancel this service.
1.Press Menu > Address Book > My Settings > FDN List.
2.Select a number > press S.
note: You must use the headset designed for this device. It is an optional
accessory. Not all headsets will have a button.
note: PIN2 must be correctly entered within 3 attempts. If you input the
incorrect code three times in a row the PIN2 code will be blocked. If the
PIN2 code is blocked please contact your service provider. Your PIN2 code is
supplied with the SIM card.
You can send or receive a call using your headset.
When you connect your headset to the jack the button on the
headset works as follows.
While in standby mode
01
02
03
04
05
06
07
08
1.Press the button once to list recent calls.
2.Press the button twice to redial the last call.
29
3
P7040
Messaging
Entering text
Receiving messages
Creating and sending text messages
Creating multimedia messages
Message templates
Message settings
Managing memory
Email
Using instant messenger
Entering text
You can enter text with multi-tap, predictive, numeric or symbol.
Useful keys
l
Display symbols
w
Adding space
m
Press to change capital mode
Press to change ab Ab AB and press to change from multi
to predictive to Number
Multi-tap dbc (all small caps / first letter caps
/ all caps)
Predictive gef (all small caps / first letter
caps / all caps)
Number a
For details on using QWERTY keypad, see page 18.
Predictive mode
The predictive mode automatically compares your keystrokes
with an internal linguistic dictionary to determine the correct
word. It will display the most commonly used word first. To save a
word not listed in phone’s dictionary, press Options > Predictive
Settings > Selection List > On.
32
1.Press m to change the mode to predictive.
2.Press A to * to input text.
For example, to write ‘hello’ press H 1 I and press D
4 times.
Alphabet input mode
1. Press m to change the mode as multi-tap.
2. Press A to * to input text repeatedly.
Numeric mode
You can input numbers in this mode.
1.Press m to change the mode to 123.
2.Press 1 to 9 and 0 to input numbers.
Symbol mode
You can input symbols.
1.Press l to view the symbols.
2.Press U/D/L/R to select symbol and press Insert.
Receiving messages
Viewing a new message
1.Press View.
Reading a message from the inbox
1.Press Menu > Messaging > Conversations.
2.Select a received message > Open > View.
Saving the contact information from a received
message
1.Select a received message > View.
2.Press Options > Save.
3.Select New Contact or Update Contact.
Saving the object in a received multimedia message
1.Open the multimedia message.
2.Select an object.
3.Press Options > Use > Save.
It will be saved in one of the categories in the My Stuff folder.
For details on photo album, see page 44.
Listening to voice message
1.Press and hold 1 or press Menu > Messaging > Voice
Mail.
It will automatically call the voice mail center.
Loading URL using Push message
1.Press Menu > Messaging > Conversations > Open.
2.Press Options > Load URL.
Saving connection settings using configuration message
1.Press Menu > Messaging > Conversations > Open.
2.Press Options > Install.
01
Creating and sending text messages
03
Sending a new text message
1.Press U or press Menu > Messaging > Create Message.
2.Enter the message.
3.To save the message as draft, press Options > Save to
Drafts.
4.Press Send to and select the person to send message and
press Select.
5.Press Send.
6.To view sent message, press Menu > Messaging >
Conversations, select a recipient > Open > View.
02
04
05
06
07
08
note: All successfully sent messages will be saved in Conversations while
the messages that failed to be sent will be saved in the Outbox.
Finding all sent messages
1.Press Menu > Messaging > Conversations.
33
Replying to a message
1.Press Menu > Messaging > Conversations.
2.Select a recipient > Open.
3.Select a message > View > Reply.
Creating multimedia messages
You can create and send multimedia messages. Capacity is
100Kb, 300Kb, 600Kb an error message will alert you once you
exceed the capacity.
Adding a saved picture to the message
1.Press U or press Menu > Messaging > Create Message.
2.Enter a message.
3.Press Insert > Picture > Picture > Camera.
4.Scroll to the saved picture and press Select.
5.To preview the current page, press Options > Preview >
Current.
6.To preview the whole message, press Options > Preview >
Whole Message. To go back to text editor page, press Stop.
7.To edit the text message, press U/D to select the text box.
8.Press Send to and select the person to send message and
press Select.
9.Press Send.
34
Adding a new picture to the message
1.Press U or press Menu > Messaging > Create Message.
2.Enter a message.
3.Press Insert > Take New Picture.
4.Focus on the object > O.
5.To preview the current page, press Options > Preview >
Current.
6.To preview the whole message, press Options > Preview >
Whole Message. To go back to text editor page, press Stop.
7.To edit the text message, press U/D to select the text box.
8.Press Send to and select the person to send message and
press Select.
9.Press Send.
For taking a picture, see page 43.
Adding a saved video to the message
1.Press U or press Menu > Messaging > Create Message.
2.Enter a message.
3.Press Insert > Video > Video.
4. Scroll to the saved video clip and press Select.
5.To preview the current page, press Options > Preview >
Current.
6.To preview the whole message, press Options > Preview >
Whole Message. To go back to text editor page, press Stop.
7.To edit the text message, press U/D to select the text box.
8.Press Send to and select the person to send message and
press Select.
9.Press Send.
Adding a new video to the message
1.Press U or press Menu > Messaging > Create Message.
2.Enter a message.
3.Press Insert > Record New Video.
4.Focus on the object > O.
5.To stop recording and save press Stop.
6.To edit the text message, press U/D to select the text box.
7.To preview the current page, press Options > Preview >
Current.
8.To preview the whole message, press Options > Preview >
Whole Message. To go back to text editor page, press Stop.
9.Press Send to and select the person to send message and
press Select.
10. Press Send.
For recording a video, see page 44.
Adding a recorded voice memo to the message
1.Press U or press Menu > Messaging > Create Message.
2.Enter a message.
3.Press Insert > Sound.
4.Select Audio > My Voice.
5.Scroll to the saved audio clip and press Select.
6.To edit the text message, press U/D to select the text box.
7.To preview the current page, press Options > Preview >
Current.
8.Press Pause to stop listening.
9.To preview the whole message, press Options > Preview >
Whole Message. To go back to text editor page, press Stop.
10. Press Send to and select the person to send message and
press Select.
11. Press Send.
01
02
03
04
05
06
07
08
Adding a new voice memo to the message
1.Press U or press Menu > Messaging > Create Message.
2.Enter a message.
3.Press Insert > Record New Sound.
4.Press Record to record the sound.
5.To stop and save press Stop.
35
6.To edit the text message, press U/D to select the text box.
7.To preview the current page, press Options > Preview >
Current.
8.Press Pause to stop listening.
9.Press Resume to replay.
10. To preview the whole message, press Options > Preview >
Whole Message. To go back to text editor page, press Stop.
11. Press Send to and select the person to send message and
press Select.
12. Press Send.
For recording a voice memo, see page 57.
Adding other files to the message
1.Press U or press Menu > Messaging > Create Message.
2.Enter a message.
3.Press Insert > Other Files > Other Files.
4.Select the file and press Select.
5.To edit the text message, press U/D to select the text box.
6.To preview the current page, press Options > Preview >
Current.
7.To preview the whole message, press Options > Preview >
Whole Message. To go back to text editor page, press Stop.
36
8.Press Send to and select the person to send message and
press Select.
9.Press Send.
Message templates
When you often use the same phrases, you can save the message
under template messages.
Adding the message as a template
1.Press Menu > Messaging > Templates.
2.Press Options > Add New.
3.Enter the frequently used message > Options > Save.
Sending a message with template
1.Press Menu > Messaging > Templates.
2.Select the message to send.
3.Press Send to add more messages.
4.Press Send to and select the person to send message and
press Select.
5.Press Send.
note: You can add a template while entering a message. Enter a message
> Insert > Templates. Select the message to add.
Message settings
Setting message center
1.Press Menu > Messaging > Settings.
2.Press Text Message.
3.Enter new Center Address.
4.Press Save.
Setting e-mail gateway
1.Press Menu > Messaging > Settings.
2.Press Text Message.
3.Enter new Email Gateway for sending text message by
email address.
4.Press Save.
Setting profiles for multimedia message
1.Press Menu > Messaging > Settings.
2.Press Multimedia Message > MMS Profiles.
3.Select a profile.
Setting for sending multimedia message
1.Press Menu > Messaging > Settings.
2.Press Multimedia Message > Sending Settings.
3.You can set the Validity Period, Delivery Time, Priority,
Creation Mode and Max Message Size.
Setting for receiving multimedia message
1.Press Menu > Messaging > Settings.
2.Press Multimedia Message > Receiving Settings.
3.You can set the Automatic Download, Allow Delivery
Reply, Allow Read Reply.
Setting for receiving voice message
1.Press Menu > Messaging > Settings.
2.Press Voice Mail.
3.Enter the number of the voice mail center > Save.
note: This number may be pre-configured by the service provider upon
activation.
01
02
03
04
05
06
07
08
Setting default edit mode
1.Press Menu > Messaging > Settings.
2.Press Default Edit Mode.
3.Select Alphabet or Predictive.
Setting for auto delete old message
When message memory capacity (Max. 200 messages) is full, the
oldest message will be deleted automatically.
37
1.Press Menu > Messaging > Settings.
2.Press Auto Delete Old Message.
3.Select On or Off.
Managing memory
Up to 200 messages can be stored in the phone memory,
additional messages will be saved to the SIM card.
When the message box is full the messages full icon will appear.
All messages share memory.
When
It means
Text messages are full (SIM and Phone messages)
Moving a message to SIM
1.Press Menu > Messaging > Conversations.
2.Select a recipient > Open.
3.Select a message > Options > Move to SIM.
Deleting a message in the inbox
1.Select a message > Options > Delete > Yes.
Deleting all messages in the inbox
1.Select a message > Options > Delete All.
38
Viewing memory space information
1.Press Menu > Messaging > Used Space.
2.Press L/R to view SIM and Phone memory.
01
Email
02
Receiving an email
04
You can receive emails from your service provider.
1.Press Menu > Messaging > Mobile Email.
2.Select an email > Select.
Using instant messenger
Use Instant Messenger (IM) to send and receive short, simple
messages that are delivered immediately.
03
05
06
07
08
Starting an instant messenger
1.Press Menu > Messaging > IM.
2.Select the IM application > Select.
3.Enter login and password > Sign In.
Viewing the conversation log
You can view the conversations log in the Instant Messenger
Saved History.
39
4
Multimedia
P7040
Camera
Photo album
Videoalbum
Audioalbum
Music player
Music player settings
Media player
Otherfiles
Managing memory
Playing games
Camera
In the options menu for camera
Youcantakepicturesandrecordmoviesusingthebuilt-in
camera. The photos and video clips can be saved and sent via
multimedia messages.
Videomode
Camera mode
Icons
Pictures Remaining
Icons
Name
White
Balance
Description
Auto( ),DayLight( ),Tungsten( ),
Fluorescent( )
Normal( ),Sepia( ),Negative( ),
Effect
B&W( )
Self Timer Off( ),5secs( ),10secs( )
1280x1024( ),1024x768( ),640x480
Picture Size
( ),320x240( )
Picture Quality, Save Location, Shutter Sound,
Advanced
Timer Sound, Default File Name
In the options menu for video camera
Size
Self Timer
Effect
WhiteBalance
Setting camera settings
Brightness
Zoom
1.PressMenu > My Stuff > Tools.
2.PressCamera.
3. Press Options > Settings to change settings prior to taking
a picture.
42
Icons
Name
White
Balance
Effect
Description
Auto( ),DayLight( ),Tungsten( ),
Fluorescent( )
Normal( ),Sepia( ),Negative( ),
B&W( )
Self Timer
Off(
),5secs(
),10secs(
)
Resolution
176x144(MMS)( ),176x144( ),
320x240( ),VideoShare
Name
Description
Advanced
VideoQuality,SoundRecording,Save
Location, Timer Sound, Default File Name
Zoom in and out
1.PressU/D. It ranges from 1xto4x.
Increasing or decreasing the brightness
1.PressL/R.Itrangesfrom-2to+2.
Taking a picture
1.PressQ in standby mode or press Menu > My Stuff >
Tools.
2.PressCamera.
3. Focus on the object > O or press Options > Capture.
5.Recordthemotion>Stop.
note: Your video will be saved automatically to My Stuff >Video.
Viewing the taken picture
1.PressQ in standby mode or press Menu > My Stuff >
Tools > Camera.
2.PressOptions > Photo Album.
3. Select the picture > View.
After taking pictures
To Press
Send a multimedia Options > Send > as Multimedia
message Message
Send via mobile share Options > Send > via Mobile Share
note: Your photo will be saved automatically to My Stuff > Picture >
Camera.
Send via bluetooth Options > Send > via Bluetooth
Changing to video camera mode
Set as address book Options > Set as > Caller ID
1.PressQ in standby mode or press Menu > My Stuff >
Tools > Camera.
2.PressOptions while camera mode is activated.
3. Press Video Camera Mode.
4.Focusontheobject>O or press Options > Record.
01
02
03
04
05
06
07
08
Set as wallpaper Options > Set as > Wallpaper
Delete Options > Delete
Rename Options > Rename
Viewphoto information Options > Properties
43
Recording a video
1.Press Menu > My Stuff > Tools > Video Camera.
2.Focus on the object > O or press Options > Record.
3.Press Stop to stop.
4.Press Options > Play to play the video clip.
5.Press C to go back to preview mode.
Changing to camera mode
1.Press Menu > My Stuff > Tools > Video Camera.
2.Press Options while video camera mode is activated.
3.Press Camera Mode.
For details on taking a picture, see page 43.
Viewing the recorded video clip
1.Press Menu > My Stuff > Tools > Video Camera.
2.Press Options > Video Album.
3.Select the video clip > Play.
After saving recorded video clips
To Press
Options > Send > as Multimedia
Send a multimedia message
Message
Send via mobile share Options > Send > via Mobile Share
44
To Press
Send via bluetooth Options > Send > via Bluetooth
View recorded video clip Options > Play
Delete Options > Delete
Rename Options > Rename
View the information Options > Properties
During recording a video
To Press
Receive an incoming call S
Stop recording Stop
Photo album
You can save photos to your phone or an external memory card
and view, send or delete them in the photo album. JPEG format is
supported, and other formats are saved in the Picture folder.
note: To access Picture, press Menu > My Stuff > Picture.
Viewing the saved pictures
1.Press Menu > My Stuff.
2.Press Picture > Camera.
3.Select a picture > View.
Viewing zoom mode
1.Press Menu > My Stuff.
2.Press Picture > Camera.
3.Select a picture >View > Options > Zoom Mode.
Setting as wallpaper in the display
1.Press Menu > My Stuff.
2.Press Picture > Camera.
3.Select a picture > Options > Set as > Wallpaper.
Setting as caller identification
1.Press Menu > My Stuff.
2.Press Picture > Camera.
3.Select a picture > Options > Set as > Caller ID.
Sending pictures using multimedia message
1.Press Menu > My Stuff.
2.Press Picture > Camera.
3.Select a picture.
4.Press Options > Send > as Multimedia Message.
For details on creating a multimedia message, see page 34.
Sending pictures via mobile share
1.Press Menu > My Stuff.
2.Press Picture > Camera.
3.Select a picture.
4.Press Options > Send > via Mobile Share.
For details on creating a multimedia message, see page 34.
Sending pictures via bluetooth
1.Press Menu > My Stuff.
2.Press Picture > Camera.
3.Select a picture.
4.Press Options > Send > via Bluetooth.
Deleting multiple pictures
1.Press Menu > My Stuff.
2.Press Picture > Camera.
3.Press Options > Multiple Select.
4.Press Select to select more than one picture.
5.Press Deselect to unselect.
6.Press Options > Delete.
01
02
03
04
05
06
07
08
Viewing file information
1.Press Menu > My Stuff.
2.Press Picture > Camera.
3.Select a picture.
4.Press Options > Properties.
45
Video album
Sending a video clip using multimedia message
You can view, send, save and delete videos.
The supported formats are MP4, WMA, 3GP and 3G2.
Playing the saved video clips
1.Press Menu > My Stuff.
2.Press Video.
3.Select a video clip > Play.
Using video player controls
To Press
Play & Pause O
Stop Options>Stop
Mute Options>Mute
Sending video clip via mobile share
1.Press Menu > My Stuff.
2.Press Video.
3.Select a video clip.
4.Press Options > Send > via Mobile Share.
For details on creating a multimedia message, see page 34.
Sending video clip via bluetooth
Repeat On Options> Repeat On
1.Press Menu > My Stuff.
2.Press Video.
3.Select a video clip.
4.Press Options > Send > via Bluetooth.
For details on creating a multimedia message, see page 34.
Properties Options> Properties
Deleting multiple video clips
Rewind hold L
Fast forward hold R
Control volume Side key up or down or U/D
46
1.Press Menu > My Stuff.
2.Press Video.
3.Select a video clip.
4.Press Options > Send > as Multimedia Message.
For details on creating a multimedia message, see page 34.
1.Press Menu > My Stuff.
2.Press Video.
3.Press Options > Multiple Select.
4.Press Select to select more than one video.
5.Press Deselect to unselect.
6.Press Options > Delete.
Audio album
You can play, send, delete, moves to external memory or to
phone the saved sounds. The supported formats are .qcp, .amr,
.mid, .pmd, .mp3, .wav, .mmf, .aac, .m4a, .imy, .wma, .midi,
.3gpa, .spmid and .mp4a.
Listening to the recorded sound
1.Press Menu > My Stuff > Audio.
2.Press My Voice > select a sound > Play.
Using sound controls
To Press
Play &Pause O
Stop Options > Stop
Mute Options > Mute
Rewind hold L
To Press
Fast forward hold R
Control volume Side key up or down or U/D
Repeat On Options> Repeat On
Properties Options> Properties
Setting as a ring tone
1.Press Menu > My Stuff > Audio.
2.Select a sound > Options > Set as Ring Tone.
note: The maximum ringtone file size is 300KB.
Moving or copying multiple sounds to external memory
1.Press Menu > My Stuff > Audio.
2.Select a sound and press Options > Multiple Select.
3.Press Select to select more than one sound file.
4.Press Options > Copy to External Memory or Move to
External Memory. The selected sound will copy to Audio
folder in external memory card.
01
02
03
04
05
06
07
08
Sending a sound file using multimedia message
1.Press Menu > My Stuff > Audio.
2.Select a sound file.
47
3.Press Options > Send > as Multimedia Message.
Music player
You can listen to music on your phone through the Music Player.
The Music Player is only compatible with and can play the
following audio types saved in MP3, .AAC, .AAC+, and .WMA.
When
1.Press Menu > AT&T Music > Music Player.
2.Select the categorize using U/D to play the music.
3.Select the file using U/D then press Play.
4.Press Options > Add to Playlist to add to the playlist.
5.Press Options > Stop to stop playing.
It means
note: Music will pause when you receive an incoming call and Music will
resume when the call ends.
Music is playing
Icons for player
Music has been paused
Music has been stopped
note: microSD card must be inserted to transfer music to your device.
Adding music from Windows Media Player™
1.Connect the USB cable to the device and the computer.
2.Select Music Player > Select.
3.Open the Sync tab in Windows Media Player™ in your
computer.
4.Select the music from the list and drag and drop to your
device.
note: Windows Media Player™ 10, 11 and Window XP version is required.
48
Playing the music
Icon
Name

Volume
Description
Pause
Play
Rewind
Fast Forward
Long Press: Rewind, Fast Forward
Previous Track
Next Track
Short Press: Previous, Next
Repeat All Tracks
Repeat Off
Icon
Name
Description
Repeat Single
Track
/
Shuffle On / Off
ON: the current list of songs are
randomly shuffled for playback
OFF: songs play in order and are
not shuffled
Making playlist
1.Press Menu > AT&T Music > Music Player.
2.Press Playlists > New Playlist.
3.Input Playlist Name > Save.
4.Select All Music, Albums, Artists or Genres.
5.Select the music file using U/D then press Select to add to
playlist.
6.Press Done.
Editing playlists
1.Press Menu > AT&T Music > Music Player.
2.Press Playlists.
3.Select the playlist to add music > Options > Add Tracks.
4.Select the music to add > Select > Done.
5.To remove tracks press Options > Remove Tracks > select
the music by pressing Select > Remove.
6.To rename the playlist press Options > Rename Playlist.
7.To delete the playlist press Options > Delete.
Listening to music with a Bluetooth headset
1.While music is playing in the standby mode, Press Menu >
AT&T Music > Music Player.
2.Press Now Playing > Play > Transfer to B/T Headset.
Viewing the information
1.Press Menu > AT&T Music > Music Player.
2.Select the categorize using U/D to play the music.
3.Select the file using U/D then press Play.
4.Press Options > Properties.
5.Use U/D to view Track Number, Title, Artist, Album,
Genre, Duration, File Name, File Size, Location, Format,
Bit Rate, Created, License and Sharing.
01
02
03
04
05
06
07
08
Setting as ringtone
1.Press Menu > AT&T Music > Music Player.
2.Select the categorize using U/D.
3.Select the file using U/D.
49
4.Press Options > Set as Ring Tone.
note: During playback, the file can not be set as ring tone. You cannot set
a file larger than 300 Kb as a ringtone.
Deleting music
1.Press Menu > AT&T Music > Music Player.
2.Select the music from the list.
3.Press Options > Delete.
note: If the music is playing you cannot delete it.
Shopping the music
1.Press Menu > AT&T Music.
2.Press Shop Music.
3.To go to previous page press C.
Listening the radio
1.Press Menu > AT&T Music.
2.Press AT&T Radio.
Using music identification
1.Press Menu > AT&T Music.
2.Press Shazam.
3.Hold the phone close to the music. Your phone will analyze
the music and display the artist, title and album.
note: For the cost plan contact your nearest carrier.
50
Watching the music video
1.Press Menu > AT&T Music.
2.Press Music Videos.
Viewing Billboard information
1.Press Menu > AT&T Music.
2.Press Make – UR – Tones.
Launching to community
1.Press Menu > AT&T Music.
2.Press Community.
Launching more applications
1.Press Menu > AT&T Music.
2.Press Music Apps.
Music player settings
Shuffling music
1.Press Menu > AT&T Music > Music Player.
2.Press Settings.
3.Select Shuffle.
4.Select Shuffle On or Shuffle Off.
Repeating the music
1.Press Menu > AT&T Music > Music Player.
2.Press Settings.
3.Select Repeat.
4.Select Repeat All Tracks, Repeat Single Track or Repeat
Off.
Setting equalizer
1.Press Menu > AT&T Music > Music Player.
2.Press Settings.
3.Select Equalizer.
4.Select the category by using L/R > Select.
Media player
You can play audio and video clips with the media player. The
Media Player is only compatible with and can play the following
formats saved in .3gp, .mp4, .m4a, .3gpa, .wmv, .wma, .mp3,
.aac, .amr, .mid, .mmf, .pmd, .imy, .wav and .qcp.
note: Do not use this feature illegally. Sound and video can be protected
by copyright. It is illegal to copy such sound / video tracks for the purpose
of selling or distribution. Pantech does not in any way support the
unauthorized use of content on your phone media player.
<Audio player>
1.Press Menu > AT&T Music > Music Player.
2.Press Settings.
3.Select Auto Full Screen.
4.Select On or Off.
Playing time
Volume controls
03
04
05
07
08
Duration
Player controls
<Video player>
Removing
1.Press Menu > AT&T Music > Music Player.
2.Press Settings.
3.Select Remove.
4.Select License Data File or All Music Contents > Yes.
02
06
Background
skin
Auto Full Screen
01
Video image
Playing time
Volume controls
Duration
Player controls
51
Icons for player
Icon
Name

Volume

Previous
Next

Pause
Play

Repeat On
For the audio player control see page 48.
Description
Long Press: Rewind, Fast Forward
Playing the video clip
1.Press Menu > My Stuff.
2.Press Tools > Media Player.
3.Press Video.
4.Select a file > Play.
Playing the audio file
1.Press Menu > My Stuff.
2.Press Tools > Media Player.
3.Press Audio.
4.Select the folder > select a file > Play.
52
Other files
You can manage files in unsupported formats saved on your
phone. It also lists files received via Bluetooth from other devices.
Viewing the list of the files
Shop games
1.Press Menu > My Stuff.
2.Press Games.
3.Select Shop Games.
4.Play the demo and press BUY to download the complete
game.
01
02
03
1.Press Menu > My Stuff.
2.Press Other Files.
04
Managing memory
06
Viewing memory status
1.Press Menu > My Stuff.
2.Press Used Space.
3.Use U/D to view the information.
05
07
08
Playing games
You can download games to play. It is easy to download and
you can preview them beforehand. You will only be able to view
games that are available on your mobile.
53
5
Useful Features
P7040
Alarm
Calendar
Notepad and voice memo
World time
Calculator, tip calculator and converter
Stop watch and timer
Businesscard
Memory information
Alarm
Viewing calendar
Setting an alarm
note: Monthly view is displayed as default.
1.Press Menu > My Stuff > Tools> Alarm Clock.
2.Press Create New for new alarm for the first time.
3.Set the Cycle, Time, Alarm Sound, Alert Type, Volume,
Snooze and Power Alarm > Save.
Viewing the saved alarms
1.Press Menu > My Stuff > Tools> Alarm Clock.
Editing existing alarms
1.Press Menu > My Stuff > Tools> Alarm Clock.
2.Select an alarm > Edit.
3.Press Options > Delete to delete an alarm.
4.Press Options > Create New to add new alarm.
Calendar
Calendar helps you manage your
schedule including your time for calls
or special days. You can set a reminder
on any given date with this function.
1.Press Menu > My Stuff > Tools> Calendar.
In the monthly view
To
Press
Move to another day
L for Previous
R for Next
Move to another week
U for Previous
D for Next
View other month
Side key down for Previous
Side key up for Next
Creating a new event and edit
1.Select a day > Options > New Event.
2.Select Schedule, Task or Note.
3.Input the events > Save.
note: You can create events for dates from 01/01/2000 to 12/31/2099
Notepad and voice memo
Using notepad
1.Press Menu > My Stuff > Tools > Notepad.
56
2.Press Create New for the first time. To add new note press
Create New or Options > Create New.
3.To edit memo press Edit.
4.Press Save to save.
5.If you want place a note on idle, Press Options > Place on
Wallpaper.
6.If you want remove the note from idle, Press Options >
Remove from Wallpaper.
Recording voice memo
1.Press Menu > My Stuff > Tools>
Voice Memo.
2.Press New Record for the first time.
To add new voice memo press New
Record or Options > New Record.
3.Press Record.
4.Press Stop to stop recording. It will automatically save on My
Voice.
5.Press Play to listen.
note: To access My Voice, press Menu > My Stuff > Audio > My Voice.
Listening a recorded sound
1.Press Menu > My Stuff > Audio > My Voice.
2.Select a sound > Play.
Using sound controls
To
Play & Pause Control volume
Stop
Mute
Repeat
Properties
Press
O
Side key up or down or U/D
Options > Stop
Options > Mute
Options > Repeat on /off
Options > Properties
World time
Using world time
01
02
03
04
05
06
07
08
1.Press Menu > My Stuff > Tools>
World Time.
2.Select the city by using the up or
down navigation key.
3.Press Save to save.
note: If you want to set dual time in idle
mode, press Menu > Settings > Display>
Home Screen > Clock Type > Clock Type5.
57
Calculator, tip calculator and converter
Using the calculator
1.Press Menu > My Stuff > Tools>
Calculator.
2.Use U/D/L/R O to calculate.
3.Press C to erase one digit.
4.Press Reset to reset.
5.Press . to use the decimal point.
Using the tip calculator
1.Press Menu > My Stuff > Tools >
Tip Calculator.
2.Enter values for all variable fields
(Bill($), Tip(%), Split) and the
corresponding calculation fields
(Tip($), Total($), You Pay) are updated automatically.
3.Press Reset to reset.
4.Press * to use the decimal point.
Using the converter
1.Press Menu > My Stuff > Tools> Converter.
2.Select the categories.
58
3.Select current unit and enter figure.
Other unit fields are updated
automatically.
Stop watch and timer
Using the stop watch
1.Press Menu > My Stuff > Tools>
Stop Watch.
2.Press Start to start.
3.Press Stop to stop.
4.Press Continue to restart.
5.Press Reset to clear.
6.To change to lap time, press Mode > Lap Time Mode.
7.To split the stopwatch, press Mode > Split Time Mode.
note: In Basic Mode, when you exit the stopwatch menu, or become idle,
the stopwatch will continue running and will be indicated by a clock icon.
You can access the stopwatch by re-entering the stopwatch menu.
Using the timer
1.Press Menu > My Stuff > Tools> Timer.
2.Press Set to input the time.
3.Enter the hour, minute and second
> O.
4.Press Start to start.
5.Press Restart to restart.
note: In Basic Mode, when you exit the timer menu, or become idle, the
timer will continue running and will be indicated by a timer icon. You can
access the timer by re-entering the timer menu.
Business card
You can send your information as a multimedia message or via
bluetooth.
Creating your own business card
1.Press Menu > Address Book > My Info.
2.Edit the fields > Save.
Forwarding
1.Press Menu > Address Book > My Info.
2.Press Options > Send My Info > Multimedia Message or
Bluetooth.
3.Search for device or choose the device to send via Bluetooth
and press Select.
4.Enter a message for Multimedia Message. Press Send to and
select the person to send message and press Select.
5.Press Send.
Updating information
1.Press Menu > Address Book > My Info.
2.Press Options > Edit My Info.
3.Update information.
4.Press Save.
Memory information
You can view the information of your phone or memory card for
Used, Audio, Games, Applications, Picture, Video, Other Files
and System.
01
02
03
04
05
06
07
08
Viewing the information
1.Press Menu > My Stuff > Used Space.
Formatting the memory
1.Press Menu > My Stuff.
2.Press Used Space.
3.Press L/R to select Phone or Memory Card
4.Press Format > Yes.
59
P7040
6
Connectivity
Bluetooth
Using mobile web
Using the browser
Profilesettings
Bluetooth
Bluetooth technology enables free wireless connections
between electronic devices within a maximum range of 33 feet
(10 meters). Bluetooth connections can be used to send images,
text, business cards, calendar events and notes or to connect to
computers using Bluetooth technology.
Your mobile phone supports:
• Connect to PC to access internet.
• Connect to Hands-Free.
• Connect to electronic devices.
Icons for Bluetooth
1.Press Menu > Settings > Connectivity > Bluetooth >
Activation.
2.Select On or Off.
Adding a device
1.Press Menu > Settings > Connectivity > Bluetooth > My
Devices.
2.Press Search.
3.The available device will display.
4.To select the device press > Select. To view the details press
View.
5.Enter password.
Bluetooth is active.
note: The other device must be in pairing mode.
Bluetooth hands-free headset is connected.
Sending an object
Bluetooth A2DP headset is connected.
Bluetooth hands-free + A2DP headset is connected.
Data transfer via Bluetooth.
62
Activating Bluetooth
1.Select the file from Menu > My Stuff > Picture, Video,
Audio or Other Files.
2.Press Options > Send > via Bluetooth.
3.Press Search.
4.Select the device > Select.
note: If the other Bluetooth device requests pairing, the object is sent
after pairing is completed. Locked object or ones containing original rights
may not be forwarded.
Receiving an object
The receiving of an object starts only when the receipt has been
approved.
The received file will be saved in each place. For example, if you
received contacts information from the sender, it will be saved in
your phone’s memory.
Setting the visibility
1.Press Menu > Settings > Connectivity > Bluetooth >
Visibility.
2.Select Hide or Show.
Naming the phone
1.Press Menu > Settings > Connectivity > Bluetooth > My
Bluetooth Info.
2.Select the Name > Edit > edit the field > Save.
note: This is what others will see in their device’s display for your phone
when searching for your device.
Using Mobile Web
Accessing Mobile Web
1.Press O in standby mode or press Menu > Mobile Web.
note: It will access the Mobile Web homepage.
Using the browser
Accessing browser
1.Press Menu > My Stuff > Applications > Browser >
Home.
note: It will access your service provider’s homepage.
Viewing bookmarks
1.Press Menu > My Stuff > Applications > Browser >
Bookmarks.
2.To open the site, press Go.
3.To send via text message, press Options >Send by MSG.
01
02
03
04
05
06
07
08
Setting new bookmarks
1.Press Menu > My Stuff > Applications > Browser >
Bookmarks.
2.Press Options > Create New.
3.Enter the field > Save.
63
Entering web addresses
1.Press Menu > My Stuff > Applications > Browser >
Enter Address.
2.Enter the web address > Go.
Viewing history
1.Press Menu > My Stuff > Applications > Browser >
History.
Setting advanced options
1.Press Menu > My Stuff > Applications > Browser >
Manage > Options.
2.Select the category > Select.
3.Select the options > Select.
Viewing certificates
1.Press Menu > My Stuff > Applications > Browser >
Manage > Security > Certificates.
Using memory operations
1.Press Menu > My Stuff > Applications > Browser >
Manage > Private Data.
2.To clear the cache, press Clear Cache > Yes.
64
3.To clear the cookies, press Clear Cookies > Yes.
4.To clear the history, press Clear History > Yes.
Viewing download status
1.Press Menu > My Stuff > Applications > Browser >
Manage > Download Manager.
Profile settings
You can set a profile and view Profile Name, Home URL,
Connection Type, Proxy Address and Proxy Port.
Adding a new profile
1.Press Menu > My Stuff > Applications > Browser >
Manage > Profiles.
2.Press Options > Create.
3.Enter the fields > Save.
Viewing default profile
1.Press Menu > My Stuff > Applications > Browser >
Manage > Profiles.
2.Select Mobile Web > Options > View.
Deleting profile
1.Press Menu > My Stuff > Applications > Browser >
Manage > Profiles.
2.Select a profile > Options > Delete.
01
02
03
04
05
06
07
08
Editing profile
1. Press Menu > My Stuff > Applications > Browser >
Manage > Profiles.
2. Select a profile > Options > Edit.
65
P7040
7
Settings
Language
Time and date
Ringtones
Display
Security
Reset
TTY
Language
Setting up
1.Press Menu > Settings > Phone > Language.
2.Select Screen Text or Predictive.
3.Select the language > Select.
Time and date
Setting up
1.Press Menu > Settings > Phone > Time & Date.
2.Select Auto Update, Time, Time Format, Date or Date
Format > Select.
3.Select the options > Select.
Ring tones
Setting ring tones
1.Press Menu > My Stuff > Audio.
2.Select the folder > select a file > Options > Set as Ring
Tone.
Setting sound profile
1.Press Menu > Settings > Profiles.
68
2.Select Normal, Vibrate and Ring, Vibrate only, Silent or
Flight Mode.
Display
Setting the home screen
You can set the Wallpaper, Clock Type and Text.
1.Press Menu > Settings > Display > Home Screen.
Setting the menu type
1.Press Menu > Settings > Display > Menu Type.
Setting the color theme
1.Press Menu > Settings > Display > Color Theme.
Setting the font
1.Press Menu > Settings > Display > Font Style.
Setting the brightness
1.Press Menu > Settings > Display > Brightness.
note: Modifying brightness may affect battery life.
Setting time for backlight
1.Press Menu > Settings > Display > Backlight Timer.
note: Modifying backlight time may affect battery life.
Security
Locking the phone
1.Press Menu > Settings > Security > Phone Lock >
Phone Lock.
2.Select On.
note: The default password is ‘1234’. To change the password press Menu
> Settings > Security > Phone Lock > Change Password.
Locking the PIN
The Personal Identification Number is the security code that
protects the phone or SIM against unauthorized use.
1.Press Menu > Settings > Security > PIN > PIN Lock >
Yes.
2.Enter PIN code > OK.
note: To change the PIN code press Menu > Settings > Security > PIN
> Change PIN.
Changing PIN 2
1.Press Menu > Settings > Security > Change PIN2.
Locking the keypad automatically
You can set the keypad to lock automatically to prevent mistaken
key presses.
1.Press Menu > Settings > Security > Auto Key Lock.
2.Select On.
note: The auto keypad lock time is equivalent to the backlight display
time. To change the backlight time, press Menu > Settings > Display >
Backlight Timer.
01
Unlocking Auto Key Lock
03
1.Press Menu > Settings > Security > Auto Key Lock.
2.Select Off.
Changing hidden key
The hidden key is a security code for USIM Contact. You can lock
the person’s information in the USIM Contacts with the hidden
key.
1.Press Menu > Settings > Security > Change Hidden Key.
02
04
05
06
07
08
note: The default password is dependent by SIM card (either depends on
the SIM card or determined by the SIM card).
Setting fixed dialing number
1.Press Menu > Settings > Security > FDN.
2.Select On or Off.
For details on fixed dialing, see page 29.
69
Reset
Resetting the phone
1.Press Menu > Settings > Reset.
2.Enter password > Master Reset > Yes.
note: It will return configuration settings to default. The default password
is ‘1234’.
Clearing the phone
1.Press Menu > Settings > Reset
2.Enter password > Master Clear > Yes.
note: It will change the setting as default and erase all personal data. The
default password is ‘1234’.
TTY
• TTY Full: Users who cannot talk and hear, can send and
receive text messages.
• TTY Talk: Users who can talk but cannot hear, can receive
text messages and reply with voice message.
• TTY Hear: Users who can hear but cannot talk, can send a
text message and receive a voice message.
01
02
03
04
05
06
07
08
The teletypewriter (TTY) is a telecommunications device that
allows people who are deaf or hard of hearing, or who have
speech or language disabilities, to communicate via a telephone.
Setting teletypewriter
1.Press Menu > Settings > TTY.
2.Select Disable, TTY Full, TTY Talk or TTY Hear.
• Disable: TTY mode is disabled.
70
71
P7040
8
Appendix
Alertmessage
Troubleshooting checklist
Safety information
Safety precautions
Aboutthebatteryusage
FCCHearing-AidCompatibility(HAC)RegulationsforWirelessDevices
FCC Regulatory Compliance
Warranty
Alert message
If you experience any problem while using your mobile phone, please refer
to the following checklist. If the problem still persists, contact your dealer
or nearest carrier.
When the “Insert SIM Card” message appears:
Make sure the SIM card is correctly installed. Check to see if the SIM card is
working properly. If it does not work, try to clean the contact points of the
card with a dry cloth. If it is out of order, take it to your service provider.
When the “Messages full” message appears:
When the “No Service” or “Network Search” appears:
If you cannot make/receive a call when you are indoors or undergrounds
where the signal strength is poor, move toward a window or go out to
an open area. If you still cannot make a connection, contact your service
provider.
Troubleshooting checklist
The received or saved messages are full in your phone memory. You need
to delete the message.
When audio quality is poor:
When the “Phone and SIM messages are full. Delete Messages”
message appears:
When the other party cannot hear you speaking:
The received or saved messages are full in your phone and SIM card
memory. You need to delete the message.
When the “Password” message appears in Phone locked
state:
Enter the phone password. The default password is”1234”. If you cannot
remember the password, contact the nearest carrier.
When the “Enter PIN1” message appears:
Input PIN1. If you cannot remember it, contact your service provider. You
74
can still receive calls even if your mobile phone becomes locked after
entering the incorrect PIN1 on three consecutive attempts.
End a call and try again.
Your phone may be set to MUTE. Disable the MUTE function. Or your hand
may be covering the microphone located below the *.
When battery lifetime is shorter than usual:
This may happen when you are in an area with low signal strength. Turn
off your phone when it is not in use. Change the battery when battery
energy is exhausted.
When your mobile phone does not turn on:
Make sure your battery is charged. Check to see if your phone works while
recharging the battery.
When you are unable to send a message:
Either you are not registered to receive an SMS service, or you may be in
an area where your network service provider cannot provide such a service.
When you are unable to make a call:
Your phone may be set to “fixed dial.” Cancel the “fixed dial” function.
When you are unable to charge the battery:
This may be the result of one of the following three cases.
1. Your charger may be out of order. Contact your nearest dealer.
2. You may be attempting to use the phone in an overly hot/cold
temperature. Try changing the charging environment.
3. Y our battery may have not been connected to the charger properly.
Check the connector.
When you are unable to input data into your Address Book:
Your Address Book memory may be full. Try deleting some entries from
your Address Book.
When you are unable to select a certain function:
You may not have subscribed to that function, or your network service
provider may be in an area where such service cannot be provided. Contact
your local service provider.
Safety information
The following list shows how to maintain your mobile phone, together
with precautions to take.
–Keep your mobile phone and its accessories out of the reach of children
and pets.
–Maintain your mobile phone in dry conditions and keep it within normal
operating temperatures. Temperatures higher than 55°C (131°F) or
lower than -20°C (-4°F) may damage your phone.
–Do not try to dry your phone in a microwave oven. If not, sparks can
occur and cause an explosion or fire.
–Do not use or store your mobile phone in dusty, dirty areas.
–Do not attempt to disassemble your mobile phone.
–Do not drop or cause severe impact to your mobile phone.
–Do not use chemical products, cleaning solvents or detergents to clean
your mobile phone.
–If your mobile phone does not work properly, contact your dealer
immediately.
–Use only authorized batteries, battery chargers and accessories. Any
malfunction or damage caused by the use of unauthorized batteries,
battery chargers and accessories will void the limited product warranty.
–Ensure that the battery and battery charger do not come in contact with
conductive objects.
01
02
03
04
05
06
07
08
75
Safety precautions
Using a mobile phone while driving may be prohibited.
Please check local laws and regulations with regard to the prohibition of
mobile phone use while driving, and comply with them.
Use of your phone while you are driving may disturb your concentration
and so cause an accident. Always switch your phone off to drive safely.
You should use your phone in an emergency, either use a hands free device
built into your car or pull over in a safe place first.
Switch off in restricted areas
Always switch your phone off in areas where mobile phone use is
restricted.
Switch off in explosive or dangerous areas
Always switch your phone off in areas with explosive or dangerous
materials (such as fuels, fuel stations or areas containing chemical goods)
and obey any instructions or signals. Do not remove your mobile phone’s
battery in such areas.
Switch off in aircraft
Always switch your phone off or select Flight Mode (press the Menu
> Settings > Profiles > Flight Mode) when you are in an aircraft. The
electromagnetic waves emitted by your phone may affect the electronic
navigation equipment in the aircraft.
76
Switch off in hospitals and near medical equipment
Always switch your phone off in hospitals, and obey the regulations or
rules of the hospital.
Switch your phone off when using medical equipment for private
purposes, if possible. Always consult with the medical equipment’s
manufacturer or an expert regarding phone use near the medical
equipment.
Installing a hands free device in your vehicle
Install vehicle hands free devices away from the steering wheel and airbag
expansion area, otherwise injury may result.
Mobile phones and other electronic devices
Mobile phones emit electromagnetic waves that may affect nearby
electronic devices. When it is switched on, do not place your phone close to
delicate electronic equipment.
About the battery usage
Your phone is powered by a Lithium Ion (Li-Ion) battery. This means that,
unlike other forms of battery technology, you can recharge your battery
while some charge remains without reducing your phone’s autonomy due
to the “battery memory effect” inherent in those technologies.
– Do not use a damaged battery or charger.
– Do not disassemble or open crush, bend or deform, puncture or shred.
– Do not modify or remanufacture, attempt to insert foreign objects into
the battery, immerse or expose to water or other liquids, expose to fire,
explosion or other hazard.
– Do not put your battery into contact with conductive objects.
– Dispose of and recycle used batteries in accordance with local
regulations. Do not dispose of batteries by burning; they may explode.
– Do not use an unauthorized charger.
– Only use the battery for the device for which it is specified.
– Only use the battery with a charging device that has been qualified
with the device per this standard. Use of an unqualified battery or
charger may present a risk of fire, explosion, leakage, or other hazard.
– Do not short circuit a battery or allow metallic conductive objects to
contact battery terminals.
– Replace the battery only with another battery that has been qualified
with the device per this standard, IEEE-Std-1725-2006. Use of an
unqualified battery may present a risk of fire, explosion, leakage or
other hazard.
– Promptly dispose of used batteries in accordance with local regulations
– Battery usage by children should be supervised.
– Avoid dropping the phone or battery. If the phone or battery is
dropped, especially on a hard surface, and the user suspects damage,
take it to a service center for inspection.
– Use your battery for the specified purpose only.
– The closer you are to your network’s base station, the longer your phone
usage time because less battery power is consumed for the connection.
– The battery recharging time varies depending on the remaining battery
capacity and the battery and charger type you use.
– Battery life inevitably shortens over time.
– Use an authorized battery and charger only.
– Since overcharging may shorten battery life, remove the phone from
its charger once it is fully charged. Unplug the charger, once charging
is complete. Leaving the battery in hot or cold places, especially inside
a car in summer or winter, may reduce the capacity and life of the
battery. Always keep the battery within normal temperatures.
– To prevent injury or burns, ensure that no metal objects come into
contact with the + and – terminals of the battery.
FCC Hearing-Aid Compatibility (HAC)
Regulations for Wireless Devices
01
02
03
04
05
06
07
08
On July 10, 2003, the U.S. Federal Communications Commission (FCC)
Report and Order in WT Docket 01-309 modified the exception of wireless
phones under the Hearing Aid Compatibility Act of 1988 (HAC Act) to
require digital wireless phones be compatible with hearing-aids. The
intent of the HAC Act is to ensure reasonable access to telecommunications
services for persons with hearing disabilities.
77
While some wireless phones are used near some hearing devices (hearing
aids and cochlear implants), users may detect a buzzing, humming, or
whining noise. Some hearing devices are more immune than others to
this interference noise, and phones also vary in the amount of interference
they generate.
The wireless telephone industry has developed a rating system for wireless
phones, to assist hearing device users find phones that may be compatible
with their hearing devices. Not all phones have been rated. Phones that
are rated have the rating on their box or a label located on the box.
The ratings are not guarantees. Results will vary depending on the user’s
hearing device and hearing loss. If your hearing device happens to be
vulnerable to interference, you may not be able to use a rated phone
successfully. Trying out the phone with your hearing device is the best way
to evaluate it for your personal needs.
• M-Ratings: Phones rated M3 or M4 meet FCC requirements and are
likely to generate less interference to hearing devices than phones that
are not labeled. M4 is the better/higher of the two ratings.
• T-Ratings: Phones rated T3 or T4 meet FCC requirements and are likely
to generate less interference to hearing devices than phones that are
not labeled. T4 is the better/higher of the two ratings.
Hearing devices may also be rated. Your hearing device manufacturer
or hearing health professional may help you find this rating. Higher
ratings mean that the hearing device is relatively immune to interference
78
noise. The hearing aid and wireless phone rating values are then added
together. A sum of 5 is considered acceptable for normal use. A sum of 6 is
considered for best use.
In the above example, if a hearing aid meets the M2 level rating and the
wireless phone meets the M3 level rating, the sum of the two values equal
M5. This is synonymous for T ratings. This should provide the hearing aid
user with “normal usage” while using their hearing aid with the particular
wireless phone. “Normal usage” in this context is defined as a signal quality
that is acceptable for normal operation.
The M mark is intended to be synonymous with the U mark. The T mark
is intended to be synonymous with the UT mark. The M and T marks are
recommended by the Alliance for Telecommunications Industries Solutions
(ATIS). The U and UT marks are referenced in Section 20.19 of the FCC
Rules. The HAC rating and measurement procedure are described in the
American National Standards Institute (ANSI) C63.19 standard.
To ensure that the Hearing Aid Compatibility rating for your phone
is maintained, secondary transmitters such as Bluetooth and WLAN
components must be disabled during a call. See Page 62 for instructions to
disable these components.
FCC Regulatory Compliance
FCC Regulatory Compliance
This device complies with Part 15 of the FCC Rules. Operation is subject
to the following two conditions: (1) this device may not cause harmful
interference, and (2) this device must accept any interference received,
including interference that may cause undesired operation.
Your mobile device is a low power radio transmitter and receiver. When
it is ON, it receives and also sends out radio frequency (RF) signals. In
August 1996, the Federal Communications Commission (FCC) adopted
RF exposure guidelines with safety levels for mobile devices. Those
guidelines are consistent with safety standards previously set by both U.S.
and international standards bodies: American National Standard Institute
(ANSI), National Council of Radiation Protection and Measurements
(NCRP), and International Commission on Non-Ionizing Radiation
Protection (ICNRP). Those standards were based on comprehensive and
periodic evaluations of the relevant scientific literature. The design of your
phone complies with the FCC guidelines and applicable.
Statement according to FCC part 15.105
NOTE: This equipment has been tested and found to comply with the
limits for a Class B digital device, pursuant to Part 15 of the FCC Rules.
These limits are designed to provide reasonable protection against harmful
interference in a residential installation. This equipment generates uses
and can radiate radio frequency energy and, if not installed and used in
accordance with the instructions, may cause harmful interference to radio
communications. However, there is no guarantee that interference will
not occur in a particular installation. If this equipment does cause harmful
interference to radio or television reception, which can be determined by
turning the equipment off and on, the user is encouraged to try to correct
the interference by one or more of the following measures:
–Reorient or relocate the receiving antenna.
–Increase the separation between the equipment and receiver.
–Connect the equipment into an outlet on a circuit different from that to
which the receiver is connected.
–Consult the dealer or an experienced radio/TV technician for help.
Statement according to FCC part 15.21
Modifications not expressly approved by this company could void the
user’s authority to operate the equipment.
01
02
03
04
05
06
07
08
RF exposure FCC
For body worn operation, to maintain compliance with FCC RF exposure
guidelines, use only accessories that contain no metallic components and
provide a separation distance of 20 mm (0.6 inches) to the body. Use of
other accessories may violate FCC RF exposure guidelines and should be
avoided.
This device and its antenna must not be co-located or operating in
conjunction with any other antenna or transmitter.
79
Health and Safety Information FCC
This EUT has been shown to be capable of compliance for localized specific
absorption rate (SAR) for uncontrolled environment/general population
exposure limits specified in ANSI/IEEE Std. C95.1-1992 and had been
tested in accordance with the measurement procedures specified in FCC/
OET Bulletin 65 Supplement C (2001) and IEEE Std. 1528-2003 Ministry of
Health (Canada), Safety Code 6. The standards include a substantial safety
margin designed to assure the safety of all persons, regardless of age and
health. The exposure standard for wireless mobile phones employs a unit
of measurement known as the Specific Absorption Rate, or SAR. The SAR
limit set by the FCC is 1.6W/kg *.
* In the U.S. and Canada, the SAR limit for mobile phones used by the
public is 1.6 watts/kg (W/kg) averaged over one gram of tissue. The
standard incorporates a substantial margin of safety to give additional
protection for the public and to account for any variations in.
** This device contains 1800 MHz GSM functions that are not operational
in U.S. Territories; this filing is applicable only for 850 MHz GSM and
1900 MHz PCS operations.
Warranty
Protect Your Warranty
Read your Warranty carefully, with the special consideration to paragraph
seven of the Limited Warranty for your unit.
80
“Warranty does not apply to... or to any product or part thereof which has
suffered through alteration... mishandling, misuse, neglect or accident”.
Many companies are making look alike accessories and in some cases,
promoting that their product is equal to or better than the Pantech
product. Be careful. Some of these products may not be compatible to
use with your Pantech product and may damage the unit or cause it to
malfunction.
If service is required on your unit and it is determined that a non-Pantech
accessory has created the problem with your unit, the Warranty will not
apply. In addition, if the unit has already suffered irreversible damage
by reason of a non-compatible accessory, the Warranty will be voided.
To protect your Warranty, use only compatible accessories which cannot
damage or interfere with the functioning of your Pantech product.
12 Month Limited Warranty
Pantech Wireless, Inc. (the Company) warrants to the original retail
purchaser of this Pantech handheld portable cellular telephone, that
should this product or any part thereof during normal consumer usage
and conditions, be proven defective in material or workmanship that
results in product failure within the first twelve (12) months period from
the date of purchase, such defect(s) will be repaired or replaced (with new
or rebuilt parts) at the Company’s option, without charge for parts or labor
directly related to the defect(s).
The antenna, keypad, display, rechargeable battery and battery charger,
if included, are similarly warranted for twelve (12) months from date
of purchase. This Warranty extends only to consumers who purchase
the product in the United States or Canada and it is not transferable or
assignable.
This Warranty does not apply to:
(a)Product subjected to abnormal use or conditions, accident,
mishandling, neglect, unauthorized alteration, misuse, improper
installation or repair or improper storage;
(b)Product whose mechanical serial number or electronic serial number
has been removed, altered or defaced.
(c) Damage from exposure to moisture, humidity, excessive temperatures
or extreme environmental conditions;
(d)Damage resulting from connection to, or use of any accessory or other
product not approved or authorized by the Company;
(e)Defects in appearance, cosmetic, decorative or structural items such as
framing and non-operative parts;
(f) Product damaged from external causes such as fire, flooding, dirt,
sand, weather conditions, battery leakage, blown fuse, theft or
improper usage of any electrical source.
The Company disclaims liability for removal or reinstallation of the
product, for geographic coverage, for inadequate signal reception by the
antenna or for communications range or operation of the cellular system
as a whole.
To obtain repairs or replacement within the terms of this Warranty, the
product should be delivered with proof of Warranty coverage (e.g. dated
bill of sale), the consumer’s return address, daytime phone number and/
or fax number and complete description of the problem, transportation
prepaid, to the Company by calling the number listed below or to the place
of purchase for repair or replacement processing.
To locate Pantech Authorized Service Center, call: (800) 962-8622 or email
[email protected].
Please have the following information available when you send the phone
in for repair:
– A valid original Proof of Purchase
– Return address
– Daytime phone number or fax number
– Model #
– IMEI # (Look for the 15 digit IMEI # behind the battery of the device.)
– Complete description of the problem
– Transportation prepaid
01
02
03
04
05
06
07
08
Other Warranty Program
You may have other warranty program with your purchase, such as
warranty exchange. If so, please refer to equipment package or the
original point of sale.
81
Memo
THE EXTENT OF THE COMPANY’S LIABILITY UNDER THIS WARRANTY IS
LIMITED TO THE REPAIR OR REPLACEMENT PROVIDED ABOVE AND, IN NO
EVENT, SHALL THE COMPANY’S LIABILITY EXCEED THE PURCHASE PRICE
PAID BY PURCHASER FOR THE PRODUCT.
ANY IMPLIED WARRANTIES, INCLUDING ANY IMPLIED WARRANTY OF
MERCHANTABILITY OR FITNESS FOR A PARTICULAR PURPOSE, SHALL BE
LIMITED TO THE DURATION OF THIS WRITTEN WARRANTY. ANY ACTION
FOR BREACH OF ANY WARRANTY MUST BE BROUGHT WITHIN A PERIOD OF
18 MONTHS FROM DATE OF ORIGINAL PURCHASE. IN NO CASE SHALL THE
COMPANY BE LIABLE FOR ANY SPECIAL CONSEQUENTIAL OR INCIDENTAL
DAMAGES FOR BREACH OF THIS OR ANY OTHER WARRANTY, EXPRESS OR
IMPLIED, WHATSOEVER. THE COMPANY SHALL NOT BE LIABLE FOR THE
DELAY IN RENDERING SERVICE UNDER THIS WARRANTY OR LOSS OF USE
DURING THE TIME THE PRODUCT IS BEING REPAIRED OR REPLACED.
No person or representative is authorized to assume for the Company any
liability other than expressed herein in connection with the sale of this
product.
Some states or provinces do not allow limitations on how long an implied
warranty lasts or the exclusion or limitation of incidental or consequential
damage so the above limitation or exclusions may not apply to you. This
Warranty gives you specific legal rights, and you may also have other rights
which vary from state to state or province to province.
82
For technical support in the U.S. & Canada, call (800) 962-8622.
Or email: [email protected].
Or visit the web site: www.pantechusa.com
For all other inquiry, write to:
PANTECH WIRELESS, INC.
5607 Glenridge Dr. Suite 500 Atlanta, GA 30342
01
02
03
04
05
06
07
08
84
85
Manual del Usuario
Gracias por elegir el Pantech Link, nuestro más reciente
teléfono móvil 3G.
El Pantech Link posee muchas funciones diseñadas para
mejorar su experiencia móvil. Por su diseño único, con estilo
y su teclado QWERTY, sabemos que disfrutará de toda la
experiencia del Link.
Esta Guía del usuario contiene información importante y útil
que lo ayudará a familiarizarse al máximo con todo lo que
Pantech Link tiene para ofrecer.
Especificaciones
Dimensiones y peso
QWERTY bar
• Peso: 91 g/3.2 oz (con batería estándar)
• Dimensiones: 115,20 mm x 60,90 mm x 9,9 mm
4,5 pulg. x 2,4 pulg. x 0,39 pulg.
Generalidades del teléfono
Diseño
Pantallas
Administración de energía (Rendimiento)
Navegación
Arriba: escribir nuevo SMS
Abajo: Lista de contactos
Izquierda: Mobile Email
Derecha: IM
Centro: OK / Mobile Web
• LCD TFT de 260.000 colores con pantalla de 2,4 pulgadas
• Resolución 320*240
• 5 líneas para texto en modo básico con fuente de 16 puntos
• Dos teclas programables, teclas de desplazamiento en cuatro
direcciones y de selección O.
Melodías
.mp3, .midi, .mid, .iMelody, .wav, .mmf, .wma, .3gpa
Cámara
Cámara CMOS integrada de 1,3M
• Resolución hasta 1280 x 1024 (1.310.720 píxeles)
• Grabación y reproducción de videos Mpeg4 hasta 15 marcos
por segundo (tamaño QVGA)
• Función de temporizador automático (5 ó 10 segundos)
• Álbum de fotos y álbum de videos
2
Tipo de
batería
Ión de litio
estándar
(Ión-litio)
Capacidad
930 mAh
Frecuencia operativa
Tiempo de
espera
Mínimo
10 días
(250 horas)
Tiempo de
conversación
Mínimo
3horas
• Redes GSM de 850 Mhz, GSM de 900 Mhz, GSM de 1800 Mhz,
GSM de 1900 Mhz, UMTS de 850 Mhz, UMTS de 1900 Mhz y
UMTS de 2100 Mhz en América del Norte, América del Sur,
Europa, África y Asia Pacífico, donde cuentan con soporte.
• Cambio de banda automático.
Receptor
Pantalla
Tecla de altavoz
Tecla Enviar
Tecla Bloq/mayús
Para escribir una sola letra mayúscula,
presione esta tecla y luego una letra
Tecla de función
Presione para ingresar un número o
un símbolo y luego presione la tecla
correspondiente
Tecla programable izquierda/derecha
Realiza las funciones que se muestran
en la línea inferior de la pantalla.
Tecla Borrar
Vuelve a la pantalla anterior o elimina
caracteres en el modo de texto.
Encendido o apagado/Tecla de salida
de menú/Tecla Terminar
Enciende y apaga el teléfono, finaliza
llamadas, sale de menús.
Tecla Supr
Presione para borrar un número o letra.
Tecla Enter
Presione para moverse a la fila siguiente.
Tecla espacio
Presione para ingresar un espacio
3
Uso de los atajos
Tecla lateral izquierda
Subir y bajar volumen
Ranura para microSD
Altavoz
Cámara
Ranura del cargador/
Aud. y mic.
Tecla de cámara
Area de la antena interna
nota: sostener el dispositivo por el área de la antena interna puede afectar la calidad de las llamadas.
4
Se puede acceder fácilmente a los elementos de menú
numerados, como menús, submenús y opciones, mediante sus
números de atajo. En modo Menú, se puede tener acceso a los
menús principales presionando las teclas numéricas (1 a 0,
*, #) que corresponden a su ubicación en la pantalla.
Ejemplo: acceso al menú Idioma.
1. Presione Menú.
2. Presione # para Configuración.
3. Presione el 4 para Teléfono.
4. Presione 1 para Idioma.
5. Presione Seleccionar para Texto de pantalla.
6. Presione la tecla de desplazamiento U o D para mostrar la
lista de idiomas disponibles.
nota: En la pantalla del menú principal, el teclado numérico coincide con
los menús de la siguiente manera.
1
2
3
4
Libreta de direcciones Mensajería
IM
Mobile Email
5
6
7
8
Mobile Web
AppCenter
AT&T GPS
YPmobile
9
9
*
#
Mi material
Online Locker AT&T Música Configuración
Generalidades del menú
Libreta de direcciones
Mi configuración
Todos los contactos
Favoritos
Grupos
Mensajería
Conversaciones
Crear mensaje
Mobile Email
IM
Buzón de salida
Borradores
Correo de voz
Configuración
Plantillas
Espacio Usado
5
IM
Mobile Email
Mobile Web
AppCenter
S
6
Mi material
Aplicaciones
Audio
Juegos
Online Locker
Imagen
Video
Herramientas
Otros archivos
Espacio usado
YPmobile
AT&T GPS
Navegar AT&T
Where
AllSport GPS Platinum
Loopt
AT&T Family Map
Depende de SIM
N
AT&T Música
Reprod Música
Comprar Música
AT&T Radio
Shazam
Video musical
Make-UR-Tones
Comunidad
Música aplicaciones
Online Locker
Configuración
Perfiles
Pantalla
Llamada
Teléfono
Conexiones de red
Red N
Conectividad
Seguridad S
Actualización de
software AT&T
Restablecer
TTY
Información de
teléfono
Depende de la red
7
Rápido y fácil
Teclas
<>
O
8
Teclas
Funciones
Ejecuta las funciones que aparecen en la parte inferior de la pantalla utilizando estas teclas programables.
Se desplaza a través de las opciones de menú en el modo Menú. En modo de espera,
Izquierda: accede al menú Mobile Email
Derecha: accede al menú IM
Arriba: accede al menú Crear mensaje
Abajo: accede al menú Contactos
Funcionaenmododebúsquedadepalabras,sisepresionaenelmododeingresodetextopredictivo.
Selecciona una función del menú o almacena información ingresada por el usuario, como nombres. Esta tecla
también se usa para confirmar como la tecla O.
Inicia Mobile Web directamente si se presiona en modo de espera.
N
Enciende el modo de altavoz.
C
Elimina caracteres de la pantalla o vuelve al menú anterior.
S
Envía o recibe una llamada. Muestra la lista de llamadas recientes en modo de espera.
E
Finalizalallamadaactual.Almantenerlapresionada,enciendeoapagaelteléfono.
Cancela lo ingresado por el usuario y vuelve a la pantalla principal mientras está en el modo Menú.
1
0~9
Funciones
Al mantenerla presionada en modo de espera, conecta rápidamente al servidor de correo de voz.
Ingresa números, letras o caracteres especiales. Al presionarla en modo de espera, lleva a la pantalla de
marcación.
B
Al mantenerla presionada en modo de espera, ingresa o sale del modo de vibración.
q
Si se mantiene presionada en el modo de espera, ingresa un prefijo de marcación internacional.
m
Q
Al presionarla en la pantalla de edición de texto, cambia entre los diversos modos de ingreso de texto.
Ajusta el volumen del auricular durante una llamada.
Controla el volumen de tono de timbre, el modo de vibración y el modo todo silencioso en espera.
Silencia el tono de timbre de una llamada entrante.
Activa el modo de captura de la cámara.
Funcionacomodisparadordelacámaraenmododecaptura.
9
Contenido
Contenido
Especificaciones..........................2
Generalidades del teléfono........3
Uso de los atajos.........................5
Generalidades del menú.............5
Rápido y fácil..............................8
1. Inicio
Tarjeta SIM y batería......................14
Encendido del teléfono
encendido/apagado......................15
Desbloqueo del teclado.................15
Indicaciones básicas de pantalla...16
Tarjeta de memoria.......................17
Asignación del menú . ..................18
Actualización de software.............18
Uso del teclado QWERTY...............19
Uso del menú Multiproceso..........19
2.Llamadas y libreta de
direcciones
Realizar, recibir y finalizar
llamadas........................................24
Uso de compartir video.................25
Opciones durante una llamada.....26
Configuración de llamada ............28
10
Verificación de todas las llamadas...28
Marcación rápida...........................29
Uso de la libreta de direcciones.....30
Configuración de la libreta de
direcciones.....................................31
Identificación de llamada.............32
Uso del auricular............................32
Números de servicio y
marcación fija................................32
3. Mensajería
Ingreso de texto.............................36
Recepción de mensajes ................37
Creación y envío de mensajes de
texto...............................................37
Creación de mensajes de
multimedia....................................38
Plantillas de mensaje....................41
Configuración de mensajes ..........41
Administración de memoria.........42
Correo electrónico..........................43
Uso de Mensajero instantáneo.....43
4. Multimedia
Cámara..........................................46
Álbum de fotos..............................49
Álbum de video.............................50
Álbum de audio.............................51
Reproductor de música.................52
Configuración del reproductor
de música......................................56
Reproductor multimedia..............56
Otros archivos................................58
Administración de memoria.........58
Juegos............................................58
5. Características útiles
Alarma...........................................62
Calendario.....................................62
Bloc de notas y memo de voz........63
Hora mundial.................................64
Calculadora, calculadora de
propinas y convertidor..................64
Cronómetro y temporizador.........65
Tarjeta de presentación.................65
Información de memoria..............66
6. Conectividad
Bluetooth.......................................70
Uso de Mobile Web .......................71
Uso del navegador.........................71
Configuración de perfil . ...............72
7. Configuración
Idioma...........................................76
Hora y fecha...................................76
Tonos de timbre.............................76
Pantalla..........................................76
Seguridad......................................77
Restablecer....................................78
TTY.................................................78
8. Apéndice
Mensajes de alerta........................82
Lista de control de solución de
problemas.....................................82
Información de seguridad.............83
Medidas de seguridad...................84
Acerca del uso de la batería...........85
Reglamentaciones sobre compatibilidad con dispositivos de audición
(HAC) de la FCC para dispositivos
inalámbricos..................................86
Cumplimiento con las reglamentaciones de la FCC..................87
Garantía.........................................89
11
P7040
1
Inicio
Tarjeta SIM y batería
Encendido del teléfono encendido/apagado
Desbloqueo del teclado
Indicaciones básicas de pantalla
Tarjeta de memoria
Asignación del menú
Actualización de software
UsodeltecladoQWERTY
UsodelmenúMultiproceso
Inicio
Tarjeta SIM y batería
Acerca de la tarjeta SIM
Cuando se suscriba a un operador de red, recibirá una tarjeta SIM
(Módulo de identidad del abonado) que contiene la información
de registro, el código PIN, etc.
Al igual que una tarjeta de crédito, debe mantenerla en un lugar
seguro y manejarla con cuidado. No debe doblarla, rayarla ni
tampoco exponerla a la humedad. Evite la electricidad estática.
Para evitar que se corrompa la memoria de la tarjeta SIM, apague
siempre el teléfono antes de extraer o insertar la tarjeta.
Acerca de la batería
Este teléfono utiliza una batería de ión litio. Asegúrese de utilizar
solamente baterías y cargadores autorizados. Para obtener más
detalles, comuníquese con el distribuidor más cercano.
nota: La energía del teléfono proviene de una batería de ión de litio
(ión-litio). A diferencia de otras tecnologías, se puede recargar la batería
mientras aún queda carga, sin reducir la autonomía del teléfono debido al
“efecto de memoria de la batería” inherente a estas tecnologías.
14
Instalación/retiro de la tarjeta SIM y de la batería
1.Extraiga la cubierta de la batería de la
unidad.
2.Para ajustar la cubierta de la batería,
póngala en el riel guía y presione hacia
arriba.
3.Introduzca la tarjeta SIM en la ranura.
Los contactos dorados de la tarjeta
SIM deben coincidir con los contactos
metálicos del teléfono.
Coloque los contactos de la batería en el
orificio de la parte inferior de la unidad
y luego presione la parte superior de la
batería hasta escuchar un chasquido.
4.Para extraer la batería, presione la parte
inferior de ésta hacia arriba (1) y sáquela
(2). Empuje la tarjeta SIM en la dirección
de la flecha, como lo indica la imagen.
Para cargar la batería
1.Para cargar la batería, abra la cubierta
protectora del costado superior
derecho y conecte el adaptador del
cargador. Asegúrese de alinear el
conector como aparece en la imagen.
De lo contrario, dañará el conector de
carga del teléfono y no se cargará.
2.Para desconectar el adaptador,
presione los botones laterales(1) de
éste y jálelo para retirarlo (2).
01
02
Correcto
Incorrecto
Encendido del teléfono encendido /
apagado
Para encender
1.Mantenga presionada la tecla E.
03
04
05
06
07
08
Para apagar
1.Mantenga presionada la tecla E.
Desbloqueo del teclado
Desbloqueo del teclado
Correcto
Incorrecto
1.Presione Desbloq. > Sí.
15
Inicio
Indicaciones básicas de pantalla
Intensidad de la señal. A mayor número de barras, más potente es
la señal. Cuando la red está en modo de búsqueda, aparece .
Hay una llamada en curso. Cuando esté en un área sin servicio,
aparece .
Transferencia de llamadaN está activo.
Las llamadas entrantes se ajustaron en sólo timbre (Normal).
Las llamadas entrantes se ajustaron en Vibrar y Timbrar
Las llamadas entrantes se ajustaron en Sólo vibrar
Las llamadas entrantes se ajustaron en Silencioso
El Modo de vuelo está activo.
Se recibieron uno o más mensajes de texto.
Se recibieron uno o más mensajes multimedia.
Se recibieron uno o más mensajes WAP de envío automático.
El navegador está activo, asegurado y se está descargando.
BGM está en reproducción, pausa y detención.
N
Depende de la red
El auricular manos libres Bluetooth está conectado.
El auricular A2DP Bluetooth está conectado.
El auricular manos libres + A2DP Bluetooth está conectado.
Tarjeta de memoria
Transferencia de datos mediante Bluetooth.
Puede usar la tarjeta microSD como tarjeta de
memoria.
Esta tarjeta le entrega más espacio para guardar
imágenes, videos, música, etc.
El auricular está conectado.
USB conectado
TTY está activo.
Señal GPRS disponible. Aparece cuando hay una sesión GPRS
activa.
Se recibieron uno o más mensajes de voz.
La tarjeta microSD está insertada.
Nivel de la batería. Si la carga de la batería es baja, aparece
Estado de YAHOO: Disponible, Ocupado, Invisible
Recibió uno o más mensajes IM.
Bluetooth está activo.
Se recibieron uno o más mensajes de configuración.
Se está recibiendo un mensaje.
Estado de MSN: Disponible, Ausente, Ocupado, Desconectado
Se ajustó Programar alarma.
Señal EDGE disponible. Aparece cuando hay una sesión EDGE
activa.
Se está enviando un mensaje.
16
Se programó una alarma.
Instalación y extracción de la tarjeta de
memoria
.
1.Abra la ranura de la tarjeta de memoria.
2.Introduzca la tarjeta. En la pantalla verá
el icono .
3.Presione la tarjeta para extraerla.
Uso de la tarjeta de memoria
Puede guardar, mover y eliminar archivos entre el teléfono y
la tarjeta de memoria externa. También puede mover y copiar
archivos desde el teléfono a la computadora.
Restablecimiento de la tarjeta
1.Presione Menú > Configuración > Restablecer.
2.Ingrese la contraseña > Restablecimiento de memoria
externa > Sí.
nota: la contraseña predeterminada es “1234”.
Para copiar el archivo a la tarjeta
1.Seleccione el archivo > Opciones > Copiar a Memoria
Externa.
2.Para copiar el archivo nuevamente al teléfono, presione
Opciones > Copiar a teléfono.
01
02
03
04
05
06
07
08
Para mover el archivo a la tarjeta
1.Seleccione el archivo > Opciones > Mover a Memoria
Externa.
2.Para mover el archivo nuevamente al teléfono, presione
Opciones > Mover a teléfono.
Estado de AIM: Disponible, Ausente, Invisible
17
Inicio
Para eliminar el archivo de la tarjeta
1.Seleccioneelarchivodelatarjeta>Opciones > Eliminar.
Para mover el archivo de la tarjeta a la computadora
1.Conecteelcablededatosalteléfonomóvilyala
computadora.
2.PresioneMenú > Configuración > Conectividad.
3. Presione Selecc Modo USB.
4.SeleccioneReprod Música, Almacenamiento masivo o
Preguntar al conectar.
5.Sigalasinstruccionesdelapantalladelacomputadora.
nota: seleccione Reprod Música cuando desee agregar música a la lista de
reproducción en su dispositivo. Cuando seleccione Preguntar al conectar,
se le pedirá que seleccione el Reprod Música o el Almacenamiento masivo
cada vez que conecte el dispositivo a la computadora.
Asignación del menú
Puede definir el menú más comúnmente usado en Opciones en
el modo de espera.
1.PresioneAtajos en el modo de espera > seleccione No
asignado.
2.PresioneAgregar.
3. Seleccione el menú y submenú.
18
Actualización de software
Puede actualizar el software sin tener que visitar al distribuidor
más cercano.
Para actualizar el software
1.PresioneMenú > Configuración > Software >
Actualización de software AT&T.
2.PresioneBuscar actualización > Sí para verificar si necesita
o no una actualización del software.
nota: una vez descargado el software, el dispositivo le solicitará actualizar
el software ahora o más tarde. Si opta por actualizar el software ahora, se
reiniciará el teléfono. Si pospone una actualización del software, puede
seleccionarentre30minutos,1horao4horasenlasOpciones. Unavez
seleccionado el tiempo de actualización, volverá al modo de espera. Si
va a Actualización de software mientras pospone, presione Continuar
actualización.
Para ver la versión del software
1.PresioneMenú > Configuración > Información de
teléfono.
2.PresioneU/D para ver Versión de software.
Uso del teclado QWERTY
Su teléfono posee un teclado QWERTY, el cual proporciona una
experiencia de escritura de texto superior en un aparato pequeño
que le brinda simpleza y comodidad. Puede utilizar todas las
funciones del teléfono con el teclado QWERTY abierto.
Tecla
Función
Ejecuta las funciones que aparecen en la parte inferior
</> de la pantalla utilizando estas teclas programables.
Presione para cambiar el modo de ingreso de texto.
m
F
Presione para escribir un carácter especial o número.
Para ingresar símbolos y números en forma continua,
presione hasta que aparezca h.
w
Ingrese el carácter de espacio en el modo de entrada
de texto.
T
Pasa a la línea siguiente en el modo de entrada de texto.
C
Elimina un carácter a la izquierda del cursor de texto en
la pantalla de edición de texto.
l
Presione para ingresar un carácter especial que no
aparezca en el teclado.
Uso del menú Multiproceso
Mantenga presionada para iniciar el menú Multiproceso que
se puede activar desde cualquier ventana o página activa del
teléfono.Noesnecesarioquedejedehacerloqueestáhaciendo
si desea pasar rápidamente a otra función común y activarla. La
idea es permitirle salir temporalmente de su ubicación actual
para acceder a un grupo de funciones comunes, como: Llamada,
Mensajería, Mobile Web, Reproductor de música, y Juegos.
Esta tecla evita que tenga que salir completamente de la tarea
o ventana actual, sin importar si es un mensaje de texto, una
página Web o una llamada activa, y realizar rápidamente otra
acción.
01
02
03
04
05
06
07
08
19
Inicio
Funciones de multiproceso
Para usar la función de multiproceso, mantenga presionada la
tecla . Puede escoger una de las siguientes funciones:
• Llamada: haga una llamada de voz mientras usa el teléfono
para otras tareas. Si el reproductor de música está activo, se
silencia durante la llamada.
• Mensajería: envíe un mensaje de texto o multimedia mientras
usa el teléfono para otras tareas.
• Mobile Web: inicie el navegador mientras usa el teléfono para
otras tareas.
• Reproductor de música: inicie el reproductor de música
mientras usa el teléfono para otras tareas. Si recibe o desea hacer
una llamada, el reproductor de música se silencia.
• Juegos: acceda a Juegos mientras usa el teléfono para otras
tareas.
20
01
02
03
04
05
06
07
08
21
2
Llamadas y libreta de direcciones
P7040
Realizar, recibir y finalizar llamadas
Usodecompartirvideo
Opciones durante una llamada
Configuración de llamada
Verificación de todas las llamadas
Marcación rápida
Usodelalibretadedirecciones
Identificación de llamada
Usodelauricular
Númerosdeservicioymarcaciónfija
Llamadas y libreta de direcciones
Realizar, recibir y finalizar llamadas
Realización de llamadas
1.Ingrese el código de área y el número de teléfono.
2.Presione S.
Contestación de llamadas
1.Presione S.
Finalización de llamadas
Realización de llamadas durante una llamada
1.Ingrese el número de teléfono o búsquelo en Libreta de
direcciones.
2.Presione S para marcar el número de la segunda
llamada. La primera llamada se retiene en forma
automática.
1.Presione E.
Cuando finalice la llamada, verá un resumen de ésta.
Cambio entre dos llamadas
Rechazo de llamadas
Realización de llamadas internacionales
1.Presione E o Ignorar.
Realización de llamadas con la lista de llamadas
El teléfono registra hasta 20 números de llamadas marcadas,
recibidas y perdidas.
1.Presione S para ver la lista de Llam. recientes.
2.Seleccione Todas las llamadas, Llamadas perdidas, Llam.
recibidas o Llam. realizadas presionando L/R.
3.Seleccione un número.
4.Presione S para marcar el número seleccionado.
24
nota: para remarcar el último número en la lista de Llam. recientes,
presione S.
1.Presione Alternar.
1.Mantenga presionada q para el prefijo internacional hasta
que aparezca el carácter “+”.
2.Ingrese el código de país, el código de área y el número de
teléfono.
3.Presione S.
Realización de llamadas de emergencia
Puede realizar llamadas de emergencia incluso si el teléfono no
tiene una tarjeta SIM.
1.Presione el número de emergencia o SOS en caso de que el
teléfono no tenga una tarjeta SIM.
2.Presione S.
<Modo de Llamada>
<Modo de Compartir video>
01
Compartir video listo
Respuesta a una llamada perdida
1.Presione Ver para ver la lista de llamadas perdidas.
2.Presione U/D para seleccionar un número para llamar.
3.Presione S.
Contestación de una segunda llamada
N
1.Presione S. La primera llamada se retiene en forma
automática.
2.Presione E para finalizar la segunda llamada.
La llamada retenida automáticamente se vuelve a conectar.
Uso de compartir video
Puede compartir video en vivo o grabado mientras está en una
llamada. Puede enviar o recibir video.
nota: Compartir video no está disponible en todos los mercados. Ambas
partes deben estar en un área de servicio 3G (debe aparecer un icono 3G
en las barras de la señal antes de que se realice la llamada) y ambas partes
deben permanecer en el área de cobertura 3G mientras dure Compartir
video.
02
03
Compartir video
Opciones
Mudo
Opciones
Detener
Realización de una llamada con Compartir video
1.Ingrese el código de área y el número de teléfono > S.
2.Presione Opciones > Compartir video.
3.Seleccione En vivo o Grabado.
nota: Para utilizar compartir video en Llam. recientes, presione Opciones
> Compartir video.
04
05
06
07
08
Desactivación del altavoz
1.Presione N o presione Opciones > Altavoz apagado
durante el modo de compartir video.
2.Presione Opciones > Mudo para silenciar el sonido.
Aumento o disminución del brillo
1.Presione Opciones > Brillo.
2.Ajuste el brillo presionando L/R.
25
Llamadas y libreta de direcciones
Acercar y alejar
Reactivación del micrófono del teléfono
Detención de la grabación
Conversación a través del altavoz
Detención o finalización de Compartir video
Retención y recuperación de una llamada N
1.Presione Opciones > Zoom. Va de x1 a x4.
1.Presione Opciones > Detener grabación.
1.Presione Detener para finalizar compartir video.
2.Se le preguntará si detendrá compartir video > Sí para
detener.
nota: El video grabado se guardará en Mi material > Video.
Recepción de compartir video
1.Una vez recibido compartir video, se le preguntará si acepta
o rechaza compartir video > Sí para aceptar y No para
rechazar.
2.Presione Opciones > Pantalla completa para aumentar el
video hasta que ocupe toda la pantalla.
Opciones durante una llamada
Micrófono encendido y apagado
Desactivación del micrófono del teléfono
1.Presione Opciones > Mudo.
26
1.Presione Opciones > No Mudo.
1.Presione Altavoz
.
Retención de llamadas
1.Presione Opciones > Retener o S.
Recuperación de una llamada retenida
1.Presione Opciones > Liberar o vuelva a presionar S.
Llamadas multipartitas N
Puede hablar con más de una persona o establecer una llamada
de conferencia.
Realización de llamadas multipartitas
1.Llame al primer participante.
2.Llame al segundo participante. La primera llamada se
retiene en forma automática.
3.Presione Opciones > Unir.
Conversación privada con un participante
1.Presione Opciones > Dividir.
2.Seleccione el participante y presione Seleccionar.
Todos los participantes de la llamada multipartita ahora pueden
oírse mutuamente.
Localización manual de un nombre en la libreta de
direcciones
Retiro de un participante de una llamada multipartita
Visualización de los detalles de la entrada resaltada
en la libreta de direcciones
1.Presione Opciones > Finalizar.
2.Seleccione el participante y presione Seleccionar.
La llamada finaliza para ese participante, pero usted puede
continuar la conversación con los demás.
Búsqueda de un número en la libreta de direcciones
durante una llamada
1.Presione D y luego Seleccionar o bien presione Opciones >
Ver contactos > Contactos.
2.Seleccione un número > S.
Búsqueda de un nombre o grupo en la libreta de
direcciones
Escriba las primeras letras del nombre para Buscar por nombre.
Los contactos aparecen comenzando con la primera entrada que
coincide con lo ingresado.
1.Presione la tecla U/D.
1.Presione Seleccionar.
Para conocer detalles de la libreta de direcciones, consulte la página
30.
Lectura de mensajes durante una llamada
1.Presione Opciones > Ver mensaje.
2.Seleccione un mensaje > Ver.
Redacción de un mensaje durante una llamada
01
02
03
04
05
06
07
08
1.Presione Opciones > Enviar mensaje.
Para conocer detalles sobre creación de mensajes de texto, consulte
la página 37.
Visualización del calendario durante una llamada
1.Presione Opciones > Ver Calendario.
Redacción de una nota durante una llamada
1.Presione Opciones > Bloc de notas.
27
Llamadas y libreta de direcciones
Grabación de voz
1.Presione Opciones > Grabación de voz.
Configuración de llamada
Configuración de remarcación automática
1.Presione Menú > Configuración > Llamada > Remarc
Auto.
2.Seleccione Activado o Desactivado.
Contestación presionando cualquier tecla
1.Presione Menú > Configuración > Llamada > Responder
con cualquier tecla.
2.Seleccione Responder con cualquier tecla.
nota: Puede responder con cualquier tecla, excepto E e Ignorar.
Contestación presionando la tecla Enviar
1.Presione Menú > Configuración > Llamada > Responder
con cualquier tecla.
2.Seleccione Responder con tecla enviar.
28
Verificación de todas las llamadas
Puede ver información sobre todas las Llam. recientes. Para
acceder a más opciones para todas las llamadas, perdidas,
recibidas y marcadas, presione Opciones.
También puede ver el historial de llamadas simplemente
presionando S.
Visualización de llamadas perdidas
1.Presione Atajos en el modo de espera o presione Menú >
Mi material > Herramientas. Presione Llam. recientes >
Llamadas perdidas.
Visualización de llamadas recibidas
1.Presione Atajos en el modo de espera o presione Menú >
Mi material > Herramientas.
2.Presione Llam. recientes > Llam. recibidas.
Visualización de llamadas realizadas
1.Presione Atajos en el modo de espera o presione Menú >
Mi material > Herramientas.
2.Presione Llam. recientes > Llam. realizadas.
Visualización de llamadas clasificadas
1.Presione Atajos en el modo de espera o presione Menú >
Mi material > Herramientas.
2.Presione Llam. recientes > Clasif Llam.
Eliminación de registros de llamadas
1.Presione Atajos en el modo de espera o presione Menú >
Mi material > Herramientas. Presione Llam. recientes >
Elim. reg. llam..
2.Seleccione Todas las llamadas > Sí.
Visualización de la hora de la llamada
1.Presione Atajos en el modo de espera o presione Menú >
Mi material > Herramientas. Presione Llam. recientes >
Hora de llamada.
2.Presione U/D para ver Última llam, Llam recibidas,
Llam. realizadas y Total de llam.
Restablecimiento de todas las horas de llamadas
1.Presione Atajos en el modo de espera o presione Menú >
Mi material > Herramientas. Presione Llam. recientes >
Hora de llamada.
2.Presione Restablecer > Sí.
3.Ingrese la contraseña > O.
nota: La contraseña predeterminada es “1234”.
Visualización de información de datos transmitidos
1.Presione Atajos en el modo de espera o presione Menú >
Mi material > Herramientas. Presione Llam. recientes >
Contador de paquetes.
• Info actual: puede ver los datos transmitidos en la sesión
actual, en Kbytes. Se encuentra también disponible la
información sobre Enviado, Recibido y Total.
• Última info: puede ver información de Enviado, Recibido,
Total y Duración de lo transmitido en la sesión anterior, en
Kbytes.
• Info total: puede ver las opciones Enviado, Recibido,
Total y Duración de los datos transmitidos en Kbytes.
• Borrar registros: la contraseña predeterminada es “1234”.
01
02
03
04
05
06
07
08
Marcación rápida
Puede marcar rápidamente a través de la función de marcación
rápida. Se pueden programar hasta 8 números de teléfono
usando los números 2 a 9.
1 : Correo de voz
q : Prefijo para llamadas internacionales
29
Llamadas y libreta de direcciones
Configuración de marcación rápida
1.Presione Menú > Libreta de direcciones > Mis
configuraciones > Marcación rápida.
2.Seleccione una entrada vacía y presione Agregar.
3.Seleccione una persona y presione Seleccionar.
Cambio de la persona de marcación rápida
1.Presione Menú > Libreta de direcciones > Mis
configuraciones > Marcación rápida.
2.Seleccione un número > Cambiar.
3.Seleccione una persona > Seleccionar > Sí.
Eliminación de marcación rápida
1.Presione Menú > Libreta de direcciones > Mis
configuraciones > Marcación rápida.
2.Seleccione un número > Remover.
Uso de la libreta de direcciones
Puede guardar nombres, números de teléfono e información en
la tarjeta SIM o el teléfono. Las entradas pueden depender de la
capacidad de la tarjeta SIM.
30
Visualización de lista de contactos
1.Presione D o bien Menú > Libreta de direcciones > Todos
los contactos.
Búsqueda de un número de teléfono
1.Presione D o bien Menú > Libreta de direcciones > Todos
los contactos.
2.Ingrese la primera o las dos primeras letras del nombre de la
persona y desplácese con U/D.
3.Presione Seleccionar para ver información detallada.
4.Para actualizar la información, presione Opciones > Editar
contacto.
Llamada desde la lista de contactos
1.Presione D o bien Menú > Libreta de direcciones > Todos
los contactos.
2.Seleccione una persona para llamar.
3.Presione S.
Reenvío de detalles del contacto
1.Presione D o bien Menú > Libreta de direcciones > Todos
los contactos.
2.Seleccione un contacto > Opciones > Enviar contacto.
3.Puede enviar la información mediante Mensaje
multimedia o Bluetooth.
Eliminación de un contacto
1.Presione D o bien Menú > Libreta de direcciones > Todos
los contactos.
2.Seleccione un contacto > Opciones > Eliminar contacto.
Adición de un contacto
1.Presione Menú > Libreta de direcciones > Todos los
contactos > Opciones > Agregar nuevo contacto.
2.Ingrese los campos.
3.Presione Guardar.
Creación y edición de grupos
1.Presione Menú > Libreta de direcciones > Grupos.
2.Para agregar un nuevo grupo, presione Opciones > Crear
nuevo grupo.
3.Para editar el grupo, presione Opciones >Editar grupo
> Agregar miembros, Editar miembros o Remover
miembros.
4.Para renombrar el grupo, presione Opciones > Renombrar
grupo.
5.Para eliminar el grupo, presione Opciones > Eliminar
grupo.
Configuración de la libreta de
direcciones
Administración de mi información
1.Presione Menú > Libreta de direcciones > Mi Ajustes >
Mi información.
Configuración del orden de clasificación
1.Presione Menú > Libreta de direcciones > Mi Ajustes >
Ordenar por.
2.Seleccione Nombre o Apellido.
Configuración de sincronización
1.Presione Menú > Libreta de direcciones > Mi Ajustes >
Libreta de direcciones.
2.Seleccione Sincronización auto activada o Sincronización
auto desactivada.
01
02
03
04
05
06
07
08
Configuración de la administración SIM
1.Presione Menú > Libreta de direcciones > Mi Ajustes >
Administración SIM.
31
Llamadas y libreta de direcciones
Identificación de llamada
Identificación de llamada N
1.Presione Menú > Configuración > Llamada > Mostrar mi
número.
2.Seleccione Predeterminado de red, Mostrar u Ocultar.
Uso del auricular
Con el auricular puede realizar o recibir llamadas.
Cuando conecta el auricular al teléfono, el botón del auricular
funciona de la siguiente forma.
nota: Es necesario que use el auricular diseñado para este dispositivo, que
es un accesorio opcional. Además, no todos los auriculares poseen botón.
En el modo de espera
1.Presione una vez el botón para ver las llamadas recientes.
2.Presione dos veces el botón para remarcar la última llamada.
1.Presione Menú > Libreta de direcciones > Mis
configuraciones > Números de servicio.
2.Seleccione un número > presione S.
Visualización de la lista de marcación fija
Marcación fija es un servicio que limita el acceso a números
específicos en la lista de la libreta de direcciones grabada en
la tarjeta SIM. Ingrese el PIN2 para configurar o cancelar este
servicio.
1.Presione Menú > Libreta de direcciones > Mis
configuraciones > Lista FDN.
2.Seleccione un número > presione S.
nota: Dispone de tres intentos para ingresar el PIN2 correcto. El código
PIN2 se bloqueará después de ingresar tres veces seguidas un código
incorrecto. Si se bloquea el código PIN2, comuníquese con el proveedor de
servicio. El código PIN2 se proporciona con la tarjeta SIM.
01
02
03
04
05
06
07
08
Números de servicio y marcación fija
Llamada a los números de servicio S
Puede ver el número de servicio para comunicarse con el
proveedor de servicio.
32
33
3
P7040
Mensajería
Ingreso de texto
Recepción de mensajes
Creación y envío de mensajes de texto
Creación de mensajes de multimedia
Plantillas de mensaje
Configuración de mensajes
Administración de memoria
Correo electrónico
UsodeMensajeroinstantáneo
Mensajería
Ingreso de texto
Puede ingresar texto con el método multi-tap (múltiples
pulsaciones), predictivo, numérico o de símbolos.
Teclas útiles
l
w
m
Mostrar símbolos
Añadir espacios
Presione para cambiar el modo de mayúsculas
Presione para cambiar ab Ab AB y presione para cambiar
del modo de múltiples pulsaciones a predictivo y a
numérico
Multi-tap dbc (todas minúsculas / primera
letra mayúscula / todas mayúsculas)
Predictivo gef (todas minúsculas / primera
letra mayúscula / todas mayúsculas)
Número a
Para conocer detalles sobre el uso del teclado QWERTY, consulte la
página 19.
Modo predictivo
El modo predictivo compara automáticamente las pulsaciones de
las teclas con un diccionario lingüístico interno para determinar
36
la palabra correcta. Primero, mostrará la palabra que se usa con
mayor frecuencia. La palabra que se utiliza con mayor frecuencia
aparecerá primero. Para guardar una palabra que no aparece en
el diccionario del teléfono, presione Opciones > Configuración
de Predictivo > Lista de selección > Activado.
1.Presione m para cambiar el modo a predictivo.
2.Presione A a * para ingresar texto.
Por ejemplo, para “hello” (hola), presione H, 1, I y D
cuatro veces.
Modo de ingreso alfabético
Presione la tecla con la letra deseada una vez para la primera
letra, dos veces para la segunda y así sucesivamente.
1.Presione m para cambiar el modo a multi-tap.
2.Presione A a * para ingresar texto repetidamente.
Modo numérico
En este modo, puede ingresar números.
1.Presione m para cambiar el modo a 123.
2.Presione 1 a 9 y 0 para ingresar números.
Modo de símbolos
Puede ingresar símbolos.
1.Presione l para ver los símbolos.
2.Presione U/D/L/R para seleccionar el símbolo y
presione Insertar.
Recepción de mensajes
Visualización de un nuevo mensaje
1.Presione Ver.
Lectura de un mensaje del buzón de mensajes
1.Presione Menú > Mensajería > Conversaciones.
2.Seleccione un mensaje recibido > Abrir > Ver.
Guardado de la dirección del remitente de un mensaje
recibido
1.Seleccione un mensaje recibido > Ver.
2.Presione Opciones > Guardar.
3.Seleccione Nuevo contacto o Actualizar contacto.
Guardado del objeto en el mensaje multimedia
recibido
1.Abra el mensaje multimedia.
2.Seleccione un objeto.
3.Presione Opciones > Usar > Guardar.
Se guardará en una de las categorías en la carpeta Mi material.
Para conocer detalles sobre el álbum de fotos, consulte la página 49.
Revisión de mensajes de voz
1.Mantenga presionado 1 o presione Menú > Mensajería
> Correo de voz.
Automáticamente llamará al centro de correo de voz.
Carga de URL usando Mensaje push
1.Presione Menú > Mensajería > Conversaciones > Abrir.
2.Presione Opciones > Cargar URL.
Guarde la configuración de la conexión usando
Mensaje de configuración
1.Presione Menú > Mensajería > Conversaciones > Abrir.
2.Presione Opciones > Instalar.
01
02
03
04
05
06
07
08
Creación y envío de mensajes de texto
Envío de un nuevo mensaje de texto
1.Presione U o Menú > Mensajería > Crear mensaje.
2.Escriba el mensaje.
3.Para guardar el mensaje como borrador, presione Opciones
> Guardar en borradores.
4.Presione Enviar a y seleccione la persona a la que desea
37
Mensajería
enviar el mensaje y presione Seleccionar.
5.Presione Enviar.
6.Para ver el mensaje enviado, presione Menú > Mensajería
> Conversaciones, seleccione un destinatario > Abrir >
Ver.
nota: Todos los mensajes enviados con éxito se guardarán en
Conversaciones mientras que los mensajes con error se guardarán en el
Buzón de salida.
Búsqueda de todos los mensajes enviados
1.Presione Menú > Mensajería > Conversaciones.
Respuesta a un mensaje
1.Presione Menú > Mensajería > Conversaciones.
2.Seleccione un destinatario > Abrir.
3.Seleccione un mensaje > Ver > Responder.
Creación de mensajes de multimedia
Puede crear un nuevo mensaje multimedia. La capacidad es de
100Kb, 300Kb, 600Kb y un mensaje de error lo alertará cuando
ésta se exceda.
38
Adición de una imagen guardada en el mensaje
1.Presione U o Menú > Mensajería > Crear mensaje.
2.Escriba un mensaje.
3.Presione Insertar > Imagen > Imagen > Cámara.
4.Desplácese hasta la imagen guardada y presione
Seleccionar.
5.Para obtener la vista previa de la página actual, presione
Opciones > Vista previa > Actual.
6.Para acceder a la vista previa del mensaje completo, presione
Opciones > Vista previa > Mensaje completo. Para volver
a la página del editor de texto, presione Detener.
7.Para editar el mensaje de texto, presione U/D para
seleccionar el cuadro de texto.
8.Presione Enviar a y seleccione la persona a la que desea
enviar el mensaje y presione Seleccionar.
9.Presione Enviar.
Adición de una nueva imagen al mensaje
1.Presione U o Menú > Mensajería > Crear mensaje.
2.Escriba un mensaje.
3.Presione Insertar > Tomar Nueva Foto.
4.Enfoque el objeto > O.
5.Para obtener la vista previa de la página actual, presione
Opciones > Vista previa > Actual.
6.Para acceder a la vista previa del mensaje completo, presione
Opciones > Vista previa > Mensaje completo. Para volver
a la página del editor de texto, presione Detener.
7.Para editar el mensaje de texto, presione U/D para
seleccionar el cuadro de texto.
8.Presione Enviar a y seleccione la persona a la que desea
enviar el mensaje y presione Seleccionar.
9.Presione Enviar.
Para tomar una fotografía, consulte la página 47.
Adición de un video guardado al mensaje
1.Presione U o Menú > Mensajería > Crear mensaje.
2.Escriba un mensaje.
3.Presione Insertar > Video > Video.
4.Desplácese hasta la secuencia de video guardada y presione
Seleccionar.
5.Para obtener la vista previa de la página actual, presione
Opciones > Vista previa > Actual.
6.Para acceder a la vista previa del mensaje completo, presione
Opciones > Vista previa > Mensaje completo. Para volver
a la página del editor de texto, presione Detener.
7.Para editar el mensaje de texto, presione U/D para
seleccionar el cuadro de texto.
8.Presione Enviar a y seleccione la persona a la que desea
enviar el mensaje y presione Seleccionar.
9.Presione Enviar.
Adición de un video nuevo al mensaje
1.Presione U o Menú > Mensajería > Crear mensaje.
2.Escriba un mensaje.
3.Presione Insertar > Grabar Nuevo Video.
4.Enfoque el objeto > O.
5.Para detener la grabación y guardar, presione Detener.
6.Para editar el mensaje de texto, presione U/D para
seleccionar el cuadro de texto.
7.Para obtener la vista previa de la página actual, presione
Opciones > Vista previa > Actual.
8.Para acceder a la vista previa del mensaje completo, presione
Opciones > Vista previa > Mensaje completo. Para volver
a la página del editor de texto, presione Detener.
9.Presione Enviar a y seleccione la persona a la que desea
enviar el mensaje y presione Seleccionar.
01
02
03
04
05
06
07
08
39
Mensajería
10. Presione Enviar.
Para grabación de video, consulte la página 48.
Adición de un memo de voz grabado al mensaje
1.Presione U o Menú > Mensajería > Crear mensaje.
2.Escriba un mensaje.
3.Presione Insertar > Sonido.
4.Seleccione Audio > Mi voz.
5.Desplácese hasta la secuencia de video guardada y presione
Seleccionar.
6.Para editar el mensaje de texto, presione U/D para
seleccionar el cuadro de texto.
7.Para obtener la vista previa de la página actual, presione
Opciones > Vista previa > Actual.
8.Presione Pausa para dejar de escuchar.
9.Para acceder a la vista previa del mensaje completo, presione
Opciones > Vista previa > Mensaje completo. Para volver
a la página del editor de texto, presione Detener.
10. Presione Enviar a y seleccione la persona a la que desea
enviar el mensaje y presione Seleccionar.
11. Presione Enviar.
40
Adición de un memo de voz al mensaje
1.Presione U o Menú > Mensajería > Crear mensaje.
2.Escriba un mensaje.
3.Presione Insertar > Grabar Nuevo Sonido.
4.Presione Grabar para grabar el sonido.
5.Para detener y guardar, presione Detener.
6.Para editar el mensaje de texto, presione U/D para
seleccionar el cuadro de texto.
7.Para obtener la vista previa de la página actual, presione
Opciones > Vista previa > Actual.
8.Presione Pausa para dejar de escuchar.
9.Presione Reanudar para volver a reproducir.
10. Para acceder a la vista previa del mensaje completo, presione
Opciones > Vista previa > Mensaje completo. Para volver
a la página del editor de texto, presione Detener.
11. Presione Enviar a y seleccione la persona a la que desea
enviar el mensaje y presione Seleccionar.
12. Presione Enviar.
Para grabación de memo de voz, consulte la página 63.
Adición de otro archivo al mensaje
1.Presione U o Menú > Mensajería > Crear mensaje.
2.Escriba un mensaje.
3.Presione Insertar > Otros archiv. > Otros archiv.
4.Seleccione el archivo y presione Seleccionar.
5.Para editar el mensaje de texto, presione U/D para
seleccionar el cuadro de texto.
6.Para obtener la vista previa de la página actual, presione
Opciones > Vista previa > Actual.
7.Para acceder a la vista previa del mensaje completo, presione
Opciones > Vista previa > Mensaje completo. Para volver
a la página del editor de texto, presione Detener.
8.Presione Enviar a y seleccione la persona a la que desea
enviar el mensaje y presione Seleccionar.
9.Presione Enviar.
Plantillas de mensaje
Cuando utiliza con frecuencia las mismas frases, puede guardar el
mensaje en una plantilla.
Adición del mensaje como plantilla
1.Presione Menú > Mensajería > Plantillas.
2.Presione Opciones > Agregar nuevo.
3.Escriba el mensaje frecuentemente usado > Opciones >
Guardar.
Envío de un mensaje con plantilla
1.Presione Menú > Mensajería > Plantillas.
2.Seleccione el mensaje que desea enviar.
3.Presione Enviar para agregar más mensajes.
4.Presione Enviar a y seleccione la persona a la que desea
enviar el mensaje y presione Seleccionar.
5.Presione Enviar.
01
02
03
04
05
nota: Puede agregar una plantilla mientras escribe el mensaje. Escriba un
mensaje > Insertar > Plantillas. Seleccione el mensaje que desea agregar.
06
Configuración de mensajes
08
07
Configuración del centro de mensajes
1.Presione Menú > Mensajería > Configuración.
2.Presione Mensaje de texto.
3.Ingrese el nuevo Centro de direcciones.
4.Presione Guardar.
Configuración de gateway de correo electrónico
1.Presione Menú > Mensajería > Configuración.
2.Presione Mensaje de texto.
41
Mensajería
3.Ingrese el nuevo Gateway de correo electrónico para
enviar mensajes de texto por dirección de correo electrónico.
4.Presione Guardar.
Configuración de perfiles para mensajes de
multimedia
1.Presione Menú > Mensajería > Configuración.
2.Presione Mensaje multimedia > Perfiles de MMS.
3.Seleccione un perfil.
Configuración para envío de mensajes de multimedia
1.Presione Menú > Mensajería > Configuración.
2.Presione Mensaje multimedia > Configuración de envío.
3.Puede definir el Período de validez, Tiempo de entrega,
Prioridad, Modo Vrear, y Tamaño msj máx.
Configuración para recepción de mensajes de
multimedia
1.Presione Menú > Mensajería > Configuración.
2.Presione Mensaje multimedia > Configuración de
recepción.
3.Puede definir Descarga autom., Permitir resp. envío,
Permitir resp lectura.
42
Configuración para la recepción de mensajes de voz
1.Presione Menú > Mensajería > Configuración.
2.Presione Correo de voz.
3.Ingrese el número del centro de correo de voz > Guardar.
nota: Es posible que el proveedor de servicio haya configurado
previamente este número al momento de la activación.
Configuración del modo de edición
1.Presione Menú > Mensajería > Configuración.
2.Presione Modo Edición predet.
3.Seleccione Alfabético o Predictivo.
Configuración para la eliminación automática de los
mensajes más antiguos
Cuando la capacidad de memoria de mensajes esté llena, el
mensaje más antiguo será eliminado automáticamente.
1.Presione Menú > Mensajería > Configuración.
2.Presione Eliminación auto de mensajes antiguos.
3.Seleccione Activado o Desactivado.
Administración de memoria
Puede almacenar 200 mensajes en la memoria de teléfono
totalmente, excepto la tarjeta SIM.
Cuando el buzón de mensajes está lleno, aparece el icono de
lleno. Todos los mensajes comparten la memoria.
Cuando aparece Significa
Mensajes de texto están lleno (mensajes de SIM
y teléfono)
Traslado de un mensaje a la tarjeta SIM
1.Presione Menú > Mensajería > Conversaciones.
2.Seleccione un destinatario > Abrir.
3.Seleccione un mensaje > Opciones > Mover a SIM.
Eliminación de un mensaje en un buzón
1.Seleccione un mensaje > Opciones > Eliminar > Sí.
Eliminación de todos los mensajes en un buzón
1.Seleccione un mensaje > Opciones > Eliminar todo.
Visualización de información de espacio de memoria
Recepción de un correo electrónico
1.Presione Menú > Mensajería > Mobile Email.
2.Seleccione un correo electrónico > Seleccionar.
Uso de Mensajero instantáneo
Use Mensajero instantáneo (IM) para enviar y recibir mensajes
cortos y simples que se entregan inmediatamente.
Inicio de un mensajero instantáneo
1.Presione Menú > Mensajería > IM.
2.Seleccione la aplicación IM > Seleccionar.
3.Ingrese su información de inicio de sesión y contraseña >
Conectar.
Visualización del registro de conversaciones
01
02
03
04
05
06
07
08
Puede ver el registro de conversaciones en el Historial guardado
del Mensajero instantáneo.
1.Presione Menú > Mensajería > Espacio Usado.
2.Presione L/R para ver la memoria de SIM y Teléfono.
Correo electrónico
Puede recibir correos electrónicos del proveedor de servicio.
43
4
Multimedia
P7040
Cámara
Álbumdefotos
Álbumdevideo
Álbumdeaudio
Reproductor de música
Configuración del reproductor de música
Reproductor multimedia
Otros archivos
Administración de memoria
Juegos
Multimedia
Cámara
En el menú Opciones de la cámara
Con la cámara incorporada puede tomar fotos y grabar películas.
Las fotos y las secuencias de video se pueden guardar y enviar en
mensajes de multimedia.
Modo de video
Modo de cámara
Fotos restantes
Tamaño
Auto regulador
Efecto
Balance de blancos
Configuración de la cámara
Brillo
Zoom
1.PresioneMenú > Mi material > Herramientas.
2.PresioneCámara.
3. Presione Opciones > Configuración para cambiar la
configuración antes de tomar una foto.
46
Iconos Nombre
Descripción
Balance de
blancos
Automático( ),Luzdedía( ),
Tungsteno( ),Fluorescente( )
Efecto
Normal( ),Sepia(
ByN( )
Auto
regulador
Off( ),5secs( ),10secs( )
Desactivado( ),5seg( ),10seg( )
Tamaño de
la imagen
1280x1024( ),1024x768(
( ),320x240( )
Avanzado
Calidad de imagen, Guardar ubicación, Sonido
del obturador, Sonido del temporizador,
Nombredearchivopredeterminado
),Negativo(
),
),640x480
Automático( ),Luzdedía( ),
Tungsteno( ),Fluorescente( )
Efecto
Normal( ),Sepia(
ByN( )
),Negativo(
Descripción
Auto
regulador
Desactivado(
Resolución
176x144(MMS)( ),176x144( ),
320x240( ),Compartirvideo
Avanzado
Calidad de video, Grabación de sonido,
Guardar ubicación, Sonido del temporizador,
Nombredearchivopredeterminado
),5seg(
),10seg(
)
Acercar y alejar
1.PresioneU/D.Varíadex1ax4.
Aumento o disminución del brillo
1.PresioneL/R.Varíade-2a+2.
1.PresioneQ en el modo de espera o presione Menú > Mi
material > Herramientas.
Presione Cámara.
2.Enfoqueelobjeto>O o presione Opciones > Capturar.
Descripción
Balance de
blancos
Iconos Nombre
Captura de una imagen
En el menú Opciones de la cámara de video
Iconos Nombre
Cambio a modo de cámara de video
),
nota: La foto se guardará automáticamente en Mi material > Imagen
> Cámara.
1.PresioneQ en el modo de espera o presione Menú > Mi
material > Herramientas > Cámara.
2.PresioneOpciones cuando el modo de cámara esté activado.
3. Presione Modo de video cámara.
4.Enfoqueelobjeto>O > o presione Opciones > Grabar.
5.Grabeelmovimiento>Detener.
nota: El video se guardará automáticamente en Mi material > Video.
Visualización de la foto tomada
1.PresioneQ en el modo de espera o presione Menú > Mi
material > Herramientas > Cámara.
2.PresioneOpciones > Álbum de fotos.
3. Seleccione la imagen > Ver.
01
02
03
04
05
06
07
08
Después de tomar fotos
Para Presione
Enviar un mensaje Opciones > Enviar > como Mensaje
multimedia mult.
Opciones > Enviar > vía Compartir
Enviar vía compartir móvil
Móvil
Enviar vía Bluetooth Opciones > Enviar > vía Bluetooth
47
Multimedia
Para Presione
Opciones > Establecer como > Papel
Establecer como papel tapiz
tapiz
Establecer como libreta de Opciones > Establecer como > ID de
direcciones llamada
Eliminar Opciones > Eliminar
Cambiar nombre Opciones > Cambiar nombre
Ver información de la foto Opciones > Propiedades
Grabación de video
1.Presione Menú > Mi material > Herramientas > Video
cámara.
2.Enfoque el objeto > O > o presione Opciones > Grabar.
3.Presione Detener para detener.
4.Presione Opciones > Reproducir para reproducir la
secuencia de video.
5.Presione C para volver al modo de vista previa.
Cambio al modo de cámara
1.Presione Menú > Mi material > Herramientas > Video
cámara.
2.Presione Opciones cuando el modo de video cámara esté
activado.
48
3.Presione Modo de cámara.
Para obtener detalles sobre tomar una fotografía, consulte la
página 47.
Visualización de secuencias de video grabadas
1.Presione Menú > Mi material > Herramientas > Video
cámara.
2.Presione Opciones > Álbum de videos.
3.Seleccione la secuencia de video > Reproducir.
Después de guardar las secuencias de video grabadas
Para Presione
Enviar un mensaje multimedia
Opciones > Enviar > como Mensaje
mult.
Opciones > Enviar > vía Compartir
Enviar vía compartir móvil
Móvil
Enviar vía Bluetooth Opciones > Enviar > vía Bluetooth
Ver secuencias de video
Opciones > Reproducir
grabadas
Eliminar Opciones > Eliminar
Cambiar nombre Opciones > Cambiar nombre
Ver la información Opciones > Propiedades
Durante la grabación de un video
Para Presione
Recibir una llamada entrante S
Detener la grabación Detener
Álbum de fotos
Puede ver, enviar, guardar en el teléfono o en una tarjeta de
memoria externa y también eliminar fotos. Se admite el formato
JPEG; otros formatos se guardan en la carpeta Imagen.
nota: Para acceder a Imagen, presione Menú > Mi material > Imagen.
Visualización de las fotos guardadas
1.Presione Menú > Mi material.
2.Presione Imagen > Cámara.
3.Seleccione una imagen > Ver.
Visualización del modo de zoom
1.Presione Menú > Mi material.
2.Presione Imagen > Cámara.
3.Seleccione una imagen > Ver > Opciones > Modo de zoom.
Establecimiento como papel tapiz en la pantalla
1.Presione Menú > Mi material.
2.Presione Imagen > Cámara.
3.Seleccione una imagen > Opciones > Establecer como >
Papel tapiz.
Establecimiento como identificación de llamada
1.Presione Menú > Mi material.
2.Presione Imagen > Cámara.
3.Seleccione una imagen > Opciones > Establecer como >
ID de llamada.
Envío de imágenes usando mensajes de multimedia
1.Presione Menú > Mi material.
2.Presione Imagen > Cámara.
3.Seleccione una imagen.
4.Presione Opciones > Enviar > como Mensaje mult.
Para conocer detalles sobre creación de mensajes multimedia,
consulte la página 38.
01
02
03
04
05
06
07
08
Envío de imágenes vía compartir móvil
1.Presione Menú > Mi material.
2.Presione Imagen > Cámara.
3.Seleccione una imagen.
4.Presione Opciones > Enviar > vía Compartir móvil.
49
Multimedia
Para conocer detalles sobre creación de mensajes multimedia,
consulte la página 38.
Envío de imágenes vía Bluetooth
1.Presione Menú > Mi material.
2.Presione Imagen > Cámara.
3.Seleccione una imagen.
4.Presione Opciones > Enviar > vía Bluetooth.
Eliminación de varias imágenes
1.Presione Menú > Mi material.
2.Presione Imagen > Cámara.
3.Presione Opciones > Selección múltiple.
4.Presione Seleccionar para seleccionar más de una imagen.
5.Presione Deseleccionar para eliminar la selección.
6.Presione Opciones > Eliminar.
Visualización de la información del archivo
1.Presione Menú > Mi material.
2.Presione Imagen > Cámara.
3.Seleccione una imagen.
4.Presione Opciones > Propiedades.
50
Álbum de video
Puede ver, enviar, guardar y eliminar videos.
Los formatos admitidos con MP4, WMA, 3GP y 3G2.
Reproducción de las secuencias de video guardadas
1.Presione Menú > Mi material.
2.Presione Video.
3.Seleccione una secuencia de video > Reproducir.
Uso de los controles del reproductor de video
Para Presione
Reproducir/Pausa O
Detener Opciones > Detener
Mudo Opciones > Mudo
Retroceder mantenga presionada L
Avance rápido mantenga presionada R
Ajustar volumen Tecla lateral arriba o abajo o U/D
Repetir Encendida Opciones > Repetir Encendida
Propiedades Opciones > Propiedades
Envío de secuencias de video en mensajes de
multimedia
1.Presione Menú > Mi material.
2.Presione Video.
3.Seleccione una secuencia de video.
4.Presione Opciones > Enviar > como Mensaje mult.
Para conocer detalles sobre creación de mensajes multimedia,
consulte la página 38.
Envío de secuencia de video vía compartir móvil
1.Presione Menú > Mi material.
2.Presione Video.
3.Seleccione una secuencia de video.
4.Presione Opciones > Enviar > vía Compartir móvil.
Para conocer detalles sobre creación de mensajes multimedia,
consulte la página 38.
Envío de secuencia de video vía Bluetooth
1.Presione Menú > Mi material.
2.Presione Video.
3.Seleccione una secuencia de video.
4.Presione Opciones > Enviar > vía Bluetooth.
Para conocer detalles sobre creación de mensajes multimedia,
consulte la página 38.
Eliminación de varias secuencias de video
1.Presione Menú > Mi material.
2.Presione Video.
3.Presione Opciones > Selección múltiple.
4.Presione Seleccionar para seleccionar más de un video.
5.Presione Deseleccionar para eliminar la selección.
6.Presione Opciones > Eliminar.
Álbum de audio
Puede reproducir, enviar, eliminar, mover los sonidos guardados
a la memoria externa o al teléfono. Los formatos admitidos con
.qcp, .amr, .mid, .pmd, .mp3, .wav, .mmf, .aac, .m4a, .imy, .wma,
.midi, .3gpa, .spmid y .mp4a.
01
02
03
04
05
06
07
08
Escuchar el sonido grabado
1.Presione Menú > Mi material > Audio.
2.Presione Mi voz > seleccione un sonido > Reproducir.
51
Multimedia
Uso de los controles de sonido
Para Presione
Reproducir/Pausa O
Detener Opciones > Detener
Mudo Opciones > Mudo
Retroceder mantenga presionada L
Avance rápido mantenga presionada R
Ajustar volumen Tecla lateral arriba o abajo o U/D
Repetir Encendida Opciones > Repetir Encendida
Propiedades Opciones > Propiedades
Establecimiento como tono de timbre
1.Presione Menú > Mi material > Audio.
2.Seleccione un sonido > Opciones > Establecer como tono
de timbre.
Traslado o copia de varios sonidos a la memoria
externa
1.Presione Menú > Mi material > Audio.
52
2.Seleccione un sonido y presione Opciones > Seleccionar
múltiple.
3.Presione Seleccionar para seleccionar más de un archivo de
sonido.
4.Presione Opciones > Copiar a Memoria Externa o Mover
a Memoria Externa. El sonido seleccionado se copiará a la
carpeta Audio en la tarjeta de memoria externa.
Envío de archivos de sonido en mensajes de
multimedia
1.Presione Menú > Mi material > Audio.
2.Seleccione un archivo de sonido.
3.Presione Opciones > Enviar > como Mensaje mult.
Reproductor de música
Puede escuchar música en el teléfono con el Reproductor de
música. El Reproductor de música sólo es compatible y puede
reproducir los siguientes tipos de audio guardados en MP3, .AAC,
.AAC+ y .WMA.
Cuando aparece Significa
Se está reproduciendo música
Se hizo una pausa en la música
Se detuvo la música
nota: Se debe insertar la tarjeta microSD para transferir música al
dispositivo.
Incorporación de música desde Windows Media
Player™
1.Conecte el cable USB al dispositivo y a la computadora.
2.Seleccione Reprod Música > Seleccionar.
3.Abra la ficha Sync en Windows Media Player™ en la
computadora.
4.Seleccione la música de la lista y arrástrela al dispositivo.
nota: Se requiere Windows Media PlayerTM 10, 11 y Window XP.
Reproducción de música
1.Presione Menú > AT&T Música > Reprod Música.
2.Seleccione la categoría usando U/D para reproducir la
música.
3.Seleccione el archivo usando U/D luego presione
Reproducir.
4.Presione Opciones > Agregar a lista de reproducción para
agregar a la lista de reproducción.
5.Presione Opciones > Detener para detener la reproducción.
nota: La música quedará en pausa cuando reciba una llamada entrante y
se reanudará al terminar la llamada.
Iconos del reproductor
Icono

Nombre
Descripción
Volumen
01
02
03
04
05
06
07
Pausa
Reproducir
08
Retroceder
Avance rápido
Presione en forma prolongada:
Retroceso, Avance rápido
Pista anterior
Pista siguiente
Presione brevemente: Anterior,
Siguiente
Repetir Todo Pista
Repetir apagado
Repetir Pista Individual
53
Multimedia
Icono
/
Nombre
Descripción
Desordenar encendido/
apagado
Encendido: la lista de canciones
actual se reproduce al azar.
Desactivado: las canciones se
reproducen en orden y no al azar.
Creación de una lista de reproducción
1.Presione Menú > AT&T Música > Reprod Música.
2.Presione Listas de reproducción > Nueva Lista de
Reproducción.
3.Ingrese el nombre de la lista de reproducción > Guardar.
Seleccione Toda la música, Álbumes, Artistas o Géneros.
5.Seleccione el archivo de música usando U/D luego
presione Seleccionar para agregar a la lista de reproducción.
6.Presione Listo.
Edición de listas de reproducción
1.Presione Menú > AT&T Música > Reprod Música.
2.Presione Listas de reproducción.
3.Seleccione la lista de reproducción para agregar música >
Opciones > Agregar Pistas.
4.Seleccione la música para agregar > Seleccionar > Listo.
5.Para quitar pistas, presione Opciones > Remover Pistas >
54
seleccione la música presionando Seleccionar > Remover.
6.Para cambiar el nombre a la lista de reproducción, presione
Opciones > Cambiar nombre a lista de reproducción.
7.Para eliminar la lista de reproducción, presione Opciones >
Eliminar.
Escuchar música con auriculares Bluetooth
1.Mientras se reproduce la música en el modo de espera,
presione Menú > AT&T Música > Reprod Música.
2.Presione Reproduciendo ahora > Reproducir > Transferir
a auricular B/T.
Visualización de la información
1.Presione Menú > AT&T Música > Reprod Música.
2.Seleccione la categoría usando U/D para reproducir la
música.
3.Seleccione el archivo usando U/D luego presione
Reproducir.
4.Presione Opciones > Propiedades.
5.Use U/D para ver Número de pista, Título, Artista,
Álbum, Género, Duración, Nombre de Archivo, Tamaño
de Archivo, Ubicación, Formato, Veloc de transmisión,
Creado, Licencia y Compartir.
Configuración como tono de timbre
1.Presione Menú > AT&T Música > Reprod Música.
2.Seleccione la categoría con U/D.
3.Seleccione el archivo con U/D.
4.Presione Opciones > Establecer como tono de timbre.
nota: Durante la reproducción de la música el archivo no se puede
establecer como tono de timbre. No puede establecer como tono de
timbre un archivo de más de 300 Kb.
Eliminación de música
1.Presione Menú > AT&T Música > Reprod Música.
2.Seleccione la música de la lista.
3.Presione Opciones > Eliminar.
nota: Si la música se está reproduciendo, no la puede eliminar.
Compra de música
1.Presione Menú > AT&T Música.
2.Presione Comprar Música.
3.Para ir a la página anterior, presione C.
Escuchar la radio
1.Presione Menú > AT&T Música.
2.Presione AT&T Radio.
Uso de identificación de música
1.Presione Menú > AT&T Música.
2.Prescione Shazam.
3.Coloque el teléfono cerca de la música. El teléfono analizará
la música y mostrará el artista, título y álbum.
nota: Para conocer el costo del plan, comuníquese con el portador más
cercano.
Visualización del video musical
1.Presione Menú > AT&T Música.
2.Presione Video musical.
Visualización de información de Billboard
1.Presione Menú > AT&T Música.
2.Presione Make-UR-Tones.
01
02
03
04
05
06
07
08
Inicio a la comunidad
1.Presione Menú > AT&T Música.
2.Presione Comunidad.
Inicio de más aplicaciones
1.Presione Menú > AT&T Música.
2.Presione Música aplicaciones.
55
Multimedia
Configuración del reproductor de
música
Música desordenada
1.Presione Menú > AT&T Música > Reprod Música.
2.Presione Configuración.
3.Seleccione Desordenar.
4.Seleccione Desordenar encendido o Desordenar apagado.
Repetición de la música
1.Presione Menú > AT&T Música > Reprod Música.
2.Presione Configuración.
3.Seleccione Repetir.
4.Seleccione Repetir Todas las Pistas, Repetir Pista
Individual o Repetir Apagado.
Configuración del ecualizador
1.Presione Menú > AT&T Música > Reprod Música.
2.Presione Configuración.
3.Seleccione Ecualizador.
4.Seleccione la categoría usando L/R > Seleccionar.
Pantalla de completación automática
1.Presione Menú > AT&T Música > Reprod Música.
56
2.Presione Configuración.
3.Seleccione Pant Complt Auto.
4.Seleccione Activado o Desactivado.
Eliminación
1.Presione Menú > AT&T Música > Reprod Música.
2.Presione Configuración.
3.Seleccione Remover.
4.Seleccione Fichero de datos de la licencia o Todo el
contenido de la música > Sí.
<Reproductor de audio>
Piel del fondo
Tiempo de
reproducción
Controles de
volumen
Duración
Controles de
reproducción
Imagen de video
nota: No use esta función de forma ilegal. Los archivos de sonido y video
pueden estar protegidos con derechos de autor. La copia de dichas pistas
de sonido/video para fines comerciales o para su distribución es ilegal.
Pantech no admite de forma alguna el uso de contenido no autorizado en
el reproductor de multimedia del teléfono.
Tiempo de
reproducción
Controles de
volumen
Opciones
Reproducir
Atrás
Iconos del reproductor
Icono

Nombre
Nombre
Descripción

Anterior
Siguiente
Presione en forma prolongada:
Retroceso, Avance rápido

Pausa
Reproducir

Repetir Encendida
Reproducción de la secuencia de video
<Reproductor de video>
Reproductor multimedia
Con el reproductor multimedia, puede reproducir secuencias
de audio y video. El Reproductor de música sólo es compatible
y puede reproducir los siguientes formatos guardados en .3gp,
.mp4, .m4a, .3gpa, .wmv, .wma, .mp3, .aac, .amr, .mid, .mmf,
.pmd, .imy, .wav y .qcp.
Icono
Descripción
Duración
Controles de
reproducción
1.Presione Menú > Mi material.
2.Presione Herramientas > Rep. multimedia.
3.Presione Video.
4.Seleccione un archivo > Reproducir.
01
02
03
04
05
06
07
08
Reproducción de un archivo de audio
1.Presione Menú > Mi material
2.Presione Herramientas > Rep. multimedia.
3.Presione Audio.
4.Seleccione la carpeta > seleccione un archivo > Reproducir.
Para el control del reproductor de audio, consulte la página 52.
Volumen
57
Multimedia
Otros archivos
Puede administrar archivos guardados en el teléfono en formatos
no compatibles. También muestra una lista de los archivos
recibidos vía Bluetooth desde otros dispositivos.
Visualización de la lista de los archivos
1.Presione Menú > Mi material.
2.Presione Otros archiv.
Administración de memoria
Visualización del estado de la memoria
1.Presione Menú > Mi material.
2.Presione Espacio Usado.
3.Use U/D para ver la información.
Comprar juegos
1.Presione Menú > Mi material.
2.Presione Juegos.
3.Seleccione Comprar Juegos.
4.Reproduzca la demostración y presione COMPRAR para
descargar el juego completo.
01
02
03
04
05
06
07
08
Juegos
Puede descargar juegos para jugar. Son fáciles de descargar y
además puede acceder a una vista previa antes de descargarlos.
Sólo podrá ver los juegos que están disponibles en el teléfono
móvil.
58
59
5
Características útiles
P7040
Alarma
Calendario
Bloc de notas y memo de voz
Hora mundial
Calculadora, calculadora de propinas y convertidor
Cronómetro y temporizador
Tarjeta de presentación
Información de memoria
Características útiles
Alarma
Configuración de una alarma
1.Presione Menú > Mi material > Herramientas > Reloj de
Alarma.
2.Presione Crear nuevo para originar una nueva alarma por
primera vez.
3.Establezca Ciclo, Hora, Sonido de Alarma, Tipo de alerta,
Volumen, Recordat. y Encender alarma > Guardar.
Visualización de las alarmas guardadas
1.Presione Menú > Mi material > Herramientas > Reloj de
Alarma.
Edición de las alarmas existentes
1.Presione Menú > Mi material > Herramientas > Reloj de
Alarma.
2.Seleccione una alarma > Editar.
3.Presione Opciones > Eliminar para eliminar una alarma.
4.Presione Opciones > Crear nuevo para agregar una nueva
alarma.
62
Calendario
Creación de un nuevo evento y edición
El Calendario le ayuda a administrar
su tiempo, incluidas las horas para
realizar llamadas o días especiales.
Con esta función, puede programar un
recordatorio en una fecha determinada.
Visualización del calendario
1.Presione Menú > Mi material > Herramientas >
Calendario.
nota: La vista mensual es la configuración predeterminada.
En la vista mensual
Para Presione
Moverse a otro día
L para Anterior
R para Siguiente
Moverse a otra semana
U para Anterior
D para Siguiente
Ver otro mes
Tecla lateral abajo para Anterior
Tecla lateral arriba para Siguiente
1.Seleccione un día > Opciones > Nuevo evento.
2.Seleccione Programar, Tarea o Nota.
3.Ingrese los eventos > Guardar.
nota: Puede crear eventos para fechas desde 01/01/2000 hasta
31/12/2099.
Bloc de notas y memo de voz
Uso del bloc de notas
1.Presione Menú > Mi material > Herramientas > Bloc de
notas.
2.Presione Crear nuevo si la originará por primera vez. Para
añadir un nuevo grupo, presione Crear nuevo u Opciones >
Crear nuevo.
3.Para editar la nota, presione Editar.
4.Presione Guardar para guardarla.
5.Si desea dejar una nota inactiva, presione Opciones >
Colocar en el papel tapiz.
6.Si desea revertir el estado de una nota inactiva, presione
Opciones > Remover del papel tapiz.
Grabación de nota de voz
1.Presione Menú > Mi material >
Herramientas > Memo de voz.
2.Presione Nva Grabac por primera
vez. Para agregar una nueva nota
de voz, presione Nueva grabación
u Opciones > Nueva grabación.
3.Presione Grabar.
4.Presione Detener para detener la grabación.
Automáticamente se guardará en Mi voz.
5.Presione Reproducir para escuchar.
nota: Para acceder a Mi voz, presione Menú > Mi material > Audio >
Mi voz.
01
02
03
04
05
06
07
08
Escuchar el sonido grabado
1.Presione Menú > Mi material > Audio > Mi voz.
2.Seleccione un sonido > Reproducir.
63
Características útiles
Uso de los controles de sonido
Para Presione
Reproducir/Pausa O
Ajustar volumen Tecla lateral arriba o abajo o U/D
Detener Opciones > Detener
Mudo Opciones > Mudo
Repetir Opciones > Repetir encendido/apagado
Propiedades Opciones > Propiedades
Hora mundial
Uso de la hora mundial
1.Presione Menú > Mi material >
Herramientas > Hora Mundial.
2.Seleccione la ciudad con las teclas
de navegación arriba o abajo.
3.Presione Guardar para guardarla.
nota: Si desea configurar hora doble en el modo inactivo, presione Menú
> Configuración > Pantalla> Pantalla de bienvenida > Tipo de reloj >
Reloj tipo 5.
64
Calculadora, calculadora de propinas y
convertidor
Uso de la calculadora
1.Presione Menú > Mi material >
Herramientas > Calculadora.
2.Use U/D/L/R O para hacer
los cálculos.
3.Presione C para borrar un dígito.
4.Presione Restablecer para restablecer.
5.Presione . para usar el punto decimal.
Uso de la calculadora de propinas
1.Presione Menú > Mi material >
Herramientas > Calc Propinas.
2.Ingrese los valores para todas los
campos variables (Cuenta($),
Propina(%), Dividir), y los campos
de cálculo correspondientes (Propina($), Total($), Usted
paga) se actualizarán automáticamente.
3.Presione Restablecer para restablecer.
4.Presione * para usar el punto decimal.
Uso del convertidor
1.Presione Menú > Mi material >
Herramientas > Convertidor.
2.Seleccione las categorías.
3.Seleccione la unidad actual e
ingrese una cifra. Luego, los otros
campos de unidad se actualizarán
automáticamente.
Cronómetro y temporizador
Uso del cronómetro
1.Presione Menú > Mi material >
Herramientas > Cronómetro.
2.Presione Iniciar para comenzar.
3.Presione Detener para detener.
4.Presione Continuar para reiniciar.
5.Presione Restablecer para borrar.
6.Para cambiar a tiempo de vuelta, presione Modo > Modo
Tiempo de Vuelta.
7.Para dividir el cronómetro, presione Modo > Modo de
Tiempo Dividido.
nota: En modo básico, cuando sale de otro menú o está inactivo mientras
el cronómetro está trabajando, podrá ver el icono de reloj en inactivo, lo
que significa que el cronómetro sigue funcionando. Además, si vuelve a
ingresar al menú, podrá ver que sigue funcionando.
01
Uso del temporizador
02
1.Presione Menú > Mi material >
Herramientas > Temporizador.
2.Presione Establecer para ingresar la
hora.
3.Ingrese la hora, los minutos y los
segundos > O.
4.Presione Iniciar para comenzar.
5.Presione Reiniciar para reiniciar.
nota: En modo básico, cuando sale de otro menú o está inactivo mientras
el temporizador está trabajando, podrá ver el icono del temporizador
en inactivo, lo que significa que sigue funcionando. Además, si vuelve a
ingresar al menú, podrá ver que sigue funcionando.
03
04
05
06
07
08
Tarjeta de presentación
Puede enviar su información como un mensaje multimedia o vía
Bluetooth.
65
Características útiles
Creación de su propia tarjeta de presentación
1.Presione Menú > Libreta de direcciones > Mi
información.
2.Edite los campos > Guardar.
Reenvío
1.Presione Menú > Libreta de direcciones > Mi
información.
2.Presione Opciones > Enviar mi información > Mensaje
multimedia o Bluetooth.
3.Busque el dispositivo o elija el dispositivo para enviar vía
Bluetooth y presione Seleccionar.
4.Escriba un mensaje para Mensaje multimedia. Presione
Enviar a y seleccione la persona a la que desea enviar el
mensaje y presione Seleccionar.
5.Presione Enviar.
Información de memoria
Puede ver la información del teléfono o la tarjeta de memoria
para Usado, Audio, Juegos, Aplicaciones, Imagen, Video,
Otros archiv. y Sistema.
01
Visualización de la información
03
1.Presione Menú > Mi material > Espacio Usado.
Formateo de la memoria
1.Presione Menú > Mi material.
2.Presione Espacio Usado.
3.Presione L/R para seleccionar Teléfono o Tarjeta de
memoria.
4.Presione Formato > Sí.
02
04
05
06
07
08
Actualización de información
1.Presione Menú > Libreta de direcciones > Mi
información.
2.Presione Opciones > Editar mi información.
3.Actualice la información.
4.Presione Guardar.
66
67
P7040
6
Conectividad
Bluetooth
UsodeMobileWeb
Usodelnavegador
Configuración de perfil
Conectividad
Bluetooth
La tecnología Bluetooth permite conexiones inalámbricas
gratuitas entre dispositivos electrónicos dentro de un rango
máximo de 10 metros (33 pies). Se puede usar una conexión
Bluetooth para enviar imágenes, texto, tarjetas de presentación,
calendario y notas, o para conectarse a computadoras que
utilicen tecnología Bluetooth.
El teléfono móvil admite:
• Conexión a PC para acceder a Internet.
• Conexión a dispositivos manos libres.
• Conexión a dispositivos electrónicos.
Iconos de Bluetooth
Bluetooth está activo.
El auricular manos libres Bluetooth está conectado.
El auricular A2DP Bluetooth está conectado.
El auricular manos libres + A2DP Bluetooth está conectado.
Transferencia de datos mediante Bluetooth.
70
Activación
1.Presione Menú > Configuración > Conectividad >
Bluetooth > Activación.
2.Seleccione Activado o Desactivado.
Adición de un dispositivo
1.Presione Menú > Configuración > Conectividad >
Bluetooth >Mis dispositivos.
2.Presione Buscar.
3.Aparecerá el dispositivo disponible.
4.Para seleccionar el dispositivo, presione Seleccionar. Para
ver los detalles, presione Ver.
5.Ingrese la contraseña.
nota: El otro dispositivo debe estar en el modo de apareamiento.
Envío de un objeto
1.Seleccione el archivo en Menú > Mi material > Imagen,
Video, Audio u Otros archiv.
2.Presione Opciones > Enviar > vía Bluetooth.
3.Presione Buscar.
4.Seleccione el dispositivo > Seleccionar.
nota: Si el otro dispositivo Bluetooth solicita apareamiento, el objeto se
envía una vez que éste finaliza. Los objetos bloqueados o aquéllos que
contienen derechos originales no se pueden reenviar.
Recepción de un objeto
El procedimiento de recepción de un objeto comienza sólo
cuando se aprueba la recepción.
El archivo recibido se guardará en el lugar correspondiente. Por
ejemplo, si recibe información de contactos del remitente, se
guardará en la memoria del teléfono.
Configuración de la visibilidad
1.Presione Menú > Configuración > Conectividad >
Bluetooth > Visibilidad.
2.Seleccione Ocultar o Mostrar.
Asignación de nombre al teléfono
1.Presione Menú > Configuración > Conectividad >
Bluetooth > Info. de mi Bluetooth.
2.Seleccione el Nombre > Editar > edite el campo >
Guardar.
nota: Esto es lo que otros verán en la pantalla con respecto a su teléfono
cuando busquen su dispositivo.
Uso de Mobile Web
Acceso a Mobile Web
1.Presione O en el modo de espera o presione Menú >
Mobile Web.
01
02
nota: Accederá a la página de inicio de Mobile Web.
03
Uso del navegador
04
Acceso al navegador
1.Presione Menú > Mi material > Aplicaciones >
Navegador > Inicio.
nota: Accederá a la página de inicio del proveedor.
Visualización de favoritos
05
06
07
08
1.Presione Menú > Mi material > Aplicaciones >
Navegador > Favoritos.
2.Para abrir el sitio, presione Ir.
3.Para enviar a través de mensaje de texto, presione Opciones
> Enviar por mensaje.
Configuración de nuevos favoritos
1.Presione Menú > Mi material > Aplicaciones >
Navegador > Favoritos.
71
Conectividad
2.Presione Opciones > Crear nuevo.
3.Ingrese el campo > Guardar.
Ingreso de dirección
1.Presione Menú > Mi material > Aplicaciones >
Navegador > Ingresar dir.
2.Ingrese la dirección Web > Ir.
Visualización de historial
1.Presione Menú > Mi material > Aplicaciones >
Navegador > Historial.
Configuración de opciones avanzadas
1.Presione Menú > Mi material > Aplicaciones >
Navegador > Administrar > Opciones.
2.Seleccione la categoría > Seleccionar.
3.Seleccione las opciones > Seleccionar.
Visualización de certificados
1.Presione Menú > Mi material > Aplicaciones >
Navegador > Administrar > Seguridad > Certificados.
Uso de operaciones de memoria
1.Presione Menú > Mi material > Aplicaciones >
Navegador > Administrar > Datos privados.
72
2.Para borrar el caché, presione Borrar Caché > Sí.
3.Para borrar las cookies, presione Borrar cookies > Sí.
4.Para borrar el historial, presione Borrar historial > Sí.
Visualización de estado de descarga
1.Presione Menú > Mi material > Aplicaciones >
Navegador > Administrar > Administrador de
Descargas.
Configuración de perfil
Puede configurar el perfil y ver Nombre del perfil, URL de
inicio, Tipo de conexión, Dirección de proxy y Puerto proxy.
Adición de nuevo perfil
2.Seleccione un perfil > Opciones > Editar.
Visualización del perfil predeterminado
1.Presione Menú > Mi material > Aplicaciones >
Navegador > Administrar > Perfiles.
2.Seleccione Mobile Web > Opciones > Ver.
Eliminación de perfil
1.Presione Menú > Mi material > Aplicaciones >
Navegador > Administrar > Perfiles.
2.Seleccione un perfil > Opciones > Eliminar.
01
02
03
04
05
06
07
08
1.Presione Menú > Mi material > Aplicaciones >
Navegador > Administrar > Perfiles.
2.Presione Opciones > Crear.
3.Ingrese los campos > Guardar.
Edición de perfil
1.Presione Menú > Mi material > Aplicaciones >
Navegador > Administrar >
Perfiles.
73
P7040
7
Configuración
Idioma
Hora y fecha
Tonos de timbre
Pantalla
Seguridad
Restablecer
TTY
Configuración
Idioma
Configuración
1.Presione Menú > Configuración > Teléfono > Idioma.
2.Seleccione Texto de pantalla o Predictivo.
3.Seleccione el idioma > Seleccionar.
Hora y fecha
Configuración
1.Presione Menú > Configuración > Teléfono > Hora y
fecha.
2.Seleccione Actualización automática, Hora, Formato de
hora, Fecha o Formato de fecha > Seleccionar.
3.Seleccione las opciones > Seleccionar.
Tonos de timbre
Establecer los tonos de timbre
1.Presione Menú > Mi material > Audio.
2.Seleccione la carpeta > seleccione un archivo > Opciones >
Establecer como tono de timbre.
76
Configuración de perfil de sonido
1.Presione Menú > Configuración > Perfiles.
2.Seleccione Normal, Vibrar y Timbrar, Sólo vibrar,
Silencioso o Modo de vuelo.
Pantalla
Configurar la pantalla de bienvenida
Puede establecer el Papel tapiz, Tipo de reloj y Texto.
1.Presione Menú > Configuración > Pantalla > Pantalla de
bienvenida.
Configuración del tipo de menú
1.Presione Menú > Configuración > Pantalla > Tipo de
menú.
Configuración del brillo
1.Presione Menú > Configuración > Pantalla > Brillo.
nota: La modificación del brillo puede afectar la vida útil de la batería.
Configuración de tiempo de la luz de fondo
1.Presione Menú > Configuración > Pantalla > Temporiz
Contraluz.
nota: La modificación del tiempo de la luz de fondo puede afectar la vida
útil de la batería.
Seguridad
Bloqueo del teléfono
1.Presione Menú > Configuración > Seguridad > Bloqueo
de teléfono > Bloqueo de teléfono.
2.Seleccione Encendido.
Establecer el tema de color
nota: La contraseña predeterminada es “1234”. Para cambiar la
contraseña, presione Menú > Configuración > Seguridad > Bloqueo de
teléfono > Cambiar contraseña.
Configuración de la letra
Bloqueo del PIN
1.Presione Menú > Configuración > Pantalla > Tema de
color.
1.Presione Menú > Configuración > Pantalla > Estilo de
letra.
El Número de identificación personal es el código de seguridad
que protege el teléfono o la SIM contra uso no autorizado.
1.Presione Menú > Configuración > Seguridad > PIN >
Bloqueo de PIN > Sí.
2.Ingrese el código PIN > O.
nota: Para cambiar el código PIN, presione Menú > Configuración >
Seguridad > PIN > Cambiar PIN.
Cambio del PIN 2
1.Presione Menú > Configuración > Seguridad > Cambiar
PIN2.
Bloqueo automático de teclas
Puede programar el bloqueo automático de teclas para evitar
que éstas se presionen accidentalmente.
1.Presione Menú > Configuración > Seguridad > Bloq de
Teclas Auto.
2.Seleccione Encendido.
01
02
03
04
05
06
07
08
nota: El tiempo del bloqueo automático de teclas es equivalente al
tiempo que está activa la función de contraluz.
Para cambiar el tiempo de contraluz, presione Menú >
Configuración > Pantalla > Temporizador de contraluz.
Liberación del bloqueo automático de teclas
1.Presione Menú > Configuración > Seguridad > Bloq de
Teclas Auto.
2.Seleccione Apagado.
77
Configuración
Cambio de la clave oculta
La clave oculta es un código de seguridad para Contacto USIM.
Con la clave oculta puede bloquear la información de la persona
en los Contactos USIM.
1.Presione Menú > Configuración > Seguridad > Cambiar
clave oculta.
nota: La contraseña predeterminada depende de la tarjeta SIM (ya sea
que dependa de la tarjeta SIM o esté determinada por la tarjeta SIM).
Configuración del número de marcación fija
1.Presione Menú > Configuración > Seguridad > FDN.
2.Seleccione Activado o Desactivado.
Para obtener detalles sobre marcación fija consulte la página 32.
Restablecer
Restablecimiento del teléfono
1.Presione Menú > Configuración > Restablecer.
2.Ingrese la contraseña > Restablecimiento maestro> Sí.
nota: La configuración volverá a sus valores predeterminados. la
contraseña predeterminada es “1234”.
Borrado del teléfono
1.Presione Menú > Configuración > Restablecer.
78
2.Ingrese la contraseña > Borrado maestro > Sí.
nota: Volverá a la configuración predeterminada y borrará todos los datos
personales. la contraseña predeterminada es “1234”.
TTY
01
02
El teleimpresor (TTY) es un dispositivo de telecomunicaciones
que permite comunicarse vía telefónica con las personas que
presentan problemas de audición o con dificultades para hablar
o de idioma.
03
Configuración del teleimpresor
06
1.Presione Menú > Configuración > TTY.
2.Seleccione Desactivar, TTY lleno, TTY hablar o TTY
escuchar.
• Desactivar: el modo TTY está desactivado.
• TTY lleno: el usuario que no puede hablar ni escuchar envía
y recibe mensajes de texto.
• TTY hablar: el usuario que puede hablar pero que no puede
escuchar, recibe mensajes de texto y envía mensajes de voz.
• TTY escuchar: el usuario que puede escuchar pero que no
puede hablar, envía mensajes de texto y recibe mensajes de
voz.
04
05
07
08
79
P7040
8
Apéndice
Mensajes de alerta
Lista de control de solución de problemas
Información de seguridad
Medidas de seguridad
Acerca del uso de la batería
Reglamentaciones sobre compatibilidad con dispositivos de audición
(HAC)delaFCCparadispositivosinalámbricos
CumplimientoconlasreglamentacionesdelaFCC
Garantía
Apéndice
Mensajes de alerta
Si experimenta algún problema mientras usa su teléfono móvil, consulte
la siguiente lista de control. Si el problema persiste, comuníquese con el
distribuidor o portador más cercano.
Cuando aparezca el mensaje “Insertar SIM”:
Ingrese el PIN1. Si no puede recordarlo, comuníquese con el proveedor
de servicio. Podrá continuar recibiendo llamadas incluso si el teléfono se
bloquea después de ingresar tres veces seguidas el PIN1 incorrecto.
Cuando aparezca “Sin servicio” o “Búsqueda de red”:
Asegúrese de que la tarjeta SIM esté correctamente instalada. Revise
que la tarjeta SIM esté funcionando adecuadamente. Si no funciona,
intente limpiar los puntos de contacto de la tarjeta con un paño seco. Si no
responde, llévela al proveedor de servicio.
Si no puede realizar ni recibir llamadas en el interior de un recinto o en
un subterráneo, donde la intensidad de la señal es débil, muévase hacia
una ventana o salga a un área abierta. Si aún no puede establecer una
conexión, comuníquese con el proveedor de servicio.
Cuando aparezca “Mensajes llenos”:
Lista de control de solución de problemas
La memoria del teléfono está llena con los mensajes recibidos o
guardados. Necesita eliminar el mensaje.
Cuando aparece el mensaje “Mensajes de teléfono y SIM lleno.
Eliminar mensajes”:
Se copó la capacidad para mensajes recibidos o guardados en el teléfono y
tarjeta SIM. Necesita eliminar el mensaje.
Cuando aparezca el mensaje “Contraseña” en el estado
Teléfono bloqueado:
Ingrese la contraseña del teléfono. La contraseña predeterminada es
“1234”. Si no puede recordar la contraseña, comuníquese con el portador
más cercano.
82
Cuando aparezca el mensaje “Ingresar PIN1”:
Cuando la calidad del audio sea débil:
Finalice la llamada y vuelva a intentarlo.
Cuando la otra persona no lo escuche:
Es posible que teléfono esté en MUDO. Desactive la función MUDO.
O bien, su mano podría estar cubriendo el micrófono ubicado debajo de
la tecla *.
Cuando la vida útil de la batería sea menor que lo habitual:
Esto podría suceder cuando se encuentre en un área con baja intensidad
de la señal. Apague el teléfono cuando no esté en uso. Cambie la batería
cuando la energía se haya agotado.
Cuando el teléfono móvil no se encienda:
Asegúrese de que la batería esté cargada. Verifique que el teléfono
funcione mientras recarga la batería.
Cuando no pueda enviar un mensaje:
Puede que no esté registrado para recibir servicio SMS o bien, puede estar
en un área en la que el proveedor de servicio de red no puede proporcionar
dicho servicio.
Cuando no pueda realizar una llamada:
El teléfono puede estar configurado en “marcación fija”. Cancele la función
“marcación fija”.
Cuando no pueda cargar la batería:
Esto podría ser el resultado de uno de los siguientes casos.
1. El cargador podría no estar funcionando. Comuníquese con el
distribuidor más cercano.
2. Podría estar intentando utilizar el teléfono en una temperatura
extremadamente calurosa/fría. Intente cambiar el entorno de carga.
3. La batería podría no estar conectada correctamente al cargador. Revise
el conector.
Cuando no pueda ingresar datos en la Libreta de direcciones:
La memoria de la Libreta de direcciones podría estar llena. Intente borrar
algunas entradas de la Libreta de direcciones.
Cuando no pueda seleccionar una función determinada:
Podría no estar suscrito a esa función o el proveedor de servicio de red
podría encontrarse en un área en la cual dicho servicio no se puede
proporcionar. Comuníquese con el proveedor de servicio local.
Información de seguridad
La siguiente lista indica cómo mantener el teléfono móvil, así como las
precauciones que se deben tomar.
–Mantenga el teléfono móvil y los accesorios fuera del alcance de los
niños y mascotas.
–Mantenga el teléfono móvil seco y dentro de las temperaturas de
funcionamiento normales. Las temperaturas superiores a 55°C (131°F) o
inferiores a -20°C (-4°F) podrían dañar el teléfono.
–No intente secar el teléfono en un horno microondas. De lo contrario, se
pueden generar chispas y una explosión o incendio.
–No use ni guarde el teléfono móvil en lugares polvorientos ni sucios.
–No intente desarmar el teléfono móvil.
–No deje caer el teléfono móvil ni lo golpee fuertemente.
–No utilice productos químicos, solventes ni detergentes para limpiar el
teléfono móvil.
–Si el teléfono no funciona correctamente, comuníquese de inmediato
con un distribuidor.
01
02
03
04
05
06
07
08
83
Apéndice
–Use sólo baterías, cargadores y accesorios autorizados. Cualquier mal
funcionamiento o daño causado por el uso de baterías, cargadores y
accesorios no autorizados invalidará la garantía limitada del producto.
–Asegúrese de que la batería y el cargador no estén en contacto con
objetos conductores.
Medidas de seguridad
Es posible que no esté permitido el uso de teléfonos móviles
mientras conduce un automóvil.
Revise las leyes y normas locales relacionadas con la prohibición de uso de
teléfonos móviles mientras se conduce y respételas siempre.
El uso del teléfono mientras conduce puede afectar su concentración y
provocar un accidente. Siempre apáguelo para conducir en forma segura.
Si debe utilizar el teléfono en caso de emergencia, use un dispositivo de
manos libres incorporado al automóvil o estaciónese primero en un lugar
seguro.
Apáguelo en áreas restringidas
Siempre apague el teléfono en áreas donde su uso esté restringido.
Apáguelo en áreas de explosivos o peligrosas
Siempre apague el teléfono en áreas expuestas a materiales explosivos
o peligrosos (como combustibles, gasolineras o zonas donde existan
productos químicos) y respete todas las instrucciones o señalizaciones
84
presentes en el lugar. No extraiga la batería del teléfono móvil en dichas
áreas.
Apáguelo dentro de los aviones
Siempre apague el teléfono o seleccione Modo de vuelo (presione Menú
> Configuración > Perfiles > Modo de vuelo) cuando se encuentre
en un avión. Las ondas electromagnéticas que emite el teléfono pueden
afectar los equipos de navegación del avión.
Apáguelo en hospitales y cerca de equipos médicos
Siempre apague el teléfono en los hospitales y respete las
reglamentaciones y normas de estos recintos.
Si es posible, apague el teléfono cuando se utilicen equipos médicos para
fines privados. Consulte siempre al fabricante del equipo médico o a un
experto sobre el uso del teléfono cuando esté cerca de dicho equipo.
Instalación de un dispositivo manos libres en el vehículo
Instale los dispositivos manos libres para vehículo lejos del volante y del
área de inflado de las bolsas de aire, de lo contrario se podrían producir
lesiones.
Teléfonos móviles y otros dispositivos electrónicos
Los teléfonos móviles emiten ondas electromagnéticas que pueden afectar
a los dispositivos electrónicos cercanos. Cuando el teléfono esté encendido,
no lo coloque cerca de equipos electrónicos delicados.
Acerca del uso de la batería
La energía del teléfono proviene de una batería de ión de litio (ión-litio).
Esto significa que, a diferencia de otras tecnologías, la batería se puede
recargar mientras aún queda carga, sin reducir la autonomía del teléfono
debido al “efecto de memoria de batería” inherente a estas tecnologías.
– No utilice baterías ni cargadores dañados.
– No desarme, abra, aplaste, doble, deforme, perfore ni destroce la
batería.
– No modifique, refabrique ni intente insertar objetos extraños en la
batería. No la sumerja ni la exponga al agua u otros líquidos, como
tampoco al fuego, explosiones u otros peligros.
– No permita que la batería tenga contacto con objetos conductores.
– Elimine y recicle las baterías usadas de acuerdo con la normativa local.
No queme las baterías; podrían explotar.
– No utilice cargadores no autorizados.
– Utilice la batería sólo para el dispositivo para el cual se especifica.
– Utilice la batería solamente con un cargador calificado para el
dispositivo de acuerdo a este estándar. El uso de una batería o cargador
no calificados puede ocasionar riesgos de fuego, explosión, filtración u
otros peligros.
– No cause cortocircuito en la batería ni permita que objetos metálicos
conductores entren en contacto con sus terminales.
– Cambie la batería sólo por otra batería calificada con el dispositivo
según el estándar IEEE-Std-1725-2006. El uso de una batería no
–
–
–
–
–
–
–
–
–
–
calificados puede ocasionar riesgos de fuego, explosión, filtración u
otros peligros.
Elimine las baterías usadas de acuerdo con la normativa local.
Los niños deben usar las baterías bajo la supervisión de un adulto.
Evite dejar caer el teléfono o la batería. Si el teléfono o la batería se cae,
especialmente en una superficie dura, y sospecha que se ha producido
algún daño, comuníquese con un centro de servicio para su revisión.
Use la batería sólo para el fin especificado.
Mientras más cerca esté de la estación base de red, mayor será el
tiempo de uso del teléfono, debido a que la conexión consume menos
energía.
El tiempo de recarga de la batería varía dependiendo de la capacidad
restante de la batería y del tipo de batería y cargador utilizados.
La vida útil de la batería inevitablemente se reduce con el tiempo.
Utilice solamente baterías y cargadores autorizados.
Debido a que la sobrecarga reduce la vida útil de la batería, desconecte
el teléfono del cargador cuando esté completamente cargado.
Desenchufe el cargador cuando finalice la carga. Dejar la batería en
lugares calurosos o fríos, especialmente al interior de un automóvil en
verano o invierno, puede reducir su vida útil. Manténgala siempre a
temperaturas normales.
Para evitar lesiones o quemaduras, asegúrese de no colocar objetos
metálicos en contacto con los terminales + y – de la batería.
01
02
03
04
05
06
07
08
85
Apéndice
Reglamentaciones sobre compatibilidad
con dispositivos de audición (HAC) de la
FCC para dispositivos inalámbricos
El 10 de julio de 2003, el Informe y Orden WT Rótulo 01-309 de la Comisión
federal de comunicaciones (FCC) de los Estados Unidos modificó la
excepción de los teléfonos inalámbricos en el Acta de compatibilidad con
dispositivos de audición de 1988 (Acta HAC) para exigir que los teléfonos
inalámbricos digitales sean compatibles con los dispositivos de audición.
La intención del Acta HAC es asegurar un acceso razonable a los servicios
de telecomunicaciones para las personas con discapacidad auditiva.
Si bien algunos teléfonos inalámbricos se usan cerca de ciertos dispositivos
de audición (audífonos e implantes coclear), los usuarios podrían detectar
un zumbido o ruido zumbador. Algunos dispositivos de audición son más
inmunes que otros a este ruido de interferencia y los teléfonos también
varían en cuanto a la cantidad de interferencia que generan.
La industria de teléfonos inalámbricos ha desarrollado un sistema de
clasificación de éstos con el fin de ayudar a los usuarios que utilizan
dispositivos de audición a encontrar teléfonos que puedan ser compatibles
con sus audífonos. No todos los teléfonos se han clasificado. Los teléfonos
que se incluyeron adjuntan la clasificación en su caja de embalaje o en una
etiqueta ubicada en ésta.
86
Las clasificaciones no son garantías. Los resultados pueden variar
dependiendo del dispositivo de audición y pérdida del oído del usuario.
Si su dispositivo de audición parece ser vulnerable a la interferencia,
no podrá usar un teléfono clasificado exitosamente. Probar el teléfono
con el dispositivo de audición es la mejor manera de evaluarlo para sus
necesidades personales.
• Clasificaciones M: los teléfonos clasificados M3 o M4 cumplen con
los requerimientos de la FCC y probablemente generarán menos
interferencia en los dispositivos de audición que los teléfonos no
rotulados. M4 es la mejor de las dos clasificaciones.
• Clasificaciones T: los teléfonos clasificados T3 o T4 cumplen con
los requerimientos de la FCC y probablemente generarán menos
interferencia en los dispositivos de audición que los teléfonos no
rotulados. T4 es la mejor de las dos clasificaciones.
Los dispositivos de audición también se pueden clasificar. El fabricante
de su dispositivo de audición o profesional de la salud del área puede
ayudarlo a encontrar esta clasificación. Las clasificaciones más altas
indican que el dispositivo de audición es relativamente inmune al ruido de
la interferencia. Los valores de clasificación del dispositivo de audición y
del teléfono inalámbrico se suman. Una suma de 5 se considera aceptable
para uso normal. Una suma de 6 se considera para el mejor uso.
En el ejemplo anterior, si un dispositivo de audición cumple con la
clasificación de nivel M2 y el teléfono inalámbrico cumple con la
clasificación de nivel M3, la suma de ambos valores es igual a M5. Esto es
igual para las clasificaciones T. Esto debe proporcionar un “uso normal” al
usuario del audífono, al utilizar el dispositivo con el teléfono inalámbrico
particular. “Uso normal” en este contexto se define como una calidad de
señal aceptable para un funcionamiento normal.
La marca M tiene como objetivo ser sinónimo de la marca U. La marca
T tiene como objetivo ser sinónimo de la marca UT. Las marcas M y T
son recomendadas por la Alianza para soluciones en la industria de las
telecomunicaciones (ATIS). Las marcas U y UT aparecen en la Sección 20.19
de las reglas de la FCC. La clasificación HAC y el procedimiento de medición
se describen en el estándar C63.19 del Instituto nacional de estándares
americanos (ANSI).
Para asegurar que se mantiene la clasificación de la Compatibilidad con los
dispositivos de audición en su teléfono, los transmisores secundarios, como
Bluetooth y componentes de WLAN, se deben desactivar durante una
llamada. Consulte la página 70 para obtener instrucciones para desactivar
estos componentes.
Cumplimiento con las reglamentaciones
de la FCC
Cumplimiento con las reglamentaciones de la FCC
Este dispositivo cumple con la sección 15 de las normas de la FCC. El
funcionamiento está sujeto a las siguientes dos condiciones: (1) este
dispositivo no debe causar interferencia perjudicial, y (2) este dispositivo
debe aceptar cualquier interferencia recibida, incluso una interferencia que
pueda causar un funcionamiento no deseado.
Su dispositivo móvil es un radiotransmisor y receptor de baja potencia.
Cuando está encendido, recibe y envía señales de radiofrecuencia (RF).
En agosto de 1996, la Comisión federal de comunicaciones (FCC) adoptó
las pautas para la exposición a la RF con niveles de seguridad para los
dispositivos móviles. Dichas pautas cumplen con los estándares de
seguridad previamente definidos por las entidades de estándares de
EE.UU. e internacionales: Instituto nacional de estándares americanos
(ANSI), Consejo nacional de protección radiológica y metrología (NCRP) y
Comisión internacional para la protección contra la radiación no ionizante
(ICNRP). Aquellos estándares se basaron en evaluaciones integrales y
periódicas de los textos científicos pertinentes. El diseño del teléfono
cumple con las pautas de la FCC y se aplica.
01
02
03
04
05
06
07
08
87
Apéndice
Declaración según la sección 15.105 de la FCC
NOTA: este equipo ha sido probado y se demostró que cumple con los
límites para un dispositivo digital clase B, conforme a la sección 15 de las
normas de la FCC. Estos límites están diseñados para ofrecer protección
adecuada contra interferencia dañina en una instalación residencial. Este
equipo genera, utiliza y puede emitir energía de radiofrecuencia y, si no se
instala y utiliza de acuerdo con las instrucciones, es posible que produzca
interferencia dañina en las comunicaciones de radio. Sin embargo, no
existe una garantía de que no se producirá interferencia en una instalación
en particular. Si este dispositivo provoca una interferencia dañina en
la recepción de radio o televisión, la que se determina encendiendo
y apagando el equipo, se recomienda al usuario intentar corregir la
interferencia mediante una o más de las siguientes medidas:
–Cambie la orientación o ubicación de la antena de recepción.
–Aumente la separación entre el equipo y el receptor.
–Conecte el equipo a un tomacorriente de un circuito diferente del que
está conectado el receptor.
–Pida ayuda a un distribuidor o técnico de radio/TV experimentado.
Declaración según la sección 15.21 de la FCC
Las modificaciones que no están expresamente aprobadas por esta
empresa podrían invalidar la autoridad del usuario de operar el equipo.
Exposición a RF según la FCC
En caso de llevarlo en el cuerpo, para mantener el cumplimiento con las
88
pautas de exposición a RF de la FCC, use sólo accesorios que no contengan
componentes metálicos y deje una distancia de 20 mm (0,6 pulgadas) del
cuerpo. El uso de otros accesorios podría violar las pautas de exposición a
RF de la FCC y deben evitarse.
Este dispositivo y la correspondiente antena no deben ubicarse en el
mismo lugar ni funcionar en conjunto con otras antenas o transmisores.
Información sobre salud y seguridad según la FCC
Este EUT ha demostrado ser capaz de cumplir con la tasa de absorción
específica (SAR) localizada para los límites de exposición de población
general/entorno no controlados especificados en el estándar IEEE/
ANSI C95.1-1992 y ha sido probado de acuerdo con los procedimientos
de medidas especificados en FCC/OET Boletín 65 Suplemento C (2001)
y estándar IEEE 1528-2003 Ministerio de salud (Canadá), Código de
seguridad 6. Las normas incluyen un margen de seguridad sustancial
diseñado para asegurar la protección de todas las personas, sin importar
su edad ni estado de salud. El estándar de exposición para los teléfonos
móviles inalámbricos emplea una unidad de medida conocida como Tasa
de absorción específica o SAR. El límite de SAR definido por la FCC es 1,6
W/kg *.
* En Estados Unidos y Canadá, el límite SAR para los teléfonos móviles
usados por el público es 1,6 watts/kg (W/kg) que está promediado
en un gramo de tejido. El estándar incorpora un margen sustancial
de seguridad para dar protección adicional al público y para justificar
cualquiera de las variaciones en las medidas.
** Este dispositivo contiene funciones GSM de 1800 MHz que no son
operativas en los territorios de Estados Unidos; este documento se
aplica sólo a las operaciones de GSM de 850 MHz y PCS de 1900 MHz.
Garantía
Proteja su garantía
Lea atentamente su Garantía, prestando especial atención al párrafo siete
de la Garantía limitada para esta unidad.
“La garantía no se aplica a... ni a ningún producto o pieza de éste que haya
sufrido alteración, mal manejo, mal uso, descuido o accidente”.
Muchas compañías están fabricando accesorios parecidos y, en algunos
casos, promoviendo que su producto es igual o mejor que el producto
Pantech. Tenga cuidado. Algunos de estos productos podrían no ser
compatibles para uso con su producto Pantech y podrían dañar la unidad o
hacer que ésta funcione incorrectamente.
Si fuera necesario reparar la unidad y se determina que un accesorio no
Pantech ha causado el problema, la Garantía no se aplicará. Además,
si la unidad ha sufrido daño irreversible causado por un accesorio no
compatible, la Garantía se anulará. Para
proteger su Garantía, use sólo accesorios compatibles que no dañen o
interfieran con el funcionamiento del producto Pantech.
Garantía limitada de 12 meses
Pantech Wireless, Inc. (la Compañía) garantiza al comprador minorista
original de este teléfono móvil portátil Pantech, que en caso de que este
producto o cualquier pieza de éste durante uso y condiciones normales
del consumidor, presentara defectos en los materiales o mano de obra,
generando una falla al producto dentro de un período de doce (12) meses
a partir de la fecha de compra, dicho o dichos defectos se repararán o
reemplazarán (con piezas nuevas o reacondicionadas) según opción
de la Compañía, sin cargo por las piezas o mano de obra directamente
relacionada con el o los defectos.
La antena, teclado, pantalla, batería recargable y cargador de la batería,
si se incluye, tienen una garantía similar de doce (12) meses a partir de
la fecha de compra. La Garantía se extiende sólo a consumidores que
compraron el producto en los Estados Unidos o Canadá y no es transferible
o asignable.
01
02
03
04
05
06
07
08
Esta Garantía no se aplica a:
(a) Producto sujeto a uso o condiciones anormales, accidente, mal manejo,
descuido, alteración no autorizada, mal uso, instalación o reparación
incorrecta o almacenamiento inadecuado;
(b) Producto cuyo número de serie mecánico o electrónico haya sido
retirado, alterado o estropeado.
(c) Daño proveniente de la exposición a la humedad, temperaturas
excesivas o condiciones ambientales extremas;
89
Apéndice
(d) Daño generado por una conexión, o uso de un accesorio u otro
producto no aprobado o autorizado por la Compañía;
(e) Defectos en el aspecto, apariencia, decoración o elementos
estructurales como marcos y piezas no relacionadas con el
funcionamiento;
(f) Producto dañado por causas externas, como fuego, inundación,
suciedad, arena, condiciones climáticas, escape de la batería, fusible
fundido, robo o uso inadecuado de cualquier fuente eléctrica.
La Compañía renuncia a toda responsabilidad por retiro o reinstalación del
producto, por cobertura geográfica, por recepción de señales inadecuadas
por la antena o por rango de comunicaciones u operación del sistema
celular como un todo.
Para obtener reparaciones o reemplazo dentro de los términos de esta
Garantía, el producto se debe entregar con prueba de cobertura de
Garantía (por ejemplo, factura de venta con fecha), dirección de devolución
del consumidor, número de teléfono diurno y/o número de fax y una
descripción completa del problema, transporte prepagado, a la Compañía,
llamando al número que aparece abajo o al lugar de compra para efectuar
el proceso de reparación o reemplazo.
Para ubicar un Centro de servicio Pantech autorizado, llame al: (800) 9628622 o escriba un correo electrónico a [email protected].
Tenga a mano la siguiente información cuando envíe el teléfono para
reparación:
90
–Un comprobante de compra original válido
–Dirección de devolución
–Número de teléfono diurno o número de fax
–Nº de modelo
–Nº IMEI (Ubique el Nº IMEI de 15 dígitos detrás de la batería del
dispositivo.)
–Descripción completa del problema
–Transporte prepagado
Otro programa de garantía
Puede contar con otro programa de garantía con la compra, como
intercambio de garantía. De ser así, consulte el embalaje del equipo o
punto de venta original.
EL MÁXIMO DE RESPONSABILIDAD DE LA COMPAÑÍA EN ESTA GARANTÍA
SE LIMITA A LA REPARACIÓN O REEMPLAZO PROPORCIONADO
ANTERIORMENTE Y, EN CASO ALGUNO, LA RESPONSABILIDAD DE LA
COMPAÑÍA DEBERÁ EXCEDER EL PRECIO DE COMPRA PAGADO POR EL
COMPRADOR DEL PRODUCTO.
CUALQUIER GARANTÍA IMPLÍCITA, INCLUYENDO LAS GARANTÍAS
IMPLÍCITAS DE COMERCIALIZACIÓN O ADECUACIÓN PARA UN PROPÓSITO
ESPECÍFICO, SE LIMITARÁN A LA DURACIÓN DE ESTA GARANTÍA ESCRITA.
CUALQUIER MEDIDA QUE SE TOME FRENTE AL INCUMPLIMIENTO DE UNA
GARANTÍA SE DEBE REALIZAR EN UN PERIODO DE 18 MESES A PARTIR DE
LA FECHA DE COMPRA ORIGINAL. EN NINGÚN CASO LA EMPRESA SERÁ
RESPONSABLE DE DAÑOS ESPECIALES, INDIRECTOS O INCIDENTALES POR
INCUMPLIMIENTO DE ESTA U OTRA GARANTÍA, EXPRESA O IMPLÍCITA,
DE NINGUNA MANERA. LA EMPRESA NO SERÁ RESPONSABLE POR EL
RETRASO EN LA ENTREGA DEL SERVICIO EN VIRTUD DE ESTA GARANTÍA
NI POR LA PÉRDIDA DE TIEMPO DE USO MIENTRAS EL PRODUCTO ESTÉ EN
REPARACIÓN O SEA REEMPLAZADO.
01
Ninguna persona o representante está autorizado a asumir en nombre
de la Compañía ninguna responsabilidad distinta a las expresadas en el
presente documento, con relación a la venta de este producto.
04
Algunos estados o provincias no permiten limitaciones en la duración de
una garantía implícita o la exclusión de limitación de daños incidentales
o por consecuencia, de modo que la limitación o exclusiones anteriores
podrían no aplicarse a usted. Esta Garantía le otorga derechos legales
específicos, sin embargo, usted también puede tener otros derechos que
varían de un estado a otro y de una provincia a otra.
02
03
05
06
07
08
Para obtener soporte técnico en EE.UU. y Canadá, llame al (800) 962-8622.
Escriba un correo electrónico a: [email protected].
O visite el sitio Web: www.pantechusa.com
Para todas las demás consultas, escriba a:
PANTECH WIRELESS, INC.
5607 Glenridge Dr. Suite 500 Atlanta, GA 30342
91
Apéndice
01
02
03
04
05
06
07
08
92
93