1
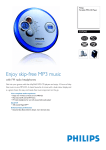
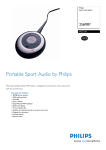
Portable MP3-CD Player
EXP3460
EXP3461
EXP3462
EXP3463
$
#
1
2
3
User manual
@
4
!
0
5
9
8
7
6
The controls on the CD-player gives you a quick start.
To operate all the features, use the supplied remote control.
Meet Philips at the Internet
http://www.philips.com
2
6 5
4 3
2
7
1
!
EXP3460, EXP3461
EXP3462, EXP3463
0
9
@
8
3
NOT FOR ALL VERSIONS
3
1
1 2 1
Printed in China
AL/bk 445-1
English
CONTROLS
CONTROLS
Supplied Accessories:
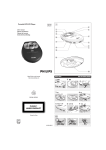
Remote control AY3802 ( see figure 2)
1 x headphones HE250
1 x remote control, AY3802
1 x AA battery door
1 x AC/DC adapter, AY3162 (for some versions only)
1 x charge cradle, AY4105 (for some versions only)
2 x rechargeable batteries AY3363 (for some versions only)
1 p ........................3.5 mm headphone jack
2 VOL +/- ............adjusts the volume
3 MODE ................selects playback options. To select and enter the display
function, press and hold MODE for 3 seconds.
4 PROG .................programs tracks and reviews the program
5 DBB ...................switches the bass enhancement on and off. When pressed
for more than 2 seconds, the button switches audible
feedback (beep) on/off.
6 ESP ............. ......selects between the battery powersave mode and
Electronic Skip Protection (ESP). ESP prevents playback
interruptions caused by shocks.
7 .. .........................clip
8 2; ......................switches the player on, starts or pauses CD playback.
9 ........................stops CD playback, clears a program or
switches the player off.
9 OFF ....................switches HOLD off (on the remote control only)
HOLD ................locks all buttons (on the remote control only)
0 ALBUM + / - .....MP3/WMA-CD only: selects the previous or next album
! SEARCH ∞ / §..skips and searches backward/ forward tracks
@ ...........................display
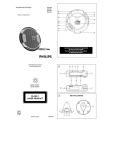
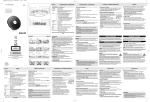
Controls ( see figure 1)
1 4.5V DC ............... jack for AC/DC adapter power supply
2 ESP ..................... selects between the battery powersave mode and
Electronic Skip Protection (ESP). ESP prevents playback
interruptions caused by shocks.
3 DBB .................... switches the bass enhancement on/off. When pressed for
more than 2 seconds, the button switches audible
feedback (beep) on/off.
4 VOLUME +,- ...... adjusts the volume
5 ............................. typeplate
6 Docking jack..... connects to the docking pins on your AY4105 charge
cradle (for some versions only)
7 9.......................... stops playback/ clears programmed tracks
/ switches off the set.
8 SEARCH ∞ / §...skips and searches backward/ forward tracks.
9 ALBUM +/ -..........MP3/WMA- CD only: selects the next/previous
album or skips forward/backward tracks.
0 2;........................ switches the player on, starts or pauses CD playback.
! ç........................ opens the CD lid
@ OFF .......................switches RESUME and HOLD off (on the set only)
RESUME .............saves the last position played
HOLD ...................locks all buttons (on the set only)
# p ......................... connect the remote control here and your headphones to
the remote control
$ ............................. battery door
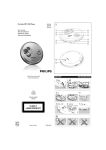
Charge cradle AY4105 ( see figure 3, for some versions only)
1 Docking pins ..... connects to the docking jacks on your CDplayer
2 Charging indicator ..... lights up red/green for charging on/standby
3 4.5V DC ..................
jack for AC/DC adapter power supply
CD PLAYER AND CD HANDLING
REMOTE CONTROL AY3802 / HEADPHONE HE 250
Using the remote control
The remote control allows you to command all the
functions on the player.
1 Firmly connect the remote control to
LINE OUT p on the set.
2 Firmly connect the headphones to the jack p
on the remote control.
3 On the remote control, press 2; to start playback.
4 Adjust the volume and sound on your remote control.
5 To stop playback, press 9.
6 To switch off the CD player, press 9 again.
Headphones HE250, LINE OUT
• Connect the remote control to LINE OUT p jack of
the player and your headphones to the remote control.
• p can also be used for connecting the player to your
HiFi system.
• Do not touch the lens A of the CD player.
• Do not expose the unit, batteries or CDs to humidity,
rain, sand or excessive heat (caused by heating
equipment or direct sunlight).
• You can clean the CD player with a soft, slightly
dampened, lint-free cloth. Do not use any cleaning agents as they may have a
corrosive effect.
• To clean the CD, wipe it in a straight line from the center toward the edge
using a soft, lint-free cloth. A cleaning agent may damage the disc! Never
write on a CD or attach a sticker to it.
• The lens may cloud over when the unit is moved suddenly from cold to warm
surroundings. Playing a CD is not possible then. Leave the CD player in a
warm environment until the moisture has evaporated.
• Active mobile phones in the vicinity of the CD player may cause malfunctions.
• Avoid dropping the unit as this may cause damage.
IMPORTANT!
Hearing safety: listen at a moderate volume. using headphones at high volume can impair your hearing.
Traffic safety: do not use headphones while driving or cycling as you may cause an
accident.
This set complies with the radio interference requirements of the
European Union.
CAUTION
Use of controls or adjustments or performance of procedures
other than herein may result in hazardous radiation exposure
or other unsafe operation.
POWER SUPPLY
POWER SUPPLY
Average playing time of batteries under normal conditions
Battery type
Power Save
Audio CD
MP3-CD
Alkaline AA
30 hours
45 hours
Alkaline AAA
13 hours
20 hours
Batteries (supplied or optionally available)
You can use the following batteries with this CD-player:
◆ alkaline batteries type AA (LR6, UM3) or AAA (LR03, UM4).
◆ PHILIPS rechargeable batteries, type AY3363
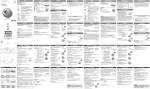
Inserting AA (LR6, UM3) batteries
1 Open the battery compartment.
2 Insert 2 x AA batteries as shown into the battery
compartment.
3 Close the battery compartment.
Charge cradle AY4105 (supplied or optionally available)
+
Inserting AAA (LR03, UM4) or AY 3363 batteries
1 Open the battery compartment.
2 Insert AAA batteries as shown onto the back of the AAA
battery door.
3 Fit the AAA battery-loaded door onto the battery compartment.
LR
03
-+
/A
AA
/U
M4
Helpful Hints:
– Old and new or different types of batteries should not be combined.
– Remove batteries if they are empty or if the player is not going to be used for a
long time.
Battery indication
The battery level is shown in the display screen as follows:
Battery full
Battery two-thirds full
Battery one-third full
Battery dead or empty. The display shows
beep tone sounds repeatedly.
and the
The AY4105 charge cradle can be used to charge batteries on board.
Recharging the ECO-PLUS NiMH battery on board the charge cradle
1 Connecting AY4105 charge cradle:
• Make sure the local voltage corresponds to the the AC/
DC adapter’s voltage.
• Connect the AC/ DC adapter to the 4.5V DC jack of
the charge cradle and to the wall outlet.
2 Insert the rechargeable ECO-PLUS NiMH battery
AY3363:
• Check the batteries are correctly loaded.
3 Mounting the CD player:
• Check that the player is switched off.
• As shown, 4 facing the charging indicator, carefully
slot the player onto the charge cradle. Make sure you
align the player’s docking jack to the docking pins.
➜ The charging indicator lights up red (for charging on) and
charging starts.
➜ The display shows:
.
➜ If the batteries become too warm, recharging will be
interrupted for approximately 30 minutes and the display shows:
➜ When the batteries are fully recharged, the charging
indicator turns green (for charging stand-by) and
appears in the display
POWER SUPPLY
Helpful Hint:
– Check that the player is switched off as it is not possible to charge
batteries when the player is in use.
– It is normal for the batteries to become warm during recharging.
– To ensure proper recharging on the charge cradle, take care that contacts are
clean.
– Use only the ECO-PLUS NiMH battery AY3363.
Handling instructions
• Recharging already charged or half-charged batteries will shorten their
lifetime. We therefore recommend that you let the rechargeable ECO-PLUS
NiMH battery run till it is completely empty before you recharge it.
• To avoid a short circuit, do not let the battery touch any metal object.
• If the battery becomes empty soon after recharging, then either its contacts
are dirty or it has reached the end of its lifetime.
POWER SUPPLY
AC/DC adapter AY3162 (supplied or optionally available)
Only use AY3162 adapter (4.5V/450mA DC, positive pole to the center pin). Any
other product may damage the player.
1 Make sure the local voltage corresponds to the
AC/ DC adapter’s voltage.
2 Connect the AC/ DC adapter to the 4.5V DC jack of the player and to the wall
outlet.
Helpful Hint:
– Always disconnect the adapter when you are not
using it.
Batteries contain chemical substances, so they should be disposed of properly
ENVIRONMENTAL INFORMATION
– Apparatus shall not be exposed to dripping or splashing.
– Do not place any sources of danger on the apparatus
(e.g. liquid filled objects, lighted candles)
• All redundant packing material has been omitted. We have done our utmost to
make the packaging easily separable into two materials: cardboard (box) and
polyethylene (bags, protective foam sheet).
• Your set consists of materials which can be recycled if disassembled by a
specialized company. Please observe the local regulations regarding the
disposal of packing materials, dead batteries and old equipment.
PLAYING A CD
ABOUT MP3/ WMA
The music compression technology MP3 (MPEG1 Audio Layer 3) and WMA
(Windows Media Audio) significantly reduce the digital data of an audio CD while
maintaining CD quality sound.
• Getting MP3/WMA files: you can either download legal music files from the
internet to your computer hard disc, or create such files by converting audio
CD files in your computer through appropriate encoder software. (128kbps bit is
recommended for MP3 files and 96 kbps bit rate for WMA files.)
• Creating a MP3/WMA CD: burn the music files from your computer hard
disc on a CDR or CDRW using your CD burner.
With this set you can play
– all pre-recorded audio CDs (CDDA)
Important: CDs encoded with copyright protection technologies by some record
companies may be unplayable by this product.
– all finalized audio CDRs and CDRWs
– WMA/MP3-CDs (CD-ROMs with WMA/MP3 files)
1 Push the open ç slider to open the CD lid.
2 Insert a disc, printed side up, by pressing gently on the
disc´s center so that it fits onto the hub. Close the lid
by pressing it down.
Helpful Hint:
– Make sure that the file names of the MP3 files end with .mp3 and WMA files
and with .wma.
– Total number of music files and albums: around 350 (with a typical file length
of 20 characters)
– The length of file names affects the number of tracks for playback. With shorter file names, more files can be burned on a disc.
Windows Media Audio® is a registered trademark of Microsoft Corporation.
All trademarks used are owned by their respective owners.
3 Press 2; to switch the player on and start playback.
➜ Display shows EXPANIUM and also "READING CD"
if the reading time exceed 5 seconds, e.g.
MP3/WMA-CD). Then,
Audio CD: current track number appears.
MP3/WMA: Current file name appears.
4 Press 2; briefly to interrupt playback.
➜ The time where playback was interrupted blinks.
Beep sounds at intervals.
5 To resume playback press 2; briefly again.
6 Press 9 to stop playback.
➜ Audio CD: total playing time and total number of tracks appear.
MP3/WMA: total number of albums/tracks appear.
PLAYING A CD
VOLUME AND SOUND
Volume adjustment
Helpful Hint:
- When playing a disc with CD Audio tracks and MP3 files, the CD Audio tracks will
be played first..
- “0” is shown as your album number, if you have not organized your MP3/WMA files
into any albums on your disc.
7 Press 9 again to switch off the CD player.
8 To remove the disc, hold it by its edge and press the
hub gently while lifting the disc.
• Adjust the volume by pressing VOLUME +/–
( 00 - 30, or VOL +/– on the remote control).
Helpful Hint:
Volume level resumes at:
- Default level 12: when starting playback from standby/power off mode.
- Previous level: when starting playback from the stop position.
Bass adjustment
OF
F
•R
ES
UM
E•
HO
LD
LINE
OUT
L.
VO
/
OPEN
Auto-standby
When a CD has reached the end of playback and remains in the stop position for
more than 25 seconds, the display will disappear. 65 seconds later, the set will
automatically switch off to save mains.
There are three DBB (Dynamic Bass Boost) options:
– Off: no bass enhancement
–
: moderate bass enhancement
–
: strong bass enhancement
• Press DBB once or more to select your option.
➜
appears if DBB activated.
PROGRAMMING TRACK NUMBERS
(remote control only)
SELECTING A TRACK/ ALBUM AND SEARCHING
Selecting and searching on all discs
Selecting a track
• Briefly press ∞ or § once or several times to skip to
the beginning of the current, previous or subsequent
track.
• In the pause/stop position, press 2; to start playback.
➜Playback continues with the selected track.
Searching for a passage during playback
1 Keep ∞ or § pressed to find a particular passage in backward or forward direction.
➜ Searching starts and playback continues at a low volume.
2 Release the button at the desired passage.
➜ Normal playback continues.
You can select up to 50 tracks and store them in the memory in a desired
sequence. You can store any track more than once.
1 Select a track with ∞ or § (and also ALBUM +/ for a MP3/WMA-CD).
2 On the remote control, press PROG to store the track.
➜ P with the number of stored tracks is displayed.
3 Select and store all desired tracks in this way.
4 If necessary, press 9 to stop normal playback. Press
and hold 2; briefly to start playback of the program.
➜ PROG Is shown and playback of the program
starts.
5 To add additional tracks to your program, press 9 to
stop playing the program and continue with step 1 and 2.
➜ After 50 tracks are stored,
is shown.
Selecting on WMA/MP3-CDs
Selecting an album
• Briefly press ALBUM +/ - once or several times to skip
to the first track of the subsequent, current or previous
album.
• In the pause/stop position, press 2; to start playback.
➜ The first track of the selected album is played.
Clearing the program
1 If necessary press 9 to stop playback.
Selecting a track
2 Press 9 to clear the program.
Reviewing the program
You can review the programme by pressing PROG for more than 3 seconds.
➜ All stored tracks are displayed in sequence.
➜
1 Keep ALBUM +/ - pressed to skip quickly to the subsequent, current or previous
is displayed.
MP3/ WMA tracks.
➜ Skipping starts and speeds up after 5 seconds.
2 Release the button at the desired track.
Helpful Hint:
➜ Playback continues with the selected track.
– The program will also be cleared if you interrupt the power supply or
open the CD lid or if the set switches off automatically.
Helpful Hint:
– When the program mode is active, use of the ALBUM +/ - keys are void.
SELECTING DIFFERENT PLAY OPTIONS − MODE
(remote control only)
You can select and change the various play modes before or during playback.
1 On the remote control, press MODE repeatedly to select any of the following:
• On the remote control, press and hold MODE 3 seconds to activate the display option mode. Within 2 seconds, press MODE briefly again, once or more
to change and select your display option:
–
: the track´s file name
–
(Shuffle All): all tracks of the disc play in random order once.
–
(Shuffle repeat all): all tracks of the disc play in random order
repeatedly.
–
: the album´s folder name
–
: the track´s title (if this ID3 tag information is available)
(Repeat 1): the current track plays repeatedly.
–
(Repeat All): all tracks of the disc/ program play repeatedly.
–
–
–
–
: each track in the disc/program plays 10 seconds
in sequence.
For MP3/WMA-CDs only:
–
(Shuffle Album): all tracks of current album play in random
order once.
–
(Shuffle Repeat Album): all tracks of current album play in
random order repeatedly.
–
(Repeat Album):all tracks of current album play repeatedly.
➜ The play mode is selected after its icon flashes 3 times.
2 Press 2; to start playback if in the stop position.
3 To return to normal playback, press MODE repeatedly until the play option
icons e.g.
and
disappear.
Helpful Hint:
–
DISPLAY INFORMATION
(WMA/MP3 tracks only)
,
,
with programmed tracks.
: only these play modes can be combined
: the artist´s name (if this ID3 tag information is available)
: the album number, elapsed playing time, and track number.
Helpful Hint:
–
The ID3 tag is part of an WMA/MP3 file and contains various track information such as the track´s title or the artist´s name. Complete the ID3 tag
information with your MP3 encoder software before burning the
WMA/MP3-CD.
–
The display can show a maximum of 31 characters.
ESP / POWERSAVING MODE
With a conventional portable CD-player you might have experienced that the
music stopped e.g. when you were jogging. The Electronic Skip Protection (ESP)
prevents loss of sound caused by light vibrations and shocks. Continuous playback
is ensured. However ESP does not prevent playback interruptions during vigorous
running. It also does not protect the unit against any damage caused by
dropping!
RESUME
( main set only, audio CD only)
RESUME - continuing from where you have stopped
You can store the last position played. When restarting, playback will continue
from where you have stopped (RESUME). Use the OFF-RESUME-HOLD slider on
the set for this function.
The power save mode helps to extend battery service life for longer playback.
1 Switch the slider to RESUME during playback to acti-
• To deactivate the shock protection and enter the power
save mode, press ESP..
➜ ESP disappears.
2 Press 9 whenever you want to stop playback.
3 Press 2; whenever you want to resume playback (or
• Press ESP again.
➜ ESPappears when shock protection is activated
➜ Oops:
maximum ESP time exceeded. Playback skips but
will resume optimum playback when the player is
free from vibration.
vate RESUME.
on the remote control, press and hold 2; briefly).
➜ Playback continues from where you have stopped.
• To deactivate RESUME, switch the slider to OFF.
HOLD
HOLD - locking all buttons
200 SEC MAGIC ESP
Average playing times when ESP skip protection is activated:
This player offers a double lock function to prevent buttons from being accidentally pressed and activated. You can choose to lock all buttons on either your set,
remote control or even both! Simply adjust the respective HOLD slider to on or
off position as desired. For example:
Seconds
track type
• Switch the OFF•RESUME•HOLD slider to HOLD to
200
WMA-CD(64kbps)
100
45
MP3-CD(128kbps)
Audio CD
activate HOLD
(or on the remote control, switch the OFF•HOLD slider to HOLD).
➜ All buttons are locked. HOLD is shown when you
press any button on the set / remote control respectively. If the set is locked and switched off, HOLD will
be shown only when you press 2;.
Helpful Hint:
–
ESP is by default activated.
HOLD
• To deactivate HOLD, switch the slider to OFF.
➜ All the buttons are unlocked.
Helpful Hint:
–
If you deactivate HOLD by switching the slider on the set to RESUME, you will
be activating the RESUME function.
ACOUSTIC FEEDBACK (BEEP)
Acoustic feedback is a beep signal that is heard when buttons on the set or
remote control are pressed. Also, when the set or remote control is in pause
mode or the battery power is low, it beeps at intervals.
1 Keep DBB pressed for more than 2 seconds to switch the beep either off or
on.
➜
: Beep is switched off.
➜
: Beep is switched on.
Helpful Hint:
–
Beep is on as the default setting.
TROUBLESHOOTING
WARNING: Under no circumstances should you try to repair the unit yourself as
this will invalidate the warranty. If a fault occurs, first check the points listed,
before taking the unit for repair. If you are unable to solve a problem by following
these hints, consult your dealer or service center.
The CD player has no power, or playback does not start
• Check that your batteries are not dead or empty, that they are inserted
correctly, that the contact pins are clean.
• Your adapter connection may be loose. Connect it securely.
The indication
is displayed
• Check that the CD is clean and correctly inserted (label-side upward).
• If your lens has steamed up, wait a few minutes for this to clear.
• Make sure the CD is not encoded with Copyright protection technologies,
as some do not conform to the Compact Disc standard.
The indication
is displayed
• CD-RW (CD-R) was not recorded properly. Use FINALIZE on your CD-recorder.
The indication
is displayed
• CD contains non-audio files. Insert a suitable disc or press SEARCH ∞ / §
once or more to skip to an audio track, instead of the data file.
The indication
is on and/or there is no reaction to controls
• If HOLD is activated, then deactivate it.
• Electrostatic discharge. Disconnect power or remove batteries for a few seconds.
The CD skips tracks
• The CD is damaged or dirty. Replace or clean the CD.
• SHUFFLE or PROG is active. Switch off whichever is on.
No sound or bad sound quality.
• pause might be active. Press 2;.
• Loose, wrong or dirty connections. Check and clean connections.
• Volume might not be appropriately adjusted. Adjust the volume.
• Strong magnetic fields. Check player’s position and connections. Also keep
away from active mobile phones.
1.
2.
+
-
-+