1
Register your product and get support at
www.philips.com/welcome
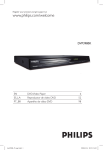
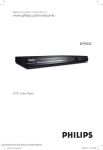
DVP5120K
EN
ES_LA
PT_BR
dvp5120k_55_eng1.indd 1
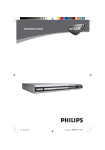
DVD Video Player
Reproductor de video DVD
Aparelho de vídeo DVD
6
42
78
2008-04-21 10:15:58 AM
AVISO IMPORTANTE
Philips Mexicana, S.A. de C.V. no se hace responsable por
daños o desperfectos causados :por:
- Maltrato, descuido o mal uso, presencia de insectos o
roedores (cucarachas, ratones etc.).
- Cuando el aparato no haya sido operarado
de acuerdo con el instructivo del uso, fuera
de los valores nominales y tolerancias de las tensiones
(voltaje), frecuencia (ciclaje) de alimentación eléctrica y
las características que deben reunir las instalaciones
auxiliares.
- Por fenómenos naturales tales como: temblores,
inundaciones, incendios, descargas eléctricas, rayos etc.
o delitos causados por terceros (choques asaltos, riñas,
etc.).
dvp5120k_55_eng1.indd 2
2008-04-21 10:16:10 AM
LASER
Type
Wave length Output Power Beam divergence Semiconductor laser
InGaAlP (DVD)
AIGaAs (CD)
658 nm (DVD)
790 nm (CD)
7.0 mW (DVD)
10.0 mW (VCD/CD)
60 degrees
Manufactured under license from Dolby
Laboratories. Dolby and the double-D symbol
are trademarks of Dolby Laboratories.
Windows Media and the Windows logo are
trademarks, or registered trademarks of
Microsoft Corporation in the United States
and/or other countries.
‘CONSUMERS SHOULD NOTE THAT NOT ALL HIGH
DEFINITION TELEVISION SETS ARE FULLY
COMPATIBLE WITH THIS PRODUCT AND MAY CAUSE
ARTIFACTS TO BE DISPLAYED IN THE PICTURE. IN
CASE OF 525 OR 625 PROGRESSIVE SCAN PICTURE
PROBLEMS, IT IS RECOMMENDED THAT THE USER
SWITCH THE CONNECTION TO THE ‘STANDARD
DEFINITION’ OUTPUT. IF THERE ARE QUESTIONS
REGARDING OUR TV SET COMPATIBILITY WITH THIS
MODEL 525p AND 625p DVD PLAYER, PLEASE
CONTACT OUR CUSTOMER SERVICE CENTER.’
ATTENTION!
For Customer Use:
Read carefully the information located at the
bottom or rear of your DVD Video player and
enter below the Serial No. Retain this
information for future reference.
Model No. DVP5120K
Serial No. _______________
CAUTION
Use of controls or adjustments or performance
of procedures other than herein may result in
hazardous radiation exposure or other unsafe
operation.
Where the MAINS plug or an appliance
coupler is used as the disconnect device, the
disconnect device shall remain readily
operable.
Registre su producto y obtenga asistencia
técnica en www.philips.com/welcome
Registre o produto e obtenha suporte em
www.philips.com/welcome
dvp5120k_55_eng1.indd 3
2008-04-21 10:16:25 AM
“Evite o uso prolongado do aparelho
com volume superior a 85 decibéis pois
isto poderá prejudicar a sua audição.”
Nível de
Decibéis
30
40
50
60
70
80
Exemplos
Biblioteca silenciosa,
sussurros leves
Sala de estar, refrigerador,
quarto longe do trânsito
Trânsito leve, conversação
normal, escritório silencioso
Ar condicionado a uma distância
de 6 m, máquina de costura
Aspirador de pó, secador de cabelo,
restaurante ruidoso
Tráfego médio de cidade, coletor
de lixo, alarme de despertador
a uma distância de 60 cm
OS RUÍDOS ABAIXO PODEM SER PERIGOSOS
EM CASO DE EXPOSIÇÃO CONSTANTE
90
100
120
140
180
Metrô, motocicleta, tráfego de
caminhão, cortador de grama
Caminhão de lixo, serra elétrica,
furadeira pneumática
Show de banda de rock em frente
às caixas acústicas, trovão
Tiro de arma de fogo, avião a jato
Lançamento de foguete
This product incorporates copyright protection
technology that is protected by method claims of
certain U.S. patents and other intellectual property
rights owned by Macrovision Corporation and
other rights owners. Use of this copyright protection technology must be authorized by Macrovision Corporation, and is intended for home and
other limited viewing uses only unless otherwise
authorized by Macrovision Corporation. Reserve
engineering or disassembly is prohibited.
dvp5120k_55_eng1.indd 4
2008-04-21 10:16:33 AM
B. Português----------------------------- 78
Español
Español----------------------------------- 42
B.Português
English------------------------------------- 6
English
Index
dvp5120k_55_eng1.indd 5
2008-04-21 10:16:34 AM
Table of contents
English
General
General Information......................................................................................................... 8
Setup precautions..................................................................................................................................................8
Accessories supplied............................................................................................................................................8
Cleaning discs.........................................................................................................................................................8
About recycling......................................................................................................................................................8
Product Overview
Your DVD Player................................................................................................................ 9
Remote Control..........................................................................................................10-12
Using the remote control.................................................................................................................................12
Connections
Basic Connections......................................................................................................13-14
Step 1: Connecting to television.....................................................................................................................13
Option 1: Using Composite Video jacks (CVBS)................................................................................13
Option 2: Using Component Video jacks (Y Pb Pr)...........................................................................13
Step 2: Connecting the power cord...............................................................................................................14
Optional Connections..................................................................................................... 15
Connecting to an Analog Stereo System......................................................................................................15
Connecting to a Digital AV Amplifier/Receiver..........................................................................................15
Basic Setup
Getting Started...........................................................................................................16-18
Finding the correct viewing channel..............................................................................................................16
Setting language preferences......................................................................................................................16-17
On-screen display (OSD) language.........................................................................................................16
Subtitle, Audio and DVD Menu language for DVD playback...........................................................17
Setting up Progressive Scan feature...............................................................................................................18
Disc Playback
Disc Operations..........................................................................................................19-26
Playable discs........................................................................................................................................................19
Region codes for DVD discs............................................................................................................................19
Playing a disc........................................................................................................................................................ 20
Basic playback controls..................................................................................................................................... 20
Other playback features for video discs ...............................................................................................21-22
Using the Disc Menu...................................................................................................................................21
Changing sound track language ............................................................................................................. 22
Changing subtitle language....................................................................................................................... 22
Zooming........................................................................................................................................................ 22
Playback Control (VCD/SVCD) ............................................................................................................ 22
dvp5120k_55_eng1.indd 6
2008-04-21 10:16:36 AM
Using Display menu options .................................................................................................................... 23-24
Selecting title/chapter/track......................................................................................................................23
Searching by time .......................................................................................................................................23
Switching camera angles.............................................................................................................................24
Selecting various repeat functions..........................................................................................................24
Repeating a specfic section (A-B)............................................................................................................24
Playing a JPEG photo disc (slide show) ...................................................................................................... 25
Zooming........................................................................................................................................................ 25
Flip/Rotate picture...................................................................................................................................... 25
Playing a MP3/ WMA disc.................................................................................................................................26
English
Table of contents
Karaoke Operation ........................................................................................................ 27
Playing a Karaoke disc ......................................................................................................................................27
Using the Karaoke Menu option..............................................................................................................27
Setup Options
Setup Menu Options.................................................................................................. 28-34
Accessing the setup menu................................................................................................................................ 28
Language Menu.............................................................................................................................................29
Video Menu ........................................................................................................................................... 30-31
Audio Menu ..................................................................................................................................................32
Rating Menu...................................................................................................................................................33
Misc Menu..................................................................................................................................................... 34
Others
Software upgrade............................................................................................................ 35
Installing the latest software............................................................................................................................35
Troubleshooting......................................................................................................... 36-38
Specifications................................................................................................................... 39
Glossary...................................................................................................................... 40-41
dvp5120k_55_eng1.indd 7
2008-04-21 10:16:38 AM
General Information
English
WARNING!
This unit does not contain any userserviceable parts. Please leave all
maintenance work to qualified
personnel.
Setup precautions
Finding a suitable location
– Place this unit on a flat, hard and
stable surface. Never place the unit on a
carpet.
– Never place this unit on top of other
equipment that might heat it up (e.g.,
receiver or amplifier).
– Never put anything under this unit
(e.g., CDs, magazines).
– Install this unit near the AC outlet
where the AC power plug can be easily
reached.
Space for ventilation
– Place this unit in a location with
adequate ventilation to prevent internal
heat build up. Allow at least 10 cm (4”)
clearance from the rear and the top of
this unit and 5 cm (2”) from the left and
right to prevent overheating.
Avoid high temperature, moisture,
water and dust
– This unit must not be exposed to
dripping or splashing.
– Never place any object or items that
can damage this unit (e.g., liquid filled
objects, lighted candles).
Accessories supplied
– 1 remote control with batteries
– 1 audio/video cables (yellow/white/
red)
– 1 power cable
–2 microphones
Cleaning discs
CAUTION!
Risk of damage to discs! Never use
solvents such as benzene, thinner,
cleaners available commercially, or antistatic sprays intended for discs.
l Wipe the disc with a micro fibre cleaning
cloth from the center to the edge in a
straight line movement.
About recycling
This user manual is printed on nonpolluting paper. This unit contains a large
number of materials that can be recycled.
If you are disposing an old equipment,
please take it to a recycling center.
Please observe the local regulations
regarding disposal of packaging materials,
exhausted batteries and old equipment.
dvp5120k_55_eng1.indd 8
2008-04-21 10:16:43 AM
English
Your DVD Player
1
2
3
a STANDBY-ON
–
Turns on this unit or turns off to normal
standby mode.
b Disc tray
c OPEN/CLOSE ç
– Opens/closes the disc tray.
d Display panel
–
Shows information about the current
status of the unit.
e IR Sensor
–
Point the remote control towards this
sensor.
4
5
6
7
8
9
10
f PLAY
– Starts playback.
g PAUSE
–
Pauses playback.
h STOPÇ –
Stops playback.
iMIC1 or MIC2
– For microphone connection.
jMIC LEVEL
– Microphone volume control.
dvp5120k_55_eng1.indd 9
2008-04-21 10:16:49 AM
Remote Control
English
a 2 (Standby-On)
1
– Turns on this unit or turns off to normal
standby mode.
bç (Open/Close)
–����������������������������
Opens/closes the disc tray.
2
3
4
5
6
7
cDISPLAY
– Displays the current status or disc
information.
d
– : Cursor buttons for moving up/
down or press up/down for a slow
backward or forward search.
– : Cursor buttons for moving to the
left/right or press left/right for fast
backward or forward search.
e�����
SETUP
– Enters or exits the disc setup menu.
f ./ M= (Previous/Next)
8
9
–������������������������������������
Skips to the previous or next title/
chapter/track.
– Press and hold this button for fast
backward or forward search.
g Ç(Stop)
– Stops playback.
h�����
AUDIO
– Selects an audio language or channel.
i�����
VOCAL
– Choose audio channel or karaoke
method.
KARAOKE
– Access karaoke menu.
10
dvp5120k_55_eng1.indd 10
2008-04-21 10:16:56 AM
Remote Control (continued)
English
jDISC MENU
– Enters or exits disc contents menu.
– For VCD 2.0 and SVCD, turns on or off
the playback control mode.
kOK
– Confirms an entry or selection.
lRETURN/TITLE
– Returns to the previous menu or shows
title menu.
10
11
mu (Play/Pause)
– Starts or pauses playback.
n% (Mute)
– Mutes or restores the volume.
12
13
oNumeric keypad 0-9
– Selects a track or title number of the
disc.
14
pSUBTITLE
– Selects a DVD subtitle language.
15
q����
ZOOM
– Zoom the picture on the TV.
16
17
11
dvp5120k_55_eng1.indd 11
2008-04-21 10:17:01 AM
Remote Control (continued)
English
Using the remote control
CAUTION!
– Remove batteries if they are
exhausted or if the remote control
is not to be used for a long time.
– Never mix batteries (old and new
or carbon and alkaline, etc.).
– Batteries contain chemical
substances; they should be disposed
of properly.
A Open the battery compartment.
BInsert two batteries type R03 or AAA,
following the indications (+-) inside
the compartment.
CClose the cover.
DPoint the remote control directly at the
remote sensor (IR) on the front panel.
Note:
Never place any objects between the
remote control and this unit while
operating.
ESelect the desired function (for example
u).
12
dvp5120k_55_eng1.indd 12
2008-04-21 10:17:18 AM
S-VIDEO
IN
COMPONENT
VIDEO IN
AUDIO
IN
VIDEO IN
S-VIDEO
IN
V (Pr/Cr)
U (Pb/Cb)
VIDEO IN
English
Basic Connections
COMPONENT
VIDEO IN
AUDIO
IN
V (Pr/Cr)
U (Pb/Cb)
Y
Y
TV
TV
Video
(yellow cable)
1
Audio
(red/white cables)
Option 1
Step 1: Connecting to
television
This connection enables you to view the
video playback from this unit.
You only need to choose one of the
options below to make the video
connection.
– For a standard TV, follow option 1.
– For a progressive scan TV, follow
option 2.
Option 1: Using Composite Video
jacks (CVBS)
You can connect this unit to a TV
through the composite video cable which
provides good picture quality.
l Connect the audio/video cables (supplied)
from the TV OUT and AUDIO out
L/R jacks on this unit to the video input
jack (yellow) and audio input jacks (red/
white) on your TV.
Audio 2
Video
Option 2
Option 2: Using Component Video
jacks (Y Pb Pr)
You can connect this unit to a TV
through the component video cables
which provides superior picture quality.
The progressive scan video quality is only
available when using Y Pb Pr connection
and a progressive scan TV is required.
A�����������������������������������
Connect the component video cables
(red/blue/green - not supplied) from the
Y Pb Pr jacks on this unit to the
corresponding component video input
jacks (or labeled as Y Pb/Cb Pr/Cr or
YUV) on your TV.
BConnect the audio/video cables (supplied)
from the AUDIO OUT L/R jacks on
this unit to the audio input jacks (red/
white) on your TV. Leave the yellow
video cable disconnected.
CProceed to ‘Getting Started - Setting up
Progressive Scan feature’ for detailed
progressive feature setup.
13
dvp5120k_55_eng1.indd 13
2008-04-21 10:17:35 AM
Basic Connections (continued)
English
Step 2: Connecting the power cord
After everything is connected
properly, plug the AC power cord
into the power outlet.
Never make or change any connections
with the power turned on.
Helpful Hint:
– Refer to the type plate at the rear or
bottom of the product for identification and
supply ratings.
14
dvp5120k_55_eng1.indd 14
2008-04-21 10:17:54 AM
English
Optional Connections
AUDIO
IN
AUDIO
IN
DIGITAL
DIGITAL
STEREO
AV Receiver
Audio
(red/white cables)
Connecting to an Analog
Stereo System
Connecting to a Digital AV
Amplifier/Receiver
You can connect this unit to a two
channel stereo system (e.g. mini system,
analog receiver) in order to enjoy stereo
sound output.
You can connect this unit to an AV
amplifier/receiver in order to enjoy
quality sound.
AConnect a coaxial cable (not supplied)
AConnect the audio/video cables
(supplied) from the AUDIO out L/R
jacks on this unit to the audio input jacks
(red/white) on your connecting device.
Leave the yellow video cable
disconnected.
from the COAXIAL DIGITAL OUT
jack on this unit to the digital coaxial
input jack of the connected device.
B
For video connection, see ‘Basic
Connections - Step 1: Connecting to
television’ for details.
B
For video connection, see ‘Basic
Connections - Step 1: Connecting to
television’ for details.
Helpful Hint:
– See ‘Setup Menu Options - Audio Menu
Page’ for optimum audio settings.
Helpful Hint:
– You have to set the appropriate Digital
Audio Output setting. Otherwise, no sound or
interference may occur. See ‘Setup Menu
Options - Audio Menu > Digital Output’ for
details.
15
dvp5120k_55_eng1.indd 15
2008-04-21 10:18:25 AM
Getting Started
English
Finding the correct viewing channel
APress 2 to turn on this unit.
BTurn on the TV and switch it to the
correct video-in channel. You should see
the blue DVD background screen.
You may go to the lowest channel on
your TV, then press the Channel Down
button on your TV’s remote control until
you see the Video In channel.
You may press ° button repeatedly
on your TV’s remote control.
Usually this channel is between the
lowest and highest channels and may be
called FRONT, A/V IN, VIDEO, etc.
Refer to your TV user manual on how
to select the correct input on your TV.
CIf you are using external device, (such as
audio system or receiver), turn it on and
select the appropriate input source for
this unit output. Refer to the device
user’s manual for detail.
Setting language preferences
The language options are different
depending on your country or region. It
may not correspond to the illustrations
shown on the user manual.
On-screen display (OSD) language
Select this to change the language of the
On screen display menu of this unit.
The menu language will remain once you
have set it.
APress SETUP on the remote control.
BMove to { Language } in the menu and
press .
CUse keys to select { OSD
Language } in the menu and press .
Language
Video
OSD Language
English
Subtitle
Español
Audio
DVD Menu
Português
: English
Audio
Rating
Misc
DSelect a language and press OK to
confirm.
16
dvp5120k_55_eng1.indd 16
2008-04-21 10:18:43 AM
Subtitle , Audio and DVD Menu
language for DVD playback
You can select your preferred language
settings for DVD playback. If the selected
language is not available on the disc, the
disc’s default language is used instead.
DUse keys to select a language and
press OK to confirm.
ERepeat steps C - D for other language
settings.
English
Getting Started (continued)
APress SETUP on the remote control.
BMove to { Language } in the menu and
press .
CUse keys to select one of the
options below and press .
Language
Video
OSD Language
: English
Subtitle
: Auto
Audio
DVD Menu
Audio
English
Spanish
Portuguese
Rating
Misc
{ Subtitle }
Select this to change the subtitle
language.
{ Audio }
Select this to change disc sound track
language.
{ DVD Menu }
Select this to change the language of the
disc menu.
17
dvp5120k_55_eng1.indd 17
2008-04-21 10:18:51 AM
Getting Started (continued)
English
Setting up Progressive Scan
feature
(for Progressive Scan TV only)
The progressive scan displays twice the
number of frames per second than
interlaced scanning (ordinary normal TV
system). With nearly double the number
of lines, progressive scan offers higher
picture resolution and quality.
Before you start...
– Ensure that you have connected this
unit to a progressive scan TV (see
‘Option 2: Using Component Video jacks
(Y Pb Pr)’ ).
ATurn on the TV to the correct viewing
channel for this unit.
Make sure that the TV progressive
scan mode is turned off (or set to
interlaced mode). Refer to your TV user
manual.
BTurn on this unit and press SETUP on
the remote control.
CUse keys to select { Video } menu
and press .
DUse keys to select { Video Out }
> { P-Scan } in the menu and press OK
to confirm.
ERead the notification message on the TV
and confirm your action by selecting the {
Yes } in the menu and press OK.
There will be no picture on your TV
at this state until you have turned
on the progressive scan mode on
your TV.
FTurn on your TV progressive scan mode,
refer to your TVs user manual.
A message appears on the TV.
GConfirm your action by selecting the
{ Yes } in the menu and press OK.
The setup is now completed and you
can start to enjoy the high quality picture.
If no picture is displayed
APress ç to open the disc tray.
BPress numeric keypad ‘1’ on the
remote control.
Helpful Hints:
– If a blank/distorted screen appears, wait
for 15 seconds for the auto recovery.
– There are some progressive scan TV that
are not fully compatible with this unit,
resulting in an unnatural picture when
playing back a DVD VIDEO disc in the
progressive scan mode. In such a case, turn
off the progressive scan feature on this unit
and your TV.
18
dvp5120k_55_eng1.indd 18
2008-04-21 10:19:04 AM
Playable discs
Region codes for DVD discs
DVD discs and players are designed with
regional restrictions. Before playing a disc,
make sure the disc is for the same region
as your unit. The region code for this unit
is indicated at the rear panel.
Region
This unit plays:
– Digital Versatile Discs (DVDs)
– Video CDs (VCDs)
– Super Video CDs (SVCDs)
– Finalized DVD Recordable (DVD±R), DVD Rewritable (DVD±RW)
– Audio Compact Discs (CDs)
– MP3/ WMA discs
– The file extension has to be ‘.mp3’,
‘.wma’
– JPEG/ISO format
– Maximum 14 characters display.
– Supported bit-rate;
64 – 320 kbps (MP3)
64 – 192 kbps (WMA)
– Picture files (Kodak, JPEG) on
CD-R(W)/DVD+R(W)
– The file extension has to be ‘.JPG’
and not ‘.JPEG.’
– JPEG/ISO format
– It can only display DCF-standard
still pictures or JPEG pictures such
as TIFF.
English
Disc Operations
Discs that can
be played
U.S.A. and
Canada regions
U.K and
Europe regions
Asia Pacific,
Taiwan, Korea
Australia,
New Zealand,
Latin America
Russia and
India regions
China, Calcos
Islands,
Walls and Futuna
Islands
Helpful Hints:
– Maximum 10 sessions for CD and 10
multi border for DVD are supported.
– For DVD-R and DVD-RW multi border,
only finalized discs are supported.
19
dvp5120k_55_eng1.indd 19
2008-04-21 10:19:57 AM
Disc Operations (continued)
English
Notes:
– If the inhibit icon appears on
the TV when a button is pressed, it
means the function is not available
on the current disc or at the current
time.
– Never put any objects other than
discs in the disc tray. Doing so may
cause the unit to malfunction.
Playing a disc
APress 2 to turn on this unit.
BTurn on the TV to the correct viewing
channel for this unit.
CPress ç to open the disc tray.
DLoad a disc into the disc tray and press
ç.
Make sure the disc label is facing
towards you.
EPlayback starts automatically.
If not, press u .
See the following pages for more
playback options and features.
Helpful Hints:
– Never close the disc tray manually.
– If you are having trouble playing a certain
disc, remove the disc and try a different one.
Improperly formatted discs cannot be played
on this unit.
–�����������������������������������������
Some discs cannot be played on this unit
due to the configuration and characteristics
of the disc, or due to the condition of
recording and authoring software that was
used.
Basic playback controls
Pausing playback
l During playback, press u.
To resume playback, press u.
Selecting another track/chapter/
title
l Press ./ M= or use the numeric
keypad 0-9 to enter a track/chapter/title
number.
If the repeat track mode is active,
press . again to replay the same
track/chapter/title.
Searching backward/forward
(not applicable for JPEG)
l Press and hold ./ M=.
While searching, press t / u
repeatedly to select different search
speed (2X, 4X, 8X, 16X, 32X).
To resume normal playback, press
u.
Playing in slow motion mode
(not applicable for CD/WMA/MP3/
JPEG)
l During playback, press / to start
slow motion play.
Sound will be muted. Press /
repeatedly to select different play speed
(1/2, 1/4, 1/8, 1/16).
Note: Slow backward motion playback is
only possible for DVD.
To resume normal playback, press
u.
Stopping playback
l Press x.
20
dvp5120k_55_eng1.indd 20
2008-04-21 10:20:07 AM
Disc Operations (continued)
Other playback features for
video discs
DISC MENU
English
Helpful Hints:
– For video disc, playback always resumes
from the point where it was last stopped. To
start playback from the beginning, press
. while the message ‘Play from start,
press [PREV]’ is displayed.
– Screen saver starts automatically if
playback is stopped for about 5 minutes.
– The unit will automatically switch to
power standby mode if you do not press any
buttons for about 15 minutes after the disc
has stopped playing.
OK
RETURN/
TITLE
SUBTITLE
AUDIO
ZOOM
Note:
The operating features described here
might not be possible for certain discs.
Always refer to the instructions supplied
with the discs.
Using the Disc Menu
Depending on the disc, a menu may
appear on the TV once you load in the
disc.
To select a playback feature
lUse keys or numeric keypad
0-9 on the remote control, then press
OK to start playback.
To access or exit the menu
l Press DISC MENU on the remote
control.
21
dvp5120k_55_eng1.indd 21
2008-04-21 10:20:18 AM
Disc Operations (continued)
English
Changing sound track language
This operation works only on DVDs with
multiple sound track languages, or VCDs/
SVCDs with multiple audio channels.
For DVD
l Press AUDIO repeatedly to select the
available audio languages.
For VCD/SVCD
l Press AUDIO repeatedly to select the
available audio channels provided by the
disc.
Changing subtitle language
This operation works only on DVDs with
multiple subtitle languages. You can
change to your desired language during
playback.
l Press SUBTITLE repeatedly to select
different subtitle languages.
Playback Control (VCD/SVCD)
Playback Control (PBC) playback allows
you to play VCDs/SVCDs interactively,
following the menu on the display.
For VCDs with PBC feature
(version 2.0 only) and SVCDs
l Press DISC MENU to turn on or off
the PBC mode.
If the PBC mode is turned on, the
PBC menu (if available) appears on the
TV.
If the PBC mode is turned off, it skips
the PBC menu and playback from the
first track.
l If the PBC mode is turned on, pressing
RETURN/TITLE during playback will
return to the PBC menu.
Helpful Hint:
– You cannot use numeric keypad 0-9 to
select track if PBC mode is on.
Zooming
This option allows you to zoom and pan
through the picture on the TV.
ADuring playback, press ZOOM
repeatedly to select a different zoom
factor.
Playback continues.
BUse keys to pan through the
enlarged picture.
CPress ZOOM repeatedly to return to
the original size.
22
dvp5120k_55_eng1.indd 22
2008-04-21 10:20:23 AM
Using Display menu options
This unit can display the disc playback
information (for example, title or chapter
number, elapsed playing time), a number
of operations can be done without
interrupting disc playback.
DISPLAY
OK
BUse the numeric keypad 0-9 to input
the number/time or use keys to
make the selection.
CPress OK to confirm.
English
Disc Operations (continued)
Playback changes to the selected
operation.
Selecting title/chapter/track
This option allows you to skip to a
specific title/chapter/track in the current
disc.
AMove to { Title } / { Chapter } or { Track }
option in the display menu.
ADuring playback, press DISPLAY
repeatedly on the remote control.
The available disc information appears
on the TV.
(DVD)
Note: { Track } option can only be
selected if PBC is set to off. To turn off
PBC mode, press DISC MENU. See
‘Disc Operations - Playback Control
(VCD/SVCD)’ for details.
BUse the numeric keypad 0-9 to input
the valid number.
CPress OK to confirm.
Playback skips to the selected
operation.
Title
Title
Title
1 /1
Chapter
6/16
Title
Time
1 /1
Chapter
6/16
TimeTime
00:03:36/01:22:34
Repeat/Repeat
A-B/Angle
Time
00:03:36/01:22:34
Off
Rep Off
Repeat/Repeat
A-B/Angle
Off
Track
Rep Off
1/1
1/1
(VCD/SVCD)
Track
Track
3/21
TimeTrack
3/21
TimeTime
00:00:56/00:03:34
Time
00:00:56/00:03:34
Repeat/Repeat A-B
Searching by time
This option allows you to skip to a
specific point in the current disc.
AMove to { Time } option in the display
menu.
BUse the numeric keypad 0-9 to enter
the time where playback should start (eg.
0:34:27).
CPress OK to confirm.
Playback skips to the selected time.
Repeat/Repeat
A-B
Off
Rep Off
Off
Rep Off
23
dvp5120k_55_eng1.indd 23
2008-04-21 10:20:54 AM
Disc Operations (continued)
English
Switching camera angles
This option is only available on DVDs
that contain sequences recorded from
different camera angles. This allows you
to view the picture from different angles.
Repeating a specific section (A-B)
AWhen ‘Repeat’ information appears on
the TV screen, press to highlight
{ Rep Off }.
BPress OK at the start point.
AMove to { Repeat/ Repeat A-B/ Angle }
option in the display menu.
BUse keys to select the angle symbol
.
CPress OK repeatedly to switch between
different angle.
Playback changes to the selected
angle.
Selecting various repeat functions
CPress OK again to end the section.
The section will now repeat
continuously.
DPress OK again to resume normal
playback.
Helpful Hint:
– The marked section for repeat playback is
only possible within the same chapter/track.
This function allows you to select the
different repeat play options.
l While playing a disc, press DISPLAY on
the remote control repeatedly to choose
a repeat play mode.
DVD
Chapter (repeat current chapter)
Title (repeat current title)
Off (exit repeat mode)
VCD/SVCD/CD
Single (repeat current track)
All (repeat entire disc)
Off (exit repeat mode)
MP3/JPEG/WMA
Single (repeat current file)
All (repeat all files in the current folder)
Off (exit repeat mode)
Helpful Hint:
– Repeat playback is not possible on VCDs
or SVCDs when the PBC mode is turned on.
24
dvp5120k_55_eng1.indd 24
2008-04-21 10:21:05 AM
Disc Operations (continued)
Before you start ...
Turn on your TV to the correct Video In
channel. See ‘Finding the correct viewing
channel’ for details.
l Load a photo CD (Kodak Picture CD/
JPEG).
The picture menu appears on the TV.
Press u to start the slide-show playback.
Zooming
ADuring playback, press ZOOM
repeatedly to select a different a zoom
factor.
BUse keys to pan through the
enlarged image.
Flip/Rotate picture
keys to
l During playback, use rotate/flip the picture on the TV.
Action
During playback:
l Press u to pause or resume playback.
l Press ./ M= to play another file in
the folder.
Helpful Hints:
– It may require longer time to display the
disc content due to the large number of
songs/pictures compiled into one disc.
English
Playing a JPEG photo disc
(slide show)
Remote
control
flip the picture vertically
-180˚.
flip the picture horizontally
+180˚.
rotate the picture counterclockwise.
rotate the picture
clockwise.
Supported file format:
– The file extension has to be ‘*.JPG’ and
not ‘*.JPEG’.
– This unit can only display digital
camera pictures according to the JPEGEXIF format, typically used by almost all
digital cameras. It cannot display Motion
JPEG, or pictures in formats other than
JPEG, or sound clips associated with
pictures.
25
dvp5120k_55_eng1.indd 25
2008-04-21 10:21:09 AM
Disc Operations (continued)
English
Playing a MP3/ WMA disc
This unit can playback most of the MP3
and WMA files recorded on a recordable
disc or commercial CD.
Before you start ...
Turn on your TV to the correct Video In
channel. See ‘Finding the correct viewing
channel’ for details.
ALoad a MP3/WMA disc.
The disc reading time may exceed 30
seconds due to the complexity of the
directory/file configuration.
The disc menu appears on the TV.
During playback:
l Press ./ M= to playback another
file in the current folder.
l Press and hold ./ M= to fast
backward/ forward search on the file.
l To select another folder from current
disc, use and OK keys to navigate
back to the root menu.
DTo stop playback, press x.
Helpful Hints:
– It is normal to experience an occasional
‘skip’ while listening to your MP3/WMA disc
due to poor clarity of digital contents during
internet downloading.
– If any special characters are present in
the MP3/WMA track name (ID3) or album
name, it might not be displayed correctly on
the screen because this unit does not support
the characters.
BUse keys to select a desired folder
and press OK to open the folder.
CUse keys to select a file and press
OK to start playback.
Playback starts from the selected file
and continues through to the end of the
folder.
26
dvp5120k_55_eng1.indd 26
2008-04-21 10:21:18 AM
Playing a Karaoke disc
Before you start...
Turn on your TV to the correct Video In
channel. Press AV, VIDEO, SELECT or
° button on your TV’s remote control
until you see the blue DVD background.
MIC LEVEL
Using the Karaoke Menu option
APress KARAOKE on the remote
control repeatedly to access the karaoke
menu.
English
Karaoke Operation
BPress to select one of the options.
{ Karaoke }
– Press OK to set karaoke { On } or
{ Off } when { Karaoke } is selected.
{ Key Shift }
– Use keys to adjust the pitch level
between 0 ~ 14 that match your voice.
AConnect microphone(s) (supplied) to the
MIC1 or MIC2 jack on the front panel
of this unit.
BLoad a karaoke disc.
lIf the disc menu appears, use
keys to make your selection and press
OK to start playback.
CPress KARAOKE on the remote
control to access karaoke menu.
{ Karaoke : Off } appears on the TV
screen.
Press OK to turn { On } or { Off } the
karaoke mode.
DAdjust the microphone volume up or
down by using MIC LEVEL on the side
panel of the unit.
{ Echo }
– Use keys to adjust the echo level
between 0 ~ 16.
{ Voice Cancel }
– Press OK to set voice cancel { On } or
{ Off } .
{ Score }
– Use keys to select scoring ranks: { Off } , { Basic } , { Intermediate } or { Advance }.
Note: If you score 30 points and above
at the end of the song, a karaoke score
will appear on the TV. Press OK to exit
the scoring and resume karaoke session.
Helpful Hint:
– Karaoke score function is only available
for DVD and VCD discs.
EPress VOCAL repeatedly to toggle
between various audio modes.
You can turn off the vocal or change
the audio mode of the karaoke disc.
Start enjoying the karaoke.
Helpful Hint:
– Before connecting the microphone, set the
microphone volume to the minumum level to
prevent howling.
27
dvp5120k_55_eng1.indd 27
2008-04-21 10:21:29 AM
Setup Menu Options
English
Accessing the setup menu
Auto
You can change the settings in this unit to
suit your particular requirements.
OK
See ‘Lauguage Menu’ on this chapter.
SETUP
APress SETUP on the remote control.
The setup menu appears.
See ‘Video Menu’ on this chapter.
BUse keys to select one of the setup
menu options and press .
See ‘Audio Menu’ on this chapter.
CUse keys to select a setup option
and press to access.
DUse keys to select the setting you
wish to change and press OK to confirm.
Instructions and explanations of the
options are provided in the following
pages.
If the option in the menu is grayed
out, that means the setting is not
available or cannot be changed in the
current state.
ETo exit, press SETUP.
See ‘Rating Menu’ on this chapter.
Language
Video
Use Default Settings
Volume
Closed Caption
60
: Off
Audio
Rating
Misc
See ‘Misc Menu’ on this chapter.
28
dvp5120k_55_eng1.indd 28
2008-04-21 10:22:17 AM
Setup Menu Options (continued)
OSD Language
Select the menu language for this unit’s on-screen display.
Subtitle
Select the preferred subtitle language for DVDs playback.
Audio
Select the preferred audio language for DVDs playback with
multiple sound tracks.
DVD Menu
Select the preferred dvd menu language for DVDs playback.
English
Language Menu (underlined options are the factory default settings)
Note: If the selected audio/subtitle/dvd menu language is not
available on the DVD, the disc’s default language will be used
instead.
29
dvp5120k_55_eng1.indd 29
2008-04-21 10:22:27 AM
Setup Menu Options (continued)
English
Video Menu (underlined options are the factory default settings)
Aspect Ratio
The picture shape can be adjusted to fit your TV.
{ 4:3 }
– For a ‘wide-screen’ display
with black bars on the top
and bottom.
{ 16:9 }
– For wide-screen TV
(frame ratio 16 :9).
View Mode
This setting allows you to scale the picture to fit the TVs width
and height.
{ Fill }
– Scale the picture to fill the screen
height and width equally.
{ Original }
– Scale the picture to fit to the original
screen size (only for MPEG).
– Scale the picture to fit to the screen
height.
– Scale the picture to fit the screen
width.
– Scale the picture proportionally with
minimum screen ratio.
– Scale the picture proportionally with
maximum screen ratio.
{ Height Fit }
{ Width Fit }
{ Auto Fit }
{ Pan Scan }
TV System
Select the color system that matches the connected TV. It
enables playback of a different type of disc (PAL or NTSC disc)
on this unit.
{ NTSC }
– For NTSC-system TV.
{ PAL }
– For PAL-system TV.
{ Multi }
– For TV that is compatible with both
PAL and NTSC.
Confirm the setting by pressing to select { Yes } in the menu
and press OK on the remote control.
30
dvp5120k_55_eng1.indd 30
2008-04-21 10:22:57 AM
Video Menu (underlined options are the factory default settings)
Video Out
Before enabling the progressive scan feature, you must ensure
that your TV can accept progressive signals (a progressive scan
TV is required) and that you have connected this unit to your TV
using the Y Pb Pr. See ‘Getting Started - Setting up the
progressive scan feature’ for details.
{ Interlaced }
– Turn off progressive scan mode.
{ P-Scan } – Turn on progressive scan mode.
English
Setup Menu Options (continued)
Confirm the setting by pressing to select { Yes } in the menu
and press OK on the remote control.
Smart Picture
This unit provides three predefined sets of picture color settings
and one personal setting which you can define yourself.
{ Standard }
– Original color setting.
{ Vivid }
– Vibrant color setting.
{ Cool }
– Soft color setting.
{ Personal }
– Select this to personalize the picture
color setting. Use the keys to
adjust to the setting that best suits your
personal preference. For an average
setting, select { 0 }.
31
dvp5120k_55_eng1.indd 31
2008-04-21 10:23:09 AM
Setup Menu Options (continued)
English
Audio Menu (underlined options are the factory default settings)
Digital Output
Night Mode
Down Sampling
This setting is only required if you have connected the audio
output of this unit to an amplifier/receiver using the digital
output jack.
{ Off }
– Disable digital audio output. Select this if
you are using the analog audio jacks to
connect this unit to a TV or Stereo system.
{ PCM }
– The connected device does not support
multi-channel formats. All audio signals are
downmixed to PCM format (2-channel).
{ ALL }
– The connected device supports multichannel audio formats. The digital audio
format will be output as on disc.
This mode optimizes playback of sound at low volume. High
volume outputs will be softened and low volume outputs will be
enhanced to an audible level. This feature is only applicable for
DVD video discs with Dolby Digital mode.
{ Off }
– Turn off night mode. Select this to enjoy the
surround sound with its full dynamic range.
{ On }
– Turn on night mode.
This feature enables you to disable digital signal processing for
better sound quality.
{ Off }
– Play disc recorded at sampling rate of 96
kHz. This rate can only be achieved in
Stereo-Classic (Flat) mode.
{ On }
– Play disc recorded at sampling rate of
48 kHz.
32
dvp5120k_55_eng1.indd 32
2008-04-21 10:23:12 AM
Rating Menu (underlined options are the factory default settings)
Parental Control
This setting allows you to control the playback of certain disc
through a rating level. It works only on the DVDs with parental
level assigned to the complete disc or to certain scenes on the
disc.
1) Use the numeric keypad 0-9 on the remote control to
enter your four-digit password and press OK.
2) Use keys to select a rating level from 1 to 8 and press
OK.
English
Setup Menu Options (continued)
Notes:
– The ratings are country-dependent (‘1’ is considered material
that is least offensive and ‘8’ is most offensive). To disable
parental controls and allow all discs to play, select ‘8’.
– Some DVDs are not encoded with a rating though the movie
rating may be printed on the disc cover. The rating level
feature does not prohibit playback of such discs. VCD, SVCD
and CD have no level indication, so parental control has no
effect on these type of discs.
– DVDs that are rated higher than the level you selected will
not be played unless you enter the same four-digit password.
Set Password
The password is used for Parental Control. The default
password is ‘0000’.
To change the password:
1) Use keys to select { Set Password } and press OK.
2) Use the numeric keypad 0-9 on the remote control to
enter your existing four-digit password at { Password }.
Note: When doing this for the first time or if you forget your
existing password, enter ‘0000’.
3) Press OK to proceed.
4) Enter the new four-digit password at { New Password }.
5) Press OK to confirm and press SETUP to exit the menu.
33
dvp5120k_55_eng1.indd 33
2008-04-21 10:23:20 AM
Setup Menu Options (continued)
English
Misc Menu (underlined options are the factory default settings)
Use Defualt Settings This setting enables you to reset all the options and settings to
the factory defaults, with exception of your password for
Parental control.
{ Yes }
– Select this to reset to factory default
settings.
{ No } – Select this to keep the existing setting.
Use keys to make a selection and press OK to confirm.
Volume
This setting allows you to adjust the volume level.
Access the volume setup menu. Use keys to set the volume
level between 0 ~ 63 and press OK to exit. ( 60 is the default
setting )
Closed Caption
This feature is only available if the disc contains of special video
signal data. It shows sound effects on the screen if your TV
supports this feature, such as ‘phone ringing’ and ‘footsteps.’
{ On }
– Turn on closed caption feature.
{ Off }
– Turn off closed caption feature.
34
dvp5120k_55_eng1.indd 34
2008-04-21 10:23:24 AM
Software upgrade
English
Installing the latest software
Philips provides software upgrades to
make sure that this unit is compatible
with the newest formats. To check the
updates, compare the current software
version of this unit with the latest
software version available at the Philips
website.
APress ç to open the disc tray.
B Press numeric keypad ‘966’ on the
remote control.
C Write down the file name.
DGo to www.philips.com/support to check
the latest software version available for
this unit.
EIf the latest software version is higher
than the software version of this unit,
download it and store onto a CD-R.
FLoad the CD-R into this unit for upgrade
operation.
Note:
Never unplug or turn off this unit
during the upgrade.
GOnce complete, this unit will power off
automatically.
35
dvp5120k_55_eng1.indd 35
2008-04-21 10:23:25 AM
Troubleshooting
English
WARNING
Under no circumstances should you try to repair this unit yourself, as this invalidates the
warranty. Do not open this unit as there is a risk of electric shock.
If a fault occurs, first check the points listed below before taking this unit for repair. If you
are unable to remedy a problem by following these hints, consult your dealer or Philips for
help.
Problem
Solution
No power.
– Press STANDBY-ON on the unit to turn on the
power.
– Ensure that the AC outlet has power.
– Disconnect the power cord from the power outlet
for a few minutes. Reconnect the power cord and try
to operate again as usual.
No picture.
– Refer to your TV manual for correct Video In channel selection. Change the TV channel until you see the
DVD screen.
– If this happens when you turn on the progressive scan
feature, wait for 15 seconds for the auto recovery or
switch back to the default mode as below:
1)Press ç to open the disc tray.
2)Press numeric keypad ‘1’ on the remote control.
– If this happens after you set the color system, wait for
15 seconds for the auto recovery or switch back to
the default TV color system:
1)Press ç to open the disc tray.
2)Press numeric keypad ‘3’ on the remote control.
Completely distorted picture
or black/white picture.
– Check the video connection.
– Ensure that the disc is compatible with this unit.
– Sometimes a small amount of picture distortion may appear. This is not a malfunction.
– The disc is dirty. Clean the disc.
36
dvp5120k_55_eng1.indd 36
2008-04-21 10:23:29 AM
Problem
Solution
No sound or distorted sound.
– Check the audio connections to the connected audio
device.
– Make sure that the connected audio device is turned
on to the correct input source.
– Set the digital output setting correctly, based on the
device you connected to this unit. See ‘Audio Menu Digital Output’ for details.
The remote control does not
function properly.
– Aim the remote control directly at the sensor on the
front of this unit (not towards the TV).
– Remove any obstacles between this unit and the
remote control.
– Batteries are weak, replace the batteries.
– Check the polarities of the batteries are as indicated
on the remote control (± signs).
The unit does not start
playback.
– Load a readable disc with the playback side facing
inwards. The DVD��������������������������
±�������������������������
R/CD-R must be finalized.
– Make sure the disc is not scratched or warped. Check
if the disc is defective by trying another disc.
– The disc is of a different region code.
– You may need to enter the password in order to
unlock the disc for playback.
– Moisture may have condensed inside this unit.
Remove the disc and leave this unit turned on for
about an hour.
The buttons on the unit do not
work.
– There is a technical problem. Disconnect this unit
from the power outlet for 10 seconds and reconnect
again.
The aspect ratio of the
screen cannot be changed
even though you have set the
TV display.
– The aspect ratio is fixed on the DVD disc.
– Depending on the TV, it may not be possible to
change the aspect ratio.
English
Troubleshooting (continued)
37
dvp5120k_55_eng1.indd 37
2008-04-21 10:23:34 AM
Troubleshooting (continued)
English
Problem
Solution
Cannot activate some
features such as Angles,
Subtitles, or multi-language
Audio.
– The features may not be available on the DVD.
– Changing the language for the sound or subtitle is prohibited on this DVD.
Not able to select some
items in the setup/system
menu.
– Press x twice before selecting the disc setup menu.
– Depending on the disc availability, some menu items
cannot be selected.
Picture freezes momentarily
during playback.
– Check the disc for fingerprint/scratches and clean
with a soft cloth wiping from center to edge.
Unable to select Progressive
Scan on/off.
– Check that the video output of this unit is connected
using the Component Video (Y Pb Pr) jacks.
38
dvp5120k_55_eng1.indd 38
2008-04-21 10:23:39 AM
AUDIO PERFORMANCE
TV STANDARD
Number of lines
Playback
(PAL/50Hz) (NTSC/60Hz)
625
525
Multistandard (PAL/NTSC)
VIDEO PERFORMANCE
Video DAC
Y Pb Pr
Video Output
12 bit, 108 MHz
0.7 Vpp ~ 75 ohm
1 Vpp ~ 75 ohm
VIDEO FORMAT
Digital
Compression
MPEG 2 for DVD, SVCD
MPEG 1 for VCD
DVD
Horiz. resolution
Vertical resolution
50 Hz
60 Hz
720 pixels
720 pixels
576 lines480 lines
VCD
50 Hz
60 Hz
Horiz. resolution352 pixels352 pixels
Vertical resolution288 lines240 lines
AUDIO FORMAT
Digital
MPEG/ AC-3/
compressed
PCM
Digital
16, 20, 24 bits
fs, 44.1, 48, 96 kHz
MP3 (ISO 9660) 96, 112, 128, 256 kbps & variable bit rate fs, 32, 44.1, 48 kHz
Analog Sound Stereo
Dolby Surround compatible downmix from Dolby
Digital multi-channel sound
DA Converter24 bit, 192 kHz
DVD
fs 96 kHz4 Hz - 44 kHz
fs 48 kHz4 Hz - 22 kHz
SVCD
fs 48 kHz4 Hz - 22 kHz
fs 44.1kHz4 Hz - 20 kHz
CD/VCD
fs 44.1kHz4 Hz - 20 kHz
Signal-Noise (1kHz)
Dynamic range(1kHz)
Crosstalk (1kHz)
Distortion/noise (1kHz)
MPEG MP3
English
Specifications
> 90 dB
> 80 dB
> 70 dB
> 65 dB
MPEG Audio L3
CONNECTIONS
Y Pb Pr Output
Video Output
Audio Output(L+R)
Digital Output
Cinch 3x
Cinch (yellow)
Cinch (white/red)
1 coaxial
IEC60958 for
CDDA / LPCM
IEC61937 for
MPEG 1/2,
Dolby Digital
CABINET
Dimensions (w x h x d)�����������������
435 x 38 x 210 mm
Weight
Approximately
������
1.7 ��
kg
POWER CONSUMPTION
Power Supply Rating
Power consumption Power consumption in
Standby mode
110 V – 240 V;
50/60 Hz < 10 W
<1W
Specifications are subject to change without prior
notice.
39
dvp5120k_55_eng1.indd 39
2008-04-21 10:23:47 AM
Glossary
English
Analog audio: Sound that has not been
turned into numbers. Analog sound is
available when you use the AUDIO LEFT/
RIGHT jacks. These red and white jacks send
audio through two channels, the left and
right.
Aspect ratio: Aspect ratio refers to the
length to height ratio of TV. The ratio of a
standard TV is 4:3, while the ratio of a highdefinition or wide TV is 16:9. The letter box
allows you to enjoy a picture with a wider
perspective on a standard 4:3 screen.
AUDIO OUT jacks: Jacks on the back of
this unit that send audio to another system
(TV, Stereo, etc.).
Bit Rate: The amount of data used to hold
a given length of music; measured in kilobits
per second, or kbps. Or, the speed at which
you record. Generally, the higher the bit
rate, or the higher the recording speed, the
better the sound quality. However, higher bit
rates use more space on a disc.
Chapter: Sections of a picture or a music
piece on a DVD that are smaller than titles.
A title is composed of several chapters. Each
chapter is assigned a chapter number
enabling you to locate the chapter you want.
CVBS: Composite video (or Composite
Video Blanking and Sync). A single video
signal commonly used in most consumer
video products.
DVD Menu: A screen display prepared for
allowing a selection of images, sounds,
subtitles, multi-angles, etc., recorded on a
DVD.
Dolby Digital: A surround sound system
developed by Dolby Laboratories containing
up to six channels of digital audio (front left
and right, surround left and right, center and
subwoofer).
JPEG: A very common digital still picture
format. A still-picture data compression
system proposed by the Joint Photographic
Expert Group, which features small decrease
in image quality in spite of its high
compression ratio. Files are recognized by
their file extension ‘JPG or JPEG’.
MP3: A file format with a sound data
compression system. ‘MP3’ is the
abbreviation of Motion Picture Experts
Group 1 (or MPEG-1) Audio Layer3. By
using the MP3 format, one CD-R or CD-RW
can contain about 10 times more data than a
regular CD.
Parental Control: A function of the DVD
to limit playback of the disc by the age of the
users according to the limitation level in each
country. The limitation varies from disc to
disc; when it is activated, playback will be
prohibited if the software’s level is higher
than the user-set level.
PBC: Playback Control. A system of
navigating a Video CD/Super VCD through
on-screen menus recorded onto the disc.
You can enjoy interactive playback and
searching.
PCM (Pulse Code Modulation): A
system for converting analog sound signal to
digital signal for later processing, with no
data compression used in conversion.
Progressive Scan: The progressive scan
displays twice the number of frames per
second than in an ordinary TV system. It
offers higher picture resolution and quality.
40
dvp5120k_55_eng1.indd 40
2008-04-21 10:23:55 AM
Glossary (continued)
English
Region code: A system allowing discs to be
played only in the region designated. This
unit will only play discs that have compatible
region codes. You can find the region code
of your unit by looking at the product label.
Some discs are compatible with more than
one region (or ALL regions).
Title: The longest section of a movie or
music feature on DVD. Each title is assigned
a title number, enabling you to locate the
title you want.
TV OUT jack: Jack on the back of this unit
that sends out video signals to the TV.
WMA: Windows Media™ Audio. Refers to
an audio compression technology developed
by Microsoft Corporation. WMA data can be
encoded by using Windows Media Player
version 9 or Windows Media Player for
Windows XP. Files are recognized by their
file extension ‘WMA’.
41
dvp5120k_55_eng1.indd 41
2008-04-21 10:24:01 AM