1
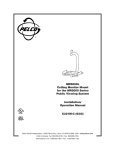
I N S T A L L A T I O N
ICS-DO111ABK
Integrated Camera
System
MR5000 Series Public Viewing System
C2495M-A (1/06)
Important Safety Instructions
1. Read these instructions.
2. Keep these instructions.
3. Heed all warnings.
4. Follow all instructions.
5. Do not block any ventilation openings. Install in accordance with the manufacturer’s
instructions.
6. Do not install near any heat sources such as radiators, heat registers, stoves, or other
apparatus (including amplifiers) that produce heat.
7. Only use attachments/accessories specified by the manufacturer.
8. Use only with the cart, stand, tripod, bracket, or table specified by the manufacturer, or sold
with the apparatus. When a cart is used, use caution when moving the cart/apparatus
combination to avoid injury from tip-over.
9. Refer all servicing to qualified service personnel. Servicing is required when the apparatus
has been damaged in any way, such as power-supply cord or plug is damaged, liquid has been
spilled or objects have fallen into the apparatus, the apparatus has been exposed to rain or
moisture, does not operate normally, or has been dropped.
10. Installation should be done only by qualified personnel and conform to all local codes.
11. Unless the unit is specifically marked as a NEMA Type 3, 3R, 3S, 4, 4X, 6, or 6P enclosure, it is
designed for indoor use only and it must not be installed where exposed to rain and moisture.
12. Use only installation methods and materials capable of supporting four times the maximum
specified load.
13. Use stainless steel hardware to fasten the mount to outdoor surfaces.
14. To prevent damage from water leakage when installing a mount outdoors on a roof or wall,
apply sealant around the bolt holes between the mount and mounting surface.
15. CAUTION: These servicing instructions are for use by qualified service personnel only.
To reduce the risk of electric shock do not perform any servicing other that contained in the
operating instructions unless you are qualified to do so.
16. Only use replacement parts recommended by Pelco.
The product and/or manual may bear the following marks:
This symbol indicates that dangerous voltage
constituting a risk of electric shock is present
within this unit.
This symbol indicates that there are important
operating and maintenance instructions in the
literature accompanying this unit
2
CAUTION:
RISK OF ELECTRIC SHOCK.
DO NOT OPEN.
C2495M-A (1/06)
Regulatory Notices
This device complies with Part 15 of the FCC Rules. Operation is subject to the following two
conditions: (1) this device may not cause harmful interference, and (2) this device must accept any
interference received, including interference that may cause undesired operation.
FCC, Class B (except auto iris models)
RADIO AND TELEVISION INTERFERENCE
This equipment has been tested and found to comply with the limits of a Class B digital device,
pursuant to Part 15 of the FCC Rules. These limits are designed to provide reasonable protection
against harmful interference in a residential installation. This equipment generates, uses, and can
radiate radio frequency energy and, if not installed and used in accordance with the instructions, may
cause harmful interference to radio communications. However there is no guarantee that the
interference will not occur in a particular installation. If this equipment does cause harmful
interference to radio or television reception, which can be determined by turning the equipment off
and on, the user is encouraged to try to correct the interference by one or more of the following
measures:
•
Reorient or relocate the receiving antenna.
•
Increase the separation between the equipment and the receiver.
•
Connect the equipment into an outlet on a circuit different from that to which the receiver is
connected.
•
Consult the dealer or an experienced radio/TV technician for help.
You may also find helpful the following booklet, prepared by the FCC: “How to Identify and Resolve
Radio-TV Interference Problems.” This booklet is available from the U.S. Government Printing Office,
Washington D.C. 20402.
Changes and modifications not expressly approved by the manufacturer or registrant of this
equipment can void your authority to operate this equipment under Federal Communications
Commission’s rules.
This Class B digital apparatus complies with Canadian ICES-003.
Cet appareil numérique de la classe B est conforme à la norme NMB-003 du Canada.
C2495M-A (1/06)
3
Description
Designed specifically for the MR5000 Series public viewing system, the ICS-DO111ABK integrated
camera system packages a camera and lens into a small, discreet, high-security dome.
Pelco’s MR5000 Series public viewing system is specifically designed for retail applications to
provide a clear, visual warning to potential shoplifters that these premises are under surveillance.
When properly installed the station is an effective deterrent against shoplifting.
4
C2495M-A (1/06)
Installation
PREPARE VIDEO AND ELECTRICAL CABLING
1. Temporarily remove the bottom end cap of the MR5000 Series mount if the end cap is
installed.
2. Feed the 42-inch video cable (provided) through the monitor feedthrough hole in the mount
arm and out the bottom end of the mount arm.
3. Pull power wires through the ICS-DO111ABK feedthrough hole located at the bottom of the
mount arm. Remove the 0.750-inch plug if it is installed.
C2495M-A (1/06)
5
INSTALL THE ICS-DO111ABK TO THE MR5000 MOUNT
Follow the steps below to install the ICS-DO111ABK to the MR5000 mount:
1. Align the adapter plate with the cover. Position the cover so that the notch on the side of the
cover faces the back of the MR5000 mount.
ADAPTER PLATE
COVER
10-32 x 0.375-INCH SCREWS
AND WASHERS
BACK BOX
8-32 x 0.375-INCH SCREWS
AND WASHERS
2. Using the two 10-32 x 0.375-inch pan head screws and internal lock washers, attach the cover
of the ICS-DO111ABK to the adapter plate.
6
C2495M-A (1/06)
3. Do the following to install the back box inside the cover of the ICS-DO111ABK:
a.
Feed the video cable and power wires attached to the ICS-DO111ABK back box through
the cover and adapter plate of the ICS-DO111ABK.
b.
Rotate and position the back box so that the conduit plug on the side of the box is
located on the opposite side (180 degrees) from the notch on the side of the cover.
Use the supplied 8-32 x 0.375-inch screws and washers to secure the back box to the
cover.
4. Connect the power wires:
•
For 12 VDC, connect the 24 VAC/12 VDC (red) and GND (black) wires to input power.
The blue wire is not used.
•
For 24 VAC, connect the 24 VAC/12 VDC (red) and 24 VAC (blue) wires to input power.
The black wire is not used.
5. Feed the video connector from the Camclosure ® base through the ICS-DO111ABK feedthrough
hole in the mount and out the bottom of the mount arm. Connect the video connector to the
mating connector of the video cable. Push the video cable back into the mount arm, and then
reinstall the bottom end cap of the MR5000 Series mount.
6. Use the supplied 3/16-inch Allen wrench and slightly loosen (do not remove) the two
5/16-18 x 0.750-inch Allen pan head screws that secure the MR5000 mount base to the
mount arm. Hook the adapter plate and cover over the loosened screws. Tighten the screws to
secure the adapter plate to the mount.
ADAPTER PLATE
CAMCLOSURE BASE
NOTE: POSITION THE BASE SO THAT THE CONDUIT OPENING
IS TURNED TOWARD THE BACK OF THE MOUNT.
C2495M-A (1/06)
7
Install Camera
WARNING: Heater elements could be hot! When camera power is on, use caution when
adjusting the camera. This applies to all models.
1. Some indoor installations do not require a
heater. If the installation does not require a
heater, remove the heater board from the
camera assembly. To remove the heater press
on an end of the board.
HEATER
BOARD
2. 12 VDC operation only: The camera is set for
24 VAC operation at the factory. For 12 VDC
operation remove the jumper from the 24 VAC
position and install it in the 12 VDC position.
VIDEO
CONNECTOR
HEATER
CONNECTOR
12 VDC JUMPER
24 VAC JUMPER
3. If the heater is installed, plug the heater
connector from the camera into the
mating connector inside the base.
Plug the video connector from the camera into
the mating connector inside the base.
VIDEO
CONNECTOR
Turn on power to the camera and monitor.
50404
4. If you have a varifocal lens, hold the assembly
in your hand and point the lens toward what
you want to view. Loosen the focal length and
focus locking screws. Adjust according to
scene detail. Retighten the screws.
E
HEATER
CONNECTOR
FOCUS
FOCAL
LENGTH
8
C2495M-A (1/06)
5. Always make sure the tab on the camera bracket is pointing out of the enclosure (away from
the ceiling or wall). Gently squeeze the bracket, place it against the groove inside the back
box, and gently release.
Proper camera orientation:
CAMERA BRACKET
TAB ALWAYS POINTS
OUT OF THE
ENCLOSURE
TOP OF
CAMERA
CAMERA BRACKET
TAB ALWAYS POINTS
OUT OF THE ENCLOSURE
C2495M-A (1/06)
9
Install Dome and Trim Ring
1. Align the screw holes in the trim ring with
those in the Camclosure base.
2. Domes with Liners (only) –
ADJUSTMENT
GROOVE
DOME LINER
Position the viewing window over the lens of
the camera by doing the following:
LOOSEN SCREWS
a. Loosen the three Phillip screws located
in the dome.
b.
Insert the blade of a standard
screwdriver in one of the adjustment
grooves. Move the dome into position.
c.
Tighten the three Phillip screws to lock the liner in place.
3. Tighten the tamper-resistant screws with the supplied 1/8-inch hollow screwdriver bit.
Adjustments (Color Camera Only)
If you have a color camera, it is set up at the factory and normally requires no adjustments.
Sometimes, however, adjustments may be necessary.
1. Remove the dome and trim ring using the supplied 1/8-inch hollow screwdriver bit.
2. Adjust the vertical phase, iris level, focus, or switch settings (refer to procedures below).
3. Replace the dome and trim ring.
VERTICAL PHASE (24 VAC OPERATION ONLY)
Adjustment is required if there is vertical roll when switching between two cameras.
1. Reverse the 24 VAC connections on one camera. If both cameras are connected to the same
transformer, this should solve the problem.
2. If reversing the connections does not solve the problem, or if cameras are connected to
different transformers, turn the adjustment screw on one camera (while switching as rapidly
as possible between the two camera views) until the switching is clean and there is no
vertical roll. If more than two cameras are out of synchronization with each other, choose one
camera and synchronize all others to it.
FIXED LENS
VARIFOCAL LENS
VERTICAL
PHASE
ADJUSTMENT
10
VERTICAL
PHASE
ADJUSTMENT
C2495M-A (1/06)
AUTO IRIS LEVEL ADJUSTMENT
If you have a varifocal lens or fixed focal length lens with an auto iris, you can adjust the level setting
to increase or decrease brightness.
VARIFOCAL LENS
FIXED LENS
IRIS LEVEL
ADJUSTMENT
AUTO IRIS LEVEL
ADJUSTMENT
FOCUS ADJUSTMENT FOR FIXED FOCAL LENGTH LENS WITH
AUTO IRIS
WARNING: Heater elements could be hot! When camera power is on, use caution when
adjusting the camera.
To adjust the focus, it may be necessary to remove the heater board in order to loosen the locking
screw on the bottom of the lens.
To remove the heater board:
HEATER
BOARD
1. Disconnect the four-pin heater wiring.
2. Wait for the heater elements to cool if they are hot.
3. Press on an end of the board.
To adjust the focus:
1. Loosen the locking screw on the bottom of the lens.
FOCUS
ADJUSTMENT SCREW
2. Move the screw in the slot to bring the picture into focus.
3. Retighten the locking screw.
4. Replace the heater board if it was removed.
5. Reconnect the four-pin heater wiring.
ADJUSTMENT SLOT
BOTTOM VIEW OF CAMERA
WITH HEATER BOARD REMOVED
C2495M-A (1/06)
11
SWITCH SETTINGS FOR FIXED FOCAL LENGTH LENS WITH AUTO IRIS
Refer to the switch drawing. The switch is located next to the lens. Automatic backlight
compensation (factory setting) is used under varying lighting conditions (such as outdoors) or fi xed
lighting conditions where there are no bright spots that darken other picture details. Manual backlight
compensation is used in fixed lighting conditions to optimize the picture detail when there are
bright spots.
BLC
ABL
OFF
Auto backlight compensation: BLC switch OFF
ABL switch ON
OFF
Always DC
Y
Y/DC switch:
FACTORY SETTINGS
ON
OFF
ELC
Manual backlight compensation: BLC switch ON
ABL switch OFF
DC
Always ALC
ALC
ALC/ELC switch:
= SWITCH POSITION
SWITCH SETTINGS FOR FIXED FOCAL LENGTH LENS WITHOUT
AUTO IRIS
FACTORY SETTINGS
Y/DC switch:
Not used
ALC
Y
DC
OFF
OFF
NOT USED
Auto backlight compensation: BLC switch OFF
ABL switch ON
Manual backlight compensation: BLC switch ON
ABL switch OFF
ABL
Always ELC
BLC
ALC/ELC switch:
ELC
Refer to the switch drawing. The switch is located next to the lens. Automatic backlight
compensation (factory setting) is used under varying lighting conditions (such as outdoors) or fi xed
lighting conditions where there are no bright spots that darken other picture details. Manual backlight
compensation is used in fixed lighting conditions to optimize the picture detail when there are
bright spots.
= SWITCH POSITION
12
C2495M-A (1/06)
SWITCH SETTINGS FOR VARIFOCAL LENS
AE Functions
The high resolution camera with varifocal lens and auto iris is configured at the factory for automatic
exposure.
1 AWB
Automatic white balance
2 GAM
Gamma function
3 AGC
Automatic gain control
4 ESC
Electronic shutter control
5 BLC
Backlight compensation
6 FL
Flickerless
7 AE
Automatic exposure
FACTORY SETTINGS
1 2 3 4 5 6 7 8
ON
OFF
OFF
= SWITCH POSITION
8 Not used
For manually setting and locking the white balance, place a white background in front of camera and
turn off switch 1.
For gamma correction, switch to accurately reproduce scene brightness; when turned on, y = 0.6, and
when turned off, y = 1.0.
For automatic exposure, turn on switch 7, and then turn on/off switch 3 for AGC, switch 4 for
electronic shutter control, switch 5 for backlight compensation, and switch 6 for fl ickerless motion.
For manual exposure and to enable auto iris, turn off switch 7; set switch 3 on to increase the gain
by 6 dB or off to increase the gain by 18 dB; set switches 4, 5, and 6 for the desired shutter speed.
WARNING: Do not change the shutter speed unless you understand how changing the
settings will affect the scene detail.
Shutter
Speed
1/60 (NTSC)
1/50 (PAL)
1/100
1/250
1/500
1/1000
1/2000
1/4000
1/10000
C2495M-A (1/06)
Switch Number and Position
7
6
5
4
Off
On
On
On
Off
On
Off
On
Off
On
Off
On
Off
Off
On
On
Off
Off
On
On
On
Off
Off
Off
Off
13
Specifications
General
Operating Temperature
Finish
Environment
Unit Weight
-50° to 122°F (-46° to 50°C)
De-ices to 25°F (-4°C)
3/4-inch (1.91 cm) conduit fitting and 3/4-inch (1.91 cm) opening for
NPT threaded pipe
Manual; 360° pan; 180° tilt
Aluminum with steel camera mounting bracket and polycarbonate
dome
Gray polyester powder coat
Low temperature, indoor/outdoor
2.2 lb (1.0 kg)
Electrical
Input Voltage
Power Consumption
Video Connector
12 VDC or 24 VAC, ±10%
13 watts or less
BNC
Cable Entry
Pan/Tilt Adjustment
Construction
3X Ø 0.343
THRU
5.50
(13.97)
3.593
(9.126)
1.76
(4.47)
2.36
(5.99)
4.01
(10.19)
1.797
(4.564)
3.79
(9.63)
NOTE: VALUES IN PARENTHESES ARE CENTIMETERS;
ALL OTHERS ARE INCHES.
(Design and product specifications subject to change without notice.)
This equipment contains electrical or electronic components that must be recycled properly to
comply with Directive 2002/96/EC of the European Union regarding the disposal of waste electrical
and electronic equipment (WEEE). Contact your local dealer for procedures for recycling this
equipment.
14
C2495M-A (1/06)
PRODUCT WARRANTY AND RETURN INFORMATION
WARRANTY
Pelco will repair or replace, without charge, any merchandise proved defective in material or workmanship for a period of one year after the date of
shipment.
Exceptions to this warranty are as noted below:
• Five years on FT/FR8000 Series fiber optic products.
• Three years on Genex® Series products (multiplexers, server, and keyboard).
• Three years on Camclosure® and fixed camera models, except the CC3701H-2, CC3701H-2X, CC3751H-2, CC3651H-2X, MC3651H-2, and
MC3651H-2X camera models, which have a five-year warranty.
• Two years on standard motorized or fixed focal length lenses.
• Two years on Legacy®, CM6700/CM6800/CM9700 Series matrix, and DF5/DF8 Series fixed dome products.
• Two years on Spectra®, Esprit®, ExSite™, and PS20 scanners, including when used in continuous motion applications.
• Two years on Esprit® and WW5700 Series window wiper (excluding wiper blades).
• Two years (except lamp and color wheel) on Digital Light Processing (DLP ®) displays. The lamp and color wheel will be covered for a period of
90 days. The air filter is not covered under warranty.
• Eighteen months on DX Series digital video recorders, NVR300 Series network video recorders, Endura™ Series distributed network-based video
products, and TW3000 Series twisted pair transmission products.
• One year (except video heads) on video cassette recorders (VCRs). Video heads will be covered for a period of six months.
• Six months on all pan and tilts, scanners or preset lenses used in continuous motion applications (that is, preset scan, tour and auto scan modes).
Pelco will warrant all replacement parts and repairs for 90 days from the date of Pelco shipment. All goods requiring warranty repair shall be sent freight
prepaid to Pelco, Clovis, California. Repairs made necessary by reason of misuse, alteration, normal wear, or accident are not covered under this
warranty.
Pelco assumes no risk and shall be subject to no liability for damages or loss resulting from the specific use or application made of the Products. Pelco’s
liability for any claim, whether based on breach of contract, negligence, infringement of any rights of any party or product liability, relating to the Products
shall not exceed the price paid by the Dealer to Pelco for such Products. In no event will Pelco be liable for any special, incidental or consequential
damages (including loss of use, loss of profit and claims of third parties) however caused, whether by the negligence of Pelco or otherwise.
The above warranty provides the Dealer with specific legal rights. The Dealer may also have additional rights, which are subject to variation from state
to state.
If a warranty repair is required, the Dealer must contact Pelco at (800) 289-9100 or (559) 292-1981 to obtain a Repair Authorization number (RA), and
provide the following information:
1. Model and serial number
2. Date of shipment, P.O. number, Sales Order number, or Pelco invoice number
3. Details of the defect or problem
If there is a dispute regarding the warranty of a product which does not fall under the warranty conditions stated above, please include a written
explanation with the product when returned.
Method of return shipment shall be the same or equal to the method by which the item was received by Pelco.
RETURNS
In order to expedite parts returned to the factory for repair or credit, please call the factory at (800) 289-9100 or (559) 292-1981 to obtain an authorization
number (CA number if returned for credit, and RA number if returned for repair).
All merchandise returned for credit may be subject to a 20% restocking and refurbishing charge.
Goods returned for repair or credit should be clearly identified with the assigned CA or RA number and freight should be prepaid. Ship to the appropriate
address below.
If you are located within the continental U.S., Alaska, Hawaii or Puerto Rico, send goods to:
Service Department
Pelco
3500 Pelco Way
Clovis, CA 93612-5699
If you are located outside the continental U.S., Alaska, Hawaii or Puerto Rico and are instructed to return goods to the USA, you may do one of the
following:
If the goods are to be sent by a COURIER SERVICE, send the goods to:
Pelco
3500 Pelco Way
Clovis, CA 93612-5699 USA
If the goods are to be sent by a FREIGHT FORWARDER, send the goods to:
Pelco c/o Expeditors
473 Eccles Avenue
South San Francisco, CA 94080 USA
Phone: 650-737-1700
Fax: 650-737-0933
REVISION HISTORY
Manual #
C2495M
C2495M-A
Date
10/05
1/06
Comments
Original version.
Updated factory switch settings for varifocal lens. Updated wiring information.
Pelco, the Pelco logo, Camclosure, Esprit, Genex, Legacy, and Spectra are registered trademarks of Pelco.
Endura and ExSite are trademarks of Pelco.
DLP is a registered trademark of Texas Instruments, Inc.
©Copyright 2006, Pelco.
All rights reserved.
Worldwide Headquarters
3500 Pelco Way
Clovis, California 93612 USA
USA & Canada
Tel: 800/289-9100
Fax: 800/289-9150
International
Tel: 1-559/292-1981
Fax: 1-559/348-1120
www.pelco.com
ISO9001
United States | Canada | United Kingdom | The Netherlands | Singapore | Spain | Scandinavia | France | Middle East