1
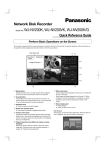
Network Disk Recorder
Quick Reference Guide
WJ-ND400K, WJ-ND400K/G
The Quick Reference Guide provides simple explanations of how to operate this recorder.
■ Network settings
Configure the network settings such as the IP address, subnet mask, etc. for each port.
● Default network settings
LCD
Client PC port
[PT#2]
DHCP
Camera port
[PT#1]
_
OFF
Maintenance port
[PT#3]
_
IP address
192.168.0.250
192.168.1.250
192.168.2.250
Subnet mask
255.255.255.0
_
255.255.255.0
192.168.1.1
255.255.255.0
_
_
80
_
Item
Default gateway
[ESC] button
Arrow buttons
[SET] button
● IP address setup display
[SET]
HTTP port
● How to configure the network settings
Repeat pressing the arrow button (up
or down) until the "IP Address Setup"
indication is displayed. When the "IP
Address Setup" indication is displayed,
press the [SET] button.
• The current selected setup item or
a value will be indicated by the
underscore mark "_".
→ The setup window will be displayed.
• When the underscore mark "_" is
below the ">" indication,
Arrow button (left or right): Select a
port number
Arrow button (up or down): Select a
setup item
Press the [SET] button while the underscore mark (_) is displayed below the ">"
indication.
→ The underscore mark "_" will move
below a setting value and the
editing of the settings became
enabled.
Move the underscore mark below the
number to be edited.
• Arrow button (left or right): Move the
underscore mark "_"
• Arrow button (up or down): Enter a
value
To determine the edited setting, move
the underscore mark below the ">" indication by pressing the [ESC] button.
To display the time and date display
(standby display) again, press the [ESC]
button again.
■ Display the operation window
Display the operation window using a web browser installed on a PC.
Launch a web browser. After the web
browser starts, enter the IP address set
to this recorder in the address box, and
press the enter key.
→ The user authentication window will
be displayed.
Enter the registered user name and
password to log in to the recorder.
• Default
User name: ADMIN
Password: 12345
→ The top page of the operation window
will be displayed.
• When the top page is displayed for
the first time, the install wizard of the
ActiveX control will be displayed.
Follow the instructions of the wizard.
Click the [login] button.
■ User interface on the operation window
w e
r
t
q
y
u
o
i
q [Control] button: Search and play recorded images,
switch the camera channels, etc.
w [Cam. Select] button: Select the camera channel from
which images are to be displayed.
e [Setup] button: Configure the settings of the recorder.
r Status display area: The status of the recorder such as
the recording status, playback status, etc. will be displayed.
t Current time display area: The current time will be displayed.
y Image display area: Live images/recorded images will be
displayed.
u Playback point operation area: Designate a point to be
played or play the latest recorded image.
i [HDD] tab: Control playback operation.
o [CAM] tab: Control the camera operation (zoom, focus,
auto function, etc.).
■ Basic settings
Configure the minimum required settings to operate the recorder.
1. Set the current time
Click the [Setup] button, and then click
the [Quick] button.
→ The "Quick" page will be displayed.
Set the current time and date.
Click the [Set] button just below the
"Time & date" setting.
➜
2. Register cameras
Select a port to which cameras are
connected to detect them.
→ Select the camera port or the client
PC port.
Determine how to assign and register
an IP address of the detected camera.
→ Select [Register the IP address
automatically given by this unit to a
detected camera] or [Register the
IP address set with a detected
camera].
Click the [Registration] button, and then
click the [OK] button.
→ The "Camera registration result"
window will be displayed after the
registration is complete.
Check the registration results, and then
click the [OK] button.
→ Up to 64 cameras can be registered.
• When the desired camera is not
detected or when the settings of a
camera are required to be
changed, configure the settings on
the "NW camera" page.
➜
3. Program
When the camera registration is complete, the recording rate for the live
image transmission and manual recording on the "Program" page will automatically be set to "1 ips".
Click the [Display] button to check the
detailed settings of "Program".
■ Monitor live images
Display live images on a 1-screen or on a 4-screen (multiscreen).
Click the [Cam. Select] button.
→ A list of the registered cameras will
be displayed in the [Cam. Select]
box.
Click the "WJ-ND400" icon, the group
title and the camera title in order.
→ Live images from the selected camera channel will be displayed on a
1-screen.
Click the [Multiscreen select] button.
→ Live images from the cameras (registered as a group) will be displayed on
a 4-screen.
• Each time the [Multiscreen select]
button is clicked, live images from
the registered camera groups will be
displayed.
Display live images from the cameras sequentially (sequential display).
Click the [Cam. Select] button, and then
click the [Sequence] button.
→ Live images from the cameras will
be displayed sequentially.
• The indicator on the [Sequence]
button will light green and the "SEQ"
indication will be displayed in the
status display area.
Click the [Sequence] button again.
→ The indicator on the [Sequence]
button will go off and the sequential
display of live images will stop.
■ Control cameras
It is possible to operate cameras with the panning/tilting function on the [CAM] tab.
q [Zoom]: Zoom in/out the displayed image.
w [Focus]: Adjust the focus point.
e [Auto mode]: Activate the designated auto function of the camera.
r Control buttons: Adjust the camera direction.
Control pad: Panning/tilting speed will be faster if a clicked point
gets farther from the center point of the control pad.
t [Brightness]: Adjust the lens iris (brightness).
y [Preset]: Move the camera to the registered preset position.
[CAM] tab
■ Manual recording
It is possible to record images manually.
Click the [▲] button in the [REC] box on
the [HDD] tab.
→ Repeat clicking the [▲] button until
the [Recording] button and the
[Recording stop] button are displayed.
Click the recording button
→ Recording will start and the [REC]
indicator in the status display area
will light red.
Click the recording stop button
(yellow).
(red).
→ Recording will stop and the [REC]
indicator in the status display area
will disappear.
q
w
e
r
t
y
■ Play recorded images
It is possible to play recorded images.
Select the desired camera channel, and
then click the [PLAY] button.
→ Playback of recorded images will
start.
The
indication will be displayed
in the status display area.
• Playback will resume from the end
point (time and date) of the last
playback.
To stop playback, click the [STOP] button.
→ The
indication will disappear and
live images from the camera will be
displayed.
Click the [Go to date] button on the
playback point operation area.
→ The "Go to date" window will be displayed.
Select the time and date by clicking the
[V] button, and then click the [Play] button.
→ Playback of the corresponding
recorded images will start and the
indication will be displayed in the
status display area.
Playback point
operation area
It is possible to perform playback operation on the [HDD] tab.
q [FF]/[REW]: Perform fast playback or fast reverse playback.
[HDD] Tab
Each time the button is clicked, the playback speed will change as
follows.
(Approx. 4x → 8x → 16x → 32x → 48x → 96x)
w [NEXT RECORD]/[PREV RECORD]: Skip to the next or previous
recorded image and play it.
e [NEXT IMAGE]/[PREV IMAGE]: Display the next or previous frame
when this button is clicked during playback/pausing.
q
w
e
■ Search and play recorded images
It is possible to search and play recorded events (REC event search).
Click the [Control] button, and then click the [Search] button in the
[Search] box.
• The "Select search method" window will be displayed.
Click the [REC event search] button.
• The "REC event search" window will be displayed.
Narrow the search by selecting the recording event type.
Designate the time range ("Start" and "End" of "Time & date"),
"Rec event" and "Camera" to filter the search and then click the
[OK] button.
• The "FILTERING" indication will be displayed in the status
display area, and then the search results will be displayed
on the list display area.
• Click the [All list] button to cancel to start searching.
Click the time & date of the desired recording event. Playback
of recorded images corresponding to the selected recording
event will start.
To stop playback, click the [STOP] button.
Nd0811-0
3TU001890BDA
Printed in China