1
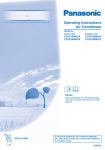
Operating Instructions
Air Conditioner
Model No.
Indoor Unit
CS-E9NKUAW
CS-E12NKUAW
Single Split
Outdoor Unit
CU-E9NKUA
CU-E12NKUA
Multi Split
Outdoor Unit
CU-2E18NBU
CU-5E36QBU
ENGLISH
Operating Instructions
Air Conditioner
2-10
Thank you for purchasing Panasonic Air Conditioner.
Installation instructions attached.
Before operating the unit, read these operating
instructions thoroughly and keep them for future
reference.
FRANÇAIS
Instructions d’utilisation
Climatiseur
11-20
Merci d’avoir acheté un climatiseur Panasonic.
Instructions d’installation en annexe.
Avant d’utiliser le climatiseur, lire ces instructions
d’utilisation et les conserver pour s’y référer dans le
futur.
QUICK GUIDE
GUIDE SOMMAIRE
F569580
SAFETY PRECAUTIONS
TABLE OF CONTENTS
SAFETY PRECAUTIONS
2~3
MULTI AIR CONDITIONER
SYSTEM
To prevent personal injury, injury to others, or property damage, please
comply with the following.
Incorrect operation due to failure to follow instructions below may cause
harm or damage, the seriousness of which is classified as below:
4
INDOOR UNIT
5
REMOTE CONTROL
TROUBLESHOOTING
INFORMATION
6~7
WARNING
This sign warns of death or
serious injury.
CAUTION
This sign warns of injury or
damage to property.
The instructions to be followed are classified by the following symbols:
This symbol denotes an action
that is PROHIBITED.
8~9
These symbols denote an
actions that is COMPULSORY.
10
QUICK GUIDE
BACK COVER
NOTE
The illustrations in this manual are for
explanation purposes only and may
differ from the actual unit. They are
subjected to change without notice for
future improvement.
OPERATION CONDITION
Use this air conditioner under the following
temperature range
Temperature
(°F/°C)
Max.
COOLING
Min.
Max.
HEATING
Min.
Temperature
(°F/°C)
Max.
Min.
Max.
HEATING
Min.
COOLING
Temperature
(°F/°C)
Max.
Min.
Max.
HEATING
Min.
COOLING
2
Indoor
*DBT
*WBT
89.6/32 73.4/23
60.8/16 51.8/11
86.0/30
-/60.8/16
-/-
WARNING
INDOOR UNIT AND OUTDOOR UNIT
This appliance is not intended for use by persons (including
children) with reduced physical, sensory or mental capabilities, or
lack of experience and knowledge, unless they have been given
supervision or instruction concerning use of the appliance by a
person responsible for their safety. Children should be supervised
to ensure that they do not play with the appliance.
Please consult authorized dealer or specialist to clean the internal
parts, repair, install, remove and reinstall the unit. Improper
installation and handling will cause leakage, electric shock or fire.
Confirm to authorized dealer or specialist on usage of specified
refrigerant type. Using of refrigerant other than the specified type
may cause product damage, burst and injury etc.
Do not install the unit in a potentially explosive or flammable
atmosphere. Failure to do so could result in fire.
Do not insert your fingers or other objects into the air
conditioner indoor or outdoor unit, rotating parts may
cause injury.
Do not touch the outdoor unit during lightning, it may cause electric
shock.
Do not expose yourself directly to cold air for a long period to avoid
excess cooling.
Do not sit or step on the unit, you may fall down
accidentally.
Outdoor
CU-E9NKUA, CU-E12NKUA
*DBT
*WBT
114.8/46
78.8/26
5.0/-15
-/75.2/24
64.4/18
5.0/-15
3.2/-16
Outdoor
CU-2E18NBU, CU-5E36QBU
*DBT
*WBT
114.8/46
78.8/26
14.0/-10
-/75.2/24
64.4/18
5.0/-15
3.2/-16
* DBT: Dry bulb temperature
* WBT: Wet bulb temperature
Indoor Unit
Air Inlet
Power
Supply
Remote
Control
Air Outlet
Air Inlet
Outdoor
Unit
Air Outlet
REMOTE CONTROL
Do not allow infants and small children to play
with the remote control to prevent them from
accidentally swallowing the batteries.
POWER SUPPLY
Do not use a modified cord,
joint cord, extension cord or
unspecified cord to prevent
overheating and fire.
To prevent overheating, fire or electric shock:
• Do not share the same power outlet with other
equipment.
• Do not operate with wet hands.
• Do not over bend the power supply cord.
If the supply cord is damage, it must be replaced
by the manufacturer, its service agent or similarly
qualified persons in order to avoid a hazard.
It is strongly recommended to install this unit
using an Earth Leakage Circuit Breaker (ELCB)
or Ground Fault Interrupt (GFCI) or Appliance
Leakage Current Interrupt (ALCI) to prevent electric
shock or fire.
Stop using the product if any abnormality/failure
occurs or turn off the power switch and breaker.
(Risk of smoke/fire/electric shock)
Examples of abnormality/failure
• The ELCB or GFCI or ALCI trip frequently.
• Burning smell is observed.
• Abnormal noise or vibration of the unit is
observed.
• Water leaks from the indoor unit.
• Power cord becomes abnormally hot.
• Fan speed cannot be controlled.
• The unit stops running immediately even if it is
switched on for operation.
• The fan does not stop even if the operation is
stopped.
Contact your local dealer immediately for
maintenance or repair assistance.
This equipment must be earthed to prevent
electrical shock or fire.
Prevent electric shock by switching off the power:
- Before cleaning or servicing.
- Extended non-use.
- Abnormally strong lightning activity.
CAUTION
INDOOR UNIT AND OUTDOOR UNIT
Do not wash the indoor unit with water, benzene,
thinner or scouring powder to avoid damage or
corrosion at the unit.
Do not use for preservation of precise equipment,
food, animals, plants, artwork or other objects. This
may cause quality deterioration, etc.
Do not use any combustible equipment in front of
the airflow outlet to avoid fire propagation.
Do not expose plants or pet directly to airflow to
avoid injury, etc.
Do not touch the sharp aluminium fin,
sharp parts may cause injury.
ENGLISH
WARNING
Do not switch ON the indoor unit when waxing the
floor. After waxing, aerate the room properly before
operating the unit.
Do not install the unit in oily and smoky areas to
prevent damage to the unit.
Do not dismantle the unit for cleaning purpose to
avoid injury.
Do not step onto an unstable bench when cleaning
the unit to avoid injury.
Do not place a vase or water container on the
unit. Water may enter the unit and degrade the
insulation. This may cause an electric shock.
Do not open window or door for long time during
COOL/DRY mode operation.
Ensure drainage pipe is connected properly and
keep drainage outlet clear of gutters, containers
or does not immersed in water to prevent water
leakage.
After a long period of use or use with any
combustible equipment, aerate the room regularly.
After a long period of use, make sure the
installation rack does not deteriorate to prevent the
unit from falling down.
REMOTE CONTROL
Do not use rechargeable (Ni-Cd) batteries.
It may damage the remote control.
To prevent malfunction or damage of the remote
control:
• Remove the batteries if the unit is not going to be
used for a long period of time.
• New batteries of the same type must be inserted
following the polarity stated.
3
MULTI AIR CONDITIONER SYSTEM
Multi Split Outdoor Unit
(CU-2E18NBU, CU-5E36QBU)
DEFINITION
Multi air conditioner systems save space by letting you connect multiple indoor units to a single outdoor unit.
INDOOR UNIT
• It is possible to operate the indoor units individually or simultaneously. The operation mode priority is given to the first unit
that turned on.
• During operation, heating and cooling mode can not be activated at the same time for different indoor unit. The power
indicator blinks to indicate the indoor unit is standing by for different operation mode.
Living room
Multi Split Outdoor Unit
Bedroom
POWER SUPPLY
Models Number
Single Split System
Multi Split System
4
CS-E9NKUAW / CU-E9NKUA
CS-E12NKUAW / CU-E12NKUA
CS-E9NKUAW / CS-E12NKUAW / CU-2E18NBU
CS-E9NKUAW / CS-E12NKUAW / CU-5E36QBU
For complete product features, please refer catalogue.
Time Delay Circuit
Breaker
15 Amps
15 Amps
25 Amps
45 Amps
Rated Volts
208/230V
208/230V
INDOOR UNIT
ENGLISH
• Switch off the power at the circuit breaker before cleaning.
• Do not touch the aluminium fin, sharp parts may cause injury.
CLEANING INSTRUCTIONS
HINT
• Do not use benzene, thinner or scouring powder.
• Use only soap ( pH7) or neutral household detergent.
• Do not use water hotter than 104°F/40°C.
• To ensure optimal performance of the unit, cleaning
maintenance has to be carried out at regular intervals. A
dirty unit may cause malfunction and you may see error
code “H99”. Please consult authorized dealer.
2
4
1
7
9
8
3
5
6
1
INDOOR UNIT
• Wipe the unit gently with a soft, dry cloth.
2
FRONT PANEL
Remove Front Panel
• Raise and pull to remove the front panel.
• Wash gently and dry.
Close Front Panel
• Press down both ends of the front panel to close it securely.
3
REMOTE CONTROL RECEIVER
4
ALUMINIUM FIN
5
HORIZONTAL AIRFLOW DIRECTION LOUVER
• Manually adjustable.
7
Step
Action
1
Press once.
Press and hold until you hear one
2
beep, then release.
Repeat step 2. Press and hold
3
until you hear two beeps, then
release.
Repeat step 3. Press and hold
4
until you hear three beeps, then
release.
Press the button to turn off.
8
6
VERTICAL AIRFLOW DIRECTION LOUVER
Mode
Automatic
Force cooling
Normal cooling
Force heating
AIR PURIFYING FILTER
Vacuum the air purifying filter.
• It is recommended to clean the filter every 6 months.
• Replace the filter every 3 years or replace any damaged filter.
Part no.: CZ-SA20P
9
• Do not adjust by hand.
AUTO OFF/ON BUTTON
• Use when remote control is misplaced or a malfunction occurs.
AIR FILTERS
• Air filter cleaning is required every two weeks.
• Wash/rinse the filters gently with water to avoid damage to the
filter surface.
• Dry the filters thoroughly under shade, away from fire or direct
sunlight.
• Replace any damaged filters.
5
REMOTE CONTROL
Press the remote control’s button
1
• Please be aware of the OFF indication on the remote
control display to prevent the unit from starting/stopping
improperly.
Maximum distance: 26ft/8m
2
INDICATOR
(Green)
TIMER
(Orange)
QUIET
(Orange)
POWERFUL
(Orange)
3
Remote
Control display
AUTO
HEAT
COOL
DRY
FAN
SPEED
AIR
SWING
1
FAN SP
TEMP
6
N
MODE
3
QUIET
2
4
5
POWER
FUL
7
TIMER
ON
1
9
OFF
2
AUTO mode - For your convenience
• During operation mode selection the power indicator
blinks.
• Unit selects operation mode every 10 minutes according
to temperature setting and room temperature (For Single
Split System).
• Unit selects operation mode every 3 hours according to
temperature setting, outdoor and room temperature
(For Multi Split System).
HEAT mode - To enjoy warm air
• Unit takes a while to warm up. The power indicator blinks
during this operation.
COOL mode - To enjoy cool air
• Use curtains to screen off sunlight and outdoor heat to
reduce power consumption during cool mode.
DRY mode - To dehumidify the environment
• Unit operates at low fan speed to give a gentle cooling
operation.
4
TO SELECT FAN SPEED
FAN SPEED
3
5
CANCE
L
AC
SET CH
ECK CL
OCK
TO SELECT OPERATION MODE
• For AUTO, the indoor fan speed is automatically adjusted
according to the operation mode.
SET
8
12
EED
AIR SW
ING
TO SET TEMPERATURE
• Selection range : 60°F ~ 86°F / 16°C ~ 30°C.
• Operating the unit within the recommended temperature
could induce energy saving.
HEAT mode : 68°F ~ 75°F / 20°C ~ 24°C.
COOL mode : 78°F ~ 82°F / 26°C ~ 28°C.
DRY mode : 2°F ~ 4°F / 1°C ~ 2°C lower than room
temperature.
POWER
OFF/O
TO TURN ON OR OFF THE UNIT
RESET
TO ADJUST VERTICAL AIRFLOW DIRECTION
RC
10
11
AIR SWING
• Keeps the room ventilated.
• In COOL/DRY mode, if AUTO is set, the louver swing up/
down automatically.
• In HEAT mode, if AUTO is set, the louver fix at
predetermined position.
6
• This operation reduces airflow noise.
TO REACH TEMPERATURE
QUICKLY
7
• Single Split System: This operation stops automatically
after 20 minutes.
• Multi Split System: Press the button again or turn OFF the
unit to stop this operation.
8
Press and hold for 5 seconds to dim or restore the
unit’s indicator brightness.
9
Press and hold for approximately 10 seconds to
show temperature setting in °F or °C.
10
Press and hold for approximately 5 seconds to show
12-hour (am/pm) or 24-hour time indication.
11
Press to restore the remote control’s default setting.
12
Not used in normal operations.
ENGLISH
TO ENJOY QUIET OPERATION
6
TO SET THE TIMER
• To turn ON or OFF the unit at a preset time.
ON
1
2
SET
OFF
Select ON or
OFF timer
Set the time
• To cancel ON or OFF timer, press
Confirm
ON
or OFF then
press CANCEL.
• When ON Timer is set, the unit may start earlier (up
to 35 minutes) before the actual set time in order to
achieve the desired temperature on time.
• Timer operation is based on the clock set in the
remote control and repeats daily once set. For clock
setting, please refer to Remote Control Preparation
on the back cover.
• If timer is cancelled manually or due to power failure,
you can restore the previous setting (once power is
SET
.
resumed) by pressing
NOTES
QUIET
POWERFUL
,
• Can be activated in all modes and can be cancelled by
pressing the respective button again.
• Cannot be selected at the same time.
7
TROUBLESHOOTING
The following symptoms do not indicate malfunction.
SYMPTOM
Mist emerges from indoor unit.
Water flowing sound during operation.
The room has a peculiar odor.
Indoor fan stops occasionally during automatic fan speed
setting.
Airflow continues even after operation has stopped.
Operation is delayed a few minutes after restarting.
Outdoor unit emits water/steam.
TIMER indicator is always on.
POWER indicator blinks during HEAT mode with no warm
air supply (and louver is closed).
Indoor fan stops occasionally during heating operation.
Power indicator blinks before the unit is switched on.
Cracking sound during operation.
CAUSE
► • Condensation effect due to cooling process.
► • Refrigerant flow inside the unit.
► • This may be due to damp smell emitted by the wall,
carpet, furniture or clothing.
► • This helps to remove the surrounding odours.
► • Extraction of remaining heat from the indoor unit
(maximum 30 seconds).
► • The delay is a protection to the unit’s compressor.
► • Condensation or evaporation occurs on pipes.
► • The timer setting repeats daily once set.
► • The unit is in defrost mode (and AIR SWING is set to
AUTO).
► • To avoid unintended cooling effect.
► • This is a preliminary step in preparation for the operation
when the ON timer has been set.
► • Changes of temperature caused the expansion/
contraction of the unit.
Check the following before calling for servicing.
SYMPTOM
Heating/Cooling operation is not working efficiently.
Noisy during operation.
8
CHECK
► •
•
•
•
► •
•
Set the temperature correctly.
Close all doors and windows.
Clean or replace the filters.
Clear any obstruction at the air inlet and air outlet vents.
Check if the unit has been installed at an incline.
Close the front panel properly.
Remote control does not work.
(Display is dim or transmission signal is weak.)
► • Insert the batteries correctly.
• Replace weak batteries.
The unit does not work.
► • Check if the circuit breaker is tripped.
• Check if timers have been set.
The unit does not receive the signal from the remote
control.
► • Make sure the receiver is not obstructed.
• Certain fluorescent lights may interfere with signal
transmitter. Please consult authorized dealer.
The unit stops and the TIMER indicator blinks.
Use remote control to retrieve error code.
1
Press for 5 seconds.
TIMER
ON
1
SET
OFF
3
Press for 5 seconds to
quit checking.
Press until you hear beep sound, then write
down the error code.
4
Turn the unit off and reveal the error code to
authorised dealer
CANCEL
AC
SET CHECK CLOCK
2
3
2
ENGLISH
TROUBLESHOOTING
RC
RESET
• For certain errors, you may restart the unit for limited operation with 4 beeps when operation starts.
Diagnostic
display
H 00
H 11
H 12
H 14
H 15
H 16
H 19
H 23
H 24
H 27
H 28
H 30
H 32
H 33
H 36
Abnormality/Protection control
No memory of failure
Indoor/outdoor abnormal communication
Indoor unit capacity unmatched
Indoor intake air temperature sensor
abnormality
Compressor temperature sensor
abnormality
Outdoor current transformer (CT)
abnormality
Indoor fan motor mechanism lock
Indoor heat exchanger temperature sensor
abnormality
Indoor heat exchanger temperature sensor
2 abnormality
Outdoor air temperature sensor
abnormality
Outdoor heat exchanger temperature
sensor 1 abnormality
Outdoor discharge pipe temperature
sensor abnormality
Outdoor heat exchanger temperature
sensor 2 abnormality
Indoor/outdoor misconnection abnormality
Outdoor gas pipe temperature sensor
abnormality
Diagnostic
display
H 37
H 38
H 39
H 64
H 97
H 98
H 99
F 11
F 17
F 90
F 91
F 93
F 94
F 95
F 96
F 97
F 98
F 99
Abnormality/Protection control
Outdoor liquid pipe temperature sensor
abnormality
Indoor/outdoor mismatch (brand code)
Abnormal indoor operating unit or standby
units
Outdoor high pressure sensor abnormality
Outdoor fan motor mechanism lock
Indoor high pressure protection
Indoor operating unit freeze protection
4-way valve switching abnormality *1
Indoor standby units freezing abnormality
Power factor correction (PFC) circuit
protection
Refrigeration cycle abnormality
Compressor abnormal revolution
Compressor discharge pressure overshoot
protection
Outdoor cooling high pressure protection
Power transistor module overheating
protection
Compressor overheating protection
Total running current protection
Outdoor direct current (DC) peak detection
*1 For cooling only model, it is the indication when indoor heat exchanger sensor or indoor air intake sensor has abnormality.
9
INFORMATION
FOR SEASONAL INSPECTION AFTER EXTENDED NON-USE
• Check remote control batteries.
• No obstruction at air inlet and air outlet vents.
• Use Auto OFF/ON button to select Cooling/Heating operation.
After 15 minutes of operation, it is normal to have the following
temperature difference between air inlet and air outlet vents:
Cooling: ≥ 14.4°F/8°C
Heating: ≥ 25.2°F/14°C
FOR EXTENDED NON-USE
• Activate Heat mode for 2~3 hours to remove moisture left in the
internal parts thoroughly to prevent mould growth.
• Switch off power at the circuit breaker.
• Remove the remote control batteries.
NON SERVICEABLE CRITERIAS
SWITCH OFF POWER AT THE CIRCUIT
BREAKER then please consult an authorized
dealer under the following conditions:
• Abnormal noise during operation.
• Water/foreign particles have entered the remote
control.
• Water leaks from Indoor unit.
• Circuit breaker switches off frequently.
• Switches or buttons are not functioning properly.
Information for Users on Collection and Disposal of Old Equipment and used Batteries
[Information on Disposal in other Countries outside the European Union]
These symbols are only valid in the European Union. If you wish to discard these items, please
contact your local authorities or dealer and ask for the correct method of disposal.
Note for the battery symbol (bottom two symbol examples):
This symbol might be used in combination with a chemical symbol. In this case it complies with
the requirement set by the Directive for the chemical involved.
Pb
Contact your local hazardous waste disposal hotline.
Models Number
CS-E9NKUAW / CU-E9NKUA
CS-E12NKUAW / CU-E12NKUA
The above listed models have been designed and manufactured to meet ENERGY STAR® criteria for
energy efficiency when matched with appropriate coil components. However, proper refrigerant charge
and proper air flow are critical to achieve rated capacity and efficiency. Installation of this product should
follow the manufacturer’s refrigerant charging and airflow instructions. Failure to confirm proper charge and
airflow may reduce energy efficiency and shorten equipment life.
Federal Communications Commission Interference Statement
This device complies with part 15 of the FCC Rules. Operation is subject to the following two conditions: (1) This device
may not cause harmful interference, and (2) this device must accept any interference received, including interference that
may cause undesired operation.
This equipment has been tested and found to comply with the limits for a Class B digital device, pursuant to part 15 of
the FCC Rules. These limits are designed to provide reasonable protection against harmful interference in a residential
installation. This equipment generates, uses and can radiate radio frequency energy and, if not installed and used in
accordance with the instructions, may cause harmful interference to radio communications. However, there is no guarantee
that interference will not occur in a particular installation. If this equipment does cause harmful interference to radio or
television reception, which can be determined by turning the equipment off and on, the user is encouraged to try to correct
the interference by one or more of the following measures:
• Reorient or relocate the receiving antenna.
• Increase the separation between the equipment and the receiver.
• Connect the equipment to an outlet on a circuit different from that to which the receiver is connected.
• Consult the dealer or an experienced radio/TV technician for help.
FCC Caution: To assure continued compliance, follow the attached installation instructions. Any changes or modifications
not expressly approved by the party responsible for compliance could void the user’s authority to operate this equipment.
Industry Canada Notice
10
This Class B digital apparatus complies with Canadian ICES-003.
QUICK GUIDE/GUIDE SOMMAIRE
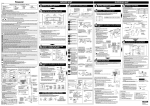
Remote Control Preparation • Préparation de la télécommande
1
2
3
4
5
6
TIMER
ON
1
3
2
CANCEL
AC
SET CHECK CLOCK
AUTO
DRY
Pull out • Dégager le couvercle
2
Insert AAA or R03 batteries (can be used ~ 1 year) •
Mettre en place des piles AAA ou R03 (durée de vie d’environ 1 an)
3
Close the cover • Remettre le couvercle en place
4
Press CLOCK • Appuyer sur CLOCK
5
Set time • Régler l’heure
6
Confirm • Confirmer
SET
OFF
1
1
RC
RESET
MODE
HEAT
COOL
AUTO
HEAT
COOL
DRY
Select the desired mode.
Sélectionner le mode voulu.
FAN
SPEED
AIR
SWING
OFF/ON
2
2
MODE
FAN SPEED
1
OFF/ON
TEMP AIR SWING
Start/stop the operation.
Mettre l’appareil en/hors marche.
QUIET
POWERFUL
TIMER
ON
1
3
3
SET
3
2
OFF
TEMP
CANCEL
AC
SET CHECK CLOCK
RC
RESET
Select the desired temperature.
Régler la température souhaitée.
Panasonic Corporation
Website: http://panasonic.net/
Panasonic Canada Inc.
Website: http://www.panasonic.com
© Panasonic Corporation 2013
Printed in Malaysia
Imprimé en Malaisie
Pour les États-Unis seulement
For inquiries (U.S.A.), please call 1-800-851-1235
F569580
SS1213-1