1
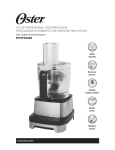
For product questions contact:
Sunbeam Consumer Service
USA : 1.800.334.0759
Canada : 1.800.667.8623
www.oster.com
©2010 Sunbeam Products, Inc. doing business as
Jarden Consumer Solutions. All rights reserved.
Distributed by Sunbeam Products, Inc. doing business as
Jarden Consumer Solutions, Boca Raton, Florida 33431.
Para preguntas sobre los productos llame:
Sunbeam Consumer Service
EE.UU.: 1.800.334.0759
Canadá : 1.800.667.8623
www.oster.com
©2010 Sunbeam Products, Inc. operando bajo el nombre de
Jarden Consumer Solutions. Todos los derechos reservados.
Distribuido por Sunbeam Products, Inc. operando bajo el nombre
de Jarden Consumer Solutions, Boca Raton, Florida 33431.
SPR-110909
P.N. 137281
Printed in China
Impreso en China
4 CUP MINI FOOD PROCESSOR
MINI PROCESADORA DE ALIMENTOS PARA 4 TAZAS
User Guide/ Guía del Usuario:
FPSTFP4010
Safety
Seguridad
How to use
Cómo usar
Cleaning
Cuidado y Limpieza
Warranty
Garantía
www.oster.com
IMPORTANT SAFEGUARDS
When using electrical appliances, basic safety precautions should always be followed
including the following:
1. Read all instructions before use.
2. To protect against risk of electrical shock, do not put food processor in water or any other liquid. This
may cause personal injury or damage to the product.
3. Close supervision is necessary when using this appliance near children.
4. Unplug from outlet when not in use, before putting on or taking off parts and before cleaning.
5. Do not contact moving parts.
6. Do not operate food processor with a damaged cord or plug or after the appliance malfunctions, or
is dropped or damaged in any manner. Return appliance to the nearest authorized service center for
examination, repair or mechanical adjustment.
7. The use of attachments not recommended or sold by the manufacturer may cause fire,
electrical shock or injury.
8. Do not let cord touch hot surfaces or hang over table edges or counters.
9. Do not use your food processor if any part is broken.
10. Do not use outdoors or for commercial purposes.
11. Keep hands and utensils away from moving blades or discs while processing food to reduce the risk
of severe injury to persons or damage to the food processor. A scraper may be used but must be used
only when the food processor is not running.
12. Blade and processing disk are sharp. Handle carefully.
13. To reduce the risk of injury to persons, never place cutting blade on motor base without first putting
container properly in place.
14. Be certain container cover is securely locked in place while operating appliance.
15. Never feed food into food chute by hand, always use the food pusher.
16. Be sure to turn switch to OFF position after each use.
17. Do not attempt to defeat the cover interlock mechanism.
18. Do not use this appliance for other than its intended use.
2
www.oster.com
THIS UNIT IS INTENDED FOR HOUSEHOLD USE ONLY.
This appliance has a polarized alternating current plug (one blade is
wider than the other). To reduce the risk of electric shock, as a safety
feature, this plug will fit in a polarized outlet only one way. If the plug
does not insert fully in the outlet, reverse the plug. If it still fails to fit,
contact a qualified electrician.
DO NOT ATTEMPT TO DEFEAT THIS SAFETY FEATURE.
EXTENSION CORD USE
A short power-supply cord is provided to reduce the risk resulting from
becoming entangled in or tripping over a longer cord. An extension cord
may be used if care is exercised in its use. If an extension cord is used, the
electrical rating of the cord must be at least as great as the electrical rating
of the appliance. The extension cord should be arranged so that it will
not drape over the countertop or tabletop where it can be pulled on by
children or tripped over unintentionally.
SAVE THESE INSTRUCTIONS
Thank you for purchasing the OSTER® 4 Cup Mini Food Processor.
Before you use this product for the first time, please take a few moments to
read these instructions and keep it for reference. Pay particular attention to
the Safety Instructions provided. Please review the product service and
warranty statements. To learn more about Oster® products, please visit us
at www.oster.com or call us at 1-800-334-0759.
www.oster.com
3
LEARNING ABOUT YOUR
4 CUP MINI FOOD PROCESSOR
a
b
c
e
d
f
g
h
i
j
k
l
UNLOCK
LOCK
m
a Food Pusher
b Food Chute
c Flow Insert
d Lid Locking Tab
e Lid with continuous
Flow Chute
f Slice/Shred Disc
g Discharge Disc
h Chopping Blade
4
www.oster.com
i Disc Stem
j Bowl
k Center Post
l Base
m Control Knob
About the Controls
Control Knob
1 Pulse – The control knob must be turned to the left and
held for unit to operate. When released, unit will stop. Use
PULSE for short processing tasks, such as chopping nuts,
raw meats, or vegetables. This lets you check processed
results and control the consistency.
2 On – When the control knob is turned to the right to the
ON position, unit will run continuously until the control knob is turned to OFF
position.
3 Off – Processor should always be left in OFF position when not in use.
Before Using Your Oster® Food Processor
• When unpacking the product and removing packing material, handle the
chopping blade and slice/shred disc carefully: they are very sharp.
• Wash all parts except the Base in hot, soapy water. Rinse them dry.
These parts can also be placed in the dishwasher. Be sure to read the
Care & Cleaning Section of this manual to learn the correct methods
for taking the unit apart and cleaning.
www.oster.com
5
HOW TO:
Using Your Food Processor
NOTE: Do not attempt to chop ice in this food processor; it will damage the bowl
and dull the Chopping Blade. This unit will not whip cream, beat egg whites,
grind coffee beans, spices or other items with high oil content, or slice or shred
hard-cooked eggs, marshmallows, or soft cheeses.
Important: For your protection, this unit has an interlock system. The processor
will not operate unless the bowl is properly locked onto the base and cover
is properly locked onto the bowl. Do not attempt to operate the unit without
the bowl lid and bowl correctly in place. Be sure base is on a flat, dry and clean
surface before you begin processing.
NOTE: Before you begin, PLEASE BE SURE THAT THE ELECTRIC CORD IS
UNPLUGGED.
How to Assemble the Bowl
Slip the bowl over the center post (Figure 1).
Align the bowl handle with the UNLOCK ▲
mark on the base. Twist the bowl handle and
bowl clockwise until it clicks onto the base.
The bowl handle should now align with the
LOCK ▲ mark on the base.
NOTE: There is only one position for the
bowl to lock onto the base. The unit will not
operate if the bowl does not lock onto the base.
Figure 1
How to Lock the Cover
Place the cover with continuous flow chute
onto the bowl with the lid locking tab to
the right of the bowl handle. Twist the cover
clockwise until it clicks onto the bowl. The ▲
mark on the lid should now align with the ▲
mark on the handle (Figure 2).
NOTE: When the cover is locked into position,
the safety mechanism on the cover and bowl
will align. The unit will not operate if the cover
is not locked onto the bowl.
NOTE: BOWL MUST BE LOCKED INTO BASE BEFORE COVER CAN BE
LOCKED INTO POSITION.
6
www.oster.com
UNLOCK
LOCK
Figure 2
How to Chop
NOTE: Make sure the unit is turned OFF and
unplugged before use. Never use hand to
push food into processor. Do not use the
processor continuously for more than 3
minutes at a time.
1 Lock the bowl onto base.
(See “How to assemble the bowl”)
2 Grasp the chopping blade by its stem and
slide it onto the center post. (Figure 3).
3 Place food into bowl.
4 Lock the cover with continuous flow chute
onto bowl. (See “How to Lock the Cover”)
NOTE: Make sure the Flow Insert is pushed
down so food will remain in the bowl. (See
Figure 4).
5 Plug the cord into an electrical outlet.
6 Turn the knob to the ON position for
continuous processing or the PULSE
position for short processing tasks. When
using the PULSE setting, hold the knob in
the PULSE position for about 2–3 seconds
at a time, check results and repeat if
desired.
Figure 3
7 When finished processing, release the
knob, or if you were using Continuous
ON, turn the knob to the OFF position
and allow the chopping blade to stop
rotating.
8 Twist the cover counter-clockwise to
remove.
9 Hold the Chopping Blade by its stem and
remove. Unlock the bowl by turning it
counter- clockwise and lifting off. Empty
the processed food.
NOTE: Chopping Blade is very sharp, use
caution when handling.
www.oster.com
Figure 4
7
How to Slice or Shred
NOTE: Make sure the unit is turned OFF
and unplugged before use. Never use hand
to push food into processor. Do not use
the processor continuously for more than
3 minutes at a time.
Processing Into the 4 Cup Bowl
1 Lock the bowl onto base.
(See “How to assemble the bowl”)
2 Slide the disc stem onto the center post of
the base. With the desired side facing up
(slicing or shredding), push the slice/shred
disc onto disc stem (Figure 5). Use caution
when handling, blades are extremely
sharp.
OCK
Figure 5
3 Lock the cover with continuous flow chute
onto bowl. (See “How to lock the cover”)
NOTE: Make sure the Flow Insert is pushed
down so sliced/shredded food will remain in
the bowl (Figure 6).
4 Plug the cord into an electric outlet.
5 Fill the Food Chute with desired food to
be processed.
6 Turn the knob to the ON position for
continuous processing. Push down with
a light but steady pressure onto the Food
Pusher (Figure 7).
Figure 6
7 When finished processing, turn the knob
to the OFF position and allow the slice/
shred disc to stop rotating. Twist the bowl
lid counter-clockwise to remove.
8 Carefully remove the Shredding Disc,
Discharge Disc and Disc Stem. Unlock the
bowl by turning it counter-clockwise to
remove.
NOTE: Shredding Disc is very sharp, use
caution when handling.
Figure 7
8
www.oster.com
NOTE: Make sure the unit is turned OFF and
unplugged before use. Never use hand to
push food into processor. Do not use the
processor continuously for more than 3
minutes at a time.
Processing Into a Separate Bowl
1 Lock the bowl onto base.
(See “How to assemble the bowl”)
2 Slide the disc stem onto the center post
of the base. Slide the discharge disc over
the disc stem. With the desired side facing
up (slicing or shredding), push the slice/
shred disc onto discharge disc (Figure 8).
Use caution when handling, blades are
extremely sharp.
Figure 8
3 Lock the cover with continuous flow chute
onto bowl. (See “How to lock the cover”)
NOTE: Make sure the Flow Insert is pulled up
so sliced/shredded food will process into the
separate bowl (Figure 9).
4 Place a large, low serving/preparation bowl
under the continuous flow chute to catch
food and spatter (Figure 9). A rimless bowl
works better than bowls with a lip.
5 Plug the cord into an electric outlet.
6 Fill the Food Chute with desired food to
be processed.
Figure 9
7 Turn the knob to the ON position for
continuous processing. Push down with
a light but steady pressure onto the Food
Pusher (Figure 10).
8 When finished processing, turn the knob to
the OFF position and allow the slice/shred
disc to stop rotating. Twist the bowl lid
counter-clockwise to remove.
9 Carefully remove the Shredding Disc,
Discharge Disc and Disc Stem. Unlock the bowl
by turning it counter-clockwise to remove.
Figure 10
NOTE: Shredding Disc is very sharp, use caution when handling.
Food Processing Tips/Liquids
• Hot liquids (less than 176˚F, not boiling) and hot foods can be
processed in the bowl.
www.oster.com
9
Care & Cleaning
NOTE: Do not attempt to sharpen the cutting edges of the chopping blade or the
reversible disc. They are permanently sharpened at the factory and will be ruined
by attempted sharpening.
Cleaning
1 Before cleaning, be sure the unit is switched off and the cord is unplugged.
2 Whenever possible, rinse parts immediately after processing for easy cleanup.
3 Wipe the base, control knob, and feet with a damp cloth and dry thoroughly.
Stubborn spots can be removed by rubbing with a damp cloth and a mild,
non-abrasive cleaner. Do not immerse the base in liquid.
4 All removable parts can be washed by hand or in a dishwasher, top rack.
• If washing by hand, wash in hot sudsy water, rinse, and dry thoroughly. If
necessary, use a small nylon bristle brush to thoroughly clean the bowl and
food chute/cover, this type of brush will also help prevent cutting yourself
on the sharp chopping blade and slice/shred disc.
• If washing in a dishwasher, place removable parts on the top rack
only — not in or near the utensil basket.
5 Do not use rough scouring pads or cleansers on any plastic or metal parts.
6 Do not fill the bowl with boiling water or place any of the parts in boiling
water. Some foods, such as carrots, may temporarily stain the bowl. To remove
stains, make a paste of 2 tablespoons (30ml) baking soda and 1 tablespoon
(15ml) warm water. Apply the paste to the stains and rub with a cloth. Rinse
with sudsy water and dry.
10
www.oster.com
1 Year Limited Warranty
Sunbeam Products, Inc. doing business as Jarden Consumer Solutions or if in Canada, Sunbeam
Corporation (Canada) Limited doing business as Jarden Consumer Solutions (collectively “JCS”) warrants
that for a period of one year from the date of purchase, this product will be free from defects in material
and workmanship. JCS, at its option, will repair or replace this product or any component of the
product found to be defective during the warranty period. Replacement will be made with a new or
remanufactured product or component. If the product is no longer available, replacement may be made
with a similar product of equal or greater value. This is your exclusive warranty. Do NOT attempt to repair
or adjust any electrical or mechanical functions on this product. Doing so will void this warranty.
This warranty is valid for the original retail purchaser from the date of initial retail purchase and is not
transferable. Keep the original sales receipt. Proof of purchase is required to obtain warranty performance.
JCS dealers, service centers, or retail stores selling JCS products do not have the right to alter, modify or
any way change the terms and conditions of this warranty.
This warranty does not cover normal wear of parts or damage resulting from any of the following:
negligent use or misuse of the product, use on improper voltage or current, use contrary to the operating
instructions, disassembly, repair or alteration by anyone other than JCS or an authorized JCS service
center. Further, the warranty does not cover: Acts of God, such as fire, flood, hurricanes and tornadoes.
What are the limits on JCS’s Liability?
JCS shall not be liable for any incidental or consequential damages caused by the breach of any express,
implied or statutory warranty or condition.
Except to the extent prohibited by applicable law, any implied warranty or condition of merchantability
or fitness for a particular purpose is limited in duration to the duration of the above warranty.
JCS disclaims all other warranties, conditions or representations, express, implied, statutory or
otherwise.
JCS shall not be liable for any damages of any kind resulting from the purchase, use or misuse of, or
inability to use the product including incidental, special, consequential or similar damages or loss
of profits, or for any breach of contract, fundamental or otherwise, or for any claim brought against
purchaser by any other party.
Some provinces, states or jurisdictions do not allow the exclusion or limitation of incidental or
consequential damages or limitations on how long an implied warranty lasts, so the above limitations
or exclusion may not apply to you.
This warranty gives you specific legal rights, and you may also have other rights that vary from province
to province, state to state or jurisdiction to jurisdiction.
How to Obtain Warranty Service
In the U.S.A.
If you have any question regarding this warranty or would like to obtain warranty service, please call
1-800-334-0759 and a convenient service center address will be provided to you.
In Canada
If you have any question regarding this warranty or would like to obtain warranty service, please call
1-800-667-8623 and a convenient service center address will be provided to you.
In the U.S.A., this warranty is offered by Sunbeam Products, Inc. doing business as Jarden Consumer
Solutions located in Boca Raton, Florida 33431. In Canada, this warranty is offered by Sunbeam
Corporation (Canada) Limited doing business as Jarden Consumer Solutions, located at 20 B Hereford
Street, Brampton, Ontario L6Y 0M1. If you have any other problem or claim in connection with this
product, please write our Consumer Service Department.
PLEASE DO NOT RETURN THIS PRODUCT TO ANY OF THESE ADDRESSES
OR TO THE PLACE OF PURCHASE
www.oster.com
11
MEDIDAS DE SEGURIDAD IMPORTANTES
Cuando se utilizan aparatos eléctricos, siempre deben tomarse medidas de seguridad básicas,
incluyendo las siguientes:
1. Lea estas instrucciones antes de usar.
2. Para prevenir el riesgo de descargas eléctricas, no sumerja la procesadora de alimentos en
agua u otros líquidos. Ello podría ocasionar lesiones personales o daños al producto.
3. Se requiere supervisión cuando el electrodoméstico se utiliza cerca de niños.
4. Desenchufe el electrodoméstico de la toma de corriente cuando no esté siendo utilizado,
antes de colocar o retirar piezas o antes de limpiarlo.
5. No toque las piezas móviles.
6. No utilice la procesadora de alimentos si el cable de alimentación o el enchufe está dañado,
si el electrodoméstico no funciona correctamente, se ha caído o presenta algún tipo de daño.
Para la inspección, reparación o ajuste mecánico, recurra al centro de mantenimiento
autorizado más cercano.
7. El uso de accesorios no recomendados o no vendidos por el fabricante puede ocasionar incendios,
descargas eléctricas o lesiones.
8. No deje que el cable cuelgue del borde de la mesa o mesada o esté en contacto con
superficies calientes.
9. No utilice la procesadora de alimentos si alguna pieza está dañada.
10. No utilice el electrodoméstico en el exterior o para fines comerciales.
11. Cuando procese alimentos, mantenga las manos y los utensilios alejados de los discos o las
cuchillas móviles para reducir el riesgo de lesiones graves a personas o daños a la procesadora
de alimentos. Puede utilizarse un raspador pero solo cuando la procesadora de alimentos no esté
en funcionamiento.
12. El disco y las cuchillas son filosas. Manipule con cuidado.
13. Para reducir el riesgo de lesiones a personas, nunca coloque la cuchilla o la base del motor sin haber
colocado previamente el recipiente correctamente en su lugar.
14. segúrese de que la tapa del recipiente esté trabada de modo seguro cuando utilice el electrodoméstico.
15. Nunca coloque alimentos en el vertedor de alimentos manualmente; siempre utilice el
empujador de alimentos.
16. Asegúrese de que el interruptor esté en la posición OFF (APAGADO) después de cada uso.
17. Solo utilice este electrodoméstico con el fin para el cual ha sido diseñado.
12
www.oster.com
ESTA UNIDAD HA SIDO DISEÑADA SOLO
PARA USO DOMÉSTICO.
Este electrodoméstico tiene un enchufe de corriente alternativo polarizado (una
paleta es más ancha que la otra). Para reducir el riesgo de descargas eléctricas,
como una función de seguridad, este enchufe encaja en la toma polarizada solo
de una forma. Si el enchufe no se inserta completamente en la toma de corriente,
invierta el enchufe. Si aun no encaja, contacte a un electricista calificado.
NO INTENTE IGNORAR ESTA MEDIDA DE SEGURIDAD
USO DE CABLE DE EXTENSIÓN
Se proporciona un cable de alimentación corto para reducir el riesgo de enredarse
o tropezar con un cable más extenso. Si se utiliza con cuidado, puede emplearse
un cable de extensión. En caso de utilizar un cable de extensión, la capacidad
eléctrica del cable debe ser al menos igual que la capacidad eléctrica nominal
del electrodoméstico. El cable de extensión debe instalarse de modo que
no cuelgue de la mesada o mesa donde pueda ser jalado por niños o pueda
ocasionar tropiezos.
GUARDE ESTAS INSTRUCCIONES
Gracias por adquirir la Procesadora de Alimentos con 11 Elementos
OSTER®. Antes de utilizar este producto por primera vez, por favor lea
estas instrucciones y consérvelas para referencia futura. Preste especial
atención a las Instrucciones de Seguridad. Por favor lea las declaraciones
de garantía y mantenimiento del producto. Para obtener más información
sobre los productos OSTER®, por favor visite www.oster.com o llámenos
al 1-800-334-0759.
www.oster.com
13
CONOZCA SU MINI PROCESADORA
DE ALIMENTOS PARA 4 TAZAS
a
b
c
e
d
f
g
h
i
j
k
l
UNLOCK
LOCK
m
a Empujador de
alimentos
b Entrada para
alimentos
e Tapa con entrada
continua para alimentos
f Disco rebanador/
rallador
i Vástago del disco
j Tazón
k Poste central
c Bloqueador de flujo
g Disco de descarga
l
d Seguro de la tapa
h Hoja de corte
m Perilla de control
14
www.oster.com
Base
Sobre los controles
Control Knob
1 Pulse (Pulso) – La perilla de control se debe girar a la
izquierda y sostenerla para que la unidad se accione.
Cuando se suelte, la unidad se detendrá. Use la opción
PULSO para tareas de procesamiento cortas, como cortar
nueces, verduras o carnes crudas. Esto le permite revisar
los resultados del proceso y controlar la consistencia.
2 On (Encendido) – Cuando la perilla de control se gira a la derecha a la posición
ON, la unidad funcionará continuamente hasta que la perilla se gire a la
posición OFF.
3 Off (Apagado) – Siempre se debe dejar la procesadora en la posición OFF
cuando no esté en uso.
Antes de usar su procesadora de alimentos Oster®
• Cuando desempaque el producto y quite el material de embalaje, maneje con
cuidado la hoja de corte y el disco rebanador/rallador, pues son muy filosas.
• Limpie todas las partes, excepto la base, con agua jabonosa caliente.
Enjuáguelas y séquelas. Estas partes también se pueden lavar en un
lavavajillas. Lea con atención la sección Cuidado y Limpieza para conocer los
métodos correctos para desmontar y limpiar la unidad.a
www.oster.com
15
CÓMO
Usar su procesadora de alimentos
NOTA: No intente moler hielo en esta procesadora de alimentos, pues se dañará
el tazón y se desafilará la hoja de corte. Esta unidad no está diseñada para batir
crema o claras de huevos, moler granos de café, especias ni otros ingredientes
con alto contenido de aceite, tampoco para rebanar o rallar huevos duros,
bombones ni quesos suaves.
Importante: Esta unidad cuenta con un sistema de bloqueo para su protección.
La procesadora no funcionará a menos que el tazón esté bien colocado en
la base y la tapa esté bien ajustada en el tazón. No intente operar la unidad si
la tapa del tazón o el tazón no están bien colocados Compruebe que la base esté
en una superficie plana, seca y limpia antes de empezar a procesar los alimentos.
NOTA: Antes de empezar, COMPRUEBE QUE EL
CABLE ELÉCTRICO ESTÁ DESCONECTADO.
Cómo ensamblar el tazón
Deslice el tazón sobre el poste central (Figura 1).
Alinee el mango del tazón con la marca UNLOCK
▲ (DESBLOQUEAR) de la base. Gire el mango del
tazón y el tazón en el sentido de las manecillas
del reloj hasta que se enganchen en la base.
Figura 1
El mango del tazón deberá ahora estar alineado
con la marca LOCK ▲ (BLOQUEAR) de la base.
NOTA: El tazón solo se puede ajustar en una posición sobre la base. La unidad no
funcionará si el tazón no está bien colocado en la base.
Cómo colocar la tapa
Coloque la cubierta con la entrada de flujo
continuo en el tazón con el seguro de la tapa a
la derecha del mango del tazón. Gire la cubierta
en el sentido contrario a las manecillas del reloj
hasta que se enganche en el tazón. La marca ▲
de la tapa deberá ahora estar alineada con la
marca ▲ del mango (Figura 2).
Figura 2
NOTA: Cuando la cubierta esté asegurada en su posición, se alineará el
mecanismo de seguridad de la cubierta y el tazón. La unidad no funcionará si la
cubierta no está bien colocada en el tazón.
NOTA: EL TAZÓN DEBE ESTAR ASEGURADO EN LA BASE ANTES DE QUE SE PUEDA
ASEGURAR LA TAPA EN SU POSICIÓN.
UNLOCK
16
www.oster.com
LOCK
Cómo picar
NOTA: Compruebe que la unidad está
APAGADA y desconectada antes de usarla.
Nunca use las manos para empujar los
alimentos en la procesadora. No use
la procesadora por más de 3 minutos
continuos a la vez.
1 Enganche el tazón a la base. (Consulte la
sección “Cómo ensamblar el tazón”).
2 Tome el vástago de la hoja de corte y
deslícelo en el poste central. (Figura 3).
3 Ponga la comida en el tazón.
4 Coloque la tapa con entrada continua en
el tazón. (Consulte “Cómo colocar la tapa”)
NOTA: Compruebe que el bloqueador de
flujo esté hasta abajo para que la comida
permanezca en el tazón (Figura 4).
5 Conecte el cable en un tomacorriente.
6 Gire la perilla a la posición ON (ENCENDIDO)
para un procesamiento continuo o en la
posición PULSE (PULSO) para tareas de
procesamiento cortas. Cuando use la
función PULSO, sostenga la perilla en la
posición PULSE (PULSO) por 2 a 3 segundos
a la vez; revise los resultados y repita si es
necesario.
Figura 3
7 Cuando termine el procesamiento, suelte
la perilla, o si está usando la función ON
para procesamiento continuo, gire la
perilla a la posición OFF (APAGADO) y
espere a que la hoja de corte deje de girar.
8 Gire la tapa en sentido contrario a las
manecillas del reloj para quitarla.
9 Tome la hoja de corte por su vástago y
quítela. Libere el tazón girándolo en el
sentido contrario a las manecillas del
reloj y levantándolo. Vacíe los alimentos
procesados.
Figure 4
NOTA: La hoja de corte es muy filosa, tenga
cuidado al manipularla.
www.oster.com
17
Cómo rebanar o rallar
NOTA: Compruebe que la unidad está
APAGADA y desconectada antes de usarla.
Nunca use las manos para empujar los alimentos
en la procesadora. No use la procesadora por
más de 3 minutos continuos a la vez.
Procesamiento con el tazón para 4 tazas
1 Enganche el tazón a la base. (Consulte la
sección “Cómo ensamblar el tazón”).
2 Deslice el vástago del disco en el poste
central de la base. Empuje el disco
rebanador/rallador con el lado deseado
(rebanado o rallado) hacia arriba en el
vástago del disco (Figura 5). Tenga cuidado
cuando los maneje, pues las hojas son muy
filosas.
LOCK
Figura 5
3 Coloque la tapa con entrada con entrada
continua en el tazón. (Consulte “Cómo
colocar la tapa”)
NOTA: Compruebe que el bloqueador de
flujo esté hasta debajo de la tapa para que la
comida rebanada/rallada permanezca en el
tazón (Figura 6).
4 Conecte el cable en un tomacorriente.
5 Llene la entrada de alimentos con los
alimentos que va a procesar.
Figura 6
6 Gire la perilla a la posición ON
ENCENDIDO) para un procesamiento
continuo. Presione levemente y de forma
continua con el empujador de alimentos
(Figura 7).
7 Cuando termine de procesar los alimentos, gire
la perilla a la posición OFF (APAGADO) y espere
a que el disco rebanador/rallador deje de girar.
Gire la tapa del tazón en sentido contrario a las
manecillas del reloj para quitarla.
8 Quite con mucho cuidado el disco rallador,
el disco de descarga y el vástago del disco.
Libere el tazón girándolo en el sentido
contrario a las manecillas del reloj y retírelo.r
NOTA: El disco rallador es muy filoso, tenga
cuidado cuando lo manipule.
18
www.oster.com
Figura 7
NOTA: Compruebe que la unidad está APAGADA y
desconectada antes de usarla. Nunca use las manos
para empujar los alimentos en la procesadora. No
use la procesadora por más de 3 minutos continuos
a la vez.
Procesamiento en un tazón separado
1 Enganche el tazón a la base. (Consulte la
sección “Cómo ensamblar el tazón”).
2 Deslice el vástago del disco en el poste central
de la base. Deslice el disco de descarga en el
vástago del disco. Empuje el disco rebanador/
rallador con el lado deseado (rebanado o
rallado) hacia arriba en el disco de descarga
(Figura 8). Tenga cuidado cuando los maneje,
pues las hojas son muy filosas.
Figura 8
3 Coloque la tapa con entrada continua en el
tazón. (Consulte “Cómo colocar la tapa”)
NOTA: Compruebe que el bloqueador de flujo esté
hacia arriba para que la comida rebanada/rallada se
procese en el tazón separado (Figura 9).
4 Coloque un tazón bajo y grande para servir/
preparar bajo la entrada continua para
alimentos para que caigan ahí los trozos de
comida (Figura 9). Es mejor usar un tazón sin
rebordes.
5 Conecte el cable en un tomacorriente.
Figura 9
6 Llene la entrada de alimentos con los alimentos
que va a procesar.
7 Gire la perilla a la posición ON (ENCENDIDO)
para un procesamiento continuo. Presione
levemente y de forma continua con el
empujador de alimentos (Figura 10).
8 Cuando termine de procesar los alimentos, gire
la perilla a la posición OFF (APAGADO) y espere
a que el disco rebanador/rallador deje de girar.
Gire la tapa del tazón en sentido contrario a las
manecillas del reloj para quitarla.
9 Quite con mucho cuidado el disco rallador, el disco
de descarga y el vástago del disco. Libere el tazón
girándolo en el sentido contrario a las manecillas del reloj y retírelo.
Figura 10
Consejos para procesar alimentos/líquidos
• Los líquidos calientes (menos de 176˚F, 80˚C, sin hervir) y los alimentos calientes
se pueden procesar en el tazón..
www.oster.com
19
Cuidado y limpieza
NOTA: No intente afilar las orillas de corte de la hoja de corte o el disco reversible,
pues tienen un afilado permanente de fábrica que se arruinará si se intentan afilar.
Limpieza
1 Antes de limpiarla, compruebe que la unidad está apagada y que el cable está
desconectado.
2 Siempre que sea posible, enjuague las partes inmediatamente después de
usarlas para limpiarlas con facilidad.
3 Limpie la base, la perilla de control y el pie con un paño húmedo y luego
séquelas completamente. Las manchas difíciles se pueden quitar frotando con
un paño húmedo y un limpiador suave, no abrasivo. No sumerja la base en
líquidos.
4 Todas las partes desmontables se pueden lavar a mano o en la rejilla superior
de un lavavajillas.
• Si lava a mano, hágalo con agua jabonosa caliente, enjuague y seque por
completo. Si es necesario, use un cepillo pequeño con cerdas de nylon para
limpiar completamente el tazón, la tapa y la entrada de alimentos, este tipo
de cepillo también ayudará a evitar que usted se corte con el filo de las hojas
de corte y el disco rebanador/rallador.
• Si usa un lavavajillas, coloque las partes desmontables solo en la rejilla
superior, no dentro ni cerca de la canastilla para utensilios
5 No use fibras ni limpiadores abrasivos en ninguna parte plástica o metálica.
6 No llene el tazón con agua hirviendo ni sumerja ninguna de las partes en
agua hirviendo. Algunos alimentos, como las zanahorias, pueden manchar
temporalmente el tazón. Para quitar las manchas, haga una pasta con 2
cucharadas (30 ml) de bicarbonato de soda y una cucharada (15 ml) de agua
tibia. Aplique la pasta a las manchas y frote con un paño. Enjuague con agua
jabonosa y seque.
20
www.oster.com
Garantía Limitada de 1 Año
Sunbeam Products, Inc. operando bajo el nombre de Jarden Consumer Solutions, o en Canadá, Sunbeam
Corporation (Canada) Limited operando bajo el nombre de Jarden Consumer Solutions, (en forma conjunta,
“JCS”), garantiza que por un período de un año a partir de la fecha de compra, este producto estará libre de
defectos de materiales y mano de obra. JCS, a su elección, reparará o reemplazará este producto o cualquier
componente del mismo que presente defectos durante el período de garantía. El reemplazo se realizará por
un producto o componente nuevo o reparado. Si el producto ya no estuviera disponible, se lo reemplazará
por un producto similar de valor igual o superior. Ésta es su garantía exclusiva. No intente reparar o ajustar
ninguna función eléctrica o mecánica de este producto. Al hacerlo elimínará ésta garantía.
La garantía es válida para el comprador minorista original a partir de la fecha de compra inicial y la misma
no es transferible. Conserve el recibo de compra original. Para solicitar servicio en garantía se requiere
presentar un recibo de compra. Los agentes y centros de servicio de JCS o las tiendas minoristas que venden
productos de JCS no tienen derecho a alterar, modificar ni cambiar de ningún otro modo los términos y las
condiciones de esta garantía.
Esta garantía no cubre el desgaste normal de las piezas ni los daños que se produzcan como resultado de
uso negligente o mal uso del producto, uso de voltaje incorrecto o corriente inapropiada, uso contrario a
las instrucciones operativas, y desarme, reparación o alteración por parte de un tercero ajeno a JCS o a un
Centro de Servicio autorizado por JCS. Asimismo, la garantía no cubre actos fortuitos tales como incendios,
inundaciones, huracanes y tornados.
¿Cuál es el límite de responsabilidad de JCS?
JCS no será responsable de daños incidentales o emergentes causados por el incumplimiento de alguna
garantía o condición expresa, implícita o legal.
Excepto en la medida en que lo prohíba la ley aplicable, cualquier garantía o condición implícita de
comerciabilidad o aptitud para un fin determinado se limita, en cuanto a su duración, al plazo de la garantía
antes mencionada.
JCS queda exenta de toda otra garantías, condiciones o manifestaciones, expresa, implícita, legal o de
cualquier otra naturaleza.
JCS no será responsable de ningún tipo de daño que resulte de la compra, uso o mal uso del producto, o por
la imposibilidad de usar el producto, incluidos los daños incidentales, especiales, emergentes o similares, o
la pérdida de ganancias, ni de ningún incumplimiento contractual, sea de una obligación esencial o de otra
naturaleza, ni de ningún reclamo iniciado contra el comprador por un tercero.
Algunas provincias, estados o jurisdicciones no permiten la exclusión o limitación de los daños incidentales
o emergentes ni las limitaciones a la duración de las garantías implícitas, de modo que es posible que la
exclusión o las limitaciones antes mencionadas no se apliquen en su caso.
Esta garantía le otorga derechos legales específicos y es posible que usted tenga otros derechos que varían
de un estado, provincia o jurisdicción a otro.
Cómo solicitar el servicio en garantía
En los Estados Unidos
Si tiene alguna pregunta sobre esta garantía o desea recibir servicio de garantía, llame al 1-800-334-0759
y podrá obtener la dirección del centro de servicio que le resulte más conveniente
En Canadá
Si tiene alguna pregunta sobre esta garantía o desea recibir servicio de garantía, llame al 1-800-667-8623
y podrá obtener la dirección del centro de servicio que le resulte más conveniente.
En los Estados Unidos, esta garantía es ofrecida por Sunbeam Products, Inc. operando bajo el nombre de
Jarden Consumer Solutions, Boca Ratón, Florida 33431. En Canadá, esta garantía es ofrecida por Sunbeam
Corporation (Canada) Limited operando bajo el nombre de Jarden Consumer Solutions, 20 B Hereford
Street, Brampton, Ontario L6Y 0M1. Si usted tiene otro problema o reclamo en conexión con este producto,
por favor escriba al Departamento de Servicio al Consumidor.
POR FAVOR NO DEVUELVA ESTE PRODUCTO A NINGUNA
DE ESTAS DIRECCIONES NI AL LUGAR DE COMPRA.
www.oster.com
21