1
CONTENTS
CONTENTS
1
ENVIRONMENT AND SAFETY ............................................................................. 3
2
SETTING UP YOUR PHONE .................................................................................. 4
PACK CONTENTS..............................................................................................................................................4
INSTALLING YOUR PHONE...................................................................................................................................4
3
PERSONALIZING YOUR PHONE ......................................................................... 5
TONES AND VOLUMES .......................................................................................................................................5
LOCK THE KEYPAD ............................................................................................................................................5
4
ABOUT YOUR PHONE ......................................................................................... 6
YOUR HANDSET/BASE UNIT BUTTONS ...............................................................................................................6
ICON’S ON YOUR HANDSET’S DISPLAY/LED INDICATOR LIGHT’S ..........................................................................7
5
MAKING CALLS .................................................................................................. 8
MAKE, ANSWER & END A CALL ..........................................................................................................................8
LAST NUMBER REDIAL ........................................................................................................................................8
MUTE THE MICROPHONE/RECALL DURATION........................................................................................................9
CALLER DISPLAY/CALLER WAITING/SWITCH BETWEEN CALLS ..................................................................................9
6
CALLER DISPLAY (CALLER ID) .......................................................................... 10
CHECK, STORE & DELETE ‘CALLER DISPLAY RECORDS’.........................................................................................10
CALLER WAITING.............................................................................................................................................10
SWITCH BETWEEN CALLS ...................................................................................................................................11
7
USING YOUR PHONEBOOK ............................................................................. 11
STORE/DELETE A PHONE NUMBER......................................................................................................................11
MAKE A MEMORY CALL ..................................................................................................................................11
8
ANSWERING MACHINE.................................................................................... 12
RECORD OUT GOING MESSAGE .......................................................................................................................12
SET THE NUMBER OF RINGS/CHECK NUMBER OF RINGS ........................................................................................12
PLAY/DELETE MESSAGES ..................................................................................................................................12
SWITCH ON/OFF THE ANSWERING MACHINE ......................................................................................................13
RECORD A MEMO ..........................................................................................................................................13
SWITCH BETWEEN OGM’S/RETURN TO DEFAULT OGM......................................................................................13
SET CLOCK ....................................................................................................................................................13
VOLUME ADJUSTMENT .....................................................................................................................................13
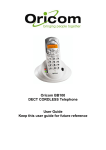
Oricom M5000 Series
9
1.8GHz DECT Cordless phone
REMOTE OPERATION ........................................................................................ 14
SET A REMOTE SECURITY CODE/CHECK YOUR REMOTE SECURITY CODE .................................................................14
SWITCHING ON REMOTELY ...............................................................................................................................14
CHECK YOUR MESSAGES REMOTELY .................................................................................................................14
REMOTE OPERATION KEYS ................................................................................................................................14
(with answering machine)
10 MULTI-HANDSET USE......................................................................................... 15
Multi-handset capable
MAKE AN INTERCOM CALL ..............................................................................................................................15
TRANSFER A CALL BETWEEN HANDSETS/SPEAKERPHONE CALL TO HANDSET/SWITCH BETWEEN CALLS.........................15
CONFERENCE CALLS ......................................................................................................................................16
User Guide
11 REGISTERING NEW HANDSETS ......................................................................... 16
REGISTER A HANDSET/DE-REGISTER ALL HANDSETS..............................................................................................16
PAUSE INSERTION ............................................................................................................................................16
12 APPENDIX.......................................................................................................... 17
TROUBLESHOOTING.........................................................................................................................................17
PRODUCT SPECIFICATIONS...............................................................................................................................18
13 NOTES FOR OPERATION IN NEW ZEALAND .................................................... 19
14 WARRANTY INFORMATION.............................................................................. 20
M5000 User guide.doc
Page 1 of 20
M5000 User guide.doc
Page 2 of 20
SETTING UP YOUR PHONE
1
•
•
•
•
•
•
•
•
•
•
•
•
•
SETTING UP YOUR PHONE
2
Environment and safety
Avoid exposure of this telephone to moisture or liquid.
To prevent electric shock, do not open the handset or base cabinet.
Avoid metallic contact (e.g. metal clips, keys) between the battery contacts and charging
conductors.
There is a slight chance that the telephone could be damaged by an electrical storm. It is
recommended that users unplug the phone from the mains supply and telephone socket during a
storm.
Do not use the handset in an explosive hazard area such as where there is gas leaking.
There is a chance that the telephone could be damaged by an electrical storm. It is recommended
that users unplug the phone from the mains supply and telephone socket during a storm.
Follow the local regulations regarding the disposal of your packing materials, exhausted batteries and
used phone. Wherever possible, recycle those materials.
We advise that this phone should not be used near intensive care medical equipment or by persons
with pacemakers.
Clean with a dry, soft, lint-free cloth. Never use cleaning agents, particularly aggressive solvents.
Because the phone works by sending radio signals between base station and handset, wearers of
hearing aids may experience interference in the form of a humming noise.
Your phone can interfere with electrical equipment such as answering machines, TV and radio sets,
clock radios and computers if placed too close. It is recommended that you position the base unit at
least one metre from such appliances.
This telephone complies with applicable safety requirements for exposure to radio waves (EMR). The
mean power of this telephone does not exceed 20mW limit at which point testing is required.
The earpiece of the handset may attract small metal objects such as staples and pins. Care should
be taken when placing the handset near these items.
CAUTION
This telephone is not designed for making emergency telephone calls when the mains power fails. Always
have a corded phone available to be able to make and receive calls to emergency services if the mains
power fails.
Do not use your telephone during an electrical storm thunderstorm as it is possible to get an electric shock.
Refer to information contained in White pages directory.
CAUTION
Use only the mains adapter supplied with this telephone. Incorrect adapter polarity or voltage can
seriously damage the unit.
Setting up your phone
Pack Contents
Depending on the model you have purchased the pack should contain the items listed below. If any of
these items are missing, please contact the retailer where you purchased the product.
Model number
Number of Base units
Number of Base power supply(s)
Number of Handsets
Number of Handset holder/charger
Number of Handset power supply(s)
Number of phone cords
Handset Battery Cover(s)
Handset AAA Rechargeable Batteries
User guide & Warranty Card
M5000
1
1
1
NIL
NIL
1
1
2
1
M5000+1
1
1
2
1
1
1
2
4
1
M5000+2
1
1
3
2
2
1
3
6
1
M5000+3
1
1
4
3
3
1
4
8
1
Purchasing additional handsets
You may expand your M5000 by adding more M5050 handsets. These may be purchased separately from
the retailer were you purchased the product or direct from Oricom (Australia). The M5000 can
accommodate up to 5 Handsets.
Installing your phone: Oricom M5000
1. Connect the mains adapter to the socket on
the back of the base unit and the mains adapter
to the wall mains supply.
Connect the telephone cord to the phone socket
on the back of the base unit and to the wall
phone socket.
2. Install the 2 rechargeable Ni-MH AAA batteries
(included), observing the correct polarity, in the
battery compartment on the handset.
Slide the battery door firmly into place.
Power supply adaptor for Base unit
Input: 230 Vac 50 Hz 60mA, Output: 9 Vdc 500 mA
Power supply adaptor for Handset Charger
Input: 230 Vac 50 Hz, Output: 6 Vdc 150 mA
3. Place the handset on the base unit and let the
batteries charge for a full 14 hours before using it
for the first time.
CAUTION
THER IS A RISK OF EXPLOSION IF BATTERY IS REPLACED BY AN INCORRECT TYPE.
Never use non-rechargeable batteries; use recommended type supplied with this telephone. Ni-MH
batteries must be disposed of in accordance with the applicable waste disposal regulations.
M5000 User guide.doc
Page 3 of 20
The handset may take some time to power up
when first charged & the display may flash until
the handset is ready. This is normal.
M5000 User guide.doc
Page 4 of 20
SETTING UP YOUR PHONE
3
Personalizing your phone
ABOUT YOUR PHONE
4
About your phone
Your Oricom M5000 Handset
Tones & Volumes
Refer to handset or base unit as suggested below.
PHONE
button
Set your handset’s ringer volume:
1. Press VOLUME button. Display will show current level 1 to 5.
2. Press CALLER DISPLAY
or R
Arrow LEFT /
RECALL
button
button, to select VOLUME level 1(lowest) to 5(loudest).
3. Press VOLUME button to confirm.
Set your handset’s ringer melody:
MEMORY
button
1. Press VOLUME & hold for 3 seconds. Display will show current melody option (1 to 9)
Arrow RIGHT
/ CALLER
DISPLAY
button
DEL
MUTE /
DELETE
button
3. Press VOLUME button to confirm.
Speaker
button
INTERCOM
button
Set your Base unit ringer volume while it is ringing:
Ringer ON /
OFF button
Keypad
LOCK/
UNLOCK
VOLUME
button for
earpiece &
ringer
LAST NUMBER
redial
2. Press CALLER DISPLAY
or Right R
to select MELODY option (1 to 9).
A key feature on the base unit is the hands-free SPEAKER PHONE button. Press when required. For the
volume:
1. Press VOLUME button & Select – to decrease or + to increase volume.
Set your handset’s Earpiece volume while it is talking mode:
1. Press VOLUME button & Display will show current volume level option (1 to 5).
2. Press a numbered key 1, 2, 3, 4, 5 to Select VOLUME.
3. Press VOLUME button to confirm.
Your Oricom M5000 Base Unit
Lock the keypad
You may wish to lock the keypad, so that no buttons are active:
1. Press LOCK button & hold for 3s until
appears on the display
2. To unlock, press LOCK button & hold until
disappears from the display.
Clock
RECALL button
DELETE or
MUTE button
LAST NUMBER
redial / Pause
Fast Forward
or Rewind
Adjust loud
speaker VOLUME
(+ increase or –
decrease)
ON/OFF or
STOP button
SPEAKERHPONE
button & light
PLAY/Pause
Handset locator
CODE
button (on
underside)
RING button
(on underside)
Handset Locator function
Lost your handsets? Just page your handset(s) from the base unit. If you have more than one handset they
will all ring, playing a pager melody.
1.
Press HANDSETLOCATOR button
on the BASE UNIT.
Note
1.
To stop the handset ringing: Press any button or numbered KEY. You will need to do this on all ringing
handsets. If you don’t press a button, the ringing will carry on for 20 seconds.
2.
A handset will not play the paging melody if it is powered off or on an outside call
3.
If an external call comes in, all powered handsets will stop ringing and play the external call melody.
M5000 User guide.doc
Page 5 of 20
M5000 User guide.doc
Page 6 of 20
ABOUT YOUR PHONE
LED Indicator lights
ABOUT YOUR PHONE
5
Base unit’s speaker phone
indicator
1. RED - activated
2. NO COLOUR – Not
activated
Answering machine ON/OFF
indicator
1. NO COLOUR - OFF
2. STEADY - ON
3. FLASHES – Check messages
Making Calls
Note: OUT-OF- RANGE warning
You may be out-of-range with the BASE UNIT if you hear a warning tone or the sound becomes distorted.
Either
1.
Move handset closer within 20 seconds until the tone stops. Otherwise, your call may be cut off.
2.
Reposition & reconnect BASE UNIT to a phone connection closer to where the handset will be used
(an extension lead(s) for power & telephone line may be useful where necessary).
Make a handset call
1. Key number into telephone.
2. If necessary, press MUTE/DEL to clear single digit or Press & Hold MUTE/DEL to clear all digits
Using/charging/
registering indicator
1. Steady - charging
status
2. On/Off light - Talking
status
3. Flash lighting registering status
4. No color - standby
mode
Memory FULL
indicator
1. RED - FULL
2. NO COLOUR –
Messages can
be added
Icons on your handset’s display
3. Press PHONE button to dial.
4. if necessary, press LAST NUMBER REDIAL button.
Note: If using the BASE UNIT to call:
1. Press SPEAKERPHONE button to get a dial tone.
2. Key number into telephone.
3. If necessary, press LAST NUMBER REDIAL button.
Hands-free
speakerphone button
Handset Locator button
Answer a call
The top line shows the handset number. When you make a call it shows the dialled number, call duration
and other icons as shown below.
Handset Number
Call duration
When the handset rings:
1. Press PHONE or SPEAKERPHONE button.
Note: Call timer - The call timer shows the duration of your current call on display.
End a call
Memory / store a number
Caller display
1. Press PHONE or SPEAKERPHONE button. The
Battery level (3 bars fully charged)
Battery low
Last Number Redial (on handset)
Ringer on
Ringer off
To call anyone of the last 3 numbers dialed:
Speakerphone on
Antenna in range/out of range
Key pad locked
Intercom call to another handset
Connected to telephone line.
Flashes – when incoming call or paged
X appears – microphone muted
Use arrows to scroll left or right
symbol disappears from the display.
1. Press LAST NUMBER REDIAL/P button.
2. If necessary, press LAST NUMBER REDIAL/P button again, until you select your number.
3. Press PHONE button to dial.
Note: If using the BASE UNIT to call or use last number redial:
1. Press SPEAKERPHONE button to get a dial tone.
2. Press LAST NUMBER REDIAL/P button.
M5000 User guide.doc
Page 7 of 20
M5000 User guide.doc
Page 8 of 20
ABOUT YOUR PHONE
Mute the microphone
ABOUT YOUR PHONE
6
Caller Display (Caller ID)
To put a call on hold, so that the person on the other end cannot hear you:
1. Press MUTE/DEL button.
Check Caller Display records
is shown on the display
2. To get back the call, press the MUTE/DEL button again.
If you subscribe to this service, you can see the phone numbers of incoming calls before you answer.
Contact your service provider to confirm availability in your area. The M5000 will store the last 20 calls
including: the record number, date, time & phone number (up to 25 digits). Use the
buttons to
scroll so that all the digits are shown.
Recall duration
Recall settings are; Australia (Recall 1)100ms and New Zealand (Recall 2) 600ms. You should not need to
change these settings if you do, in standby mode follow these steps as required:
1. Press & hold LAST NUMBER REDIAL/P button for 2 seconds. Handset will send out a long beep and the LCD
will show "L" (indicating 600ms for NEW ZEALAND).
2. Press & hold LAST NUMBER REDIAL/P button for 2 seconds. Handset will send out a long beep and the LCD
will show "S" (indicating 100ms for AUSTRALIA).
Note:
The display may show ‘- - - -‘, if the caller’s number is:
1.
NOT available (because the network they’re calling from doesn’t support this feature)
2.
the caller has WITHHELD their number
The symbol
will flash if there have been calls unanswered. To check caller display records:
1. Press CALLER DISPLAY button.
will appear if no display records.
2. Press CALLER DISPLAY button again to view caller’s number.
3. Press CALLERDISPLAY
button again to view next record or R
button for previous record.
Store a Caller display record
While the number is shown on the display:
1. Press MEMORY button & hold for 2 seconds unit the
symbol flashes.
2. Key in two-digit memory location number (01 to 50). Confirmation tone when stored.
5. Press MEMORY button to confirm. Will beep once stored.
Delete a caller display record
While the record is shown on display:
1. Press MUTE/DEL button until you will hear a beep.
The display moves to the next Caller Display record for deletion. No more Caller Display records available
when the display shows
Caller waiting
If the service is available in your area you can use the Recall function to answer a second call while you
are on the phone. However this service will need to be turned on with your service provider. For example
to turn on Telstra's Call Waiting service:
1. Press PHONE or SPEAKERPHONE wait for dial tone then Press *43#. You will hear a service tone.
2. Press PHONE or SPEAKERPHONE button.
For more details on this and other services contact your local service provider.
Note: 2nd Caller’s Caller ID (Australia Only)
If you subscribe to the ‘Call Waiting’ or ‘Caller ID’ service. Your phone will display the number of
the 2nd incoming call, for around 30 seconds while you are talking on the phone.
When the handset receives a 2nd call, the caller ID of the caller appears on the display. It will
display for 30 seconds or until you press a key on the phone.
M5000 User guide.doc
Page 9 of 20
M5000 User guide.doc
Page 10 of 20
ABOUT YOUR PHONE
Switch between calls
During a call, you will hear two beeps periodically to notify you of an incoming call. To answer the second
call, during a call:
ABOUT YOUR PHONE
8
Answering machine
Callers can hear one of two pre-recorded messages:
OGM1 - Gives the caller an option to leave a message ‘Please leave a message after the beep’
OGM2 - Gives NO option to leave message ‘Please call later’
You can also record your own personalised greeting (from 3 second to 120 seconds) to callers.
1. Press RECALL button, you will hear dial tone.
2. Press ‘2’ on the key pad.
3. Repeat step’s 1/2 to swap between the two callers.
Record OGM1 (Out going message 1)
1. Press ON-OFF (STOP) button so that the machine says ‘Announcement one’.
7
Using your phonebook
2. Press & hold OGM (REWIND) button until you hear a beep & Answer/Message light flashes.
3. Record your OGM, speaking 15cm from the base unit’s microphone.
You can store up to 50 numbers in each handset’s memory, in memory locations 01 to 50. Each number
can have up to 25 digits.
Store a phone number
5. To change go step 1.
Record OGM2 (Out going message 2)
1. Press ON-OFF (STOP) button twice, so that the machine says ‘Announcement two’.
Ensure the handset is idle (not connected on a call):
1. Press MEMORY button & hold for 2s until the
symbol flashes + cursor (small dash) flashing above it
2. Key in the number you want to store. Press MUTE/DEL button to delete any incorrect digits.
2. Press & hold OGM (REWIND) button until you hear a beep & Answer/Message light flashes.
3. Record your OGM, speaking 15cm from the base unit’s microphone.
4. Press ON-OFF (STOP) button to stop recording, machine plays back recording.
3. Press MEMORY button.
5. To change go step 1.
4. Key in two-digit memory location number (01 to 50). Confirmation tone when stored.
5. Make a note of the location number/phone number for future use.
Set the number of rings
The machine can answer calls after 2 – 9 rings. It has a default setting of 6 rings. If the machine is switched
off it will answer after 15 rings & play OGM2.
Make a memory call
Note: Toll Saver feature
If you check your messages remotely, you can set TOLL SAVER. The machine will
1.
Answer in 2 rings if there are new messages.
2.
Answer in 5 rings if there are NO new messages.
So if it hasn’t answered after 2 rings you can hang up to save the cost of the call.
1. Press MEMORY button.
2. Key in two-digit memory location number (01 to 50).
3. If necessary, use the arrows
4. Press ON-OFF (STOP) button to stop recording, machine plays back recording.
to move location or to select phone number.
4. Press PHONE or SPEAKERPHONE button to dial number.
1. Press and hold RING button (on the underside of the base unit) until you hear ‘Please set rings”.
Delete a number from memory
2. Press FASTFORWARD or REWIND button to change the number of rings.
3. Press RING button again to confirm the number of rings you have set.
You can replace an existing number with a new number or:
1. Press MEMORY button & hold for 2s till the
Check the number of rings
flashes on the display.
1. Press RING button (on the underside of the base).
2. Press MEMORY button again.
3. Key in two-digit memory location number (01 to 50). Confirmation tone once location is free.
Play messages
ANSWER/MESSAGE light flashes when new messages/memos are waiting. To check your messages:
Note: OUT-OF- RANGE warning
If you hear a warning tone or the sound piece becomes faint/distorted you may be out-of-range with
the BASE UNIT. Either
1.
Move handset closer within 20 seconds until the tone stops. Otherwise, your call may be cut off.
2.
Reposition & reconnect BASE UNIT to a phone connection closer to where the handset will be
used.
1. Press PLAY/PAUSE button to play ALL messages/memos.
2. To PAUSE, press PLAY/PAUSE button.
3. Press PLAY/PAUSE button to resume.
4. To REPLAY current message, press PREWIND button.
5. To REPLAY previous message, press PREWIND button twice.
6. To SKIP message, press FASTFORWARD (MEMO) button.
7. To STOP message, press ON-OFF (STOP) button.
M5000 User guide.doc
Page 11 of 20
M5000 User guide.doc
Page 12 of 20
ABOUT YOUR PHONE
ABOUT YOUR PHONE
9
Delete messages
To delete the CURRENT message:
Remote operation
There is a 3 digit code you need to dial home to check your messages. Unless you set a different code (any
3 digits) it is 321.
1. Press PLAY/PAUSE button to play messages/memos.
2. Press & Hold DEL/X button DURING playback for 2 seconds. You will hear ‘message erased’.
To delete ALL messages:
Set a remote security code
1. Press PLAY/PAUSE button to play messages/memos.
1. Press CODE button (on the under side of the base unit) until you hear ‘Please set security code’.
2. Press & Hold DEL/X button AFTER playback, until you hear ‘message erased’.
2. Press FASTFORWARD or REWIND button to set the 1st digit.
Remember to delete messages!
After you have listened to your message, please delete from memory to allow space for new
messages. Memory full light turns ON when capacity is reached.
NOTE: The machine will NOT delete messages you have NOT listened to.
3. Press CODE button again.
4. Repeat steps 2 & 3 to set the 2nd and 3rd digits.
Switching on remotely
If the answering machine is switched off, it will answer your call after 15 rings. To switch on remotely:
Switch on/off the answering machine
1. Press & hold ON-OFF (STOP) button to switch ON and OFF. The ANSWER/MESSAGE light comes on when
the machine is switched on.
1. When you hear your outgoing message, press
2. When you hear a ‘beep’, key in your remote SECURITY CODE.
3. Press
Record a memo
You can record a 3 second to 120 second memo.
to switch on.
Check your remote security code
1. Press CODE button (on the under side of the base unit).
1. Press & hold MEMO (FAST FORWARD) button until you hear a beep.
2. Record your memo, speaking clearly from about 15cm from the base unit’s microphone.
Check your messages remotely
3. Press ON-OFF (STOP) button to stop recording.
1. using a tone dialing phone, dial your HOME NUMBER.
2. When you hear your outgoing message, press
Switch between OGM’s
3. When you hear a ‘beep’, key in your REMOTE SECURITY CODE. You will hear 2 beeps & list of keys you
can press for different functions (Refer below).
1. Press & hold ON-OFF / STOP button to switch between OGM1 & OGM2.
4. Press
Return to the default OGM
to play back your messages.
1. Press ON-OFF (STOP) button.
Note: You must press a key within 10 seconds or the machine will cut off your call.
2. Press OGM (REWIND) button to play the greeting.
If the machine pauses during play back, press
within 10 seconds to continue.
4. While the message is playing, press DEL/X button & hold.
Remote operation keys
Set clock
Operation
On the base unit:
1. Press & hold CLOCK button, until you hear ‘please set day’.
2. Press OGM FASTFORWARD or MEMO REWIND button, to select DAY.
3. Press CLOCK button, you will hear ‘please set time’.
4. Press OGM FASTFORWARD or MEMO REWIND button, to change the HOUR.
5. Press CLOCK button, you will hear current minute setting.
6. Press OGM FASTFORWARD or MEMO REWIND button, to change the MINUTES.
7. Press CLOCK button, you will hear current day & time you have set.
Volumes adjustment on playback/call
On the base unit:
1. Press either – OR + button. Select – to decrease or + to increase volume.
M5000 User guide.doc
Page 13 of 20
Key
Operation
Interrupt & bypass the out going
message(OGM)
Delete message currently
played
Play new messages (after playing
messages you can press again to hear
recorded messages)
Pause & restart during message play
Delete all messages that have
been played
Skip forward to next message
Record a new outgoing
message (OGM1 or OGM2)
Repeat the current message
Switch the machine on
Skip back to previous message
Switch between OGM1 and
OGM2
Stop playback or recording
Switch the machine off
Key
Play outgoing message
(OGM1 or OGM2)
M5000 User guide.doc
Page 14 of 20
ABOUT YOUR PHONE
10
ABOUT YOUR PHONE
Multi-handset use
Your M5000 series phone can have up to 5 handsets registered to 1 base unit. Each handset has its own
number HS-1, HS-2, HS-3, HS-4, & HS-5 shown on the left-hand side of the display. With 2 or more handsets
you can:
•
Make intercom calls while on an outside call
•
Switch between an out side call & intercom call
•
Transfer an out side call from one handset to another
•
Set a 3-way conference call between yourself, an outside call & intercom call
Notes
•
•
•
A maximum of 1x outside call & 2x intercom calls can take place per base unit.
If you make an outside call + another handset is on line = result is a busy tone.
If you make an intercom call + one is already in progress = result is a busy tone.
Make an intercom call
1. Press INTERCOM button. When you hear your outgoing message, press
2. Key the handset number 1, 2, 3, 4, OR 5, you wish to call.
3. On the RECIEVING handset, press PHONE button.
4. To end, press PHONE button on the CALLING handset. The RECIEVING handset will hear a busy tone.
Transfer a call between handsets
1. Press INTERCOM button.
2. Key the handset number 1, 2, 3, 4, OR 5, you wish to call.
3. On the RECIEVING handset, press PHONE button to receive call.
4. Press PHONE button on the CALLING handset to transfer. Call will return back within 90 seconds if
unanswered.
Transfer a speakerphone call to a handset
1. Press HANDSET LOCATOR button on the base unit.
2. Press PHONE button on the handset to pick up call.
Switch between calls
An outside call + an intercom call in progress, you switch between the 2 calls:
1. Press INTERCOM button to speak to outside call, while the intercom call is on hold.
2. Press INTERCOM button again to speak to intercom call, while outside call is on hold.
3. Press PHONE to transfer outside call to the other handset (while connected to intercom call).
Note
•
•
If you press the PHONE button while connected to the outside call, you will
disconnect
If the other handset user presses the PHONE button to hang up, you will be left with
the outside call
M5000 User guide.doc
Page 15 of 20
M5000 User guide.doc
Page 16 of 20
ABOUT YOUR PHONE
12
ABOUT YOUR PHONE
Product specifications
Appendix
Troubleshooting
Problem
Possible cause(s)
Solution(s)
No dial tone
1. The base unit is not properly connected
to electricity or to the telephone sockets.
2. Too far from the base unit.
3. Battery is charge low.
4. Incorrect battery polarity.
1. The handset is not registered. If the
handset is unregistered, it displays
UNREGISTERED.
2. The handset is out of range.
1. The handset is not placed properly on
the base unit or charger.
2. Charging contacts are dirty.
3. The handset tone is turned off.
4. The handset’s power is turned off.
1. Check CONNECTION to power & telephone line.
2. Move handset CLOSER to base unit
3. CHARGE battery
4. RE-INSERT batteries check + & -
Antenna symbol
is flashing.
1. REGISTER the handset
1. Handset battery is defective or faulty.
2. Handset is not placed properly on the
base unit or charger.
3. Battery installed incorrectly.
2. Move CLOSER to the base unit
1. Lift handset off the base unit and carefully
REPOSITION correctly.
2. CLEAN charging contacts with a clean and dry
cloth.
3. Turn ON the handset tone from the Sounds Menu.
4. CHECK batteries
1. REPLACE with new AAA rechargeable NiMH
batteries.
2. CHECK to make sure the battery icon is scrolling
3. RE-INSERT batteries check + & -
1. Battery is uncharged.
2. The product is not properly connected.
1. CHARGE battery.
2. Make sure your product is properly PLUGGED-IN.
1. Interference from nearby electrical
appliance.
2. Base unit is installed in a room with thick
walls.
3. The handset is too far from the base
unit.
1. Service not activated.
1. Try plugging the base unit to a DIFFERENT location
away from the appliance.
2. Install the base unit in a DIFFERENT room OR use
EXTENSION leads.
1. The ringer is off.
2. Too many phones are sharing the same
phone line.
3. Base unit not plugged in
Key pad may be locked
1. Turn ON the ringer.
2. REMOVE some of the phones from the phone
line.
3. Check base unit CONNECTIONS.
UNLOCK keypad
No dial tone on
handset/base
1. Chip in handset has frozen.
2. Chip in base unit has frozen.
1. Use base unit for calls or RESET as shown below
2. RESET phone by disconnecting main power &
remove batteries. Reconnect after 1 minute.
Busy tone + inuse light on
1. Other handset may be still-on
2. Check power to base
1. Check ALL handsets & END calls.
2. Check CONNECTIONS to wall & base
Can’t transfer a
call
1. Handset busy
2. Handset out of range
3. Wrong handset number
1. Check ALL handsets & END calls
2. Move handset CLOSER to base unit
3. Check HANDSET NUMBER
Answering
machine won’t
record
Remote
operation
doesn’t work
1. Message overload
2. Machine not switched on
3. OGM2 selected
1. DELETE old messages to allow new recordings
2. SWITCH-ON answering machine
3. Can only record with OGM1, CHANGE to OGM1.
1. Incorrect security code
2. Some cordless & mobiles do not
generate continuous tones
3. Too long between key pressures, call
cut.
1. CHECK security code or RESET code
2. Need to use a TONE-DIALLING phone
No beep when
handset is
placed on base
unit or charger
Battery icon
remains empty
but handset
charged for 24
hours.
No symbol on
the display.
Bad audio
quality (crackles,
echo, etc.)
Caller ID does
not work
Phone does not
ring when a call
comes in.
Key pad does
not work
3. Move CLOSER to the base unit.
2. Check your SUBSCRIPTION with the SERVICE
provider.
Phone - Oricom M5000
Frequency range
Channel bandwidth
Operating range**
Standby time
Talk time
Temperate range
3. RE-KEY strokes within 10 seconds maximum
M5000 User guide.doc
Page 17 of 20
Compatibility
Multiple handset capability
Multiple bases
Ringer melodies
Specification
1.88 – 1.9 GHz (bandwidth = 20MHz)
1.728 MH
Up to 300m outdoors, up to 50m indoors
Up to 80 hours
Typically 6 hours with speaker OFF/ 1 hour with speaker
ON.
Operating 0 to 40 ˚C
Storage -20 to 60 ˚C
Only GAP compatible DECT phones
Up to 5 handsets per base
Up to 4 bases per handset
5 music & 4 monotone
** Line of sight under optimum conditions
Included Accessories
Battery charge time
Rechargeable Batteries
Mains Power supply for Base unit
Mains Power supply for Charger
14 hours
AAA Ni-MH 1.2V 600mAH
Input: 230 Vac 50 Hz 60mA, Output: 9 Vdc 500 mA
Input: 230 Vac 50 Hz , Output: 6 Vdc 150 mA
Answering Machine
Memory
Redial memory
Recording time
Up to 50 phone numbers (Up to 25 digits per number)
Max 3 phone numbers
11 minutes or max 55 messages
M5000 User guide.doc
Page 18 of 20
ABOUT YOUR PHONE
13
Notes for operation in New Zealand
ABOUT YOUR PHONE
14
The grant of a Telepermit for any item of terminal equipment indicates only that TELECOM has accepted
that the item complies with the minimum conditions for connection to its network. It indicates no
endorsement of the product by TELECOM, nor does it provide any sort of warranty. Above all, it provides
no assurance that any item will work correctly in all respects with another item of Telepermitted equipment
of a different make or model, nor does it imply that any product is compatible with all of TELECOM’s
network services. This device may be subject to ringing or bell tinkle when certain other devices are
connected to the same line. If this occurs, the problem should not be referred to the Telecom Faults
service.
Warranty Information
This product is covered by a 12 month warranty against defective workmanship or parts. The warranty does
not extend to damage caused by misuse, negligence, excessive voltage, faults on the telephone line or
lightning. This guarantee in no way affects your statutory rights. Full details of the warranty are contained in
the enclosed warranty card.
If you feel this product is not working correctly please consult the user guide and ensure that you are using
the product in accordance with the instructions.
Remove all extra telephone equipment and connect only this telephone directly to the telephone socket.
This equipment shall not be set to make automatic calls to the Telecom “111” Emergency Service. This
equipment may not provide for the effective hand-over of a call to another device connected to the
same line.
REN (RN for New Zealand)
The REN (Ringer Equivalence Number) or (RN) is of significance only if you wish to connect more than 1
telephone to your telephone line. A standard telephone line has a maximum REN capacity of 3 (RN of 5). It
is possible to connect 3(5) devices with a REN of 1 (RN of 1) with no degradation to the product’s
performance. Exceeding this limit may cause the volume of the ringer in any phone to decrease or not ring
at all.
If the fault is still present, connect another telephone (if available) to the telephone socket. The results will
show you whether the fault lies with this unit or with the telephone line. If the product is working correctly
the fault is on the telephone line. Please contact your service provider for assistance
To orders spare parts additional handsets, replacement batteries and in case of any technical
issues you may have with product please consult our website for further information or send us an
email for a prompt response to your enquiry. In the unlikely event of a fault developing, please
contact us for assistance. If the product is then found to be faulty you will be asked to return it
directly to us with a copy of the purchase receipt.
Caller ID
Customers using NON-TELECOM toll services should NOT use the ‘dial back’ feature for local calls as this will
incur a charge only the 7 digit number should be dialled. Some of the CID services listed may not be
available in New Zealand.
This telephone is not designed for making emergency telephone calls when the power fails. Make
alternative arrangements for access to emergency services via corded or mobile telephone.
New Zealand
Atlas Gentech (NZ) Limited
Private Bag 14927,
Panmure, Auckland
Customer support
Email: [email protected]
Web: www.atlasgentech.co.nz
Fax: (09) 574 2722
Ph: 0900 50 025 (Toll Call)
M5000 User guide.doc
Page 19 of 20
M5000 User guide.doc
Page 20 of 20