1
Contents
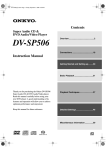
Super Audio CD &
DVD Audio/Video Player
DV-SP504/
DV-SP504E
Overview ..............................................2
Connections ......................................18
Instruction Manual
Getting Started and Setting up ........27
Basic Playback ..................................28
Thank you for purchasing the Onkyo DV-SP504/
DV-SP504E Super Audio CD & DVD Audio/
Video player. Read this manual carefully before
using your new DVD player. A good understanding of its features and operation will allow you to
achieve optimum performance and enjoyment.
Playback Techniques ........................34
Keep this manual for future reference.
Detailed Settings ...............................43
Miscellaneous information ...............55
En
WARNING:
TO REDUCE THE RISK OF FIRE OR ELECTRIC
SHOCK, DO NOT EXPOSE THIS APPARATUS
TO RAIN OR MOISTURE.
CAUTION:
TO REDUCE THE RISK OF ELECTRIC SHOCK,
DO NOT REMOVE COVER (OR BACK). NO
USER-SERVICEABLE PARTS INSIDE. REFER
SERVICING
TO
QUALIFIED
SERVICE
PERSONNEL.
WARNING
AVIS
RISK OF ELECTRIC SHOCK
DO NOT OPEN
RISQUE DE CHOC ELECTRIQUE
NE PAS OUVRIR
The lightning flash with arrowhead symbol, within an
equilateral triangle, is intended to alert the user to the
presence of uninsulated “dangerous voltage” within
the product’s enclosure that may be of sufficient
magnitude to constitute a risk of electric shock to
persons.
The exclamation point within an equilateral triangle is
intended to alert the user to the presence of important
operating and maintenance (servicing) instructions in
the literature accompanying the appliance.
Important Safety Instructions
1.
2.
3.
4.
5.
6.
7.
8.
9.
10.
11.
12.
13.
14.
2
Read these instructions.
Keep these instructions.
Heed all warnings.
Follow all instructions.
Do not use this apparatus near water.
Clean only with dry cloth.
Do not block any ventilation openings. Install in
accordance with the manufacturer’s instructions.
Do not install near any heat sources such as radiators, heat registers, stoves, or other apparatus
(including amplifiers) that produce heat.
Do not defeat the safety purpose of the polarized or
grounding-type plug. A polarized plug has two
blades with one wider than the other. A grounding
type plug has two blades and a third grounding
prong. The wide blade or the third prong are provided for your safety. If the provided plug does not
fit into your outlet, consult an electrician for
replacement of the obsolete outlet.
Protect the power cord from being walked on or
pinched particularly at plugs, convenience receptacles, and the point where they exit from the apparatus.
Only use attachments/accessories specified by the
manufacturer.
Use only with the cart, stand, PORTABLE CART WARNING
tripod, bracket, or table specified by the manufacturer, or
sold with the apparatus.
When a cart is used, use caution when moving the cart/
apparatus combination to
avoid injury from tip-over.
S3125A
Unplug this apparatus during lightning storms or
when unused for long periods of time.
Refer all servicing to qualified service personnel.
Servicing is required when the apparatus has been
damaged in any way, such as power-supply cord or
plug is damaged, liquid has been spilled or objects
have fallen into the apparatus, the apparatus has
been exposed to rain or moisture, does not operate
normally, or has been dropped.
15. Damage Requiring Service
Unplug the apparatus from the wall outlet and refer
servicing to qualified service personnel under the
following conditions:
A. When the power-supply cord or plug is damaged,
B. If liquid has been spilled, or objects have fallen
into the apparatus,
C. If the apparatus has been exposed to rain or
water,
D. If the apparatus does not operate normally by
following the operating instructions. Adjust only
those controls that are covered by the operating
instructions as an improper adjustment of other
controls may result in damage and will often
require extensive work by a qualified technician
to restore the apparatus to its normal operation,
E. If the apparatus has been dropped or damaged in
any way, and
F. When the apparatus exhibits a distinct change in
performance this indicates a need for service.
16. Object and Liquid Entry
Never push objects of any kind into the apparatus
through openings as they may touch dangerous voltage points or short-out parts that could result in a
fire or electric shock.
The apparatus shall not be exposed to dripping or
splashing and no objects filled with liquids, such as
vases shall be placed on the apparatus.
Don’t put candles or other burning objects on top of
this unit.
17. Batteries
Always consider the environmental issues and follow local regulations when disposing of batteries.
18. If you install the apparatus in a built-in installation,
such as a bookcase or rack, ensure that there is adequate ventilation.
Leave 20 cm (8") of free space at the top and sides
and 10 cm (4") at the rear. The rear edge of the shelf
or board above the apparatus shall be set 10 cm (4")
away from the rear panel or wall, creating a flue-like
gap for warm air to escape.
Precautions
1. Recording Copyright—Unless it’s for personal use
only, recording copyrighted material is illegal without the permission of the copyright holder.
2. AC Fuse—The AC fuse inside the unit is not userserviceable. If you cannot turn on the unit, contact
your Onkyo dealer.
3. Care—Occasionally you should dust the unit all
over with a soft cloth. For stubborn stains, use a soft
cloth dampened with a weak solution of mild detergent and water. Dry the unit immediately afterwards
with a clean cloth. Don’t use abrasive cloths, thinners, alcohol, or other chemical solvents, because
they may damage the finish or remove the panel lettering.
4. Power
WARNING
BEFORE PLUGGING IN THE UNIT FOR THE
FIRST TIME, READ THE FOLLOWING SECTION CAREFULLY.
AC outlet voltages vary from country to country.
Make sure that the voltage in your area meets the
voltage requirements printed on the unit’s rear panel
(e.g., AC 230 V, 50 Hz or AC 120 V, 60 Hz).
The power cord plug is used to disconnect this unit
from the AC power source. Make sure that the plug
is readily operable (easily accessible) at all times.
Pressing the [STANDBY/ON] button to select
Standby mode does not fully shutdown the unit. If
you do not intend to use the unit for an extended
period, remove the power cord from the AC outlet.
5. Never Touch this Unit with Wet Hands—Never
handle this unit or its power cord while your hands
are wet or damp. If water or any other liquid gets
inside this unit, have it checked by your Onkyo
dealer.
6. Handling Notes
• If you need to transport this unit, use the original
packaging to pack it how it was when you originally bought it.
• Do not leave rubber or plastic items on this unit
for a long time, because they may leave marks on
the case.
• This unit’s top and rear panels may get warm
after prolonged use. This is normal.
• If you do not use this unit for a long time, it may
not work properly the next time you turn it on, so
be sure to use it occasionally.
• When you’ve finished using this unit, remove all
discs and turn off the power.
7. Installing this Unit
• Install this unit in a well-ventilated location.
• Ensure that there’s adequate ventilation all
around this unit, especially if it’s installed in an
audio rack. If the ventilation is inadequate, the
unit may overheat, leading to malfunction.
• Do not expose this unit to direct sunlight or heat
sources, because its internal temperature may
rise, shortening the life of the optical pickup.
• Avoid damp and dusty places, and places subject
to vibrations from loudspeakers. Never put the
unit on top of, or directly above a loudspeaker.
• Install this unit horizontally. Never use it on its
side or on a sloping surface, because it may cause
a malfunction.
• If you install this unit near a TV, radio, or VCR,
the picture and sound quality may be affected. If
this occurs, move this unit away from the TV,
radio, or VCR.
8. To Obtain a Clear Picture—This unit is a hightech, precision device. If the lens on the optical
pickup, or the disc drive mechanism becomes dirty
or worn, the picture quality may be affected. To
maintain the best picture quality, we recommend
regular inspection and maintenance (cleaning or
worn part replacement) every 1,000 hours of use
depending on the operating environment. Contact
your Onkyo dealer for details.
9. Moisture Condensation
Moisture condensation may damage this unit.
Read the following carefully:
Moisture may condense on the lens of the optical
pickup, one of the most important parts inside this
unit.
• Moisture condensation can occur in the following
situations:
– The unit is moved from a cold place to a warm
place.
– A heater is turned on, or cold air from an air
conditioner is hitting the unit.
– In the summer, when this unit is moved from an
air conditioned room to a hot and humid place.
– The unit is used in a humid place.
• Do not use this unit when there’s the possibility
of moisture condensation occurring. Doing so
may damage your discs and certain parts inside
this unit.
If condensation does occur, remove all discs and
leave this unit turned on for two to three hours. By
this time, the unit will have warmed up and any condensation will have evaporated.
3
Precautions—Continued
10. Region Numbers—The DVD standard uses region
numbers to control how discs can be played around
the world, the world being divided into six regions.
This unit will only play DVD discs that match its
region number, which can be found on its rear panel
(e.g., 1 ,
).
11. About this Manual—This manual explains how to
use all of this unit’s functions. Although the DVD
standard offers many special features, not all discs
use them all, so depending on the disc being played,
this unit may not respond to certain functions. See
the disc’s sleeve notes for supported features.
ALL
This unit contains a semiconductor laser system and is
classified as a “CLASS 1 LASER PRODUCT”. So, to
use this model properly, read this Instruction Manual
carefully. In case of any trouble, please contact the store
where you purchased the unit.
To prevent being exposed to the laser beam, do not try
to open the enclosure.
CAUTION:
CLASS 1M VISIBLE AND INVISIBLE LASER
RADIATION WHEN OPEN. DO NOT VIEW
DIRECTLY WITH OPTICAL INSTRUMENTS.
THIS PRODUCT UTILIZES A LASER. USE OF
CONTROLS OR ADJUSTMENTS OR PERFORMANCE OF PROCEDURES OTHER THAN THOSE
SPECIFIED HEREIN MAY RESULT IN HAZARDOUS RADIATION EXPOSURE.
The label on the right is
applied on the rear panel.
1. This unit is a CLASS 1
LASER PRODUCT and
employs a laser inside the cabinet.
2. To prevent the laser from being exposed, do not remove the
cover. Refer servicing to qualified personnel.
For U.S. models
FCC Information for User
CAUTION:
The user changes or modifications not expressly
approved by the party responsible for compliance could
void the user’s authority to operate the equipment.
NOTE:
This equipment has been tested and found to comply
with the limits for a Class B digital device, pursuant to
Part 15 of the FCC Rules. These limits are designed to
provide reasonable protection against harmful interference in a residential installation.
This equipment generates, uses and can radiate radio
frequency energy and, if not installed and used in accordance with the instructions, may cause harmful interference to radio communications. However, there is no
guarantee that interference will not occur in a particular
installation. If this equipment does cause harmful interference to radio or television reception, which can be
determined by turning the equipment off and on, the
user is encouraged to try to correct the interference by
one or more of the following measures:
• Reorient or relocate the receiving antenna.
• Increase the separation between the equipment and
receiver.
• Connect the equipment into an outlet on a circuit different from that to which the receiver is connected.
• Consult the dealer or an experienced radio/TV technician for help.
For European Models
Declaration of Conformity
We, ONKYO EUROPE
ELECTRONICS GmbH
LIEGNITZERSTRASSE 6,
82194 GROEBENZELL,
GERMANY
declare in own responsibility, that the ONKYO product
described in this instruction manual is in compliance with the
corresponding
technical standards such as EN60065,
EN55013, EN55020 and EN61000-3-2, -3-3.
GROEBENZELL, GERMANY
K. MIYAGI
ONKYO EUROPE ELECTRONICS GmbH
4
Precautions—Continued
Supplied Accessories
For Canadian Models
Make sure you have the following accessories:
NOTE: THIS CLASS B DIGITAL APPARATUS
COMPLIES WITH CANADIAN ICES-003.
For models having a power cord with a polarized plug:
CAUTION: TO PREVENT ELECTRIC SHOCK,
MATCH WIDE BLADE OF PLUG TO WIDE SLOT,
FULLY INSERT.
Modèle pour les Canadien
RC-657DV
Remote controller & 2 batteries (AA/R6)
REMARQUE: CET APPAREIL NUMÉRIQUE DE
LA CLASSE B EST CONFORME À LA NORME
NMB-003 DU CANADA.
Sur les modèles dont la fiche est polarisée:
ATTENTION: POUR ÉVITER LES CHOCS ÉLECTRIQUES, INTRODUIRE LA LAME LA PLUS
LARGE DE LA FICHE DANS LA BORNE CORRESPONDANTE DE LA PRISE ET POUSSER
JUSQU’AU FOND.
For British models
AV cable (RCA) (1.5 m)
Coaxial cable (1.0 m)
Replacement and mounting of an AC plug on the power
supply cord of this unit should be performed only by
qualified service personnel.
IMPORTANT
The wires in the mains lead are coloured in accordance
with the following code:
Blue:
Neutral
Brown: Live
As the colours of the wires in the mains lead of this
apparatus may not correspond with the coloured markings identifying the terminals in your plug, proceed as
follows:
The wire which is coloured blue must be connected to
the terminal which is marked with the letter N or
coloured black.
The wire which is coloured brown must be connected to
the terminal which is marked with the letter L or
coloured red.
cable (0.8 m)
This cable is used to connect the DVD player to other
-compatible Onkyo components for
(Remote
Interactive) control.
To use
, in addition to an
connection, you must
make an analog audio connection (RCA) between the
DVD player and your Onkyo AV receiver.
Power cord (1.8 m, 2 m for Australian model)
IMPORTANT
The plug is fitted with an appropriate fuse. If the fuse
needs to be replaced, the replacement fuse must
approved by ASTA or BSI to BS1362 and have the same
ampere rating as that indicated on the plug. Check for
the ASTA mark or the BSI mark on the body of the fuse.
If the power cord’s plug is not suitable for your socket
outlets, cut it off and fit a suitable plug. Fit a suitable
fuse in the plug.
Power-plug adapter
Only supplied in certain countries. Use this adapter if
your AC outlet does not match with the plug on the DVD
player’s power cord. (Adapter varies from country to
country.)
5
Introduction
Features
Highlights
Dolby*1
Digital, DTS*2
•
• DVD-Video, Video CD, audio CD
• MP3, WMA,*3 JPEG, DivX®*4 (not North American model)
• DVD-Audio and Super Audio CD
• CD-R/RW, DVD-R/RW, and DVD+R/RW compatible
• HDMI*5 digital interface
• 5.1-channel analog audio output
Video
•
•
•
•
•
•
Advanced 108 MHz/14-bit video D/A converter
Component, S-Video, and composite video outputs
Repeat/A-B Repeat/Random/Memory playback
Supports 4:3 and 16:9 aspect ratio TVs
Parental Lock function
Screen Saver function
Audio
• 192 kHz/24-bit D/A converter
• Optical / Coaxial digital output
• VLSC*6 (Vector Linear Shaping Circuitry) on all
channels
• Dynamic Range Control setting
Others
• Adjustable display brightness
• Full-function remote controller
6
*1 Manufactured under license from Dolby Laboratories.
“Dolby”, “Pro Logic” and the double-D symbol are trademarks
of Dolby Laboratories.
*2 “DTS” and “DTS Digital Surround” are registered trademarks
of Digital Theater Systems, Inc.
*3 Windows Media, and the Windows logo are trademarks, or
registered trademarks of
Microsoft Corporation in the
United States and/or other countries.
*4 DivX, DivX Certified, and associated logos are trademarks of
DivX, Inc. and are used under
license.
*5 HDMI, the HDMI logo and
High-Definition Multimedia Interface are trademarks or registered trademarks of HDMI licensing LLC.
*6 VLSC and the VLSC logo are registered trademarks of Onkyo
Corporation.
Contents
Basic Operation
Advanced Operation
Overview
Playback Techniques
Important Safety Instructions .............................. 2
Precautions ......................................................... 3
Supplied Accessories.......................................... 5
Introduction ......................................................... 6
Features .......................................................... 6
Disc Notes....................................................... 8
Before Using the DVD player............................ 11
Installing the Batteries................................... 11
Using the Remote Controller......................... 11
Front & Rear Panels ......................................... 12
Front Panel.................................................... 12
Display .......................................................... 13
Rear Panel .................................................... 14
Remote Controller ......................................... 16
Connections
Connecting the DVD player .............................. 18
AV Cables & Connectors .............................. 18
Video Output/Video Setting Matrix ................ 19
Audio Output/Audio Setting Matrix ................ 19
Before Making Any Connections................... 20
Basic Setup ................................................... 20
Connecting Your TV (video connection) ....... 21
Connecting to an AV Receiver ...................... 22
Connecting
-compatible Components ..... 23
Connecting your HDTV or AV receiver
with an HDMI Input ..................................... 24
Using the Multiroom Control Kits
(North American model only)...................... 25
Connecting the Power/Turning
on the DVD player......................................... 26
Getting Started and Setting up
Initial Setup ....................................................... 27
First Time Setup............................................ 27
Advanced Playback...........................................34
Selecting Chapters/Titles/Tracks/Folders
by Number ..................................................34
Searching by Time.........................................35
Repeat Playback ...........................................36
A-B Repeat Playback ....................................36
Random Playback .........................................37
Memory Playback ..........................................38
Last Memory..................................................39
Zooming.........................................................40
Selecting Camera Angles ..............................40
Selecting Soundtracks...................................41
Selecting Subtitles .........................................41
Displaying Information ...................................42
Detailed Settings
HDMI and Progressive Settings ........................43
Setting the HDMI ...........................................43
Selecting Progressive or Interlaced...............43
Configuring the DVD player...............................44
Using the Onscreen Setup Menus.................45
Picture Menu .................................................46
Audio Menu ...................................................48
Language Menu.............................................50
Display Menu.................................................52
Operation Setting Menu.................................53
Miscellaneous information
Additional information........................................55
Resetting the player.......................................55
Adjusting the Display Brightness ...................55
DVD-Video regions........................................55
Disc Content Organization.............................55
Glossary ............................................................56
Troubleshooting.................................................58
Specifications ....................................................62
Basic Playback
Playing Discs .................................................... 28
Starting, Pausing & Stopping Playback......... 28
Select Next & Previous track/chapter............ 29
Fast Forward & Reverse ............................... 30
Forward Frame-by-Frame Playback ............. 30
Slow-motion Playback................................... 30
Navigating DVD & VCD Disc Menus............. 31
Navigating CDs & Super Audio CDs ............. 31
Navigating MP3, WMA, and DivX Discs........ 32
Viewing a Slideshow of JPEG Images .......... 33
7
Introduction—Continued
Disc Notes
Supported Discs
The DVD player supports the following discs.
Disc
Logo
Format or file type
DVD-Video
*1
DVD-Audio
DVD-Audio
Super Audio
CD
Super Audio CD (single
layer, dual layer, hybrid)
DVD-R*2
DVD-Video, MP3, WMA,
JPEG
DVD-RW*2
DVD-Video, VR format*3,
MP3, WMA, JPEG
About playing copy-controlled CDs
Some copy-controlled CDs may not conform to official
CD standards. They are special discs and may not play
on the DVD player.
Video CD
Including PBC
Function Support
Audio CD*4
PCM
CD-R*2
Audio CD, MP3, WMA,
JPEG, DivX
CD-RW*2
Audio CD, MP3, WMA,
JPEG
JPEG CD
JPEG
– DVD+R/RW –
The DVD player supports DVD+R/RW discs
recorded in the following formats:
• Discs recorded in DVD-Video mode.
• Discs recorded in ISO 9660 Level 2 or Joliet format containing MP3, WMA, or JPEG files.
*1 The DVD player’s region number is printed on the rear panel.
If you attempt to play a disc intended for another region, the
message appears onscreen.
*2 MP3, WMA, and JPEG files are supported on discs recorded in
ISO 9660 Level 2 or Joliet format. (See “MP3/WMA/JPEG
Compatibility” on page 9 for more details.) However, some
CD-R, CD-RW, DVD-R, and DVD-RW discs may not work
properly for any of the following reasons: incomplete disc
finalization, disc burner characteristics, disc characteristics, the
disc is damaged or dirty, the disc contains only a small amount
of data. Discs that contain different types of files, JPEG, MP3,
WMA, DivX, and so on, are not supported. See the manual supplied with your disc burner for more information. Condensation or dirt on the optical pickup lens can also affect playback.
*3 The DVD player does not support DVD-VR discs that use
CPRM (Content Protection for Recordable Media).
*4 Some audio CDs feature copy protection that doesn’t conform
to the official CD standard. Since these are nonstandard discs,
they may not play properly in the DVD player.
8
• The DVD player does not support disc types not listed.
• The DVD player supports 8 cm and 12 cm discs.
• Don’t use discs with an unusual shape, such as those
shown below, because you may damage the DVD
player.
• Don’t use discs that have residue from adhesive tape,
rental discs with peeling labels, or discs with custommade labels or stickers. Doing so may damage the
DVD player and you may not be able to remove the
disc properly.
The following icons are used throughout this manual to
indicate which functions can be used with the various
disc formats and file types.
Icon
Disc format or file type
DVD-V
DVD-Video
DVD-A
DVD-Audio
SACD
Super Audio CD
VCD
Video CD
CD
Audio CD
MP3
MP3 file
WMA
WMA file
JPEG
JPEG file
DivX
DivX® (not North American model)
About this Manual
This manual explains how to use all of the DVD player’s
functions. Although the DVD standard offers many special features, not all discs use them all, so depending on
the disc being played, the DVD player may not respond
to certain functions. See your disc’s sleeve notes for supported features.
When you attempt to use a DVD feature that is
not available, this logo may appear onscreen,
indicating that the feature is not supported by
the current disc or by the DVD player.
Introduction—Continued
MP3/WMA/JPEG Compatibility
About DivX
• The DVD player can play/display MP3, WMA, and
JPEG files recorded on CD-R, CD-RW, DVD-R,
DVD-RW, DVD+R and DVD+RW discs.
• Discs must be in ISO 9660 Level 2 or Joliet format
(folders can be up to eight levels deep). Music files
recorded on discs that use the HFS (hierarchical file
system) cannot be played.
• Discs must be finalized.
• The DVD player can only recognize the first session
on multisession discs.
• You can determine the order in which the DVD player
plays/displays your MP3/WMA songs and JPEG pictures by prefixing file and folder names with a threedigit number. For example 001.Root, 002.Folder, and
so on, and 001.Track.mp3, 002.Track.mp3, and so on.
• Only the first eight characters of folder and track names
(excluding the filename extension) are displayed.
• The folder numbered “001” appears as “ROOT” in the
Disc Navigator.
• The DVD player supports up to 255 folders and up to
255 files per folder.
• If you try to play an incompatible file, the message
“This format cannot be played” appears on the display.
DivX is a compressed digital video format created by the
DivX® video codec from DivXNetworks, Inc. This
player can play DivX video files burned on CD-R discs.
When naming files on a disc prior to burning, keep in
mind that by default they will be played in alphabetical
order.
Note:
• North American models do not support DivX Video.
■ MP3
• MP3 files must be MPEG1 Audio Layer 3 format, 44.1
or 48 kHz, fixed bit-rate.
• MP3 files must have a “.mp3” or “.MP3” filename
extension.
• Variable bit-rates (VBR) from 32 kbps to 320 kbps are
supported. (Playing times may display incorrectly
with VBR.)
DivX video compatibility
• Official DivX® Certified product.
• Plays DivX® 5, DivX® 4, DivX® 3 and DivX® VOD
video content (in compliance with DivX® Certified
technical requirements).
DivX® disc compatibility with this player is limited as
follows:
Playable discs
CD-R
CD-RW not recommended
File system
ISO9660 Level 1, 2, or Joliet
File name
A file name should be in alphabet
and numerals only, and must incorporate “AVI” extension.
e.g. “*****.AVI”
Total number of
folders
Less than 255
Total number of
files
Less than 255
■ WMA
• WMA files must have the copyright option turned off.
• Sampling rates 44.1/48 kHz are supported.
• Variable bit-rates (VBR) from 48 kbps to 192 kbps
(44.1 kHz) and 128 kbps to 192 kbps (48 kHz) are supported. (Playing times may display incorrectly with
VBR.)
• WMA files must have a “.wma” or “.WMA” filename
extension.
■ JPEG
• JPEG files must have a “.jpg” or “.JPG” filename
extension.
• JPEG files must be less than 5 megabytes in size.
• JPEG files up to 5,700 x 3,800 pixels are supported.
About WMA
WMA is an acronym for Windows Media Audio and
refers to an audio compression technology developed by
Microsoft Corporation. WMA content can be encoded
by using Windows Media® Player version 7/7.1 or 8.
9
Introduction—Continued
Handling Discs
Copyright
• Never touch the underside of a disc. Always hold discs
by the edge, as shown.
It is forbidden by law to copy, broadcast, show, broadcast
on cable, play in public, or rent copyrighted material
without permission.
DVD-Video discs are copy-protected, and any recordings made from these discs will be distorted.
This product incorporates copyright protection technology that is protected by method claims of certain U.S.
patents and other intellectual property rights owned by
Macrovision Corporation and other rights owners. Use
of this copyright-protection technology must be authorized by Macrovision Corporation, and is intended for
home and other limited viewing uses only, unless otherwise authorized by Macrovision Corporation. Reverse
engineering or disassembly is prohibited.
Underside
• Never attach adhesive tape or sticky labels to discs.
Cleaning Discs
• For best results, keep your discs clean. Fingerprints
and dust can affect the sound and picture quality and
should be removed as follows. Using a clean soft
cloth, wipe from the center outwards, as shown. Never
wipe in a circular direction.
✔
• To remove stubborn dust or dirt, wipe the disc with a
damp soft cloth, and then dry it with a dry cloth.
• Never use solvent-based cleaning fluids, such as thinner or benzine, commercially available cleaners, or
antistatic sprays intended for vinyl records, because
they may damage the disc.
Storing Discs
• Don’t store discs in places subject to direct sunlight, or
near heat sources.
• Don’t store discs in places subject to moisture or dust,
such as in a bathroom or near a humidifier.
• Always store discs in their cases and vertically. Stacking, or putting objects on unprotected discs may cause
warping, scratches, or other damage.
10
Before Using the DVD player
Installing the Batteries
1
Open the battery compartment, as shown.
Using the Remote Controller
To use the remote controller, point it at the DVD player’s
remote control sensor, as shown below.
Remote control sensor
DVD player
)
30˚
2
3
Insert the two supplied batteries (AA/R6)
in accordance with the polarity diagram
inside the battery compartment.
Close the battery compartment.
Notes:
• If the remote controller doesn’t work reliably, try
replacing both batteries.
• Don’t mix new and old batteries, or different types of
batteries.
• If you intend not to use the remote controller for a long
time, remove the batteries to prevent possible leakage
and corrosion.
• Flat batteries should be removed as soon as possible to
prevent possible leakage and corrosion.
5
.(
30˚
6
m
ft
1
x.
ro
p
Ap
Notes:
• The remote controller may not work reliably if the
DVD player is subjected to bright light, such as direct
sunlight or inverter-type fluorescent lights. Keep this
in mind when installing the DVD player.
• If another remote controller of the same type is used in
the same room, or the DVD player is installed close to
equipment that uses infrared rays, the remote controller may not work reliably.
• Don’t put anything, such as a book, on the remote controller, because the buttons may be pressed inadvertently, thereby draining the batteries.
• The remote controller may not work reliably if the
DVD player is installed in a rack behind colored glass
doors. Keep this in mind when installing the DVD
player.
• The remote controller will not work if there’s an obstacle between it and the DVD player’s remote control
sensor.
11
Front & Rear Panels
For detailed information, refer to the pages in brackets.
Front Panel
1
2
34 5
6
7 8 9
TOP MENU
CU
This button is used to set the DVD player to On or
Standby.
B STANDBY indicator [26]
This indicator lights up when the DVD player is in
Standby.
C RESOLUTION button [43]
This button is used to select the video resolution for
the HDMI output, and select progressive or interlaced scanning.
D HDMI button [43]
This button is used to turn HDMI on or off.
E HDMI indicator [43]
This indicator lights up when a HDMI signal is
being output.
F Disc tray [28]
Discs are loaded here.
G TOP MENU button [31, 33]
With DVD discs, this button displays the main
menu. With a JPEG disc, it displays thumbnails of
the images. With a Video CD, it turns PBC on or off.
H Cursor
/ / / & ENTER buttons [45]
The four cursor buttons located around the central
[ENTER] button are used to navigate DVD-Video
menus and the onscreen setup menus.
The central [ENTER] button is used to start playback of the selected title, chapter, or track and to
confirm settings.
I MENU button [31, 33]
This button is used to display a menu on a DVD or
to open the Disc Navigator when using a JPEG disc.
12
M
R
P
A STANDBY/ON button [26]
L
SETUP
US
P
K
MENU
RSOR
RETURN
S R Q
J
H TO ENTE
O
N
J
(open/close) button [28]
This button is used to open and close the disc tray.
K
(pause) button [28, 30]
This button is used to pause playback.
L
(stop) button [29]
This button is used to stop playback.
M
(play) button [28]
This button is used to start playback.
N Previous/Next
/
buttons [29]
The Previous button is used to select the previous
chapter or track. During playback it selects the
beginning of the current track.
The Next button is used to select the next chapter or
track.
O SETUP button [45]
This button is used to open and close the onscreen
setup menus.
P RETURN button
This button is used to exit the onscreen setup.
Q Remote control sensor [11]
This sensor receives control signals from the remote
controller.
R DISPLAY button [42]
This button is used to display information about the
title, chapter, or track, including the elapsed time,
remaining time, total time, and so on. Press it
repeatedly to display more information.
S DIMMER button [55]
This button is used to adjust the display brightness.
normal
dim
dimmer
Front & Rear Panels—Continued
Display
1
2
3 4
D E F G H
1
D PRO LOGIC indicator
The
D indicator appears when playing Dolby
Digital material. The PRO LOGIC indicator appears
when the DVD player’s Dolby Pro Logic decoder is
on.
2 Disc type indicators
These indicators show the type of disc loaded.
3 TITLE indicator
While stopped, the total number of titles on the current DVD-Video disc is displayed here. During
playback, the number of the current title is displayed.
4 GROUP indicator
While stopped, the total number of groups on the
current DVD-Audio disc is displayed here. During
playback, the number of the current group is displayed.
5 TRACK indicator
This indicator appears while track numbers are
being displayed. While stopped, the total number of
tracks on the current SACD, Video CD, audio CD,
or MP3/WMA disc are displayed. During playback,
the number of the current track is displayed.
6 5.1 CH indicator
This indicator appears when playing 5.1-channel
material.
7 CHP indicator
This indicator appears while the number of the current chapter is being displayed.
8 D.MIX indicator
During multichannel audio playback, indicates that
the output signal has been down mixed from the
original audio source. This is an automatic function
performed by the player in order to present the most
appropriate audio mix to the speakers present in
your system.
56 7 8
9
0 A B C
I
9 RANDOM indicator
This indicator appears when using the Random
function.
0 REMAIN indicator
This indicator appears while the remaining time is
being displayed.
A Repeat
indicator
This indicator appears when A-B playback or repeat
playback is used.
B A-B indicator
These indicators appear when using the A-B Repeat
function.
C Camera angle
indicator
This indicator appears if the DVD-Video disc being
played features multiple camera angles.
D PROGRESSIVE indicator
This indicator appears when progressive video is
being output by the component video output.
E DTS indicator
This indicator appears when playing DTS material.
F Play
indicator
This indicator is shown during playback.
G Pause
indicator
This indicator appears when playback is paused.
H MP3 indicator
This indicator appears when playing an MP3 disc.
I Message & time area
Time information, such as total time, remaining
time, and so on, is displayed here in hours, minutes,
and seconds. Other messages are also displayed.
13
Front & Rear Panels—Continued
Rear Panel
■ North American model
1
2
K
3
4 56 7
89
J
56 7
89
J
56 7
89
J
L
■ European model
1
2
K
M
L
■ Other models
1
2
K
14
L
Front & Rear Panels—Continued
A AUDIO OUTPUT [20, 22, 23]
These jacks make up the multichannel analog audio
output. The FRONT/D.MIX jacks can be connected
to a stereo input on a TV, hi-fi amp, or other component. The 1 and 2 jacks output the same signals, so
use either pair. If you use this connection, in the
Speaker Configuration (page 48), set the Subwoofer, Center Speaker, and Surround Speaker settings to Off, so that 5.1-channel DVD audio is down
mixed into two channels.
If you’re using an AV receiver or surround decoder
with a 5.1-channel analog audio input, use the
FRONT/D.MIX 1 or 2 jacks and the SURR 1 L/R,
CENTER, and SUBWOOFER jacks.
If you’re using an AV receiver or surround decoder
with a 7.1-channel analog audio input, connect the
SURR 2 L/R jacks to your amp’s surround back L/R
jacks, and set the SURR MODE switch to “1+2.”
The SURR 1 and SURR 2 jacks output the same
signals.
B
jack [23]
These
(Remote Interactive) connectors can be
connected to the
connectors on your other
Onkyo AV components for interactive control.
Connecting an
cable only does not make the
system operational. You must also connect the audio
cables as well.
I COAXIAL DIGITAL AUDIO OUTPUT [22]
This coaxial digital audio output can be connected
to a coaxial digital audio input on a hi-fi amp, AV
receiver, or surround sound decoder (Dolby Digital,
DTS) with supplied coaxial cable.
J AC INLET [26]
The supplied power cord is connected here. The
other of the power cord should be connected to a
suitable wall outlet.
K SURR MODE switch [23]
This switch is used to turn the AUDIO OUTPUT
SURR 2 on or off. To use this output, set the switch
to “1+2.” The SURR 2 jacks output the same signals
as the SURR 1 jacks.
L HDMI OUT [24]
This HDMI output can be used to connect a TV or
projector with an HDMI input. This HDMI connector outputs digital audio and digital video.
M AV CONNECTOR (European model only) [21]
This SCART output can be connected to a TV or
projector with a SCART input. This SCART connector outputs 2-channel stereo audio (same signals
as the FRONT/D.MIX jacks), composite video,
S-Video, and RGB video.
C RS 232 (North American model only)
This port is for servicing.
D IR IN/OUT (North American model only) [25]
A commercially available IR receiver can be connected to the IR IN jack, allowing you to control the
DVD player when it's out of sight, for example,
installed in a cabinet.
A commercially available IR emitter can be connected to the IR OUT jack to pass IR (infrared)
remote control signals along to other components.
E S VIDEO OUTPUT [21]
This connector can be used to connect a TV or projector with an S-Video input.
F VIDEO OUTPUT [20]
This RCA connector can be used to connect a TV or
projector with a composite video input.
G COMPONENT VIDEO OUTPUT [21]
These jacks output component video and can be
connected to an component video input on a TV or
projector.
H OPTICAL DIGITAL AUDIO OUTPUT [22]
This optical digital audio output can be connected to
an optical digital audio input on a hi-fi amp, AV
receiver, or surround sound decoder (Dolby Digital,
DTS).
15
Front & Rear Panels—Continued
Remote Controller
A STANDBY button [26]
This button is used to set the DVD player to
Standby.
B ON button [26]
1
2
N
This button is used to turn on the DVD player.
Don’t turn on the DVD player until you’ve completed, and double checked all connections
(pages 20–25).
C Number buttons [34, 35, 53]
3
O
P
Q
4
5
6
7
8
R
S
T
U
V
W
These buttons are used to enter title, chapter, and
track numbers and to enter times for locating specific points in time.
D AUDIO button [41]
This button is used to select foreign language
soundtracks and audio formats (e.g., Dolby Digital
or DTS) on DVD-Video discs.
For Video CDs, you can select left-channel, rightchannel, mix, or stereo.
E SUBTITLE button [41]
This button is used to select subtitles on
DVD-Video discs.
F RANDOM button [37]
X
This button is used with the Random function.
G SLOW
Y
/ buttons [30]
These buttons are used for slow-motion playback.
H Previous/Next
9
J
Z
K
a
L
b
M
c
/
buttons [29]
The Previous button is used to select the previous
chapter or track. During playback it selects the
beginning of the current track.
The Next button is used to select the next chapter or
track.
I Fast Reverse/Fast Forward
/
buttons
[30]
These buttons are used for fast reverse and fast forward.
J Cursor
/ / / buttons [45]
These buttons are used to navigate onscreen menus.
K MENU button [31, 33]
This button is used to display a menu on a DVD or
to open the Disc Navigator when using a JPEG disc.
L TOP MENU button [31, 33]
With DVD discs, this button displays the main
menu. With a JPEG disc, it displays thumbnails of
the images. With a Video CD, it turns PBC on or off.
M ASPECT/ZOOM button [40, 46]
This button is used to change the view mode. Pressing and holding it for a few seconds selects Zoom
mode.
16
Front & Rear Panels—Continued
N OPEN/CLOSE
button [28]
This button is used to open and close the disc tray.
O SEARCH button [34, 35]
This button is used to search for titles, chapters,
groups, folders, tracks, and specific points in time.
P MEMORY button [38]
This button is used with the Memory function.
Q REPEAT button [36]
This button is used to set the Repeat function.
R A-B button [36]
This button is used to set the A-B Repeat function.
S CLR button [34, 35, 39]
This button is used to cancel various functions.
T DISPLAY button [42]
This button is used to display information about the
title, chapter, or track, including the elapsed time,
remaining time, total time, and so on. Press it
repeatedly to display more information.
U ANGLE button [40]
This button is used to select camera angles on
DVD-Video discs.
V LAST MEMORY button [39]
This button is used with the Last Memory function.
W Pause
button [28, 30]
This button is used to pause playback. While playback is paused, pressing this button moves the video
forward one frame at a time.
X Play
button [28]
This button is used to start playback.
Y Stop
button [29]
This button is used to stop playback.
Z ENTER button [45]
This button is used to start playback of the selected
title, chapter, or track, and to confirm settings.
a RETURN button
This button is used to exit the onscreen setup.
b SETUP button [45]
This button is used to open and close the onscreen
setup menus.
c RESOLUTION button [43]
This button is used to select a video resolution for
the HDMI OUT.
17
Connecting the DVD player
AV Cables & Connectors
Video
Cable
Jack
Description
HDMI connections can carry uncompressed, standard or high definition digital video and digital
audio, for the best picture and sound quality.
HDMI
Y
Component
video
Component video separates the luminance (Y) and
color difference signals (PR, PB), providing the best
picture quality. Some TV manufacturers label their
component video inputs differently.
Y
P B / CB
P B / CB
P R / CR
P R / CR
S-Video provides better picture quality than composite video.
S-Video
S VIDEO
Composite
video
(supplied)
Composite video can be found on virtually all TVs,
VCRs, and video equipment.
VIDEO
Scart
(European
model only)
SCART connections carry analog audio and video
(composite, S-Video, RGB) all in one cable.
AV CONNECTOR
Audio
Cable
Jack
Description
Optical digital audio connections provide better
audio quality than analog connections.
Optical digital
OPTICAL
COAXIAL
Coaxial digital
(supplied)
RCA analog audio connectors can be found on virtually all AV components.
L
Analog
(supplied)
Coaxial digital audio connections provide better
audio quality than analog connections.
R
Multichannel
analog audio
cable (RCA)
FRONT/D. MIX
1
18
2
SURR1
CENTER
SUB
WOOFER
This cable carries multichannel analog audio and
it’s typically used to connect DVD players with
individual 5.1 channel analog audio outputs. Several standard analog audio cables can be used
instead of a multichannel cable.
Connecting the DVD player—Continued
Video Output/Video Setting Matrix
The following matrix shows how the video outputs work in relation to the various video settings.
HDMI Output Setting (page 27)
Setting
On (default)
Off
HD Resolution setting (page 43)
Progressive Setting (page 43)
Auto
480p/576p
(default)
720p, 1080i
Progressive
Interlaced
✓
✓
✓*3
No output
No output
Component
✓*1
✓*2
No output
✓*2
✓
S-Video
✓*1
✓
No output
✓
✓
Composite
✓*1
✓
No output
✓
✓
✓*1
✓
No output
✓
✓
Video output
HDMI
SCART*4 (European
model only)
*1
*2
*3
*4
Depending on the native resolution of your TV, you may get no picture.
If your TV doesn’t support progressive scanning, you’ll get no picture.
If your TV doesn’t support the HD Resolution settings of 720p and 1080i, you’ll get no picture.
With the SCART Output Setting, you can choose RGB, S-Video, or composite video for the SCART output. However, when
HDMI is on, you cannot select RGB. Also, when RGB is selected, nothing will be output by the component video output (see
page 48).
Audio Output/Audio Setting Matrixes
■ Digital Audio Output/Audio Setting Matrix
The following matrix shows how the digital audio outputs work in relation to the Digital/HDMI Audio Out setting.
Digital/HDMI Audio Out setting (page 48)
Setting
Digital
audio output
All (default)*a
PCM*a
Off
✓
✓*b
No output
✓
✓*b
No output
HDMI
Digital (optical & coaxial)
Audio from SACDs is not output by the HDMI OUT or optical or coaxial digital audio outputs. It’s only output by the analog
audio outputs. Audio from the multichannel area of a DVD-Audio disc is also only output by the analog audio outputs.
*a If your TV or amp doesn’t support higher sampling rates, set the Linear PCM Out setting to Down Sample On (page 48).
*b Dolby Digital and DTS sources will be converted to PCM. If your TV or amp doesn’t support Dolby Digital and DTS, choose this
option.
■ Analog Audio Output/Audio Setting Matrix
The following matrix shows the recommended audio settings for each analog audio output.
Speaker Configuration (page 48)
Setting
Analog audio output
5.1 channel (default):
Subwoofer: On
Front: Small
Center: Small
Surround: Small
✓*c
2-channel (FRONT/D.MIX)
Multichannel
SCART (European model only)
2 channel:
Subwoofer: Off
Front: Large
Center: Off
Surround: Off
✓
✓*c
For 5.1-channel playback with an SACD, press the [AUDIO] button to select the multichannel area of the disc. For 2-channel playback,
select the 2-channel area.
*c If your TV or multichannel amp has a Dolby Pro Logic decoder built in, by setting the Downmix Setting (page 50) to Lt/Rt,
multichannel sources can be down mixed and output as an Lt/Rt mix.
19
Connecting the DVD player—Continued
Before Making Any Connections
• Read the manuals supplied with your AV components.
• Don’t connect the power cord until you’ve completed
all audio and video connections.
Optical Digital Outputs
The DVD player’s optical digital connectors have a shutter-type cover that opens when an optical plug is
inserted, and closes when it’s removed. Push the plug in
all the way.
Caution: To prevent shutter damage, hold the optical
plug straight when inserting and removing.
RCA AV Connection Color Coding
RCA AV connections are usually color coded: red,
white, and yellow. Use red plugs to connect right-channel audio inputs and outputs (typically labeled “R”). Use
white plugs to connect left-channel audio inputs and outputs (typically labeled “L”). And use yellow plugs to
connect composite video inputs and outputs.
The supplied AV cable is made up of an analog audio
cable and a composite video cable.
Analog audio
Right (red)
Right (red)
Left (white)
Left (white)
Composite video
(Yellow)
(Yellow)
• Push each plug in all the way to
make a good connection (loose
connections can cause noise or
malfunctions).
• To prevent interference, keep
audio and video cables away from
power cords and speaker cables.
Right!
Wrong!
Basic Setup
The setup described here is a basic setup that allows you to play discs using just the cables supplied with the player. In
this setup, stereo audio is played through the speakers in your TV.
AV cable
(Supplied)
L
R
TV
ANALOG
INPUT
VIDEO IN
To power outlet
This player is equipped with copy protection technology. Do not connect this player to your TV via a VCR
using AV cables, as the picture from this player will
not appear properly on your TV. (This player may
also not be compatible with some combination TV/
VCRs for the same reason; refer to the manufacturer
for more information.)
Power cord
(Supplied)
1. Connect the VIDEO OUTPUT and AUDIO OUTPUT FRONT/D.MIX 1 jacks to a set of AV inputs
on your TV.
Use the supplied AV cable (RCA), connecting the
red and white plugs to the audio outputs and the yellow plug to the video output.
See the following page if you want to use other cable
for the video connection.
2. Connect the supplied AC power cord to the AC
INLET, then plug into a power outlet.
20
Connecting the DVD player—Continued
Connecting Your TV
(video connection)
• Connect the DVD player directly to your TV. If you
connect the DVD player through a VCR, TV/VCR
combination, or video selector, the picture may be distorted because DVD-Video discs are usually copy protected.
Using S-Video
If your TV (or other equipment) has an S-Video input,
you can use this instead of the standard (composite) output for a better quality picture.
• Use an S-Video cable (not supplied) to connect the S
VIDEO OUTPUT to an S-Video input on your TV (or
monitor or AV receiver).
Line up the small triangle above the jack with the same
mark on the plug before plugging in.
Compatibility of this unit with progressive-scan TVs.
This player is compatible with progressive video Macro
Vision System Copy Guard.
CONSUMERS SHOULD NOTE THAT NOT ALL
HIGH DEFINITION TELEVISION SETS ARE FULLY
COMPATIBLE WITH THIS PRODUCT AND MAY
CAUSE ARTIFACTS TO BE DISPLAYED IN THE
PICTURE. IN CASE OF 525 OR 625 PROGRESSIVE
SCAN PICTURE PROBLEMS, IT IS RECOMMENDED THAT THE USER SWITCH THE CONNECTION TO THE “STANDARD DEFINITION”
OUTPUT. IF THERE ARE QUESTIONS REGARDING OUR TV SET COMPATIBILITY WITH THIS
MODEL 525p AND 625p DVD PLAYER, PLEASE
CONTACT OUR CUSTOMER SERVICE CENTER.
Using SCART (European model only)
If your TV has a SCART-type AV input, you can use a
SCART cable to connect this player to your TV. This
type of connection carries both the sound and the picture,
so there’s no need to connect up the AUDIO OUTPUT
L/R and VIDEO OUTPUT jacks.
• Use a SCART cable (not supplied) to connect the AV
CONNECTOR to an AV input on your TV.
S VIDEO
TV
S VIDEO IN
Using Component Video
AV CONNECTOR
You can use the component video output instead of the
standard video out jack to connect this player to your TV
(or other equipment).
This will provide better quality picture than S-Video.
• Use a component video cable (not supplied) to connect the COMPONENT VIDEO OUTPUT jacks to a
component video input on your TV (or monitor or AV
receiver).
If you connect the component video output to a TV or
another component that doesn’t support progressive
scanning, be sure to turn off HDMI (see page 43).
You can set the component video output to Progressive
or Interlaced (see page 43).
TV
SCART
Y
This connector can output composite video, S-Video, or
RGB video. The default setting is composite, which
should work with all TVs. Consult the manual that came
with your TV to see if you can use one of the higher quality settings. See page 48 for how to change the video output.
PB
PR
COMPONENT
TV
COMPONENT
VIDEO IN
Y
PB
PR
21
Connecting the DVD player—Continued
Connecting to an AV Receiver
Step 1: Audio Connection
You can connect the DVD player to your AV receiver
using the multichannel analog audio output or one of
the digital audio outputs. In addition, you should also
connect a 2-channel analog audio output for compatibility all certain discs.
Connecting the Analog Output
Connect the FRONT/D.MIX 1 or 2 AUDIO OUTPUT
jacks on this player to a set of analog audio inputs on
your AV receiver with the supplied AV cable (RCA).
The FRONT/D.MIX 1 and 2 jacks output the same signals, so use either pair.
AV receiver
Step 2: Video Connection (See pages 20–21)
You may also want to connect the DVD player’s video
output to your AV receiver and connect the AV
receiver’s video output to a video input on your TV.
You can use any of the DVD player’s video outputs.
Typically, you must use the same type of video cable
to connect your DVD player to your AV receiver as
you do to connect your AV receiver to your TV.
FRONT/D. MIX
FRONT
L
R
1
2
Before Connecting
• Before making any connections, turn off the DVD
player and AV receiver, and disconnect them from the
wall outlets. Failure to do so may result in speaker
damage.
Connection Hints
• To enjoy Dolby Digital or DTS surround sound, you
must connect the DVD player to your AV receiver by
using an optical or coaxial digital audio cable or
HDMI cable. See page 24 for HDMI connection information.
• To record the audio from a CD-R disc to a cassette
deck or CDR recorder that’s connected to the AV
receiver, or if you want to use your AV receiver’s
Zone 2 function, you must connect the DVD player’s
stereo analog audio output to your AV receiver.
• If your AV receiver has an analog multichannel input,
we recommend that you connect it to the DVD
player’s multichannel analog output. This will ensure
that you can enjoy all types of discs, including Dolby
Digital and DTS DVD-Video discs, and DVD-Audio
and SACD discs containing multichannel audio at
higher sampling rates.
Note:
• If you use this connection, in the Speaker Configuration (page 48), set the Subwoofer, Center Speaker, and
Surround Speaker settings to Off, so that multichannel
audio sources are down mixed into two channels.
Connecting the Digital Output
Connect one of the DIGITAL AUDIO OUTPUT jacks
on this player to a digital input on your AV receiver.
A coaxial digital audio cable is supplied with this player.
COAXIAL
OPTICAL
COAXIAL
OPTICAL
Connect one
or the other
AV receiver
If your AV receiver doesn’t support Dolby Digital and
DTS, set the Digital/HDMI Audio Out setting to PCM.
See page 48, and also refer to the operating instructions
that came with your AV receiver.
Note that digital audio is not output when playing SACD
discs.
22
Connecting the DVD player—Continued
Connecting the Multichannel Analog
Output
Connecting
Components
-compatible
Connect the DVD player’s FRONT/D.MIX 1 or 2,
SURR 1, CENTER, and SUBWOOFER jacks to the
multichannel analog audio input on your AV receiver.
You can use three stereo audio cables for this.
FRONT/D. MIX
REMOTE
CONTROL
1
AUDIO OUTPUT
ANALOG
SURR1 CENTER
2
FRONT/D. MIX
IN
L
1
2
SUB
WOOFER
R
REMOTE
CONTROL
FRONT
R
SUB
L
CENTER
AV receiver
SURR
AV receiver
■ If Your AV Receiver has a 7.1-channel Analog
Audio Input
Connect the DVD player’s SURR 1 jacks to your AV
receiver’s surround input jacks, and connect the
SURR 2 jacks to your AV receiver’s surround back
input jacks. The SURR 1 and SURR 2 outputs output
the same signals.
When you make this connection, set the SURR MODE
switch to “1+2.”
If you use this connection, the output level will be
reduced by 3 dB (i.e., the volume level will be reduced
slightly).
• The remote controller supplied with Onkyo AV
receiver or amplifiers can be used to control the DVD
player.
• The function of the upper and lower
connectors
are the same. Connect to either one.
• To use
, in addition to an
connection, you must
also make an analog audio connection (RCA) between
the DVD player and your other
-capable components.
23
Connecting the DVD player—Continued
Connecting your HDTV or AV
receiver with an HDMI Input
This section shows how to connect the DVD player to a
AV receiver, HDTV, or projector that has an HDMI input
socket.
What is HDMI?
HDMI (High Definition Multimedia Interface) is a new
connection format that can carry uncompressed, standard or high definition digital video and digital audio.
Until now, several separate video and audio cables have
been required to connect AV components together. With
HDMI, a single cable is all that’s necessary to achieve
the best picture and audio quality.
HDMI video is compatible with DVI (Digital Visual
Interface). To send HDMI video to a DVI input requires
an HDMI-to-DVI cable. The DVD player supports
HDCP (High-bandwidth Digital Content Protection),
and for an HDMI-to-DVI connection to work, the other
component must also support it. Note that this may not
work with some DVI components.
Using HDMI
Use the HDMI cable (not supplied) to connect the DVD
player’s HDMI OUT to an HDMI input on your AV
receiver. Alternatively, you can connect the DVD player
directly to the HDMI input on your TV.
Signal flow
HDMI
HDMI
IN
HDMI cable
(not supplied)
HDTV,
projector
or
AV receiver
HDTV,
projector
24
HDMI
IN
HDMI
Notes:
• The DVD player supports HDCP (High-bandwidth
Digital Content Protection), a protection system for
digital video. HDMI components that you connect to
the DVD player must also support HDCP.
• The DVD player supports High-Definition Multimedia Interface Specification Information Version 1.0.
HDMI & the DVD player
■ Video
The DVD player’s HDMI OUT supports the following
video resolutions:
• 720 x 480p (progressive), 60 Hz
• 720 x 576p (progressive), 50 Hz (not North American
and Korean models)
• 1280 x 720p (progressive), 50/60 Hz
• 1920 x 1080i (interlaced), 50/60 Hz
If the connected HDTV or projector doesn’t support a
resolution, you may get no picture.
On the DVD player, you can select a resolution suitable
for use with the connected HDTV or projector (see
page 43).
■ Audio Formats
The DVD player’s HDMI OUT supports the following
audio formats:
• PCM (96 kHz, 48 kHz, 44.1 kHz)
• Dolby Digital
• DTS
If your HDMI-compatible TV or projector doesn’t support Dolby Digital and DTS, the HDMI OUT will not
output digital audio in that format. In this case, set the
Digital/HDMI Audio Out setting to PCM (see page 48).
If your TV doesn’t support digital audio at high sampling
rates, set the Linear PCM Out setting to Down Sample
On, so that it’s down sampled to below 48 kHz (see
page 48).
Note that audio from SACD discs is not output by the
HDMI OUT. For this format, you need to use the analog
multichannel output (see page 23).
Connecting the DVD player—Continued
Using the Multiroom Control Kits
(North American model only)
To control the DVD player with the remote controller
when DVD player is located in a cabinet, you’ll need a
commercially available multiroom remote control kit.
• Multiroom kits are made by Niles and Xantech.
These kits can also be used when control other components.
Using a Multiroom Kit with Other
Components
In this setup, an IR emitter is connected to the DVD
player’s IR OUT jack and placed in front of the other
component’s remote control sensor. Infrared signals
received at the DVD player’s IR IN jack are fed through
to the other component via the IR emitter. Signals picked
up by the DVD player’s remote control sensor are not
output.
Using a Multiroom Kit with a Cabinet
In this setup, the IR receiver picks up the infrared signals
from the remote controller and feeds them to the DVD
player located in the cabinet via the connecting block.
IR Receiver
Connecting
block
IR IN
IR OUT
DVD player
IR Emitter
Remote controller
IR Receiver
Connecting
block
Other component
IR IN
Signal flow
DVD player
The IR emitter should be connected to the DVD player’s
IR OUT jack, as shown below.
Inside
cabinet
Remote controller
Signal flow
Other component
Remote control
sensor
Miniplug cable
The miniplug cable from the connecting block should be
connected to the DVD player’s IR IN jack, as shown
below.
Emitter
Miniplug
IR Emitter
Miniplug cable
DVD player
Signal flow
From the connecting block
DVD player
25
Connecting the Power/Turning on the DVD player
Before connecting
• Make sure that all the connections on pages 18–25 are
complete (the connection to a TV is required).
• Before unplugging the player from the
power outlet, make sure you first
switch it into standby.
• For the above reasons, do not plug this
player into a switched power supply
found on some amplifiers and AV
receivers.
STANDBY/ON
STANDBY indicator
TOP MENU
CU
RSOR
RETURN
MENU
SETUP
PU
SH
ER
TO ENT
To a wall
outlet
ON
STANDBY
2
STANDBY/ON
STANDBY
Remote
controller
1
26
Plug the supplied power cord into
the AC INLET and then into the
power outlet on the wall.
• Do not use a power cord other than the
one supplied with the DVD player. The
power cord supplied is designed for
use with the DVD player and should
not be used with any other device.
• Never have the power cord disconnected from the DVD player while the
other end is plugged into the wall outlet. Doing so may cause an electric
shock. Always connect by plugging
into the wall outlet last and disconnect
by unplugging from the wall outlet
first.
Press [STANDBY/ON] button on
the DVD player or [ON] on the
remote controller.
Turn on your TV and select the
input through which the DVD
player is connected.
The DVD player turns on and the
STANDBY indicator turns off.
• To put the DVD player in the standby
mode, press [STANDBY/ON] on the
DVD player, or [STANDBY] on the
remote controller.
• While the STANDBY indicator lights
up, the DVD player can receive signals
from the remote controller.
• Setting the [STANDBY/ON] button to
standby does not shut off the power
completely.
Note:
• This player features a screen saver and an auto power
off function. If the player is stopped and no button is
pressed for 15 minutes, the screen saver starts (see
page 52). If the disc tray is closed but no disc is playing and no control is pressed for 20 minutes, the player
automatically goes into standby (see page 54).
Initial Setup
This chapter explains the settings you need to make the
very first time the DVD player is turned on.
2
Remote
controller
Use the Up and Down [ ]/[ ]
buttons to select “On” or “Off”
for “HDMI Output Setting,” and
then press [ENTER]
Select “On” to use the HDMI output.
Initial Setup
TV Shape
HDMI Output Setting
: 4:3 Letter box
✔
On-Screen Language
ENTER
/
Remote
controller
The very first time you turn on the DVD player, the Initial Setup menu appears onscreen.
Initial Setup
Use the Up and Down [ ]/[ ]
buttons to select a language, and
then press [ENTER].
See page 50 for more information on
the language options.
Initial Setup
TV Shape
: 4:3 Letter box
HDMI Output Setting
: On
On-Screen Language
TV Shape
✔
4:3 Letter box
HDMI Output Setting
4:3 Pan Scan
On-Screen Language
16:9 Widescreen
16:9 Compressed
Off
The “On-Screen Language” menu
appears next.
3
First Time Setup
On
✔
English
Français
Español
Deutsch
Italiano
The Initial Setup menu closes and the
setup is complete.
The DVD player is now ready to use.
Here you need to make a few settings to get the DVD
player up and running. You can change these settings
later (see page 45).
1
Remote
controller
Note:
• You can cancel the Initial Setup by pressing the
[SETUP] button and complete the settings later by
using the onscreen setup menus (see page 45).
Use the Up and Down [ ]/[ ]
buttons to select a TV shape, and
then press [ENTER].
Select “4:3 Letter box” or “4:3 Pan
Scan” if you have a 4:3 TV. Select
“16:9 Widescreen” or “16:9 Compressed” if you have a widescreen TV.
See page 46 for more information.
Initial Setup
TV Shape
✔
4:3 Letter box
HDMI Output Setting
4:3 Pan Scan
On-Screen Language
16:9 Widescreen
16:9 Compressed
The “HDMI Output Setting” menu
appears next.
27
Playing Discs
This chapter covers basic playback. Advanced playback
functions are covered in the next chapter.
Important:
• Throughout this manual, the term DVD refers to DVDVideo, DVD-Audio, DVD-R/RW, and DVD+R/RW
discs. When a function is specific to a particular type
of DVD disc, it will be specified.
TOP MENU
CU
3
Press
OPEN/CLOSE.
The disc tray closes and the relevant disc
type indicator appears on the display.
Remote
controller
• For details on playing JPEG picture
discs, see “Viewing a Slideshow of
JPEG Images” on page 33.
MENU
RSOR
RETURN
SETUP
PU
S
H TO ENTE
Tip:
If you press the Play [ ] button, the disc
tray will close and, depending on the
type of disc, playback will start automatically.
R
/
Note:
• Only load discs that are supported by the DVD player.
See pages 8 to 10.
OPEN/
CLOSE
Starting, Pausing & Stopping
Playback
This section explains how to start, pause, and stop
playback.
■ Start
1
Press OPEN/CLOSE to open the
disc tray.
Remote
controller
Remote
controller
■ Pause
2
28
Load a disc.
Load a disc with the label side facing up,
using the disc tray guide to align the disc
(if you’re loading a double-sided DVD
disc, load it with the side you want to
play face down).
Remote
controller
To start playback, press the Play
[ ] button.
Playback starts and the Play indicator appears on the display.
If you’re playing a DVD-Video disc, or
a VCD with PBC (Playback Control),
you may need to start playback from a
menu (see page 31).
See page 32 for more on MP3 discs.
To pause playback, press the
Pause [ ] button.
Playback pauses and the Pause indicator appears on the display.
To resume playback, press the Play [ ]
button.
Playback resumes and the Pause
indicator disappears.
For DVD-Audio discs, pause cannot be
used while a menu is displayed.
Playing Discs—Continued
■ Stop
Remote
controller
To stop playback, press the Stop
[ ] button.
Playback stops and the Play indicator disappears.
• When you stop playback of a
DVD-Video disc, the DVD player
remembers the point at which playback was stopped and “Resume”
appears onscreen. To resume playback from that point, press the Play
[ ] button. To cancel the Resume
function, press the Stop [ ] button
again. The Resume function is reset
when the disc is removed from the
DVD player.
• With the Last Memory function you
can resume playback from any point
even if the disc has been removed
(see page 39).
Notes:
• Prolonged display of the same picture or menu may
cause irreparable damage to your TV screen known as
screen burn-in. To prevent this, don’t keep playback
paused for too long and always press the Stop [ ] button when you’ve finished playing a DVD-Video disc
or VCD. The DVD player features a screen saver to
protect your TV from the effects of burn-in (see
page 52).
• With some DVD-Video discs, you may experience
picture noise that is not normally visible with standard
TV broadcasts. This is usually because DVD-Video
uses a lot of high-resolution video data. The amount of
noise, if any, will depend on your particular TV and
the problem can sometimes be alleviated by turning
down the TV’s sharpness control.
Select Next & Previous track/chapter
DVD-V
DVD-A
SACD
VCD
CD
MP3
WMA
DivX
JPEG
The North American model does not support DivX.
This section explains how to skip to the next and previous track and chapter.
■ Select
Next
track/
chapter
During Playback, press the Next
[
] button to select next track/
chapter.
The Next track/chapter starts playback.
Remote
controller
■ Select
Previous
track/
chapter
During Playback, press the Previous [
] button to select previous tack/chapter.
The first press selects the beginning of
the current track.
Remote
controller
29
Playing Discs—Continued
Forward Frame-by-Frame Playback
DVD-V
VCD
With frame-by-frame playback you can view individual
picture frames one at a time forward.
■ Forward Press the Pause [ ] button.
frame-by- Press it repeatedly to view subframe
sequent frames.
Remote
controller
To resume normal playback, press the
Play [ ] button.
Slow-motion Playback
Fast Forward & Reverse
DVD-V
DVD-A
SACD
VCD
CD
MP3
DVD-V
DivX
The North American model does not support DivX.
This section explains how to fast forward and reverse.
■ Fast
forward
Remote
controller
During playback, press the [ ]
button to start fast forward.
Playback fast forwards and “ x2”
appears onscreen.
To change the fast-forward speed, press
the [ ] button repeatedly to select:
x2, x4, x8, x16.
To resume normal playback, press the
Play [ ] button.
■ Fast
reverse
Remote
controller
During playback, press the [ ]
button to start fast reverse.
Playback reverses and “ x2” appears
onscreen.
To change the fast-reverse speed, press
the [ ] button repeatedly to select:
x2, x4, x8, x16.
To resume normal playback, press the
Play [ ] button.
Notes:
• Fast forward and fast reverse may not always work at
the speed shown onscreen.
• For discs other than audio CDs, no sound is output
during fast forward or fast reverse.
• For DVD-Audio discs, fast forward and fast reverse
cannot be used while a menu is displayed.
30
With slow-motion playback you can watch a scene
slowly either forward or backward.
■ Forward
slow
motion
Remote
controller
During playback or paused,
press the SLOW Forward [ ]
button.
Forward slow-motion playback starts
and “ 1/2” appears onscreen.
To change the slow-motion speed, press
the SLOW Forward [ ] button repeatedly to cycle through the speeds:
1/2, 1/4, 1/6, 1/8.
To resume normal playback, press the
Play [ ] button.
■ Backward During playback or paused,
slow
press the SLOW Back [ ] button.
motion
Backward slow-motion playback starts
and “ 1/2” appears onscreen.
Remote
controller
To change the slow-motion speed, press
the SLOW Back [ ] button repeatedly
to cycle through the speeds:
1/2, 1/4, 1/6, 1/8.
To resume normal playback, press the
Play [ ] button.
Note:
• Backward slow-motion playback cannot be used with
DivX and Video CD. For Video CD, the slow-motion
speed cannot be changed.
Playing Discs—Continued
/ /
TOP MENU
TOP MENU
CU
/
, ENTER
Remote
controller
MENU
RSOR
RETURN
SETUP
PU
S
H TO ENTE
R
MENU
/
On a VCD menu, use the number
buttons to select the tracks.
If the VCD’s menu consists of several
pages, use the Next [
] and Previous
[
] buttons to view them. During
playback, you can return to the menu
by pressing the [RETURN] button.
Notes:
• Not all DVDs and VCDs have menus.
• Menu operation varies from disc-to-disc. See the
disc’s sleeve notes for details.
• On some DVDs, to display the disc menu, press the
[MENU] button.
Number
buttons
ENTER
/ /
TOP MENU
/
To set VCD’s PBC on and off
PBC menus can turned on or off by pressing the [TOP
MENU] button.
MENU
Navigating CDs & Super Audio CDs
Navigating DVD & VCD Disc Menus
DVD-V
DVD-A
VCD
This section explains how to play audio CDs and Super
Audio CDs with the Disc Navigator.
1
Load an audio CD or Super Audio
CD.
The Disc Navigator appears.
DVD-Video discs usually have a menu from which you
can select titles, chapters, and other options, including
soundtracks, subtitles, and audio formats (e.g., Dolby
Digital or DTS). VCDs that support PBC (Playback
Control) may also have an onscreen menu.
1
Load a DVD or VCD.
With DVDs, a menu usually appears
when the Play [ ] button is pressed. If
it doesn’t, try pressing the [TOP
MENU] button.
With VCDs that support PBC, you may
have to press the Play [ ] button to display the menu.
2
Remote
controller
On a DVD menu, use the arrow
[ ], [ ], [ ], [ ] buttons to
select an item, and then press
[ENTER].
Stop
Disc
/Track01.CDA
001. Track01
002. Track02
003. Track03
004. Track04
005. Track05
006. Track06
007. Track07
008. Track08
CD
Repeat
Random
:Off
:Off
The tracks are displayed.
2
Remote
controller
Use the Up and Down [ ]/[ ]
buttons to select a track, and
press [ENTER] to start playback.
With SACDs, you can select the multichannel area, 2-channel area, or CD
layer by pressing the [AUDIO] button.
Note:
• During random playback or memory playback, the
arrow buttons cannot be used.
31
Playing Discs—Continued
3
Remote
controller
ENTER
/ /
/
RETURN
4
Remote
controller
Navigating MP3, WMA & DivX Discs
MP3
WMA
DivX
or
The North American model does not support DivX.
This section explains how to play MP3, WMA, and
DivX files with the Disc Navigator.
1
Load an MP3, WMA, or DivX disc.
The Disc Navigator appears.
Stop
Disc DATA
1/3
-/5
/mp3
001. ROOT
Repeat
002. mp3
Random
003. MP3 music
001. Track01
002. Track02
003. Track03
004. Track04
005. Track05
Remote
controller
32
To play the selected track, press
the Play [ ] or [ENTER] button.
If available, the ID3 tag information,
(Title name, Artist name, Album name,
and so on) will scroll across the bottom
of the screen.
Disc DATA
Play
3/11
2/3
00:00:29 00:03:58 00:04:27
/mp3/Track03.MP3
002. mp3
Repeat
:Off
001. Track01
Random :Off
002. Track02
003. Track03
004. Track04
005. Track05
006. Track06
007. Track07
Name: Onkyo
To open a folder, use the Up and
Down [ ]/[ ] buttons to select
it, and then press [ENTER].
The contents of the folder are displayed.
Artist Name: Onkyo
Album Name: Onkyo
For MP3 playback
:Off
:Off
Initially, the folders in the root directory are displayed.
The DVD player numbers folders and
tracks in hierarchical order. You can use
these numbers to select folders and
tracks directly with the Search function
(see page 34).
2
Use the Up and Down [ ]/[ ]
buttons to select tracks and subfolders in the open folder.
To open a folder in the list, press the
[ENTER] button. To close a folder (i.e.,
move back up the directory tree), press
the [RETURN] button. Alternatively,
select the item at the top of the list and
press the [ENTER] button.
Use the Left and Right [ ]/[ ] buttons
to display the other folders that contain
playable tracks.
Subsequent tracks in the same folder
are played in order.
5
Remote
controller
Press the Stop [
playback.
] button to stop
Note:
• During random playback or memory playback, the
arrow buttons cannot be used.
Playing Discs—Continued
Viewing a Slideshow of JPEG Images
Use the Left and Right [ ]/[ ] buttons
to display other folders that contain
JPEG images.
JPEG
This section explains how to display a slideshow of
JPEG images on your TV.
1
4
Remote
controller
Load a JPEG disc.
The Disc Navigator appears.
Disc DATA
Stop
1/17
-//jpg
001. jpg
Repeat
002. image0
Random
003. image1
004. image2
005. image3
001. 001
002. 002
003. 003
or
:Off
:Off
Initially, the folders in the root directory are displayed.
The DVD player numbers folders and
files in hierarchical order. You can use
these numbers to select folders and files
directly with the Search function (see
page 34).
2
Remote
controller
3
Remote
controller
To open a folder, use the Up and
Down [ ]/[ ] buttons to select
it, and then press [ENTER].
The contents of the folder are displayed.
Use the Up and Down [ ]/[ ]
buttons to select images and
subfolders in the open folder.
A thumbnail-size preview for the currently selected image is displayed.
DATA
Disc DATA
1/17
-//image1/001.JPG
005. image1
Repeat
:Off
001. 001
Random :Off
002. 002
003. 003
004. 004
005. 005
006. 006
007. 007
W: 150 H: 120
5
Remote
controller
To play a slideshow, press the
Play [ ] or [ENTER] button.
Subsequent images are displayed in
order, with each image being displayed
for five seconds.
To display an image for longer, press
the Pause [ ] button. Press the Play
[ ] button to resume.
Use the Previous and Next [
]/[
]
buttons to view the previous or next
image.
To flip a picture 180 degrees, use the
Up and Down [ ]/[ ] buttons (not
while zoomed in).
To rotate a picture counterclockwise or
clockwise, use the Left and Right [ ]/
[ ] buttons (not while zoomed in).
To zoom in or out, use the [ ] and
[ ] buttons. While zoomed in, use the
[ ]/[ ]/[ ]/[ ] buttons to move
around the picture.
To stop the slideshow, press the
Stop [ ] or [MENU] button.
The slideshow stops automatically
when all pictures have been displayed.
■ To display thumbnails
To display thumbnails, in step 3, after opening the folder
you want to display, press the [TOP MENU] button.
Use the arrow [ ], [ ], [ ], [ ] buttons to select the
thumbnails, and press [ENTER] to start a slideshow.
Press the [MENU] button to return to the Disc Navigator.
■ About HD JPEG
If your TV is connected via HDMI and the HDMI resolution is set to 720p or 1080i, you can view your JPEG
images in high definition (see page 47).
To open a folder in the list, press the
[ENTER] button. To close a folder (i.e.,
move back up the directory tree), press
the [RETURN] button. Alternatively,
select the item at the top of the list and
press the [ENTER] button.
33
Advanced Playback
2
Remote
controller
SEARCH
Number
buttons
Use the number buttons to specify a title, chapter, or track number.
To enter, for example, “12,” press the
[1] button followed by the [2] button.
Search
Title
Disc
DVD-VIDEO
Chapter
Current/Total 12/ 19 Current/Total
5/ 7
Entered title number
appears here
Entered chapter number
appears here
ENTER
If you’re playing a DVD, MP3, WMA,
or DivX disc, use the Left and Right
[ ]/[ ] buttons to select the Title/
Group/Folder and Chapter/Track fields.
To clear a number, press the [CLR] button.
Selecting Chapters/Titles/Tracks/
Folders by Number
DVD-V
SACD
VCD
CD
MP3
WMA
3
Remote
controller
DivX
Press the Play [ ] or [ENTER]
button to start playback of the
specified title, chapter, or track.
The North American model does not support DivX.
With the Search function you can select chapters, titles,
and tracks by number.
or
1
Remote
controller
Press the [SEARCH] button.
The Search window appears onscreen.
This is what appears for DVDs.
Search
Disc
DVD-VIDEO
Title
Chapter
Current/Total 1/ 19 Current/Total - - -/ 78
This is what appears for CDs.
Search
34
Disc
Track
CDDA
Current/Total - -/ 10
Notes:
• During playback, you can select other chapters or
tracks directly by using the number buttons (i.e., without pressing the [SEARCH] button). For example, to
select chapter #2, simply press [2]. To select chapter
#10, press [+10] and [0].
• DVD-Video discs usually have menus for selecting
titles and chapters.
• When Video CD PBC is on, you can’t search for
tracks. Turn PBC off first.
• The [SEARCH] button cannot be used during random
playback or memory playback.
• Search may not work with some discs.
Advanced Playback—Continued
3
Remote
controller
Press the Play [ ] or [ENTER]
button to start playback of the
specified time.
SEARCH
Number
buttons
or
Notes:
• In some cases, playback may start from a slightly different point to the one that you specify.
• Time search may not work with some discs.
• Time search cannot be used while a DVD-Video or
Video CD menu is displayed onscreen.
• The [SEARCH] button cannot be used during random
playback or memory playback.
ENTER
Searching by Time
DVD-V
SACD
VCD
CD
With the Search function you can search by time.
1
Remote
controller
During playback, press the
[SEARCH] button twice.
The Search window appears onscreen.
Search
Disc
DVD-VIDEO
2
Remote
controller
Time
-:- -:- -
Use the number buttons to enter
a time.
Time search only works within the current title or track.
To enter, for example, 5 minutes, 30
seconds, press [5] [3] [0] buttons.
Search
Disc
DVD-VIDEO
Time
-:-5:30
To clear a number, press the [CLR] button.
35
Advanced Playback—Continued
A-B Repeat Playback
DVD-V
SACD
VCD
CD
MP3
With the A-B Repeat function you can play a specified
section over-and-over again.
REPEAT
A–B
1
Remote
controller
2
Remote
controller
Repeat Playback
DVD-V
DVD-A
SACD
VCD
CD
MP3
WMA
Remote
controller
2
Remote
controller
During playback, press the
[REPEAT] button repeatedly to
select a repeat option.
The selected repeat option appears
onscreen.
The available options depend on the
type of disc, as follows:
DVD-Video: Chapter Repeat, Title
Repeat, Disc Repeat, Repeat Off.
DVD-Audio: Track Repeat, Group
Repeat, Repeat Off.
SACD, VCD, CD: Track Repeat, Disc
Repeat, Repeat Off.
MP3, JPEG, WMA: Track Repeat,
Folder Repeat, Disc Repeat, Repeat
Off.
To cancel repeat playback, use
the [REPEAT] button to select
“Repeat Off.”
Notes:
• Repeat playback may not work with some discs.
• If the Memory function is on (see page 38), the selectable options are Memory Repeat, which plays the
playlist repeatedly, and Repeat Off.
36
Press the [A-B] button again to
set the B point (i.e., the end of the
section you want to repeat).
Playback repeats between the A and B
points, and “Repeat A-B” appears
onscreen and
AB indicator
appears on the display.
JPEG
With the Repeat function you can play a disc, title, chapter, group, track, or folder over-and-over again.
1
During playback, press the [A-B]
button to set the A point (i.e., the
start of the section you want to
repeat).
“Repeat A-” appears onscreen and
A indicator appears on the display.
3
Remote
controller
To cancel A-B repeat playback,
press the [A-B] button.
Notes:
• The A-B Repeat function may not work with some
DVD-Video discs and VCDs that support PBC.
• In some cases, the A and B points may be at slightly
different points to the ones that you specify.
Advanced Playback—Continued
2
Remote
controller
RANDOM
Random Playback
DVD-V
DVD-A
SACD
VCD
CD
MP3
WMA
To cancel random playback, use
the [RANDOM] button to select
“Random Off.”
Notes:
• Random playback may not work with some discs.
• To use the Random function with a VCD that supports
PBC, you must first turn off PBC (see page 31).
• If the Memory function is on (page 38), random playback is unavailable.
• You can’t use the [SEARCH] button during random
playback.
• During random playback, the remote controller’s
arrow [ ], [ ], [ ], [ ] buttons and number buttons
don’t work with the Disc Navigator.
• The Random function cannot be used with JPEG files.
With the Random function you can enjoy a random
selection of titles, chapters, groups, tracks, or folders.
1
Remote
controller
During playback, press the [RANDOM] button repeatedly to select
a random option.
The selected random option appears
onscreen.
The options available depends on the
type of disc, as follows:
DVD-Video: Title Random, Disc Random, Random Off.
DVD-Audio: Group Random, Random
Off.
SACD, VCD, CD: Disc Random, Random Off.
MP3, WMA: Folder Random, Disc
Random, Random Off.
With the Title Random option, chapters
within the current title are played at
random. With the Disc Random option,
titles, chapters, groups, tracks, or folders on the disc are played at random.
Random playback begins after the current chapter or track has finished.
Random playback stops automatically
when all of the items have been played
once.
37
Advanced Playback—Continued
3
Repeat step 2 to add more items
to the memory list.
You can add up to 32 items to the memory list.
4
To play the memory list, press
the Play [ ] button.
The Memory Play Setup window must
be open when you press the Play [ ]
button.
MEMORY
CLR
Remote
controller
LAST
MEMORY
ENTER
/ /
/
5
Remote
controller
Memory Playback
DVD-V
DVD-A
VCD
SACD
CD
MP3
WMA
To stop playback, press the Stop
[ ] button.
While playback is stopped, you can
delete the memory list by pressing the
[CLR] button.
While playback is stopped, you can
cancel the Memory Playback function
by pressing the Stop [ ] button again.
With the Memory Playback function you can create your
own memory list of titles, chapters, and tracks.
1
Remote
controller
Press the [MEMORY] button.
The Memory List window appears
onscreen, as shown.
No.
01
02
03
04
05
06
07
08
Remote
controller
1
Remote
controller
Memory List
Title/Folder
Chapter/Track
Current/Total 001 / 019 Current/Total --- / 078
--- / 019
--- / 019
--- / 019
--- / 019
--- / 019
--- / 019
--- / 019
--- / 019
--- / 078
--- / 078
--- / 078
--- / 078
--- / 078
--- / 078
--- / 078
--- / 078
The top row ( ) is used to enter title/
folder and chapter/track numbers.
The steps in the memory list are numbered.
2
Adding New Items to the List
Enter the title/folder, and chapter/
track numbers of the item you
want to add to the memory list,
and then press [ENTER].
Use the remote controller’s Left/Right
[ ]/[ ] buttons to select the parameters, and use the number buttons to
enter the number.
The new item is added to the memory
list as step 01.
No.
01
02
03
04
05
06
07
08
2
Remote
controller
3
Remote
controller
38
Use the Up/Down [ ]/[ ] buttons
to select the step before which
you want to insert the new item,
and then press the [ENTER] button.
Memory List
Title/Folder
Chapter/Track
Current/Total 001 / 019 Current/Total --- / 078
005 / 019
002 / 019
--- / 019
003 / 019
010 / 019
--- / 019
--- / 019
--- / 019
001 / 078
012 / 078
--- / 078
004 / 078
003 / 078
--- / 078
--- / 078
--- / 078
Enter the title/folder, and chapter/
track numbers of the item to be
inserted.
Use the remote controller’s Left/Right
[ ]/[ ] buttons to select the parameters, and use the number buttons to
enter the number.
Press the [ENTER] button.
The new item is inserted into the memory list and subsequent items move
down the list.
Advanced Playback—Continued
Deleting Items from the List
Remote
controller
Use the Up/Down [ ]/[ ] buttons
to select it, and then press the
[CLR] button.
The item is deleted and subsequent
items move up the list.
Editing Steps
1
Remote
controller
2
Remote
controller
Last Memory
DVD-V
With the Last Memory function you can resume playback from where you left off even if the disc has been
removed and the DVD player has been set to Standby.
Last Memory also remembers the soundtrack and subtitle settings you were using.
1
Use the Up/Down [ ]/[ ] buttons
to select the step.
Use the Left/Right [ ]/[ ] buttons
and number buttons to edit the
title/folder or chapter/track numbers, and then press [ENTER].
Remote
controller
2
Remote
controller
To stop playback, press the Stop
[ ] button.
Now you may remove the disc
and turn off the DVD player.
Remote
controller
To resume playback, load the
disc, and then press the Play [ ]
button.
The Last Memory dialog box appears.
3
Notes:
• To close the Memory List window, press the
[RETURN] button.
• The memory list will be deleted when the DVD player
is set to Standby or the disc tray is opened.
• To use this function with a VCD that supports PBC,
you must first turn off PBC.
• The Memory Playback function cannot be used with
some discs.
• JPEG images can be added to the memory list, however, they will not be displayed.
During DVD playback, press the
[LAST MEMORY] button.
The last memory point for the disc is
stored, “LAST MEM” appears on the
display.
If the [LAST MEMORY] button is
pressed again, the last memory point is
updated.
Last Memory is set.
Start playback from memory location?
Yes
4
Remote
controller
No
Memory Clear
To resume playback from the last
memory point, select “Yes,” and
then press [ENTER].
To start playback from the beginning,
select “No,” and then press [ENTER].
To start playback from the beginning
and delete the last memory point, select
“Memory Clear,” and then press
[ENTER].
Notes:
• The Last Memory function can store the last point for
up to six DVDs. When you set the Last Memory function for a seventh disc, the first disc’s settings are
deleted.
• The Last Memory function will not work while a
menu is being displayed onscreen.
• The Last Memory function may not work with some
DVDs.
39
Advanced Playback—Continued
Selecting Camera Angles
DVD-V
ANGLE
/ /
/
ZOOM
Zooming
DVD-V
VCD
JPEG
With the Zoom function you can enlarge any part of the
picture.
1
Remote
controller
2
Remote
controller
3
Remote
controller
During playback or while playback is paused, press and hold
the [ZOOM] button for 2 seconds.
The picture is enlarged.
Press the [ZOOM] again repeatedly to Zoom in.
The number of zoom steps available
depends on the resolution of the disc or
file.
After the maximum zoom, the picture
returns to its normal size.
To see other areas of the picture
while zoomed, use the remote
controller’s arrow [ ], [ ], [ ],
[ ] buttons.
Notes:
• The Zoom function may not work with some discs.
• The Zoom function can also be used during slowmotion playback.
• The Zoom function cannot be used with HD JPEG.
• The Zoom function cannot be used with disc menus.
40
Some DVDs feature multiple camera angles that allow
you to view scenes from different angles. When a DVD
features multiple camera angles, the camera indicator
appears on the display. Such discs usually have the camera angle logo ( ) printed on the sleeve.
Remote
controller
Press the [ANGLE] button repeatedly to cycle through the available camera angles.
The number of the currently selected
camera angle appears onscreen. For
example, on a disc with three camera
angles, you’d see 1/3, 2/3, and 3/3.
Notes:
• With some DVDs you may not be able to select different camera angles even though the camera
indicator is displayed.
• With some DVDs you can select camera angles from
a menu.
Advanced Playback—Continued
Selecting Subtitles
DVD-V
Some DVD-Video discs feature subtitles in several languages. See the disc’s sleeve notes for details.
AUDIO
SUBTITLE
Selecting Soundtracks
DVD-V
DVD-A
VCD
SACD
Some DVD-Video discs feature soundtracks in several
languages or audio formats (e.g., Dolby Digital or DTS).
Music DVD-Video discs and DVD-Audio discs sometimes feature audio in several formats, such as PCM,
Dolby Digital, or DTS. See the disc’s sleeve notes for
details.
Remote
controller
Remote
controller
During playback, press the [SUBTITLE] button repeatedly to cycle
through the available subtitles.
The name of the selected subtitle
appears onscreen for several seconds.
To turn off subtitles, use the [SUBTITLE] button to select “Off.”
Notes:
• When you stop playback and cancel the Resume function (see page 28), the subtitle language will revert to
your default subtile language (see page 50), or the
disc’s default subtitle language.
• With some DVDs you can select subtitles from a
menu, and you may not be able to select subtitles during playback.
During playback, press the
[AUDIO] button repeatedly to
cycle through the available
soundtracks.
The name of the selected soundtrack
appears onscreen for several seconds.
For VCDs, you can select Stereo, Mono
L (left), Mono R (right), or Mix, so long
as all speakers other than the front
speakers are turned off in the Speaker
Configuration.
For SACDs, you can select the multichannel area, 2-channel area, or CD
layer. If you make a selection during
playback, playback will stop.
Notes:
• With DVD-Video discs, when you stop playback and
cancel the Resume function (see page 28), the
soundtrack language will revert to your default language (see page 50), or the disc’s default language.
• With some discs, selecting another soundtrack may
cause the picture to skip momentarily.
• With some DVDs you need to select soundtracks from
a menu, and you may not be able to select other
soundtracks during playback.
41
Advanced Playback—Continued
Displaying Information
You can display various information about the current
disc, title, chapter, or track as follows.
1
Remote
controller
During playback, press the [DISPLAY] button repeatedly to cycle
though the information.
Various information appears onscreen.
The operating status (e.g., Stop, Play,
Resume) and disc type information is
displayed along the top of the screen.
The information displayed depends on the type of disc,
as follows:
■ DVD-Video
Onscreen:
• Current/total title number, elapsed title time, remaining title time, total title time, selected soundtrack,
selected subtitle, and the number of available camera
angles.
• Current/total chapter number, elapsed chapter time,
remaining chapter time, and total chapter time.
Display:
• Elapsed chapter time
• Remaining title time
■ DVD-Audio
Onscreen:
• Current/total track number, elapsed track time,
remaining track time, total track time, and selected
soundtrack.
• Current/total group number, elapsed group time,
remaining group time, and total group time.
Display:
• Elapsed track time
• Remaining track time
■ Video CD
Onscreen:
• Current/total track number, elapsed track time,
remaining track time, and total track time.
• Current/total track number, elapsed track time,
remaining disc time, and total disc time.
Display:
• Elapsed track time
• Remaining track time
• Elapsed disc time
• Remaining disc time
Note:
• If PBC is on, no information is displayed when the
[DISPLAY] button is pressed.
42
■ Audio CD, Super Audio CD
Onscreen:
• Current/total track number, elapsed track time,
remaining track time, and total track time.
• Current/total track number, elapsed disc time, remaining disc time, and total disc time.
Display:
• Elapsed track time
• Remaining track time
• Elapsed disc time
• Remaining disc time
■ MP3, WMA
Onscreen:
• Current/total folder number, current/total track number in the folder, elapsed track time, remaining track
time (MP3 only), and total track time (MP3 only).
Display:
• Elapsed track time
• File name
• Folder name
• Total number of folders
■ JEPG
Display:
• Folder number, track number
• File name
• Folder name
• Total number of folders
■ DivX
Onscreen:
• Current/total track number, elapsed track time,
remaining track time, total track time, selected
soundtrack, and selected subtitle.
Display:
• Elapsed track time
• File name
• Folder name
• Total number of folders
HDMI and Progressive Settings
RESOLUTION
HDMI
TOP MENU
CU
SETUP
PU
S
H TO ENTE
R
Setting the HDMI
This section explains how to turn on the HDMI OUT and
change the video resolution when your TV or projector
is connected to the HDMI OUT.
1
Press the DVD player’s [HDMI]
button to turn on HDMI.
2
Remote
controller
RESOLUTION
MENU
RSOR
RETURN
Press the [RESOLUTION] button
repeatedly to change the HDMI
resolution.
The first button press displays the current resolution onscreen. Press the button again while the resolution is
displayed to change the setting.
The DVD player supports the following resolutions:
Auto:
The resolution is automatically set to the native resolution of the TV connected to the HDMI OUT.
If the DVD player does not support the TV’s native resolution setting, the resolution 480p/576p will be used.
480p (480p/576p) (default):
The setting displayed depends on the country in which
you purchased the DVD player.
720 × 480p 60Hz or 720 × 576p 50Hz
Also output by the DVD player’s analog video outputs.
With this setting, component video output will be progressive.
720p:
1280 × 720p 50/60Hz
Not output by the DVD player’s analog video outputs.
1080i:
1920 × 1080i 50/60Hz
Not output by the DVD player’s analog video outputs.
Note:
• Be sure to choose a resolution that’s supported by your
TV. If you select a resolution that your TV doesn’t
support, there will be no picture.
Selecting Progressive or Interlaced
If your TV supports progressive video, you can set the
DVD player to progressive and enjoy progressive video
on your TV. If your TV doesn’t support progressive
video, set the DVD player to interlaced.
When HDMI output is at 480p/576p, the component
video output is fixed at progressive and depending on the
selected resolution there may be no output, so turn off
the HDMI OUT before changing this setting.
1
Press the DVD player’s [HDMI]
button to turn off HDMI.
2
Use the [RESOLUTION] button to
select progressive or interlaced.
The first button press displays the current setting onscreen. Press the button
again while the setting is displayed to
change the setting.
Remote
controller
The PROGRESSIVE indicator appears
on the display when progressive is
selected.
Tip:
These settings can also be changed by using the onscreen
setup menus (see pages 46, 47).
43
Configuring the DVD player
This chapter explains the various functions and settings of the onscreen setup menus.
Functions and settings are arranged into six menus: Picture, Audio, Language, Display, Operation Setting, and Initial.
The following table lists all the functions and settings, with a brief description and page number where you can find full
details.
Menu
Picture
Setting
Description
TV Shape
Select the aspect ratio that matches your TV.
Page #
View Mode
Stretch the picture to fit your TV screen.
46
HDMI Output Setting
Turn HDMI video output on or off.
46
Progressive Setting
Set the component video output to progressive or
interlaced.
46
HD Resolution
Select the video resolution for the HDMI OUT.
47
HD JPEG Mode
For displaying JPEG images at a high resolution on a
HDTV.
47
Video Black Level
Choose a video black level.
47
46
Brightness
Adjust the picture brightness.
47
Sharpness
Adjust the picture sharpness.
47
PAL Output Setting (not North
American and Korean models)
Convert the disc’s video format to NTSC or PAL.
47
Scart Output Setting (European model only)
Selects the video format for the SCART output: RGB,
S-Video, or composite.
48
Digital/HDMI Audio Out
Settings for the digital signal output by the optical,
coaxial, and HDMI digital audio outputs.
48
Linear PCM Out
Select whether or not the DVD player down samples
digital audio.
48
Configure the speakers settings for the multichannel
analog audio output.
48
Test tone for adjusting the level of each channel of
your amp’s multichannel input.
49
Surr. delay
Delay for the multichannel output’s center and surround jacks.
49
Dynamic Range Control
Set the Dynamic Range function.
49
Pro Logic
Determines how the built-in Dolby Pro Logic decoder
works.
49
SACD Audio Setup
Determines whether DSD or PCM is output when
playing SACDs.
50
Downmix Setting
Dolby and DTS downmix settings.
50
On-Screen Language
Select a language for the onscreen setup menus and
messages.
50
Disc Menu Language
Select your preferred language for disc menus.
50
Audio Language
Select your preferred language for soundtracks.
50
Subtitle Language
Select your preferred language for subtitles.
50
DivX Subtitle (not North American model)
Select your preferred language for DivX subtitle.
52
On-Screen Display
Turn on or off onscreen messages and indicators.
52
On-Screen Display Color
Select a color for onscreen setup menus and messages.
52
Background
Select a background color for when playback is
stopped.
52
Screen Saver
Set the Screen Saver function.
52
Subwoofer
Front Speaker
Center Speaker
Audio
Surround Speaker
Test Tone
Center delay
Language
Display
44
Configuring the DVD player—Continued
Menu
Operation
Setting
Initial Setup
Setting
Description
Parental Lock
Set the Parental Lock function.
53
Security Code
Change the security code for use with parental lock.
53
DVD Priority Contents
Determines what's played on DVD-Audio discs with
DVD-Video contents.
54
SACD Priority Contents
Determines how the SACD multichannel and 2-channel area and the CD area are played.
54
Auto Power Off
Sets the Auto power off function.
54
DivX Registration (not North
American model)
Displays your DivX VOD registration code
54
This menu appears automatically the very first time
you turn on your DVD player. (These settings are
available in other menus.)
27
TV Shape
HDMI Output Setting
On-Screen Language
Page #
Using the Onscreen Setup Menus
This section explains how to navigate the onscreen setup menus.
1
SETUP
Press the [SETUP] button.
The onscreen setup menu appears, as
shown.
Picture
ENTER
/ /
/
TV Shape
: 4:3 Letter box
View Mode
: Normal
HDMI Output Setting
: Off
Progressive Setting
: Interlace
HD Resolution
: 480p
HD JPEG mode
: Off
Video Black Level
: Light
Brightness
: Level 4
Sharpness
Progressive Conversion
: Level 4
: Auto
2
Use the arrow [ ]/[ ]/[ ]/[ ]
buttons to navigate the menus,
and press the [ENTER] button to
see the available options.
3
Use the Up/Down [ ]/[ ] buttons
to select the options, and press
the [ENTER] button to confirm
your selection.
SETUP
4
SETUP
When you’ve finished, press the
[SETUP] button again.
The onscreen setup menu closes.
45
Configuring the DVD player—Continued
Picture Menu
TV Shape
With this setting you can select a picture format to match
the aspect ratio of your TV.
4:3 Letter box (default): Choose
this option if you have a standard
TV (4:3 aspect ratio). When you
watch widescreen DVD-Video
movies, the entire picture will be
visible and there will be black
bars at the top and bottom of the screen, as shown.
4:3 Pan & Scan:Choose this
option if you have a standard TV
(4:3 aspect ratio) and want to use
the full height of the screen when
watching widescreen
DVD-Video movies. In order to
use the full height of the screen, the picture will be
cropped on both sides, as shown. This option won’t
work with discs that don’t support pan and scan.
16:9 Widescreen: Choose this option if you have a
widescreen TV (16:9 aspect ratio). Depends on TV,
the picture appears stretched when watching programs
in 4:3 format.
16:9 Compressed: Choose
this option if you have a
widescreen TV (16:9 aspect
ratio) and the picture appears
stretched when watching
programs in 4:3 format. This
option will correct the issue.
Notes:
• This setting does not apply to DVD menus.
• When the HDMI OUT signal is at a resolution of 720p
or 1080i, programs in 4:3 format will appear stretched,
so we recommend that you select the 16:9 Compressed option.
• With some DVD-Video discs this setting may have no
effect. See the disc’s sleeve notes to see which picture
format is used.
View Mode
With this setting you can adjust the aspect of the picture
so that it fits your TV screen. Due to your TV’s aspect
ratio setting and the DVD’s aspect ratio, black bars may
appear above and below the picture or at the sides and the
aspect of the picture may be unsuitable. In this case, use
this setting to adjust the aspect of the picture as you like.
Normal (default): The picture is displayed in its
original aspect ratio.
View Mode 1: The picture is stretched horizontally
to make it fit the height of the screen.
View Mode 2: The picture is stretched vertically to
make it fit the width of the screen.
View Mode 3: The picture is stretched horizontally
and vertically.
Tip:
The view mode can also be changed by
using the remote controller’s [ASPECT]
button.
Note:
• This setting does not apply to DVD menus.
HDMI Output Setting
With this setting you can turn the HDMI video output on
or off. See page 43 for more information.
On (default): Video is output by the HDMI OUT.
Off: Video is not output by the HDMI OUT.
Tip:
This setting can also be changed by using the [HDMI]
button on the front panel (see page 43).
Note:
• When this setting is set to On, video is output by the
analog video outputs only when the HD Resolution is
set to 480p/576p.
Progressive Setting
With this setting you can set the component video output
to progressive or interlaced. While the HDMI Output
Setting is set to On, this setting is fixed at Progressive
and cannot be changed. See page 43 for more information.
Interlaced: Component video output is interlaced.
Progressive: Component video output is progressive.
Tip:
When the HDMI Output Setting is set to Off, you can
also change this setting by using the [RESOLUTION]
button on the front panel (see page 43).
46
Configuring the DVD player—Continued
HD Resolution
Brightness
With this setting you can set the video resolution for the
HDMI OUT. See page 43 for more information.
With this setting you can adjust the picture brightness.
Auto: The resolution is automatically set to the
Level 1-7: 1 is the darkest. 7 is the brightest. The
default brightness is 4 (standard).
native resolution of the TV connected to the HDMI
OUT.
Sharpness
480p (480p/576p) (default): The setting displayed
With this setting you can adjust the picture sharpness.
depends on the country in which you purchased the
DVD player.
720 x 480p 60 Hz or 720 x 576p 50 Hz
Level 1-7: 1 is the softest. 7 is the sharpest. The
default sharpness is 4 (standard).
720p: 1280 x 720p 50/60 Hz
1080i: 1920 x 1080i 50/60 Hz
Tip:
When the HDMI Output Setting is set to On, you can
also change this setting by using the [RESOLUTION]
button on the front panel (see page 43).
Note:
• Initially, the DVD player is configured to output both
HDMI and analog video. However, if after changing
the resolution settings there’s no picture, with the analog video connection or HDMI connection in place,
press the [RESOLUTION] button repeatedly to
restore the picture.
HD JPEG mode
If your TV is connected to the HDMI OUT and the
HDMI resolution is set to 720p or 1080i, this setting
allows you to display your JPEG pictures in high definition.
On: JPEG pictures displayed in high definition.
Off (default): JPEG pictures displayed as normal.
Notes:
• If your TV is connected to a video output other than
the HDMI OUT, or the HDMI output resolution is set
to something other than 720p or 1080i, even if this setting is set to On, your JPEG pictures will not be displayed in high definition.
• When using HD JPEG, it may take a while to display
each picture. And the Zoom function cannot be used.
Also, onscreen status messages such as “Play” and
“Stop” are not displayed.
PAL Output Setting (Not North American
and Korean models)
With this setting you can specify how the DVD player
outputs video signals when playing NTSC format
DVD-Video discs or Video CDs.
AUTO (default): Use this option if your TV supports
both PAL and NTSC. The DVD player does not convert the video format. When you play a PAL disc, the
video output will be PAL format. And when you play
an NTSC disc, it’ll be NTSC format.
NTSC: Use this option if your TV doesn’t support
PAL playback, or the picture is distorted when
watching PAL discs. The DVD player will convert
PAL format video signals to NTSC-compatible format.
PAL: Use this option if your TV doesn’t support
NTSC playback, or the picture is distorted when
watching NTSC discs. The DVD player will convert
NTSC format video signals to PAL-compatible format.
Note:
• If you select the wrong setting by mistake and loose
the picture, while pressing and holding the Next
button, press the [STANDBY/ON] button to return to
the previous setting.
Video Black Level
With this setting you can adjust the picture blackness for
the analog video outputs. It does not affect the component video output when its set to progressive.
Light: Blacks are lighter, and the entire picture
becomes lighter.
Dark: Blacks are darker, and the entire picture
becomes darker.
47
Configuring the DVD player—Continued
SCART Output Setting
(European model only)
With this setting you can select the video format to be
used for the SCART AV CONNECTOR: RGB, S-Video,
or composite video. Before changing this setting, refer to
your TV’s manual to see if its SCART input can accept
video signals in these formats.
Composite (default): Composite video offers standard quality.
S-Video: S-Video offers the next best picture quality.
RGB: This format offers the best picture quality.
Notes:
• If you select a format that is not supported by your TV,
the setup menu may disappear from the screen. If this
happens, switch off your equipment, connect the DVD
player to your TV with a composite video or S-Video
cable, and then change this setting.
• When RGB is selected, nothing is output by the component video output and HDMI output.
• With some discs, even if you select Down Sample Off,
the digital audio will be down sampled, and in some
cases may not be output by the DVD player’s digital
audio outputs.
Speaker Configuration
With these settings, you can specify which speakers are
connected and their sizes. These settings only apply to
the DVD player’s analog multichannel output. If you
connect to only the FRONT/D.MIX L/R jacks, set the
Subwoofer, Center Speaker, and Surround Speaker settings to Off.
Note:
• The Speaker Configurations have no effect on
192 kHz/176.4 kHz DVD-Audio.
• To use the Speaker Configuration settings with SACD
playback, in the SACD Audio Setup, select PCM.
■ Subwoofer
On (default): Select if a subwoofer is connected.
Audio Menu
Digital/HDMI Audio Out
With this setting you can configure the optical, coaxial,
and HDMI digital outputs.
All (default): Dolby Digital and DTS signals are output as they are.
PCM: Dolby Digital and DTS signals are down
mixed to 2 channels and output as PCM.
Off: No digital signals are output.
Note:
• MPEG is output as PCM regardless of this setting.
Linear PCM Out
With this setting you can configure the DVD player to
output digital audio with higher sampling rates (e.g.,
88.2 kHz, 96 kHz) as it is or to down sample it to 48 kHz
or below.
If the AV component you connect to the DVD player’s
digital audio outputs supports 96 kHz digital audio,
select Down Sample Off. Otherwise, select Down Sample On.
■ Front Speaker
Large: Select if the front speakers are large.
Small (default): Select if the front speakers are
small.
Note:
• If the Subwoofer setting is set to Off, this setting is
fixed at Large and cannot be changed.
■ Center Speaker
Large: Select if the center speaker is large.
Small (default): Select if the center speaker is small.
Off: Select if no center speaker is connected.
Notes:
• If the Front Speaker setting is set to Small, the
Large option cannot be selected.
• The Center Speaker and Surround Speaker settings
can only be set to the same size.
■ Surround Speaker
Large: Select if the surround speakers are large.
Small (default): Select if the surround speakers are
Down Sample On: 196 kHz and 96 kHz sources are
small.
down sampled to 48 kHz, and 176.4 kHz and
88.2 kHz sources are down sampled to 44.1 kHz.
Off: Select if no surround speakers are connected.
Down Sample Off (default): Sources are output as
they are.
Notes:
• Some copy-protected DVD-Video discs may use
96 kHz digital audio only for D/A conversion to the
analog audio outputs.
48
Off: Select if no subwoofer is connected.
Notes:
• If the Front Speaker setting is set to Small, the
Large option cannot be selected.
• The Center Speaker and Surround Speaker settings
can only be set to the same size.
Configuring the DVD player—Continued
Test Tone
If you can adjust the volume level of each channel of
your amp’s multichannel input, with this function, you
can output a test tone from each multichannel output
jack in turn and adjust each level as necessary.
1. Use the Up/Down [ ]/[ ] buttons to select a
speaker, and then press the [ENTER] button.
A test tone is output by each speaker as it’s selected.
2. Refer to your AV receiver’s instruction manual
for details on adjusting the volume level of each
channel.
Note:
• The test tone is not output by the digital audio outputs.
Center Delay and Surr. Delay
With these settings, you can adjust the multichannel output signals relative to the listening position.
For 5.1-channel surround playback, ideally your speakers should all be the same distance away from the listening position, but this isn’t always practical. By setting a
delay time for the center and surround speakers, you can
adjust their virtual positions without having to physically
move them, creating the ideal listening environment. The
diagram below shows the ideal locations for the center
and surround speakers.
Ideal location of center speaker
(A)
FL
FR
Dc
SW
Df
Ds
SL
SR
All speakers should be
located within the circle
with a radius of Df.
(B)
Ideal location of a
surround speaker
■ Center Delay
Center Delay (A) = Df – Dc
No Delay (default): When Df equals Dc.
1msec: When (A) is approx. 1 ft. (0.3 m)
2msec: When (A) is approx. 2 ft. (0.6 m)
3msec: When (A) is approx. 3 ft. (0.9 m)
4msec: When (A) is approx. 4 ft. (1.2 m)
5msec: When (A) is approx. 5 ft. (1.5 m)
■ Surr. Delay
Surr. Delay (B) = Df – Ds
No Delay (default): When Df equals Ds.
5msec: When (B) is approx. 5 ft. (1.5 m)
10msec: When (B) is approx. 10 ft. (3 m)
15msec: When (B) is approx. 15 ft. (4.5 m)
Notes:
• The delay settings have no effect on 192 kHz/
176.4 kHz DVD-Audio.
• To use the delay settings with SACD playback, in the
SACD Audio Setup, select PCM.
Dynamic Range Control (Dolby Digital
only)
With the Dynamic Range Control function you can
reduce the dynamic range of Dolby Digital material so
that you can still hear quiet parts even when listening at
low volume levels—ideal for watching movies late at
night when you don’t want to disturb anyone.
Off (default): The full dynamic range is preserved.
On: The dynamic range of Dolby Digital material is
compressed.
Notes:
• The impact of the Dynamic Range Control function
depends on the Dolby Digital material that you are
playing and with some material there will be little or
no effect.
• When the DVD player is set to Standby, this function
is automatically set to Off.
• Depending on the Speaker Configuration settings, this
setting may be fixed.
Pro Logic
This setting determines how the DVD player’s built-in
Dolby Pro Logic decoder works with 2-channel material.
On: The Dolby Pro Logic decoder decodes Dolby
Surround material and processes the following audio
formats: 2-channel Dolby Digital on DVD-Video
discs, 48 kHz (16-, 20-, and 24-bit) PCM audio on
DVD-Video discs, and 2-channel audio on CDs.
Off (default): The Dolby Pro Logic decoder is off.
Note:
• If the Center Speaker or Surround Speaker is set to Off
in the Speaker Configuration settings (page 48), the
Dolby Pro Logic decoder will not work even if you
select On.
49
Configuring the DVD player—Continued
SACD Audio Setup
Disc Menu Language
With this setting you can choose whether DSD (Direct
Stream Digital) or PCM is output when playing Super
Audio CDs.
When DSD is selected, the Speaker Configuration settings have no effect and the source is output as it is: 2channel material is output as 2-channels, and multichannel material is output as multichannel.
When PCM is selected, the source is output is in accordance with the Speaker Configuration settings and the
output is down mixed.
With this setting you can select your preferred language
for disc menus. When you play a DVD-Video disc with
multiple language disc menus, your preferred language
will be selected automatically.
Select “Others” if the language you want is not displayed. See “Selecting Other Languages” on page 51.
Notes:
• Not all DVD-Video discs have menus in multiple languages.
• Even if a DVD-Video disc has menus in multiple languages, this setting may not always work.
• If a DVD has only one menu language, that will be
used.
• With some DVD-Video discs you can select languages
from a menu.
DSD (default): The source signal is output as it is.
PCM: The source signal is output in accordance with
the Speaker Configuration settings.
Downmix Setting
With this setting you can configure the FRONT/D.MIX
AUDIO OUT jacks and AV CONNECTOR for use with
a 2-channel stereo amp or an amp with a built-in Dolby
Pro Logic decoder. It determines how multichannel
audio sources are down mixed.
In the Speaker Configuration, set the Subwoofer, Center
Speaker, and Surround Speaker settings to Off.
Stereo (default): Choose this option if you’re connecting the FRONT/D.MIX AUDIO OUT jacks or
AV CONNECTOR to a stereo amp or TV. Multichannel audio is down mixed into stereo.
Lt/Rt: Choose this option if you’re connecting the
FRONT/D.MIX AUDIO OUT jacks or AV CONNECTOR to an AV receiver, TV, or other component
with a built-in Dolby Pro Logic decoder. Multichannel audio is down mixed into an Lt/Rt mix, which is
a 2-channel mix containing front left, front right,
center, and surround channel information.
Language Menu
On-Screen Language
With this setting you can select a language for the
onscreen setup menus and messages.
Select one of the displayed languages.
50
Audio
With this setting you can select your preferred language
for soundtracks. When you play a DVD-Video disc with
multiple language soundtracks, your preferred language
will be selected automatically.
Select “Others” if the language you want is not displayed. See “Selecting Other Languages” on page 51.
Notes:
• Not all DVD-Video discs have soundtracks in multiple
languages.
• Even if a DVD-Video disc has soundtracks in multiple
languages, this setting may not always work.
• If a DVD has only one soundtrack, that will be used.
• With some DVD-Video discs you can select languages
from a menu.
Subtitle Language
With this setting you can select your preferred language
for subtitles. When you play a DVD-Video disc with
multiple language subtitles, your preferred language will
be selected automatically.
Select “No Subtitle” if you don’t want subtitles displayed. Select “Others” if the language you want is not
displayed. See “Selecting Other Languages” on page 51.
Notes:
• Not all DVD-Video discs have subtitles.
• Even if a DVD-Video disc has subtitles in multiple
languages, this setting may not always work.
• If a DVD has only one subtitle language, that will be
used.
• With some DVD-Video discs you can select subtitles
from a menu.
Configuring the DVD player—Continued
■ Selecting Other Languages
This section explains how to select other languages for
disc menus, audio, and subtitles.
1
Remote
controller
2
Remote
controller
3
Remote
controller
Select “Others” from the Disc
Menu Language, Audio Language, or Subtitle menu, and
then press [ENTER].
Use the Left/Right [ ]/[ ] buttons
to select the code.
Use the Up/Down [ ]/[ ] buttons
to enter a language code.
See adjacent table for language codes.
When you’ve finished, press the
[ENTER] button.
Use this list when specifying other languages.
Language
Japanese
English
French
German
Italian
Spanish
Chinese
Dutch
Portuguese
Swedish
Russian
Korean
Greek
Afar
Abkhazian
Afrikaans
Amharic
Arabic
Assamese
Aymara
Azerbaijani
Bashkir
Code
JA
EN
FR
DE
IT
ES
ZH
NL
PT
SV
RU
KO
EL
AA
AB
AF
AM
AR
AS
AY
AZ
BA
Language
Kirghiz
Latin
Lingala
Laothian
Lithuanian
Latvian
Malagasy
Maori
Macedonian
Malayalam
Mongolian
Moldavian
Marathi
Malay
Maltese
Burmese
Nauru
Nepali
Norwegian
Occitan
Oromo
Oriya
Code
KY
LA
LN
LO
LT
LV
MG
MI
MK
ML
MN
MO
MR
MS
MT
MY
NA
NE
NO
OC
OM
OR
Language
Byelorussian
Bulgarian
Bihari
Bislama
Bengali
Tibetan
Breton
Catalan
Corsican
Czech
Welsh
Danish
Bhutani
Esperanto
Estonian
Basque
Persian
Finnish
Fiji
Faroese
Frisian
Irish
Scots-Gaelic
Galician
Guarani
Gujarati
Hausa
Hindi
Croatian
Hungarian
Armenian
Interlingua
Interlingue
Inupiak
Indonesian
Icelandic
Hebrew
Yiddish
Javanese
Georgian
Kazakh
Greenlandic
Cambodian
Kannada
Kashmiri
Kurdish
Code
BE
BG
BH
BI
BN
BO
BR
CA
CO
CS
CY
DA
DZ
EO
ET
EU
FA
FI
FJ
FO
FY
GA
GD
GL
GN
GU
HA
HI
HR
HU
HY
IA
IE
IK
IN
IS
IW
JI
JW
KA
KK
KL
KM
KN
KS
KU
Language
Panjabi
Polish
Pashto, Pushto
Quechua
Rhaeto-Romance
Kirundi
Romanian
Kinyarwanda
Sanskrit
Sindhi
Sangho
Serbo-Croatian
Sinhalese
Slovak
Slovenian
Samoan
Shona
Somali
Albanian
Serbian
Siswati
Sesotho
Sundanese
Swahili
Tamil
Telugu
Tajik
Thai
Tigrinya
Turkmen
Tagalog
Setswana
Tonga
Turkish
Tsonga
Tatar
Twi
Ukrainian
Urdu
Uzbek
Vietnamese
Volapük
Wolof
Xhosa
Yoruba
Zulu
Code
PA
PL
PS
QU
RM
RN
RO
RW
SA
SD
SG
SH
SI
SK
SL
SM
SN
SO
SQ
SR
SS
ST
SU
SW
TA
TE
TG
TH
TI
TK
TL
TN
TO
TR
TS
TT
TW
UK
UR
UZ
VI
VO
WO
XH
YO
ZU
51
Configuring the DVD player—Continued
DivX Subtitle (Not North American model)
Some DivX video discs include subtitles in one or more
languages. The disc packaging will usually inform you
about which subtitle languages are available.
With this setting you can select your preferred language
for DivX subtitles. When you play a DivX disc with multiple language subtitles, your preferred language will be
selected automatically.
You can select DivX subtitle languages by region:
Unicode (UTF-8): Unicode encoding scheme. Two
bytes are used to encode each character.
Western European
Display Menu
On-Screen Display
With this setting you can turn on or off onscreen messages, such as “Play,” “Stop,” and “Resume.”
Off: Onscreen messages are not displayed.
On (default): Onscreen messages are displayed.
On-Screen Display Color
With this setting you can set the color and theme of the
Disc navigation window.
Turkish
Sapphire
Central European
Pearl
Cyrillic
Amethyst
Greek
Garnet
Hebrew
Arabic
Baltic
Vietnam
Background
With this setting you can select the color of the background that’s displayed when the DVD player is stopped.
Blue
Note:
• Some external subtitle files may display incorrectly or
not at all.
Gray
Graphic: The theme picture specified for the On-
Screen Display Color setting is used.
Screen Saver
With the Screen Saver function you can protect your TV
against screen burn-in, which can occur when the same
image or menu is displayed for a long time.
Off: Screen saver off.
On (default): Screen saver on.
When the Screen Saver function is set to On, and playback is stopped for 15 minutes, the Screen Saver function automatically displays a moving image.
Once the screen saver has been activated, you can cancel
it by pressing either the Play [ ] button.
52
Configuring the DVD player—Continued
Operation Setting Menu
Setting the Parental Lock
With the Parental Lock function you can block access to
certain scenes that the authors have flagged as being
unsuitable for children.
1
Select “Operation Setting” menu
in the setup.
2
Use the Up/Down [ ]/[ ] buttons
to select “Parental Lock,” and
then press the [ENTER] button.
The security code input screen appears.
Remote
controller
Change the Security Code
To change the Security Code, confirm your existing code
then enter a new one.
1
Select “Operation Setting” menu
in the setup.
2
Use the Up/Down [ ]/[ ] buttons
to select “Security Code,” and
then press the [ENTER] button.
The security code input screen appears.
Remote
controller
3
Remote
controller
3
Remote
controller
Enter the security code using the
remote controller’s number buttons, and then press the [ENTER]
button.
The default security code is “8888.”
You can change the security code in the
next section.
4
Remote
controller
4
Remote
controller
Use the Up/Down [ ]/[ ] buttons
to change the level of parental
lock, and then press the [ENTER]
button.
At level 8 parental lock is off, with level
1 being the strictest level.
Notes:
• When entering a security code, you can use the [CLR]
button to delete the numbers entered so far, if necessary.
• Not all discs use parental lock. See the disc’s sleeve
notes for details.
• Discs with parental lock may cut certain scenes,
replace certain scenes with children-friendly scenes,
or prevent playback of the entire disc.
Enter the existing security code
using the remote controller’s
number buttons, and then press
the [ENTER] button.
The default security code is “8888.”
Even if a new security code has been
entered, the code “8888” can still be
used.
Once the security code has been
entered, the new security code input
screen appears.
Enter the new security code
using the remote controller’s
number buttons, and then press
the [ENTER] button.
The new security code has been set.
Note:
• If you forget your security code, enter “8888” instead.
“8888” is a security code that can always be used.
53
Configuring the DVD player—Continued
DVD Priority Contents
DivX® Registration
This setting determines what is played when a
DVD-Audio disc also contains DVD-Video material.
To play DivX VOD (video on demand) content on this
DVD player, you first need to register it with your DivX
VOD content provider. You do this by generating a DivX
VOD registration code, which you then submit to your
provider.
Your 8-digit registration code is displayed.
Burn DivX VOD content that you download to a blank
CD-R.
DVD-AUDIO (default): The DVD-Audio material is
played.
DVD-VIDEO: The DVD-Video material is played.
SACD Priority Contents
SACDs have two separate areas for storing audio
tracks—one for multichannel audio, the other for 2channel stereo audio. In addition, hybrid SACDs have
an extra layer for playback in standard CD players.
With this setting you can determine how SACDs are
played by the DVD player.
DivX® Video On Demand
Your registration code is:
01234567
(http://www.divx.com/vod)
OK
2 ch Area: The 2-channel stereo audio tracks are
played.
Multi ch Area (default): The multichannel audio
tracks are played.
CD Area: The CD layer of hybrid SACDs is played.
Notes:
• This setting determines which area of the disc is
played initially. If Multi ch Area is selected, and an
SACD that contains no multichannel area is loaded,
the 2-channel area will be played.
Auto power off
The Auto power off function automatically turns off the
DVD player after 20 minutes of inactivity.
Off (default): Auto power off function off.
On: Auto power off function on.
54
Make a note of the code as you will need it when you
register with a DivX VOD provider.
Important:
• DivX VOD content is protected by DRM (digital
rights management). This restricts playback of content
to specific, registered devices.
Additional information
Resetting the player
Disc Content Organization
Use this procedure to reset all the player’s settings to the
factory default.
1
Turn on the DVD player.
Wait until “ONKYO DVD” has disappeared from the display.
2
STANDBY/ON
Using the front panel buttons, hold
down the Stop [ ] button and
press [STANDBY/ON] button.
“INITIALIZE” appears on the display.
When the reset is complete, “COMPLETE” is displayed, and the DVD
player enters Standby mode.
■ DVD-Video Format
DVD-Video discs contain titles, which are usually subdivided into chapters.
Title 2
Title 1
Chapter 1
Chapter 2
Chapter 1
Chapter 2
DVD-Video
■ DVD-Audio
DVD-Audio discs contain groups and tracks.
Group 1
Track 1
Group 2
Track 2
Track 3
Track 1
Track 2
STANDBY
DVD-Audio
Adjusting the Display Brightness
You can adjust the brightness of the display as follows.
1
Press the [DIMMER] button
repeatedly to cycle through the
following options:
dim, dimmer, normal.
■ SACD
SACDs have two separate areas for storing audio
tracks—one for multichannel audio, the other for 2channel stereo audio. In addition, hybrid SACDs have an
extra layer for playback in standard CD players. You can
specify how the DVD player handles SACDs on page 50.
Multichannel area
Track 1
Track 2
Stereo area
Track 3
Track 1
Track 2
Track 3
CD layer of a hybrid SACD
SACD
DVD-Video regions
All DVD-Video discs carry a region mark on the case
somewhere that indicates which region(s) of the world
the disc is compatible with. Your DVD player also has a
region mark, which you can find on the rear panel. Discs
from incompatible regions will not play in this player.
Discs marked “ALL” will play in any player.
The diagram below shows the various DVD regions of
the world.
■ VCD
VCDs contain video tracks.
Track 1
Track 2
Track 3
Track 4
Video CD
■ Audio CD Format
Audio CDs contain tracks.
Track 1
Track 2
Track 3
Track 4
Track 5
1
5
2
6
2
1
Audio CD
3
4
5
2
4
55
Additional information—Continued
■ MP3, WMA, JPEG & DivX Files
MP3, WMA, JPEG, and DivX files are typically organized into folders. The DVD player handles MP3,
WMA, JPEG, and DivX files as tracks.
Folder 1
Track 1
Track 2
Folder 2
Track 3
Track 1
Track 2
MP3/WMA/JPEG/DivX (CD-R/CD-RW)
Glossary
Analog audio
DRM
An electrical signal that directly represents sound. Compare this to digital audio which can be an electrical signal, but is an indirect representation of sound. See also
“Digital audio.”
DRM (digital rights management) is a type of server
software developed to enable secure distribution of paid
content over the web, recently incorporated by WMA
(Windows Media Audio).
Aspect ratio
DTS*3
The width of a TV screen relative to its height. Conventional TVs are 4:3 (in other words, the screen is almost
square); widescreen models are 16:9 (the screen is
almost twice as wide as it is high).
DTS stands for Digital Theater Systems. DTS is
a surround system different from Dolby Digital that has
become a popular surround sound format for movies.
Digital audio
An indirect representation of sound by numbers. During
recording, the sound is measured at discrete intervals
(44,100 times a second for CD audio) by an analog-todigital converter, generating a stream of numbers.
On playback, a digital-to-analog converter generates an
analog signal based on these numbers. See also “Sampling frequency” and “Analog audio.”
DivX*1
File extension
A tag added to the end of a filename to indicate the type
of file. For example, “.mp3” indicates an MP3 file.
DivX is a media technology created by DivX,
Inc. DivX media files contain compressed video. DivX
files can also include advanced media features like
menus, subtitles, and alternate audio tracks.
HD
Dolby Digital*2
The video encryption technology developed by Intel for
HDMI/DVI. It’s designed to protect video content and
requires a HDCP-compatible device to display the
encrypted video.
Using a maximum of 5.1 channels of audio,
this high quality surround system is used in many of the
finer movie theaters around the world.
The on-screen display shows which channels are active,
for example showing 3/2.1. The 3 being the two front
channels and the center channel; the 2 being the surround
channels, and the .1 being the LFE channel.
*1. DivX, DivX Certified, and associated logos are trademarks of
DivX, Inc. and are used under license.
*2. Manufactured under license from Dolby Laboratories. “Dolby”
and the double-D symbol are trademarks of Dolby Laboratories.
56
Dynamic range
The difference between the quietest and loudest sounds
possible in an audio signal (without distorting or getting
lost in noise).
Dolby Digital and DTS soundtracks are capable of a very
wide dynamic range, delivering dramatic cinema-like
effects.
Abbreviation for high definition, as in HDTV (high-definition TV).
HDCP (High-bandwidth Digital Content Protection)
*3. “DTS” and “DTS Digital Surround” are registered trademarks
of Digital Theater Systems, Inc.
Glossary—Continued
HDMI*1
Regions (DVD-Video only)
HDMI (High-Definition Multimedia Interface) is a highspeed digital interface which has the capability to support standard, enhanced, or high-definition video plus
standard to multichannel surround-sound audio on a single digital connection. HDMI features include uncompressed digital video, a bandwidth of up to 5 gigabytes
per second and communication between the AV source
and AV devices such as DTVs.
These associate discs and players with particular areas of
the world. This unit will only play discs that have compatible region codes. You can find the region code of
your unit by looking on the rear panel. Some discs are
compatible with more than one region (or all regions).
ISO 9660 format
International standard for the volume and file structure
of CD-ROM discs.
JPEG
A file format used for still images, such as photographs
and illustrations. JPEG files are identified by the file
extension “.jpg” or “.JPG”. Most digital cameras use this
format.
MP3
Sampling frequency
The rate at which sound is measured to be turned into
digital audio data. The higher the rate, the better the
sound quality, but the more digital information is generated. Standard CD audio has a sampling frequency of
44.1kHz, which means 44,100 samples (measurements)
per second. See also “Digital audio.”
WMA
WMA is short for Windows Media Audio and refers to
an audio compression technology developed by
Microsoft Corporation. WMA data can be encoded by
using Windows Media Player version 8.
MP3 (MPEG1 audio layer 3) is a compressed audio file
format. Files are recognized by their file extension
“.mp3” or “.MP3”.
MPEG video
The video format used for Video CDs and DVDs. Video
CD uses the older MPEG-1 standard, while DVD uses
the newer and much better quality MPEG-2 standard.
PBC (PlayBack Control) (Video CD only)
A system of navigating a Video CD through on-screen
menus recorded onto the disc. Especially good for discs
that you would normally not watch from beginning to
end all at once—karaoke discs, for example.
PCM (Pulse Code Modulation)
The most common system of encoding digital audio,
found on CDs and DAT. Excellent quality, but requires a
lot of data compared to formats such as Dolby Digital.
For compatibility with digital audio recorders (CD, MD,
and DAT) and AV amplifiers with digital inputs, this unit
can convert Dolby Digital, and DTS to PCM. See also
“Digital audio.”
Progressive scan video
All the lines that make up a video picture are updated in
one pass (compared to interlace which takes two passes
to update the whole picture).
*1. HDMI, the HDMI logo and High-Definition Multimedia Interface are trademarks or registered trademarks of HDMI licensing LLC.
57
Troubleshooting
Symptom
Can’t turn on the DVD
player?
The DVD player turns
itself off when it’s not
being used?
Possible cause
Remedy
The power cord is not connected.
Connect the power cord to a suitable wall outlet
(page 26).
External interference is affecting the DVD
player’s digital circuitry.
Turn off the DVD player, wait five seconds, then try
turning it on again. If that fails, disconnect the
power cord from the wall outlet, wait ten seconds,
reconnect it, then try turning it on again.
The Auto power off function will turn the DVD
player off automatically after 20 minutes of
inactivity.
The Auto power off function can be turned on or off
as required (page 54).
The wrong input source is selected on your TV.
On your TV, select the input to which the DVD
player is connected.
The video cable is not connected properly.
Check the video cable and correct as necessary.
The PAL Output Setting is set wrong for your
TV.
Change the PAL Output Setting to suit your TV
(page 47).
The SCART Output Setting is set wrong for
your TV.
Make sure your TV supports the selected video
output format (page 48).
No HDMI Video Output?
The HDMI Output Setting is set to Off.
Your TV doesn’t support HDMI Resolution
settings of 720p and 1080i.
No picture?
The connected component doesn’t support
HDCP.
Try pressing the [HDMI] button on the front panel
repeatedly to switch the HDMI OUT on, and then
pressing the [RESOLUTION] button repeatedly to
get picture (page 43).
If the DVD player is connected to your AV receiver,
try connecting it directly to your TV. It will not
work if you connect to a component that doesn’t
support HDCP (page 24).
No Component Video Output?
Your TV does not support progressive scanning, and the HDMI OUT is on.
While the HDMI OUT is on, the component
video output outputs progressive video.
Try pressing the [HDMI] button on the front panel
repeatedly to switch the HDMI OUT off, and then
pressing the [RESOLUTION] button repeatedly to
switch to Interlaced (page 43).
The HDMI Resolution is not set to 480p
(480p/576p).
Press the [RESOLUTION] button repeatedly to
select 480p (480p/576p) (page 43).
No S-Video or Composite Video Output?
No sound?
58
The HDMI Resolution is not set to 480p
(480p/576p).
Try pressing the [RESOLUTION] button on the
front panel repeatedly to get picture (page 19).
The wrong input source is selected on your
hi-fi amp or AV receiver.
On your hi-fi amp or AV receiver, select the input to
which the DVD player is connected.
The audio cable is not connected properly.
Check the audio cable and correct as necessary.
Your hi-fi amp or AV receiver is turned off.
Turn on your hi-fi amp or AV receiver.
Not all of the analog and digital audio outputs
work with all disc types and formats.
See page 19 for details on how the DVD player outputs audio from each output.
Troubleshooting—Continued
Symptom
Possible cause
Remedy
No Sound from the HDMI OUT?
The Digital/HDMI Audio Out setting is set to
Off.
Change the Digital/HDMI Audio Out setting to
either All or PCM (page 48).
The DVD player is connected to the DVI jack
on your TV or AV receiver.
You won’t hear any sound from the HDMI OUT if
your TV or AV receiver only supports DVI.
The HDMI setting on your TV or AV receiver
is set to DVI.
Change the HDMI setting on your TV or AV
receiver to HDMI.
Your TV or AV receiver doesn’t support Dolby
or DTS.
Change the Digital/HDMI Audio Out setting to
PCM (page 48).
You’re playing an SACD.
SACD audio is not output by the HDMI OUT
(page 19).
Your TV or AV receiver doesn’t support
88.2 kHz, 96 kHz, 176.4 kHz or 196 kHz
PCM.
Change the Linear PCM Out setting to Down Sample On (page 48).
No sound?
No Digital Audio Output?
The picture distorts occasionally?
Picture instability or
noise?
The Digital/HDMI Audio Out setting is set to
Off.
Change the Digital/HDMI Audio Out setting to
either All or PCM (page 48).
Your TV or AV receiver doesn’t support Dolby
or DTS.
Change the Digital/HDMI Audio Out setting to
PCM (page 48).
Your TV or AV receiver doesn’t support
88.2 kHz, 96 kHz, 176.4 kHz or 196 kHz
PCM.
Change the Linear PCM Out setting to Down Sample On (page 48).
The disc is dirty.
Remove the disc and clean it (page 10).
You’re using the Fast Forward or Fast Reverse
function.
A little picture distortion may occur when using
these functions. This is normal.
The DVD player is connected to your TV via a
VCR or other video equipment whose copy
protection system is affecting the picture.
Connect the DVD player directly to your TV
(page 20).
No disc loaded.
Load a disc (page 28).
The disc is incompatible.
Load only compatible discs (pages 8, 9).
The disc is upside down.
Load the disc the correct way up (page 28).
The disc is not centered in the disc tray.
Place the disc in the center of the disc tray
(page 28).
The disc is dirty.
Remove the disc and clean it (page 10).
The disc supports parental lock and the Parental Lock function is on.
Turn off the Parental Lock function (page 53).
Can’t watch the
DVD-Video material on a
DVD-Audio disc?
The DVD Priority Contents setting is set to
DVD-AUDIO.
Set the DVD Priority Contents setting to
DVD-VIDEO (page 54).
Can’t play the multichannel area of a hybrid
SACD?
The SACD Priority Contents setting is not set
to Multi ch Area.
Set the SACD Priority Contents setting to Multi ch
Area (page 54).
Can’t start playback?
Can’t play MP3 and JPEG
discs?
The disc is not ISO 9660 Level 2 format.
Use only ISO 9660 Level 2 format discs (page 9).
The disc has not been finalized.
Finalize the disc (page 9).
There’s a noise when using
repeat playback.
During CD 1-Track Repeat playback, the start
of the next track may be heard.
This is not a malfunction.
59
Troubleshooting—Continued
Symptom
Possible cause
Remedy
MP3 files without a “.mp3” or “.MP3” filename extension are not recognized.
Use the correct filename extension (page 9).
The MP3 disc is a multisession disc.
Only files in the first session of a multisession disc
can be played (page 9).
WMA files without a “.wma” or “.WMA” filename extension are not recognized.
Use the correct filename extension (page 9).
The WMA file’s copyright option is on.
Don’t use the copyright option (page 9).
JPEG files without a “.jpg” or “.JPG” or
“.JPEG” filename extension are not recognized.
Use the correct filename extension (page 9).
The JPEG file is too big.
Use JPEG files that are less than 5 megabytes
(page 9).
Can’t play a DivX file?
The file is not encoded correctly.
Make sure the DivX file was encoded with DivX
Version 5, 4, or 3 Home Theater mode.
DivX plays but there’s no
sound?
The DVD player may not support the audio
format.
Try re-encoding the file with a supported audio format.
Buttons on the DVD player
and remote controller
don’t work?
Power supply voltage fluctuations and other
anomalies, such as static electricity, can interfere with normal operation.
Turn off the DVD player, wait five seconds, then
turn it on again. If that doesn’t resolve the issue,
disconnect the power cord from the wall outlet,
wait ten seconds, reconnect it, then try again.
There are no batteries in the remote controller.
Install new batteries (page 11).
The batteries are flat.
Replace with new batteries (page 11).
The batteries are installed incorrectly.
Check the batteries and correct as necessary
(page 11).
You’re not pointing the remote controller at the
DVD player’s remote sensor.
Point the remote controller at the DVD player’s
remote sensor (page 11).
You’re too far away from the DVD player.
Use the remote controller closer to the DVD player
(page 11). The remote controller has a range of
approximately 16 ft. (5 meters).
A strong light source is interfering with the
DVD player’s remote sensor.
Make sure that the DVD player is not subjected to
direct sunshine or inverter-type fluorescent lights.
Relocate if necessary.
If the DVD player is installed in a cabinet with
colored glass doors, the remote controller may
not work reliably when the doors are closed.
Open the doors, or use a cabinet without colored
glass.
Can’t select MP3 files?
Can’t play WMA files?
Can’t view JPEG files?
Buttons on the DVD player
work OK but those on the
remote controller don’t?
The DVD player contains a microcomputer for signal processing and control functions. In very rare situations, severe interference, noise from an external source, or static electricity may cause it to lockup. In the
unlikely even that this should happen, unplug the power cord from the wall outlet, wait at least ten seconds,
and then plug it back in again. Alternatively, press and hold the Stop [ ] button until “RESET” appears on
the display (about 10 seconds).
Onkyo is not responsible for damages (such as CD rental fees) due to unsuccessful recordings caused by the
unit’s malfunction. Before you record important data, make sure that the material will be recorded correctly.
60
Troubleshooting—Continued
■ HDMI Status Mode
If you’re using an HDMI connection and there’s no picture or sound, you can check the status of the HDMI connection
by pressing and holding down the DVD player’s [DISPLAY] button for 10 seconds until a message ID appears on the
display. Look up the message ID in the following tables and check the HDMI connections and settings on both the DVD
player and the connected component.
HDMI connection and HDMI-related settings status
Displayed ID
Message
MSG ID 001
MSG ID 015
Turn the DVD player and the connected component off, then turn them on again. Make sure that
the connected component is working properly and that the DVD player’s HDMI settings are configured suitably for that component.
No picture from the HDMI connection
Displayed ID
Message
MSG ID 002
The HDMI Output Setting is set to Off. Change it to On (page 43).
MSG ID 003
MSG ID 004
The HDMI cable may not be connected properly. Check the connection. Also, make sure the HDMI
input on the TV or AV receiver is correctly configured to received HDMI.
MSG ID 005
MSG ID 006
MSG ID 007
Make sure the HDMI input on the TV or AV receiver is correctly configured to received HDMI.
The connected component may not support HDCP. Make sure the connected component supports
HDCP.
Turn the DVD player and the connected component off, then turn them on again.
The DVD player may be connected to the other component’s DVI jack. Some TVs may not properly
receive the video output by the DVD player. Also, with a DVI connection, there will be no sound.
MSG ID 008
The DVD player’s HD Resolution setting is set to 720p or 1080i. If your TV doesn’t support these
resolutions, select another resolution (page 43).
MSG ID 009
The connected component may not be receiving the HDMI signal properly.
Try selecting another resolution on the DVD player (page 43).
No sound from the HDMI connection
Displayed ID
Message
MSG ID 010
The DVD player’s Digital/HDMI Audio Out setting is set to Off. Change the setting to All or PCM
(page 48).
MSG ID 011
MSG ID 014
The connected component may not support 96 kHz PCM. Set the DVD player’s Linear PCM Out
setting to Down Sample On (page 48).
MSG ID 012
MSG ID 013
The connected component may not support Dolby Digital. Set the DVD player’s Digital/HDMI Audio
Out setting to PCM (page 48).
MSG ID 016
MSG ID 017
The connected component may not support DTS. Set the DVD player’s Digital/HDMI Audio Out
setting to PCM (page 48).
MSG ID 020
Audio from SACDs is not output by the HDMI OUT (page 19).
61
Specifications
Signal System
North American and Korean model: NTSC
Other model: PAL/NTSC
Composite Video Output/Impedance
1.0 V (p-p)/75Ω negative sync, RCA
S-Video Output/Impedance
Y: 1.0 V (p-p)/75Ω negative sync, 4-pin mini DIN
C: 0.286 V (p-p)/75Ω
Component Video Output/Impedance
Y: 1.0 V (p-p)/75Ω
PB/PR: 0.7 V (p-p)/75 Ω RCA/ phono
AV Connector (European model only)
1.0 V (p-p)/75Ω, Scart
Component Video Frequency Response
Frequency response
5 Hz–50 MHz
DVD Audio
4 Hz–88 kHz (192 kHz)
Super Audio CD
4 Hz–50 kHz
DVD Linear Sound
4 Hz–44 kHz (96 kHz)
4 Hz–22 kHz (48 kHz)
Audio CD
4 Hz–20 kHz (44.1 kHz)
S/N Ratio
106 dB
Audio Dynamic Range
96 dB
THD (Total Harmonic Distortion)
0.003% (1 kHz)
Wow and Flutter
Below threshold of measurability
Audio Output (Digital/Optical)
–22.5 dBm
Audio Output/Impedance (Digital/Coaxial)
0.5 p-p/75Ω
Audio Output/Impedance (Analog)
FRONT D.MIX/CENTER/SUBWOOFER: 2.0 V/440Ω
SURROUND 1, 2: 2.0 V/440Ω (SURR MODE 1)
1.4 V/440Ω (SURR MODE 1+2)
■ General
Power Supply
North American model: AC 120 V, 60 Hz
Other model: AC 100–240 V, 50/60 Hz
Power Consumption
17 W
Stand-by Power Consumption
0.4 W
Dimensions (W x H x D)
435 x 81 x 309 mm
(17 1/8 x 3 3/16 x 12 3/16 ins.)
Weight
3.7 kg (8.2 lbs.)
Operation Condition Temperature and Humidity
5˚C–35˚C (41˚F–95˚F), 5%–85%
Disc Compatibility
SACD, DVD-Audio, DVD-video, DVD-R/RW (VR, VIDEO),
DVD+R/RW, CD, CD-R/RW, Video CD, MP3, WMA, JPEG,
DivX (not North American model)
Disc that have not been property finalized may only be partially
playable or not playable at all
Specifications and features subject to change without notice.
The letter displayed at the end of the product name found in catalogs and on package represents the color of the DVD
player. Though the color varies, the specifications and operations are the same.
62
Memo
63
Sales & Product Planning Div. : 2-1, Nisshin-cho, Neyagawa-shi, OSAKA 572-8540, JAPAN
Tel: 072-831-8023 Fax: 072-831-8124
ONKYO U.S.A. CORPORATION
18 Park Way, Upper Saddle River, N.J. 07458, U.S.A.
Tel: 201-785-2600 Fax: 201-785-2650 http://www.us.onkyo.com/
ONKYO EUROPE ELECTRONICS GmbH
Liegnitzerstrasse 6, 82194 Groebenzell, GERMANY
Tel: +49-8142-4401-0 Fax: +49-8142-4401-555 http://www.eu.onkyo.com/
ONKYO EUROPE UK Office
Suite 1, Gregories Court, Gregories Road, Beaconsfield, Buckinghamshire, HP9 1HQ
UNITED KINGDOM Tel: +44-(0)1494-681515 Fax: +44(0)-1494-680452
ONKYO CHINA LIMITED
Unit 1&12, 9/F, Ever Gain PlazaTower 1, 88, Container Port Road, Kwai Chung,
N.T., HONG KONG Tel: 852-2429-3118 Fax: 852-2428-9039
http://www.ch.onkyo.com/
HOMEPAGE
http://www.onkyo.com/
I0608-1
SN 29344210
(C) Copyright 2006 ONKYO CORPORATION Japan. All rights reserved.
64
* 2 9 3 4 4 2 1 0 *