Transcript
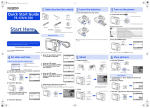
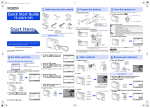
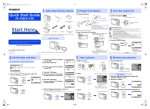
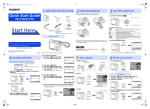
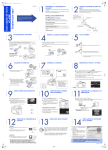
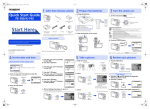
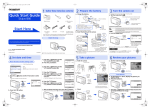
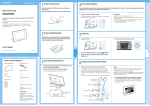
d4316_e_qsg_7.fm Page 1 Monday, July 31, 2006 11:14 PM 4 Gather these items (box contents) Prepare the battery a. Charge the battery Quick Start Guide W 3 Power Cable Digital Camera Strap Lithium Ion Battery Battery Charger LI-42B Lithium Ion Battery 1 USB Cable AV Cable OLYMPUS Master Software CD-ROM Items not shown: Advanced Manual (CD-ROM), Basic Manual, and warranty card. Contents may vary depending on purchase location. a. Press the o button X Charging Indicator Light On (Red): Charging Light Off: Charging complete (Charging time: Approx. 5 hours) Start Here LI-40C Battery Charger Turn the camera on 2 AC Wall Outlet The camera you have purchased is equipped with "Normal mode" and “Simple mode”. This manual presumes that you are using the camera in “Normal mode”, which is the default setting. For instructions on how to switch between “Normal mode” and “Simple mode” and how to operate the camera in “Simple mode”, refer to the “Advanced Manual”. For details on inserting an optional xDPicture Card™, please refer to the advanced manual. Y ----.--.-- --:-- o Button Battery comes partially charged. M D TIME CANCEL b. Insert the battery in the camera Y/M/D MENU • When the date and time have not yet been set, this screen will appear. 1 2 To turn off the camera, press the o button once again. Attach the strap For more information, please refer to the Basic & Advanced Manuals or visit: www.olympusamerica.com/support 3 © 2006 Printed in Japan Insert the battery with the side down. To remove the battery, slide the battery lock knob in the direction of the arrow. The strap can also be fed through strap eyelet on the lower side. 1AG6P1P3259-- VH748601 Set date and time About the date and time setting screen 4 The directions of the arrow pad (1243) is indicated with 1243 in the supplied instruction manual. Battery lock knob Pull the strap tight so that it does not come loose. c. Press the 1F button and the 2Y button to select [M]. d. Press the 3# button. 1 Hint 3 2 Take a picture X Y a. Press the q button. a. Hold the camera M D TIME 2006.11 2006 11.-.-- --:-- Review your pictures Horizontal grip Y/M/D Vertical grip [IN IN] HQ Y-M-D (Year-Month-Day) X Y ----.--.-- --:-- CANCEL e. Press the 1F button and the 2Y button to select [D]. Hour Minute Date formats (Y-M-D, M-D-Y, D-M-Y) M D TIME Y/M/D Exits a setting. a. Press the 1 F button and the 2Y button to select [Y]. • The first two digits of the year are fixed. f. Press the 3# button. g. Press the 1F button and the 2Y button to select “hour”, “minute”. X Y Y CANCEL Y/M/D MENU b. Focus MENU Y/M/D h. Press the 3# button. i. Press the 1F button and the 2Y button to select [Y/M/D]. Place this mark over your subject. Y/M/D Shutter Button (Pressed halfway) SET OK MENU [ M D TIME 2006.11 2006 11.26 26 12 12:30 30 CANCEL j. After all items have been set, press the button. [ IN ] The green lamp indicates the focus and exposure are locked. [ 3# Button Button HQ 3072×2304 YES NO S Button 1F Button Shutter Button (Pressed completely) ] [IN] BACK MENU SET OK c. Press the 1F button to select [YES] and press the button to erase the image. c. Shoot • For precise time setting, press the button as the time signal strikes 00 seconds. P ERASE 4 The number of remaining still pictures is displayed. Y/M/D SET OK MENU a. As described in a. above, display the picture you want to erase. b. Press the S button. ] HQ 3072×2304 X Y Erase pictures P M D TIME 2006.11 2006 11.26 26 12 12:30 30 Next Picture Prev. Picture X Y '06.11.26 12:30 100-0001 1 Arrow Pad M D TIME CANCEL M D TIME CANCEL b. Press the 3# button. q Button X • The time is displayed in the 24-hour format. 2006.--.-2006 .--.-- --:-- 2Y Button MENU 2006.11 2006 11.26 26 --:-- MENU 1 F Button CANCEL ER A SE YES NO [ IN ] 4 BACK The K button blinks. MENU SET OK