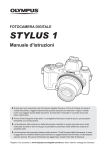
Download Olympus Stylus 1 Instruction Manual
Transcript
DIGITAL CAMERA
STYLUS 1
Instruction Manual
Thank you for purchasing an Olympus digital camera. Before you start to use your new
camera, please read these instructions carefully to enjoy optimum performance and a longer
service life. Keep this manual in a safe place for future reference.
We recommend that you take test shots to get accustomed to your camera before taking
important photographs.
The screen and camera illustrations shown in this manual were produced during the
development stages and may differ from the actual product.
The contents in this manual are based on firmware version 1.0 for this camera. If there
are additions and/or modifications of functions due to firmware update for the camera, the
contents will differ. For the latest information, please visit the Olympus website.
Indications used in this manual
The following symbols are used throughout this manual.
#
Cautions
Warns of operations that should be absolutely avoided. Also
important information on factors which may lead to a malfunction or
operational problems.
$
Notes
Points to note when using the camera.
%
Tips
Useful information and hints that will help you get the most out of
your camera.
g
Reference pages describing details or related information.
Unpack the box contents
The following items are included with the camera.
If anything is missing or damaged, contact the dealer from whom you purchased the
camera.
Strap
USB cable
(CB-USB8)
Lithium ion battery
(BLS-5)
Lithium ion charger
(BCS-5)
Camera
• Computer software CD-ROM
• Instruction manual
• Warranty card
2 EN
Automatic lens cap
The automatic lens cap is removable.
When attaching the conversion lens and the other lenses, remove the automatic lens
cap.
• Removing
• Attaching
1
1
2
2
Attaching
mark
Attach the lens cap so that the attaching
mark ● turns up.
EN 3
Names of parts
1 Shutter button ...........................P. 10, 39
2 R (Movie) button/H button
...............................................P. 13/P. 12
3 Zoom lever ................................P. 10, 11
4 Sub dial*1 (j) ..........................P. 11, 20
5 Self-timer lamp/AF illuminator
...............................................P. 30/P. 68
6 Control ring*2 (j)
.............................. P. 12, 17 - 20, 31, 70
7 V button ......................................P. 70
8 Lever ........................... P. 17 - 20, 31, 68
9 Lens
0 Built-in flash ....................................P. 28
*1
*2
4 EN
a
b
c
d
e
f
g
h
i
j
k
Mode dial ..................................P. 10, 16
Flash switch ....................................P. 28
Side zoom lever ..............................P. 70
Stereo microphone
Speaker ..........................................P. 13
Tripod socket
Battery/card compartment cover.......P. 7
Battery/card compartment lock .........P. 7
Connector cover
Multi-connector ...................P. 80, 82, 86
HDMI micro connector (Type D)......P. 80
In this manual, the j icon represents operations performed using the sub dial.
In this manual, the j icon represents operations performed using the control ring.
d
F (Up) /
F (Exposure compensation) button (P. 29)
I (Right) /
# (Flash) button
(P. 28)
H (Left) /
P (AF target) button
(P. 31)
Q button
(P. 13, 32)
G (Down) /
jY (Sequential shooting/Self-timer) (P. 30) /
(Erase) button (P. 12)
1
2
3
4
5
6
7
Diopter adjustment dial ...................P. 10
Viewfinder ...........................P. 10, 42, 76
Eyecup ............................................P. 90
Monitor (Touch screen) ... P. 14 - 15, 42 - 43
q (Playback) button......................P. 11
MENU button ...............P. 46, 57, 60, 69
INFO (Information display) button
............................................P. 14, 15, 78
8
9
0
a
b
c
d
Hot shoe ................................. P. 90 - 91
u button.......................................P. 76
ON/OFF button ....................P. 8, 10, 42
Indicator lamp
U button ................................P. 12, 68
Strap eyelet.......................................P. 6
Arrow pad .......................................P. 11
Using the monitor
You can adjust the angle of the monitor.
1
2
EN 5
1
Preparations for shooting
Attaching the camera strap
1
Preparations for shooting
• Attach the strap to the other eyelet in the same manner.
• Pull the strap tight so that it does not come loose.
Charging the battery
1
Charging the battery.
Charging indicator
BCS-5
Charging in
progress
Charging
complete
Charging
error
Direction indicating mark ()
3
Lithium ion battery
Lights orange
Off
Blinks orange
(Charging time: Up to
approximately 3.5 hours)
# Cautions
• Unplug the charger when
charging is complete.
6 EN
Charging indicator
1
AC wall outlet
Lithium ion charger
2
AC cable
Inserting and removing the battery and card
1
Follow Steps 1 and 2 to open the
battery/card compartment cover.
Battery/card compartment cover
• Turn off the camera before opening the battery/
card compartment cover.
2
1
Battery/card compartment lock
2
Insert the battery while sliding the battery
lock knob in the direction of the arrow.
• Insert the battery as illustrated with the direction
indicating mark toward the back side of the
camera.
• Slide the battery lock knob in the direction of the
arrow to unlock, and then remove the battery.
Direction
indicating mark
3
Insert the card straight until it clicks into
place.
Preparations for shooting
1
Battery
lock knob
Write-protect switch
• Always use SD/SDHC/SDXC cards or Eye-Fi
card with this camera. Do not insert other types of
memory cards. g “Using the card” (P. 100)
• Do not touch the metallic parts of the card
directly.
To remove the card
Press the card in until it clicks and comes out
slightly, then remove the card.
4
Follow Steps 1 and 2 to close battery/
card compartment cover.
• When using the camera, be sure to close the
battery/card compartment cover.
1
2
EN 7
Turning on the camera and making the initial settings
When you turn on the camera for the first time, a screen appears enabling to set the
language for the menus and messages displayed in the monitor, and the date and time.
1
Preparations for shooting
1
After turning the camera on with the ON/OFF button, select a language
using FGHI and press the A button.
2
Use FG to select the year for
[Y].
X
Y
M
D
Time
2013
Y/M/D
Cancel
3
Press I to save the setting for
[Y].
X
Y
M
D
Time
2013
Y/M/D
Cancel
4
As in Steps 2 and 3, useFGHIto set [M] (month), [D] (day), [Time]
(hours and minutes), and [Y/M/D] (date order), and then press the A
button.
• For precise time setting, press the A button as the time signal strikes 00 seconds.
5
Use HI to select the [x]
time zone and then press the
A button.
• Use FG to turn daylight saving time
([Summer]) on or off.
’13.10.26 12:30
Seoul
Tokyo
Summer
Camera sleep operation
If no operations are performed for the time set, the camera enters “sleep” (stand-by)
mode. In this mode, the monitor turns off and all actions are canceled. The camera
activates again when you touch any button (the shutter button, q button, etc.). The
camera will turn off automatically if left in sleep mode for 5 minutes. Turn the camera on
again before use.
8 EN
1
Preparations for shooting
EN 9
2
Using basic functions
Taking photographs
1
2
Press the n button to turn
on the camera.
When the camera is turned on, the
monitor will turn on.
Using basic functions
2
Set the mode dial to P.
3
Frame the shot.
The viewfinder turns on and the monitor
turns off automatically when you put
your eye to the viewfinder.
• When holding the camera, take care
not to cover the flash, microphone
or other important parts with your
fingers, etc.
You can also shoot with viewing the back monitor. g “Shooting through the
monitor” (P. 42)
Using the zoom
Turning the zoom lever adjusts the shooting range.
4
T side
W side
Press the shutter button
halfway down to focus.
The camera was unable to focus if
the AF target mark flashes red. Try
focusing again.
AF target
Press halfway
ISO-A
160
P
125 F5.6
01:02:03
1023
Shutter speed Aperture value
5
To take the picture, gently press the
shutter button all the way down while
being careful not to shake the camera.
Press halfway
Press the rest of
the way down
• If the display in the viewfinder looks blurry, look through the viewfinder and rotate the
diopter adjustment dial (P. 5) until the display is in sharp focus.
• You can also take photographs using the touch screen.
g “Shooting using touch panel” (P. 43)
10 EN
Viewing/Erasing still images
Turn on the camera.
Viewing photographs
Press the q button.
• Your most recent photograph is displayed.
• Press HI or turn the sub dial to select an image.
2
Sub dial
Displays the
next frame
4:3
2013.10.26 12:30
L N 100-0020
Using basic functions
Displays the
previous frame
20
Still image
q button
Arrow pad
You can view later frames and earlier frames using the touch
screen.
• Drag the screen to left to advance one frame, and drag the
screen to right to rewind one frame.
Index display
• In single-frame playback, turn the zoom lever to W for Index
playback.
• Use FGHI to move the cursor.
• Turn the zoom lever to T for single-frame playback.
2013.10.26 12:30
21
2013.10.26 12:30
21
Tap F to display Index playback.
• Slide your finger up to view the next page, down to view the
previous page.
• Top the monitor to display the menu.
Use t or u to choose the number of images
displayed.
For single-frame playback, tap u until the current image
is displayed full frame.
• Tap an image to view it full frame.
EN 11
2
Close-up playback
• In single-frame playback, turn the zoom lever to T to zoom in
up to 14×; turn to W to return to single-frame playback.
• You can also use the control ring to change the magnification
strength.
• Use your finger to scroll the display when the picture is
zoomed in.
• Double tap the screen for playback zoom.
• Slide the zoom bar to change the magnification strength.
• To return the first magnification, slide the zoom bar to the
lowest position.
2x
Using basic functions
Erasing still images
Display an image you want to delete and
press G (). Select [Yes] and press Q.
Erase
Yes
No
Set
Back
Protecting images
Protect images from accidental deletion. Display an image
you wish to protect and press the U button; a 0
(protect) icon will appear on the image. Press the U
button again to remove protection.
4:3
2013.10.26 12:30
L N 100-0020
20
# Cautions
• Formatting the card erases all images even if they have been protected.
Erasing and protecting selected images
Select multiple pictures for protection or deletion. Press the
H button to select the current picture. Selected pictures
are marked with v. To remove v and deselect the
picture, press the H button again.
Press Q to display the delete or protect selection menu.
2013.10.26 12:30
12 EN
21
Recording movies
Turn on the camera.
1
2
Set the mode dial to P.
Press the R button to begin recording.
2
Press the R button again to end
recording.
R
Displayed during
recording
P
00:02:18
Recording time
• When using a camera with a CMOS image sensor, moving objects may appear distorted
due to the rolling shutter phenomenon. This is a physical phenomenon whereby distortion
occurs in the filmed image when shooting a fast-moving subject or due to camera shaking.
In particular, this phenomenon becomes more noticeable when using a long focal length.
Using basic functions
3
Movie playback
Turn on the camera.
1
2
Press the q button.
Press HI or turn the sub dial to select the
movie, and press the Q button.
WB
AUTO
P
HD
100-0004
2013.06.01 12:30
3
Select [Movie Play] and press Q to begin
playback.
Movie Play
Share Order
• Press the Q button to pause, and press the MENU
button to end the playback.
Pausing
• Press the HI to display previous frame or next frame.
• Press the FG to display the first frame or the last
frame.
• Press the Q button to resume.
4
Movie
L
Erase
Back
Set
Volume can be adjusted by pressing F or G during singleframe and movie playback.
00:00:02/00:00:14
EN 13
Monitor display during shooting
1 2 34 5 678 9
y
0a b
IS OFF
j
S-AF
ISO
+2.0
LN
C
Using basic functions
6
7
8
9
0
a
b
c
d
e
f
g
h
i
j
k
+7
AEL
P
o
n
m
HD
01:02:03
125 F5.6 +2.0
p
1
2
3
4
5
T
10.7
IS OFF
S-AF
ISO
400
A
4:3
-3
r
q
c
d
e
f
400
s
2
z
W
R
Wi-Fi RC ND
x
w
v
u
t
1023
l
g
h
i
j
4”
8 60 250 2000
F2.8 3.2 4.0 5.6 8.0
P
125 F5.6 +2.0
B
01:02:03
1023
k
Card write indicator
Connection to Smartphone .............P. 64
# RC Mode ..............................P. 28, 90
ND Filter Setting .............................P. 41
1 ....................................................P. 53
Digital Tele-converter ......................P. 77
World Time......................................P. 60
Face priority ....................................P. 40
Movie sound ...................................P. 75
Internal temperature warning .........P. 93
Aspect ratio ...............................P. 36, 50
Sequential shooting/self-timer ........P. 30
Flash (blinks: charging in progress) ........P. 28
Image stabilizer...............................P. 33
Art filter ...........................................P. 21
Scene mode....................................P. 21
Picture mode.............................P. 33, 48
White balance .................................P. 34
Live guide recall ..............................P. 26
Record mode (still images) .....P. 37, 101
Record mode (movies) ...................P. 37
Available recording time ...............P. 101
Number of storable still pictures ....P. 101
Highlight&Shadow ..........................P. 44
l Top:
Flash intensity control ......P. 38
Bottom: Exposure compensation
indicator............................P. 29
m Exposure compensation value........P. 29
n Aperture value ...................P. 10, 17 – 20
o Shutter speed ....................P. 10, 17 – 20
p AEL .................................................P. 77
q Shooting mode.........................P. 16 – 26
r C Mode Setup .................................P. 47
s Touch screen mode ........................P. 43
t Flash intensity control .....................P. 38
u ISO sensitivity .................................P. 40
v AF mode .........................................P. 39
w Metering mode ................................P. 38
x Flash mode .....................................P. 28
y Battery check
7 Lit up (green) : Ready for use
(displayed for about ten seconds
after the camera is turned on)
8 Lit up (green) : Battery is running low
9 Blinks (red) : Charging required
z Zoom bar ........................................P. 10
A Control ring function......................P. 103
B Histogram .......................................P. 14
Press the INFO button to choose the information displayed when shooting.
INFO
ISO
INFO
200
LN
LN
HD
P
INFO
ISO
200
125 F5.6
0.0
01:02:03
38
Information display on
HD
P
125 F5.6
0.0
01:02:03
Histogram display
38
Image only
By changing the settings of [G/Info Settings] (P. 68) in the custom menu, [Highlight&Shadow],
[Level Gauge 1], and [Level Gauge 2] can be displayed.
Histogram display
Displays a histogram showing the distribution of brightness in the image. The horizontal axis
gives the brightness, the vertical axis the number of pixels of each brightness in the image.
Areas above the upper limit at shooting are displayed in red, those below the lower limit in
blue, and the area metered using spot metering in green.
14 EN
Monitor display during playback
Simplified display
1
Overall display
2 3 4567
c
d
e
fg
×10
×10
F5.6
125
P
+2.0
20mm
+1.0
WB
AUTO
A+4
G+4
ISO 400
sRGB
3968×2976
4:3
b
L N 100-0015
2013.10.26 12:30
15
8
9
a 0
s
1 Battery check
2 Eye-Fi upload complete ..................P. 76
3 Print reservation
Number of prints .............................P. 85
4 Share Order ....................................P. 64
5 Sound record ............................P. 55, 59
6 Protect ............................................P. 12
7 Image selected ...............................P. 12
8 File number
9 Frame number
0 Record mode ....................P. 36, 50, 101
a Aspect ratio .........................P. 36, 50, 58
b Date and time .............................P. 8, 61
c Aspect border .....................P. 36, 50, 58
d AF target .........................................P. 31
1/8
L N 100-0015
4:3
2013.10.26 12:30
e
f
g
h
i
j
k
l
m
n
o
p
q
r
s
15
rqp o
Shooting mode.........................P. 16 – 26
Exposure compensation .................P. 29
Shutter speed ....................P. 10, 17 – 20
Aperture value ...................P. 10, 17 – 20
Focal length ..............................P. 10, 90
Flash intensity control .....................P. 38
White balance compensation..........P. 74
Color space.....................................P. 74
Picture mode.............................P. 33, 48
Compression rate .............P. 37, 75, 101
Pixel count ........................P. 37, 75, 101
ISO sensitivity .................................P. 40
White balance .................................P. 34
Metering mode ................................P. 38
Histogram .......................................P. 14
2
Using basic functions
iNatural
h
i
j
k
l
m
n
The INFO button can be used to choose the information displayed during playback.
×10
INFO
×10
INFO
125
P
+2.0
F5.6
INFO
20mm
±0.0
WB
AUTO
A±10
ISO 400
Adobe
iNatural
3968×2976
4:3
L N 100-0015
2013.10.26 12:30
Image only
Simplified display
15
4:3
G±10
1/8
L N 100-0015
2013.10.26 12:30
15
Overall display
By changing the settings of [G/Info Settings] (P. 68) in the custom menu, [&] and
[Highlight&Shadow] can be displayed.
EN 15
3
Shooting using basic functions
Using the shooting modes
List of shooting mode
Shooting mode
Sub mode
A (iAUTO mode)
–
3
P (Program mode)
–
A (Aperture-priority mode)
–
Shooting using basic functions
S (Shutter-priority mode)
–
M (Manual mode)
–
C1 (Custom Mode 1)
–
C2 (Custom Mode 2)
–
P (PHOTO STORY)
Standard/Fun Frames
SCN (Scene Mode)
O Portrait/P e-Portrait/L Landscape/J Sport/
G Night Scene/U Night+Portrait/R Sunset/
T Documents/s Panorama/( Fireworks/
0 Multi. Exposure/g Beach & Snow
ART (Art Filter)
Pop Art/Soft Focus/Pale&Light Color/Light Tone/Grainy Film/
Pin Hole/Diorama/Cross Process/Gentle Sepia/
Dramatic Tone/Key Line
Selecting shooting mode
Turn the mode dial to set the shooting mode to the
indicator.
• After selecting SCN or ART, select the sub mode. After
selecting PHOTO STORY, select the theme.
Moreover, you can modify filters and add effects in ART.
16 EN
P program mode
In mode P, the camera automatically adjusts
shutter speed and aperture in response to
subject brightness.
• The shutter speed and aperture displays
flash if the camera is unable to achieve
optimal exposure.
ISO
400
LN
HD
Shooting mode
P
125 F5.6
0.0
01:02:03
38
Shutter speed Aperture value
Warning display
example (blinking)
Status
3
Action
F2.8
The subject is too dark.
Use the flash.
2000
F8
The subject is too bright.
Use [ND Filter Setting].
g “Using shooting options (Set by
live control)” (P. 32)
Shooting using basic functions
2”
Program shift (%)
You can choose different combinations of aperture value and
shutter speed without altering exposure.
After setting the lever as the illustration shows, rotate the
control ring for program shift.
• While % is displayed, the camera is performing program
shift.
To cancel program shift, rotate the control ring backwards until
P is displayed.
• Program shift is not available when you are using a flash.
ISO
400
LN
HD
Ps
125 F5.6
250
0.0
01:02:03
38
Program shift
EN 17
A aperture-priority mode
In mode A, you choose the aperture and let the camera
automatically adjust shutter speed for optimal exposure.
You can express the depth of field, and blur the background
intentionally.
• Larger apertures (lower F-numbers) decrease depth of field
(the area in front of or behind the focus point that appears to
be in focus), softening background details. Smaller apertures
(higher F-numbers) increase depth of field.
ISO
400
LN
HD
A
125 F5.6 +0.0
01:02:03
Aperture value
3
Shooting using basic functions
After setting the lever as the illustration shows, rotate the
control ring to set the aperture value.
• The shutter speed display will blink if the camera is unable to
achieve optimal exposure.
Warning display
example (blinking)
2”
F5.6
2000 F5.6
Lower aperture
value
18 EN
Status
Action
The subject is underexposed.
Decrease the aperture value.
The subject is overexposed.
Use [ND Filter Setting].
g “Using shooting options (Set
by live control)” (P. 32)
Otherwise, increase the aperture
value.
F2.8 F5.6 F8.0
Higher aperture
value
38
S shutter-priority mode
In mode S, you choose the shutter speed and let the
camera automatically adjust aperture for optimal exposure.
You can shoot a fast action scene without any blur, and
shoot with impression of dynamic motion.
ISO
400
LN
HD
S
125 F5.6 +0.0
01:02:03
38
Shutter speed
After setting the lever as the illustration shows, rotate the
control ring to set the shutter speed.
• The aperture value display will blink if the camera is unable
to achieve optimal exposure.
2000 F2.8
125
F8
Status
Action
The subject is underexposed.
Set the shutter speed slower.
The subject is overexposed.
Use [ND Filter Setting].
g “Using shooting options (Set
by live control)” (P. 32)
Otherwise, set the shutter speed
faster.
Shooting using basic functions
Warning display
example (blinking)
3
EN 19
M manual mode
3
In mode M, you choose both the aperture and the shutter
speed. At a speed of BULB, the shutter remains open while the
shutter button is pressed.
After setting the lever as the illustration shows, rotate the
control ring to set the shutter speed, and rotate the sub dial to
set the aperture value.
• Use the exposure compensation indicator to view the
exposure difference between suitable exposure and the
exposure derived from set aperture value and shutter speed.
• The shutter speed can be set to 1/2000 – 60 sec. or [BULB].
• You can change the functions assigned to the control ring
and the sub dial. g “c Custom Menu” (P. 68)
ISO
400
Shooting using basic functions
LN
# Cautions
• Exposure compensation is not available in M mode.
HD
M
125 F5.6 +0.0
Shutter
speed
01:02:03
38
Exposure
compensation
indicator
Choosing when the exposure ends (bulb)
You can take a picture with a bulb exposure time in which the shutter stays open as
long as you hold down the shutter button. Time the end of the exposure to suit the
subject. Use for night landscapes and fireworks. In M mode, set the shutter speed to
[BULB].
# Cautions
• Maximum 15 minutes (default)
• The maximum exposure time of bulb shooting depends on ISO sensitivity.
• To reduce camera shake for bulb shooting, mounting the camera on a stable tripod or
using a remote cable (sold separately) is recommended.
• The following features are not available during long exposures:
Sequential shooting/self-timer shooting/AE bracket shooting/image stabilizer/
flash bracketing.
Noise in images
While shooting at slow shutter speeds, noise may appear on-screen. These phenomena
are caused when current is generated in those sections of the image pickup device that
are not normally exposed to light, resulting in a rise in temperature in the image pickup
device or image pickup device drive circuit. This can also occur when shooting with a high
ISO setting in a high-temperature environment. To reduce this noise, the camera activates
the noise reduction function. g “c Custom Menu” (P. 68)
20 EN
ART art filters
You can shoot with color and effect like posters and paintings.
1
2
Rotate the mode dial to ART.
ART
1
Pop Art
1
Filter Type
1
Use FG to select a sub mode and press the
A button at the end.
• Press the A button once again to display the sub
mode selection screen.
Selecting modifying filters, adding effects
Press I before selecting a sub mode and press the
A button for the selecting modifying filters screen and the
adding effects screen.
ART
Set
Set
3
OFF
Exit
Set
Adding effects
After pressing G and I, use FG to select the adding
effects and press the A button at the end.
SCN scene mode
Only by selecting a sub mode according to the subject or the scene, you can shoot
with an proper setting.
1
2
Rotate the mode dial to SCN.
1
Portrait
Shooting using basic functions
Selecting modifying filters
After pressing I once again, use FG to select modifying
filters and press the A button at the end.
Exit
Use FG to select a sub mode and press the
A button at the end.
• Press the A button once again to display the sub
mode selection screen.
# Cautions
• In [e-Portrait] mode, two images are recorded: an unmodified image and a second image
to which [e-Portrait] effects have been applied. The unmodified image is recorded using
the option currently selected for image quality, the modified copy at an image quality of
JPEG (X-quality (2560 × 1920)).
• Effects of some scene modes are not applied in recording movies.
EN 21
Taking pictures for a panorama
If you have installed the supplied computer software, you can use it to join pictures
together to form a panorama. g “Installing Software” (P. 86)
1
2
3
4
Rotate the mode dial to SCN.
Select [Panorama] and press Q.
Use FGHI to choose a pan direction.
Take a picture, using the guides to frame the
shot.
• Focus, exposure, and other settings are fixed at the
values for the first shot.
3
Shooting using basic functions
5
ISO
200
M
125 F5.6
38
Take the remaining images, framing each shot so that the guides overlap
with the previous picture.
ISO
200
M
125 F5.6
38
[2]
Exit
[3]
Exit
• A panorama may include up to 10 images. A warning indicator (g) is displayed after
the tenth shot.
6
After taking the last shot, press Q to end the series.
# Cautions
• During panorama shooting, the image previously taken for position alignment will not be
displayed. With the frames or other markers for display in the images as a guide, set the
composition such that the edges of the overlapping images overlap within the frames.
$ Notes
• Pressing Q before shooting the first frame returns to the scene mode selection menu.
Pressing Q in the midst of shooting ends the sequence of panorama shooting, and allows
you to continue with the next one.
22 EN
3
Shooting using basic functions
EN 23
P PHOTO STORY
When shooting, an image is incorporated into a layout frame set to create a desired collage.
This enables wide range of photo expression with themes or stories.
3
1
Rotate the mode dial to P.
2
Select a theme using FG and press I.
Shooting using basic functions
1
Types of theme
Standard
1
P1 Standard
P2 Fun Frames
2
Set
Exit
3
1
Select desired items in the theme using
FGHI, then press A.
Standard
• Press the shutter button halfway to return to
the shooting screen.
Exit
P1
Standard
Sub-menus of [Type] [Effect]
1
[Type]
[Pics/
Sheet]
Current item
24 EN
Theme
P2
Fun Frame
[Effect]
4
Set
4
Tap a frame in standby mode to shoot.
ISO
ISO
400
ISO
400
125 F5.6
0.0
38
400
125 F5.6
0.0
38
125 F5.6
0.0
38
• Tap the frame when the subject is not displayed in a frame.
5
• Shot images are displayed in the frames.
• Touch any framed image and then U while U is displayed, so that the image is
canceled, and you can retake the shot.
• Press the MENU button and select [Exit] not to save the picture and restart shooting
again.
After shooting all frames, press a and save the picture.
# Cautions
• When changing a shooting mode in the middle of shooting, the picture will not be saved.
• An image is saved as one photo collage. When set to RAW+JPEG option, RAW images
are saved per frame.
3
Shooting using basic functions
6
Shoot each frame in the same way.
EN 25
C1/C2 custom mode
You can shoot with the preselected settings which you registered.
• You can register different settings in C1 and C2. For the registration, refer to (P. 47).
Set the mode dial to C1 or C2 to use.
A iAUTO mode
3
Shooting using basic functions
A full auto mode in which the camera automatically optimizes settings for the current scene.
The camera does all the work, which is convenient for beginners.
Set the mode dial to A to use.
• In A, you can shoot with [Live Guide] in which the set effect is visible in the display
like “Color Saturation”, “Color Image”, “Brightness”, “Blur Background”, and “Express
Motions”. You can shoot easily without using any term.
* You can use [Live Guide] only in A.
Using live guides
When the shooting mode is set to A
1
Tab
Touch the tab and swipe your finger to the
left to display live guides.
ISO-A
200
LN
HD
01:02:03
125 F5.6
2
Select and touch the guide item.
3
Using your finger to position the sliders,
press the A button to confirm the setting.
38
Change Color Saturation
• The guide items indicates [Saturation], [Color],
[Brightness], [Blurring background], [Motion], and
[Shooting Tips] from the top.
• In [Shooting Tips], the adding effects is
unavailable.
Clear & Vivid
0
Flat & Muted
4
26 EN
Shoot.
• To clear the live guide from the display, press the MENU button.
• Changing the shooting mode or an playback also cancels the settings.
# Cautions
• If [RAW] is currently selected for image quality, image quality will automatically be set to
[YN+RAW].
• Live guide settings other than [Blur Background] and [Express Motions] are not applied to
the RAW copy.
• [Blur Background] and [Express Motions] settings are not applied to movie recording.
• Pictures may appear grainy at some live guide setting levels.
• Changes to live guide setting levels may not be visible in the monitor.
• The flash can not be used with the live guide.
• Changes to live guide options cancel previous changes.
• Choosing live guide settings that exceed the limits of the camera exposure meters may
result in pictures that are over- or under-exposed.
3
Shooting using basic functions
EN 27
4
Shooting using various functions
Press the direct button, A button, or MENU button to use various functions.
# Cautions
• Some items are not available in some shooting modes.
g “List of settings available in each shooting mode” (P. 107)
Using shooting options (Set by direct button)
4
Flash
You can use a flash when shooting.
Shooting using various functions
1
Press the flash switch to pop up the
flash unit.
2
Press the # button (I) to display
options.
3
Use HI to choose a flash mode
and press Q.
Auto flash
The flash fires automatically in low light or
backlight conditions.
Red-eye reduction flash
This function allows you to reduce the redeye phenomenon.
#
Fill-in flash
The flash fires regardless of the light
conditions.
$
Flash off
The flash does not fire.
Slow synchronization/
Red-eye reduction flash
Combines slow synchronization with redeye reduction.
#SLOW*1
Slow synchronization
Slow shutter speeds are used to brighten
dimly-lit backgrounds.
#FULL,
#1/4, etc.
Manual
For users who prefer manual operation.
#AUTO
!
!*1
SLOW
*1 Mode P and A only.
28 EN
Flash switch
4
Press the shutter button all the way.
• In [!](Red-eye reduction flash), after the pre-flashes, it takes about 1 second
before the shutter is released. Do not move the camera until shooting is complete.
• [!](Red-eye reduction flash) may not work effectively under some shooting
conditions.
• #AUTO, $ can be set in A mode.
• The lens may cast shadows over objects close to the camera, causing vignetting, or
be too bright even at minimum output.
• To prevent photographs from being overexposed, select mode A or M and choose a
high f-number, or reduce ISO sensitivity.
Exposure compensation
Compensates the brightness (appropriate exposure) adjusted by the camera.
1
Rotate the sub dial for the exposure compensation.
Negative (–)
2
Shoot.
No compensation (0)
Positive (+)
4
Shooting using various functions
• Pressing the HI button after pressing the +/- button (F) can also perform the
adjustment.
• Choose positive (“+”) values to make pictures brighter, negative (“–”) values to make
pictures darker.
EN 29
Self timer
Sets the time after the shutter button is pressed until the picture is taken.
1
2
4
Press the jY button (G) to display the direct menu.
Select [Y12s], [Y2s] or [YC] using HI and press the Q button.
Y12s
Self-timer
12 SEC
Press the shutter button halfway to focus, the rest of the way
down to start the timer. First, the self-timer lamp lights up for
approximately 10 seconds, then it blinks for approximately
2 seconds and the picture is taken.
Y2s
Self-timer
2 SEC
Press the shutter button halfway to focus, the rest of the
way down to start the timer. The self-timer lamp blinks for
approximately 2 seconds, and then the picture is taken.
YC
Self-timer
Custom
Photographs are taken at “the number of frames, the time after
the shutter button is pressed until the picture is taken, and the
interval time” set in the shooting menu.
Shooting using various functions
• To cancel the activated self-timer, press the jY button.
• Fix the camera securely on a tripod for self-timer shooting.
• If you stand in front of the camera to press the shutter button halfway when using the selftimer, the photograph may be out of focus.
• Self timer is not canceled automatically after shooting.
Single/Sequential
1
2
Press the jY button (G) to display the direct menu.
Select [o] or [j] using HI and press the Q button.
o
Single-frame shooting
Shoots 1 frame at a time when the shutter button is
pressed (normal shooting mode).
j
Sequential shooting
Photographs are taken at about 5 frames per
second (fps) while the shutter button is pressed all
the way down.
• During sequential shooting, focus, exposure, and white balance are locked at the first
frame.
• During sequential shooting, if the battery check blinks due to low battery, the camera
stops shooting and starts saving the pictures you have taken on the card. The camera
may not save all of the pictures depending on how much battery power remains.
30 EN
Bracketing (BKT)
While the shutter button is pressed all the way down, photographs are taken with
automatically changing the settings for each frame (bracket photography).
1
2
Press the jY button (G) to display the direct menu.
Select [Bracketing] using HI and press the Q button.
• Bracketing is available only when [Bracketing] (P. 51) is selected.
Manual focus (MF)
This function allows you to manually focus on any subject.
1
After setting the lever as the illustration shows,
rotate the control ring.
4
You can select the focus target manually. Normally the camera automatically chooses
from the 35 of focus targets.
1
2
Press the P button (H) to display the AF target.
Use FGHI to move the green border to the focus point.
• When you move the cursor off the screen, “All targets” mode is restored and the
camera automatically chooses from the 35 of focus targets.
All Targets
Single Target
The camera automatically
chooses from the full set of
focus targets.
Select the focus target
manually.
All Targets
Shooting using various functions
AF target
• While using the digital tele-converter, AF targets decrease to 9 targets.
EN 31
Using shooting options (Set by live control)
In P, A, S and M modes, after pressing the A button, the live control can be used to
adjust settings. Using live control allows you to preview the effects of different settings
in the monitor.
Available settings
4
Image stabilizer ....................................P. 33
Picture mode ........................................P. 33
White balance .......................................P. 34
Sequential shooting/self-timer ..............P. 30
Aspect Ratio .........................................P. 36
Record mode ........................................P. 36
Flash mode ...........................................P. 28
Shooting using various functions
1
Press Q to display the live control.
2
Use FG on the arrow pad
to select settings, use HI to
change the selected setting,
and press Q.
Flash intensity control ...........................P. 38
Metering mode......................................P. 38
AF mode ...............................................P. 39
ISO sensitivity .......................................P. 40
Face priority ..........................................P. 40
ND Filter Setting ...................................P. 41
• To hide the live control, press Q again.
Displays the selected
function name
Function
IS OFF
i
• The selected settings take effect
automatically if no operations
are performed for about
8 seconds.
WB
WB
AUTO
AUTO
4:3
LF
WB Auto
Selection
P
AUTO
AUTO
Arrow pad (HI)
# Cautions
• Some items are not available in some shooting modes.
g “List of settings available in each shooting mode” (P. 107)
32 EN
HD
n
Arrow
pad
(FG)
Image Stabilizer
Select [ON] to reduce camera shake that can occur when shooting in low light
situations or shooting with high magnification.
1
Press the Q button to display the live control,
and select the image stabilizer (IS) item using
FG.
IS ON
i
WB
AUTO
4:3
2
LF
Select [ON] with HI and press Q.
Auto
P
HD
ON
• The image stabilizer cannot correct excessive camera shake or camera shake that occurs
when the shutter speed is set to the slowest speed. In these cases, it is recommended
that you use a tripod.
• When using a tripod, set [Image Stabilizer] to [Off].
Change a picture mode. When the mode dial is set to SCN, ART, A, and P, the
mode cannot be set.
1
Press the Q button to display the live control,
and select the picture mode item (j) using
FG.
IS OFF
j
WB
AUTO
4:3
LF
Muted
P
h
i-Enhance
h i j Z a J j
Produces more impressive-looking results suited to the
scene.
Produces vivid colors.
i
Vivid
j
Natural
Produces natural colors.
Z
Muted
Produces flat tones.
a
Portrait
Produces beautiful skin tones.
J
Monotone
Produces black and white tone.
HD
Shooting using various functions
Picture Mode
4
j Pop Art
k Soft Focus
l Pale&Light Color
m Light Tone
n Grainy Film
o Pin Hole
Choose an art filter and select the desired effect.
s Diorama
t Cross Process
u Gentle Sepia
v Dramatic Tone
Y Key Line
EN 33
White Balance
White balance (WB) ensures that white objects in images recorded by the camera
appear white. [AUTO] is suitable in most circumstances, but other values can be
selected according to the light source when [AUTO] fails to produce the desired results
or you wish to introduce a deliberate color cast into your images.
1
2
Press the Q button to display the live control,
and select the white balance item using FG.
IS OFF
i
WB
WB
AUTO
AUTO
Select an option using HI and press Q.
4:3
LF
WB Auto
P
4
Shooting using various functions
Auto white
balance
Preset
white
balance
One-touch
white
balance
Custom
white
balance
34 EN
Color
temperature
WB mode
AUTO
AUTO
HD
n
Light conditions
AUTO
k
Used for most light conditions (when there is a
white portion framed on the monitor). Use this
mode for general use.
5
5300K
For shooting outdoors on a clear day, or to
capture the reds in a sunset or the colors in a
fireworks display
N
7500K
For shooting outdoors in the shadows on a
clear day
O
6000K
For shooting outdoors on a cloudy day
1
3000K
For shooting under a tungsten light
>
4000K
For subjects lit by fluorescent lights
n
5500K
P
Q
CWB
Color
temperature
set by onetouch WB.
2000K –
14000K
For flash shooting
Choose when a white or gray subject can be
used to measure white balance and the subject
is under mixed lighting or lit by an unknown type
of flash or other light source.
After pressing the INFO button, use HI
buttons to select a color temperature and then
press Q.
One-touch white balance
Measure white balance by framing a piece of paper or other white object under the lighting
that will be used in the final photograph. This is useful when shooting a subject under natural
light, as well as under various light sources with different color temperatures.
1
Select [P] or [Q] (one-touch white balance 1 or 2) and press the INFO
button.
2
Photograph a piece of colorless (white or gray) paper.
3
Select [Yes] and press Q.
• Frame the object so that it fills the display and no shadows fall it.
• The one-touch white balance screen appears.
• The new value is saved as a preset white balance option.
• The new value is stored until one-touch white balance is recorded again. Turning the
power off does not erase the data.
• If the subject is too bright or too dark or visibly tinted, the message [WB NG Retry] will be
displayed and no value will be recorded. Correct the problem and repeat the process from
Step 1.
4
Shooting using various functions
% Tips
EN 35
Image Aspect
You can change the aspect ratio (horizontal-to-vertical ratio) when taking pictures.
Depending on your preference, you can set the aspect ratio to [4:3] (standard), [16:9],
[3:2] or [1:1].
1
Press the Q button to display the live control, and select the aspect ratio
item using FG.
2
Use HI to select an aspect ratio and press Q.
# Cautions
4
• JPEG images are cropped to the selected aspect ratio; RAW images, however, are not
cropped but are instead saved with information on the selected aspect ratio.
• When RAW images are played back, the selected aspect ratio is shown by a frame.
Record Mode
Shooting using various functions
Select an image quality for photographs and movies according their intended use, for
example retouching on a computer or display on the web.
1
Press the Q button to display the live control,
and select a record mode for photographs or
movies using FG.
IS OFF
i
WB
AUTO
4:3
2
36 EN
Select an option using HI and press Q.
3968x2976
P
RAW
L FL N
MN
HD
SN
L
F
+RAW
L
N
+RAW
Record mode
Record modes (still images)
Choose from RAW and JPEG (YF, YN, XN, and WN) modes. Choose a RAW+JPEG option
to record both a RAW and a JPEG image with each shot. JPEG modes combine image
size (Y, X, and W) and compression ratio (SF, F, N, and B). The options available can be
selected using the [K Set] option in the “c Custom Menu” (P. 68).
Image size
Name
Y (Large)
Compression rate
Pixel count
SF
(Super
Fine)
F
(Fine)
N
(Normal)
B
(Basic)
3968 × 2976*
YSF
YF*
YN*
YB
XSF
XF
XN*
XB
WSF
WF
WN*
WB
Application
3200 × 2400
X (Middle)
2560 × 1920*
1920 × 1440
Select for the
print size
1280 × 960*
W (Small)
1024 × 768
640 × 480
For small
prints and use
on a website
* Default
RAW image data
This format (extension “.ORF”) stores unprocessed image data for later processing. RAW
image data cannot be viewed using other cameras or software, and RAW images cannot
be selected for printing. JPEG copies of RAW images can be created using [Edit] in the
“Using functions of playback menu” (P. 57).
Record modes (movies)
Pixel count
Frame rate
Full HD
Record mode
1920×1080
30 fps
HD
1280×720
30 fps
HS120*
640×480
120 fps
HS240*
320×240
240 fps
4
Shooting using various functions
1600 × 1200
Recording length
29 min
20 sec
* HS: Record quickly moving subjects for slow-motion playback. Available in P/A/S/M
mode.
# Cautions
• Individual files can be up to 4 GB in size.
• Depending on the type of card used, recording may end before the maximum length is
reached.
EN 37
Flash Intensity Control
Flash output can be adjusted if you find that your subject to appears overexposed, or is
underexposed even though the exposure in the rest of the frame is just right.
1
2
Press the Q button to display the live control,
and select the flash intensity control item using
FG.
Choose the compensation value with HI and
press Q.
S-AF
ISO
AUTO
0.0
OFF
R
0.0
P
0
Metering
4
Choose how the camera meters subject brightness.
Shooting using various functions
1
Press the Q button to display the live control,
and select the metering item using FG.
2
Select an option with HI and press Q.
OFF
R
ESP
P
HI
SH
The camera optimizes exposure for the current scene
or
(if an option other than [Off] is selected for [I Face
Priority]) portrait subject. This mode is recommended
for general use.
p
ESP metering
H
This metering mode provides the
average metering between the subject
Center weighted
and the background lighting, placing
averaging metering
more weight on the subject at the
center.
Spot metering
Choose this option to meter a small
area with the camera pointed at the
object you wish to meter. Exposure will
be adjusted according to the brightness
at the metered point.
IHI
Spot metering highlight
Increases spot metering exposure. Ensures bright
subjects appear bright.
ISH
Spot metering shadow
Lowers spot metering exposure. Ensures dark subjects
appear dark.
I
38 EN
S-AF
ISO
AUTO
AF Mode
Select a focusing method (focus mode).
1
Press the Q button to display the live control,
and select the AF mode item using FG.
S-AF
S-AF
S-AF
2
ISO
AUTO
Select an option with HI and press Q.
• The selected AF mode is displayed on the monitor.
R
Single AF
P
S-AF
C-AF
C-AF
TR
MF
S-AF (single AF)
The camera focuses once when the shutter button is pressed
halfway. When the focus is locked, a beep sounds, the AF
target mark lights up. This mode is suitable for taking pictures
of still subjects or subjects with limited movement.
Super Macro
You can focus from 5 cm away from the subject.
C-AF+TR
(AF tracking)
Press the shutter button halfway to focus; the camera then
tracks and maintains focus on the current subject while the
shutter button is held in this position.
• The AF target is displayed in red if the camera can no longer
track the subject. Release the shutter button and then frame
the subject again and press the shutter button halfway.
MF (manual focus)
This function allows you to manually focus on any subject.
Press and hold Q for a while, then focus on the subject with
FG.
4
Shooting using various functions
The camera repeats focusing while the shutter button remains
pressed halfway. When the subject is in focus, the AF target
mark lights up on the monitor and the beep sounds when the
C-AF (continuous AF)
focus is locked at the first time. Even if the subject moves
or you change the composition of the picture, the camera
continues trying to focus.
# Cautions
• The flash and zoom are unavailable during super macro photography. The zoom is
automatically adjusted.
• The camera may be unable to focus if the subject is poorly lit, obscured by mist or smoke,
or lacks contrast.
Focus lock
If the camera is unable to focus on your chosen subject, select single target mode and use
focus lock to focus on another subject at about the same distance.
1
In [S-AF] mode, position the AF target over the subject and press the
shutter button halfway.
• Check that the AF target mark has turned green.
• Focus locks while the shutter button is pressed halfway.
2
Keeping the shutter button pressed halfway, recompose the photograph
and then press the shutter button the rest of the way down.
• Do not change the distance between the camera and the subject while pressing the
shutter button halfway.
EN 39
ISO
Increasing ISO sensitivity increases noise (graininess) but allows photographs to be
taken when lighting is poor. The setting recommended in most situations is [AUTO],
which adjusts ISO sensitivity according to shooting conditions.
1
Press the Q button to display the live control, and select the ISO
sensitivity item using FG.
2
Select an option using HI and press Q.
AUTO
The sensitivity is set automatically according to the shooting conditions.
100 – 12800
Sensitivity is set to the selected value.
4
I Face Priority
Shooting using various functions
1
Press the Q button to display the live control,
and select the face priority item using FG.
2
Use HI to select an option and press Q.
The camera detects faces and adjusts focus and ESP metering.
S-AF
ISO
AUTO
R
Face Priority On
P
3
4
5
i
iR
iL
J
Face Priority Off
Face priority off.
I
Face Priority On
Face priority on.
K
Face & Eye Priority On
The autofocus system selects the pupil of the eye
closest to the camera for face-priority AF.
L
Face & R. Eye Priority On
The autofocus system selects the pupil of the eye
on the right for face-priority AF.
M
Face & L. Eye Priority On
The autofocus system selects the pupil of the eye
on the left for face-priority AF.
Point the camera at your subject.
• If a face is detected, it will be indicated by a white
border.
ISO
200
Press the shutter button halfway to focus.
• When the camera focuses on the face in the white
border, the border will turn green.
LN
HD
P
125 F5.6
0.0
01:02:03
Press the shutter button the rest of the way down to shoot.
# Cautions
• Face priority applies only to the first shot in each sequence taken during sequential
shooting.
• Depending on the subject, the camera may not be able to correctly detect the face.
• In metering modes other than [p] (ESP metering), the camera will meter exposure for
the selected position.
40 EN
1023
ND Filter Setting
Set the ND filter.
1
Press the Q button to display the live control, and select the ND filter
item using FG.
2
Use HI to select an option and press Q.
Off
The ND filter is not used.
On
The ND filter is used.
4
Shooting using various functions
EN 41
Shooting through the monitor
1
Turn the camera on with the n button.
2
Rotate the mode dial to
set the shooting mode.
3
Frame the shot.
• The back monitor will turn on.
4
Shooting using various functions
• When you look through the
viewfinder, the back monitor
automatically turns off and
the viewfinder switches on.
You can also switch the
display manually.
[EVF Auto Switch]
g “c Custom Menu” (P. 68)
Horizontal grip
Vertical grip
• When switching the display manually, the viewfinder and the back monitor display
switches each time the monitor button is pressed.
4
Press the shutter button
halfway to focus.
• If the AF target mark blinks
in red, the subject is not in
focus.
Adjust focus again.
AF target
Press halfway
ISO-A
160
P
125 F5.6
01:02:03
1023
Shutter speed Aperture value
5
42 EN
While keeping the position of the
camera, press the shutter button
rest of the way down gently to
shoot.
Press halfway
Press the rest of
the way down
Shooting using touch panel
When you shoot through the monitor, you can touch to shoot instead of pressing the
shutter button.
When framing the shot, touch to focus point.
• Tap a subject to focus and automatically release the
shutter.
ISO-A
200
LN
HD
01:02:03
125 F5.6
38
You can disable the touch screen operations, or tap a
subject only to focus.
Touch screen operations disabled.
V
Tap a subject to focus. Photographs can be
taken by pressing the shutter button.
T
Tap a subject to focus and automatically
release the shutter.
ISO
200
LN
HD
P
125 F5.6
0.0
01:02:03
30
Shooting using various functions
U
4
EN 43
Highlight & Shadow Control
Press the F button (F) and press the INFO button to
display the shadow control dialog. Then press the INFO
button to display the highlight control dialog.
Each time the INFO button is pressed, the camera
switches to the exposure compensation control dialog, the
shadow control dialog, and the highlight control dialog.
INFO
INFO
0
Exposure
compensation
4
Tone level: low
Shooting using various functions
Shadow Control
You can adjust dark tone level.
Choose “-” to darken shadows.
Choose “+” to brighten shadows.
Highlight Control
44 EN
You can adjust bright tone level.
Choose “-” to darken highlights.
Choose “+” to brighten highlights.
INFO
+1
0
Tone level: high
IS OFF
j
ISO
200
LN
0
P
125 F5.6 +2.0
HD
01:02:03
1234
AF target (Choosing a focus target)
Select 9 targets from all 35 of them, and let the camera automatically choose from the
targets in the selected area. (According the area, select 6 or 4 targets.)
Press the P button (H) to display the AF
target.
2
Press the INFO button and use FG to select
group target display.
3
Press the A button to select group target
mode.
4
Use FGHI to select the autofocus area.
• The camera automatically chooses from the targets in
the selected group.
4
Shooting using various functions
1
EN 45
Setting shooting functions
In the Shooting Menu 1 and 2, you can set the functions below.
I Shooting Menu 1
J Shooting Menu 2
Card Setup (P. 47)
Reset/C Mode Setup (P. 47)
Picture Mode (P. 48)
K (P. 50)
Image Aspect (P. 50)
j/Y (P. 50)
Image Stabilizer (P. 50)
Bracketing (P. 51)
# RC Mode (P. 53)
# Sync (P. 53)
1 (P. 53)
4
1
Shooting using various functions
Press the MENU button to display
the menus.
2
Use FG to select a tab and press
Q.
Shooting Menu 1
1
Tab
2
c
Operation
guide
Card Setup
Reset/C Mode Setup
Picture Mode
D
Image Aspect
Set
Back
Press the MENU
button to go back
one screen
3
Press Q to
confirm the
setting
Select an item using FG and press Q to display options for the
selected item.
Function
The current setting is displayed
Shooting Menu 2
Shooting Menu 2
1
2
c
Back
4
j
4:3
j /Y
Image Stabilizer
Bracketing
# RC Mode
# Sync
1
o
Off
Off
Off
# Sync 1
Off
Q
Set
1
2
c
j/Y
Image Stabilizer
Bracketing
# RC Mode
# Sync
1
Back
o
Off
On
Off
# Sync 1
Off
Set
Use FG to highlight an option and press Q to select.
• Press the MENU button repeatedly to exit the menu.
$ Notes
• For details on the functions that can be set with the menu, refer to “Menu directory” (P. 102).
• A guide is displayed for about 2 seconds after you select an option. Press the INFO
button to view or hide guides.
46 EN
Card Setup (Erasing data completely)
All data stored on the card, including protected images, is erased when the card is
formatted.
Confirm there are no images that you still want to keep on the memory.
• Cards formatted on a computer or other camera must be formatted with the camera
before they can be used.
1
2
3
Select [Card Setup] in I shooting menu 1.
Card Setup
Select [Format].
All Erase
Format
Select [Yes] and press Q.
• Formatting is performed.
Set
Back
4
Restore default settings.
1
2
3
Select [Reset/C Mode Setup] in I shooting menu 1.
Select [Reset] and press Q.
• Highlight [Reset] and press I to choose the reset
type. To reset all settings except the date, language,
and a few others, highlight [Full] and press Q.
g “Menu directory” (P. 102)
Select [Yes] and press Q.
Reset/C Mode Setup
Reset
Custom Mode
Back
Basic
Set
Set
C Mode Setup (Registering a custom setting)
You can shoot with the preselected settings which you registered.
1
2
3
4
Shooting using various functions
Reset (Restoring default or custom settings)
Adjust settings in order to save.
Select [Reset/C Mode Setup] in I shooting menu 1.
Select [Custom Mode 1] or [Custom Mode 2] and press the Q button.
Select [Set] and press Q.
• To erase the registered setting, select [Reset] and press Q.
• Functions that can be saved to [C Mode Setup]. g “Menu directory” (P. 102)
EN 47
Picture Mode (Processing options)
Select a picture mode and make individual adjustments to contrast, sharpness, and
other parameters. Changes to each picture mode are stored separately.
1
Select [Picture Mode] in I shooting menu 1.
Shooting Menu 1
1
2
2
Select an option with FG and press Q.
c
Card Setup
Reset/C Mode Setup
Picture Mode
D
Image Aspect
Back
h
4
i-Enhance
Shooting using various functions
i
Vivid
j
Natural
Produces natural colors.
Z
Muted
Produces flat tones.
a
Portrait
Produces beautiful skin tones.
J
Monotone
Produces black and white tone.
j Pop Art
k Soft Focus
l Pale&Light Color
m Light Tone
n Grainy Film
o Pin Hole
s Diorama
t Cross Process
u Gentle Sepia
v Dramatic Tone
Y Key Line
48 EN
Produces more impressive-looking results suited to the
scene.
Produces vivid colors.
Choose an art filter and select the desired effect.
j
4:3
Set
3
Press I to display settings for the selected option.
h-a
J
Contrast
Distinction between light and dark
Sharpness
Sharpness of the image
Saturation
Vividness of the color
k
Gradation
Adjust tone (gradation).
Auto
Divides the image into detailed regions and
adjusts the brightness separately for each region.
This is effective for images with areas of large
contrast in which the whites appear too bright or
the blacks appear too dark.
Use [Normal] mode for general uses.
High Key
Gradation for a bright subject.
Low Key
Gradation for a dark subject.
Effect
(i-Enhance)
Sets the extent that the effect will be applied.
B&W Filter
Creates a black and white image. The filter color
is brightened and the complementary color is
darkened.
N:Neutral
Creates a normal black and white image.
Ye:Yellow
Reproduces clearly defined white cloud with
natural blue sky.
Or:Orange
Slightly emphasizes colors in blue skies and
sunsets.
R:Red
Strongly emphasizes colors in blue skies and
brightness of crimson foliage.
G:Green
Strongly emphasizes colors in red lips and green
leaves.
Pict. Tone
4
k
k
k
Shooting using various functions
Normal
Colors the black and white image.
N:Neutral
Creates a normal black and white image.
S:Sepia
Sepia
B:Blue
Bluish
P:Purple
Purplish
G:Green
Greenish
# Cautions
• Changes to contrast have no effect at settings other than [Normal].
EN 49
Record Mode (Image quality)
Select an image quality. You can select a separate image quality for photographs and
movies. This is the same as the [Record Mode] (P. 36) item in [Live Control].
• You can change the JPEG image size and compression ratio combination, and [X] and
[W] pixel counts.
[K set], [Pixel Count] g “c Custom Menu” (P. 68)
Image Aspect (Setting the image aspect )
You can change the aspect ratio (horizontal-to-vertical ratio) when taking pictures.
Depending on your preference, you can set the aspect ratio to [4:3] (standard), [16:9],
[3:2] or [1:1].
# Cautions
4
Shooting using various functions
• JPEG images are cropped to the selected aspect ratio; RAW images, however, are not
cropped but are instead saved with information on the selected aspect ratio.
• When RAW images are played back, the selected aspect ratio is shown by a frame.
j/Y (Setting custom self-timer)
You can customize the self timer operation.
1
Select [j/Y] in J Shooting Menu 2.
1
2
c
Shooting Menu 2
j /Y
o
Image Stabilizer
Off
Bracketing
Off
# RC Mode
Off
# Sync
# Sync 1
1
Off
Back
2
3
Set
Select [YC] (custom) and press I.
Use FG to select the item and press I.
• Use FG to select the setting and press Q.
Frame
Sets the number of frames to be shot.
Y Timer
Sets the time after the shutter button is pressed until the picture
is taken.
Interval Time
Sets the shooting interval for the second and subsequent
frames.
Image Stabilizer (Reducing camera shake)
You can set the image stabilizer to on or off (the same as the image stabilizer of the
live control ).
50 EN
Bracketing (Varying settings over a series of photographs)
“Bracketing” refers to the act of varying settings automatically over a series of shots or
a series of images to “bracket” the current value.
In the shooting menu, settings for bracketing are available. Bracketing is available only
when [BKT] is selected.
1
Select [Bracketing] in J Shooting Menu 2 and
press Q.
Shooting Menu 2
1
2
c
j /Y
Image Stabilizer
Bracketing
# RC Mode
# Sync
1
o
Off
Off
Off
# Sync 1
Off
Back
2
Choose a bracketing type.
• You can select only one bracketing type.
Set
Bracketing
Back
3f 1.0EV
A-- G-----
Set
AE BKT (AE bracketing)
The camera varies the exposure of each shot. The modification amount can be selected from
0.3 EV, 0.7 EV, or 1.0 EV. The camera continues to take shots in the following order while
the shutter button is pressed all the way down: no modification, negative, positive. Number of
shots: 2 or 3
• The camera brackets the value currently selected for
Bracketing
-AE BKT
Off
exposure compensation.
WB BKT
FL BKT
ISO BKT
ART BKT
Back
A-- G-2f 0.3EV
2f 0.7EV -2f 1.0EV -3f 0.3EV -3f 0.7EV -3f 1.0EV
4
Shooting using various functions
AE BKT
WB BKT
FL BKT
ISO BKT
ART BKT
Set
WB BKT (WB bracketing)
Three images with different white balances (adjusted in specified color directions) are
automatically created from one shot, starting with the value currently selected for white
balance. WB bracketing is available in P, A, S and M modes.
• White balance can be varied by 2, 4, or 6 steps on each of
WB BKT
the A – B (Amber – Blue) and G – M (Green – Magenta) axes.
A-B
G-M
• The camera brackets the value currently selected for white
3f 4Step
3f 4Step
balance compensation.
• No pictures will be taken during WB bracketing if there is
not enough memory on the card for the selected number of
Back
Set
frames.
EN 51
FL BKT (FL bracketing)
The camera varies flash level over three shots (no modification on the first shot, negative on
the second, and positive on the third). In sequential shooting, all shots are taken while the
shutter button is pressed.
Bracketing
AE BKT
WB BKT
FL BKT
ISO BKT
ART BKT
-Off
A-- G-3f 0.3EV
3f 0.7EV -3f 1.0EV ---
Back
4
Set
Shooting using various functions
ISO BKT (ISO bracketing)
The camera varies the sensitivity over three shots while keeping the shutter speed and
aperture fixed. The modification amount can be selected from 0.3 EV, 0.7 EV, or 1.0 EV. Each
time the shutter button is pressed, the camera shoots three frames with the set sensitivity
(or if auto sensitivity is selected, the optimal sensitivity setting) on the first shot, negative
modification on the second shot, and positive modification on the third shot.
• Bracketing is performed regardless of the upper limit set with
Bracketing
-AE BKT
Off
[ISO-Auto Set]. g “c Custom Menu” (P. 68)
WB BKT
FL BKT
ISO BKT
ART BKT
A-- G-3f 0.3EV
3f 0.7EV -3f 1.0EV ---
Back
Set
ART BKT (ART bracketing)
Each time the shutter is released, the camera records multiple images, each with a different
art filter settiing. You can turn art filter bracketing on or off separately for each picture mode.
• Recording may take some time.
ART BKT
Pop Art
Soft Focus
Pale&Light Color
Light Tone
Grainy Film
Pin Hole
Diorama
Back
52 EN
Remote Flash (Wireless remote control flash photography)
The built-in flash unit and external flash units that offer a remote control mode and
are designated for use with this camera can be used for wireless flash photography.
Select [On] to set each flash with the camera. g “Wireless remote control flash
photography” (P. 90)
# Sync (Setting the flash timing)
You can set the flash timing. For [# Sync 1], flash fires as shutter opens, while flash
fires just before the shutter closes for [# Sync 2], creating a stream of light behind
moving light sources.
1 (Taking pictures with a conversion lens)
Off
TCON-17
Select when taking pictures without a conversion lens.
Select when taking pictures with a designated optional conversion lens.
• When a conversion lens is attached, light from the built-in flash can cause vignetting
where shadows from the conversion lens appear on the images.
• When a conversion lens is attached, the camera may take extra time to focus.
• Conversion lens adapter CLA-13 (available separately) is required to attach the
conversion lens to the camera.
• After removing the automatic lens cap, attach the conversion lens adapter.
g “Automatic lens cap” (P. 3)
Shooting using various functions
# Cautions
4
EN 53
5
Viewing images using playback options
Using playback options
Press Q during playback to display a menu of simple options that can be used in
playback mode.
JPEG
JPEG Edit
Share Order
R
Rotate
L
Set
Back
5
Still image frame
Viewing images using playback options
JPEG
Audio playback
—
JPEG Edit (P. 58)
—
—
RAW Data Edit (P. 58)
—
—
Movie Play
—
—
—
Share Order (P. 64)
0 (Protect) (P. 12)
R (Audio recording)
—
Rotate
—
L (Slideshow)
< (Print reservation) (P. 85)
—
—
Erase (P. 12)
Audio playback
You can play back recorded audio.
Use the FG button to adjust the volume.
54 EN
RAW+JPEG
Movie frame
RAW
Performing operations on a movie frame (Movie Play)
Q
Pause or resume playback.
• You can perform the following operations while playback is paused.
Previous/Next
HIor Sub dial
Press and hold HI to continue the operation.
Display the first frame.
F
Display the last frame.
G
H/I
Advance or rewind a movie.
F/G
Adjust volume.
# Cautions
• We recommend using the supplied PC software to play movies on a computer. Before
launching the software for the first time, connect the camera to the computer.
5
R (Audio recording)
1
Display the image to which you want to add an audio recording and
press Q.
• Audio recording is not available with protected images.
• Audio recording is also available in the playback menu.
2
Select [R] and press Q.
JPEG
H Play
JPEG Edit
Share Order
• To exit without adding a recording, select [No].
R
Rotate
Back
3
Select [R Start] and press Q to begin
recording.
• To stop recording part-way through, press Q.
• When 30 seconds passed, the recording automatically
ends.
• Images with audio recordings are indicated by a H
icon.
• To delete a recording, select [Erase] in Step 2.
Set
R
No
R Start
Viewing images using playback options
Add an audio recording (up to 30 sec. long) to the current photograph.
Erase
Back
Set
EN 55
Playing back slideshow
This function displays images stored on the card one after another.
1
2
5
3
Press Q during playback and select the slideshow option.
Adjust settings.
Start
Start the slideshow. Images are displayed in order, starting with the
current picture.
BGM
Set BGM (5 types) or turn BGM [Off].
Effect
Choose the transition between frames.
Slide
Set type of slideshow to execute.
Slide Interval
Choose the length of time each slide is displayed from 2 to 10
seconds.
Movie Interval
Select [Full] to include full-length movie clips in the slideshow,
[Short] to include only the opening portion of each clip.
Select [Start] and press Q.
Viewing images using playback options
• The slideshow will start.
• Press Q to stop the slideshow.
Displaying images rotated
Choose whether to rotate photographs.
1
2
3
56 EN
Play the photograph back and press Q.
Select [Rotate] and press Q.
Press F to rotate the image counterclockwise, G to rotate it clockwise;
the image rotates each time the button is pressed.
• Press Q to save settings and exit.
• The rotated image is saved in its current orientation.
• Movies and protected images can not be rotated.
Using functions of playback menu
In the Playback Menu, you can use the functions below.
1
2
L (P. 56)
< (P. 82)
R (P. 58)
Reset Protect (P. 59)
Edit (P. 58)
Connection to Smartphone (P. 59)
Press the MENU button to display
the menus.
Use FG to select a tab and press
Q.
Playback Menu
1
Tab
2
c
Operation
guide
L
R
Edit
<
Reset Protect
Connection to Smartphone
Back
Set
Select an item using FG and press Q to display options for the
selected item.
Function
The current setting is displayed
Playback Menu
1
2
c
Back
4
Press Q to
confirm the
setting
L
R
Edit
<
Reset Protect
Connection to Smartphone
Playback Menu
Off
Q
1
2
c
Set
L
Off
R
On
Edit
<
Reset Protect
Connection to Smartphone
Back
Off
Set
Use FG to highlight an option and press Q to select.
• Press the MENU button repeatedly to exit the menu.
$ Notes
5
Viewing images using playback options
Press the MENU
button to go back
one screen
3
Off
• For details on the functions that can be set with the menu, refer to “Menu directory” (P. 102).
• A guide is displayed for about 2 seconds after you select an option. Press the INFO
button to view or hide guides.
EN 57
R (Displaying images rotated)
When set to [On], photographs taken with the camera rotated in portrait orientation are
automatically rotated and displayed in portrait orientation.
Edit (Editing still images)
Recorded images can be edited and saved as new images.
1
2
3
5
Viewing images using playback options
4
58 EN
Select [Edit] in the q playback menu and press Q.
Use HI to select the image to be edited and press Q.
Select [RAW Data Edit] or [JPEG Edit] and press Q.
• [RAW Data Edit] is displayed if the picture is a RAW image, [JPEG Edit] if it is a JPEG
image. If the image was recorded in RAW+JPEG format, both [RAW Data Edit] and
[JPEG Edit] will be displayed. Select the menu for the image to be edited.
RAW Data
Edit
Create a JPEG copy of a RAW image edited according to the settings.
The editing was done with the curent settings. Set the camera settings
before editing.
JPEG Edit
Choose from the following options:
[Shadow Adj]: Brightens a dark backlit subject.
[Redeye Fix]: Reduces the red-eye phenomenon during flash shooting.
[P]: Use the sub dial to choose the size
of the crop and FGHI to position
the crop.
[Aspect]: Changes the aspect ratio of
images from 4:3 (standard) to [3:2],
[16:9] or [1:1]. After changing the aspect
ratio, use FGHI to specify the
O
Set
trimming position.
[Q]: Converts the image file size to
1280 × 960, 640 × 480, or 320 × 240.
[e-Portrait]: Makes skin look smooth and translucent.
You may not be able to compensate depending on the image if face
detection fails.
When the settings are complete, press Q.
• The settings will be applied to the image.
5
Select [Yes] and press Q.
• The edited image is stored.
# Cautions
• Movies cannot be edited.
• Red-eye correction may not work depending on the image.
• Editing of a JPEG image is not possible in the following cases:
When an image is processed on a PC, when there is not enough space in the card
memory, when an image is recorded on another camera
• When resizing ([Q]) an image, you cannot select a larger number of pixels than was
originally recorded.
• [P] and [Aspect] can only be used to edit images with an aspect ratio of 4:3 (standard).
Audio recording
Add an audio recording (up to 30 sec. long) to the current photograph.
This is the same function as [R] during playback. (P. 55)
This function lets you cancel the protection of several images at one time.
1
2
Select [Reset Protect] in the q playback menu.
Select [Yes] and press Q.
Connection to Smartphone
(Using the Smartphone connection option)
The camera can connect to a smartphone by using the wireless LAN function. Once
connected camera images can be viewed on and transferred to the other device.
g “Sharing images over Wi-Fi connection” (P. 64)
5
Viewing images using playback options
Reset Protect (Canceling all protections)
EN 59
6
Setting the camera
Setting setup menu
Use the Setup Menu to set the basic camera functions.
Rec View
Firmware
Wi-Fi Settings
X (Date/time setting)
World Time
W (Changing the display language)
i (Monitor brightness adjustment)
1
6
2
Press the MENU button to display
the menus.
Use FG to select a tab and press
Q.
Setup Menu
1
Tab
2
c
Setting the camera
Operation
guide
X
World Time
W
Back
Set
Press Q to
confirm the
setting
Select an item using FG and press Q to display options for the
selected item.
Function
The current setting is displayed
Setup Menu
1
2
c
Back
4
English
j±0 k±0
2sec
Rec View
Firmware
Wi-Fi Settings
Press the MENU
button to go back
one screen
3
--.--.-- --:--
X
World Time
W
Rec View
Firmware
Wi-Fi Settings
Setup Menu
--.--.-- --:-English
j±0 k±0
2sec
Q
Set
1
2
c
X
World Time
W
Rec View
Firmware
Wi-Fi Settings
Back
--.--.-- --:-English
j±0 k±0
2sec
Set
Use FG to highlight an option and press Q to select.
• Press the MENU button repeatedly to exit the menu.
$ Notes
• For details on the functions that can be set with the menu, refer to “Menu directory” (P. 102).
• A guide is displayed for about 2 seconds after you select an option. Press the INFO
button to view or hide guides.
60 EN
Option
g
Description
Set the camera clock.
X
(Date/time setting)
1) Use FG to select the year for [Y].
2) Press I to save the setting for [Y].
3) As in Steps 1 and 2, use FGHI to set [M] (month),
[D] (day), [Time] (hours and minutes), and [Y/M/D] (date
order), and then press the A button.
• For precise time setting, press the A button as the
time signal strikes 00 seconds.
8
World Time
You can set your home and destination to change the date and
time display.
—
W
(Changing the
display language)
You can change the language used for the on-screen display
and error messages from English to another language.
Rec View
j
-5
k
+2
6
Vivid
—
Natural
Back
Set
Choose whether pictures are displayed immediately after
shooting and for how long. This is useful for making a brief
check of the picture you have just taken. Pressing the shutter
button halfway while checking the picture lets you resume
shooting immediately.
[1sec] – [20sec]: Selects the number of seconds to display each
picture. Can be set in units of 1 second.
[Off]: The picture being recorded to the card is not displayed.
[Autoq]: Displays the image being recorded, and then
switches to playback mode. This is useful for erasing a picture
after checking it.
Firmware
Wi-Fi Settings
Setting the camera
You can adjust the brightness and
i
(Monitor brightness color temperature of the monitor.
Color temperature adjustment
adjustment)
will affect only the monitor display
during playback. Use HI to
highlight j (color temperature) or
k (brightness) and FG to adjust
the value.
Press the INFO button to switch
between [Natural] and [Vivid]
monitor color display.
—
—
Your product’s firmware version will be displayed. When you
make inquiries about your camera or accessories or when you
want to download software, you will need to state which version
of each of the products you are using.
—
Set up the camera to connect to a smartphone with Wi-Fi
connectivity using the wireless function on the camera.
62
EN 61
7
Using Wi-Fi function
Using the wireless LAN functions on the camera, you can share images (viewing
images, and transferring images between the camera and smartphone) and operate
the camera connecting to a smartphone with Wi-Fi connectivity.
To use this function, you must have the relevant app installed on the smartphone.
http://olympuspen.com/OIShare/
# Cautions
• Before using the wireless LAN function, read “Precautions when using the wireless
LAN function” (P. 114).
• If using the wireless LAN function in a country outside the region where the camera
was purchased, there is a risk that the camera will not conform to the wireless
communication regulations of that country. Olympus will not be held responsible for
any failure to meet such regulations.
• As with any wireless communication, there is always a risk of interception by a third
party.
• The wireless LAN function on the camera cannot be used to connect to a home or
public access point.
7
Using Wi-Fi function
Setting up a wireless LAN connection
(Wi-Fi Settings)
To use the wireless LAN functions on the camera (P. 64), you need to make setting such
as the password to be used when connecting.
[Private] and [One-Time] for a one-time connection are available.
Setting password selection method
1
2
3
Select [Wi-Fi Settings] in the d Setup Menu and press Q.
Select [Wi-Fi Connect Settings] and press I.
Select the wireless LAN connection method and press Q.
•
•
•
•
[Private]: Connect using a preset password.
[One-Time]: Connect using a different password each time.
[Select]: Select which method to use each time.
[Off]: The Wi-Fi function is turned off.
Changing private connection password
Change the password used for [Private].
1
2
3
62 EN
Select [Wi-Fi Settings] in the d Setup Menu and press Q.
Select [Private Password] and press I.
Follow the operation guide and press the G button.
• A new password will be set.
Cancelling image sharing
Deselects images selected for sharing (P. 64) when connected to a wireless LAN
network.
1
2
3
Select [Wi-Fi Settings] in the d Setup Menu and press Q.
Select [Reset share Order] and press I.
Select [Yes] and press Q.
Initializing wireless LAN settings
Initializes content of [Wi-Fi Settings].
1
2
3
Select [Wi-Fi Settings] in the d Setup Menu and press Q.
Select [Reset Wi-Fi Settings] and press I.
Select [Yes] and press Q.
# Cautions
7
Using Wi-Fi function
• The wireless LAN antenna is contained in the camera grip. Where possible, avoid
covering the antenna with your hands.
• During wireless LAN connection, the battery will run down faster. If the battery is
running low, the connection may be lost during a transfer.
• Connection may be difficult or slow in proximity to devices that generate magnetic
fields, static electricity or radio waves, such as near microwaves, cordless telephone.
EN 63
Sharing images over Wi-Fi connection
Share Order
You can connect the camera to a smartphone over wireless LAN (P. 62). Once the
smartphone is connected, you can use it view images stored on the card, and transfer
images between the camera and smartphone.
With [Share Order], you can select the images to share in advance.
1
On the playback screen, touch the screen.
2
Select an image using a touch operation or HI and then touch h on
the touch menu.
• A touch menu will be displayed.
• h is displayed on the images selected for sharing.
• To cancel the selection, touch h again.
3
Touch the screen to exit [Share Order].
• After an image has been selected for sharing, the selected image will be shared
when a Wi-Fi connection is established using [One-Time].
# Cautions
7
• You can set a share order on a maximum around 200 frames.
Using Wi-Fi function
Connection to Smartphone
You can view images directly on a smartphone that has Wi-Fi connectivity or transfer
images between the camera and a smartphone that has Wi-Fi connectivity.
To use this function, you must install and start the relevant app for the smartphone
”OI.Share (OLYMPUS IMAGE SHARE)”.
1
2
Select [Connection to Smartphone] in the q playback menu and press Q.
Select the connection method and press Q.
Private connection
Follow the guide displayed on the screen.
One-time connection
Follow the guide displayed on the screen.
3
64 EN
To end the connection, press on the camera or touch [Stop] on
the monitor screen.
Things you can do with OI.Share
Shooting using Wi-Fi function
You can shoot pictures with the camera by performing operations on your smartphone.
To use this function, you must start the relevant app installed on the smartphone.
This function is only available when connected with [Private].
1
Start [Connection to Smartphone] in your
camera.
Wi-Fi
• You can also connect by touching w on the
shooting screen.
2
Wi-Fi
Shoot pictures using your smartphone.
ISO
200
# Cautions
• Not all camera functions are available over the
wireless LAN connection.
LN
HD
P
250 F5.6
0.0
01:02:03
30
Adding smartphone position information to images
• The position information will be added to images on the memory card. g is displayed
on images to which position information has been added.
• Log position information is only available when using a smartphone with a GPS
function.
7
Using Wi-Fi function
Synchronize the time and date on your camera with your
smartphone
Synchronize the time and date on your smartphone and camera to allow position
information to be added to images on your camera. Start time synchronization in
OI.Share.
EN 65
8
Using useful functions
Using the super control panel
The term “super control panel” refers to the display shown below, which lists shooting
settings together with the option currently selected for each.
Use the arrow pad or touch screen operations to make the settings.
1
6
ISO
ISO
AUTO
2
j
WB
AUTO
3
4
7
NORM
5
IS On
P
g f
4:3
mall
Super Fine +RAW
ND Off
125 F5.6 +2.0
e
d
c
8
9
0
Off
38
ba
Displaying the super control panel
To set and use the super control panel, select the check box of [SCP] of [KControl
Settings] in the “c Custom Menu” (P. 68).
Press the A button in the shooting mode, the setting screen like the live control, the
super control panel and the other settings. Press the INFO button to switch the setting
screen.
8
Using useful functions
Settings that can be modified using super control panel
Currently selected option
ISO sensitivity .................................P. 40
Sequential shooting/self-timer ........P. 30
Flash mode .....................................P. 28
Flash intensity control .....................P. 38
White balance .................................P. 34
White balance compensation..........P. 35
7 Picture mode...................................P. 33
8 Sharpness N..................................P. 49
Contrast J .....................................P. 49
Saturation T .................................P. 49
Gradation z...................................P. 49
B&W Filter x .................................P. 49
Picture tone y ...............................P. 49
1
2
3
4
5
6
* Only ART or SCN mode.
66 EN
Color space.....................................P. 74
ND Filter Setting .............................P. 41
Face priority ....................................P. 40
Metering mode ................................P. 38
Aspect ratio .....................................P. 36
Record mode ..................................P. 37
AF mode .........................................P. 39
AF target .........................................P. 31
f Image stabilizer...............................P. 33
g Shooting mode* ..............................P. 10
9
0
a
b
c
d
e
1
After displaying the super control
panel, select the desired setting using
FGHI and press Q.
ISO
Cursor
NORM
ND Off
4:3
mall
Super Fine +RAW
P
125 F5.6
38
Select an option using HI and press the
INFO button.
• Repeat steps 1 and 2 as necessary.
• The selected settings take effect automatically if no
operations are performed for a few seconds.
ISO-A
200
P
3
j
WB
AUTO
Off
• You can also select settings using the sub
dial.
• You can also select settings touching the
screen.
2
ISO
AUTO
AUTO
100
125
160
200
250
320
Press the shutter button halfway to return to shooting mode.
Switching the function setting panel
Each time you press the INFO button, the setting screen switches according to the
setting in the custom menu.
INFO
IS OFF
i
INFO
Metering
ISO
AUTO
WB
WB
AUTO
AUTO
A
WB
AUTO
NORM
AUTO
4:3
Off
4:3
mall
Super Fine +RAW
LF
WB Auto
P
Live guide
HD
AUTO
AUTO
P
n
Live control*
AEL / AFL
250 F5.6
36
LV Super control
panel*
INFO
Q
IS OFF
i
INFO
Metering
ISO
AUTO
WB
WB
AUTO
AUTO
P/A/S/M
P
HD
AUTO
AUTO
NORM
Off
4:3
mall
Super Fine +RAW
LF
WB Auto
WB
AUTO
AUTO
4:3
P
n
Live control
8
Using useful functions
Q
INFO
Change Color Saturation
AEL / AFL
250 F5.6
36
LV Super control
panel*
INFO
Art filter menu
Q
ART
1
Pop Art
1
1
Portrait
INFO
IS OFF
i
INFO
Metering
ISO
AUTO
WB
WB
AUTO
AUTO
ART/SCN
WB Auto
Set
Set
P
Scene menu
AUTO
AUTO
HD
n
Live control*
NORM
Off
4:3
mall
Super Fine +RAW
LF
Exit
WB
AUTO
AUTO
4:3
P
250 F5.6
AEL / AFL
36
LV Super control
panel*
* Displayed according to the setting in [K Control Settings].
EN 67
9
Customizing camera setting
Camera settings can be customized using the c Custom Menu.
c Custom Menu
R AF/MF
(P. 70)
AF Mode
AF Area
V Exp/p/ISO
(P. 73)
P Set Home
AF Illuminat.
I Face Priority
MF Assist
S Button/Dial/
Lever (P. 70)
Button Function
9
W # Custom
(P. 73)
#Slow LImit
X K/Color/WB
(P. 74)
WB
Customizing camera setting
68 EN
All >
W Keep Warm Color
L Lever Function
#+WB
Dial Direction
Color Space
q Power On
K Set
HDMI
Pixel Count
Y Record (P. 75)
Video Out
File Name
Edit Filename
8 (Beep sound)
dpi Settings
Volume
Copyright Settings
G/Info Setting
Displayed Grid
KControl Setting
Picture Mode Setting
V Exp/p/ISO
(P. 73)
w+F
Dial Function
USB mode
U Display
(P. 72)
ISO-Auto Set
Bulb Timer
Zoom Speed
T Connection/
Sound
(P. 71)
ISO
Z Movie
(P. 75)
Movie R
Wind Noise Reduction
Recording Volume
b K Utility (P. 76) Pixel Mapping
Exposure Shift
Histogram Settings
Level Adjust
Live View Boost
Touch Screen Settings
Sleep
Eye-Fi
Metering
m/ft
P+Metering
EVF Adjust
Noise Reduct.
EVF Auto Switch
Noise Filter
While Exposing "
Customizing the setting
1
2
Press the MENU button to display the menus.
C. Connection/Sound
HDMI
Video Out
8
Volume
USB Mode
Select c Custom Menu using FG, and press
Q.
3
4
Use FG to select a tab and press Q.
5
Use FGto highlight an option and press Q to select.
Select an item using FG and press Q to
display options for the selected item.
Back
On
3
Auto
Set
• For details on each menu item, refer to the following pages.
9
Customizing camera setting
EN 69
MENU
R AF/MF
Option
AF Mode
AF Area
Choose the AF target mode.
31
P Set Home
Choose the AF target position that will be saved as the
home position. p appears in the AF target selection
display while you choose a home position.
—
AF Illuminat.
Select [Off] to disable the AF illuminator.
—
I Face Priority
The camera gives priority to the faces or pupils of human
portrait subjects during focusing.
40
MF Assist
Select [On] to automatically magnify the image for precise
focus when the control ring is rotated in manual focus mode.
Rotate the sub dial to choose the zoom ratio.
—
Option
Button Function
Customizing camera setting
70 EN
R
g
39
Description
Choose the AF mode.
MENU
S Button/Dial/Lever
9
c
Description
Choose the function assigned to the selected button.
U Function
Off, AEL, Preview, k, P Home, Digital Tele-converter,
Conversion Lens, ND Filter Setting, Zoom Framing Assist
V Function
IS Mode, Picture Mode, SCN, ART, WB, j/Y, Aspect,
K Image Quality, n Image Quality, #, w, Metering, AF
Mode, ISO, I Face Priority, ND Filter Setting
R Function
AEL, Preview, k, P Home, Digital Tele-converter,
Conversion Lens, ND Filter Setting, Zoom Framing Assist,
R REC
I Function
Off, #
G Function
c
Choose the roles played by the control ring and sub dials.
L Lever Function
You can choose the control ring function from [MF], [Zoom]
or [MF/Zoom] while the lever function is activated.
Dial Direction
Choose the direction in which the dials are rotated to adjust
shutter speed or aperture or to move the cursor.
If you hold down q, the camera turns on and starts up in
playback mode.
Zoom Speed
g
—
77
Off, j, Y
Dial Function
q Power On
S
Choose the zoom speed from [Low] or [Normal] using the
side zoom lever.
—
MENU
T Connection/Sound
Option
HDMI
c
Description
T
g
[HDMI Out]: Selecting the digital video signal format for
connecting to a TV via an HDMI cable.
[HDMI Control]: Select [On] to allow the camera to be
operated using remotes for TVs that support HDMI control.
80
Video Out
Choose the video standard ([NTSC] or [PAL]) used in your
country or region.
80
8 (Beep sound)
You can set to on or off the volume of the shutter sound and
the beep sound emitted when performing operations.
—
Volume
Adjust playback volume.
USB Mode
Choose a mode for connecting the camera to a computer or
printer. Choose [Auto] to display USB mode options every
time the camera is connected.
10, 54
—
9
Customizing camera setting
EN 71
Option
G/Info Settings
9
Customizing camera setting
72 EN
c
MENU
U Display
U
g
Description
Choose the information displayed when the INFO button is
pressed.
[qInfo]: Choose the information displayed in full frame
playback.
[LV-Info]: Choose the information displayed when the
camera is in shooting mode.
[G Settings]: Choose the information displayed in index
and calendar playback.
qInfo
LV-Info
G Settings
Image Only
Overall
–
–
–
&
–
Highlight & Shadow
–
Level Gauge 1
–
Level Gauge 2
–
4-frame Index
9-frame Index
25-frame Index
–
–
–
–
–
–
–
–
78
Displayed Grid
To choose a framing guide from [Off], [w], [x], [y], or
[X], select [Displayed Grid].
KControl
Settings
Choose the controls displayed in each shooting mode.
—
Shooting mode
Controls
A
P/A/
S/M
ART
SCN
Live Control (P. 32)
SCP (P. 66)
Live Guide (P. 26)
–
–
Art Menu
–
–
–
Scene Menu
–
–
–
—
–
Picture Mode
Settings
Display only the selected picture mode when the live control
or super control panel is used to select a picture mode.
33, 48
Histogram
Settings
[Highlight]: Choose the lower bound for the highlight display.
[Shadow]: Choose the upper bound for the shadow display.
—
Live View Boost
If [On] is selected, priority will be given to making images
clearly visible; the effects exposure compensation and other
settings will not be visible in the monitor.
—
Sleep
The camera will enter sleep (energy saving) mode if no
operations are performed for the selected period. The
camera can be reactivated by pressing the shutter button
halfway.
—
MENU
V Exp/p/ISO
Option
c
V
g
38
Description
Metering
Choose a metering mode according to the scene.
P+Metering
If [On] is selected, the exposure is measured using the
selected AF target.
—
Noise Reduct.
This function reduces the noise that is generated during
long exposures.
[Auto]: Noise reduction is only performed at slow shutter
speeds.
[On]: Noise reduction is performed with every shot.
[Off]: Noise reduction off.
• Noise reduction requires about twice the time needed to
record the image.
• Noise reduction turns off automatically during sequential
shooting.
• This function may not work effectively with some shooting
conditions or subjects.
20
Noise Filter
Choose the amount of noise reduction performed at high
ISO sensitivities.
—
ISO
Set ISO sensitivity.
40
ISO-Auto Set
Choose the upper limit and default value used for ISO
sensitivity when [Auto] is selected for [ISO].
[High Limit]: Choose the upper limit for auto ISO sensitivity
selection.
[Default]: Choose the default value for auto ISO sensitivity
selection.
—
You can set the maximum time for bulb shooting.
—
MENU
W #Custom
Option
9
c
Description
W
g
# Slow Limit
Choose the slowest shutter speed available when a flash is
used.
—
w+F
When set to [On], it will be added to the exposure
compensation value and flash intensity control will be
performed.
—
Customizing camera setting
Bulb Timer
EN 73
Option
WB
X
g
Description
Set the white balance. This is the same as the live control
setting. You can also fine-tune the white balance for each
mode. You can also make fine adjustments using white
balance compensation on the super control panel (P. 66).
34
[All Set]: Use the same white balance compensation in all
modes except [CWB].
[All Reset]: Set white balance compensation for all modes
except [CWB] to 0.
—
W Keep Warm
Color
Select [Off] to eliminate “warm” colors from pictures taken
under incandescent lighting.
—
#+WB
Adjust white balance for use with a flash.
—
Color Space
You can select how colors are reproduced on the monitor or
printer.
—
K Set
The record mode for JPEG photographs can be selected
from four combinations of image size and compression
rate. The camera offers a choice of three sizes and four
compression rates for each combination.
All >
1) Use HI to select a
combination ([K1] –
[K4]) and use FG
to change.
9
Customizing camera setting
74 EN
c
MENU
X K/Color/WB
D Set
1
Y SF
2) Press Q.
2
X
F
3
W N
Pixel Count
Pixel Count
36, 101
F
Set
Back
Number of pixels
4
W SF
Compression rate
Choose the pixel count for [X]- and [W]-size images.
1) Select [Xiddle] or
[Wmall] and press I.
2) Choose a pixel count
and press Q.
Pixel Count
Xiddle
Wmall
Back
3200×2400
1280×960
Set
36, 101
MENU
Y Record
Option
File Name
c
Y
g
Description
[Auto]: Even when a new card is inserted, the file numbers
are retained from the previous card. File numbering
continues from the last number used or from the highest
number available on the card.
[Reset]: When you insert a new card, the folder numbers
starts at 100 and the file name starts at 0001. If a card
containing images is inserted, the file numbers start at the
number following the highest file number on the card.
—
Choose how image files are named by editing the portion of
the filename highlighted below in gray.
sRGB: Pmdd0000.jpg
Pmdd
AdobeRGB: _mdd0000.jpg
mdd
—
dpi Settings
Choose the print resolution.
—
Copyright
Settings*
Add the names of the photographer and copyright holder to
new photographs. Names can be up to 63 characters long.
[Copyright Info.]: Select [On] to include the names of the
photographer and copyright holder in the Exif data for new
photographs.
[Artist Name]: Enter the name of the photographer.
[Copyright Name]: Enter the name of the copyright holder.
Edit Filename
1) Highlight a character 2 and press Q to add the
highlighted character to the name 1.
9
1
Copyright Name
05/63
—
ABCDE
0
@
P
a
o
!
1
A
Q
b
p
”
2
B
R
c
q
#
3
C
S
d
r
$
4
D
T
e
s
%
5
E
U
f
t
&
6
F
V
g
u
’
7
G
W
h
v
(
8
H
X
i
w
)
9
I
Y
j
x
*
:
J
Z
k
y
+
;
K
[
l
z
,
<
L
]
m
{
Cancel
=
M
_
n
}
. /
> ?
N O
Delete
END
Set
2
Customizing camera setting
2) Repeat Step 1 to
complete the name,
then highlight [END] and
press Q.
• To delete a character,
press the INFO
button to place the
cursor in the name
area 1, and highlight
the character. After
selecting press the
INFO button to return
the cursor to the area
2, and press [Delete].
* OLYMPUS does not accept liability for damages arising from disputes involving the use of
[Copyright Settings]. Use at your own risk.
MENU
Z Movie
c
Z
Movie R
Choose [Off] to record silent movies.
g
—
Wind Noise
Reduction
Reduce wind noise during recording.
—
Recording Volume Adjust microphone sensitivity according to the distance to
your subject.
—
Option
Description
EN 75
Option
c
MENU
b K Utility
b
g
Description
Pixel Mapping
The pixel mapping feature allows the camera to check
and adjust the image pickup device and image processing
functions.
98
Exposure Shift
Adjust optimal exposure separately for each metering mode.
• This reduces the number of exposure compensation
options available in the selected direction.
• The effects are not visible in the monitor. To make
normal adjustments to the exposure, perform exposure
compensation (P. 29).
—
Adjust the angle of the virtual horizon.
[Reset]: Restore the factory default angle.
[Adjust]: Set the virtual horizon to the camera’s current
angle.
—
Touch Screen
Settings
Activate the touch screen. Choose [Off] to disable the touch
screen.
—
Eye-Fi*
Enable or disable upload when using an Eye-Fi card.
m/ft
When [AF Mode] (P. 39) is set to [MF], you can select meters
or feet as the unit of length displayed on the monitor.
EVF Adjust
Adjust the brightness and
color temperature of the
electronic viewfinder. The
selected color temperature
is also used in the monitor
during playback. Use HI to
select color temperature (j)
or brightness (k) and use
FG to choose from values
between [+7] and [–7].
Level Adjust
9
100
—
EVF Adjust
j
-5
Customizing camera setting
Back
k
+2
Set
—
Brightness is automatically adjusted when [EVF Auto
Luminance] is set to [On].
EVF Auto Switch
Sets whether to automatically switch the EVF.
If [Off] is selected, the viewfinder will not turn on when
you put your eye to the viewfinder. Use the u button to
choose the display. The same menu can also be displayed
by pressing and holding the u button.
While Exposing " Sets whether to continue to stabilize an image.
When set to [On], an image is stabilized during shooting.
The image is more stabilized.
—
33, 50
* Use in accordance with local regulations. Onboard airplanes and in other locations in
which the use of wireless devices is prohibited, remove the Eye-Fi card from the camera
or select [Off] for [Eye-Fi].
The camera does not support the “endless” Eye-Fi mode.
76 EN
MENU
Button Function
c
S
[Button Function]
See the table below for the functions that can be assigned. The options available vary from
button to button.
Button function items
[U Function] / [V Function] / [R Function] / [I Function] / [G Function]
Press the button to lock the exposure.
Preview
Aperture is stopped down to the selected value while the button
is pressed.
k
The camera measures white balance when the shutter button is
pressed all the way down while pressing the button (P. 35).
P Home
Pressing the button selects the AF target position saved with
[P Set Home] (P. 68). The home AF target position is indicated
by a p icon. Press the button again to return to AF target
mode. If the camera is turned off when the home position is
selected, the home position will be reset.
Digital Tele-converter
Digital Tele-converter is used to zoom in beyond the current
zoom ratio. The camera saves the center crop. Zoom is
increased by about 2×. Press the button to turn digital zoom on
or off.
Conversion lens
Sets the attached conversion lens.
ND Filter Setting
Adjust the ND filter.
Zoom Framing Assist
Press the button during zooming in to zooming out some
distance. Press and hold the button to turn off the zoom framing
assist after releasing the button.
Off
No function is assigned to the button.
IS Mode
Adjust image stabilization settings.
Picture mode
Set the finish and art filters for an image.
SCN
You can change the scene mode.
ART
You can change the art filter.
WB
Adjust white balance.
j/Y
Choose a sequential shooting or self timer option.
Aspect
Adjust the aspect ratio.
K Image Quality
Adjust the image quality for photographs.
n Image Quality
Adjust the image quality for movies.
#
Choose a flash mode.
w
Adjust the flash output.
Metering
Adjust the exposure method.
AF Mode
Adjust the AF method.
ISO
Set ISO sensitivity.
I Face priority
Adjust face priority.
R REC
Press the button to record a movie.
9
Customizing camera setting
AEL
EN 77
Switching the information display
When setting to [On] in [G/Info Settings], you can switch the information displayed in
the monitor during shooting using the INFO button.
INFO
ISO
P
INFO
INFO
ISO
200
ISO
200
125 F5.6
LN
HD
HD
01:02:03
0.0
200
LN
P
38
Information display on
125 F5.6
0.0
-3
250 F5.6
P
38
Histogram display
INFO
P
LN
0
01:02:03
125 F5.6 +2.0
HD
01:02:03
1234
Highlight & Shadow
display
INFO
INFO
+7
0.0
Level gauge 2 display
P
250 F5.6
0.0
Level gauge 1 display
Image only
Level gauge display
Indicate the orientation of the camera. The “tilt” direction is indicated on the vertical bar and
the “horizon” direction on the horizontal bar. Use the indicators on the level gauge as a guide.
If the level gauge does not indicate the orientation correctly, calibrate the angle of the level
gauge. g [Level Adjust] (P. 68)
9
Highlight & Shadow display
Areas above the upper limit of brightness for the image are shown in red, those below the
lower limit in blue. g [Histogram Settings] (P. 68)
Customizing camera setting
78 EN
9
Customizing camera setting
EN 79
10
Connecting the camera to another device
Viewing camera images on TV
Use the AV cable (sold separately) to playback recorded images on your TV. You can
playback high-definition images on a high-definition TV by connecting it to the camera
using the HDMI cable (sold separately).
Multi-connector
AV cable (sold separately: CB-AVC3)
(Connect to the TV video input jack (yellow)
and audio input jack (white).)
HDMI cable
(Connect to the HDMI connector
on the TV.)
HDMI Micro
connector (type D)
10
Connecting the camera to another device
1
Use the cable to connect the camera to the TV.
2
Choose the TV input channel.
• Adjust settings on the TV before connecting the camera.
• Choose the camera video mode before connecting the camera via an AV cable.
g [Video Out] (P. 71)
• The camera monitor turns off when the cable is connected.
• Press the q button when connecting via an AV cable.
# Cautions
80 EN
• For details on changing the input source of the TV, refer to the TV’s instruction manual.
• Depending on the TV’s settings, the displayed images and information may become
cropped.
• If the camera is connected using both an A/V and HDMI cable, it will assign priority to
HDMI.
• If the camera is connected via an HDMI cable, you will be able to choose the digital video
signal type. Choose a format that matches the input format selected with the TV.
1080i
Priority is given to 1080i HDMI output.
720p
Priority is given to 720p HDMI output.
480p/576p
480p/576p HDMI output. 576p is used when [PAL] is selected for
[Video Out] (P. 71).
Using the TV remote control
The camera can be operated by a TV remote control when connected to a TV that
supports HDMI control.
1
2
3
Select [HDMI] in c Custom Menu tab T.
Select [HDMI Control] and choose [On].
Operate the camera by using the TV remote control.
• You can operate the camera by following the operation guide displayed on the TV.
• During single-frame playback, you can display or hide the information display by
pressing the “Red” button, and display or hide the index display by pressing the
“Green” button.
• Some televisions may not support all features.
• You cannot shoot pictures or movies when the HDMI cable is connected.
• Do not connect the camera to other HDMI output devices. Doing so may damage the
camera.
• HDMI output is not performed while connected via USB to a computer or printer.
10
Connecting the camera to another device
EN 81
Printing Pictures
Direct printing (PictBridge)
By connecting the camera to a PictBridge-compatible printer with the USB cable, you
can print out recorded pictures directly.
Connecting the camera
Smaller
terminal
Multi-connector
USB cable
USB port
# Cautions
• Use a fully charged battery for printing.
• RAW images and movies can not be printed.
10
Easy printing
Connecting the camera to another device
1
2
Use HI to display the pictures you want to print on the camera.
Connect the camera to the printer using the
supplied USB cable.
• If the easy print start screen is not displayed, select
[Auto] for the USB mode in the camera custom menu T
before connecting PC again.
3
82 EN
Press I.
Easy Print Start
Custom Print
• The picture selection screen appears when printing is
completed. To print another picture, use HI to select the image and press Q.
• To exit, unplug the USB cable from the camera while the picture selection screen is
displayed.
Custom printing
1
Connect the camera to the printer using the supplied USB cable and turn
the camera on.
• When the camera is turned on, a dialog should be
displayed in the monitor prompting you to choose a
host. If it is not, select [Auto] for [USB Mode] (P. 68) in the
camera custom menus.
2
Use FG to select [Custom Print].
3
Follow the operation guide to set a print option.
USB
Storage
MTP
Easy Print
Custom Print
Set
• [Do Not Remove USB Cable] will be displayed, followed
by a print-mode selection dialog.
• If the screen is not displayed after a few minutes, disconnect the USB cable and start
again from Step 1.
Selecting the print mode
Select the type of printing (print mode). The available print modes are as shown below.
Print
Prints selected pictures.
All Print
Prints all the pictures stored in the card and makes one print for
each picture.
Multi Print
Prints multiple copies of one image in separate frames on a single
sheet.
All Index
Prints an index of all the pictures stored in the card.
Print Order
Prints according to the print reservation you made. If there is no
picture with print reservation, this is not available.
Size
Sets the paper size that the printer supports.
Borderless
Selects whether the picture is printed on the entire page or inside a
blank frame.
Pics/sheet
Selects the number of pictures per sheet. Displayed when you have
selected [Multi Print].
10
Connecting the camera to another device
Setting the print paper items
This setting varies with the type of printer. If only the printer’s STANDARD setting is
available, you cannot change the setting.
EN 83
Selecting pictures you want to print
Select pictures you want to print. The selected pictures
can be printed later (single-frame reservation) or the
picture you are displaying can be printed right away.
123-3456
2013.10.26 12:30
Select
Single Print
15
Print
More
Print (f)
Prints the currently displayed picture. If there is a picture that
[Single Print] reservation has already been applied to, only that
reserved picture will be printed.
Single Print (t)
Applies print reservation to the currently displayed picture. If you
want to apply reservation to other pictures after applying [Single
Print], use HI to select them.
More (u)
Sets the number of prints and other items for the currently
displayed picture, and whether or not to print it. For operation,
refer to “Setting printing data” in the next section.
Setting printing data
Select whether to print printing data such as the date and time or file name on the picture
when printing.
10
Connecting the camera to another device
4
<×
Sets the number of prints.
Date
Prints the date and time recorded on the picture.
File Name
Prints the file name recorded on the picture.
P
Trims the picture for printing. Set the trimming size with the control
ring or sub dial, and set the trimming position with FGHI.
Once you have set the pictures for printing and printing data, select
[Print], then press Q.
• To stop and cancel printing, press Q. To resume printing, select [Continue].
Cancelling printing
To cancel printing, highlight [Cancel] and press Q. Note that any changes to the print order
will be lost; to cancel printing and return to the previous step, where you can make changes
to the current print order, press MENU.
84 EN
Print reservation (DPOF)
You can save digital “print orders” to the memory card listing the pictures to be printed
and the number of copies of each print. You can then have the pictures printed at a
print shop that supports DPOF or print the pictures yourself by connecting the camera
directly to a DPOF printer. A memory card is required when creating a print order.
Creating a print order
1
2
Press Q during playback and select [<].
Select [<] or [U] and press Q.
Individual pictures
Press HI to select the frame that you want to set as
print reservation, then press FG to set the number of
prints.
• To set print reservation for several pictures, repeat this
step. Press Q when all the desired pictures have been
selected.
Print Order
<
ALL
Back
Set
All pictures
Select [U] and press Q.
3
Select the date and time format and press Q.
No
The pictures are printed without the date and time.
Date
The pictures are printed with the shooting date.
X
No
Date
Time
Time The pictures are printed with the shooting time.
Back
4
Set
Select [Set] and press Q.
• The camera can not be used to modify print orders created with other devices. Creating a
new print order deletes any existing print orders created with other devices.
• Print orders can not include RAW images or movies.
Removing all or selected pictures from the print order
You can reset all print reservation data or just the data for selected pictures.
1
2
Press Q during playback and select [<].
3
Press HI to select images you wish to remove from the print order.
4
Select the date and time format and press Q.
5
Select [Set] and press Q.
Select [<] and press Q.
• To remove all pictures from the print order, select [Reset] and press Q.
To exit without removing all pictures, select [Keep] and press Q.
• Use G to set the number of prints to 0. Press Q once you have removed all the
desired pictures from the print order.
Connecting the camera to another device
# Cautions
10
• This setting is applied to all frames with print reservation data.
EN 85
Connecting the camera to a computer
Connecting the camera
Smaller
terminal
Multi-connector
USB cable
USB port
# Caution
• When the camera is connected to another device via USB, a message will be
displayed prompting you to choose a connection type. Select [Storage].
• If nothing is displayed on the camera screen even after connecting the camera to the
computer, the battery may be exhausted. Use a full-charged battery.
• If the message is not displayed, select [Auto] for the USB mode in the camera custom
menu T (P. 68) before connecting PC again.
Installing Software
10
Connecting the camera to another device
Windows
1
Insert the supplied CD in a CD-ROM drive.
Windows XP
• A “Setup” dialog will be displayed.
Windows Vista/Windows 7/Windows 8
• An Autorun dialog will be displayed. Click “OLYMPUS
Setup” to display the “Setup” dialog.
# Caution
• If the “Setup” dialog is not displayed, select “My Computer” (Windows XP) or
“Computer” (Windows Vista/Windows 7) from the start menu. Double-click the
CD-ROM (OLYMPUS Setup) icon to open the “OLYMPUS Setup” window and then
double-click “LAUNCHER.EXE”.
• If a “User Account Control” dialog is displayed, click “Yes” or “Continue”.
2
86 EN
Follow the on-screen instructions on your computer.
3
Register your Olympus product.
4
Install OLYMPUS Viewer 3.
• Click the “Registration” button and follow the on-screen instructions.
• Check the system requirements before beginning installation.
• Click the “OLYMPUS Viewer 3” button and follow the on-screen instructions to install
the software.
Operating System
Windows XP SP3 /Windows Vista SP2 /
Windows 7 SP1 /Windows 8
Processor
Pentium 4 1.3 GHz or better
(Core 2 Duo 2.13 GHz or better required for movies)
RAM
1 GB or more (2 GB or more recommended)
Free Hard Drive Space
3 GB or more
Monitor Settings
1024 × 768 pixels or more
Minimum 65,536 colors (16,770,000 colors recommended)
• See online help for information on using the software.
Macintosh
1
Insert the supplied CD in a CD-ROM drive.
2
Install OLYMPUS Viewer 3.
• The disk contents should automatically be displayed in
the Finder. If they are not, double-click the CD icon on
the desktop.
• Double-click the “Setup” icon to display the “Setup”
dialog.
Operating System
Mac OS X v10.5–v10.8
Processor
Intel Core Solo/Duo 1.5 GHz or better
(Core 2 Duo 2.13 GHz or better required for movies)
RAM
1 GB or more (2 GB or more recommended)
Free Hard Drive Space
3 GB or more
Monitor Settings
1024 × 768 pixels or more
Minimum 32,000 colors (16,770,000 colors recommended)
• Other languages can be selected from the language combo box. For information on using
the software, see online help.
10
Connecting the camera to another device
• Check the system requirements before beginning
installation.
• Click the “OLYMPUS Viewer 3” button and follow the
on-screen instructions to install the software.
EN 87
Copying pictures to a computer without
OLYMPUS Viewer 3
Your camera supports the USB Mass Storage Class. You can transfer images to a
computer by connecting the camera to the computer with the provided USB cable. The
following operating systems are compatible with the USB connection:
Windows
Windows XP SP3 /Windows Vista SP2 / Windows 7 SP1 /
Windows 8
Macintosh
Mac OS X v10.5-v10.8
1
Turn the camera off and connect it to the computer.
2
Turn on the camera.
3
Press FG to select [Storage]. Press Q.
• The location of the USB port varies with the computer. For details, refer to your
computer’s manual.
• The selection screen for the USB connection is
displayed.
USB
Storage
MTP
Easy Print
Custom Print
Set
4
10
The computer recognizes the camera as a new device.
# Cautions
Connecting the camera to another device
88 EN
• If your computer is running Windows Vista/Windows 7/Windows 8, select [MTP] in Step 3
to use Windows Photo Gallery.
• Data transfer is not guaranteed in the following environments, even if your computer is
equipped with a USB port.
Computers with a USB port added by means of an extension card, etc.
Computers without a factory-installed OS and home-built computers
• Camera controls can not be used while the camera is connected to a computer.
• If the dialog shown in Step 2 is not displayed when the camera is connected, select [Auto]
for [USB Mode] (P. 68) in the camera custom menus.
10
Connecting the camera to another device
EN 89
11
Using separately sold accessories
Eyecup
You can exchange this for a larger eyecup
(EP-11).
Removing
Using external flash units designated for use with
this camera
With this camera, you can use one of the separately sold external flash units to achieve
a flash suited to your needs. The external flashes communicate with the camera,
allowing you to control the camera’s flash modes with various available flash control
modes, such as TTL-AUTO.
An external flash unit specified for use with this camera can be mounted on the camera
by attaching it to the camera’s hot shoe. You can also attach the flash to the flash
bracket on the camera using the bracket cable (optional). Refer to the documentation
provided with the external flash units as well.
Functions available with external flash units
Optional flash
FL-14
FL-36R
FL-50R
FL-300R
FL-600R
11
Flash control mode
TTL-AUTO, AUTO, MANUAL
Using separately sold accessories
GN (Guide number) (ISO100)
GN14 (28 mm*)
GN36 (85 mm*) GN20 (24 mm*)
GN50 (85 mm*) GN28 (24 mm*)
GN20 (28 mm*)
GN36 (85 mm*) GN20 (24 mm*)
* The focal length of the lens that can be used (Calculated based on 35 mm film camera).
Wireless remote control flash photography
External flash units that are designated for use with this camera and have a remote
control mode can be used for wireless flash photography. The camera can control the
flash units in up to three separate groups. See the instruction manuals provided with
the external flash units for details.
1
Set the remote flash units to RC mode and place them as desired.
2
Select [On] for [# RC Mode] in J Shooting menu 2 (P. 46).
90 EN
• Turn each flash unit on, press the MODE button, and select RC mode.
• Select a channel and group for each flash unit.
• The super control panel switches to RC mode.
• You can choose a super control panel display by repeatedly pressing the INFO
button.
• Select a flash mode (note that red-eye reduction is not available in RC mode).
3
Adjust the settings for each group in the super control panel.
Group
• Select the flash control
mode and adjust the flash
intensity separately for
each group. For MANUAL,
select the flash intensity.
Flash intensity value
Adjust settings for the camera
flash unit.
P
# Sync
A Mode
TTL
M
Off
TTL
+5.0
1/8
–
+3.0
250 F5.6
Ch
Channel
• Set the communication
channel to the same
channel used on the flash.
1
0.0
38
Flash control Flash intensity
mode
4
Press the flash switch to pop up the internal flash.
• After confirming that the built-in and remote flash units have charged, take a test
shot.
Wireless flash control range
Position the wireless flash units with their
remote sensors facing the camera. The
following illustration shows the approximate
ranges at which the flash units can be
positioned. The actual control range varies with
local conditions.
30°
60°
30°
5m
50°
100°
50°
3m
# Cautions
Other external flash units
Observe the following precautions when mounting an external flash unit not designated
for use with this camera on the camera hot shoe:
• Using obsolete flash units that apply currents of more than about 24 V to the camera hot
shoe X-contact will damage the camera.
• Connecting flash units with signal contacts that do not conform to Olympus specifications
may damage the camera.
• Use only with the camera in shooting mode M at ISO settings other than [AUTO].
• Flash control can only be performed by manually setting the flash to the ISO sensitivity
and aperture values selected with the camera. Flash brightness can be adjusted by
adjusting either ISO sensitivity or aperture.
• Use a flash with an angle of illumination suited to the lens. Angle of illumination is usually
expressed using 35-mm format equivalent focal lengths.
11
Using separately sold accessories
• We recommend using a single group of up to three remote flash units.
• Remote flash units can not be used for second curtain slow synchronization longer than
4 seconds.
• If the subject is too close to the camera, the control flashes emitted by the built-in flash
may affect exposure (this effect can be reduced by reducing the output of the built-in flash
by, for example, using a diffuser).
EN 91
12
Usage Tips
If the camera does not work as intended, or if an error message is displayed on the screen,
and you are unsure of what to do, refer to the information below to fix the problem(s).
Troubleshooting
Battery
The camera does not work even when
batteries are installed.
• Insert recharged batteries in the correct
direction. g “Inserting and removing
the battery and card” (P. 7)
• Battery performance may have been
reduced temporarily due to low
temperature. Take the batteries out of
the camera, and warm them by putting
them in your pocket for a while.
Card
An error message is displayed.
• g “Error message” (P. 93)
Shutter button
No picture is taken when the shutter
button is pressed.
12
Usage Tips
92 EN
• Cancel sleep mode.
To save battery power, the camera
automatically goes into sleep mode and
the monitor turns off if no operations are
performed for a pre-determined period of
times while the camera is on. No picture
is taken even if the shutter button is
fully pressed in this mode. Operate the
zoom lever or other buttons to restore
the camera from sleep mode before
taking a picture. If the camera is left for
another 5 minutes, it automatically turns
off. Press the n button to turn the
camera on.
• Press the q button to switch to the
shooting mode.
• Wait until #(flash charge) stops blinking
before taking pictures.
• With prolonged camera use, the internal
temperature may increase, resulting in
automatic shutdown. If this occurs, wait
until the camera has sufficiently cooled.
The camera’s external temperature
may also increase during use, however
this is normal and does not indicate
malfunction.
Monitor
Difficult to see.
• Condensation may have occurred. Turn
off the power, and wait for the camera
body to become acclimated to the
surrounding temperature and dry out
before taking pictures.
The light is caught in the picture.
• Shooting with flash in dark situations
results in an image with many flash
reflections on dust in the air.
Date and time function
Date and time settings return to the
default setting.
• If the batteries are removed and left
out of the camera for about 3 days*1,
the date and time settings return to the
default setting, and must be reset.
*1 The time until the date and time
settings return to the default setting
varies depending on how long the
batteries have been loaded.
g “Turning on the camera and
making the initial settings” (P. 8)
Error message
Monitor indication
Possible cause
Corrective action
There is a problem with the card.
Insert the card again.
If the problem persists, format
the card.
If the card cannot be
formatted, it cannot be used.
Writing to the card is prohibited.
The card write-protect switch
is set to the “LOCK” side.
Release the switch. (P. 100)
• The card is full. No more
pictures can be taken or no
more information such as print
reservation can be recorded.
• There is no space in the card
and print reservation or new
images cannot be recorded.
Replace the card or erase
unwanted pictures.
Before erasing, download
important images to a PC.
There are no pictures on the
card.
The card contains no pictures.
Record pictures and play
back.
The selected picture cannot be
displayed for playback due to
a problem with this picture. Or
the picture cannot be used for
playback on this camera.
Use image processing
software to view the picture
on a PC.
If that cannot be done, the
image file is damaged.
Pictures taken with another
camera cannot be edited on this
camera.
Use image processing
software to edit the picture.
Card Error
Write Protect
Card Full
No Picture
Picture Error
The Image Cannot Be
Edited
12
Usage Tips
EN 93
Monitor indication
Possible cause
Corrective action
Turn off the camera and wait
for the internal temperature
to cool.
Internal camera
temperature is too high.
Please wait for cooling
before camera use.
The internal temperature of
the camera has risen due to
sequential shooting.
Wait a moment for the camera
to turn off automatically. Allow
the internal temperature of
the camera to cool before
resuming operations.
The battery is drained.
Charge the battery.
The camera is not connected to
the computer or printer correctly.
Disconnect the camera and
connect it again correctly.
There is no paper in the printer.
Load some paper in the
printer.
The printer has run out of ink.
Replace the ink cartridge in
the printer.
The paper is jammed.
Remove the jammed paper.
The printer's paper cassette has
been removed or the printer has
been manipulated while making
settings on the camera.
Do not manipulate the printer
while making settings on the
camera.
There is a problem with the
printer and/or camera.
Turn off camera and printer.
Check the printer and remedy
any problems before turning
the power on again.
Pictures recorded on other
cameras may not be printed on
this camera.
Use a personal computer to
print.
Battery Empty
No Connection
No Paper
No Ink
Jammed
12
Settings Changed
Usage Tips
Print Error
Cannot Print
94 EN
Shooting tips
When you are unsure of how to take a picture that you envision, refer to the information
below.
Focusing
Focusing on the subject.
• Take pictures using the touch screen. g P. 43
• Taking a picture of a subject not in the center of the monitor. g P. 39
After focusing on an object at the same distance as the subject, compose the shot, and
take the picture.
• Using the face priority AF. g P. 40
• Taking a picture of a shadowy subject. g P. 68
Using the AF illuminator makes focusing easier.
• Taking a picture of subjects where autofocus is difficult.
In the following cases, after focusing on an object (by pressing the shutter button
halfway down) with high contrast at the same distance as the subject, compose the
shot, and take the picture.
Subject with low contrast
Excessively bright light in
center of frame
Subject containing no vertical
lines *1
Subjects at different
distances*1
Fast-moving subject
Subject not inside AF area
Camera shake
Taking pictures without camera shake.
• Taking pictures using [Image Stabilizer]. g P. 33
The image pickup device shifts to correct for camera shake even if the ISO sensitivity
is not increased. This function is also effective when taking pictures at a high zoom
magnification.
• Select [J Sport] in the scene mode. g P. 21
The [J Sport] mode uses a fast shutter speed and can reduce the blur incurred by a
moving subject.
• Taking pictures at a high ISO sensitivity. g P. 40
If a high ISO sensitivity is selected, pictures can be taken at a high shutter speed even
at locations where a flash cannot be used.
12
Usage Tips
*1 It is also effective to compose the shot by holding the camera vertically to focus, and then
returning to the horizontal position to take the picture.
EN 95
Exposure (brightness)
Taking pictures with the right brightness.
• Select [Auto] for [Gradation] in picture mode. g P. 33
• Taking pictures using [Spot Metering]. g P. 38
Brightness is matched with a subject in the center of the screen and the image is not
affected by background light.
• Taking pictures using [Fill In] flash. g P. 28
A subject against backlight is brightened.
• Taking pictures of a white beach or snow scene. g P. 21
Select [g Beach & Snow] in the scene mode.
• Taking pictures using exposure compensation. g P. 29
Adjust the brightness while viewing the screen for taking the picture. Normally, taking
pictures of white subjects (such as snow) results in images that are darker than the
actual subject. Use the exposure compensation to adjust in the positive (+) direction
to express whites as they appear. When taking pictures of black subjects, on the other
hand, it is effective to adjust in the negative (-) direction.
Color hue
Taking pictures with colors at the same shade as they appear.
• Taking pictures by selecting white balance. g P. 34
Best results in most environments can normally be obtained with the [WB Auto] setting,
but for some subjects, you should try experimenting with different settings. (This is
especially true for sunshade under a clear sky, mixed natural and artificial light settings,
and so on.)
Image quality
Taking sharper pictures.
• Taking pictures at a low ISO sensitivity. g P. 40
If the picture is taken with a high ISO sensitivity, noise (small colored spots and color
unevenness that were not in the original image) can occur, and the image can appear
grainy.
12
Playback/Editing tips
Usage Tips
Playback
Viewing images with high picture quality on a highdefinition TV
• Connect the camera to the TV using an HDMI cable (sold separately). g P. 80
Editing
Erasing the sound recorded to a still image.
• Display a still image to erase the sound, and select [Erase] for [R]. g P. 55
96 EN
12
Usage Tips
EN 97
13
Information
Cleaning and storing the camera
Camera care
Exterior:
• Wipe gently with a soft cloth. If the camera is very dirty, soak the cloth in mild soapy water
and wring well. Wipe the camera with the damp cloth and then dry it with a dry cloth. If you
have used the camera at the beach, use a cloth soaked in clean water and well wrung.
Monitor:
• Wipe gently with a soft cloth.
Lens:
• Blow dust off the lens with a commercial blower, then wipe gently with a lens cleaner.
# Cautions
• Do not use strong solvents such as benzene or alcohol, or a chemically treated cloth.
• Mold may form on the lens surface if the lens is left dirty.
Storage
• When storing the camera for extended periods, remove the battery, adapter and card, and
keep in a cool, dry place that is well ventilated.
• Periodically insert the battery and test the camera functions.
# Cautions
• Avoid leaving the camera in places where chemical products are handled since this may
result in corrosion.
Pixel mapping - Checking the image processing functions
13
Information
The pixel mapping feature allows the camera to check and adjust the image pickup device
and image processing functions. After using the monitor or taking continuous shots, wait
for at least one minute before using the pixel mapping function to ensure that it operates
correctly.
1
2
Select [Pixel Mapping] in c Custom Menu (P. 68) tab b.
Press I, then press Q.
• The [Busy] bar is displayed when pixel mapping is in progress. When pixel mapping
is finished, the menu is restored.
# Cautions
• If you accidentally turn the camera off during pixel mapping, start again from Step 1.
98 EN
Battery and charger
• Use the single Olympus lithium-ion battery. Use only genuine OLYMPUS rechargeable
batteries.
• The camera’s power consumption varies widely with usage and other conditions.
• As the following consume a lot of power even without shooting, the battery will be drained
quickly.
• The zoom is used repeatedly.
• Performing auto focus repeatedly by pressing the shutter button halfway in shooting
mode.
• Displaying images on the monitor for a prolonged period.
• When connected to a computer or printer.
• When using a drained battery, the camera may turn off without the low battery warning
being displayed.
• The battery will not be fully charged at the time of purchase. Charge the battery using the
provided charger before use.
• The normal charging time using the provided charger is approximately 3 hours 30 minutes
(estimated).
• Do not attempt to use chargers not specifically designated for use with the supplied
battery, or to use batteries not specifically designated for use with the supplied charger.
# Cautions
• There is a risk of explosion if the battery is replaced with the incorrect battery type.
• Dispose of the used battery following the instructions “Battery Handling Precautions” (P. 113).
Using your charger abroad
• The charger can be used in most home electrical sources within the range of 100 V to
240 V AC (50/60 Hz) around the world. However, depending on the country or area you
are in, the AC wall outlet may be shaped differently and the charger may require a plug
adapter to match the wall outlet. For details, ask at your local electrical shop or travel
agent.
• Do not use commercially available travel adapters as the charger may malfunction.
13
Information
EN 99
Using the card
Cards compatible with this camera
In this manual, all storage devices are referred to as “cards.” The
following types of SD memory card (commercially available) can be
used with this camera: SD, SDHC, SDXC, and Eye-Fi. For the latest
information, please visit the Olympus website.
SD card write protect switch
The SD card body has a write protect switch. If you set the switch to
the “LOCK” side, you will not be able to write to the card, delete data or
format. Return the switch to the unlock position enable writing.
LOCK
# Cautions
• The data in the card will not be erased completely even after formatting the card or
deleting the data. When discarding, destroy the card to prevent leakage of personal
information.
• Use the Eye-Fi card in compliance with the laws and regulations of the country where the
camera is used. Remove the Eye-Fi card from the camera or disable the card functions in
airplanes and other locations where use is prohibited. g [Eye-Fi] (P. 76)
• The Eye-Fi card may become hot during use.
• When using an Eye-Fi card, the battery may run out faster.
• When using an Eye-Fi card, the camera may function more slowly.
13
Information
100 EN
Record mode and file size/number of storable still
pictures
The file size in the table is approximate for files with a 4:3 aspect ratio.
Record
mode
RAW
YSF
3968×2976
3200×2400
2560×1920
1920×1440
1600×1200
1280×960
1024×768
640×480
Compression
File format
File size (MB)
—
ORF
1/2.7
Approx. 18.5
Approx. 8.8
Number of storable
still pictures
Card*1
190
420
1/4
1/8
1/12
1/2.7
1/4
1/8
1/12
1/2.7
1/4
1/8
1/12
1/2.7
1/4
1/8
1/12
1/2.7
1/4
1/8
1/12
1/2.7
1/4
1/8
1/12
1/2.7
1/4
1/8
1/12
1/2.7
1/4
1/8
1/12
Approx. 6.1
Approx. 3.3
Approx. 2.3
Approx. 5.9
Approx. 4.2
Approx. 2.3
Approx. 1.7
Approx. 4.0
Approx. 2.8
Approx. 1.7
Approx. 1.3
Approx. 2.0
Approx. 1.4
Approx. 0.7
Approx. 0.5
Approx. 1.4
Approx. 1.0
Approx. 0.5
Approx. 0.3
Approx. 0.9
Approx. 0.6
Approx. 0.3
Approx. 0.3
Approx. 0.6
Approx. 0.4
Approx. 0.2
Approx. 0.2
Approx. 0.3
Approx. 0.2
Approx. 0.1
Approx. 0.1
600
1,320
1,960
620
1,020
2,030
2,970
1,080
1,580
3,120
4,520
1,900
2,770
5,300
7,620
2,710
3,930
7,620
10,170
4,060
5,810
11,090
15,250
6,100
8,710
15,250
20,340
13,560
20,340
30,510
40,680
JPEG
13
Information
YF
YN
YB
XSF
XF
XN
XB
XSF
XF
XN
XB
XSF
XF
XN
XB
XSF
XF
XN
XB
WSF
WF
WN
WB
WSF
WF
WN
WB
WSF
WF
WN
WB
Number of
pixels
(Pixel Count)
4000×2992
*1 Assumes a 4GB SD card.
# Cautions
• The number of remaining pictures may change according to the subject, whether or not
print reservations have been made, and other factors. In certain instances, the number of
remaining pictures displayed on the monitor will not change even when you take pictures
or erase stored images.
• The actual file size varies according to the subject.
• The maximum number of storable still pictures displayed on the monitor is 9999.
• For the available recording time for movies, see the Olympus website.
EN 101
Menu directory
*1: Can be added to [C Mode Setup].
*2: Default can be restored by selecting [Full] for [Reset].
*3: Default can be restored by selecting [Basic] for [Reset].
I Shooting Menu 1 / J Shooting Menu 2
Tab
I
Function
Default
All Erase/
Cancel
―
iNatural
YN
Full HD
4:3
o
On
Off
Card Setup
Reset/C Mode Setup
Picture Mode
Still Picture
Movie
K
J
Image Aspect
j/Y
Image Stabilizer
AE BKT
WB BKT
Bracketing
FL BKT
ISO BKT
ART BKT
#RC Mode
# Sync
1
A– B
G–M
*1
*2
*3
47
47
33
36
36
30
33
51
52
52
52
53
53
53
*1
*2
*3
g
51
Off
Off
Off
Off
Off
# Sync 1
Off
g
q Playback Menu
Tab
q
13
Information
102 EN
Function
Start
BGM
Effect
Slide
Slide Interval
Movie Interval
Default
Start
Cosmic
Standard
L
All
3 sec
Short
On
R
―
RAW Data Edit
―
JPEG Edit
Edit
Sel. Image
R
―
<
―
―
Reset Protect
―
Connection to Smartphone
56
58
58
58
59
85
59
59, 64
d Setup Menu
Tab
d
Function
X
World Time
W*
i
Rec View
Firmware
Wi-Fi Settings
Wi-Fi Connect
Settings
Private Password
Reset share Order
Reset Wi-Fi Settings
OFF
Default
*1
―
Home/Alternate
―
j ±0, k ±0, Natural
2 sec
―
*2
*3
Private
g
60
―
―
―
―
* Settings differ depending on the region where the camera is purchased.
c Custom Menu
Zoom Speed
Default
S-AF
o
o
On
Face Priority Off
On
Off
―
Movie
#
j/Y
j: Ps
j: F
j: FNo.
j: F
j: Shutter
j: Shutter
j: F
j: FNo.
j: Ps
j: F
*1
*2
*3
MF
b
c
b
b
Yes
Low
70
13
70
j: Mode Switching j: F
j: B
j: GU
g
Information
Tab
Function
c R AF/MF
AF Mode
Still Picture
AF Area
P Set Home
AF Illuminat.
I Face Priority
MF Assist.
S Button/dial/Lever
U Function
V Function
Button
R Function
Function
I Function
G Function
P
A
S
M
Dial Function P
SCN
ART
Menu
q
L Lever Function
Exposure
Menu
Dial Direction
MF
Zoom
q Power On
j: A /Value
j: Prev/Next
EN 103
Tab
Function
c T Connection/Sound
HDMI Out
HDMI
HDMI Control
Video Out
8 Beep Sound
Volume
USB Mode
U Display
q Info
G/Info
Settings
LV-Info
G Settings
Displayed Grid
iAUTO
P/A/S/M
KControl
Settings
ART
SCN
13
Information
104 EN
Default
*1
1080i
Off
*2
*3
―
On
3
Auto
H
H
I
I
H
I
I
I
H
I
I
H
Off
H
I
I
H
I
H
I
I
H
I
I
g
Image Only
Overall
u
Highlight&Shadow
u
Highlight&Shadow
Level Gauge 1
Level Gauge 2
Image Only
A
B
C
Live Guide
Live Control
Live SCP
Live Control
Live SCP
Art Menu
Live Control
Live SCP
Scene Menu
Live Control
Live SCP
71
72
Tab
c U
Function
Picture Mode Settings
Highlight
Histogram
Settings
Shadow
Live View Boost
Sleep
V Exp/p/ISO
Metering
P+Metering
Noise Reduct.
Noise Filter
ISO
ISO-Auto Set
Bulb Timer
W # Custom
#Slow Limit
w+F
X K/Color/WB
WB
K Set
Pixel Count
Xiddle
Wmall
i-Enhance
Vivid
Muted
Portrait
Monotone
Soft Focus
Pale&Light Color
Light Tone
Grainy Film
Pin Hole
Diorama
Cross Process
Gentle Sepia
Dramatic Tone
Key Line
255
0
Off
1 min
*1
*2
*3
g
72
p
Off
Auto
Standard
Auto
High Limit: 1600
Default: 100
15 min
1/30
Off
Auto
A : ±0, G : ±0
No
On
Off
sRGB
K1: YF
K2: YN
K3: XN
K4: WN
2560×1920
1280×960
73
73
13
74
Information
All Set
All >
All Reset
W Keep Warm Color
#+WB
Color Space
Default
H
H
H
H
H
H
H
H
H
H
H
H
H
H
H
EN 105
Tab
Function
c Y Record
File Name
sRGB
Edit filename
Adobe RGB
dpi Settings
Copyright
Info.
Copyright
Artist Name
Settings
Copyright
Name
Z Movie
Movie R
Wind Noise Reduction
Recording Volume
b K Utility
Pixel Mapping
p
Exposure
J
Shift
5
Level Adjust
Touch Screen Settings
Eye-Fi
m/ft *
EVF Auto
Luminance
EVF Adjust
EVF Adjust
EVF Auto Switch
While Exposing "
* Displayed when MF is selected.
13
Information
106 EN
Default
*1
*2
Reset
Off
*3
350
Off
g
75
—
—
On
Off
Normal
75
—
±0
Reset
On
On
m
76
On
j ±0, k ±0
On
Off
List of settings available in each shooting mode
A
P/A/S/M
P
C1/C2
Standard
Fun Frames
F
―
―
―
Highlight&Shadow
―
―
―
IS Mode
Picture Mode
―
―
―
WB
j/Y
*1
―
―
Aspect
―
―
K Image Quality
n Image Quality
*1
#
*1
*1
w
―
Metering
―
―
―
AF Mode
*1
*1
ISO
―
*1
I Face Priority
―
―
―
ND Filter Setting
―
Movie R
Digital Tele-converter
―
―
1
*1 Some functions cannot be set.
13
Information
EN 107
List of SCN settings
O
P
L
J
G
U
R
T
s
(
0
g
F
―
―
―
―
―
―
―
―
―
―
―
―
Highlight&Shadow
―
―
―
―
―
―
―
―
―
―
―
―
IS Mode
Picture Mode
―
―
―
―
―
―
―
―
―
―
―
―
WB
―
―
―
―
―
―
―
―
―
―
―
―
j/Y
*1
*1
*1
*1
*1
*1
*1
*1
*1
*1
*1
*1
Aspect
―
K Image Quality
*1
*1
n Image Quality
*1
*1
*1
*1
*1
*1
*1
*1
*1
*1
*1
*1
#
*1
*1
―
*1
―
*1
―
―
―
―
*1
*1
w
―
―
―
―
―
―
―
―
―
―
―
―
Metering
―
―
―
―
―
―
―
―
―
―
―
―
AF Mode
―
―
―
―
―
―
―
―
―
―
―
ISO
―
―
―
―
―
―
―
―
―
―
―
―
I Face Priority
―
―
ND Filter Setting
―
―
―
―
―
―
―
―
―
―
―
Movie R
Digital Tele-converter
1
*1 Some functions cannot be set.
13
Information
108 EN
List of ART settings
Pop Art
Soft Focus
Pale&
Light Color
Light Tone
Grainy Film
F
Highlight&Shadow
IS Mode
Picture Mode
WB
j/Y
Aspect
K Image Quality
n Image Quality
―
―
―
―
―
*1
*1
*1
*1
*1
*1
*1
*1
*1
*1
#
w
Metering
AF Mode
ISO
I Face Priority
ND Filter Setting
Movie R
Digital Tele-converter
1
Diorama
Cross
Process
Gentle
Sepia
Dramatic
Tone
Key Line
F
Highlight&Shadow
IS Mode
Picture Mode
WB
j/Y
Aspect
K Image Quality
n Image Quality
―
―
―
―
―
―
*1
*1
*1
*1
*1
*1
*1
*1
*1
*1
*1
*1
#
w
Metering
AF Mode
ISO
I Face Priority
ND Filter Setting
Movie R
Digital Tele-converter
1
13
Information
Pin Hole
*1 Some functions cannot be set.
EN 109
Specifications
Camera
Product type
Product type
Image pickup device
Product type
No. of effective pixels
Aspect ratio
Viewfinder
Type
No. of pixels
Magnification
Eye point
Monitor
Product type
Total no. of pixels
Compact digital camera
1/1.7" CMOS sensor
Approx. 12,000,000 pixels
1.33 (4:3)
Electronic viewfinder with eye sensor
1,440,000 pixels
100%
Approx. 18.0 mm (–1 m-1)
3.0″ TFT color LCD display, touch screen
Approx. 920,000 dots (aspect ratio 3 : 2)
Lens
Olympus lens 6.0 to 64.3 mm, f2.8
(Equivalent to 28 to 300 mm on a 35 mm film)
ND Filter
3 EV equivalent
Shutter
Shutter speed
1/2000 - 60 sec., bulb photography
Shooting range
0.1 m (4 inch) to (W), 0.8 m (2.6 ft.) to (T) (Normal/Macro)
0.05 m (2 inch) to 0.6 m (2 ft.) (super macro mode)
Auto focus
Product type
Focusing points
13
Exposure control
Metering system
Information
ISO sensitivity
Exposure compensation
TTL metering system (imager metering)
ESP metering/Center weighted averaging metering/Spot metering/
Selected target metering
EV–3 -17 (ESP metering/Center weighted averaging metering/Spot
metering)
100 - 12800 (1/3 EV step)
±3 EV (1/3 EV step)
White balance
Mode setting
Auto/Preset WB (7 settings)/Customized WB/One-touch WB
Metered range
Recording
Memory
Recording system
Applicable standards
Sound with still pictures
Movie
Audio
110 EN
Imager contrast detection system
Maximum of 35 points
SD/SDHC/SDXC (supports UHS-I), Eye-Fi card
Digital recording, JPEG (in accordance with Design rule for Camera File
system (DCF)), RAW Data
Exif 2.3, Digital Print Order Format (DPOF), PRINT Image Matching III,
PictBridge
Wave format
MOV(MPEG-4 AVC/H.264)/AVI Motion JPEG
PCM 48kHz
Playback
Display format
Single-frame playback/Close-up playback/Index display
External connector
Multi-connector (USB connector, AV connector)/
HDMI micro connector (Type D)
Automatic calendar system
2000 up to 2099
Power supply
Battery
Dimensions/weight
Dimensions
Weight
Operating environment
Temperature
Humidity
One Olympus lithium ion battery (BLS-5)
116.2 mm (W) × 87 mm (H) × 56.5 mm (D) (4.6" × 3.4" × 2.2")
(excluding protrusions)
Approx. 402 g (14.0 oz.) (including battery and memory card)
0 °C - 40 °C (32 °F - 104 °F) (operation)/
– 20 °C - 60 °C (– 4 °F - 140 °F) (storage)
30% - 90% (operation)/10% - 90% (storage)
Lithium ion battery
MODEL NO.
Product type
Nominal voltage
Nominal capacity
No. of charge and
discharge times
Ambient temperature
Dimensions
Weight
BLS-5
Rechargeable Lithium ion battery
DC 7.2 V
1150 mAh
Approx. 500 times (varies with usage conditions)
0 °C - 40 °C (32 °F - 104 °F) (charging)
Approx. 35.5 mm (W) × 12.8 mm (H) × 55 mm (D) (1.4" × 0.5" × 2.2")
Approx. 44 g (0.1 Ib.)
Lithium ion charger
MODEL NO.
Rated input
Rated output
Charging time
Ambient temperature
• The AC cable supplied with this device is for use only with this device and should not be
used with other devices. Do not use cables for other devices with this device.
13
Information
Dimensions
Weight (without AC cable)
BCS-5
AC 100 V - 240 V (50/60 Hz)
DC 8.35 V, 400 mA
Approx. 3.5 hours (room temperature)
0 °C - 40 °C (32 °F - 104 °F) (operation)/
–20 °C - 60 °C (–4 °F - 140 °F) (storage)
Approx. 62 mm (W) × 38 mm (H) × 83 mm (D) (2.4" × 1.5" × 3.3")
Approx. 70 g (0.2 Ib.)
SPECIFICATIONS ARE SUBJECT TO CHANGE WITHOUT ANY NOTICE OR
OBLIGATION ON THE PART OF THE MANUFACTURER.
HDMI, the HDMI logo and High-Definition
Multimedia Interface are trademarks or registered
trademarks of HDMI Licensing LLC.
EN 111
14
SAFETY PRECAUTIONS
CAUTION
RISK OF ELECTRIC
SHOCK
DO NOT OPEN
CAUTION: TO REDUCE THE RISK OF
ELECTRICAL
SHOCK, DO NOT REMOVE COVER (OR
BACK).
NO USER-SERVICEABLE PARTS INSIDE.
REFER SERVICING TO QUALIFIED
OLYMPUS
SERVICE PERSONNEL.
An exclamation mark
enclosed in a triangle
alerts you to important
operating and maintenance
instructions in the
documentation provided with
the product.
DANGER If the product is used without
observing the information
given under this symbol,
serious injury or death may
result.
WARNING If the product is used without
observing the information
given under this symbol,
injury or death may result.
CAUTION If the product is used without
observing the information
given under this symbol,
minor personal injury,
damage to the equipment,
or loss of valuable data may
result.
WARNING!
TO AVOID THE RISK OF FIRE OR
ELECTRICAL SHOCK, NEVER
DISASSEMBLE, EXPOSE THIS
PRODUCT TO WATER OR OPERATE IN
A HIGH HUMIDITY ENVIRONMENT.
14
SAFETY PRECAUTIONS
General Precautions
Read All Instructions — Before you use the product,
read all operating instructions. Save all manuals and
documentation for future reference.
Cleaning — Always unplug this product from the wall outlet
before cleaning. Use only a damp cloth for cleaning. Never
use any type of liquid or aerosol cleaner, or any type of
organic solvent to clean this product.
Attachments — For your safety, and to avoid damaging the
product, use only accessories recommended by Olympus.
112 EN
Water and Moisture — For precautions on products with
weatherproof designs, read the weatherproofing sections.
Location — To avoid damage to the product, mount the
product securely on a stable tripod, stand, or bracket.
Power Source — Connect this product only to the power
source described on the product label.
Foreign Objects — To avoid personal injury, never insert a
metal object into the product.
Heat — Never use or store this product near any heat
source such as a radiator, heat register, stove, or any type
of equipment or appliance that generates heat, including
stereo amplifiers.
Handling the Camera
WARNING
• Do not use the camera near flammable or explosive gases.
• Do not use the flash and LED (including AF illuminator) on
people (infants, small children, etc.) at close range.
• You must be at least 1 m (3 ft.) away from the faces of your
subjects. Firing the flash too close to the subject’s eyes
could cause a momentary loss of vision.
• Keep young children and infants away from the camera.
• Always use and store the camera out of the reach of young
children and infants to prevent the following dangerous
situations which could cause serious injury:
• Becoming entangled in the camera strap, causing
strangulation.
• Accidentally swallowing the battery, cards or other small
parts.
• Accidentally firing the flash into their own eyes or those
of another child.
• Accidentally being injured by the moving parts of the
camera.
• Do not look at the sun or strong lights with the camera.
• Do not use or store the camera in dusty or humid places.
• Do not cover the flash with a hand while firing.
• Use SD/SDHC/SDXC memory cards or Eye-Fi cards only.
Never use other types of cards.
If you accidently insert another type of card into the camera,
contact an authorized distributor or service center. Do not try
to remove the card by force.
• Should you notice that the charger is emitting smoke, heat,
or an unusual noise or smell, immediately cease use and
unplug the charger from the power outlet, and then contact an
authorized distributor or service center.
CAUTION
• Stop using the camera immediately if you notice any unusual
odors, noise, or smoke around it.
• Never remove the batteries with bare hands, which may
cause a fire or burn your hands.
• Never hold or operate the camera with wet hands.
• Do not leave the camera in places where it may be subject to
extremely high temperatures.
• Doing so may cause parts to deteriorate and, in some
circumstances, cause the camera to catch fire. Do not use
the charger if it is covered (such as a blanket). This could
cause overheating, resulting in fire.
• Handle the camera with care to avoid getting a lowtemperature burn.
• When the camera contains metal parts, overheating can
result in a low-temperature burn. Pay attention to the
following:
• When used for a long period, the camera will get hot. If
you hold on to the camera in this state, a low-temperature
burn may be caused.
• In places subject to extremely cold temperatures, the
temperature of the camera’s body may be lower than the
environmental temperature. If possible, wear gloves when
handling the camera in cold temperatures.
• Be careful with the strap.
• Be careful with the strap when you carry the camera. It
could easily catch on stray objects and cause serious
damage.
• To protect the high-precision technology contained in this
product, never leave the camera in the places listed below,
no matter if in use or storage:
• Places where temperatures and/or humidity are high or go
through extreme changes. Direct sunlight, beaches, locked
cars, or near other heat sources (stove, radiator, etc.) or
humidifiers.
• In sandy or dusty environments.
• Near flammable items or explosives.
• In wet places, such as bathrooms or in the rain. When
using products with weatherproof designs, read their
manuals as well.
• In places prone to strong vibrations.
• Never drop the camera or subject it to severe shocks or
vibrations.
• When attaching the camera to or removing it from a tripod,
rotate the tripod screw, not the camera.
• Before transporting the camera, remove a tripod and all
other non-OLYMPUS accessories.
• Do not touch electric contacts on cameras.
• Do not leave the camera pointed directly at the sun. This
may cause lens or shutter curtain damage, color failure,
ghosting on the image pickup device, or may possibly
cause fires.
• Do not push or pull severely on the lens.
• Before storing the camera for a long period, remove the
batteries. Select a cool, dry location for storage to prevent
condensation or mold from forming inside the camera. After
storage, test the camera by turning it on and pressing the
shutter button to make sure that it is operating normally.
• The camera may malfunction if it is used in a location where
it is subject to a magnetic/electromagnetic field, radio waves,
or high voltage, such as near a TV set, microwave, video
game, loud speakers, large monitor unit, TV/radio tower, or
transmission towers. In such cases, turn the camera off and
on again before further operation.
• Always observe the operating environment restrictions
described in the camera’s manual.
DANGER
• The camera uses a lithium ion battery specified by Olympus.
Charge the battery with the specified charger. Do not use
any other chargers.
• Never heat or incinerate batteries.
• Take precautions when carrying or storing batteries to
prevent them from coming into contact with any metal
objects such as jewelry, pins, fasteners, etc.
WARNING
• Keep batteries dry at all times.
• To prevent batteries from leaking, overheating, or causing
a fire or explosion, use only batteries recommended for use
with this product.
• Insert the battery carefully as described in the operating
instructions.
• If rechargeable batteries have not been recharged within the
specified time, stop charging them and do not use them.
• Do not use a battery if it is cracked or broken.
• If a battery leaks, becomes discolored or deformed, or
becomes abnormal in any other way during operation, stop
using the camera.
• If a battery leaks fluid onto your clothing or skin, remove the
clothing and flush the affected area with clean, running cold
water immediately. If the fluid burns your skin, seek medical
attention immediately.
• Never subject batteries to strong shocks or continuous
vibration.
CAUTION
• Before loading, always inspect the battery carefully for leaks,
discoloration, warping, or any other abnormality.
• The battery may become hot during prolonged use. To avoid
minor burns, do not remove it immediately after using the
camera.
• Always unload the battery from the camera before storing
the camera for a long period.
• This camera uses one Olympus lithium ion battery (BLS-5).
No other type of batteries can be used.
There is a risk of explosion if the battery is replaced with the
incorrect battery type.
• Power consumption by the camera varies depending on
which functions are used.
• During the conditions described below, power is consumed
continuously and the battery becomes exhausted quickly.
• The zoom is used repeatedly.
• The shutter button is pressed halfway repeatedly in
shooting mode, activating the auto focus.
• A picture is displayed on the monitor for an extended
period of time.
• The camera is connected to a printer.
• Using an exhausted battery may cause the camera to turn
off without displaying the battery level warning.
• The Olympus lithium ion battery is designed to be used only
for the Olympus digital camera. Do not use the battery to
other devices.
14
SAFETY PRECAUTIONS
Battery Handling Precautions
Follow these important guidelines
to prevent batteries from leaking,
overheating, burning, exploding, or
causing electrical shocks or burns.
• Never store batteries where they will be exposed to direct
sunlight, or subjected to high temperatures in a hot vehicle,
near a heat source, etc.
• To prevent causing battery leaks or damaging their
terminals, carefully follow all instructions regarding the use of
batteries. Never attempt to disassemble a battery or modify
it in any way, solder, etc.
• If battery fluid gets into your eyes, flush your eyes
immediately with clear, cold running water and seek medical
attention immediately.
• Always store batteries out of the reach of small children. If a
child accidentally swallows a battery, seek medical attention
immediately.
• If you cannot remove the battery from the camera, contact
an authorized distributor or service center. Do not try to
remove the battery by force.
Damage to the battery exterior (scratches, etc.) may produce
heat or an explosion.
• Always store batteries out of the reach of small children and
pets. If they accidentally swallow a battery, seek medical
attention immediately.
EN 113
• If the battery’s terminals get wet or greasy, camera contact
failure may result. Wipe the battery well with a dry cloth
before use.
• Always charge a battery when using it for the first time, or if
it has not been used for a long period.
• When operating the camera with battery power at low
temperatures, try to keep the camera and spare battery
as warm as possible. A battery that has run down at low
temperatures may be restored after it is warmed at room
temperature.
• Before going on a long trip, and especially before traveling
abroad, purchase extra batteries. A recommended battery
may be difficult to obtain while traveling.
• When storing the battery for a long period, select a cool
location for storage.
• Please recycle batteries to help save our planet’s resources.
When you throw away dead batteries, be sure to cover their
terminals and always observe local laws and regulations.
Use Only Dedicated Rechargeable Battery
and Battery Charger
We strongly recommend that you use only the genuine
Olympus dedicated rechargeable battery and battery charger
with this camera.
Using a non-genuine rechargeable battery and/or battery
charger may result in fire or personal injury due to leakage,
heating, ignition or damage to the battery. Olympus does not
assume any liability for accidents or damage that may result
from the use of a battery and/or battery charger that are not
genuine Olympus accessories.
Precautions when using the wireless LAN
function
WARNING
• Turn off the camera in hospitals and other locations where
medical equipment is present.
The radio waves from the camera may adversely affect
medical equipment, causing a malfunction that results in
an accident.
• Turn off the camera when onboard aircraft.
Using wireless devices onboard may hinder safe operation
of the aircraft.
Monitor
14
SAFETY PRECAUTIONS
• Do not push the monitor forcibly; otherwise the image may
become vague, resulting in a playback mode failure or
damage to the monitor.
• A strip of light may appear on the top/bottom of the monitor,
but this is not a malfunction.
• When a subject is viewed diagonally in the camera, the
edges may appear zigzagged on the monitor. This is not a
malfunction; it will be less noticeable in playback mode.
• In places subject to low temperatures, the monitor may take
a long time to turn on or its color may change temporarily.
When using the camera in extremely cold places, it is a good
idea to occasionally place it in a warm place. The monitor
exhibiting poor performance due to low temperatures will
recover in normal temperatures.
• The monitor of this product is manufactured with high-quality
accuracy, however, there may be a stuck or dead pixel on the
monitor. These pixels do not have any influence on the image
to be saved. Because of the characteristics, the unevenness
of the color or brightness may also be found depending on the
angle, but this is due to the structure of the monitor. This is not
a malfunction.
114 EN
Legal and Other Notices
• Olympus makes no representations or warranties regarding
any damages, or benefit expected by using this unit lawfully,
or any request from a third person, which are caused by the
inappropriate use of this product.
• Olympus makes no representations or warranties regarding
any damages or any benefit expected by using this unit
lawfully which are caused by erasing picture data.
Disclaimer of Warranty
• Olympus makes no representations or warranties, either
expressed or implied, by or concerning any content of these
written materials or software, and in no event shall be liable
for any implied warranty of merchantability or fitness for
any particular purpose or for any consequential, incidental
or indirect damages (including but not limited to damages
for loss of business profits, business interruption and loss
of business information) arising from the use or inability to
use these written materials or software or equipment. Some
countries do not allow the exclusion or limitation of liability
for consequential or incidental damages or of the implied
warranty, so the above limitations may not apply to you.
• Olympus reserves all rights to this manual.
Warning
Unauthorized photographing or use of copyrighted material
may violate applicable copyright laws. Olympus assumes no
responsibility for unauthorized photographing, use or other
acts that infringe upon the rights of copyright owners.
Copyright Notice
All rights reserved. No part of these written materials or this
software may be reproduced or used in any form or by any
means, electronic or mechanical, including photocopying
and recording or the use of any type of information storage
and retrieval system, without the prior written permission of
Olympus. No liability is assumed with respect to the use of the
information contained in these written materials or software,
or for damages resulting from the use of the information
contained therein. Olympus reserves the right to alter the
features and contents of this publication or software without
obligation or advance notice.
FCC Notice
This equipment has been tested and found to comply with
the limits for a Class B digital device, pursuant to part 15
of the FCC Rules. These limits are designed to provide
reasonable protection against harmful interference in a
residential installation. This equipment generates, uses and
can radiate radio frequency energy and, if not installed and
used in accordance with the instructions, may cause harmful
interference to radio communications. However, there is
no guarantee that interference will not occur in a particular
installation. If this equipment does cause harmful interference
to radio or television reception, which can be determined by
turning the equipment off and on, the user is encouraged to
try to correct the interference by one or more of the following
measures:
• Reorient or relocate the receiving antenna.
• Increase the separation between the equipment and
receiver.
• Connect the equipment into an outlet on a circuit different
from that to which the receiver is connected.
• Consult the dealer or an experienced radio/TV technician
for help.
• Only the OLYMPUS-supplied USB cable should be used to
connect the camera to USB enabled personal computers.
FCC Caution
Changes or modifications not expressly approved by the party
responsible for compliance could void the user’s authority to
operate the equipment.
This transmitter must not be co-located or operated in
conjunction with any other antenna or transmitter.
This equipment complies with FCC/IC radiation exposure
limits set forth for an uncontrolled environment and meets
the FCC radio frequency (RF) Exposure Guidelines in
Supplement C to OET65 and RSS-102 of the IC radio
frequency (RF) Exposure rules. This equipment has very low
levels of RF energy that are deemed to comply without testing
of specific absorption ratio (SAR).
For customers in North and South America
For customers in USA
Declaration of Conformity
Model Number:
STYLUS 1
Trade Name:
OLYMPUS
Responsible Party:
Address:
3500 Corporate Parkway, P.O. Box 610,
Center Valley, PA 18034-0610, U.S.A.
Telephone Number:
484-896-5000
Tested To Comply With FCC Standards
FOR HOME OR OFFICE USE
This device complies with Part 15 of FCC Rules and Industry
Canada licence-exempt RSS standard(s). Operation is subject to
the following two conditions:
(1) This device may not cause harmful interference.
(2) This device must accept any interference received,
including interference that may cause undesired operation.
For customers in CANADA
This Class B digital apparatus complies with Canadian
ICES-003. CAN ICES-3(B)
OLYMPUS WORLDWIDE LIMITED WARRANTY IMAGING PRODUCTS
Excluded from this limited warranty and not warranted
by Olympus in any fashion, either express, implied, or by
statute, are:
(a) products and accessories not manufactured by Olympus
and/or not bearing the “OLYMPUS” brand label (the
warranty coverage for products and accessories of other
manufacturers, which may be distributed by Olympus, is
the responsibility of the manufacturers of such products
and accessories in accordance with the terms and
duration of such manufacturers’ warranties);
(b) any Product which has been disassembled, repaired,
tampered with, altered, changed, or modified by persons
other than Olympus’s own authorized service personnel
unless repair by others is made with the written consent of
Olympus;
(c) defects or damage to the Products resulting from wear,
tear, misuse, abuse, negligence, sand, liquids, impact,
improper storage, nonperformance of scheduled
operator and maintenance items, battery leakage, use
of non-“OLYMPUS” brand accessories, consumables, or
supplies, or use of the Products in combination with noncompatible devices;
(d) software programs;
(e) supplies and consumables (including but not limited to
lamps, ink, paper, film, prints, negatives, cables and
batteries); and/or
(f) Products which do not contain a validly placed and
recorded Olympus serial number, unless they are a model
on which Olympus does not place and record serial
numbers.
EXCEPT FOR THE LIMITED WARRANTY SET FORTH
ABOVE, OLYMPUS MAKES NO AND DISCLAIMS ALL
OTHER REPRESENTATIONS, GUARANTIES, CONDITIONS,
AND WARRANTIES CONCERNING THE PRODUCTS,
WHETHER DIRECT OR INDIRECT, EXPRESS OR IMPLIED,
OR ARISING UNDER ANY STATUTE, ORDINANCE,
COMMERCIAL USAGE OR OTHERWISE, INCLUDING BUT
NOT LIMITED TO ANY WARRANTY OR REPRESENTATION
AS TO THE SUITABILITY, DURABILITY, DESIGN,
OPERATION, OR CONDITON OF THE PRODUCTS (OR
ANY PART THEREOF) OR THE MERCHANTABILITY OF
THE PRODUCTS OR THEIR FITNESS FOR A PARTICULAR
PURPOSE, OR RELATING TO THE INFRINGEMENT OF ANY
PATENT, COPYRIGHT, OR OTHER PROPRIETARY RIGHT
USED OR INCLUDED THEREIN.
IF ANY IMPLIED WARRANTIES APPLY AS A MATTER OF
LAW, THEY ARE LIMITED IN DURATION TO THE LENGTH
OF THIS LIMITED WARRANTY.
SOME STATES MAY NOT RECOGNIZE A DISCLAIMER
OR LIMITATION OF WARRANTIES AND/OR LIMITATION
OF LIABILITY SO THE ABOVE DISCLAIMERS AND
EXCLUSIONS MAY NOT APPLY.
THE CUSTOMER MAY ALSO HAVE DIFFERENT AND/OR
ADDITIONAL RIGHTS AND REMEDIES THAT VARY FROM
STATE TO STATE.
THE CUSTOMER ACKNOWLEDGES AND AGREES THAT
OLYMPUS SHALL NOT BE RESPONSIBLE FOR ANY
DAMAGES THAT THE CUSTOMER MAY INCUR FROM
DELAYED SHIPMENT, PRODUCT FAILURE, PRODUCT
DESIGN, SELECTION, OR PRODUCTION, IMAGE OR DATA
LOSS OR IMPAIRMENT OR FROM ANY OTHER CAUSE,
WHETHER LIABILITY IS ASSERTED IN CONTRACT, TORT
(INCLUDING NEGLIGENCE AND STRICT PRODUCT
LIABILITY) OR OTHERWISE. IN NO EVENT SHALL
OLYMPUS BE LIABLE FOR ANY INDIRECT, INCIDENTAL,
CONSEQUENTIAL OR SPECIAL DAMAGES OF ANY KIND
(INCLUDING WITHOUT LIMITATION LOSS OF PROFITS OR
LOSS OF USE), WHETHER OR NOT OLYMPUS SHALL BE
OR SHOULD BE AWARE OF THE POSSIBILITY OF SUCH
POTENTIAL LOSS OR DAMAGE.
14
SAFETY PRECAUTIONS
Olympus warrants that the enclosed Olympus® imaging
product(s) and related Olympus® accessories (individually
a “Product” and collectively the “Products”) will be free from
defects in materials and workmanship under normal use and
service for a period of one (1) year from the date of purchase.
If any Product proves to be defective within the one-year
warranty period, the customer must return the defective
Product to any of Olympus Service Centers, following the
procedure set forth below (See “WHAT TO DO WHEN
SERVICE IS NEEDED”).
Olympus, at its sole discretion, will repair, replace, or adjust
the defective Product, provided that Olympus investigation
and factory inspection disclose that (a) such defect developed
under normal and proper use and (b) the Product is covered
under this limited warranty.
Repair, replacement, or adjustment of defective Products
shall be Olympus’s sole obligation and the customer’s sole
remedy hereunder.
The customer is liable and shall pay for shipment of the
Products to the Olympus Service Center.
Olympus shall not be obligated to perform preventive
maintenance, installation, deinstallation, or maintenance.
Olympus reserves the right to (i) use reconditioned,
refurbished, and/or serviceable used parts (that meet
Olympus’s quality assurance standards) for warranty or any
other repairs and (ii) make any internal or external design
and/or feature changes on or to its products without any
liability to incorporate such changes on or to the Products.
WHAT IS NOT COVERED BY THIS LIMITED
WARRANTY
EN 115
Representations and warranties made by any person,
including but not limited to dealers, representatives,
salespersons, or agents of Olympus, which are inconsistent
or in conflict with or in addition to the terms of this limited
warranty, shall not be binding upon Olympus unless reduced
to writing and approved by an expressly authorized officer
of Olympus.
This limited warranty is the complete and exclusive
statement of warranty which Olympus agrees to provide
with respect to the Products and it shall supersede all
prior and contemporaneous oral or written agreements,
understandings, proposals, and communications pertaining to
the subject matter hereof.
This limited warranty is exclusively for the benefit of the
original customer and cannot be transferred or assigned.
WHAT TO DO WHEN SERVICE IS NEEDED
The customer must transfer any image or other data saved on
a Product to another image or data storage medium and/or
remove any film from the Product prior to sending the Product
to Olympus for service.
IN NO EVENT SHALL OLYMPUS BE RESPONSIBLE FOR
SAVING, KEEPING OR MAINTAINING ANY IMAGE OR
DATA SAVED ON A PRODUCT RECEIVED BY IT FOR
SERVICE, OR ON ANY FILM CONTAINED WITHIN A
PRODUCT RECEIVED BY IT FOR SERVICE, NOR SHALL
OLYMPUS BE RESPONSIBLE FOR ANY DAMAGES
IN THE EVENT ANY IMAGE OR DATA IS LOST OR
IMPAIRED WHILE SERVICE IS BEING PERFORMED
(INCLUDING, WITHOUT LIMITATION, DIRECT, INDIRECT,
INCIDENTAL, CONSEQUENTIAL OR SPECIAL DAMAGES,
LOSS OF PROFITS OR LOSS OF USE), WHETHER OR
NOT OLYMPUS SHALL BE OR SHOULD BE AWARE
OF THE POSSIBILITY OF SUCH POTENTIAL LOSS OR
IMPAIRMENT.
14
Package the Product carefully using ample padding material
to prevent damage in transit and either deliver it to the
Authorized Olympus Dealer that sold you the Product or ship
it postage prepaid and insured to any of our Olympus Service
Centers.
When returning Products for service, your package should
include the following:
1 Sales receipt showing date and place of purchase.
2 Copy of this limited warranty bearing the Product
serial number corresponding to the serial
number on the Product (unless it is a model on which
Olympus does not place and record serial numbers).
3 A detailed description of the problem.
4 Sample prints, negatives, digital prints (or files on disk) if
available and related to the problem.
When service is completed, the Product will be returned to
you postage prepaid.
WHERE TO SEND PRODUCT FOR SERVICE
SAFETY PRECAUTIONS
See “WORLDWIDE WARRANTY” for the nearest service
center.
INTERNATIONAL WARRANTY SERVICE
International warranty service is available under this warranty.
116 EN
For customers in Europe
“CE” mark indicates that this
product complies with the
European requirements for safety,
health, environment and customer
protection. “CE” mark cameras
are intended for sales in Europe.
Hereby, Olympus Imaging Corp.
and Olympus Europa SE & Co.
KG declare that this STYLUS 1 is
in compliance with the essential
requirements and other relevant
provisions of Directive 1999/5/EC.
For details visit:
http://olympus-europa.com/
This symbol [crossed-out wheeled
bin WEEE Annex IV] indicates
separate collection of waste
electrical and electronic equipment
in the EU countries.
Please do not throw the equipment
into the domestic refuse.
Please use the return and
collection systems available in
your country for the disposal of
this product.
This symbol [crossed-out wheeled
bin Directive 2006/66/EC Annex II]
indicates separate collection
of waste batteries in the EU
countries.
Please do not throw the batteries
into the domestic refuse.
Please use the return and
collection systems available in
your country for the disposal of the
waste batteries.
Provisions of warranty
1 If this product proves to be defective, although it has been
used properly (in accordance with the written Handling
Care and Operating instructions supplied with it), during
the applicable national warranty period and has been
purchased from an authorized Olympus distributor within
the business area of Olympus Europa SE & Co. KG as
stipulated on the website: http://www.olympus.com this
product will be repaired, or at Olympus’s option replaced,
free of charge. To claim under this warranty the customer
must take the product before the end of the applicable
national warranty period to the dealer where the product
was purchased or any other Olympus service station within
the business area of Olympus Europa SE & Co. KG as
stipulated on the website: http://www.olympus.com.
During the one year period of the World Wide Guarantee
the customer may turn the product in at any Olympus
service station. Please notice that not in all countries such
Olympus service station exists.
2 The customer shall transport the product to the dealer or
Olympus authorized service station at his own risk and
shall be responsible for any costs incurred in transporting
the product.
Provisions of Guarantee
1 “OLYMPUS IMAGING CORP.” grants a one year World
Wide Guarantee. This worldwide Guarantee must be
presented at an Olympus authorized repair service
station before any repair can be made under conditions
of this Guarantee. This Guarantee is valid only if the
Guarantee Certificate and proof of purchase are presented
at the Olympus repair service station. Please note that
this Guarantee is in addition to and does not affect the
customer’s legal warranty rights under the applicable
national legislation governing the sale of consumer goods
mentioned above.
2 This Guarantee does not cover the following and the
customer will be required to pay repair charge, even for
defects occurring within the Guarantee period referred to
above.
a. Any defect that occurs due to mishandling (such as
an operation performed that is not mentioned in the
Handling Care or other sections of the instructions, etc.)
b. Any defect that occurs due to repair, modification,
cleaning, etc. performed by anyone other than Olympus
or an Olympus authorized service station.
c. Any defect or damage that occurs due to transport, a fall,
shock, etc. after purchase of the product.
d. Any defect or damage that occurs due to fire,
earthquake, flood damage, thunderbolt, other natural
disasters, environmental pollution and irregular voltage
sources.
e. Any defect that occurs due to careless or improper
storage (such as keeping the product under conditions
of high temperature and humidity, near insect repellents
such as naphthalene or harmful drugs, etc.), improper
maintenance, etc.
f. Any defect that occurs due to exhausted batteries, etc.
g. Any defect that occurs due to sand, mud, etc. entering
the inside of the product casing.
h. When the Guarantee Certificate is not returned with
the product.
i. When any alterations whatsoever are made to the
Guarantee Certificate regarding the year, month and
date of purchase, the customer’s name, the dealer’s
name, and the serial number.
j. When proof of purchase is not presented with this
Guarantee Certificate.
3 This Guarantee applies to the product only; the Guarantee
does not apply to any other accessory equipment, such as
the case, strap, lens cap and batteries.
4 Olympus’s sole liability under this Guarantee shall be
limited to repairing or replacing the product. Any liability
under the Guarantee for indirect or consequential loss or
damage of any kind incurred or suffered by the customer
due to a defect of the product, and in particular any loss
or damage caused to any lenses, films, other equipment
or accessories used with the product or for any loss
resulting from a delay in repair or loss of data, is excluded.
Compelling regulations by law remain unaffected by this.
Notes regarding Guarantee maintenance
1 lf this product proves to be defective, although it has been
used properly (in accordance with the written Handling
Care and Operating instructions supplied with it), during
a period of up to one year from the date of purchase this
product will be repaired, or at Olympus’s option replaced,
free of charge. To claim under warranty the customer must
take the product and this Warranty certificate before the
end of the one year warranty period to the dealer where the
product was purchased or any Olympus authorized service
station listed in the instructions and request the necessary
repairs.
2 The customer shall transport the product to the dealer or
Olympus authorized service station at his own risk and
shall be responsible for any costs incurred in transporting
the product.
3 This warranty does not cover the following and the
customer will be required to pay repair charge, even for
defects occurring within the one year period referred to
above.
a. Any defect that occurs due to mishandling (such as
an operation performed that is not mentioned in the
Handling Care or other sections of the instructions, etc.)
b. Any defect that occurs due to repair, modification,
cleaning, etc. performed by anyone other than Olympus
or an Olympus authorized service station.
c. Any defect or damage that occurs due to transport, a fall,
shock, etc. after purchase of the product.
d. Any defect or damage that occurs due to fire,
earthquake, flood damage, thunderbolt, other natural
disasters, environmental pollution and irregular voltage
sources.
e. Any defect that occurs due to careless or improper
storage (such as keeping the product under conditions
of high temperature and humidity, near insect repellents
such as naphthalene or harmful drugs, etc.), improper
maintenance, etc.
f. Any defect that occurs due to exhausted batteries, etc.
g. Any defect that occurs due to sand, mud, etc. entering
the inside of the product casing.
h. When this Warranty Certificate is not returned with the
product.
i. When any alterations whatsoever are made to the
Warranty Certificate regarding the year, month and date
of purchase, the customer’s name, the dealer’s name,
and the serial number.
j. When proof of purchase is not presented with this
Warranty Certificate.
4 This Warranty applies to the product only; the Warranty
does not apply to any other accessory equipment, such as
the case, strap, lens cap and batteries.
5 Olympus’ sole liability under this warranty shall be limited
to repairing or replacing the product and any liability for
indirect or consequential loss or damage of any kind
incurred or suffered by the customer due to a defect in the
product, and in particular any loss or damage caused to
any film or lenses or other equipment or accessories used
with the product or for any loss resulting from delay in
repair, is excluded.
For customers in Thailand
This telecommunication equipment conforms to NTC
technical requirement.
For customers in Mexico
The operation of this equipment is subject to the
following two conditions:
(1) it is possible that this equipment or device may not
cause harmful interference, and (2) this equipment
or device must accept any interference, including
interference that may cause undesired operation.
14
SAFETY PRECAUTIONS
1 This Guarantee will only be valid if the Guarantee
Certificate is duly completed by Olympus or an authorized
dealer or other documents contain sufficient proof.
Therefore, please make sure that your name, the name
of the dealer, the serial number and the year, month and
date of purchase are all completed or the original invoice or
the sales receipt (indicating the dealer’s name, the date of
purchase and product type) is attached to this Guarantee
Certificate. Olympus reserves the right to refuse free-ofcharge service if neither Guarantee Certificate is completed
nor the above document is attached or if the information
contained in it is incomplete or illegible.
2 Since this Guarantee Certificate will not be re-issued, keep
it in a safe place.
* Please refer to the list on the web site: http://www.olympus.
com for the authorized international Olympus service
network.
For customers in Asia
Provisions of warranty
EN 117
For customer in Singapore
Notes;
1 This Warranty is in addition to and does not affect the
customer’s statutory right.
2 lf you have any queries regarding this Warranty, call any
of the Olympus authorized service stations listed in the
instructions.
Notes regarding warranty maintenance
1 This Warranty will only be valid if the Warranty Certificate is
duly completed by Olympus or the dealer. Make sure that
your name, the name of the dealer, the serial number and
the year, month and date of purchase are all completed.
2 Since this Warranty Certificate will not be re-issued, keep it
in a safe place.
3 Any request for repair by a customer in same country
where the product was purchased shall be subject to the
terms of the warranty issued by the Olympus distributor in
that country. Where the local Olympus distributor does not
issue a separate warranty or where the customer is not in
the country where the product was purchased the terms of
this worldwide warranty shall apply.
4 Where applicable, this Warranty is valid worldwide. The
Olympus authorized service stations listed in this Warranty
will gladly honor it.
* Please refer to the appended list for the authorized
international Olympus service network.
Disclaimer of Warranty
Olympus makes no representations or warranties, either
expressed or implied, by or concerning any content if these
written materials or software, and in no event shall be liable
for any implied warranty of merchantability or fitness for
any particular purpose or for any consequential, incidental
or indirect damages (including but not limited to damages
for loss of business profits, business interruption and loss
of business information) arising from the use of inability to
use these written materials or software. Some states do not
allow the exclusion or limitation of liability for consequential
or incidental damages, so the above limitations may not
apply to you.
14
SAFETY PRECAUTIONS
118 EN
Trademarks
• Microsoft and Windows are registered trademarks of
Microsoft Corporation.
• Macintosh is a trademark of Apple Inc.
• SDXC logo is a trademark of SD-3C, LLC.
• Eye-Fi is a registered trademark of Eye-Fi, Inc.
• Wi-Fi is a registered trademark of
the Wi-Fi Alliance.
• The Wi-Fi CERTIFIED logo is
a certification mark of the Wi-Fi
Alliance.
• Powered by ARCSOFT.
• “Shadow Adjustment Technology” function
contains patented technologies from Apical
Limited.
• All other company and product names are
registered trademarks and/or trademarks of
their respective owners.
THIS PRODUCT IS LICENSED UNDER THE AVC
PATENT PORTFOLIO LICENSE FOR THE PERSONAL
AND NONCOMMERCIAL USE OF A CONSUMER TO
(i) ENCODE VIDEO IN COMPLIANCE WITH THE AVC
STANDARD (“AVC VIDEO”) AND/OR (ii) DECODE
AVC VIDEO THAT WAS ENCODED BY A CONSUMER
ENGAGED IN A PERSONAL AND NON-COMMERCIAL
ACTIVITY AND/OR WAS OBTAINED FROM A VIDEO
PROVIDER LICENSED TO PROVIDE AVC VIDEO. NO
LICENSE IS GRANTED OR SHALL BE IMPLIED FOR
ANY OTHER USE. ADDITIONAL INFORMATION MAY
BE OBTAINED FROM MPEG LA, L.L.C. SEE HTTP://
WWW.MPEGLA.COM
The software in this camera may include third party
software. Any third party software is subject to the
terms and conditions, imposed by the owners or
licensors of that software, under which software is
provided to you.
Those terms and other third party software notices,
if any, may be found in the software notice PDF file
stored within the accompanying CD-ROM or at
http://www.olympus.co.jp/en/support/imsg/
digicamera/download/notice/notice.cfm
• The standards for camera file systems referred to in this
manual are the “Design rule for Camera File system/
DCF” standards stipulated by the Japan Electronics and
Information Technology Industries Association (JEITA).
Premises: Consumer Product Division
Wendenstrasse 14-18, 20097 Hamburg, Germany
Tel.: +49 40-23 77 3-0 / Fax: +49 40-23 07 61
Goods delivery: Modul H, Willi-Bleicher Str. 36, 52353 Düren, Germany
Letters: Postfach 10 49 08, 20034 Hamburg, Germany
European Technical Customer Support:
Please visit our homepage http://www.olympus-europa.com or call our TOLL FREE NUMBER* : 00800 - 67 10 83 00
for Austria, Belgium, Czech Republic, Denmark, Finland, France, Germany, Luxemburg, Netherlands, Norway, Portugal, Russia, Spain, Sweden,
Switzerland, United Kingdom.
* Please note some (mobile) phone services / provider do not permit access or request an additional prefix to +800 numbers.
For all not listed European Countries and in case that you can’t get connected to the above mentioned number please make use of the following
CHARGED NUMBER: +49 40 - 237 73 899.
WC209801