1
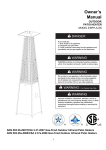
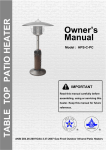
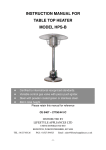
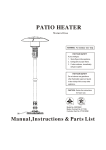
OWNER’S MANUAL
Tabletop Heater
Safety First!
Read and become familiar
with this entire manual.
C
US
1-888-775-1330
Please retain this manual for reference
Distributed by:
RTA International
Youngtown, AZ 85363
OWNER’S MANUAL
TABLE OF CONTENTS
? Read These Safety Instructions.........................................
1
? Contents Breakdown.......................................................... 2
? Screw Packing List.............................................................
3
? Assembly Procedure..........................................................
3
? Assembly..........................................................................
4
? Safety First........................................................................
7
? Tabletop Heater Location....................................................
8
? Checking For Leaks............................................................
8
? Before Operating................................................................
8
? Operating..........................................................................
9
? After Operating.................................................................. 11
? Maintenance...................................................................... 11
? Storage............................................................................. 11
? Troubleshooting................................................................. 12
All rights reserved . No part of this manual may be
reproduced , transmitted , stored in a retrieval system , or translated into
any language in any form by any
means , mechanical , optical , electronic , recording , or otherwise without
the written permission of Changzhou Gardensun Furnace Co ., Ltd .
Changzhou Gardensun Furnace Co ., Ltd . Reserves the right to revise
this manual and to make changes to any or all parts at any
time , without obligation to notify any person or entify of such revision
and changes .
Copyright © 2006 , Changzhou Gardensun Furnace Co ., Ltd .
2006 Edition the front page
OWNER’S MANUAL
READ THESE SAFETY INSTRUCTIONS
If you smell gas :
? Shut off gas to the appliance .
? Extinguish any open flame .
? Open lid .
? If odor continues , immediately call your Gas supplier or your life
Department .
WARNING
Failure to comply with these instructions could result in a fire or
explosion that could cause serious bodily injury , death , or property
damage .
ATTENTION
? Only to be used outdoors .
? Warning : Accessible parts may be very hot . Keep young children
away .
? Turn off the gas supply at the gas container after use .
? Any modification of the appliance may be dangerous .
FOR YOUR SAFETY
? Gas leaks may cause a fire or explosion can cause serious bodily
injury or death , or damage to property .
? You must follow all leak checking procedures operating this unit .
? Never use an open flame to check for leaks .
WARNING
Do not store or use gasoline or other flammable vapors or liquids in
the vicinity of this or any other appliance .
Danger Carbon monoxide hazard
1 . This appliance can produce carbon monoxide which has no odor .
2 . Using it in an enclosed space can kill you .
3 . Never use this appliance in an enclosed space as camper , tent , car
or home .
? Do NOT touch or move heater for at least 45 minutes after use .
? Dome is hot to the touch .
? Allow dome to cool before touching .
1
OWNER’S MANUAL
CONTENTS BREAKDOWN
2
OWNER’S MANUAL
Item
No.
Item
Qty.
Item
No.
1
2
3
4
5
6
7
8
9
10
M6 Castle nut
Reflector
Ø6mm Washer
Emitter screen
Guard
Door Plate
Base
Cast Iron
M6×15mm bolt
3/16" bolt
3
1
3
1
1
1
1
1
4
4
11
12
13
14
15
16
17
18
19
20
Item
Burner
3/16" bolt
M5×10mm bolt
Tank Housing
Igniter button
Control knob
Handle
Regulator
60mm pin
M6 flange nut
Qty.
1
4
1
1
1
1
1
1
3
3
SCREW PACKAGING LIST
Item
M6 Castle nut
Ø6mm Washer
M6×15mm bolt
3/16" bolt
Qty.
3
6
4
8
Item
Qty.
M5×10mm bolt & M5 nut 1
60mm pin
3
M6 flange nut
3
Wrench
1
ASSEMBLY PROCEDURE
Tools needed: ( not included)
?
?
?
?
3
Adjustable opening wrench (2) 20 cm long
Slip joint pliers 23 cm long
Philips screwdriver w/medium blade
Teflon plumbing tape for joints
OWNER’S MANUAL
ASSEMBLY
STEP 1
STEP 2
1-1. Take out all the parts of
the tabletop Heater.
1-2. Aim the cast iron at the
holes on the base.
2-1. Use 4pcs M6X15mm bolts
to fix the tank housing to the
base & cast iron.
2 - 2 . Ti g h t e n t h e b o l t s a s
above show.
STEP 3
STEP 4
3-1. Put the burner on the tank
housing then fix them with
4pcs 3/16” bolts.
4-1. Fix the regulator to the
tank housing with the
M5X10mm bolt & M5 nut.
4
OWNER’S MANUAL
STEP 5
STEP 6
5-1. Fix 3pcs pins of 60mm
length to the emitter screen
with 3pcs M6 flange nuts then
tighten them.
6-1. Put the emitter screen on
the burner.
6-2. Use 4pcs 3/16” bolts to
connect the emitter screen to
the burner. Tighten the bolts.
5
STEP 7
STEP 8
7-1. Put the guard on the
burner through the emitter
screen.
7-2. Put the ends of the guard
into the holes of the burner.
8-1. Put 3pcs washers on each
pins of the 60mm length.
OWNER’S MANUAL
STEP 9
9-1. Put the reflector through
the pins and on the washers.
STEP 10
10-1. Fasten the reflector with
3pcs M6 Castle nuts.
STEP 11
STEP 12
11-1. Turn off the control knob
of the burner.
11-2. Fix the 1.02Lbs gas tank
(not included) to the regulator
(rotate the gas tank clockwise
toward the regulator
until
tighten it).
12-1. Close the door plate and
lock it with the handle (rotate
the handle 90 degree).
6
OWNER’S MANUAL
SAFETY FIRST
Read and become familiar with this entire manual, especially the
following precautions .
Caution: this appliance is for outdoor use only(outside any enclosure)
Always make sure there is fresh air ventilation.
? Use only outdoors in a well-ventilated space, never use in a building,
garage or any other enclosed area.
? Always maintain at least 18“clearance(top)and 24”clearance (side)
from combustible materials.
? Always place heater on a hard and level surface.
? Do not use if the wind velocity is greater than 10 miles per hour.
? Unit will operate at reduced efficiency below 40°F (5℃).
? Keep sprinklers and other water sources away from burner and
controls.
? Always use extreme caution when near heater. Alert both children and
adults to the hazards of high temperatures , especially to avoid burns
or clothing catching fire.
? Young children and pets should be carefully supervised when they are
in the area of heater.
? Do not place clothing or other flammable materials either on or near
heater.
? Any guard or other protective device removed for servicing the heater
must be replaced prior to operating the heater.
? Certain materials or items, when stored under heater, will be subjected
to radiant heat and could be seriously damaged.
? Do not alter heater in any manner.
? The pressure regulator and hose assembly supplied with the
appliance must be used and replacements must be those specified by
the manufacturer.
? Inspect heater before each use. If a damaged part is detected, do not
operate until an original equipment replacement part has been
properly installed. Use of unauthorized parts will void warranty and
create an unsafe condition.
? Do not attempt to use this appliance without a functional factorysupplied gas regulator in place. If regulator becomes damaged, use
only a factory-supplied replacement.
? Prior to operating heater, replace any guards or protective devices
removed for servicing.
? During operation, do not touch burner assembly. The surface of
heater's emitter can reach temperatures approaching 1600°F.
? After shutdown, do not touch burner assembly until heater has
cooled(approximately 45 minutes after use).
7
OWNER’S MANUAL
TABLETOP HEATER LOCATION
● The tabletop heater is primarily for outdoor
use only. Always ensure that adequate fresh
air ventilation is provided.
● Always maintain proper clearance to
combustible materials, i.e. top 45 cm(18”)
and sides 60 cm(24”) minimum.
● Tabletop heater must be located on a
stable and strong table.
● Never operate heater in an explosive
atmosphere like in areas where gasoline or
other flammable liquids or vapors are stored.
CHECKING FOR LEAKS
Make 1-2 oz. of leak solution by mixing one part liquid dishwashing soap
and 3parts water.
Spoon several drops(or use squirt bottle ) of the solution onto the
regulator/canister connections.
Inspect the connections and look for bubbles.
If NO bubbles appear, the connection is safe.
If bubbles appear, there is a leak:
? Loosen and re-tighten this connection.
? Re-check for a leak.
If you continue to see bubbles after several attempts, disconnect propane
source.
BEFORE OPERATING
? I am familiar with entire owner's manual and understand all
precautions noted in “Safety First”.
? All components are properly assembled, intact and operable.
? No alterations have been made.
? All gas connections are secure and do not leak.
? Wind velocity is below 10 mph.
? Outdoor temperature is greater than 40 degrees F.
? Heater is outdoors (outside any enclosure).
? There is adequate fresh air ventilation.
? Heater is away from gasoline or other flammable liquids or vapors.
? Heater is away from windows, air intake openings, sprinklers and
other water sources.
? Heater is at least 18“clearance (top) and 24” clearance (side) from
combustible materials.
8
OWNER’S MANUAL
?
?
?
?
?
Heater is on a hard and level surface.
There are no signs of spider or insect nests.
All burner passages are clear.
All air circulation passages clear.
Children, pets, clothing, flammable materials and items that can be
damaged from radiant heat are away from the heater.
? Children and adults in the area have been alerted to the high
temperature hazards: especially burns and clothing fires.
? Children and adults in the area have been warned not to touch heater
near emitter during operation and until unit has cooled.
OPERATION
Inspect the visible portion of the hose before each use of the
appliance. Inspect the entire hose assembly at least annually.
Before Turning Gas Supply ON
Your heater was designed and approved for OUTDOOR USE ONLY. DO
NOT use it inside a building, garage or any other enclosed area.
Make sure surrounding areas are free of combustible materials, gasoline,
and other flammable liquids.
? Ensure that there is no obstruction to air ventilation.
? Be sure all gas connections are tight and there are no leaks
? Be sure the access panel is clear of debris.
? Be sure any component removed during assembly or servicing is
replaced prior to starting.
Before Lighting
Heater should be thoroughly inspected before each use, and by a
qualified service person at least annually.
If relighting a hot heater, always wait at least 5 minutes for gas to
dissipate.
Off
LO
9
HI
HI
Pilot
Pilot
Off
LO
OWNER’S MANUAL
Lighting
1. Turn Gas control knob to “Off” position.
2. Push in and rotate the Control Knob to“Pilot”position. Depress igniter
button.
3. Once burner is lit, hold Control Knob in for at least 30 seconds and
release.
4. If burner does not stay lit, turn to“Off” position and wait 5 minutes and
repeat 2 and 3.
5. Once burner is lit, rotate Knob to desired heating level (LO: low ; HI:
high).
If you experience any ignition problem, turn off the heater and gas supply,
and consult “Troubleshooting” on page 12.
Caution
Avoid inhaling fumes emitted from the heater's first use. Smoke and
odor from the burning of oils used in manufacturing will appear. Both
smoke and odor will dissipate after approximately 30 minutes. The
heater should NOT produce thick black smoke.
Note: The burner may be noisy when initially turned on. To eliminate
excessive noise from the burner, turn the Control Knob to the LOW
position. Then, turn the knob to the level of heat desired.
When heater is ON:
Emitter screen will become bright red due to intense heat. The color is
more visible at night.
Burner will display tongues of blue flame. These flames should not be
yellow or produce thick black smoke, indicating an obstruction of airflow
through the burners.
If yellow flame is detected, turn off heater and gas supply and consult
“Troubleshooting”.
Re-lighting
Note: For your safety, Control Knob cannot be turned “Pilot” without first
depressing Control Knob in “Off” position and then rotating to “Pilot”.
1. Turn Gas Control Knob to “Off”.
2. Wait 5 minutes to let gas dissipate before attempting to relight burner.
3. Repeat the “Lighting” Steps 2 and 3.
1. Rotate Gas Control Knob to “Off” position. Normally, burner will make a
slight popping sound when extinguished.
2. Remove Door Plate.
3. Unscrew gas line from regulator.
4.Close Door Plate. Note: After use, some discoloration of the emitter
screen is normal.
10
OWNER’S MANUAL
AFTER OPERATING
? Gas control is in OFF position.
? Disconnect Gas line.
? Heater is upright in a secure location.
MAINTENANCE
? To enjoy years of outstanding performance from your heater, make
sure you perform the following maintenance activities on a regular
basis: Inspect the visible portion of the hose before each use of the
appliance. Inspect the entire hose assembly at least annually.
? Air flow must be unobstructed. Keep controls, burner, and circulating
air passageways clean. Signs of possible blockage include: Gas odor
with extreme yellow tipping of flame. Heater does NOT reach the
desired temperature. Heater glow is excessively uneven.
? Heater makes popping noises. Spiders and insects can nest in burner
or orifices. This dangerous condition can damage heater and render it
unsafe for use. Clean burner holes by using a heavy-duty pipe cleaner.
? Compressed air may help clear away smaller particles.
? Carbon deposits may create a fire hazard. Clean dome and emitter
with warm soapy water if any carbon deposits develop.
Note : In a salt-air environment(such as near an ocean), corrosion occurs
more quickly than normal.
? Frequently check for corroded areas and repair them promptly.
? Keep exterior surfaces clean.
STORAGE
Between uses:
? Turn Control Knob OFF.
? Disconnect LP source.
? Store heater upright in an area sheltered from direct contact with
inclement weather(such as rain, sleet, hail, snow, debris).
If desired, cover heater to protect exterior surfaces and to help prevent
build up in air passages.
Note: Wait until heater is cool before covering.
During periods of extended inactivity or when transporting:
? Turn Control Knob OFF.
? Disconnect LP source and move to a secure, well-ventilated location
outdoors.
? Store heater upright in an area sheltered from direct contact with
inclement weather (such as rain, sleet, hail, snow, dust and debris).
If desired, cover heater to protect exterior surfaces and to help prevent
build up in passages.
11
OWNER’S MANUAL
TROUBLESHOOTING
PROBLEM
PROBABLE CAUSE
SOLUTION
Pilot will not light
Tank fuel empty
Replace LPG tank
Pilot will not stay on
Opening blocked
Clean or replace opening
Air in supply system
Purge air from lines
Loose connections
Check all fittings
Debris around pilot
Clean dirty area
Loose connections
Tighten connections
Thermocouple bad
Replace thermocouple
Gas leak in line
Check connections
Lack of fuel pressure
Tank near empty. Replace LPG
tank.
Burner will not light
Pressure is low
Tank near empty. Replace LPG
tank.
Opening blocked
Remove and clean
Control not ON
Turn valve to ON
Thermocouple bad
Replace thermocouple
Pilot light assembly bent
Place pilot properly
Not in correct location
Position properly and retry
12