1
INSTALLATION INSTRUCTIONS
HB0026
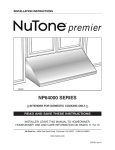
NP60000 SERIES
!
INTENDED FOR DOMESTIC COOKING ONLY
!
READ AND SAVE THESE INSTRUCTIONS
INSTALLER: LEAVE THIS MANUAL TO HOMEOWNER.
HOMEOWNER: USE AND CARE INFORMATION ON PAGE 11.
NuTone Inc., 4820 Red Bank Road, Cincinnati, OH 45227 (1-800-543-8687)
www.nutone.com
V7450 rev. A
!
WARNING
!
WARNING
TO REDUCE THE RISK OF FIRE, ELECTRIC
SHOCK OR INJURY TO PERSONS, OBSERVE
THE FOLLOWING:
TO REDUCE THE RISK OF INJURY TO PERSONS
IN THE EVENT OF A RANGE TOP GREASE
FIRE, OBSERVE THE FOLLOWING*:
1.
Use this unit only in the manner intended by the
manufacturer. If you have questions, contact the
manufacturer at the address or telephone number
listed in the warranty.
1.
2.
Before servicing or cleaning unit, switch power
off at service panel and lock service disconnecting
means to prevent power from being switched on
accidentally. When the service disconnecting
means cannot be locked, securely fasten a prominent
warning device, such as a tag, to the service panel.
3.
Installation work and electrical wiring must be
done by qualified personnel in accordance with all
applicable codes and standards, including fire-rated
construction codes and standards.
4.
Sufficient air is needed for proper combustion and
exhausting of gases through the flue (chimney) of
fuel burning equipment to prevent backdrafting.
Follow the heating equipment manufacturer’s
guidelines and safety standards such as those
published by the National Fire Protection
Association (NFPA), and the American Society for
Heating, Refrigeration and Air Conditioning
Engineers (ASHRAE), and the local code authorities.
5.
When cutting or drilling into wall or ceiling, do not
damage electrical wiring and other hidden utilities.
6.
Ducted fans must always be vented to the outdoors.
7.
Do not use this unit with any additional solid-state
speed control device.
8.
To reduce the risk of fire, use only steel ductwork.
9.
This unit must be grounded.
SMOTHER FLAMES with a close-fitting lid, cookie
sheet or metal tray, then turn off the burner.
BE CAREFUL TO PREVENT BURNS. IF THE
FLAMES DO NOT GO OUT IMMEDIATELY, EVACUATE
AND CALL THE FIRE DEPARTMENT.
2.
NEVER PICK UP A FLAMING PAN—You may be
burned.
3.
DO NOT USE WATER, including wet dishcloths or
towels—This could cause a violent steam explosion.
4.
Use an extinguisher ONLY if:
A. You own a Class ABC extinguisher and you
know how to operate it.
B. The fire is small and contained in the area
where it started.
C. The fire department has been called.
D. You can fight the fire with your back to an exit.
* Based on “Kitchen Fire Safety Tips” published by NFPA.
CAUTION
1.
2.
3.
4.
TO REDUCE THE RISK OF A RANGE TOP
GREASE FIRE:
5.
a)
Never leave surface units unattended at high settings.
Boilovers cause smoking and greasy spillovers
that may ignite. Heat oils slowly on low or medium
settings.
6.
b)
Always turn hood ON when cooking at high heat or
when flambeing food (Crêpes Suzette, Cherries
Jubilee, Peppercorn Beef Flambé).
7.
c)
Clean ventilating fans frequently. Grease should
not be allowed to accumulate on fan or filter.
d)
Use proper pan size. Always use cookware appropriate
for the size of the surface element.
8.
9.
10.
11.
-2-
For general ventilating use only. Do not use to
exhaust hazardous or explosive materials and vapors.
To avoid motor bearing damage and noisy and/or
unbalanced impellers, keep drywall spray,
construction dust, etc. off power unit.
Your hood motor has a thermal overload which will
automatically shut off the motor if it becomes
overheated. The motor will restart when it will be
cooled down. If the motor continues to shut off and
restart, have the hood serviced.
For best capture of cooking impurities, the bottom
of the hood should be at a minimum of 24” and at
a maximum of 30” above the cooking surface.
Two installers are recommended because of the
large size and weight of this hood.
To reduce the risk of fire and to properly exhaust
air, be sure to duct air outside—Do not exhaust air
into spaces within walls or ceiling or into attics,
crawl space or garage.
This product is equipped with a thermostat which
may start blower automatically. To reduce the risk
of injury and to prevent power from being switched
on accidentally, switch power off at service panel
and lock or tag service panel.
Because of the high exhausting capacity of this
hood, you should make sure enough air is entering
the house to replace exhausted air by opening a
window close to or in the kitchen.
To reduce the risk of fire and electric shock, the
NuTone Premier NP60000 Series hood must be
installed with NuTone interior blower models
RM325H or RM326H; NuTone exterior blower models
331H, 332H, 335 or 336; NuTone in-line blowers
models HLB3, HLB6, HLB9, HLB11. Other blowers
cannot be substituted. (Blowers sold separately.)
Use with approved cord-connection kit only.
Please read specification label on product for
further information and requirements.
TABLE OF CONTENTS
1.
2.
3.
4.
5.
6.
7.
8.
9.
10.
11.
12.
13.
14.
15.
16.
17.
SELECT BLOWER OPTION AND INSTALL DUCTWORK............................................................................6
MEASURE INSTALLATION...................................................................................................................7
PREPARE THE INSTALLATION .............................................................................................................7
INSTALL BACKSPLASH ......................................................................................................................8
INSTALL WOOD MOUNTING STRIP .....................................................................................................8
INSTALL THE HOOD .........................................................................................................................8
SELECT BLOWER OPTION (EXTERIOR OR INTERIOR)............................................................................8
INSTALL TRANSITION TO ROUGH-IN PLATE ..........................................................................................8
INSTALL THE ROUGH-IN PLATE TO THE HOOD .....................................................................................9
CONNECT THE WIRING ....................................................................................................................9
INSTALL THE OPTIONAL SOFFIT CHIMNEY ..........................................................................................9
INSTALL THE BLOWER ......................................................................................................................9
INSTALL LIGHT BULBS AND WARMING LAMPS .....................................................................................10
INSTALL FILTERS .............................................................................................................................10
USE AND CARE ..............................................................................................................................11
OPERATION ....................................................................................................................................11
SERVICE PARTS ..............................................................................................................................12
WARRANTY
NUTONE ONE-YEAR LIMITED WARRANTY
NuTone warrants to the original consumer purchaser of its products that such products will be free from defects
in materials or workmanship for a period of one year from the date of original purchase. THERE ARE NO OTHER
WARRANTIES, EXPRESS OR IMPLIED, INCLUDING, BUT NOT LIMITED TO, IMPLIED WARRANTIES OR
MERCHANTABILITY OR FITNESS FOR A PARTICULAR PURPOSE.
During this one-year period, NuTone will, at its option, repair or replace, without charge, any product or part which
is found to be defective under normal use and service.
This warranty does not cover (a) normal maintenance and service or (b) any products or parts which have been
subject to misuse, negligence, accident, improper maintenance or repair (other than by NuTone), faulty
installation or installation contrary to recommended installation instructions.
The duration of any implied warranty is limited to the one-year period as specified for the express warranty.
Some states or provinces do not allow limitation on how long an implied warranty lasts, so the above limitation
may not apply to you.
NUTONE’S OBLIGATION TO REPAIR OR REPLACE, AT NUTONE’S OPTION, SHALL BE THE
PURCHASER’S SOLE AND EXCLUSIVE REMEDY UNDER THIS WARRANTY. NUTONE SHALL NOT BE
LIABLE FOR INCIDENTAL, CONSEQUENTIAL OR SPECIAL DAMAGES ARISING OUT OF OR IN
CONNECTION WITH PRODUCT USE OR PERFORMANCE. Some states or provinces do not allow the
exclusion or limitation of incidental or consequential damages, so the above limitation or exclusion may
not apply to you.
This warranty gives you specific legal rights, and you may also have other rights, which vary from state to state
or province to another. This warranty supersedes all prior warranties.
To qualify for warranty service, you must (a) notify NuTone at the address or telephone number below,
(b) give the model number and part identification and (c) describe the nature of any defect in the product or part.
At the time of requesting warranty service, you must present evidence of the original purchase date.
NuTone Inc., 4820 Red Bank Road, Cincinnati, OH 45227 (1-800-543-8687)
-3-
-
NP60000 SERIES RANGE HOOD SYSTEM INTERIOR BLOWERS
Model 437
(High capacity roof cap)
Model 441
(10’’ round wall cap)
Model 410
(10” round duct—2 ft. sections)
Model 423
Model 424
(4 1/2” x 18 1/2” to (4 1/2” x 18 1/2” to
10” round - vertical 10” round - horiz.
front/rear
Model 634 or 644
(roof cap)
Model 415
(7” round adjustable elbow)
Model 418
(10” round adjustable elbow)
Model 427
(4 1/2” x 18 1/2”
to 10” round,
6” high - lateral
Model 647
(7” round wall cap)
Model 407
(7” round duct—2 ft. sections)
Model 454
(4 1/2” x 18 1/2”
to 10” round horiz. /right
Model 453
(4 1/2” x 18 1/2”
to 10” round horiz. /left
OPTIONAL
SOFFIT CHIMNEY
RMN SERIES
MODEL RM326H
BLOWER/ROUGH-IN KIT
(1200 cfm interior blower
& rough-in plate)
NP60000
SERIES HOOD
(Canopy with
blower controls
& lighting.
Required for all
installations.)
RMP SERIES BACKSPLASH
(Stainless steel wall covering
with warming shelves. Optional)
HL0075
-4-
MODEL RM325H
BLOWER/ROUGH-IN KIT
(600 cfm interior blower &
rough-in plate)
OPTIONAL
BAFFLE FILTERS
RBF SERIES
-
NP60000 SERIES RANGE HOOD SYSTEM IN-LINE AND EXTERIOR BLOWERS
Model 437
(High capacity roof cap)
Model 441
Model HLB9 (800 cfm) (10” round wall cap)
Model 335 (1200 cfm)
or HLB11 (1100 cfm)
or 336 (1500 cfm)
in-line blower
Model 331H (600 cfm) exterior blower
(includes two 8” x 12” to
or 332H (900 cfm)
10’’ round transitions)
exterior blower
Model 441
(10” Round
wall cap)
Model HLB6 (600 cfm)
in-line blower
(includes two 4 ½” x 18 ½”
to 10’’ round transitions)
Model HLB3 (280 cfm)
in-line blower
(includes one 8” to 10”
round transition)
Model 421
(10” round vert.
in-line damper)
Recommended
for use with
exterior blowers
Model 418
10” round
adjustable elbow
(optional)
Model 410
(10” round duct
—2ft. sections)
OPTIONAL
SOFFIT CHIMNEY
RMN SERIES
NP60000
SERIES HOOD
(Canopy with
blower controls
& lighting.
required for all
installations.)
332KR in-line and exterior blower
rough-in kit - Purchase separately.
OPTIONAL
BAFFLE FILTERS
RBF SERIES
RMP SERIES
BACKSPLASH
(Stainless steel wall
covering with warming
shelves. Optional.)
HL0076
-5-
1. SELECT BLOWER OPTION AND INSTALL DUCTWORK
Either an interior or exterior blower or in-line blower may be used with this hood. The NuTone Premier 60000 Series must
be installed with blower models RM325H, RM326H, HLB3, HLB6, HLB9, HLB11, 331H, 332H, 335 or 336 only.
Other blowers cannot be substituted. (Blowers sold separately).
NOTE: In addition to the blower models listed above, this hood is also compatible with older internal versions 325H
and 326H. However, discard the installation instructions included with those blowers and contact our technical
support to obtain replacement instruction.
Plan where and how the ductwork will be installed.
If installing in-line blower, refer to instructions packed with in-line blower and follow steps 1 up to 6, 9, 10, 11,
13 and up of this manual.
Install proper-sized ductwork, elbows and roof or wall cap for the type of blower you are installing. Use 2” duct tape to
seal duct joints.
ROOF CAP
ROOF CAP
7" (178 mm)
ROUND DUCT
DECORATIVE
12"
FLUE
(305 mm)
or SOFFIT
10" (254 mm)
ROUND DUCT
WALL CAP
WALL CAP
12"
DECORATIVE
FLUE (305 mm)
or SOFFIT
HOOD
7" (178 mm)
ROUND
ELBOW
4-1/2" x 18-1/2"
to 10"
(114 x 470 to
254 mm) ROUND
TRANSITION
(see page 4)
HOOD
24" TO 30" (609 to 762 mm)
ABOVE COOKING SURFACE
24" TO 30" (609 to 762 mm)
ABOVE COOKING SURFACE
HH0025A
HH0024A
MODEL RM326H DUAL BLOWER
TYPICAL DUCTWORK
MODEL RM325H SINGLE BLOWER
TYPICAL DUCTWORK
EXTERIOR BLOWER
Roof cap
10" (254 mm)
ROUND DUCT
DECORATIVE
12"
FLUE
or SOFFIT (305 mm)
10” round duct
In-line blower
10" (254 mm)
ROUND ELBOW
Wall
cap
EXTERIOR
BLOWER
HOOD
332KR
ROUGH-IN KIT
(see page 5)
Hood
24” minimum
above cooking
surface
24" TO 30" (609 to 762 mm)
ABOVE COOKING SURFACE
HH0026A
HH0066A
MODEL 331H, 332H, 335 OR 336
EXTERIOR BLOWER TYPICAL DUCTWORK
MODEL HLB3, HLB6, HLB9 OR HLB11
IN-LINE BLOWER TYPICAL DUCTWORK
-6-
2. MEASURE INSTALLATION
Dimensions for the most common installation are shown below.
The minimum hood distance above cooktop must not be less than 24’’. A maximum of 30” above cooktop is
highly recommended for best capture of cooking impurities.
Distances over 30” are at the installer and users discretion.
Standard
8 ft. (2.44 m)
ceiling
Standard 18"
(457 mm) H
over-cooktop
cabinet
18"
(457 mm)
19"
(483 mm)
Top of wood
mounting strip
Hood
RMP Series
Backsplash
(optional)
24"
(610 mm)
Cooktop
Standard 36"
(914 mm)
H cooktop HH0028A
INSTALLATION WITH STANDARD 18’’
HIGH OVER-COOKTOP CABINET
INSTALLATION WITH STANDARD
12’’ SOFFIT OR OPTIONAL
SOFFIT CHIMNEY RMN SERIES
3. PREPARE THE INSTALLATION
Remove the installation kit from inside the hood.
Make sure that the following items are included:
- Wood strip
- Installation manual
- Accessories including:
• Filters (Quantity varies depending on range hood width)
• Bag of parts including:
(4) flat head screws #10-2’’, (8) screws #8 x 3⁄4’’, (4) nuts #10-32, (2) wall anchors, (2) washers 3⁄16’’ ID x 3⁄4’’ OD
Parts sold separately:
- Interior blower Model RM325H or RM326H (both include rough-in kit)
- In-line blower assembly HLB3, HLB6, HLB9 or HLB11 (all include transition)
- In-line and exterior blower rough-in plate model 332KR, required for all In-line or Exterior Blowers
- Exterior blower assembly 331H, 332H, 335 or 336
- Halogen lights (120 V, 50 W, PAR 20)
- Heat lamps (Infrared, 120 V, BR40, 250 W max.)
4
3
- RMP Series Backsplash (optional)
- RBF Series Baffle filters (optional)
- Transitions, duct, elbows, dampers, wall and roof caps.
Refer to pages 4 and 5 for a complete list of venting options
1
and model numbers.
2
Using a Phillips #2 or a Robertson #2 screwdriver, unscrew the
hood from the bottom of crate. Refer to figure beside to locate all
4 screws. Discard these screws and remove hood from wood pallet. HR0002
-7-
4. INSTALL BACKSPLASH (OPTIONAL)
(Optional) RMP Series
Backsplash must be installed before the hood shell because the hood shell covers the backsplash top mounting
screws. In order to be able to install the backsplash, make sure you have at least 18’’ clearance between bottom of
hood and range control panel or cooktop. (See instructions packed with backsplash.)
5. INSTALL WOOD MOUNTING STRIP
Measure and mark a level line on wall above cooktop location for the wood mounting strip (see illustration below and
under step 2). Use #10 - 2’’ flat head screws to secure the mounting strip to the drywall. Make sure to hit the wall studs.
CAUTION
Due to the weight of this hood, ensure that the wood strip
is attached to all of the available studs (2 studs minimum
for a 30’’ hood, more as wood width increases); not into
the drywall alone.
(see page 7)
1. Drywall
2. Wood mounting strip
3. Flat head screw
4. Wall anchor location
5. Back of hood outline
6. Wall studs
6. INSTALL THE HOOD
Rest the back cavity of the hood on the wood mounting strip.
CAUTION
TOP
Hold the hood until it is completely secured to the wood
mounting strip.
Secure the hood to wood mounting strip with (4) screws #8 x 3⁄4’’ (for 30’’
and 36’’ width hoods) or (6) screws (for 42’’ width and wider hoods)
provided at locations shown. Drill (2) 3⁄16’’ size holes into the drywall for
wall anchors through the existing holes in the inside hood back in the
locations shown. Then, install the two wall anchors with the remaining
#8 x 3⁄4’’ screws and the (2) washers provided.
OF HOOD (INSIDE VIEW)
MOUNTING
BACK
SCREWS LOCATION
OF HOOD (INSIDE VIEW)
WALL
ANCHORS LOCATION
HD0064
7. SELECT BLOWER OPTION (EXTERIOR OR INTERIOR)
INTERIOR BLOWER: Follow all subsequent steps of this manual.
EXTERIOR BLOWER: Refer to instructions packed with exterior blower and follow steps 9 and up of the present manual.
8. INSTALL TRANSITION TO ROUGH-IN PLATE (INTERIOR BLOWER ONLY)
Model 423, 424, 427 453, or 454
Attach transition (if required) to blower rough-in plate.
Use duct tape to make all joints secure and air-tight.
NOTE: Model RM325H blower plate connects directly to 7’’ round
ductwork without a transition.
HD0049
-8-
9. INSTALL THE ROUGH-IN PLATE TO THE HOOD (ALL BLOWERS)
Run power cable to installation location. Refer to the instructions included
with the selected blower or rough-in kit (sold separately) for details on
installing the rough-in plate. Install the rough-in plate so that the wiring
box is located on the right side as you are facing the hood.
For ducting through back of hood, remove existing plate from inside
back of hood and attach it to inside top of hood to cover hole. Secure to
threaded studs with same (4) nuts.
For ducting through top of hood, existing plate remains in place on
inside back of hood.
Connect ducting to transition or rough-in plate as you are installing the
rough-in plate. Use duct tape to make all joints secure and air-tight.
2
1
1
3
4 1
1
HD0063
1. Locknuts
3. Rough-in plate on back of hood
2. Plate on top of hood 4. Wiring cover
10. CONNECT THE WIRING (ALL BLOWERS)
! WARNING
Risk of electrical shock. Electrical wiring must be done by qualified personnel in accordance with
all applicable codes and standards. Before connecting wires, switch power off at service panel and
lock service disconnecting means to prevent power to be switched on accidentally.
Remove wiring cover from rough-in plate and set aside.
Connect BLACK to BLACK, WHITE to WHITE and GREEN or bare wire under GREEN ground screw.
Reinstall wiring cover.
11. INSTALL THE OPTIONAL SOFFIT CHIMNEY
(OPTIONAL) RMN Series
Refer to the instructions included with the soffit chimney.
12. INSTALL THE BLOWER (INTERIOR OR EXTERIOR BLOWER)
Refer to instructions included with blower.
Once the blower is installed, plug the power supply to the 3-prong male
connector (A) and the blower unit into the 2-prong female receptacle (B)
inside the hood.
A
! WARNING
Never plug the 2-prong blower cord to the 3-prong power
supply cord.
HE0003
-9-
B
13. INSTALL LIGHT BULBS AND WARMING LAMPS
Install (2) heat lamp bulbs. Use BR40 size, 250 W max., infrared bulbs only (sold separately).
Install (3) halogen light bulbs. Use PAR20 size, 50 W (sold separately).
14. INSTALL FILTERS
CAUTION
Remove protective plastic film covering filters before installing them.
It is recommended to install side filters first and finish with center one(s).
1.
2.
3.
4.
Insert upper end of filter into the hood (finger sized cup side).
Raise lower end toward the inside of hood.
Position lower end of filter into channel and pull.
Using finger sized cup, pull on the upper end of filter and slide it under the front inner retaining piece.
1
2
4
3
HD0065
HD0024
Replacement filters are available from your dealer. See label inside hood for size and part number.
Baffle Filters
Baffle filters are available as an option. To order them, refer to the table below to find the appropriate filter kit number
to your hood. To install them, refer to instruction sheet included with baffle filter kit.
KIT #
RBF6030
RBF6036
RBF6042
RBF6048
RBF6054
RBF6060
RBF6066
RBF6072
HOOD WIDTH
30”
36”
42”
48”
54”
60”
66”
72”
HD0011
BAFFLE FILTER (TYPICAL)
- 10 -
15. USE AND CARE
16. OPERATION
Grease Filters
The grease filters should be cleaned frequently. Use a
warm detergent solution. Grease filters are dishwasher
safe. Wash more often if your cooking style generates
greater grease—like frying foods or wok cooking.
Remove filters by pushing filters towards the back of hood
and rotating filters downward.
Blower Cleaning
Remove the filters in order to access the blower. Vacuum
blower to clean. Do not immerse in water. Refer to blower
instruction manual for more details.
Grease Rail
The grease rail should be cleaned frequently, especially if
baffle filters are used.
Remove filters, then, disassemble the grease rail from the hood
by removing its 3 retaining screws. See illustration below.
Always turn ON your hood before you begin cooking in
order to establish an air flow in the kitchen. Let the blower run
for a few minutes to clear the air after you turn off the range.
This will help keep the whole kitchen cleaner and brighter.
6
4
3
1
3
2
5
1
3
HC0004
1. Warming lamps
2. Warming lamp switches
3. Halogen lights
4. Halogen light switches
5. ON/OFF Blower switch
6. Blower speed control
Warming lamps (Infrared)
Each warming lamp (item 1 in picture above) is controlled
with is own ON/OFF switch (item 2 on picture above).
Use only BR40 Size, 250 W max., Infrared bulbs (purchase
separately).
! WARNING
Never place highly flammable material under
warming lamps.
Cooktop Lighting (Halogen)
A double set of ON/OFF switches (item 4 on picture above)
control the halogen lights (item 3 on picture above).
The front rocker controls the center light. The rear rocker
controls both side lights. Select one, two, or three lights for
best cooktop lighting.
Use PAR 20, 50 W halogen bulbs (purchase separately).
HD0069
Refer to Stainless steel cleaning in Hood Cleaning section
below. Once the grease rail is clean and dry, reassemble it
to the hood and reinstall filters.
Hood Cleaning
Stainless steel cleaning: How to maintain its “BRIGHT LOOK”
Do:
• Regularly wash with clean cloth or rag soaked with
warm water and mild soap or liquid dish detergent.
• Always clean in the direction of original polish lines.
• Always rinse well with clear water (2 or 3 times) after
cleaning. Wipe dry completely.
• You may also use a specialized household stainless
steel cleaner.
Don’t:
• Do not use any steel or stainless steel wool or any
other scrapers to remove stubborn dirt.
• Do not use any harsh or abrasive cleansers.
• Do not allow dirt to accumulate.
• Do not let plaster dust or any other construction
residues reach the hood. During construction/renovation,
cover the hood to make sure no dust sticks to stainless
steel surface.
Avoid: When choosing a detergent
• Any cleaners that contain bleach will attack stainless steel.
• Any products containing: chloride, fluoride, iodide,
bromide will deteriorate surfaces rapidly.
• Any combustible products used for cleaning such as
acetone, alcohol, ether, benzol, etc., are highly explosive
and should never be used close to a range.
Enamel finish:
Clean with warm water and mild detergent only.
When discoloration occcurs, use a good enamel polish
such as automotive polish. (DO NOT use rough abrasive
cleaner or porcelain cleaner.)
- 11
Blower
The blower is operated using two (2) controls.
Use the red, lighted ON/OFF switch (item 5 on picture
above) to start and stop the blower. When turned on, the
blower will operate at the previous setting of the speed
control (item 6 on picture above).
Turn the speed control knob clockwise to decrease blower
speed—counterclockwise to increase speed.
HEAT SENTRY™
This hood is equipped with a HEAT SENTRY™ thermostat.
This thermostat is a device that will turn on or speed up the
blower if it senses excessive heat above the cooking surface.
1) If blower is OFF—it turns blower ON to HIGH speed.
2) If blower is ON at a lower speed setting—it turns the
blower up to HIGH speed.
When the temperature level drops to normal, the blower
will return to its original setting.
! WARNING
The HEAT SENTRYTM can start the blower even if
the hood is turned OFF. In this case, it is impossible
to turn the blower OFF with blower switch. If you
must stop the blower, do it from the main
electrical panel.
-
17. SERVICE PARTS
19
20
18
16
17
10
13
11
3
21
15
2
19
5
12
4
7
14
6
6
1
HL0031
8
9
1
KEY
PART
NO. NUMBER DESCRIPTION
30’’
5
1
V02264 SOCKET LAMP
1
2
V02773 MALE CONNECTOR
1
3
V02772 FEMALE CONNECTOR
1
4
V03435 THERMOSTAT
1
5
V03436 THERMOSTAT BRACKET
2
6
V02563 SPST SINGLE SWITCH FOR WARMING LAMPS
1
7
V03502 SPST DOUBLE SWITCH FOR HALOGEN LAMP
1
8
V03503 SPST LIGHTED SINGLE SWITCH FOR BLOWER
1
9
V03504 SPEED CONTROL BUTTON
1
10 V03501 SPEED CONTROLLER
1
11 V03505 TERMINAL STRIP
1
§
V03517 10’’ POWER CORD
1
§
V03519 10’’ CONTROL WIRE
1
§
V03520 10’’ LIGHTED SWITCH WIRE
2
12 V00673 LOCK-NUT 8-32
2
13 V02512 SCREW 8-32 X 1⁄2 QUADREX
2
14 V01869 MACHINE SCREW 8-32 X 1⁄4
2
15 V01582 LOCK NUT 6-32
3
SQUARE PERF. GRILLE FILTER 9.5” X 15.25” X 0.355”
SQUARE PERF. GRILLE FILTER 11.61” X 15.25” X 0.355”
16 V05522
SQUARE PERF. GRILLE FILTER 13.61” X 15.25” X 0.355”
SQUARE PERF. GRILLE FILTER 17.525” X 15.25” X 0.355”
1
GREASE RAIL 30’’
GREASE RAIL 36’’
GREASE RAIL 42’’
GREASE RAIL 48’’
17 V14766
GREASE RAIL 54’’
GREASE RAIL 60’’
GREASE RAIL 66’’
GREASE RAIL 72’’
3
18 V05528 FILTER SPRING 5.265’’ X 0.350’’
2
19 V05521 SEALING EXTRUSION 20.625’’
1
20 V14744 LEFT SIDE LINER
1
21 V14745 RIGHT SIDE LINER
1
§
V05527 INSTALLATION GUIDE
PARTS BAG (FLAT HEAD SCREW #10 X 2’’ (4),
1
§
V12971 SCREWS #8 X 3⁄4’’ (8), NUTS #10-32 (4),
WALL ANCHORS (2), WASHERS 3⁄16’’ ID X 3⁄4’’ OD)
3
§
V02544 HALOGEN LAMP PAR 20, 50 W
2
§*
WARMING LAMP BR40, 250 W MAX.
§ NOT SHOWN.
* PURCHASE LOCALLY
- 12 -
36’’
5
1
1
1
1
2
1
1
1
1
1
1
1
1
2
2
2
2
3
1
3
2
1
1
1
QTY (HOOD WIDTH)
42’’ 48’’ 54’’ 60’’
5
5
5
5
1
1
1
1
1
1
1
1
1
1
1
1
1
1
1
1
2
2
2
2
1
1
1
1
1
1
1
1
1
1
1
1
1
1
1
1
1
1
1
1
1
1
1
1
1
1
1
1
1
1
1
1
2
2
2
2
2
2
2
2
2
2
2
2
2
2
2
2
4
5
3
3
1
1
1
1
3
4
3
5
2
2
2
2
1
1
1
1
1
1
1
1
1
1
1
1
66’’ 72’’
5
5
1
1
1
1
1
1
1
1
2
2
1
1
1
1
1
1
1
1
1
1
1
1
1
1
1
1
2
2
2
2
2
2
2
2
2
3
4
1
1
5
4
2
2
1
1
1
1
1
1
1
1
1
1
1
1
1
3
2
3
2
3
2
3
2
3
2
3
2
3
2