1
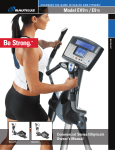
C H A N G I N G T H E G A M E I N H E A LT H A N D F I T N E S S ™
Model EV916 / E916
NAUTILUS ®
Be Strong.
™
Commercial Series Ellipticals
Assembly Manual
Model EV916
Model E916
C H A N G I N G T H E G A M E I N H E A LT H A N D F I T N E S S ™
INTRODUCTION
Thank you for purchasing the Nautilus ® Commercial Series EV916 or E916 Ellipticals. For more
than 30 years Nautilus has been producing the world’s finest fi tness equipment used in health
clubs and homes around the globe. We hope this product exceeds your expectations and is a
valuable tool for your facility.
Please carefully read through this manual to familiarize yourself with the operation of your new
Nautilus elliptical. Doing so will help to insure that your users get the most out of your elliptical,
enjoying safe and effective workouts ahead.
Nautilus
World Headquarters
16400 SE Nautilus Drive
Vancouver, WA 98683
1-800-NAUTILUS
nautilus.com
Model EV9 16
b
Model E9 16
SAFETY REQUIREMENTS: SAVE THESE INSTRUCTIONS!
WHEN USING ELECTRICAL EQUIPMENT, ALWAYS
FOLLOW THESE BASIC PRECAUTIONS:
6. To avoid potential safety and electrical problems, replace with
manufacturer’s specified parts only.
7. Connect the external power supply to a properly grounded AC wall
IMPORTANT SAFETY INSTRUCTIONS
outlet. Keep all cords away from heated surfaces. To disconnect
the external power supply, remove the plug from the AC wall
The following definitions apply to the words “Danger” and “Warning”
found throughout this manual:
DANGER
WARNING
outlet.
Used to call attention to IMMEDIATE hazards which,
if not avoided, will result in immediate, serious
personal injury or loss of life.
8. Do not let liquid enter the console. If it does, the console must be
Used to call attention to POTENTIAL hazards that
9. Never drop or insert any object into any opening on the machine.
inspected and tested for safety by an approved technician before
it can be used again.
could result in personal injury or loss of life.
Keep the area underneath and around the machine clear.
10. Do not operate where aerosol (spray) products are being used.
READ ALL INSTRUCTIONS BEFORE USING
THE MACHINE.
DANGER
To reduce the risk of electrical shock, always unplug
11. Always wear insulated gloves when handling batteries.
12. Do not crush, incinerate, or dismantle the battery. The electrolyte
contains sulfuric acid, which can cause serious damage to eyes
the external power supply from the electrical outlet
and skin. Should this occur, flush profusely with water and seek
before cleaning, maintaining, or repairing.
WARNING
To reduce the risk of burns, electric shock, or injury
to persons:
medical attention.
The safety level provided by the design of this equipment can only be
maintained when the equipment is regularly examined for damage
Read this manual in full before operating the elliptical. Failure to
follow these guidelines can produce a serious or possibly fatal
electrical shock hazard or other serious injury. Consult a qualified
electrician as required.
and wear. Inoperable components should be replaced immediately or
the equipment be put out of use until it is repaired. Failure to follow
the guidelines may compromise the effectiveness of the exercise
experience, expose you (and possibly others) to injury, and reduce
the longevity of the machine. Follow all training instructions listed in
1. The external power supply should always be unplugged from the
AC wall outlet before removing or installing parts. Never make
the manual and/or on the machine. Physical injury may result from
incorrect or excessive training.
adjustments or repairs while an exercise program is in progress.
Failure to follow the conditions set forth below shall limit, to the
2. Close supervision is necessary whenever the machine is used by
or near children, invalids, or disabled persons.
3. Keep your hands away from all moving parts and keep your feet on
extent allowed by law, Nautilus, Inc. responsibility for the safety,
reliability, and performance of this equipment.
•
the pedals while exercising. Do not operate the machine with the
trainer before the product is first used. Each user must be
side covers removed, or outdoors.
4. Use this machine only for its intended use as described in this
The operator manual must be read in full by each owner and
instructed in the proper use of the elliptical and its accessories.
•
Manual. Do not use parts, attachments, or accessories other than
The equipment must be used in accordance with the instructions
for use.
those provided by Nautilus Inc.
•
5. Do not use the external power supply if it has a damaged cord or
Only Nautilus ® -trained or Nautilus ® -authorized personnel should
carry out assembly operations, extensions, readjustments,
plug, it is not working properly, if it has been dropped or damaged,
modifications, or repairs.
or dropped in water. Contact our Technical Service Department to
arrange for the return of damaged parts.
•
For further information or instruction on use, maintenance or
specifications, please contact your Authorized Nautilus ® Fitness
Dealer or Service Technician.
1
C H A N G I N G T H E G A M E I N H E A LT H A N D F I T N E S S ™
SAFE OPERATION
WARNING
THESE GUIDELINES ARE
DIRECTED TO YOU, AS THE
OWNER OF THE MACHINE.
YOU SHOULD INSIST THAT
ALL USERS FOLLOW THE
SAME GUIDELINES.
WARNING!
Do not begin an exercise
program without first
consulting a physician.
WARNING!
If at any time during your
workout you feel chest pain,
experience severe muscular
discomfort, feel faint, or
are short of breath, stop
exercising immediately. If
the condition persists, you
should consult your medical
doctor immediately.
WARNING!
Secure long hair and loose
clothing before use.
2
General Guidelines For Safe Operation
1. Obtain a complete physical examination from your medical doctor and enlist a
health/fi tness professional’s aid in developing an exercise program suitable
for your current health status.
2. When working out for the first time, use the MANUAL exercise program at
the lower levels until you feel comfortable and capable of higher workloads.
3. The intensity and duration of your exercise program should always be subject
to how you feel. Never permit peer pressure to override your personal
judgment while exercising.
4. Overweight or severely deconditioned individuals should be particularly
cautious when using the machine for the first time. Even though such
individuals may not have histories of serious physical problems, they may
perceive the exercise to be far less intense than it really is, resulting in the
possibility of overexertion or injury.
5. Although all equipment manufactured by Nautilus, Inc. has been thoroughly
inspected by the manufacturing facility prior to shipment, proper installation
and regular maintenance are required to ensure safety. Maintenance is the
sole responsibility of the owner.
Moving Your Machine
This machine is heavy and requires two people to safely move from one location
to another. To move, have two people lift up the front end of the machine until
the transport wheels are in contact with the ground. The machine can now be
rolled on the transport wheels. Note: The transport wheels are intended for
indoor use only and should never be rolled on concrete or asphalt surfaces.
GETTING STARTED
Receiving
When the carrier delivers your order, verify that the number of items received equals the
number listed on the freight bill or express receipt.
Inspect the containers for damage. Itemize discrepancies and damage on the waybill and
have the agent sign it. Failure to describe external evidence of loss adequately may result
in the carrier refusing to honor your claim. Do not discard the packing materials until you
have verified physical condition and proper operation.
Installation Notice
The elliptical must be installed correctly before being used. Nautilus recommends that
you contact your elliptical dealer or sales representative when your equipment arrives.
The representative will help unpack, install, and demonstrate how to use the machine to
ensure the following:
• Equipment is free from shipping damage
• Installation and operation are in accordance with Nautilus standards.
Incorrect installation by unauthorized personnel can lead to equipment damage and may
void the warranty.
3
C H A N G I N G T H E G A M E I N H E A LT H A N D F I T N E S S ™
Hardware Included
Tools Required
(4) Screw, 3/8” - 16 x 3/4”, Hex Head
(4) Washer, 3/8” Split Lock
(4) Washer, 3/8” Flat
(22) Screw, #10-32 x 3/4”, Pan Head with Lock Washer
(2) Screw, 1/2”-13 x 4”, Hex Head
(4) Washer, 1/2” Flat
(2) Nut, 1/2”-13, Self Locking
(4) Screw, 1/4” x 3/4”, Pan Head with Lock Washer
Shears or Razor Knife
Components included
(1) Bottom Front Left Cover
(1) Bottom Front Right Cover
(2) Bottom Pivot Cover #1
(2) Bottom Pivot Cover #2
(2) Bottom Swing Arm Shaft
(1) Elliptical Console
4
9/16” Hex Socket Wrench
3/4” Hex Socket Wrench
3/8” Hex Socket Wrench
#2 Phillips Screw Driver
Torque Wrench (if available)
Unpacking the Elliptical
1. Inspect the containers for damage. Itemize discrepancies and damage on the waybill and have the agent sign
it. Failure to describe external evidence of loss or damage adequately may result in the carrier refusing to honor
your claim.
2. Use shears or a razor knife to cut the straps that secure the elliptical cover to the pallet. Remove the cover.
3. Remove the packing materials from the machine.
4. Remove the parts box.
5. Unpack and detach the Bottom Front Cover, Front Pivot Covers, Elliptical Console, and hardware from the box.
6. Use shears or a razor knife to cut the straps that secure the elliptical machine to the pallet.
7. Use a 3/8” hex socket wrench to remove the two lag bolts at the rear of the pallet that hold the machine to the
pallet.
8. Remove the packaging material from the elliptical machine mast assembly.
5
C H A N G I N G T H E G A M E I N H E A LT H A N D F I T N E S S ™
9. Rotate the elliptical mast into the proper position, taking care not to pinch the electrical cable at the bottom
in the process (see Figure 1).
10. Connect the electrical cables coming out of the front bottom flange of the mast assembly to the electrical
cables coming out of the front flange of the main frame center tube (see Figure 1). The color-coded cables
snap together with basic male/female connectors for corresponding cable colors.
11. Install and tighten (4) 3/8”-16 hex head screws, (4) 3/8” flat washers, and (4) 3/8” lock washers into front
bottom flange of the upright and the front flange of the main frame tube. Take care not to pinch the electrical
cable during this process. This requires a 9/16” hex socket wrench.
12. Install the front left and right covers and align the holes at the side. (See Figure 1).
13. Secure the front bottom left and right covers with (10) #10-32 Phillips head screws. This will require a #2
Phillips head screw driver.
Front Left Cover
Front Right Cover
Figure 1
#10-32 Phillips Head Screws
• 3/8”-16 Hex Head Screw
• 3/8” Lock washer
• 3/8” Flat Washer
6
Electrical Cable
Take care not to pinch when assembling.
Connect before securing flanges together.
14. Install (1) Bottom Swing Arm Shaft into the swing arm and the install the foot support tube (see Figures 2 and 3).
15. Install and tighten (1) 1/2”-13 hex head screw, (2) 1/2” washers, and (1) 1/2”-13 nuts connecting the swing arm and
the foot support tube (both left and right sides). This will require a 3/4” hex socket wrench. Install nuts toward
middle of the machine as is shown in Figure 2. Torque bolts to 45 ft/lbs (if torque wrench is available).
16. Repeat steps 14 and 15 for the opposite foot support tube.
1/2”-13 Nut
EV916 ONLY:
Wire Connection
Swing Arm
Swing Arm Shaft
Foot Support Tube
1/2”-13 Hex Head Screw
1/2” Flat Washer
Figure 2
SWING ARM
1/2” FLAT
WASHER
1/2”-13
NUT
Figure 3
1/2” FLAT
WASHER
SWING ARM
SHAFT
1/2”-13 HEX
HEAD SCREW
(2X) PLASTIC BUSHING
(FACTORY INSTALLED)
FOOT SUPPORT
TUBE
7
C H A N G I N G T H E G A M E I N H E A LT H A N D F I T N E S S ™
If you have an EV916 manufactured PRIOR to September 30, 2005, please follow steps
17-22 (for units manufactured AFTER September 30, 2005, please skip to step 19).
To determine the manufacturing date of your machine, refer to the 14-digit serial number:
08000050926005
1st 5 digits: Model Number (above example: Model #08000)
Next 6 digits: Year, Month, Day (above example, “050926) means September 26, 2005)
Last 3 digits: Number of units built this day (above example, 005 means this was the fifth unit built on
September 26, 2005)
17. Remove the rubber grommets from the openings in
the left Swing Arm and left Foot Support Tube. Slide
the Grommets onto the Footlink Cable extruding from
the Foot support Tube.
18. Using a 1 1/2” section of sheathed housing, make
a loop in the sheathed portion of the footlink cable
between the grommets and the end connector, and
use a zip tie to secure the loop. See Figure 4.
19. Connect the swing arm cable to the footlink cable.
You can remove the warning tag at this time.
Figure 4
8
20. Carefully insert the connectors and zip tied loop into the swing arm tube’s opening (see Figure 5).
NOTE: If connectors are not inserted into the swing arm tube,
they will be damaged during use!
21. Install the swing arm rubber grommet, and insert any remaining slack cable into either tube.
22. Make sure that grommets are fully installed and that only the sheathed cable is exposed (see Figure 6).
Figure 5
Figure 6
9
C H A N G I N G T H E G A M E I N H E A LT H A N D F I T N E S S ™
23.Install the (1) Bottom Pivot Cover #1 and (1) Bottom Pivot Cover #2 and align the holes at the sides of the swing
arm tube (see Figure 7).
24. Install and tighten (5) #10-32 Phillips head screws. This requires a #2 Phillips head screwdriver.
25. Repeat steps 23 and 24 for the opposite swing arm tube.
#10-32x.75 Screw
#10-32x.75 Screw
Bottom Pivot Cover #2
Bottom Pivot Cover #1
Figure 7
10
26. Position console so that the electrical cables can be connected. Use the correct cables with the proper
connectors. See wiring diagram on next page.
27. Install the console and tighten (4) 1/4” Phillips head screws (see Figure 8). This requires a #2 Phillips head
screwdriver.
28. The elliptical can now be removed from the pallet and is ready for use.
Figure 8
11
C H A N G I N G T H E G A M E I N H E A LT H A N D F I T N E S S ™
29. Ensure all console wiring is connected correctly, using the following wiring diagram.
12
If you need assistance, please have both the serial number of your machine and the date of purchase available
when you contact the appropriate Nautilus office listed below.
OFFICES IN THE UNITED STATES INTERNATIONAL OFFICES
• NAUTILUS INNOVATION CENTER
Nautilus, Inc.
1886 Prairie Way
Louisville, Colorado, USA 80027
Phone: 800-864-1270
Fax: 800-898-9410
• TECHNICAL/CUSTOMER SERVICE
Nautilus, Inc.
10757 East Ute Street
Tulsa, Oklahoma. USA 74116
Phone: 800-864-1270
Fax: 800-764-7380
E-mail: [email protected]
• CORPORATE HEADQUARTERS
Nautilus, Inc.
World Headquarters
16400 SE Nautilus Drive
Vancouver, Washington, USA 98683
Phone: 800-NAUTILUS
For technical assistance and a list of distributors in your
area, please call or fax one of the following numbers.
• INTERNATIONAL CUSTOMER SERVICE
NORTH AMERICA OFFICE
Nautilus, Inc.
World Headquarters
16400 SE Nautilus Drive
Vancouver, Washington, USA 98683
Phone: 800-864-1270
Fax: 800-764-7380
E-mail: [email protected]
• GERMANY OFFICE
Nautilus GmbH
Tel: 02204 61027
Fax: 02204 62890
• ITALY OFFICE
Nautilus Italy s.r.l.
Tel: 031 51 10 86
Fax: 031 34 24 97
• SWISS OFFICE
Nautilus International S.A.
Rue Jean Prouvé 6
1762 Givisiez / Switzerland
Tel: + 41 26 460 77 77
Fax: + 41 26 460 77 70
• UNITED KINGDOM OFFICE
Nautilus UK Ltd
Tel: 01 908 267 345
Fax: 01 908 267 346
13
C H A N G I N G T H E G A M E I N H E A LT H A N D F I T N E S S ™
Model EV916
Model E916
©2005. Nautilus, Inc. All rights reserved. Nautilus, the Nautilus Logo, Remote Operation Control,
ROC, StairMaster and Changing the Game in Health and Fitness are either registered trademarks
of trademarks of Nautilus, Inc. Polar is a registered trademark of its respective company.
Nautilus, Inc. World Headquarters, 16400 SE Nautilus Drive, Vancouver, WA 98683
1-800-NAUTILUS www.nautilus.com
14
EV916/E916 V.1-09/05
P/N 40388A