1
T571 manual (GB)
26/11/01
6:48 pm
Page 1
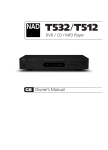
T571
DVD / CD / MP3 5 Disc Changer
GB Owner’s Manual
T571 manual (GB)
19/11/01
2:14 pm
Page 2
Introduction
SAFETY PRECAUTIONS
WARNING : TO REDUCE THE RISK OF FIRE OR ELECTRIC SHOCK, DO NOT EXPOSE
THIS PRODUCT TO RAIN OR MOISTURE.
CAUTION
THIS DVD RECEIVER EMPLOYS A LASER SYSTEM.
TO ENSURE PROPER USE OF THIS PRODUCT, PLEASE READ THIS OWNER’S MANUAL CAREFULLY AND
RETAIN FOR FUTURE REFERENCE, SHOULD THE UNIT REQUIRE MAINTENANCE, CONTACT AN
AUTHORIZED SERVICE LOCATION-SEE SERVICE PROCEDURE.
USE OF CONTROLS, ADJUSTMENTS OR THE PERFORMANCE OF PROCEDURES OTHER THAN THOSE
SPECIFIED MAY RESULT IN HAZARDOUS RADIATION EXPOSURE. TO PREVENT DIRECT EXPOSURE TO
LASER BEAM, DO NOT TRY TO OPEN THE ENCLOSURE. VISIBLE LASER RADIATION WHEN OPEN THE
ENCLOSURE. DO NOT STARE INTO BEAM.
THE APPARATUS SHALL NOT BE EXPOSED TO DRIPPING OR SPLASHING AND THAT NO OBJECTS FILLED
WITH LIQUIDS, SUCH AS VASES, SHALL BE PLACED ON THE APPARATUS.
WARNING
CHANGES OR MODIFICATIONS NOT EXPRESSLY APPROVED BY THE PARTY RESPONSIBLE FOR
COMPLIANCE COULD VOID THE USER’S AUTHORITY TO OPERATE THE EQUIPMENT.
This product is manufactured to comply with the radio interference requirements of EEC DIRECTIVE
89/336/EEC, 93/68/EEC and 73/23/EEC
RECORD YOUR MODEL NUMBER (Now, while you can see it)
The model and serial number of your new DVD player are located on the back of the DVD player cabinet.
For your future convenience, we suggest that you record these numbers here:
MODEL NO.____________________________________
SERIAL NO.____________________________________
GB
2
T571 manual (GB)
19/11/01
2:14 pm
Page 3
Introduction
TABLE OF CONTENTS
INTRODUCTION
Safety Precautions . . . . . . . . . . . . . . . . . . . . . . . . . . . . . . . . . . . . . . . . . . . . . . . . . . . . . . . . . . .2
Table of Contents . . . . . . . . . . . . . . . . . . . . . . . . . . . . . . . . . . . . . . . . . . . . . . . . . . . . . . . . . . . .3
Precautions . . . . . . . . . . . . . . . . . . . . . . . . . . . . . . . . . . . . . . . . . . . . . . . . . . . . . . . . . . . . . . . . .4
Notes on Discs . . . . . . . . . . . . . . . . . . . . . . . . . . . . . . . . . . . . . . . . . . . . . . . . . . . . . . . . . . . . . .5
Identification of Controls . . . . . . . . . . . . . . . . . . . . . . . . . . . . . . . . . . . . . . . . . . . . . . . . . . . .6-9
Front Panel/Display Window . . . . . . . . . . . . . . . . . . . . . . . . . . . . . . . . . . . . . . . . . . . . . . . . . . . 6
Rear Panel. . . . . . . . . . . . . . . . . . . . . . . . . . . . . . . . . . . . . . . . . . . . . . . . . . . . . . . . . . . . . . . . . 7
Remote Control . . . . . . . . . . . . . . . . . . . . . . . . . . . . . . . . . . . . . . . . . . . . . . . . . . . . . . . . . . . . 8
Preparing the Remote Control . . . . . . . . . . . . . . . . . . . . . . . . . . . . . . . . . . . . . . . . . . . . . . . . . . 9
Operating with the Remote Control. . . . . . . . . . . . . . . . . . . . . . . . . . . . . . . . . . . . . . . . . . . . . . 9
CONNECTIONS
Connecting to Surround Sound System . . . . . . . . . . . . . . . . . . . . . . . . . . . . . . . . . . . . . . .10-12
Enjoying Dolby Digital Sound. . . . . . . . . . . . . . . . . . . . . . . . . . . . . . . . . . . . . . . . . . . . . . . . . . 10
Enjoying Dolby Pro Logic Surround Sound . . . . . . . . . . . . . . . . . . . . . . . . . . . . . . . . . . . . . . . . 11
Enjoying 2 Channel Digital Stereo Sound . . . . . . . . . . . . . . . . . . . . . . . . . . . . . . . . . . . . . . . . . 12
Enjoying DTS Sound . . . . . . . . . . . . . . . . . . . . . . . . . . . . . . . . . . . . . . . . . . . . . . . . . . . . . . . . 12
Connecting to a Stereo System . . . . . . . . . . . . . . . . . . . . . . . . . . . . . . . . . . . . . . . . . . . . . . . .13
Connecting to a TV . . . . . . . . . . . . . . . . . . . . . . . . . . . . . . . . . . . . . . . . . . . . . . . . . . . . . . . . . .14
INITIAL SETTINGS
Selection of Initial Settings . . . . . . . . . . . . . . . . . . . . . . . . . . . . . . . . . . . . . . . . . . . . . . . . . . .15
Selecting Disc Languages . . . . . . . . . . . . . . . . . . . . . . . . . . . . . . . . . . . . . . . . . . . . . . . . . . . . .16
Selecting Parental Control Rating Level and Password . . . . . . . . . . . . . . . . . . . . . . . . . . .17-18
Selecting TV Aspect . . . . . . . . . . . . . . . . . . . . . . . . . . . . . . . . . . . . . . . . . . . . . . . . . . . . . . . . .19
Selecting Menu Language . . . . . . . . . . . . . . . . . . . . . . . . . . . . . . . . . . . . . . . . . . . . . . . . . . . .20
Selecting Digital Audio Output . . . . . . . . . . . . . . . . . . . . . . . . . . . . . . . . . . . . . . . . . . . . . . . .21
Others . . . . . . . . . . . . . . . . . . . . . . . . . . . . . . . . . . . . . . . . . . . . . . . . . . . . . . . . . . . . . . . . . . . .22
Table of Languages and Their Codes . . . . . . . . . . . . . . . . . . . . . . . . . . . . . . . . . . . . . . . . . . . .23
BASIC OPERATIONS
Basic Playback . . . . . . . . . . . . . . . . . . . . . . . . . . . . . . . . . . . . . . . . . . . . . . . . . . . . . . . . . . .24-27
Stopping Play . . . . . . . . . . . . . . . . . . . . . . . . . . . . . . . . . . . . . . . . . . . . . . . . . . . . . . . . . . . . . 26
Resume Play . . . . . . . . . . . . . . . . . . . . . . . . . . . . . . . . . . . . . . . . . . . . . . . . . . . . . . . . . . . . . . 26
Last Scene Memory . . . . . . . . . . . . . . . . . . . . . . . . . . . . . . . . . . . . . . . . . . . . . . . . . . . . . . . . . 26
Screen Saver . . . . . . . . . . . . . . . . . . . . . . . . . . . . . . . . . . . . . . . . . . . . . . . . . . . . . . . . . . . . . . 26
Skipping Discs . . . . . . . . . . . . . . . . . . . . . . . . . . . . . . . . . . . . . . . . . . . . . . . . . . . . . . . . . . . . . 27
Exchanging the Disc and Starting Playback. . . . . . . . . . . . . . . . . . . . . . . . . . . . . . . . . . . . . . . . 27
Special Playback . . . . . . . . . . . . . . . . . . . . . . . . . . . . . . . . . . . . . . . . . . . . . . . . . . . . . . . . .28-29
Still Picture . . . . . . . . . . . . . . . . . . . . . . . . . . . . . . . . . . . . . . . . . . . . . . . . . . . . . . . . . . . . . . . 28
Frame Advance . . . . . . . . . . . . . . . . . . . . . . . . . . . . . . . . . . . . . . . . . . . . . . . . . . . . . . . . . . . . 28
Skipping Chapters and Tracks Forward or Back. . . . . . . . . . . . . . . . . . . . . . . . . . . . . . . . . . . . . 28
HDCD Playback . . . . . . . . . . . . . . . . . . . . . . . . . . . . . . . . . . . . . . . . . . . . . . . . . . . . . . . . . . . . 28
To Scan at Fast Forward or Fast Reverse Playback . . . . . . . . . . . . . . . . . . . . . . . . . . . . . . . . . . . 29
Playing in Slow-Motion . . . . . . . . . . . . . . . . . . . . . . . . . . . . . . . . . . . . . . . . . . . . . . . . . . . . . . 29
GB
OPERATION USING GUI (GRAPHICAL USER INTERFACE) MENU ICONS
General Information about GUI Menu Icons . . . . . . . . . . . . . . . . . . . . . . . . . . . . . . . . . . . . . .30
Detailed Description of each GUI Menu Icon . . . . . . . . . . . . . . . . . . . . . . . . . . . . . . . . . . . . .31
ADVANCED OPERATION
Using a Title Menu . . . . . . . . . . . . . . . . . . . . . . . . . . . . . . . . . . . . . . . . . . . . . . . . . . . . . . . . . .32
Using a DVD Menu . . . . . . . . . . . . . . . . . . . . . . . . . . . . . . . . . . . . . . . . . . . . . . . . . . . . . . . . . .32
Changing Subtitle Language . . . . . . . . . . . . . . . . . . . . . . . . . . . . . . . . . . . . . . . . . . . . . . . . . .33
Changing Audio Soundtrack Language . . . . . . . . . . . . . . . . . . . . . . . . . . . . . . . . . . . . . . . . .33
Viewing from another Angle . . . . . . . . . . . . . . . . . . . . . . . . . . . . . . . . . . . . . . . . . . . . . . . . . .34
Producing a 3D Surround Effect . . . . . . . . . . . . . . . . . . . . . . . . . . . . . . . . . . . . . . . . . . . . . . .34
Repeat Play . . . . . . . . . . . . . . . . . . . . . . . . . . . . . . . . . . . . . . . . . . . . . . . . . . . . . . . . . . . . . . . .35
Storing Markers in Memory to be Viewed (Listened to) again . . . . . . . . . . . . . . . . . . . . . . .36
Zoom Feature . . . . . . . . . . . . . . . . . . . . . . . . . . . . . . . . . . . . . . . . . . . . . . . . . . . . . . . . . . . . . .37
Random Play . . . . . . . . . . . . . . . . . . . . . . . . . . . . . . . . . . . . . . . . . . . . . . . . . . . . . . . . . . . . . . .37
Program Play . . . . . . . . . . . . . . . . . . . . . . . . . . . . . . . . . . . . . . . . . . . . . . . . . . . . . . . . . . . . . .38
Playback with MP3 . . . . . . . . . . . . . . . . . . . . . . . . . . . . . . . . . . . . . . . . . . . . . . . . . . . . . . .39-40
REFERENCE
Disc Requirements/Copyright Information . . . . . . . . . . . . . . . . . . . . . . . . . . . . . . . . . . . . . . .41
Before Calling Service Personnel . . . . . . . . . . . . . . . . . . . . . . . . . . . . . . . . . . . . . . . . . . . . . . .42
Specifications . . . . . . . . . . . . . . . . . . . . . . . . . . . . . . . . . . . . . . . . . . . . . . . . . . . . . . . . . . . . . .43
3
T571 manual (GB)
19/11/01
2:14 pm
Page 4
Introduction
PRECAUTIONS
NOTES ON HANDLING
• When shipping the DVD player, always use the original shipping carton and packing materials. For
maximum protection, repack the unit as it was originally packed at the factory.
• Do not use volatile liquids, such as insect spray, near the DVD player. Do not leave rubber or plastic
products in contact with the DVD player for a long time. They will leave marks on the finish.
• The top and rear panels of the DVD player may become warm after a long period of use. This is normal
and not a malfunction.
• When the DVD player is not in use, be sure to remove the disc and turn off the power.
• If you do not use the DVD player for a long period, the unit may not function properly in the future.
Turn on and use the DVD player occasionally.
NOTES ON LOCATING
• When you place this DVD player near a TV, radio, or VCR, the playback picture may become poor and
the sound may be distorted. In this case, move the DVD player away from the TV, radio, or VCR.
NOTES ON CLEANING
Use a dry soft cloth for cleaning
• For stubborn dirt, soak the cloth in a weak detergent solution, wring well and wipe. Use a dry cloth
to wipe it dry. Do not use any type of solvent, such as thinner and benzine, as they may damage the
surface of the DVD player.
• If you use a chemical saturated cloth to clean the unit, follow that product’s instructions.
WARNING
Cleaning and adjustment of lenses and/or other components of playback mechanism should be
performed by a qualified service technician.
NOTES ON MOISTURE CONDENSATION
Moisture condensation damages the DVD player. Please read the following carefully:
Moisture condensation occurs, for example, when you pour a cold drink into a glass on a warm day.
Drops of water form on the outside of the glass. In the same way, moisture may condense on the
optical pick-up lens inside this unit, one of the most crucial internal parts of the DVD player.
Moisture condensation occurs during the following cases:
• When you bring the DVD player directly from a cold place to a warm place.
• When you use the DVD player in a room where you just turned on the heater, or a place where the
cold wind from the air conditioner directly hits the unit.
• In summer, when you use the DVD player in a hot and humid place just after you move the unit from
an air conditioned room.
• When you use the DVD player in a humid place.
GB
Do not use the DVD player when moisture condensation may occur.
If you use the DVD player in such a situation, it may damage discs and internal parts. Remove the
disc, connect the power cord of the DVD player to the wall outlet, turn on the DVD player and leave
it “ON” for two or three hours. After two or three hours, the DVD player will have warmed up and
evaporated any moisture. Keep the DVD player connected to the wall outlet and moisture
condensation will seldom occur.
4
T571 manual (GB)
19/11/01
2:14 pm
Page 5
Introduction
NOTES ON DISCS
This section shows you how to handle, clean, and store discs.
ON HANDLING DISCS
• Do not touch the playback side of the disc.
• Do not attach paper or tape to discs.
ON CLEANING DISCS
• Fingerprints and dust on the disc cause picture and sound deterioration. Wipe the disc from the center
outward with a soft cloth. Always keep the disc clean.
• If you cannot wipe off the dust with a soft cloth, wipe the disc lightly with a slightly moistened soft
cloth and finish with a dry cloth.
• Do not use any type of solvents such as thinner, benzine, commercially available cleaners or anti-static
spray for vinyl LPs. They may damage the disc.
ON STORING DISCS
• Do not store discs in a place subject to direct sunlight or near heat sources.
• Do not store discs in places subject to moisture and dust such as a bathroom or near a humidifier.
• Store discs vertically in a case. Stacking or placing objects on discs outside of their case may cause
warping.
ABOUT THIS OWNER’S MANUAL
• This owner’s manual explains the basic instructions of this DVD player.
• Some DVD video discs have functions that may not be explained in this owner’s manual. Therefore,
some instructions may differ from this owner’s manual, and there may be extra instructions. In this
case, follow the instructions displayed on the TV screen or package.
• “
” may appear on the TV screen during operation. This icon means the function explained in this
owner’s manual is not available on that specific DVD video disc.
GB
5
T571 manual (GB)
19/11/01
2:14 pm
Page 6
Introduction
IDENTIFICATION OF CONTROLS
FRONT PANEL
POWER indicator
MENU button
SKIP buttons
RANDOM button
REPEAT button
ARROW buttons
PAUSE button
PLAY button
Remote sensor
Display Window
SELECT/ENTER
button
POWER button
OPEN/CLOSE button
Disc tray
STOP button
SCAN buttons
NEXT DISC button
DISPLAY WINDOW
MP3 indicator
PROGRAM indicator
HDCD indicator
GB
Operating status
indicator
RANDOM indicator
Repeat playback mode
indicators
CD indicator
DVD indicator
MP3
HD CD DVD
1
2
3
TITLE
CHP/TRK
PROG.
RANDOM ALL A
5
4
Total playing time/elapsed time indicators
Disc 1-5 indicator
Angle icon indicator
6
Chapter/Track number indicator
Title number indicator
B
T571 manual (GB)
19/11/01
2:14 pm
Page 7
Introduction
IDENTIFICATION OF CONTROLS
REAR PANEL
TV SYSTEM SELECT Switch
Refer to explanation below.
VIDEO OUT jack
12V TRIGGER INPUT jack
By connecting this DVD player to another NAD audio component or system
controller equipped with a 12V trigger output, you can remotely operate
the T571 power ON/OFF.
S-VIDEO OUT jack
VIDEO OUTPUT SELECT switch
SCART/RGB OUT jack
POWER CORD
Connect to an AC 110-240V, 50/60Hz outlet only.
COAXIAL DIGITAL AUDIO OUT jack
OPTICAL DIGITAL AUDIO OUT jack
Remove the dust protection cap from the connector and connect the optical digital cable
(not supplied) firmly so that the configurations of both the cable and the connector
match. Keep the dust protection cap and always reattach the cap when not using the
connector to protect against dust.
AUDIO OUT (L/R) jacks
Dust protection cap
GB
TV SYSTEM SELECT
You can enjoy NTSC or PAL discs by using your TV SYSTEM SELECT switch to choose the appropriate system.
• If you try to play back PAL disc with NTSC-TV. The player will not playback the disc.
• When the selected TV SYSTEM SELECT switch does not coincide with the system of your TV, normal color picture may not be displayed.
• Select the TV SYSTEM SELECT switch when the power is turned off.
• When you playback NTSC disc with PAL-TV, some discs may produce black bands at the top and bottom of the screen.
Position of TV SYSTEM SELECT switch
PAL
NTSC
AUTO
Connected TV
PAL
NTSC
MULTI system TV
Available disc
NTSC/PAL DVD disc
NTSC/PAL DVD disc
NTSC/PAL DVD disc
7
T571 manual (GB)
19/11/01
2:14 pm
Page 8
Introduction
IDENTIFICATION OF CONTROLS
REMOTE CONTROL
You will find instructions for each of the remote control functions in the appropriate sections of this instruction manual.
POWER button
OPEN/CLOSE button
REPEAT button
A-B button
POWER
OPEN/CLOSE
RANDOM button
SETUP button
SETUP
REPEAT
A-B
RANDOM
AUDIO
SUBTITLE
ANGLE
SOUND
SUBTITLE button
ANGLE button
SOUND button
AUDIO button
TITLE
MENU
*MENU button
***TITLE button
**ARROW buttons
SELECT/ENTER button
SELECT
ENTER
RETURN button
DISPLAY button
DISPLAY
RETURN
MARKER-SEARCH button
ZOOM button
ZOOM
MARKER — SEARCH
PLAY button
FWD/REV SCAN button
SCAN
STOP button
PAUSE/STEP button
PLAY
SKIP
FWD/REV SKIP button
STOP
NEXT DISC PAUSE/STEP
SLOW
NEXT DISC button
SLOW buttons
PROGRAM button
1
2
3
4
5
6
7
8
Number buttons
CLEAR button
GB
CLEAR
9
PROGRAM
0
* MENU BUTTON
Use the MENU button to display the menu
screen included on DVD video discs. To
operate a menu screen, follow the instructions
in “Using a DVD Menu” (page 32).
8
** DIRECTIONAL ARROW BUTTONS
(up, down, left, right) for use in highlighting a
selection on a GUI menu screen, TITLE and
MENU screen.
*** TITLE BUTTON
Use the TITLE button to display the title screen
included on DVD video discs. To operate a
menu screen, follow the instructions in “Using
a Title Menu” (page 32).
T571 manual (GB)
19/11/01
2:14 pm
Page 9
Introduction
IDENTIFICATION OF CONTROLS
PREPARING THE REMOTE CONTROL
Insert the batteries into the remote control so you can use it to operate the DVD player.
1 Open the battery cover.
2 Insert batteries (AAA size).
Make sure to match the + and - on the batteries to
the marks inside the battery compartment.
3 Close the cover.
NOTES ON BATTERIES
• Improper use of batteries may cause battery leakage and corrosion.
• To operate the remote control correctly, follow the instructions.
• Do not insert the batteries into the remote control in the wrong direction.
• Do not charge, heat, open, or short-circuit the batteries.
• Do not throw the batteries into fire.
• Do not leave dead or exhausted batteries in the remote control.
• Do not use different types of batteries together, or mix old and new batteries.
• If you do not use the remote control for a long period of time, remove the batteries to avoid possible
damage from battery corrosion.
• If the remote control does not function correctly or if the operating range becomes reduced, replace
all batteries with new ones.
• If battery leakage occurs, wipe the battery liquid from the battery compartment, then insert new batteries.
• The batteries should last about one year with normal use.
OPERATING WITH THE REMOTE CONTROL
This section shows you how to use the remote control.
GB
30° 30°
23 ft (7m)
POWER
OPEN/CLOSE
SETUP
REPEAT
A-B
RANDOM
AUDIO
SUBTITLE
ANGLE
SOUND
TITLE
MENU
SELECT
ENTER
Point the remote control at the remote sensor and press the buttons.
Distance: About 23 ft (7 m) from the front of the remote sensor
Angle:
About 30° in each direction of the front of the remote sensor
• Do not expose the remote sensor of the DVD player to a strong light source such as direct sunlight or
illumination. If you do so, you may not be able to operate the DVD player with the remote control.
NOTES ON THE REMOTE CONTROL
• Point the remote control at the remote sensor on the DVD player.
• Do not drop or give the remote control a shock.
• Do not leave the remote control near an extremely hot or humid place.
• Do not spill water or put anything wet on the remote control.
• Do not disassemble the remote control.
9
T571 manual (GB)
19/11/01
2:14 pm
Page 10
Connections
CONNECTING TO THE SURROUND SOUND SYSTEM
ENJOYING DOLBY DIGITAL SOUND
You can enjoy the high quality dynamic sound of Dolby Digital, Dolby Pro Logic, and 2 Channel Digital Stereo.
DOLBY DIGITAL
Dolby Digital is the surround sound technology used in theaters showing the latest movies, and is now available to reproduce this realistic effect in
the home. You can enjoy motion picture and live concert DVD video discs with this dynamic realistic sound by connecting the DVD player to a 5.1
channel receiver equipped with a Dolby Digital decoder or Dolby Digital processor.
To DIGITAL OUT
(COAXIAL or OPTICAL)
To S-VIDEO OUT or VIDEO OUT
75 ohm coaxial cable or
Optical cable
GB
To enjoy Dolby Digital sound
from this DVD player you
need the following:
• DVD recorded in Dolby Digital
• 5.1 channel receiver equipped
with a Dolby Digital decoder,
or Dolby Digital processor and
power receiver
• 5 speakers and 1 sub woofer
To enjoy Dolby Digital sound
You need to select “Dolby
Digital” on the SETUP menu.
S-Video cable or Video cable
Connection example
To digital audio
input
Receiver equipped
with a Dolby
Digital decoder
To S-video Input or
Video Input
Front speaker (right)
Front speaker (left)
Center speaker
Sub woofer
Rear speaker (left surround)
Rear speaker (right surround)
NOTES
Refer to the owner’s manual of your audio system for operating instructions.
• Before you connect the DVD player to other equipment, be sure to turn off the power and unplug all of the equipment from the wall outlet before
making any connections.
• The output sound of the DVD player has a wide dynamic range. Be sure to adjust the receiver’s volume to a moderate listening level. Otherwise,
the speakers may be damaged by a sudden high volume sound.
• Turn off the receiver before you connect or disconnect the DVD player’s power cord. If you leave the receiver power on, the speakers may be
damaged.
Manufactured under license from Dolby Laboratories.
“Dolby”, “Pro Logic”, and the double-D symbol are trademarks of Dolby Laboratories. Confidential Unpublished works. Copyright 1992-1997 Dolby
Laboratories. All rights reserved.
10
T571 manual (GB)
19/11/01
2:14 pm
Page 11
Connections
CONNECTING TO THE SURROUND SOUND SYSTEM
ENJOYING DOLBY PRO LOGIC SURROUND SOUND
You can still enjoy the excitement of Surround Sound even if your A/V receiver does not offer Dolby Digital decoding. If your A/V receiver has a Dolby
Pro Logic decoder, refer to the following connection diagram.
Connect one or two rear speakers
Note: The surround effect is greatly
enhanced by using two surround speakers.
To VIDEO OUT
To AUDIO OUT
Video cable
Audio cable
To audio input
Connection example
Receiver equipped with
Dolby Pro Logic Surround
To video input
Centre speaker
Front speaker
(left)
Front speaker
(right)
GB
TV
Rear speaker (left)
Rear speaker (right)
With a receiver equipped with Dolby Digital
Connect the equipment the same way as described in “Enjoying Dolby Digital Sound” on the previous page. Refer to that receiver’s owner’s manual
and set the receiver so you can enjoy Dolby Pro Logic Surround sound.
WARNING
Do not set the Digital Audio Output of this DVD player to “Dolby Digital” unless you are connecting the DIGITAL OUT jack of this DVD player to an
AV decoder that has the Dolby Digital decoding function. High volume sound may damage your hearing as well as the speakers (Refer to “Selecting
Digital Audio Output” on page 21).
11
T571 manual (GB)
19/11/01
2:14 pm
Page 12
Connections
CONNECTING TO THE SURROUND SOUND SYSTEM
ENJOYING 2 CHANNEL DIGITAL STEREO SOUND
You can enjoy the dynamic sound of 2 Channel Digital Stereo by connecting this DVD player to a receiver equipped with a digital audio input and
speaker system (right and left front speakers).
Connection example
75 ohm coaxial cable or Optical Cable
To S-video Input
or Video Input
To DIGITAL OUT
(COAXIAL or OPTICAL)
To S-VIDEO OUT
or VIDEO OUT
S-Video cable
or Video cable
Receiver equipped with a
digital audio input
To digital audio input
Front speaker
(left)
Front speaker
(right)
TV
ENJOYING DTS SOUND
• Your A/V Receiver or processor must be equipped with a DTS Decoder.
• The digital output (see selecting digital output page 21) must be set to “stream”.
• The disc must have a DTS soundtrack.
Connection example
75 ohm coaxial cable or optical cable
To S-video Input
or Video Input
GB
To DIGITAL OUT
(COAXIAL or OPTICAL)
To S-VIDEO OUT
or VIDEO OUT
Receiver equipped with
a DTS decoder
To digital audio input
S-Video cable or
Video cable
Front speaker
(left)
Front speaker
(right)
Center
speaker
Sub woofer
Rear speaker
(left surround)
Rear speaker
(right surround)
NOTES
• Refer to the owner’s manual of your audio system for operating instructions.
• Before you connect the DVD player to other equipment, be sure to turn off the power and unplug all of the equipment from the wall outlet before
making any connections.
• The output sound of the DVD player has a wide dynamic range. Be sure to adjust the receiver’s volume to a moderate listening level. Otherwise,
the speakers may be damaged by a sudden high volume sound.
• Turn off the receiver before you connect or disconnect the DVD player’s power cord. If you leave the receiver power on, the speakers may be
damaged.
“DTS” and “DTS Digital Out” are trademarks of Digital Theater Systems, Inc.
12
T571 manual (GB)
19/11/01
2:14 pm
Page 13
Connections
CONNECTING TO A STEREO SYSTEM
To S-VIDEO OUT
S-video cable (Not supplied)
To VIDEO OUT
If the TV has an S-video input,
connect the DVD player with the
S-video cable
To AUDIO OUT (L/R)
Audio cable (supplied)
To S-video input
To audio inputs
Stereo system
Video cable (supplied)
To video input
TV or monitor with
audio/video inputs
GB
NOTES
• Refer to the owner’s manual of your stereo system for operating instructions.
• Before you connect the DVD player to other equipment, be sure to turn off the power and unplug all of the equipment from the wall outlet before
making any connections.
• If you place the DVD player near a tuner or radio, the radio broadcast sound might be distorted. In this case, move the DVD player away from
the tuner and radio.
• The output sound of the DVD player has a wide dynamic range. Be sure to adjust the receiver’s volume to a moderate listening level. Otherwise,
the speakers may be damaged by a sudden high volume sound.
• Turn off the receiver before you connect or disconnect the DVD player’s power cord. If you leave the receiver power on, the speakers may be
damaged.
WARNING
Do not set the Digital Audio Output of this DVD player to “Dolby Digital” unless you are connecting the DIGITAL OUT jack of this DVD player to an
AV decoder that has the Dolby Digital decoding function. High volume sound may damage your hearing as well as the speakers (Refer to “Selecting
Digital Audio Output” on page 21).
13
T571 manual (GB)
19/11/01
2:14 pm
Page 14
Connections
CONNECTING TO A TV
To SCART
VIDEO OUTPUT SELECT switch
21-pin SCART Cable (Not supplied)
To VIDEO OUT
To AUDIO OUT (L/R)
Audio/Video cable
(supplied)
To S-VIDEO OUT
For using SCART’s RGB signal, set the “VIDEO
OUTPUT” switch to “SCART/RGB” or for
using S-VIDEO OUT jack, set the “VIDEO
OUTPUT” switch to “S-VIDEO”.
If the TV has an S-video input,
connect the DVD player with the
S-video cable.
To 21-pin SCART socket
S-video cable (Not supplied)
To S-video input
To audio inputs
To video input
TV or monitor with
audio/video inputs
GB
NOTES
• Refer to the owner’s manual of your TV for TV operating instructions.
• Before you connect the DVD player to your TV, be sure to turn off the power and unplug both units from the wall outlet before making any
connections.
• Connect the DVD player to your TV directly. If you connect the DVD player to a VCR, the playback picture will be distorted because DVD video
discs are copy protected.
• In case of the TV set corresponding to RGB signal, the RGB signal is automatically selected in the TV (Only when the “VIDEO OUTPUT Switch” is
set to “SCART/RGB” on the Rear Panel).
WARNING
Do not set the Digital Audio Output of this DVD player to “Dolby Digital” unless you are connecting the DIGITAL OUT jack of this DVD player to an
AV decoder that has the Dolby Digital decoding function. High volume sound may damage your hearing as wellas the speakers (Refer to “Selecting
Digital Audio Output” on page 21).
14
T571 manual (GB)
19/11/01
2:14 pm
Page 15
Initial Settings
SELECTION OF INITIAL SETTINGS
Once the initial settings have been completed, the player can always be
operated under the same conditions (especially with DVD discs).
The settings will be retained in the memory until they are changed, even
if the power is switched off.
SELECTION OF INITIAL SETTINGS
1 Press SETUP in the stop or playback mode. The SETUP menu is
displayed.
POWER
Disc Audio
Original
Disc Subtitle
English
Disc Menu
French
Rating
German
Password
Spanish
TV Aspect
Italian
Menu Language
Chinese
Progressive Scan
Polish
Digital Audio Output
Hungarian
5.1 Speaker Setup
Russian
Others
Other — — — —
OPEN/CLOSE
SETUP
REPEAT
A-B
RANDOM
AUDIO
SUBTITLE
ANGLE
SOUND
1
TITLE
MENU
2,3
SELECT
ENTER
DISPLAY
2 Press
to select the desired item. The screen will show the
current setting for the selected item, and the alternate setting(s).
• Disc Audio (see page 16.)
• Disc Subtitle (see page 16.)
• Disc Menu (see page 16.)
• Rating (see page 17.)
• Password (see page 18.)
• TV Aspect (see page 19.)
• Menu Language (see page 20.)
• Digital Audio Output (see page 21)
• Others (see page 22.)
RETURN
ZOOM
MARKER — SEARCH
SCAN
PLAY
STOP
NEXT DISC PAUSE/STEP
SLOW
1
2
3
4
5
6
7
8
CLEAR
3 Press
and then
to select the desired setting and
press SELECT/ENTER. Some items require additional steps. (See the
respective page.)
SKIP
9
PROGRAM
0
GB
When the alternate setting is selected the screen returns to the Initial
Settings display.
TO EXIT SETUP MENU
Press SETUP, RETURN or PLAY.
15
T571 manual (GB)
19/11/01
2:15 pm
Page 16
Initial Settings
SELECTING DISC LANGUAGE
This is to select the audio soundtrack language, subtitle language and
the language used in title menus or DVD menus which will always be
used for every disc to be played back.
When you play back a DVD video disc, the DVD player automatically
displays the pre-selected subtitle language if it is included on the disc.
POWER
OPEN/CLOSE
SETUP
REPEAT
AUDIO
SUBTITLE
A-B
RANDOM
ANGLE
SOUND
TITLE
MENU
1,2
SELECT
ENTER
DISPLAY
RETURN
ZOOM
1 At the setup screen, press
press
to select “Disc Audio” and
Disc Audio
Original
Disc Subtitle
English
Disc Menu
French
Rating
German
Password
Spanish
TV Aspect
Italian
Menu Language
Chinese
Progressive Scan
Polish
Digital Audio Output
Hungarian
5.1 Speaker Setup
Russian
Others
Other — — — —
MARKER — SEARCH
SCAN
PLAY
SKIP
2 Press
to select the desired language and then press
SELECT/ENTER.
STOP
NEXT DISC PAUSE/STEP
1
4
7
2
5
8
CLEAR
3
6
9
PROGRAM
0
GB
SLOW
Disc Audio
Original
Disc Subtitle
English
Disc Menu
French
Rating
German
Password
Spanish
TV Aspect
Italian
Menu Language
Chinese
Progressive Scan
Polish
Digital Audio Output
Hungarian
5.1 Speaker Setup
Russian
Others
Other — — — —
Original : The original language of each disc will be selected.
English : The English will be Selected.
Other : Another language can be selected. You can input 4-number
language code. (Refer to the language codes on page 23.)
The “Disc Subtitle” and “Disc Menu” are selected by the same method.
NOTE
• If the language selected is not available on the disc, the original
language designated by each disc will be selected.
16
T571 manual (GB)
19/11/01
2:15 pm
Page 17
Initial Settings
SELECTING RATING LEVEL AND PASSWORD
This is to prohibit the playing of specified DVDs which are unsuitable for
children. Some DVD discs contain a restriction level which enables
parents to remove scenes or prevent playback of discs by children. DVD
players are equipped with a password designed to prevent children
from changing the level.
SELECTING RATING LEVEL (DVD ONLY)
1 At the SETUP screen, press
to select “Rating” and press
POWER
Disc Audio
8
Disc Subtitle
7
Disc Menu
6
Rating
5
Password
4
TV Aspect
3
Menu Language
2
Progressive Scan
1
Digital Audio Output
Unlock
OPEN/CLOSE
SETUP
REPEAT
A-B
RANDOM
AUDIO
SUBTITLE
ANGLE
SOUND
TITLE
MENU
1,2
SELECT
ENTER
5.1 Speaker Setup
DISPLAY
RETURN
Others
ZOOM
2 Press
to select the desired level and press
SELECT/ENTER.
MARKER — SEARCH
SCAN
PLAY
SKIP
STOP
Disc Audio
8 Blocked
Disc Subtitle
7 Blocked
Disc Menu
6
Rating
5
Password
4
TV Aspect
3
Menu Language
2
Progressive Scan
1
Digital Audio Output
Unlock
5.1 Speaker Setup
NEXT DISC PAUSE/STEP
SLOW
1
2
3
4
5
6
7
8
CLEAR
9
PROGRAM
0
Others
GB
You cannot play DVD video discs rated higher than the level you
selected unless you cancel the parental lock function.
For example, when you select level 7, discs rated higher than level 7 are
blocked and cannot be played.
The parent lock level is equivalent to the following USA movie ratings.
Level 7: NC-17
Level 6: R
Level 4: PG 13
Level 3: PG
Level 1: G
• Some titles do not match with the rating level described as above.
If you change the level and enter a password, playback of all DVDs with
ratings higher than your selection will be blocked, unless the correct
password is entered again. For example: if you change the level to “5”,
the DVD player will not play discs with ratings of “6”, “7” or “8” unless
the correct password is entered on the remote control.
17
T571 manual (GB)
19/11/01
2:15 pm
Page 18
Initial Settings
SELECTING RATING LEVEL AND PASSWORD
SETTING YOUR PASSWORD (DVD ONLY)
If you change the rating level to “7” or lower, you must enter a 4number “password” to prevent playback of discs with higher ratings.
1 At the SETUP screen, press
press
POWER
OPEN/CLOSE
to select “Password” and
Disc Audio
New
Disc Subtitle
————
Disc Menu
Rating
Password
SETUP
REPEAT
A-B
RANDOM
AUDIO
SUBTITLE
ANGLE
SOUND
TV Aspect
Menu Language
Progressive Scan
Digital Audio Output
TITLE
MENU
5.1 Speaker Setup
Others
1,2,3
2 Input a 4-number password and press SELECT/ENTER.
Example : 1234
Do not forget your password.
SELECT
ENTER
DISPLAY
RETURN
ZOOM
MARKER — SEARCH
SCAN
PLAY
SKIP
STOP
NEXT DISC PAUSE/STEP
SLOW
1
2
3
4
5
6
7
8
9
2,3
3 Input the 4-number password again and press SELECT/ENTER
to verify. Setting is complete.
• The rating is locked. Any disc whose rating is higher than the setting,
cannot be played back unless the correct password is entered.
TO CHANGE/CLEAR MEMORIZED PASSWORD
1 At the SETUP screen, press
to select “Password” and
press
2 Input your password and press SELECT/ENTER.
Disc Audio
Change
Disc Subtitle
Clear
Disc Menu
Rating
CLEAR
PROGRAM
0
Password
TV Aspect
Menu Language
Progressive Scan
Digital Audio Output
5.1 Speaker Setup
Others
GB
3 To change or clear your password, press
to select the
“Change” or “Clear” and press SELECT/ENTER. To change the
rating level/password, follow the steps on page 17-18 again.
TO CLEAR YOUR 4-NUMBER PASSWORD
If you forget your password, to clear the current password, follow the
procedure below.
1 Press SETUP. The SETUP menu is displayed
2 Enter 6-digit number “210499” by pressing number buttons.
The 4-number password is cleared. “P CLr” appears on the display.
3 Enter a new password. Refer to “Setting your password” section
on the right.
18
T571 manual (GB)
19/11/01
2:15 pm
Page 19
Initial Settings
SELECTING TV ASPECT
Select the appropriate screen type according to your TV set;
conventional size screen (4:3) or wide-screen (16:9).
1 At the SETUP screen, press
press
to select “TV Aspect” and
Disc Audio
4:3 Letterbox
Disc Subtitle
4:3 Panscan
Disc Menu
16:9 Wide
Rating
POWER
OPEN/CLOSE
Password
TV Aspect
SETUP
REPEAT
A-B
RANDOM
AUDIO
SUBTITLE
ANGLE
SOUND
Menu Language
Progressive Scan
Digital Audio Output
TITLE
5.1 Speaker Setup
MENU
Others
2 Press
to select the desired Aspect and press
SELECT/ENTER.
1,2
SELECT
ENTER
DISPLAY
Disc Audio
4:3 Letterbox
Disc Subtitle
4:3 Panscan
Disc Menu
16:9 Wide
RETURN
ZOOM
Rating
MARKER — SEARCH
SCAN
PLAY
SKIP
Password
STOP
TV Aspect
Menu Language
NEXT DISC PAUSE/STEP
SLOW
Progressive Scan
Digital Audio Output
5.1 Speaker Setup
1
2
3
4
5
6
7
8
Others
4:3 Letterbox : The video material not formatted in the Pan & Scan
style is played back in the letterbox style (black bands appear at top and
bottom of screen).
4:3 Panscan : Select when a conventional TV set is connected. The
video material formatted in the Pan & Scan style is played back in that
style (the left and right edges are cut off).
16:9 Wide : Select when a wide-screen TV set is connected. Played in
“FULL” size. (Setting the wide-screen TV to “FULL” mode is also
necessary.)
CLEAR
9
PROGRAM
0
GB
• Each screen shows an example when the video material for a widescreen is played. (This setting does not affect the video material for
conventional size.)
4:3 Letterbox
Cut Off
4:3 Panscan
16:9 Wide
19
T571 manual (GB)
19/11/01
2:15 pm
Page 20
Initial Settings
SELECTING MENU LANGUAGE
Selects language for SETUP menus and displays on the TV.
1 At the SETUP screen, press
and press
POWER
OPEN/CLOSE
to select “Menu Language”
Disc Audio
English
Disc Subtitle
Spanish
Disc Menu
French
Rating
German
Password
Italian
TV Aspect
SETUP
REPEAT
A-B
RANDOM
AUDIO
SUBTITLE
ANGLE
SOUND
Menu Language
Progressive Scan
Digital Audio Output
5.1 Speaker Setup
TITLE
MENU
Others
1,2
2 Press
to select the desired Language and press
SELECT/ENTER.
SELECT
ENTER
DISPLAY
RETURN
ZOOM
MARKER — SEARCH
SCAN
PLAY
SKIP
Disc Audio
English
Disc Subtitle
Spanish
Disc Menu
French
Rating
German
Password
Italian
TV Aspect
STOP
Menu Language
Progressive Scan
NEXT DISC PAUSE/STEP
SLOW
Digital Audio Output
5.1 Speaker Setup
1
2
3
4
5
6
7
8
CLEAR
0
GB
20
9
PROGRAM
Others
T571 manual (GB)
19/11/01
2:15 pm
Page 21
Initial Settings
SELECTING DIGITAL AUDIO OUTPUT
Each DVD disc has a variety of audio output options. Set the player’s
Digital Audio Output according to the type of audio system you use.
1 At the SETUP screen, press
Output and press
to select Digital Audio
POWER
Disc Audio
DOLBY
DIGITAL
Disc Subtitle
Stream/PCM
Disc Menu
PCM
OPEN/CLOSE
/PCM
Rating
SETUP
REPEAT
A-B
RANDOM
AUDIO
SUBTITLE
ANGLE
SOUND
Password
TV Aspect
TITLE
MENU
Menu Language
Progressive Scan
Digital Audio Output
1,2
SELECT
ENTER
5.1 Speaker Setup
Others
DISPLAY
2 Press
to select the desired output and press
SELECT/ENTER.
Disc Audio
DOLBY
DIGITAL
Disc Subtitle
Stream/PCM
Disc Menu
PCM
ZOOM
RETURN
MARKER — SEARCH
/PCM
OUTPUT
Stream/PCM
Dolby Digital/PCM
PCM only
PCM
PCM
PCM
DTS DVD
DTS bit Stream
DTS bit Stream
DTS bit Stream
Dolby Digital DVD
Dolby Digital bit
Stream
Dolby Digital bit
Stream
PCM
MPEG DVD
MPEG bit Stream
PCM
PCM
PCM
PCM
PCM
DTS bit Stream
DTS bit Stream
DTS bit Stream
Rating
Playback Disc
Password
96 kHz Linear PCM
DVD
TV Aspect
Menu Language
Progressive Scan
Digital Audio Output
5.1 Speaker Setup
Others
You can select Digital Audio Output or Sampling Frequency item by
pressing SELECT/ENTER.
DIGITAL AUDIO OUTPUT
DOLBY DIGITAL/PCM : Select “DOLBY DIGITAL/PCM” if an active
digital output is supplied to a Dolby Digital decoder, (or an amplifier or
other equipment with Dolby Digital decoder).
Stream/PCM : Select “Stream/PCM” if an active digital output is
supplied to an amplifier or other equipment with DTS decoder, Dolby
Digital decoder and MPEG decoder.
PCM : Select “PCM” if an active digital output is supplied to an
amplifier or other equipment with linear PCM only (or MD recorder or
DAT deck).
SAMPLING FREQUENCY
To change the Sample Frequency setting, first select the desired digital
audio output type as indicated above. If your A/V receiver or surround
processor is NOT capable of handling 96kHz signals, select the 48kHz
option. When this choice is made, this unit will automatically convert any
96kHz signals to a 48kHz output so that your system is capable of decoding
them. If your A/V receiver or surround processor is capable of handling
96kHz signals, select the 96kHz option. When this choice is made, this unit
will pass each type of signal through without any further processing.
Audio CD
DTS Audio CD
GB
NOTES
• If an active digital audio output signal is supplied to a receiver or
other equipment without a corresponding digital decoding
capability, a very loud noise may be produced which could
permanently damage the speakers.
• The DTS DVD disc sound is played back only when the DVD player
is connected to a receiver with a DTS decoder.
21
T571 manual (GB)
19/11/01
2:15 pm
Page 22
Initial Settings
OTHERS
The DRC settings can be changed.
POWER
OPEN/CLOSE
SETUP
REPEAT
A-B
RANDOM
AUDIO
SUBTITLE
ANGLE
SOUND
TITLE
ABOUT DRC (DYNAMIC RANGE COMPRESSION)
With the DVD format you have the opportunity to hear a program’s soundtrack in the most accurate and
realistic presentation possible, thanks to the use of digital audio technology. However, in certain instances
you may wish to slightly compress the dynamic range of the audio output (the difference between the
loudest sounds and the quietest ones) so that you may listen to a movie at a lower volume without losing
dialogue intelligibility.
MENU
1 At the SETUP screen, press
SELECT
ENTER
1,2
to select “Others” and press
Disc Audio
DRC On
Disc Subtitle
Pseudo PAL On
Disc Menu
DISPLAY
RETURN
Rating
Password
ZOOM
SCAN
TV Aspect
MARKER — SEARCH
PLAY
SKIP
Menu Language
Progressive Scan
Digital Audio Output
5.1 Speaker Setup
Others
2 Press
to select the desired items and press SELECT/ENTER. The setting of the selected item
are changed between On and Off.
DRC (DYNAMIC RANGE COMPRESSION) ON/OFF
On : Select this option to turn on the Dynamic Range Compression circuitry so that the dialogue remains
clear even at low volume levels.
Off : Select this option to turn off the Dynamic Range Compression and have the soundtrack presented
exactly as it was created.
NOTES
• The DRC function works only during playback of Dolby Digital recorded discs.
• The level of Dynamic Range Compression may differ depending on the DVD disc.
GB
22
T571 manual (GB)
19/11/01
2:15 pm
Page 23
Initial Settings
TABLE OF LANGUAGES AND THEIR CODES
Enter the appropriate code number for the initial settings “Audio”, “Subtitle” and/or “Menu” (see page 16)
Code
6565
6566
6570
6577
6582
6583
6588
6590
6665
6669
6671
6672
6678
6679
6682
6765
6779
6783
6789
6865
6869
6890
6976
6978
6979
6983
6984
6985
7065
7073
7074
Language
Afar
Abkhazian
Afrikaans
Ameharic
Arabic
Assamese
Aymara
Azerbaijani
Bashkir
Byelorussian
Bulgarian
Bihari
Bengali; Bangla
Tibetan
Breton
Catalan
Corsican
Czech
Welsh
Danish
German
Bhutani
Greek
English
Esperanto
Spanish
Estonian
Basque
Persian
Finnish
Fiji
Code
7079
7082
7089
7165
7168
7176
7178
7185
7265
7273
7282
7285
7289
7365
7378
7383
7384
7387
7465
7473
7487
7565
7575
7576
7577
7578
7579
7583
7585
7589
7665
Language
Faroese
French
Frisian
Irish
Scots Gaelic
Galician
Guarani
Gujarati
Hausa
Hindi
Croatian
Hungarian
Armenian
Interlingua
Indonesian
Icelandic
Italian
Hebrew
Japanese
Yiddish
Javanese
Georgian
Kazakh
Greenlandic
Cambodian
Kannada
Korean
Kashmiri
Kurdish
Kirghiz
Latin
Code
7678
7679
7684
7686
7771
7773
7775
7776
7778
7779
7782
7783
7784
7789
7865
7869
7876
7879
7982
8065
8076
8083
8084
8185
8277
8279
8285
8365
8368
8372
8373
Language
Lingala
Laothian
Lithuanian
Latvian, Lettish
Malagasy
Maori
Macedonian
Malayalam
Mongolian
Moldavian
Marathi
Malay
Maltese
Burmese
Nauru
Nepali
Dutch
Norwegian
Oriya
Panjabi
Polish
Pashto, Pushto
Portuguese
Quechua
Rhaeto-Romance
Rumanian
Russian
Sanskrit
Sindhi
Serbo-Croatian
Singhalese
Code
8375
8376
8377
8378
8379
8381
8382
8385
8386
8387
8465
8469
8471
8472
8473
8475
8476
8479
8482
8484
8487
8575
8582
8590
8673
8679
8779
8872
8979
9072
9085
Language
Slovak
Slovenian
Samoan
Shona
Somali
Albanian
Serbian
Sudanese
Swedish
Swahili
Tamil
Telugu
Tajik
Thai
Tigrinya
Turkmen
Tagalog
Tonga
Turkish
Tatar
Twi
Ukrainian
Urdu
Uzbek
Vietnamese
Volapük
Wolof
Xhosa
Yoruba
Chinese
Zulu
GB
23
T571 manual (GB)
19/11/01
2:15 pm
Page 24
Basic Operations
BASIC PLAYBACK
This section shows you the basics on how to play back a DVD video disc.
PREPARATIONS
• When you want to play back DVD video discs, turn on the TV and
select the video input source connected to the DVD player.
• When you want to enjoy the sound of DVD video discs or audio CDs
from the audio system, turn on the audio system and select the
input source connected to the DVD player.
• For connection details, see pages 10 through 14.
• Set the playback picture size according to the aspect ratio of the
connected TV via the SETUP menu (TV Aspect).
• If you do not have the necessary equipment to enjoy Dolby Digital
sound, set the Digital Audio Output (via the SETUP menu) to
“PCM”.
1 Press POWER. The DVD player turns on and the power indicator
lights.
3
2 Press OPEN/CLOSE. The disc tray opens.
• You can open the disc tray by pressing this button even if the
DVD player is in standby mode.
POWER
OPEN/CLOSE
1
2,4
SETUP
REPEAT
A-B
RANDOM
AUDIO
SUBTITLE
ANGLE
SOUND
TITLE
MENU
SELECT
ENTER
DISPLAY
RETURN
ZOOM
MARKER — SEARCH
SCAN
PLAY
SKIP
3 Place a disc on the disc tray with the playback side down.
• There are two different disc sizes. Place the disc in the correct
guide on the disc tray. If the disc is out of the guide, it may
damage the disc and cause the DVD player to malfunction.
• Do not place anything except 3” discs or 5” discs on the disc tray.
• Discs can be loaded one at a time by pressing NEXT DISC to
rotate the carousel.
4 Press OPEN/CLOSE or PLAY to close the loading drawer. The
disc on the tray 1 is ready to be played back. Playback may begin
automatically depending on the disc. If no disc is loaded on disc tray
1, select another disc by following step 5.
• Do not close the loading drawer by hand.
• If the disc is placed in upside down (and it is a single-sided disc),
“NO DISC” or “DISC ERROR” appears on the TV screen.
4
GB
STOP
MP3
NEXT DISC PAUSE/STEP
HD CD DVD
1
2
SLOW
3
TITLE
CHP/TRK
PROG.
RANDOM ALL A
B
5
4
Operating status indicator
1
2
3
4
5
6
7
8
CLEAR
0
24
9
PROGRAM
• If you insert an audio CD, the CD indicator lights up on the
display. The title number does not appear.
• After playing back all of the chapters in the title, the DVD player
automatically stops and returns to the menu screen.
T571 manual (GB)
19/11/01
2:15 pm
Page 25
Basic Operations
BASIC PLAYBACK
5 If you want to select another disc, press NEXT DISC once or
more. Also you can select a disc in the DVD player directly by using
the remote control, press NEXT DISC and then press a number
button (1-5) on the remote control within one second.
POWER
6 Press PLAY to begin playback. Playback begins. You can skip this
step if the disc is already playing automatically.
The menu screen appears on the TV screen.
In the case of interactive DVDs with playback, a menu screen
appears on the TV screen. Perform the following steps:
3
4
SETUP
REPEAT
A-B
RANDOM
AUDIO
SUBTITLE
ANGLE
SOUND
TITLE
7 Press
and press SELECT/ENTER, or press the
numeric button(s), to select the desired item. Playback of the
selected item begins.
1
2
OPEN/CLOSE
MENU
DISPLAY
RETURN
ZOOM
MARKER — SEARCH
SCAN
OR
7
SELECT
ENTER
PLAY
SKIP
6
STOP
NEXT DISC PAUSE/STEP
SLOW
5
Example of interactive DVD On-Screen Menu
• For further information, refer to the disc jacket of the disc you are
playing.
After operation
When the unit is not in use, remove the disc and press POWER to turn
off the DVD player.
1
2
3
4
5
6
7
8
CLEAR
9
PROGRAM
0
NOTES
• Do not move the DVD player during playback. Doing so may
damage the disc and the DVD player.
• Use the OPEN/CLOSE button on the remote control or DVD player to
open and close the disc tray. Do not push the disc tray while it is
moving. Doing so may cause the DVD player to malfunction.
• Do not push up the disc tray or put any objects other than discs on
the disc tray. Doing so may cause the DVD video player to
malfunction.
• Keep your fingers well clear of the disc tray as it is closing. Be
especially careful with children’s fingers around the closing disc tray
as there is a risk of personal injury.
• When “
“ appears on the TV screen while a button is pressed,
it means that this function is not available on the disc you are
playing.
• Depending on the DVD disc, some operations may be different or
restricted. Refer to the jacket or case of the disc you are playing.
GB
25
T571 manual (GB)
19/11/01
2:15 pm
Page 26
Basic Operations
BASIC PLAYBACK
STOPPING PLAY
Press STOP during playback
POWER
OPEN/CLOSE
SETUP
REPEAT
A-B
RANDOM
AUDIO
SUBTITLE
ANGLE
SOUND
TITLE
RESUME PLAY
• When play is stopped, the unit records the point where STOP was
pressed (RESUME function). Press PLAY and play will resume from
this point.
MENU
NOTES
• This operation works only with discs for which the elapsed playing
time appears in the DVD display window during stop.
• Resume function will be cleared when the STOP is pressed in the
STOP mode.
• The Resume function may not be available on some DVD discs.
SELECT
ENTER
DISPLAY
RETURN
ZOOM
MARKER — SEARCH
SCAN
PLAY
SKIP
PLAY
STOP
STOP
NEXT DISC PAUSE/STEP
SLOW
1
2
3
4
5
6
7
8
CLEAR
LAST SCENE MEMORY
This player memorizes last scene for the last disc you have watched.
Settings remain in memory even if you remove the disc from the player
or switch off the player. If you load a disc that has its settings
memorized, Latest Stop Position is automatically recalled.
9
PROGRAM
0
NOTES
• Settings are stored in memory for use any time.
• Switching of the audio mode, etc., is automatic on some discs.
• This player does not memorize if you switch off the player when a
DVD or title menu appears on the TV screen.
• The last scene memory function will be cleared when the STOP is
pressed in the STOP mode.
SCREEN SAVER
The screen saver is useful to prevent your display from becoming
damaged. The screen saver picture appears when you leave the DVD
player in stop mode for about 5 minutes.
Automatic power off function
After the Screen Saver has been engaged for about 5 minutes, the DVD
player will automatically turn itself off.
GB
Screen Saver
26
T571 manual (GB)
19/11/01
2:15 pm
Page 27
Basic Operations
BASIC PLAYBACK
SKIPPING DISCS
Press NEXT DISC during playback or in the stop mode.
• Each time the button is pressed, the next disc tray is selected.
DVD
1
2
3
3
CHP/TRK
4
NEXT DISC
1
2
TITLE
5
5
4
NOTES
• When the NEXT DISC is pressed during playback or in the stop
mode, the disc tray advances to the next disc.
• If there is no disc on the selected disc tray, the disc tray of the next
number will be selected.
POWER
OPEN/CLOSE
OPEN/CLOSE
EXCHANGING THE DISC AND STARTING PLAYBACK
1 Press OPEN/CLOSE during playback or in the stop mode. Play
is stopped (if pressed during playback), the loading drawer opens
and the disc tray which was in the play position comes to the center
position.
SETUP
REPEAT
A-B
RANDOM
AUDIO
SUBTITLE
ANGLE
SOUND
TITLE
MENU
2 Exchange the disc in the center position.
SELECT
ENTER
DISPLAY
RETURN
Center position
ZOOM
MARKER — SEARCH
SCAN
3 Press OPEN/CLOSE or PLAY again. The loading drawer closes,
the disc tray returns to the play position and playback begins from
the new disc.
PLAY
SKIP
PLAY
STOP
NEXT DISC PAUSE/STEP
SLOW
NEXT DISC
1
2
3
4
5
6
7
8
CLEAR
GB
9
PROGRAM
0
27
T571 manual (GB)
19/11/01
2:15 pm
Page 28
Basic Operations
SPECIAL PLAYBACK
POWER
HOW TO SET THE VIDEO MODE
• With certain DVD disc, the playback picture is flickering or Dot Crawl
is shown on straight lines. That means Vertical interpolation or Deinterlace is not perfectly matched with DVD disc. In that case, the
picture quality can be improved with changing video mode.
• To change the video mode, press and hold DISPLAY button on the
remote control about 3 seconds during playback of DVD disc.
• Changed video mode number is displayed on the TV screen. Check
whether video quality is improved. You can repeat above procedure
until desired picture quality appears.
• Procedure of video mode is changed;
MODE2 ➜ MODE3 ➜ MODE4 ➜ MODE5 ➜ MODE1.
• If you turn off the the power, the video mode will be back to initial
state (Auto).
OPEN/CLOSE
SETUP
REPEAT
A-B
RANDOM
AUDIO
SUBTITLE
ANGLE
SOUND
TITLE
MENU
STILL PICTURE (PAUSE)
Press PAUSE/STEP during playback.
DVD The player will be placed in the still picture mode.
CD The player will be placed in the pause mode.
SELECT
ENTER
DISPLAY
RETURN
ZOOM
MARKER — SEARCH
SCAN
PLAY
SKIP
PLAY
STOP
SKIP
STOP
NEXT DISC PAUSE/STEP
SLOW
PAUSE/STEP
1
2
3
4
5
6
7
8
CLEAR
GB
9
PROGRAM
0
FRAME ADVANCE (DVD ONLY)
Press PAUSE/STEP during still playback.
(Each time you press PAUSE/STEP, the picture advances one frame)
To resume normal playback, press PLAY.
SKIPPING CHAPTERS AND TRACKS FORWARD OR BACK
Skipping forward
Press SKIP
during playback.
A chapter (DVD) or a track (CD) is skipped each time the button is
pressed.
Skipping back
Press SKIP
during playback.
When the button is pressed once midway through a chapter/track, the
player returns to the start of that chapter/track. When it is pressed
again, a chapter/track is skipped each time the button is pressed.
HDCD PLAYBACK
HDCD is a process that increases the fidelity of both specially encoded
HDCD discs and standard CD audio discs. When an HDCD-encoded disc
is playing, the special decoder is automatically activated and the HDCD
Indicator lights. No user intervention is required.
To enjoy the benefits of HDCD, your DVD Player must be connected to
your A/V receiver via the Analog Audio Outputs. However, if your A/V
receiver or surround processor is equipped with built-in HDCD
decoding, you may also use a Coaxial or Optical digital audio
connection so that the HDCD processing is done there.
28
T571 manual (GB)
19/11/01
2:15 pm
Page 29
Basic Operations
SPECIAL PLAYBACK
You can play back discs at various speeds.
To scan at fast forward or fast reverse playback
Press the SCAN
or
button during playback.
[TV screen]
X2
X2
POWER
• The speed of advance (reverse) is relatively slow at first. When the
button is pressed again, the speed becomes faster. (Each time the
button is pressed, the speed increases up to 4 steps (DVD) or 3 steps
(CD).)
• The speed will be retained even after the button is released.
OPEN/CLOSE
SETUP
REPEAT
A-B
RANDOM
AUDIO
SUBTITLE
ANGLE
SOUND
TITLE
MENU
To return to normal playback, press PLAY.
SELECT
ENTER
NOTE
• The DVD player does not play back sound during the high speed
reverse and forward playback of DVD video discs. However, the DVD
player plays back sound during fast forward or fast reverse playback
of audio CDs.
DISPLAY
RETURN
ZOOM
MARKER — SEARCH
SCAN
PLAY
SKIP
PLAY
SCAN
PLAYING IN SLOW-MOTION (DVD ONLY)
Press SLOW
or
during playback.
The playback speed becomes 1/16 of the normal speed.
NEXT DISC PAUSE/STEP
SLOW
SLOW
[TV screen]
1/16
STOP
1/16
1
2
3
4
5
6
7
8
CLEAR
• The speed of slow-motion is slow at first. When the button is
pressed again, the speed becomes faster. (Each time the button is
pressed, the speed increase up to 4 steps.
• The speed will be retained even after the button is released.
9
PROGRAM
0
GB
To return to normal playback, press PLAY.
NOTES
• The sound is muted during slow-motion playback.
• Subtitles do not appear on the screen during slow motion playback.
• The SLOW buttons do not work with Audio CDs.
29
T571 manual (GB)
19/11/01
2:15 pm
Page 30
Operation Using Menu Icons (Graphical User Interface)
GENERAL INFORMATION ABOUT GUI MENU ICONS
This unit features GUI Menu Icons showing disc information (title/chapter/track number, elapsed playing
time, audio/subtitle language, angle, and sound) and player information (repeat play, play mode, marker,
etc.). Some icons only show the indicated information. Other icons allow the settings to be changed.
COMMON PROCEDURES
1 Press DISPLAY during playback. Title function can be accessed from the stop mode.
POWER
OPEN/CLOSE
SETUP
REPEAT
A-B
RANDOM
AUDIO
SUBTITLE
ANGLE
SOUND
TITLE
2,3
MENU
SELECT
ENTER
DISPLAY
2 Press
to select the desired item. The current selected item is indicated by a yellow frame on
its GUI menu icons.
3 Press
to select the desired setting. When numbers are displayed (e.g. title number), the
numeric buttons can also be used for setting instead of
. For some functions, the setting will be
registered immediately; for others, SELECT/ENTER must be pressed.
To clear the GUI Menu Icons, press DISPLAY again.
RETURN
1
ZOOM
SCAN
MARKER — SEARCH
PLAY
SKIP
EXAMPLES OF GUI MENU ICONS
(The screens may differ depending on the disc contents.)
(DVD GUI)
(CD GUI)
(DVD or CD GUI)
1
1
1
16:57
1/5
CHAPT
0:16:57
GB
1 ENG
D
6 CH
OFF
1
NORM.
30
STER.
NORM.
A
B
OFF
T571 manual (GB)
19/11/01
2:15 pm
Page 31
Operation Using Menu Icons (Graphical User Interface)
DETAILED DESCRIPTION OF EACH GUI MENU ICON
You can view information about a disc and its operational status on the TV screen.
Press DISPLAY during playback.
[TV SCREEN] DVD GUI
(Press
FUNCTION
to select desired item)
SELECTION METHOD
1
To show the current title nmber, and to jump to the desired title number.
or Numeric
SELECT/ENTER
1
To show the current chapter number and to jump to the desired chapter
number.
or Numeric
SELECT/ENTER SKIP
0:16:57
To show the elapsed time and directly select scenes by the desired time.
Numeric
SELECT/ENTER
1 ENG
D
6 CH
To show the current audio soundtrack language, encoding method, channel
number and to change the setting.
OFF
1
NORM.
Press DISPLAY during playback.
[TV screen] CD GUI
1
16:57
To show the current subtitles language and to change the setting.
To show the current angle number and to change the angle.
AUDIO
SUBTITLE
ANGLE
To show the current sound (NORMAL or 3D SURROUND) and to change the
setting.
(Press
FUNCTION
to select desired item)
To show the current track number and to jump to the desired track number.
To show the elapsed time (Display only)
SELECTION METHOD
or Numeric
SELECT/ENTER SKIP
-
STER.
To show the current audio (STEREO, LEFT, RIGHT) and to select to the desired
audio channel.
AUDIO
NORM.
To show the current sound (NORMAL or 3D SURROUND) and to change the
setting.
SOUND
GB
NOTE
• Some DVD discs may not provide all of the above GUI menu icons.
31
T571 manual (GB)
19/11/01
2:15 pm
Page 32
Advanced Operation
USING A TITLE MENU
TITLE
Some movie discs may contain two or more titles. If the disc has a title menu recorded on it, the TITLE
button can be used to select the movie title. (The details of operation differ depending on the disc used.)
Selecting a title may not be possible on certain DVD discs.
MENU
1
2
SELECT
ENTER
1 Press TITLE. A list of the titles on the disc is displayed.
DISPLAY
RETURN
ZOOM
MARKER — SEARCH
SCAN
SKIP
PLAY
2
STOP
NEXT DISC PAUSE/STEP
Press TITLE again to resume play from the scene when TITLE was first pressed. Resume play may not
be possible on certain discs.
SLOW
2 Press
desired title.
and press SELECT/ENTER or PLAY, or press the numeric button(s), to select
The selected title now starts playing.
USING A DVD MENU
TITLE
MENU
1
Some DVDs have unique menu structures called DVD menus. For example, DVDs programmed with
complex contents provide guide menus, and those recorded with various languages provide menus for
audio and subtitle language. Although the DVD menu’s contents and operation differ from disc to disc,
the following explains the basic operation when this feature is used.
2
SELECT
ENTER
1 Press MENU during play. The DVD menu available on the disc is now displayed.
GB
DISPLAY
RETURN
ZOOM
1
2
MARKER — SEARCH
SCAN
PLAY
SKIP
3
4
STOP
NEXT DISC PAUSE/STEP
SLOW
1
2
3
4
5
6
7
8
CLEAR
Pressing MENU again resumes play from the scene when MENU was first pressed. Resume play may not
be possible on certain discs.
2 Press
item.
and press SELECT/ENTER, or press the numeric button(s), to select desired
9
PROGRAM
0
The selected item is now executed.
32
T571 manual (GB)
19/11/01
2:15 pm
Page 33
Advanced Operation
CHANGING SUBTITLE LANGUAGE
It is possible to change the subtitle language to a different language from the one selected at the initial
settings. (See page 16 for further info.) This operation works only with discs on which multiple subtitle
languages are recorded.
NOTES
• In some cases, the subtitle language is not changed to the selected one immediately.
• When a disc supporting the closed caption is played, the subtitle and the closed caption may overlap
each other on the TV screen. In this case, turn the subtitle off.
• When the desired language is not selected even after pressing the button several times, it means that
the language is not available on the disc.
• When the power is turned on or the disc is removed, subtitles appears in the language selected at the
initial settings. If this language is not recorded on the disc, the disc’s priority language appears.
1 Press SUBTITLE during playback. When no subtitles are
recorded, “OFF” will be displayed instead of the language
number.
OFF
2 Press SUBTITLE repeatedly until the desired language is
selected. Number of the subtitle language being played back
is shown
1 ENG
POWER
OPEN/CLOSE
SETUP
REPEAT
A-B
RANDOM
AUDIO
SUBTITLE
ANGLE
SOUND
1,2
TITLE
MENU
SELECT
To eliminate the On Screen Subtitles.
Press SUBTITLE repeatedly to select OFF at step 2.
CHANGING AUDIO SOUNDTRACK LANGUAGE
It is possible to change the audio soundtrack language to a different language from the one selected at
the initial settings in case of DVD disc. (See page 16 for further info.) This operation works only with discs
on which multiple audio soundtrack languages are recorded. And it is possible to change the audio
channel in case of audio CD.
NOTES
• When the desired language is not selected even after pressing the button several times, it means that
the language is not available on the disc.
• When the power is turned on or the disc is removed, the language heard is the one selected at the
initial settings. If this language is not recorded on the disc, only the available language on the disc will
be heard.
• Some discs may not respond to Audio feature.
DVD
1 Press AUDIO during play. Number of the audio soundtrack
language being played back.
2 Press AUDIO repeatedly until the desired language (or
encoding method, channel number) is selected.
CD
1 Press AUDIO during play.
2 Press AUDIO repeatedly until the desired sound is
selected.
1 ENG
D
6 CH
POWER
GB
OPEN/CLOSE
SETUP
REPEAT
A-B
RANDOM
AUDIO
SUBTITLE
ANGLE
SOUND
1,2
TITLE
MENU
SELECT
2 FRE
D
6 CH
STER.
LEFT
33
T571 manual (GB)
19/11/01
2:15 pm
Page 34
Advanced Operation
VIEWING FROM ANOTHER ANGLE
Some DVDs may contain scenes which have been shot simultaneously from a number of different angles.
For these discs, the same scene can be viewed from each of these different angles using the ANGLE
button. (The recorded angles differ depending on the disc used.)
1
POWER
2
3
OPEN/CLOSE
SETUP
REPEAT
A-B
RANDOM
AUDIO
SUBTITLE
ANGLE
SOUND
1,2
TITLE
MENU
SELECT
1 Press ANGLE during playback. Number of angle being
played back.
1
2 Press ANGLE repeatedly until the desired angle is
selected.
2
FOR YOUR REFERENCE
• The ANGLE indicator will blink in the DVD display window at scenes recorded at different angles to
indicate that angle switching is possible.
• The angle number can be programmed beforehand; the angle will be switched to the selected
number when the ANGLE indicator blinks.
NOTE
• This function only works for discs having scenes recorded at different angles.
PRODUCING A 3D SURROUND EFFECT
This unit can produce a 3D Surround effect, using Spatializer technology, which simulates multi-channel
audio playback from two conventional stereo speakers instead of the five or more speakers normally
required to listen to multi-channel audio from a home theater. This feature works with DVD discs encoded
with Dolby Pro Logic and Dolby Digital (audio tracks.
POWER
GB
OPEN/CLOSE
SETUP
REPEAT
A-B
RANDOM
AUDIO
SUBTITLE
ANGLE
SOUND
1 Press SOUND during playback. Each time this button is
pressed, the TV screen displays changes.
NORM.
2 Press SOUND repeatedly until the desired sound is
selected.
3D SUR
1,2
TITLE
MENU
SELECT
34
NOTES
• This 3D Surround effect may not be available on some DVD discs, such as those recorded with a mono
audio sound-track.
• Turn off the TV surround sound and other surround effects when using this 3D surround effect.
• For best 3D Surround effect using only two speakers it is recommended that the two speakers be
positioned approximately 2m to 2.5m apart, and the listening position should be 2m to 2.5m away
from the speakers.
T571 manual (GB)
19/11/01
2:15 pm
Page 35
Advanced Operation
REPEAT PLAY
REPEATING VIEWING (LISTENING)
Press REPEAT during playback
Each time this button is pressed, the TV screen changes as shown below and the disc will repeat a chapter
or title (DVD) or a track (CD).
DVD
Repeat of chapter being played
CHAPT
Repeat of title being played
TITLE
Cancel repeat mode (normal play)
CD
Repeat of track being played
OFF
TRACK
Repeat of entire current disc contents
DISC
ALL
Repeat of entire all discs contents
OFF
Cancels repeat mode (normal play)
To enjoy program repeat play (CD)
If REPEAT is pressed during program play, repeat play is operated as below.
Repeat of the current programmed track
Repeat of all programs
Cancel repeat mode (Program play)
TRACK
ALL
OFF
To return to normal play
Press REPEAT several times until OFF is displayed.
REPEATING SECTIONS BETWEEN TWO SPECIFIC POINTS (A-B REPEAT)
1 Press A-B during play at the point where repeat play is to start (A) You can select OFF at this
step by pressing CLEAR.
2 Press A-B during play at the point where repeat play is to be concluded (B) Repeat play of the
selection between points A and B starts.
To return to normal play
Press A-B once OFF is displayed.
A
*
A
B
GB
OFF
NOTES
• Repeat play works only with discs for which the elapsed playing time appears in the DVD display
window during playback.
• Repeat play may not work correctly with some DVDs.
• A-B repeat play works only within a title (DVD) or a track (CD).
• Some subtitles recorded around point A or B may fail to appear (DVD).
35
T571 manual (GB)
19/11/01
2:15 pm
Page 36
Advanced Operation
STORING MARKERS IN MEMORY TO BE VIEWED (LISTENED TO) AGAIN
Storing a MARKER in the DVD memory is similar to marking your page in a book. It allows you to quickly
return to any point on the disc.
STORING A MARKER IN THE MEMORY
1 Press MARKER during play at the starting point to be viewed (listened to) again.
POWER
OPEN/CLOSE
1/9
SETUP
REPEAT
A-B
RANDOM
AUDIO
SUBTITLE
ANGLE
SOUND
TITLE
Indicates “1/9” is stored in the memory.
Up to 9 marks can be stored in the memory.
MENU
4
SELECT
ENTER
3
DISPLAY
RECALLING/CLEARING A MARKER
2 Press SEARCH during playback. The MARKER SEARCH menu will appear on the TV screen.
MARKER SEARCH
1 2 3 4 5 6 7 8 9
RETURN
ZOOM
MARKER — SEARCH
2
1
SCAN
PLAY
SKIP
3 Press
to select the marker to be recalled/cleared.
STOP
NEXT DISC PAUSE/STEP
1
2
3
4
5
6
7
8
CLEAR
4
GB
36
SLOW
9
PROGRAM
0
4 Press SELECT/ENTER to recall a marker. Or press CLEAR to clear a marker. Play resumes from the
point corresponding to the selected marker, or the selected marker is cleared.
NOTES
• These operations work only with discs for which the elapsed playing time appears in the DVD display
window during playback or stop.
• Some subtitles recorded around the marker may fail to appear (DVD).
• All the markers are cleared when the power is turned off or the disc is removed.
• The marker is not stored when the DVD or title menu is displayed on the TV screen.
T571 manual (GB)
19/11/01
2:15 pm
Page 37
Advanced Operation
ZOOM FEATURE
The Zoom function allows you to enlarge the video image and to move through the enlarged image.
1 Press ZOOM during playback or still playback to activate the Zoom function. If you further
press ZOOM repeatedly, the magnification level increases (6 steps).
2 Press
buttons to move through the zoomed picture.
TITLE
MENU
SELECT
ENTER
2
3 Press CLEAR to resume normal playback.
DISPLAY
RETURN
1
NOTES
• Some discs may not respond to the Zoom feature.
• Zoom does not work on subtitles or menus included on DVD video discs.
ZOOM
MARKER — SEARCH
SCAN
SKIP
PLAY
STOP
NEXT DISC PAUSE/STEP
SLOW
1
2
3
4
5
6
7
8
9
CLEAR
PROGRAM
0
3
RANDOM PLAY
NOTE
This function only works with audio CD discs. Random does not work with DVD movies.
You can playback titles or tracks in random order. (Random playback)
RANDOM PLAY (CD ONLY)
1 Press RANDOM repeatedly until desired random mode is selected during playback or stop
mode. The unit automatically begins Random Playback and RANDOM (1-3) appears on the TV screen.
• RANDOM1: Plays all the tracks on a single disc in random order and then stops.
• RANDOM2: Plays all the tracks on current disc in random order and then plays all the tracks on each
succeeding disc in random order and then stops.
• RANDOM3: Plays 2 tracks randomly from a disc and then plays 2 tracks randomly from a different disc
until all tracks on all discs have been played.
POWER
GB
OPEN/CLOSE
SETUP
REPEAT
A-B
RANDOM
AUDIO
SUBTITLE
ANGLE
SOUND
1,2
TITLE
MENU
SELECT
ENTER
2 To return to normal playback, press RANDOM repeatedly until NORMAL appears on the TV
screen. The RANDOM indicator in the DVD display window disappears.
DISPLAY
ZOOM
NOTES
• Random playback may not be possible on certain discs.
• If you press the SKIP
or
button during random playback, the DVD player goes to another
track randomly and starts playback.
• Random playback may not be possible on MP3 encoded discs.
SCAN
RETURN
MARKER — SEARCH
PLAY
SKIP
STOP
37
T571 manual (GB)
19/11/01
2:15 pm
Page 38
Advanced Operation
PROGRAM PLAY
The player plays the tracks on the disc in the order you specify.
NOTE
Program play function is possible only with audio CDs. It does not work with DVD movie discs.
1 Press PROGRAM in the stop mode. The program playback screen appears on the TV screen.
Program
POWER
Step
1
Total Time 00:00
OPEN/CLOSE
SETUP
REPEAT
A-B
RANDOM
AUDIO
SUBTITLE
ANGLE
SOUND
TITLE
MENU
Clear All
• To exit the screen, press PROGRAM or RETURN.
SELECT
ENTER
2,3
DISPLAY
2 Enter the disc number using the numerical keys (1-5) and then press SELECT/ENTER.
RETURN
ZOOM
3 Enter the track number using the numerical keys (0-9) and then press SELECT/ENTER. The
next area is selected.
MARKER — SEARCH
SCAN
PLAY
SKIP
5
STOP
NEXT DISC PAUSE/STEP
2,3
4 Repeat steps 2 to 3. Up to 20 tracks can be programmed.
SLOW
1
2
3
4
5
6
7
8
9
CLEAR
5 Press PLAY to exit the screen. The selected tracks are stored in the player memory and playback
begins with the first programmed sequence.
After playback of all tracks programmed
Play is stopped.
PROGRAM
0
1
CLEARING THE PROGRAM
To clear the programmed tracks one by one
Press
to select the unwanted number and then press CLEAR.
To clear all the programmed tracks
Press
to select “Clear All” and then press SELECT/ENTER. Press PROGRAM or RETURN to exit
the screen. (The programs are also cleared when the power is turned off or the disc is removed.)
GB
38
T571 manual (GB)
19/11/01
2:15 pm
Page 39
Advanced Operation
PLAYBACK WITH MP3
TO PLAY AN MP3 FILE
MP3
Program
TITLE
MENU
MP3-1
1 Load an MP3 disc. The MP3 menu is displayed.
TRACK 1.mp3
TRACK 2.mp3
TRACK 3.mp3
TRACK 4.mp3
SELECT
ENTER
2
TRACK 5.mp3
TRACK 6.mp3
TRACK 7.mp3
TRACK 8.mp3
TRACK 9.mp3
2 Press
button to select the desired MP3 file and then
press PLAY to start playback of the file.
MP3
DISPLAY
Clear All
RETURN
ZOOM
Program
MARKER — SEARCH
MP3-1
SCAN
TRACK 1.mp3
PLAY
SKIP
2
TRACK 2.mp3
STOP
TRACK 3.mp3
TRACK 4.mp3
TRACK 5.mp3
NEXT DISC PAUSE/STEP
TRACK 6.mp3
SLOW
TRACK 7.mp3
TRACK 8.mp3
TRACK 9.mp3
Clear All
FOR YOUR REFERENCE
• Press SKIP
or SKIP
to play the next file or previous file during playback.
• Press DISPLAY to move to the next page.
• Press PAUSE/STEP to enter the pause mode, press PLAY or PAUSE/STEP again to return to normal
playback.
• Press STOP to stop the playback.
1
2
3
4
5
6
TO PLAY AN MP3 FILE REPEATEDLY
• If you press REPEAT once during play, the current MP3 file will play repeatedly.
• If you press REPEAT twice during play, all MP3 files on the disc will play repeatedly.
• If you press REPEAT three times, repeat play will be cancelled.
MP3
Prog
MP3
Progr
MP3-1
MP3-1
TRACK 1.mp3
TRACK 1.mp3
TRACK 2.mp3
TRACK 2.mp3
TRACK 3.mp3
TRACK 3.mp3
TRACK 4.mp3
TRACK 4.mp3
TRACK 5.mp3
TRACK 5.mp3
TRACK 6.mp3
TRACK 6.mp3
TRACK 7.mp3
TRACK 7.mp3
TRACK 8.mp3
TRACK 8.mp3
TRACK 9.mp3
TRACK 9.mp3
REPEAT Symbol
GB
NOTES
• The file name is only displayed in English.
• If there is an impossible code to display, it will be displayed underlined (_) instead of English.
• This unit can play up to 200 files per disc. A disc recorded with more than 200 files cannot be played.
• Disc format is compatible with ISO9660 only.
• If you record MP3 files using the software which cannot create a FILE SYSTEM, for example “DirectCD” etc., it is impossible to playback MP3 files. We therefore recommend that you use “Easy-CD
Creator”, which creates an ISO9660 file system.
• A single session disc requires MP3 files in the first track. If there is no MP3 file in the 1st track, it cannot
playback MP3 files. If you wish to playback MP3 files, format all the data in the disc or use a new one.
• If there are already data files which are not MP3 files on the CD-R disc, please, do not use that disc;
use a new one instead. However, if the disc is a CD-RW disc, this does not apply.
• Direct access to individual tracks may not work with MP3 encoded discs.
39
T571 manual (GB)
19/11/01
2:15 pm
Page 40
Advanced Operation
PLAYBACK WITH MP3
TO PROGRAM PLAY AN MP3 FILE
1 Load an MP3 disc. The MP3 menu is displayed.
2 Press STOP to stop playback.
3 Press PROGRAM to enter the Program Edition mode in the stop mode. The mark [E] appears
on the right of the word Program on the right side of MP3 menu. Press RETURN to exit the Program
Edition mode, the [E] mark will disappear.
MP3
Program
MP3-1
4 Press
to select the desired MP3 file and then press SELECT/ENTER to add the MP3 file
to the program list.
• Repeat step 4 to select another track.
• Up to 60 files can be programmed.
E
TRACK 2.mp3
TRACK 1.mp3
TRACK 7.mp3
TRACK 2.mp3
TRACK 6.mp3
TRACK 3.mp3
TRACK 9.mp3
TRACK 4.mp3
TRACK 5.mp3
TRACK 6.mp3
TRACK 7.mp3
TRACK 8.mp3
TRACK 9.mp3
Clear All
MP3
5 Press PLAY to play. The playback now begins in the programmed sequence.
Program
MP3-1
TRACK 2.mp3
TRACK 1.mp3
TRACK 7.mp3
TRACK 2.mp3
TRACK 6.mp3
TRACK 3.mp3
TRACK 9.mp3
TRACK 4.mp3
TRACK 5.mp3
TRACK 6.mp3
TRACK 7.mp3
TRACK 8.mp3
TRACK 9.mp3
Clear All
If you want to enter the main menu, press
TITLE
After playback of all tracks programmed
Play is stopped.
MENU
CLEARING THE PROGRAM
To clear the program one by one
In the Program Edition mode, press
then press CLEAR.
SELECT
ENTER
4
DISPLAY
RETURN
ZOOM
to select the unwanted MP3 file on the program list and
MARKER — SEARCH
SCAN
PLAY
To clear all the programs
In the Program Edition mode, press
SKIP
5
STOP
2
GB
NEXT DISC PAUSE/STEP
SLOW
1
2
3
4
5
6
7
8
CLEAR
Program
3
to select the “Clear All” and press SELECT/ENTER.
Program
TRACK_2
TO PLAY
AN MP3 FILE REPEATEDLY
TRACK_2
TRACK_7
TRACK_7
• If you
press REPEAT button once during
play, the current MP3 file will play repeatedly.
TRACK_6
TRACK_6
TRACK_9play, all MP3 files on the program list will play repeatedly.
• If you
press REPEAT button twice during
TRACK_9
• If you press REPEAT button three times, repeat play will be cancelled.
Program
9
PROGRAM
0
Program
Clear
All
TRACK
2.mp3
Clear
All
TRACK
2.mp3
TRACK 7.mp3
TRACK 7.mp3
TRACK 6.mp3
TRACK 6.mp3
TRACK 9.mp3
TRACK 9.mp3
Clear All
Clear All
REPEAT symbol
40
button.
T571 manual (GB)
19/11/01
2:15 pm
Page 41
Reference
DISC REQUIREMENTS / COPYRIGHT INFORMATION
PLAYABLE DISCS
This DVD player can play back the following discs.
Disc Mark
Contents
Disc size
Maximum playback time
Approx. 4 hours (single sided disc)
12 cm
DVD video discs
Approx. 8 hours (double sided disc)
Audio+ Video
(moving pictures)
Approx. 80 minutes (single sided disc)
8 cm
Approx. 160 minutes (double sided disc)
Audio CDs
12 cm
74 minutes
8 cm
20 minutes
Audio
In addition, this unit can play back a CD-R or CD-RW that contains audio titles or MP3 files. And this unit can play back a HDCD also.
You cannot playback discs other than those listed above. (Video CD, CD-ROM, CD-Extra, CD-G, photo CD, and CD-i discs can not be played on this
DVD player.)
HDCD®, High Definition Compatible Digital and Pacific Microsonics™ are either registered trademarks or trademarks of Pacific Microsonics, Inc., in
the United States and/or other countries. HDCD system manufactured under license from Pacific Microsonics, Inc. This product is covered by one or
more of the following: In the USA: 5,479,168; 5,638,074; 5,640,161; 5,808,574; 5,838,274; 5,854,600; 5,864,311; 5,872,531; and in Australia:
669114. Other patents pending.
REGION MANAGEMENT INFORMATION
Region Management Information: This DVD Player is designed and manufactured to respond to the Region Management Information that is recorded
on a DVD disc. If the Region number described on the DVD disc does not correspond to the Region number of this DVD player, this DVD player cannot
play that disc.
The Region number of this DVD player is 2.
2
NOTES ON UNAUTHORIZED DISCS
You may not be able to play back some DVD video discs on this player if they were purchased from outside your geographic area or made for business
purposes. When you try to play back an unauthorized disc, “Check Regional Code” appears on the TV screen.
NOTES ON COPYRIGHT
It is forbidden by law to copy, broadcast, show, broadcast on cable, play in public, and rent copyrighted material without permission.
DVD video discs are copy protected, and any recordings made from these discs will be distorted.
This product incorporates copyright protection technology that is protected by method claims of certain U.S. patents and other intellectual property
rights owned by Macrovision Corporation and other rights owners. Use of this copyright protection technology must be authorized by Macrovision
Corporation, and is intended for home and other limited viewing uses only, unless otherwise authorized by Macrovision Corporation. Reverse
engineering or disassembly is prohibited.
41
GB
T571 manual (GB)
19/11/01
2:15 pm
Page 42
Reference
BEFORE CALLING SERVICE PERSONNEL
SYMPTOMS AND CORRECTION
Check the following guide for the possible cause of a problem before contacting service.
SYMPTOM
CAUSE
CORRECTION
No power.
•
The power cord is disconnected
•
Plug the power cord into the wall outlet securely.
The power is on, but the DVD player does not
work.
•
No disc is inserted.
•
Insert a disc. (Check that the DVD or, audio CD
indicator in the DVD display is lit.)
No picture
•
The TV is not set to receive DVD signal output.
•
Select the appropriate video input mode on the
TV so the picture from the DVD player appears
on the TV screen.
•
The video cable is not connected securely.
•
Connect the video cable into the jacks securely.
•
The connected TV power is turned off.
•
Turn on the TV.
•
The equipment connected with the audio cable
is not set to receive DVD signal output.
•
Select the correct input mode of the audio
receiver so you can listen to the sound from the
DVD player.
•
The audio cables are not connected securely.
•
Connect the audio cable into the jacks securely.
•
The power of the equipment connected with the
audio cable is turned off.
•
Turn on the equipment connected with the
audio cable.
•
The Digital Audio Output is set to the wrong
position.
•
Set the Digital Audio Output to the correct
position, then turn on the DVD player again by
pressing the POWER button.
The playback picture is poor
•
The disc is dirty.
•
Clean the disc.
The DVD player does not start playback
•
No disc is inserted.
•
Insert a disc.(Check that the DVD, or audio CD
indicator in the DVD display is lit.)
•
An unplayable disc is inserted.
•
Insert a playable disc. (Check the disc type, color
system and Regional code.)
•
The disc is placed upside down.
•
Place the disc with the playback side down.
•
The disc is not placed within the guide.
•
Place the disc on the disc tray correctly inside the
guide.
•
The disc is dirty.
•
Clean the disc.
•
A menu is on the TV screen.
•
Press the SETUP button to turn off the menu
screen.
•
The Rating level is set.
•
Cancel the Rating function or change the rating
level.
•
The remote control is not pointed at the remote
sensor of the DVD player.
•
Point the remote control at the remote sensor of
the DVD player.
•
The remote control is too far from the DVD
player.
•
Operate the remote control within about 23 ft
(7m).
•
There is an obstacle in the path of the remote
control and the DVD player.
•
Remove the obstacle.
•
The batteries in the remote control are
exhausted.
•
Replace the batteries with new ones.
No sound
GB
The remote control does not work properly.
42
T571 manual (GB)
19/11/01
2:15 pm
Page 43
Reference
SPECIFICATIONS
DVD PLAYER
Power supply
Power consumption
Mass
External dimensions (W X H X D)
Signal system
Laser
Frequency range (audio)
Signal-to-noise ratio (audio)
Dynamic range (audio)
Harmonic distortion (audio)
Operating conditions
Operation status
AC 110-240V, 50/60 Hz
16 W
5.7 kg
430 x 118 x 411 mm
PAL 625/50 , NTSC 525/60
Semiconductor laser, wavelength 650 nm (DVD),
780 nm (CD)
4 Hz to 20 kHz
More than 95 dB (EIAJ)
More than 90 dB (EIAJ)
0.008 %
Temperature: 5°C to 35°C
Horizontal
OUTPUTS
Video output
S-video output
Audio output (digital audio)
Audio output (optical audio)
Audio output (analog audio)
1.0 V (p-p), 75Ω, negative sync.,
RCA jack x 1/SCART
(Y) 1.0 V (p-p), 75Ω, negative sync.,
Mini DIN 4-pin x 1
(C) 0.286 V (p-p), 75Ω
0.5 V (p-p), 75Ω, RCA jack x 1
Optical connector x 1
1.0 Vrms(1 KHz, -6 dB), 330Ω,
RCA jack (L, R) x 1/SCART
SUPPLIED ACCESSORIES
Video cable
Audio cable
Remote control
Batteries
1
1
1
2
Designs and specifications are subject to change without notice.
GB
43
T571 manual (GB)
19/11/01
2:15 pm
Page 44
www.NADelectronics.com
©2001 NAD ELECTRONICS INTERNATIONAL
All rights reserved. No part of this publication may be reproduced, stored or transmitted in any form without the written permission of NAD Electronics International
T571 Manual 11/01 Printed in Korea