1
Illustration
1
2 Band Alarm
Clock Radio
..
3
2
5 6 7 8
4
13
12
9
11
10
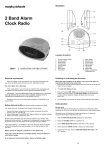
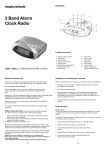
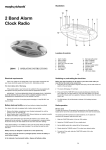
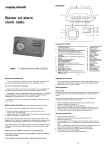
Location of controls
1
2
3
4
5
6
28049
LED display
Dial scale with pointer
Auto/Alarm indicator
Snooze button
Minute button
Hour button
7
8
9
10
11
12
13
OPERATING INSTRUCTIONS
Alarm button
Sleep button
Function switch
AC adaptor socket
Buzzer on/volume control
Band switch
Tuning control
P.2
Electrical requirements
Wake up to the radio alarm
Check the voltage on the rating plate of your clock radio corresponds with
your house electricity supply which must be A.C. (Alternating current).
Use only with the adaptor unit supplied.
Switching on, and setting the clock time
Before any alarm functions can be used on your alarm clock radio you
must first set the clock to the correct time.
1 Place the unit on a flat surface. Plug the adaptor plug into the adaptor
socket on the product and plug into the wall socket and switch on the wall
socket.
2
The clock LED display (1) will flash.
3
Press and hold the hour button (6) or the minute button (5). The LED clock
display (1) will fast forward the hour and minute segments. Release all
buttons when the correct time is set.
Having selected your station and set the volume at the desired level, proceed as
follows:
1
2
3
Switch the FUNCTION switch (9) to the ‘AUTO’ position. The auto/alarm
indicator (3) will light.
Press the ALARM button (7) and simultaneously press the HOUR button (6)
and then the minute button (5) until the desired alarm time is set.
To check the wake up time simply press the ALARM button and the clock will
show the present time.
The preset wake up time will continue to be registered in the timer memory and
the radio will switch on automatically the next day.
Ensure the station you select will be transmitting at the preset alarm time.
Wake to buzzer
1
Set the controls as for ‘wake to radio’ and set the VOLUME/BUZZER control
(11) to the BUZZER position.
The dial will click when the buzzer position is reached.
Radio operation
•
To obtain the maximum reception rotate the clock radio.
To stop the alarm
1
Slide the FUNCTION switch (9) to the ‘ON’ position.
2
Adjust the VOLUME control (11) to a suitable level.
3
Set the BAND switch (12) to either MW or FM as desired.
4
Slowly adjust the TUNING control (13) to select your desired station.
5
To switch off the radio, slide the FUNCTION switch (9) to the
‘OFF’ position.
The alarm is programmed to run for 1 hour 59 minutes.
P.3
1
2
The alarm can be switched off by pressing the by sliding the FUNCTION
switch to the ‘OFF’ position.
To stop the alarm temporarily, press the SNOOZE button (4). The alarm
will sound again 9 minutes later.
The alarm will stop and will operate again 24 hours later.
The buzzer alarm will wake you up at the set alarm time.
The buzzer will automatically turn off after a set period.
P.4
Snooze function
Maintenance
The alarm can be interrupted for a 9 minute period.
1 Press the SNOOZE button (4), after 9 minutes the radio or alarm buzzer will
sound again.
Do not expose your clock radio to extremes of temperature. The product should
be kept in a warm environment free from dust and damp. For external cleaning
use only a soft, clean, damp cloth. Use of detergents may damage the finish.
Technical specification
To set the sleep function
Your clock radio is equipped with a sleep function that will turn the radio
on and switch it off automatically after a set period of time from between
1 minute to 1 hour 59 minutes.
1
Ensure all controls are preset to ‘wake to radio’.
2
Press the SLEEP button (8) the LED display (1) will show 0:59
sleep time at the same time the radio will come on and stay on for
59 minutes.
3
Press and hold the SLEEP button (8) whilst pressing the MINUTE
button (5) the sleep time shown on the LED display (1) will start descending.
4
Press the HOUR button (6) to set the sleep time to 1:59.
5
Release all buttons when the desired sleep time is shown on the LED
display (1).
6
After the set sleep time has elapsed, the radio will automatically switch
off.
7
To switch off before the set sleep time has elapsed press the SNOOZE
button (4).
AC Output
:
9v
200mA (1.8va)
Use only adaptor supplied or service
department replacement
Radio
:
:
FM 88Mhz - 108MHz
MW 530Khz - 1600kHz
P.5
P.6
Warning labels
WARNING: to reduce the risk of electric shock, do not expose this appliance
to rain or moisture.
ATTENTION: To reduce the risk of electric shock, do not
remove the cover. There are no user serviceable parts inside
the unit. Refer any servicing to qualified personnel.
The lightning flash with arrowhead symbol within the triangle is a warning
sign alerting the user of ‘dangerous voltage’ inside the unit.
Guarantee
Morphy Richards products are manufactured to internationally accepted quality
standards. In addition to your statutory rights, Morphy Richards guarantee your
product to be free from manufacturing and component defects for a period of TWO
YEARS from date of purchase.
If your product proves to be defective within 28 days of purchase, your Morphy
Richards dealer from whom the product was purchased will be pleased to replace it
free of charge.
Should your product develop a defect within the guarantee period but after the
replacement period, please return the product to the following address, together with
the proof of purchase, brief details of the symptoms and your own name and
address.
The exclamation point within the triangle is a warning sign alerting the user of
important instructions accompanying the product.
Registered address
Morphy Richards Limited
Mexborough
South Yorkshire
S64 8AJ
To prevent fire or shock hazard do not expose this apparatus to dripping or
splashing.
Your post office will provide a certificate of posting. The product will be
repaired and returned to you promptly.
Helpline (8:30-5:00 Mon-Thur/ 8:30-4:00 Fri) UK 0870 060 2614
Republic of Ireland 1800 409119
Replacement parts 0870 167 6645
www.morphyrichards.co.uk
AD28049M UK Rev 1
P.7