1
KIT FEATURES
Shaft and
DIN unit
provisions
Incorporates
factory climate
controls into
installation
KIT COMPONENTS
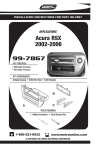
Replacement
Bezel
99-3101
INSTALLATION
INSTRUCTIONS
APPLICATIONS
CAR
PAGE
CHEVROLET
Beretta 1988-90
(models equipped with AC).............................1-2
Corsica 1988-90
(models equipped with AC).............................1-2
TOOLS REQUIRED
Phillips screwdriver
Cutting tool
1-800-221-0932
rev. 271202
Adjustable wrench
www.metraonline.com
© COPYRIGHT 2001 METRA ELECTRONICS CORPORATION
3
ALL VEHICLES
A
4
B
1
C
D
A) Strip wire ends back ½"
B) Twist ends together
C) Solder
D) Tape
Disconnect the negative battery terminal to prevent an accidental short circuit. Unclip the trim
bezel surrounding the factory head unit and climate controls. Remove (4) screws securing the
head unit/climate control assembly. Reach under the dash and remove the colored tubing
assembly connected to the "mode" control on the climate control panel. Pull the head
unit/climate control assembly from the dash and disconnect the wiring. Remove (4) screws
securing the factory head unit to the metal bracket housing and remove the unit. Remove (4)
screws securing the climate controls to the metal bracket housing and remove the controls.
Locate the factory wiring harness in the
dash. Metra recommends using the
proper mating adaptor and making
connections as shown. (Isolate and
individually tape off the ends of any
unused wires to prevent electrical short
circuit).
Mount the climate controls to the back of the
Replacement Bezel with (4) screws previously
removed in step #1.
5
2
Fig. A
Fig. B
2-SHAFT HEAD UNITS: Slide the aftermarket head unit into the kit and secure with shaft
nuts. (see Fig. A)
DIN HEAD UNITS: Cut and remove the shaft supports from the Replacement Bezel. Slide
the DIN cage into the kit and secure by bending the metal locking tabs down. Slide the
aftermarket head unit into the cage until secure. (see Fig. B)
1
Re-connect the battery terminal and test the unit for proper operation. Mount the head uni t/kit
assembly to the sub-dash with (4) screws previoulsy removed in step #1.
2