1
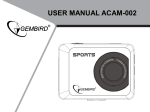
ACT-ACAM-002 User manual – Handleiding – Handbuch – Manuel- Manual 1 English……………….........................................……………………………………3 Deutsch…………………………………….........................................……………..21 Nederlands…………………………………….........................................…………44 Francais…………………………………….........................................…………….60 Castellano……………………………........................................…………………..77 2 Welcome Thank you for choosing this camera. Please carefully read the manual before first use, and keep it at a safe place for future reference. All texts, images and screenshots, are according to the latest standards, however, the actual product might differ slightly sometimes due to changes in production techniques, materials or product functionality. Precautions For the best result please only use high-speed microSD card at Class10 or above for use in this camera. Instructions for using the memory card ● When you place a microSD card in the camera, please format the memory card first via the on screen menu; ● Before plugging in or removing the memory card, please disconnect the power supply of the camera; ● Performance of the memory card will decline over time. In case of lowered performance, a new memory card is needed; ● Don’t keep the memory card near strong electromagnetic or magnetic field, like speakers or 3 receivers; ● Don’t use or keep the memory card in fast changing, very high or low temperatures; ● Keep the memory card clean and away from liquids. In case of contacting liquid, please dry it quickly with a soft cloth; ● Please note that the memory card can get a little warm after long-term usage, this is normal; Camera Maintenance ● When you don’t use the camera, store it in a clean and dry place, away from direct sunlight; ● If you need to clean the camera lens, first blow off any dust or dirt particles and than use a soft cloth that is suitable for cleaning optical equipment to wipe the lens gently. Use only professional camera cleanser to clean the lens. Do not use any organic solvent; ● Do not touch the lens surface with your fingers. 4 Appearance 5 6 Key Functions and Indicators Key/Indicator Function Power key Power On/Off; switch camera mode between video, photo and playback Shutter key Start/stop Video recording, take photo; play/stop playing video file (Playback mode); menu confirmation MENU key Open and exit from menu;Stop play video files (playback mode) Up key Digital zoom-in: select menu (after opening the menu); file page-up; pause playing video (playback mode); Reverse quickly video (playback mode) Down key Digital zoom-out: select menu (after opening the menu); file page-down ;Fast forward video (playback mode) Charger indicator Indicator lights up in red during charging, and turns off after charging is completed. Busy indicator When the camera is busy (for example: during film recording, capturing, automatic screen-off), the busy indicator will light. 7 Before the first use 1.Charge the built-in lithium battery The camera is equipped with built-in 3.7V lithium battery. Please charge the battery completely before the first use and charge it whenever the camera has a low battery. Connect the camera to computer for charging under shutdown status. The charging indicator will be on when charging, and will be off when the battery is fully charged. Usually, the battery will be fully charged after 2-4 hours. 8 2. How to use the memory card 2.1. Properly insert the microSD card into the card holder as indicated on the camera body. 2.2. To remove the memory card, gently press the end of the card, the card will be ejected. Note: The camera is not equipped with built-in memory. Please insert memory card before using. Before using the camera, it is needed to format the memory card on the camera. 3. Startup and shutdown: 3.1 Startup: press the POWER key for 3 seconds, the camera will show startup screen and enters into POWER ON state; 9 3.2 Shutdown: press the POWER key when the camera is under idle mode to shut down; 3.3 Auto shutdown: the camera will be shut down automatically when the camera is under idle mode for a certain time to save power. The default time for auto shutdown is 3 minutes. 3.4 Shutdown under low power: when the battery power is low, the LCD will indicate “ ”. Please charge the battery in this case. When the icon turns red and flashes, the camera will be shut down automatically. 4. Function modes switching The camera has 3 modes: photo mode, video mode, and playback mode. Use the power key to switch between the modes after starting up. Video mode: for recording videos; Photo mode: for taking photos; Playback mode: for playing back the current video. 5. Indicators 5.1 BUSY indicator: When the camera is working (e.g. recording, photographing, auto screen off etc.), the indicator will light; 10 5.2 Charging indicator: In shutdown state, the burning indicator means the camera battery is being charged. 6. Photo/recording mode By default, the camera will startup in recording mode. Use the power key to switch to photo mode. In video mode, press Shutter to start recording, and press Shutter again to stop recording. In photo mode, press Shutter to directly take photo. In both video- and photo mode, press Up/Down for digital zoom in/out. 6.1 Screen display in photo mode 1. 2. 3. 4. 5. 6. 7. 8. 9. Photo mode; Three photos continuous shooting mode; Self-timer mode; Photo resolution; Photo quality; Available shooting count; Icon of digital zoom Battery state Face detect (optional) 11 6.2 Screen display in recording mode 1. 2. 3. 4. 5. 6. 7. 8. Video mode Video quality Video frame rate Video resolution Available time to record Face detect Icon of digital zoom Battery state Note: 1. When recording HD or FHD video, use high-speed memory card, class 10 or above. 2. During recording the screen will automatically turn off for saving power. You can shortly press the Power key or shutter key to turn the screen back on. 12 7. Video and photo mode Settings Menu 7.1 Menu display In photo, video and playback mode, press the Menu key to open the menu, and then press Up/Down key to select menu items and press the Shutter key to confirm selection or enter submenu. When selecting menu items, the selected menu item will be marked blue. In video mode you can use the "Seamless" menu setting to enable/disable loop recording. Video segments can be set to lengths of 1/3/5 minutes. All video segments will connect seamlessly to each other. When the card is full, the oldest video segment is automatically deleted and overwritten. This way the camera can continuously keep recording video. Photo mode menu Video mode menu 13 7.2 System Settings menu Open the menu by pressing the Menu key and shortly press the power key to switch over to the system setting menu. Press the Up/Down key to select menu items and press the Shutter key to confirm selection or enter submenu. In the submenu, press Up or Down key to select menu item, and press Shutter to confirm. After returning to the main menu, press Menu key to exit from the menu. System menu 14 7.3 Setting date and time Press the Menu key to open the menu, then press the Power key to switch to system settings menu and press Shutter key to confirm. Press the Down key to the select “Date and time” menu item, and then press Shutter key to enter the date/time settings window. In the date/time settings window, press Power key to select items (date, time) to be adjusted, and then press Up key or Down key to make adjustment, press Shutter key for confirmation when adjustment is completed. Press Menu key to cancel setting and exit. Finally, press Menu key to exit from settings menu. 15 7.4 Playback mode settings menu Put the camera into playback mode. Press the Menu key to open playback main menu, press Up or Down key to select menu items and press Shutter key to enter submenu. In the submenu, again press Up or Down key for selection, and press Shutter key to confirm. After returning to the main menu, press Menu key to exit from the menu. ▲ Playback menu 16 8. Playback mode Press Power key to enter playback mode to browse photo/video files and play the videos recorded. Press Up/Down key to select previous or next photo/video. Play movie: Press the shutter button to start/pause play video, press the up/down key to reverse quickly /fast forward playback, press the MENU button to stop play videos. Video file playback Video pause mode 9. Connect to computer to download photo/video When the camera is connected with the computer, select the ‘removable disk’ (MSDS) mode. There will be a removable disk added in the Windows file explorer. The photo or video files will be stored in a folder named “DCIM\100MEDIA” on this removable disk. Browse this file folder to select and copy files onto the hard disk of your computer. 17 Note: During file transfer, it is not allowed to disconnect the USB cable or to remove the memory card to avoid loss of data. Use Camera Functions The ACT-ACAM-002 can also be used as webcam (video only) on your PC. In order to use the webcam function, please follow the next steps: 1. Connect the camera to your PC with the supplied USB cable 2. Turn the camera on with the power button 3. the camera display will show PC functions (MSDS by default), select “PC Cam” 4. Windows will now install all needed camera drivers automatically 5. You can now use the ACT-ACAM-002 as webcam in all common software that supports webcam use, e.g. Skype. 18 Technical parameters Image sensor 5.0 MP CMOS Function mode Video, photo, playback Lens F2.5 f=3.53mm Digital zoom 8x LCD screen 2.0” color LCD screen Picture resolution 12M (4000 x 3000), 8M (3264 x 2448), 5M (2592 x 1944) FHD (1920x1080@30fps) HD (1280X720@30fps) HD Video resolution (1280X720@60fps) Storage medium MicroSD (TF) card, speed class 10 (Max. 32GB) File format JPEG (photo), AVI or MOV (video) 19 USB port USB 2.0 Power supply 5V, 800 mA Battery Built-in 3.7V rechargeable lithium battery (700 mAh) Operating system requirements Windows XP/Vista/7/8, Mac 10.2 Dimensions 58 x 44 x 23 mm Weight 55 g Note: The product design specifications are based on the latest information available while compiling this product manual. All camera specifications and features are subject to change without further notice. 20 Willkommen Vielen Dank fur den Erwerb dieser Kamera. Dieses Benutzerhandbuch hilft Ihnen bei der richtigen Verwendung und gibt Ihnen weitere Hinweise im Umgang mit diesem Produkt. Alle Texte, Abbildungen und Screenshots stellen den zum Zeitpunkt des Drucks des Handbuchs aktuellen Stand dar. Das akutelle Produkt kann auf Grund von Anderungen geringfugig abweichen. Vorbereitung der Kamera Fur bestmogliche Filmaufnahmen, nutzen Sie bitte microSD Karten der Klasse 10 oder hoher. Verwendung der microSD Karte • Nachdem Sie die microSD Karte in die Kamera eingesetzt haben, formatieren Sie diese bitte zunachst uber das Display-Menu. • Bevor Sie die microSD Karte entfernen oder einsetzen, unterbrechen Sie bitte zunachst die Stromzufuhr zur Kamera. 21 • Die Lese- und Schreibeigenschaften der microSD Karte werden mit der Zeit nachlassen. Bitte ersetzen Sie im Falle von schlechter werdenden Aufnahmen die microSD Karte durch eine neue. • Halten Sie die microSD Karte moglichst von Geraten mit magnetischen oder elektromagnetischen Feldern fern. Dies betrifft zum Beispiel Lautsprecher, Funk-Empfanger usw. • Setzen Sie Ihre microSD Karte moglichst keinen gro.en Temperaturschwankungen aus. • Halten Sie Ihre microS Karte moglichst sauber und von Flussigkeiten fern. Sollte die Karte mit einer Flussigkeit in Kontakt geraten, trocken Sie diese umgehend mit einem weichen Tuch. • Bitte beachten Sie, dass es normal sein kann, dass die microSD Karte nach langerer Verwendung etwas erwarmt ist. Pflege der Kamera • Verwenden Sie die Kamera fur eine Weile nicht, so lagern Sie diese bitte an einem trockenen, sauberen Ort sowie nicht in direkter Sonneneinstrahlung. • Mochten Sie die Linse der Kamera reinigen, pusten Sie bitte zunachst grobe Verunreinigungen 22 herunter und verwenden Sie anschlie.end ein weiches Tuch, welches zur Reinigung von Linsen oder Objektiven vorgesehen ist. • Bitte beruhren Sie die Linse nicht mit Ihren Fingern. Gesamtansicht Linse microUSB `Anschluss Power-Taste/Modus Mikrofon OK/Ausloser-Taste Reset microSD Slot 23 Pfeiltaste hoch Pfeiltaste runter Menu-Taste Gewinde fur Stativ Ladestatusanzeige Statusanzeige Funktionen und Anzeigen LCD-Bildschirm 24 Taste/Indikator Power-Taste Funktion Ein-/Ausschalter; Wechsel zwischen Kamera-, Video-, Foto- und Wiedergabemodus Ausloser Starten/stoppen der Videoaufnahme, Foto aufnehmen; Play/Stop im Wiedergabemodus; Bestatigung in der Menuauswahl Menu-Taste Menu aufrufen und schlie.en; Wiedergabe stoppen (im Wiedergabemodus) Pfeil hoch Hineinzoomen; Menuauswahl; Seite hoch; Pause (im Wiedergabemodus); Zuruckspulen (im Wiedergabemodus) Pfeil runter Herauszoomen; Menuauswahl; Seite runter; Vorspulen (im Wiedergabemodus) 25 Ladestatusanzeige Leuchtet wahrend des Ladevorgangs rot auf und erlischt, sobald der Ladevorgang abgeschlossen ist. Statusanzeige Ist die Kamera beschaftigt, zum Beispiel mit einer Aufnahme, leuchtet diese Anzeige auf. Vor der ersten Verwendung Aufladen des internen Akkus Die Kamera ist mit einem integrierten 3,7 V Akku ausgestattet. Bitte laden Sie den Akku vor der ersten Verwendung vollstandig auf und ebenso, sobald die Leistung des Akkus sehr niedrig ist. 26 Ist der Akku der Kamera vollstandig entladen, schlie.en Sie die Kamera mittels des beiliegenden USB-Kabels an einen freien USB-Port Ihres Computers an. Wird der Akku aufgeladen, erscheint auf dem Display die Ladestatusanzeige. Ist der Akku vollstandig aufgeladen, erlischt die Anzeige wieder. Eine vollstandige Aufladung des Akkus benotigt circa 2 bis 4 Stunden. Einsetzen der microSD Karte Setzen Sie die microSD Karte wie auf der Kamera gezeigt vorsichtig ein. Um die Karte wieder zu entfernen, drucken Sie auf das Ende der Karte bis diese hervorsteht und 27 entnehmen Sie sie vorsichtig. Hinweis: Die Kamera hat keinen internen Speicher, bitte setzen Sie vor der ersten Verwendung eine microSD Karte ein und formatieren Sie diese uber das Display-Menu. Starten und Ausschalten der Kamera: • Starten: Drucken und halten Sie die Power-Taste fur etwa 3 Sekunden. Die Kamera startet anschlie.end den Bereitschaftsmodus. 28 • Ausschalten: Ist die Kamera im Bereitschaftsmodus, drucken Sie Power-Taste, um die Kamera auszuschalten. • Automatisch ausschalten: Ist die Kamera im Bereitschaftsmodus und es findet keine Aufnahme statt, schaltet sich die Kamera automatisch aus. Die voreingestellte Zeit, nach welcher sich die Kamera abschaltet, betragt 3 Minuten. • Ausschalten bei wenig verbleibender Akkuleistung: Ist die Leistung des Akkus nahezu aufgebraucht, erscheint dieses Icon auf dem Display “ “. • Beginnt diese Anzeige rot zu blinken, schaltet sich die Kamera automatisch aus. Modus wechseln Die Kamera verfugt uber 3 verschiedene Modi: Foto-Modus, Video-Modus und Wiedergabe-Modus. Drucken Sie kurz auf die Power-Taste, um den Modus zu wechseln. Video-Modus: zur Aufnahme von Videos Foto-Modus: zur Aufnahme von Fotos 29 Wiedergabe-Modus: zur Wiedergabe von zuvor aufgenommenen Bildern und Videos. Indikatoren • Statusanzeige: Ist die Kamera zum Beispiel mit einer Aufnahme beschaftigt, leuchtet diese Anzeige. • Ladestatusanzeige: Ist die Kamera ausgeschaltet und diese Anzeige leuchtet auf, wird der Akku der Kamera derzeit aufgeladen. Foto-/Video-Modus Wird die Kamera eingeschaltet, startet diese immer im Video-Modus. Um den Modus zu wechseln, drucken Sie kurz auf die Power-Taste. Um eine Videoaufnahme zu starten, drucken Sie bitte kurz auf die OK/Ausloser-Taste. Um im Foto-Modus ein Foto aufzunehmen, drucken Sie bitte ebenso auf die OK/Ausloser-Taste. Um sowohl im Video- als auch im Foto-Modus zu zoomen, benutzen Sie bitte die Pfeiltasten. 30 1. Foto-Modus 2. 3 Bilder verbleibend im aktuellen Modus 3. Selbstausloser-Modus 4. Foto-Auflosung 5. Bildqualitat 6. Verbleibende Anzahl moglicher Bildaufnahmen 7. Zoomfaktor 8. Ladestatus 9. Gesichtserkennung (option) Bildschirmanzeige im Video-Modus 31 1. Video-Modus 2. Videoqualitat 3. Video-Bildrate 4. Videoauflosung 5. Verbleibende Dauer moglicher Videoaufnahmen 6. Gesichtserkennung 7. Zoomfaktor 8. Ladestatus Hinweis: 32 1. Verwenden Sie zur Aufnahme von HD oder Full HD Videaufnahmen bitte eine microSD Karte der Klasse 10 oder hoher. 2. Wahrend der Aufnahme wird sich automatisch der Bildschirm ausschalten, um Energie einzusparen. Um den Bildschirm wieder einzuschalten, drucken Sie bitte kurz auf die Power-Taste. Video- und Foto-Modus Einstellungen Menuanzeige Drucken Sie im Foto-, Video- und Wiedergabe-Modus kurz auf die Menu-Taste, um das Menu aufzurufen. Wahlen Sie nun mittels der Pfeiltasten einen Eintrag aus und bestatigen Sie Ihre Wahl mit einem Druck auf die OK/Ausloser-Taste. Im Video-Modus konnen Sie im Menupunkt „Seamless“ auswahlen, in welchen Intervallen Videos aufgenommen werden sollen. Zur Auswahl stehen 1, 3 und 5 Minuten. Ist die eingelegte 33 Speicherkarte voll, wird automatisch die alteste Videodatei geloscht und uberschrieben. Menuanzeige im Foto-Modus Menuanzeige im Video-Modus 34 Systemeinstellungen Offnen Sie zunachst das Menu mit der Menu-Taste und drucken Sie anschlie.end kurz auf die Power-Taste, um die Systemeinstellungen aufzurufen. Wahlen Sie nun mit den Pfeiltasten die gewunschten Optionen aus und bestatigen Sie Ihre Wahl mit einem kurzen Druck auf die OK/Ausloster-Taste. Um das Menu wieder zu verlassen, drucken Sie bitte erneut die Menu-Taste. Menu der Systemeinstellungen 35 Datum und Uhrzeit einstellen Offnen Sie zunachst das Menu mit der Menu-Taste und drucken Sie anschlie.end kurz auf die Power-Taste, um die Systemeinstellungen aufzurufen. Wahlen Sie mittels der Pfeiltasten den Eintrag “Date and time” aus und drucken Sie zur Auswahl die OK/Ausloser-Taste. Wahlen Sie mittels der Power-Taste das gewunschte Feld (Datum, Uhrzeit) aus und stellen Sie anschlie.end mittels der Pfeiltasten den gewunschten Wert ein. Bestatigen Sie Ihre Einstellungen mit der OK/Ausloser-Taste. Drucken Sie anschlie.end die Menu-Taste, um das Menu wieder zu verlassen. 36 Einstellungen des Wiedergabe-Modus Stellen Sie die Kamera mittels der Power-Taste in den Wiedergabe-Modus. Drucken Sie anschlie.end die Menu-Taste, um das Menu aufzurufen. Wahlen Sie nun mittels der Pfeiltasten den gewunschten Eintrag aus und bestatigen Sie mit der OK/Ausloser-Taste. Haben Sie Ihre gewunschten Einstellungen vorgenommen, drucken Sie anschlie.end die Menu-Taste, um das Menu wieder zu verlassen. Menu des Wiedergabe-Modus 37 Wiedergabe-Modus Stellen Sie die Kamera mittels der Power-Taste in den Wiedergabe-Modus, um Video- und Bilddateien auszuwahlen und anzusehen. Wahlen Sie mit den Pfeiltasten die gewunschte Datei zunachst aus. Um nun ein Video anzusehen, drucken Sie bitte die OK/Ausloser-Taste um die Wiedergabe zu starten oder zu pausieren. Um die Wiedergabe zu beenden, drucken Sie bitte auf die Menu-Taste. 38 Videodatei auswahlen Videodatei pausieren Verbindung mit dem Computer Um Dateien auf den Computer zu ubertragen oder von der Kamera zu loschen, verbinden Sie die Kamera mit dem USB-Kabel und einem freien USB-Port Ihres Computers. Wahlen Sie anschlie.end den “Removable Disc“-Modus (MSDS) aus. Die Kamera wird nun als Wechseldatentrager in Ihrem Dateibrowser angezeigt. Aufgenommene Bilder und Videos befinden sich im Verzeichnis “DCIM\100MEDIA”. Von diesem Verzeichnis aus konnen Sie Ihre Bilder und Videos wie gewohnt auf den Computer ubertragen. 39 Hinweis: Um Datenverlust zu vermeiden, unterbrechen Sie die USB-Verbdinung zwischen Kamera und Computer wahrend der Datenubertragung nicht. Kamera am Computer verwenden Die Kamera kann auch also herkommliche Webcam am Computer verwendet werden. Um die Kamera als Webcam zu verwenden, gehen Sie bitte wie folgt vor: 1. Verbinden Sie die Kamera mittels des beiliegenden USB-Kabels mit einem freien USB-Port an Ihrem Computer. 2. Schalten Sie die Kamera mit einem Druck auf die Power-Taste ein. 3. Wahlen Sie in dem nun erscheinenden Menu die Option “PC Cam” aus (vorausgewahlt ist MSDS). 4. Windows wird die Kamera automatisch erkennen und installieren. 5. Die Kamera kann anschließend mit jedem beliebigen Programm, das die Verwendung einer 40 Webcam unterstutzt, verwendet werden. Zum Beispiel in Sprachchatanwendungen wie Skype. 41 Technische Spezifikationen Bild Sensor 5 MP CMOS Digitaler Zoom 8fach Auflosung Video max. 1920 x 1080 Full HD (30 fps) Dateiformat Video AVI / MOV Dateiformat Bilder JPEG Linse F2.5 f=3,53 mm Unterstutzte Speicherkarten TF/Micro SDHC (Klasse 10, max. 32 GB) USB-Port USB 2.0 USB-Kabellange 0,8 m Stromversorgung 5 V DC bis zu 800 mA Batterie Integrierte Wiederaufladbare 3,7 V Lithium Batterie, 700 mAh Systemvoraussetzungen Windows 7/8, Mac 10.2 Abmessung 58 x 44 42 Entsorgungshinweise: Werfen Sie dieses Gerat nicht in den Hausmull. Unsachgema.e Entsorgung kann sowohl der Umwelt als auch der menschlichen Gesundheit schaden. Informationen zu Sammelstellen fur Altgerate erhalten Sie bei Ihrer Stadtverwaltung oder einer autorisierten Stelle fur die Entsorgung von Elektro-und Elektronikgeraten. Batterien und Akkus sind im entladenen Zustand in Altbatteriesammelgefa.e im Handel und bei offentlich-rechtlichen Entsorgungstragern zu entsorgen. Bitte beachten Sie, dass eine vollstandige Entladung der Batterie/des Akkus erst mit ublichem Gebrauchsende erreicht ist. 43 Welkom Gefeliciteerd met de keuze voor deze ACT-ACAM-002 Full HD action camera van Maxxter. Lees deze handleiding goed door voor het eerste gebruik en bewaar deze voor later gebruik. Alle in deze handleiding opgenomen teksten, foto’s, screenshots etc, zijn gebaseerd op de meest recente stand van zaken. Door veranderingen in techniek, functies of materiaalgebruik etc, kan het uiteindelijke product mogelijk licht afwijken. Voorzorgsmaatregelen Gebruik voor het beste resultaat altijd een high-speed microSD (SDHC) kaart van klasse 10 of hoger. Gebruik van de geheugenkaart ● Als u een microSD geheugenkaart in de camera plaatst, formatteer deze kaart dan eerst met de formatteerfunctie van de camera ● Schakel de camera uit en verwijder de USB kabel alvorens de geheugenkaart te plaatsen ● Geheugenkaarten kunnen kapot. Als de geheugenkaart niet meer goed functioneert, dient u deze te vervangen. ● Houd de geheugenkaart uit de buurt van magneten, zoals luidsprekers, winkelkassa’s of versterkers; 44 ● Bescherm de geheugenkaart tegen sterk wisselende temperatuursomstandigheden ● Houd de geheugenkaar schoon en bescherm tegen water/vocht. Indien nat, snel drogen met zachte doek ● De geheugenkaart kan een beetje warm worden na langdurig gebruik, dit is normaal Onderhoud van de camera ● Als u de camera voor langer tijd niet gebruikt, berg hem dan stofvrij op, beschermd tegen direct zonlicht ● Als u de cameralens wilt reinigen, blaas dan eerst stof en vuildeeltjes weg. Gebruik daarna een zachte doek die geschikt is voor het reinigen van optische lenzen om de lens schoon te maken. Gebruik geen schoonmaakmiddelen of oplosmiddelen voor het reinigen van de lens of de camera. ● Raak de lens niet aan met de vingers 45 Overzicht van de camera 46 47 Knoppen en indicators Knop/indicator Functies(s) Power knop Camera AAN/UIT schakelen en wisselen tussen video-, foto- en playbackmodus Shutter knop Start/stop video-opname, foto nemen, video afspelen (Playbackmodus), keuzes bevestigen in het menu MENU knop Menu openen en sluiten, video afspelen stoppen (playbackmodus) Up knop Digitale zoom-in: navigeren in het menu; navigeren, terugspoelen en afspelen pauseren in de playbackmodus Down knop Digitale zoom-uit: navigeren in het menu; navigeren en vooruitspoelen in de playbackmodus Charger indicator Brandt rood tijdens het laden van de batterij, gaat uit als de batterij vol is Busy indicator Brandt als de camera bezig is (b.v. tijdens het filmen) 48 Voor het eerste gebruik 2.Opladen van de ingebouwde lithium batterij Deze camera heeft een ingebouwde oplaadbare 3.7 V lithium batterij. Het wordt aangeraden de batterij volledig op te laden voor het eerste gebruik. Daarna kunt u de batterij opladen als deze (bijna) leeg is. Gebruik de meegeleverde USB-kabel voor het opladen van de batterij, bijvoorbeeld door deze aan te sluiten op de USB-poort van uw PC. Tijdens het laden zal de laadindicator branden. Deze indicator gaat vanzelf uit zodra het laden voltooid is. Een volledige laadcyclus zal doorgaans ongeveer 2-4 uur duren. 49 2. Plaatsen van de geheugenkaart 2.1. Plaats de microSD kaart in de kaartsleuf, in de richting/positie zoals aangegeven op de camera. 2.2. Om de kaart weer te verwijderen, druk u zachtjes op de kaart. De kaart komt dan vanzelf iets naar buiten. LET OP: De camera heeft geen ingebouwd geheugen. Plaats voor gebruik een geheugenkaart. Het wordt aangeraden om de geheugenkaart de eerste keer te formateren in de camera. 3. De camera aan- en uitzetten: 3.1 AAN: Druk op de AAN/UIT knop en houd deze 3 seconden ingedrukt. De camera laat nu het 50 opstartscherm zien en schakelt zichzelf in. 3.2 UIT: Druk 3 seconden op de AAN/UIT knop om de camera uit te zetten 3.3 Automatisch uitschakelen: Als de camera een tijdje niet gebuikt wordt, dan zal deze vanzelf uitschakelen. Standaard gebeurt dit na 3 minuten. 3.4 Uitschakelen bij lege batterij: Als u dit “ ” icoon in het scherm ziet, dan is de batterij bijna leeg. Als u niet tijdig de batterij oplaadt, dan zal het icoon rood gaan knipperen. Kort daarna schakelt de camera zichzelf automatisch uit. 4. Wisselen tussen video- foto- en playbackmodus De camera heeft 3 standen: videomodus, fotomodus en playbackmodus. Druk kort op de AAN/UIT knop om tussen deze standen te wisselen. Videomodus: Voor het opnemen van video’s Fotomodus: Voor het nemen van foto’s Playbackmodus: Voor het afspelen van eerder opgenomen video’s 5. LED statusindicators 5.1 BUSY indicator: Als de camera met een taak bezig is (b.v. opnemen, scherm uitschakelen, 51 etc.), dan zal deze indicator oplichten. 5.2 Charging indicator: Deze LED indicator geeft aan de de batterij geladen wordt (als de camera uit staat). 6. Video- en fotomodus De camera zal altijd opstarten in de video modus. Druk eventueel kort op de AAN/UIT knop om naar de fotomodus te schakelen. In de video modus drukt op de opnameknop om video-opnames te starten en stoppen. In de fotomodus kunt u met een druk op de opnameknop een foto nemen. In zowel video- als fotomodus kunt u met de pijltjestoetsen digitaal in- en uitzoomen. 6.1 Display in fotomodus 1.Fotomodus 2.Tripple-shot / continu opname 3.Zelfontspanner 4.Fotoresolutie 5.Fotokwaliteit 6.Beschikbare ruimte (aantal foto’s) 7.Digitale zoom 8.Batterijstatus 9.Gezichtsherkenning (optioneel) 52 6.2 Display in videomodus 1.Videomodus 2.Videokwaliteit 3.Video framerate 4.Videoresolutie 5.Beschikbare ruimte (in opnametijd) 6.Gezichtsherkenning 7.Digitale zoom 8.Batterijstatus Note: 1. Bij het opnemen in HD of FHD videokwaliteit, gebruik dan een geheugenkaar van klasse 10 of hoger. 2. Tijdens het opnemen gaat het scherm automatisch uit om de batterij te sparen. Druk kort op de AAN/UIT knop om het scherm weer te activeren. 53 7. Instellingenmenu in video- en fotomodus 7.1 Menu openen Zowel in video-, foto-, als playbackmodus drukt u op de MENU knop om het menu te openen. Gebruik de pijltjestoetsen om door het menu te navigeren en druk op de OPNAME knop om een keuze te bevestigen. Een geselecteerd menu-item is blauw gearceerd. In de videomodus kunt u met behulp van de "Seamless" instelling de continu-opnamefunctie aan- of uitzetten. Videosegmenten kunnen dan worden ingesteld op een lengte van 1/3/5 minuten. Als deze functie is ingeschakeld neemt de camera de video’s op in fragmenten die naadloos in elkaar overlopen. Als de kaart vol is, dan wordt het oudste segment overschreven, waardoor de camera continu kan blijven opnemen zonder dat de kaart ooit vol raakt. Fotomodus menu Videomodus menu 54 7.2 Systeeminstellingenmenu Druk op de MENU knop om het menu te openen en druk vervolgens op de AAN/UIT knop om naar het systeeminstellingenmenu te schakelen en druk op de OPNAME knop om dit te bevestigen. Gebruik ook in het submenu de pijltjestoetsen om te navigeren en druk op de OPNAME knop om een keuze te bevestigen. Als u klaar bent drukt u op de MENU knop om het menu weer te verlaten Systeeminstellingenmenu 55 7.3 Datum en tijd instellen Druk op de MENU knop om het menu te openen en druk vervolgens op de AAN/UIT knop om naar het systeeminstellingenmenu te schakelen en druk op de OPNAME knop om dit te bevestigen. Gebruik de pijltjestoetsen om “Datum en tijd” te selecteren en druk vervolgens op de OPNAME knop om deze keuze te bevestigen. In het datum/tijd instellingenscherm drukt u op de AAN/UIT knop om te wisselen tussen datum of tijdsinstellingen en vervolgens op de pijltjestoetsen om de datum/tijd te wijzingen. Druk op de OPNAME knop om te bevestigen. Als u klaar bent drukt u op de MENU knop om het datumscherm weer te verlaten. 56 7.4 Playbackmodus menu Zet de camera in playbackmodus en druk op de MENU knop om het menu te openen. Gebruik de pijltjestoetsen om door het menu te navigeren en druk op de OPNAME knop om een keuze te bevestigen en/of een submenu te openen. Gebruik ook in het submenu de pijltjestoetsen om te navigeren en druk op de OPNAME knop om een keuze te bevestigen. Als u klaar bent drukt u op de MENU knop om het menu weer te verlaten ▲ Playback menu 57 8. Playbackmodus Zet de camera in playbackmodus om eerder gemaakte foto’s en video’s te bekijken. Gebruik de pijltjestoetsen om naar de volgende/vorige opname te gaan.. Video afspelen: Selecteer de video en druk op de OPNAME knop om het afspelen te starten (of te pauzeren). Gebruik de pijltjestoetsen om snel terug- of vooruit te spoelen tijdens het afspelen. Druk op de MENU knop om het afspelen te stoppen. Video playback Video op pauze 9. Verbinden met een PC Als de camera met een PC wordt verbinden via de meegeleverde USB-kabel, dan komt er een klein keuzemenu in beeld. Kies voor de ‘removable disk’ (MSDS) modus als u de bestanden op de camera wilt inzien. Windows zal de camera nu toevoegen als een apparaat voor verwisselbare opslag. De foto en videobestanden staan in de map met de naam “DCIM\100MEDIA”. Bekijk de inhoud van deze map en sla desgewenst de bestanden op in uw computer. 58 LET OP: Tijdens het kopiëren, opslaan of verwijderen van bestanden op de camera mag u de verbinding met de computer niet verbreken om dataverlies en/of beschadiging van de geheugenkaart te voorkomen. ACT-ACAM-002 als webcam gebruiken De ACT-ACAM-002 kan ook als webcam (alleen video) gebruikt worden bij uw PC. Volg de volgende stappen om de ACT-ACAM-002 als webcam te gebruiken: 1. Verbind de camera met de PC via de meegeleverde USB-kabel 2. Zet de camera aan met de AAN/UIT knop 3. De camera laat nu een klein keuzemenu zien (MSDS is standaard geselecteerd), kies voor “PC Cam” 4. Windows zal nu alle benodigde webcam drivers automatisch installeren 5. U kunt nu de ACT-ACAM-002 als webcam gebruiken in de meeste software die gebruik maakt van webcamfuncties, zoals Skype. 59 Introduction Veuillez lire ce mode d’emploi avant utiliser votre ACT-ACAM-002. Ceci vous aidera à mieux connaitre votre appareil de très haute technologie. Les textes, images et copie écrans, sont selon la dernière révision / modification. Cependant la conception et les spécifications sont susceptibles de modifications sans préavis. Précautions Cet appareil accepte la carte mémoires de type MicroSD. Pour un bon résultat, n’utiliser une carte à la norme Class 10 minimum. Instruction de la carte de mémoires MicroSD. ● Insérez la carte MicroSD dans l’appareil, puis formater la carte via le menu de l’écran. ● Avant insertion ou retrait de la carte de mémoires. Veuillez mettre hors tension votre ACT-ACAM-002 ● La Performance de la carte MicroSD peut être en déclin avec le temps. Ayez une carte en reserve. ● Ne pas conserver vos cartes MicroSD près de champs électromagnétique puissants ou source de chaleur.. ● Et éviter des endroits chaud / froid, poussiéreux ou humide. 60 ● Pendant l’utilisation, la carte MicroSD peut être légèrement chaude. La Maintenance ● Si vous ne prévoyez pas d’utiliser votre ACT-ACAM-002 pendant une longue période, retirez sa batterie et carte MicroSD et rangez l’appareil dans un endroit frais, sec et bien ventilé. Evitez les endroits ou sont stockés des produits chimiques corrosifs. ● Après une longue période de stockage. Veuillez tester toutes ses fonctions avant de l’utiliser. Utiliser une poire soufflante pour éliminer la poussière qui s’accumule sur l’objectif et n’utiliser que de produits nettoyants à base de solvants organiques. ● La ACT-ACAM-002 renferme des circuits électroniques de haute précision. N’essayez jamais de le démonter et évitez de toucher l’objectif ou le capteur avec vos doigts. 61 Nomenclature 62 63 Fonctions + Indicateurs Indicateur Fonction Interrupteur Touche On/Off (alim); commutateur de mode, vidéo, photo et lecture Touche obturateur Démarrage/Arrêt enregistrement vidéo, prendre photo; Lecture/Arrêt de lire fichier vidéo; menu de confirmation Touche MENU Ouvrir et sortir de menu ; Arrêt de lire fichier vidéo (mode lecture) Touche HAUT Zoom de lecture numérique: sélectionner menu (après le mode menu); fichier page-haut; pause lecture vidéo (mode de lecture); Retour vidéo rapide (mode de visualisation) Touche BAS Zoom numérique : sélectionner le menu (après le mode menu); fichier page-bas;Avance rapide vidéo (mode lecture) Témoin de charge Voyant “occupé” Voyant rouge allumé pendant la charge et arrêt après pleine charge (100%) Quand l’appareil en marche (exemple: pendant enregistrement, prise de vue, en veille automatique), the voyant led « occupé » restera allumé. 64 Avant la mise en route 3.Charger la batterie (fournie) L’appareil est livré avec une batterie rechargeable 3.7V au lithium. Veuillez charger la batterie avant chaque utilisation. Connecter votre appareil sur un ordinateur, le voyant LED est allumé lors du chargement. Prévoir entre 2 à 4 heures pour une charge à 100%. 65 2. Utilisation de la carte mémoire 2.1. Insérez une carte microSD dans le support carte jusqu’à ce qu’elle se met en place avec un déclic. 2.2. Pour retirer la carte de mémoire, enfoncer la carte légèrement. L’éjection de carte est automatique. Nota: L’appareil n’a pas de mémoires internes. Veuillez insérer une carte de type MicroSD avant la mise en route. Et éventuellement la formatée. 3. Démarrage et Arrêt : 3.1 Démarrage : Appuyer sur la touche ON/OFF pendant 3 secondes. La mise sous tension peut prendre un certain temps avant l’écran s’affiche. 66 3.2 Arrêt : Appuyer sur la touche ON/OFF pour l’arrêt. 3.3 Arrêt Auto: L’appareil fera un arrêt automatique quand il est en mode veille et pendant certain temps en mode ECO. Le temps par défaut pour arrêt automatique est 3 minutes. 3.4 Arrêt auto lors batterie faible : lorsque la batterie est faible, Sur l’écran ça affiche « ». Veuillez mettre en charge votre appareil. Quand l’indicateur change de couleur en rouge et clignotant, votre appareil va immédiatement en mode arrêt automatique. 4. Changement de modes L’appareil a 3 modes : Photo, Video et Lecture. Après démarrage, utiliser la touche ON/OFF pour sélectionner votre choix. Mode Video : enregistrement image Mode Photo : prendre des photos Lecture : lire vos fichiers, video ou photo 5. Indicateurs 5.1 Occupé: Quand l’appareil est en fonctionnement (enregistrement, photo, mode éco, etc.), le voyant s’allume. 67 5.2 En charge : Pendant l’arrêt auto, le voyant indique que le chargement n’est pas terminé. 6. Photo / mode enregistrement Par défaut, l’appareil commence en mode enregistrement. Appuyer sur la touche ON/OFF pour mode photo. En mode vidéo, Appuyer sur touche obturateur enregistrement puis la même touche pour arrêter. En mode photo, Appuyer sur touche obturateur pour prendre une photo. En mode video et photo, sélectionner HAUT / BAS pour la fonction Zoom numérique. 6.1 Affichage en mode Photo 1.Mode Photo; 2.Trois photos en continu; 3.Mode de retardateur; 4.Résolution photo; 5.Qualité photo; 6.Nombre de photos availabel; 7.Zoom numérique 8.État de la batterie 9.Détection de visage (en option) 68 6.2 Affichage en mode enregistrement 1.Mode video; 2.Qualité video; 3.Video frame rate 4.Resolution vidéo 5.Temps restant 6.Detection visage 7.Indicateur Zoom numérique 8.Niveau de batterie Nota: 1. 2. Pour les enregistrements vidéo en HD ou FHD. Veuillez utiliser les cartes MicroSD de type Class 10 minimum. Pendant l’enregistrement, l’écran s’arrêt automatiquement en mode ECO. Appuyer sur la touche ON/OFF pour afficher l’écran. 69 7. Menu de réglages (Photo / vidéo) 7.1 Affichage du Menu En mode photo, video ou playback, Appuyer sur la touche MENU pour faire votre choix, puis faire HAUT / BAS pour sélectionner et la touche « Obturateur » pour confirmer votre sélection. Votre selection sera en soulignement « BLEU ». En mode vidéo vous pouvez désélectionner la fonction video en boucle en choisissant “Seamless”. La durée de la Video peut être limitée à 1, 3 ou 5 minutes. Chaque video sera attaché ensemble. Lors de manque de place sur la carte, le fichier moins récent sera automatiquement effacé et remplacer par un fichier plus récent et pouvoir filmer en boucle. Menu mode Photo Menu mode Vidéo 70 7.2 Réglages du menu système. Sélectionner le menu en appuyant sur la touche menu et un appuie rapid sur touche demurrage ON/OFF pour aller aux réglages menu. Utiliser les touches HAUT/BAS pour sélectionner votre choix puis la touche « Obturateur » pour confirmer. Dans le sous menu, sélectionner avec la touché HAUT ou BAS pour sélectionner votre choix puis sur la touche « obturateur » pour la confirmation. Après avoir retourné au menu principal, appuyer sur la touche Menu pour sortir. Mode menu système 71 7.3 Réglage de l’horloge Apres avoir appuyé sur la touche menu, puis sur ON/OFF, votre Menu s’affiche sur l’écran. Naviguer avec la touche “Down” vers “Date and time”, puis appuyer sur “obturateur” pour avoir la fenêtre en réglage DATE et HEURE. Dans la fenêtre de réglage “date / time”, appuyer sur “ON/OFF” pour sélectionner votre choix (date, heure) à ajuster, puis les touches HAUT ou BAS, Et touche « Obturateur » pour la confirmation. Ou touche Menu pour annuler et sortir du menu de réglages. 72 7.4 Paramètre réglage, Mode lecture Sélectionner votre appareil en mode “Lecture”. Appuyer sur la touche HAUT ou BAS pour votre choix de réglages et touche « obturateur » pour aller au sous-menu. Dans le sous-menu, avec les touches HAUT ou BAS pour la sélection et puis confirmer avec la touche « obturateur ». Retourner au menu ou sortir du menu en appuyant sur la touche “menu” ▲ Menu “Lecture” 73 8. Mode Lecture Appuyer sur la touché “ON/OFF” pour entrer en mode de lecture. Puis sélectionner le fichier pour visualisation. Utiliser les touche HAUT / BAS pour sélectionner un fichier Photo ou Vidéo. Lecture : Appuyer sur la touche “obturateur” pour lire fichier vidéo, et la touche HAUT / BAS pour retour rapide / avance rapide, Puis sur la touche MENU pour arrêter la lecture. Lecture fichier Vidéo Mode pause Vidéo 9. Connecter sur un ordinateur pour échanger des fichiers photo ou vidéo Quand votre appareil est connecté avec un ordinateur, sélectionner le mode ‘removable disk’ (MSDS). L’icône “removable disk” va être ajouté automatiquement dans la fenêtre de Windows file explorer. Les fichiers photo ou vidéo seront sauvegardé dans “DCIM\100MEDIA” dans la branche removable disk. 74 Nota: Pendant le transfère des fichiers, veuillez ne pas débrancher le câble pour éviter de perte de données. Fonctions incorporées dans cet appareil L’ACT-ACAM-002 peut être utilisé comme une webcam (seulement en vidéo) sur votre PC. Marche à suivre pour la function webcam. 1. Connectez l’appareil sur votre PC via le câble USB (fourni) 2. Puis allumez votre ACT-ACAM-002, appuyer sur la touché ON/OFF. 3. L’écran va montrer les différentes fonctions, sélectionner la fonction “PC Camera” 4. Windows va mettre à jour les fichiers nécessaires pour le bon fonctionnement. 5. Puis le ACT-ACAM-002 est prêt à fonctionner comme une webcam et compatible avec des applications diverses comme ; Skype … 75 Specifications Capteur image 5.0 MP type CMOS Mode Video, photo, lecture Objectif F2.5 f=3.53mm Zoom numérique 8x Ecran LCD 2.0” couleur matrice active TFT Resolution photo 12M (4000 x 3000), 8M (3264 x 2448), 5M (2592 x 1944) Resolution video FHD (1920x1080@30fps) HD (1280X720@30fps) HD (1280X720@60fps) Support sauvegarde Carte MicroSD (TF) , vitesse, class 10 (Max. 32Go) Format de fichier JPEG (photo), AVI / MOV (vidéo) USB USB type 2.0 Alimentation 5V, 800 mA Batterie 3.7V rechargeable batterie lithium (700 mAh) Compatible Windows XP / Vista / 7 / 8, Mac 10.2 Dimensions 58 x 44 x 23 mm Poids 55 g Nota: La conception et les spécifications sont susceptibles de modifications sans préavis. 76 Bienvenido Gracias por elegir esta cámara. Por favor, lea atentamente el manual antes del primer uso y consérvelo en un lugar seguro para futuras consultas. Todos los textos, imágenes y capturas de pantalla, están de acuerdo con los últimos estándares, sin embargo, el producto real puede diferir ligeramente a veces debido a los cambios en las técnicas de producción, los materiales o la funcionalidad del producto. Precauciones Para el mejor resultado por favor utilice tarjetas microSD de alta velocidad Class10 o por encima en esta cámara. Instrucciones para utilizer la tarjeta de memoria ● Cuando se coloca la tarjeta microSD en la cámara, formatee la tarjeta de memoria en primer lugar a través de la pantalla de menú; ● Antes de insertar o extraer la tarjeta de memoria, desconecte la fuente de alimentación de la cámara; ● El rendimiento de la tarjeta de memoria disminuirá con el tiempo. En el caso de un rendimiento reducido, se necesita una tarjeta de memoria nueva; ● No guarde la tarjeta de memoria cerca de fuertes campos electromagnéticos o magnéticos, 77 ● ● ● como altavoces o receptores; No utilice ni almacene la tarjeta de memoria cambiando rápidamente, temperaturas muy altas o bajas; Mantenga la tarjeta de memoria limpia y alejada de líquidos. En caso de contacto líquido, por favor secar rápidamente con un paño suave Tenga en cuenta que la tarjeta de memoria puede quedarse un poco caliente después del uso a largo plazo, esto es normal; Mantenamiento de la cámara ● Cuando no utilice la cámara, guárdela en un lugar limpio y seco, lejos de la luz solar directa; ● Si necesita limpiar la lente de la cámara, primero sople cualquier partícula de polvo o suciedad y que utilice un paño suave que es apto para la limpieza de equipos ópticos para limpiar suavemente la lente. Utilice únicamente limpiador profesional para limpiar la lente de la cámara. No utilice ningún disolvente orgánico; ● No toque la superficie de la lente con los dedos. 78 Apariencia Disparador/ OK Micrófono Energia / modo Indicador de bateria Indicador de actividad 79 Lente Agujero para trípode 80 Funcciones de teclas y Indicadores Tecla / Indicador Tecla de energia Funcción Encendido/ apagado; cambiar entre él modo de cámara de vídeo y repoducción de fotos Iniciar/ parar la grabación de vídeo; sacar la foto; reproducir / detener la Tecla de disparador reproducción de archivos de vídeo (modo de reproducción); menú de confirmación Tecla menu Abrir y cerrar el menú, parar reproducción de archivos de video (modo de reproducción) Zoom-in digital: menú de selección (después de abrir el menú); presentar Tecla UP la página siguiente; hacer una pausa en la reproducción de vídeo (modo de reproducción); Retroceso rápido de vídeo (modo de reproducción) Salida de zoom digital; selección de menu (después de abrir él menu); Tecla Down presentar la página anterior; avanzo rápido de video (modo de reproducción) Indicador de bateria Indicador se ilumina en rojo durante la carga y se apaga cuando la carga está completada Indicador de Cuando la cámara está ocupada (por ejemplo: durante la grabación de actividad video, captura, pantalla apagada), el indicador de actividad se ilumina 81 Antes de la primera utilización 4.Cargue la bactería de litio incorporada La cámara está equipada con una batería de litio de 3,7 V integrada. Por favor cargue la batería por completo antes del primer uso y cargarlo cada vez que la cámara presente batería baja. Conecte la cámara al ordenador y cargarlo en el estado de apagado. El indicador de carga se enciende al cargar, y se apagará cuando la batería está completamente cargada. Por lo general, la batería se carga completamente después de 2-4 horas 82 2. Cómo utilizar la tarjeta de memoria 2.1. Inserte correctamente la tarjeta microSD en el soporte de la tarjeta como se indica en el cuerpo de la cámara. 2.2. Para extraer la tarjeta de memoria, presione suavemente el extremo de la tarjeta, la tarjeta será expulsada. Nota: La cámara no está equipada con la memoria incorporada. Por favor, inserte la tarjeta de memoria antes de usarla. Antes de usar la cámara, es necesario formatear la tarjeta de memoria en la cámara. 3. Iniciar y apagar: 3.1 Iniciar: Pulse la tecla de energía durante 3 segundos, la cámara mostrará la pantalla de inicio 83 y entra en estado de encendido; 3.2 Apagar: pulse el botón de Energia cuando la cámara está en modo de inactividad para cerrar; 3.3 Apagar automático: la cámara se apagará automáticamente cuando la cámara está en modo inactivo durante un tiempo determinado para ahorrar energía. El tiempo predeterminado para el apagado automático es de 3 minutos. 3.4 Apagar con baja potencia: cuando la bacteria esta baja, la pantalla LCD enseñará “ ”. Por favor cargue la bacteria en este caso. Cuando él ícono vuelve rojo y parpadea, la camara se apagará automaticamente. 4. Función de cambio de modo La camara tiene 3 modos: modo foto, modo video e modo de reproducción. Utilize la tecla de energia para cambiar entre los modos despues de empezar a funccionar. Modo de video: para grabar videos; Modo de foto: para sacar fotos; Modo de reproduccion: para reproduzir él video actual. 84 5. Indicadores 5.1 Indicador de actividad: Cuando la cámara está funcionando (por ejemplo, la grabación, la fotografía, la pantalla de apagado automático, etc), el indicador se encenderá; 5.2 Indicador de carga: En estado de apagado. Él indicador de ardiente significa que la bateria se está cargando. 6. Modo Foto/ grabación Por defecto, la cámara puesta en marcha en modo de grabación. Use la tecla de encendido para cambiar a modo de foto. En el modo de vídeo, pulse de disparador para iniciar la grabación, y pulse disparador de nuevo para detener la grabación. En el modo foto, pulse disparador para tomar la foto directamente. Tanto en el modo de vídeo y foto, pulse Arriba / Abajo para zoom digital in / out 6.1 Screen display in photo mode 1.Modo de foto; 2.Modo de disparar 3 fotos continuas; 3.Modo de autodisparador; 4.Resolutión de la foto; 5.Calidad de la foto; 6.Contador de disparos; 7.Icono de zoom digital 8.Estado de bateria 9.Detector de rostro 85 6.2 Visualización de la pantalla en el modo de grabación 1.Modo de video; 2.Calidad de video; 3.Velocidad de fotogramas de video 4.Resolucion del video; 5.Tiempo disponible para grabar; 6.Detector de rostros; 7.Icono de zoom digital; 8.Estado de bateria; Nota: 1. Al grabar él video en HD o FHD, utilizer la tarjeta de memoria de alta velocidad, class 10 o superior . 2. Durante la grabacion la pantalla se apagará automaticamente para ahorrar energia. Puede pulsar brevemente la tecla de energia o la tecla del disparador para reactivar la pantalla. 86 7. Menu cofiguración, modo de foto y video 7.1 Menu pantalla En la foto, el video y el modo de reproducción, pulse la tecla Menú para abrir el menú y, a continuación, pulse la tecla Arriba / Abajo para seleccionar los elementos de menú y pulse la tecla de disparador para confirmar la selección o acceder al submenú. Al seleccionar los elementos del menú, el elemento de menú seleccionado se representa en color azul. En el modo de vídeo se puede utilizar el ajuste de menú "sin costura" para permitir/ desactivar la grabación en bucle Los segmentos de vídeo se pueden ajustar a las longitudes de 1/3/5 minutos. Todos los segmentos de vídeo se conectaran perfectamente entre sí. Cuando la tarjeta está llena, el segmento de vídeo más antiguo se borra y sobrescribe automáticamente. De esta forma la cámara puede mantener continuamente la grabación de vídeo Menu modo foto Menu modo video 87 7.2 Menu de configuración del sistema Abra el menú pulsando la tecla Menú y pulse brevemente la tecla de energía para cambiar al menú de configuración del sistema. Pulse la tecla arriba / abajo para seleccionar los elementos de menú y pulse la tecla de disparador para confirmar la selección o acceder al submenú. En el submenú, pulse Arriba o Abajo para seleccionar el elemento de menú y pulse él disparador para confirmar. Después de volver al menú principal, pulse la tecla Menú para salir del menú. Menu modo del sistema 88 7.3 Configuracion de fecha y hora Pulse la tecla Menú para abrir el menú, a continuación, pulse la tecla de energia para cambiar al menú de configuración del sistema y pulse la tecla de disparador para confirmar. Pulse la tecla Abajo para elegir "Fecha y hora" en el menú, y pulse la tecla de disparador para entrar en la ventana de configuración de fecha / hora En la ventana de configuracion de fecha/ hora pulse la tecla de energia para elegir (fecha/ hora) que desea ajustar y a, continuación, pulse la tecla arriba o abajo para realizar el ajuste, pulse la tecla del disparador para su confirmación cuando se haya completado el ajuste.Pulse la tecla Mnú para cancelar el ajuste y salir.Por ultimo, pulse la tecla Menú para salir del menu 89 de configuración. 7.4 Configuración del menu de reproducción Coloque la cámara en modo de reproducción. Pulse la tecla Menú para abrir el menú de reproducción principal, pulse Arriba o Abajo para seleccionar los elementos del menú y la tecla del disparador para entrar en el submenú. En el submenú, pulse de nuevo la tecla arriba o abajo para la selección, y pulse la tecla del disparador para confirmar. Después de volver al menú principal, pulse la tecla Menú para salir del menú. ▲ Menu Reproducción 90 8. Modo de reproducción Presione la tecla de encendido para entrar en el modo de reproducción para buscar archivos de fotos / videos y reproducir los videos grabados. Pulse la tecla arriba / abajo para seleccionar la foto/ video anterior o seguiente Reproducir película: Pulse él botón disparador para iniciar/ pausar el video, pulse la tecla de arriba/abajo para revertir / avanzar rapidamene, presione él botón MENU para detener la reproducción de videos. Reproducción de video Modo de pausa de video 9. Conectar al ordenador para descargar foto / video Cuando la cámara está conectada al ordenador, seleccione el modo “disco removable” (MSDS). Habrá un disco romovible añadido en el windows explorer. Los archivos de fotos o de video se almacenan en una carpeta denominada “DCIM/100MEDIA” en este disco extraíble. Navegar en esta carpeta para seleccionar y copiar archivos en el disco duro de su ordenador. Nota: durante la transferencia de archivos, no esta permitido desconectar el cable USB o 91 extraer la tarjeta de memoria para evitar la pérdida de datos Utilizar funciones de la camara La ACT-ACAM-002 tambien se puede utilizer como camara web (solo video) en su PC.. Para utilizer la función de webcam, por favor siga los siguientes pasos: 1. Conecte la cámara a su PC con él cable USB suministrado 2. Encienda la cámara con él botón de energia 3. La pantalla de la camara mostrará las funciones del PC (MSDS por defecto), seleccione “camara PC” 4. Windows ahora todos los controladores de la camara necesarios, automaticamente 5. Ahora puede utilizer la ACT-ACAM-002, como webcam en todo él software comun que soporta el uso de camaras web, por ejemplo, skype. 92 Parámetros técnicos Sensor de imagen Modo de función Lente Zoom digital Pantalla LED Resolución de la imagen 5.0 MP CMOS Video,foto, reproducción F2.5 f=3.53mm 8x Pantalla LCD 2.0” colores 12M (4000 x 3000), 8M (3264 x 2448), 5M (2592 x 1944) Resolucción del video FHD (1920x1080@30fps) HD (1280X720@30fps) HD (1280X720@60fps) Medio de almacenamiento Formato del archive Puerto USB Fuente de alimentación Bateria Requisitos del Sistema operativo Dimensiones Peso Tarjeta MicroSD (TF), velocidad class 10 (Max. 32GB) JPEG (photo), AVI / MOV (video) USB 2.0 5V, 800 mA incorporada 3.7V batería de litio recargable (700 mAh) Windows XP/Vista/7/8, Mac 10.2 58 x 44 x 23 mm 55 g Nota: Las especificaciones de diseño de productos se basan en la informacion mas reciente disponible, mientras la elaboracion de este manual. Todas las especificaciones y caracteristicas de la camara estan sujetos a cambios sin previo aviso 93 (ENG) Declaration of conformity This product is tested and complies with the essential requirements of the laws of member states concerning EMC (2004/108/EG). The CE declaration can be found under www.maxxter.biz (NL/BE) Verklaring van overeenstemming Dit product is getest en voldoet aan alle geldende nationale en Europese richtlijnen en regelgeving met betrekking tot EMC (2004/108/EG). Dit product heeft een CE-markering en de bijbehorende CE-verklaring van overeenstemming is beschikbaar op onze website: www.maxxter.biz (FR/BE) Déclaration de conformité Le produit est contrôlé et rempli les exigences des directives nationales et de la directive EMC (2004/108/EG). La conformité CE a été démontrée et les déclarations correspondantes sont déposées chez le fabricant a: www.maxxter.biz (DE) Konformitätserklärung Dieses Produkt wurde getestet und stimmt mit den grundlegenden Anforderungen der Richtlinie EMV (2004/108/EG) überein. Die Konformitätserklärung kann auf unserer Webseite www.maxxter.biz heruntergeladen werden. 94