1
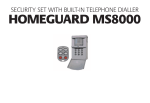
SECURITY SYSTEM WITH BUILT-IN TELEPHONE DIALLER
HOMEGUARD MS8000
OMEGUARD
MS800
OWNER’S MANUAL
2
option KR21
art. no. 09169
20012 / 050204© ALL RIGHTS RESERVED MARMITEK ®
1. SAFETY PRECAUTIONS:
3
2
5
1
a. HomeGuard is designed for indoor use only.
b. Use HomeGuard only in dry places
c. The supplied power adapter is designed for use
for 230V only
d. Do not open the power adapter, as there is
dangerous voltage inside. No serviceable parts
are located inside.
e. In case of any need for service, contact your
nearest Marmitek Authorised Service Centre
(MASC).
f. The built -in siren generates an extremely high
noise level that may harm you if you are too
close! Never put your ears close to the
HomeGuard.
4. Battery compartment:
Contains a back-up battery in case of a power failure
or tampering. For longer back up times a 9V alkaline (approx.10h) or Lithium battery (approx. 30h)
can be used.
Battery lifetime is reduced each time the power is
switched off or the power adapter is disconnected
from mains. If the HomeGuard is disconnected from
mains for a longer period of time on purpose,
remove the battery first.
1. Keyboard:
Open the cover by pulling the upper part forward.
5. Status indicators:
red:
• burns continuously when the alarm
is activated.
green: • flashes when the device is being
programmed.
• flashes when the device is being turned
on (time delay).
• burns continuously when the device is on.
2. Passive Infrared Sensor (PIR):
Detects motion within a range of 12 meters and an
opening angle of 110˚.
6. Telephone input:
Connects the HomeGuard to the public telephone
network with the supplied cable.
3. Siren:
Built-in 90dB siren is triggered by an alarm and can
7. Power supply:
Only use the supplied 12V power adapter.
2. IMPORTANT FUNCTIONS AND
CONTROLS:
7
be switched of (silent alarm) via the keyboard after
entering your personal access code (PIN).
4
8
2
6
MARMITEK - NICOSHOP
8. External alarm contact:
This input allows you to connect any external alarm
device with a non-powered NO (Normally Open) or
NC (Normally Closed) contact. E.g. smoke alarms,
magnetic door/window contacts, flood and temperature detectors, etc.
You may connect multiple devices in series to the
HomeGuard. This allows you to turn your
HomeGuard into a complete security system with
built-in telephone dialler.
To connect any external security device, use the
supplied cable with mini-plug or install an equivalent jack plug on these devices.
3. WIRELESS KEY FOB REMOTE
CONTROL KR21 (OPTION)
ARM: Will put the HomeGuard into the armed position.
The alarm is instant or delayed. Delayed arming
allows you to leave the room within 30 seconds or
enter the room and switch off the alarm within 15
seconds after entering. The factory default is instant
arming (no delay). To change this setting please
refer to Delayed Arm (7).
DISARM: Switches off and resets the HomeGuard.
PANIC: If pressed simultaneously will cause an alarm
instantly.
Lights On/Lights Off: These buttons are not used
with HomeGuard.
HOMEGUARD MS8000
Indicator flashes if remote transmits a command. If
indicator does not flash or lights up weakly, replace
the batteries.
The battery holder is located inside the remote.
The back of the remote can be easily opened using
your fingernails or a small screwdriver. Only use
3V lithium batteries model CR2016. Push the ARM key
for more than 3 seconds and release the button; the
indicator blinks. If batteries are replaced, you’ve to reregister with the base station (refer to installation).
5
1
2
4
4
3
3
4. SELECTING A SUITABLE LOCATION
The base station has a so-called passive infrared element that detects any change in temperature within its range. A certain amount of heat related to
human beings is detected for an alarm. However to
achieve the best performance of your HomeGuard,
note following installation recommendations before
installing:
a. It should be located at approx. 170-180cm
height on a fixed vertical surface e.g.
wall or cupboard
b. Choose a location where an intruder may pass
the monitored area at all time in an early stage
of intrusion.
c. Choose a location near to a wall outlet and telephone socket.
3
d. The sensor should not be placed above or near
heating elements or in front of air-conditioners.
e. Do not mount the sensor on a metal surface or
next to electrical equipment such as TV sets or
computers.
Caution:
a. Radio equipment (e.g. wireless headphones or
loudspeakers) working on a frequency band of
433MHz will not create a false alarm, however,
these devices will limit the RF range of the
remote control considerably.
b. Pets, e.g. dogs or cats, may trigger the alarm,
and should therefore not be kept in the same
room as where the activated sensor is mounted.
5. PIN CODE SETTING:
Your HomeGuard can be operated and programmed
by using a so-called PIN code (Personal Identification
Number). The factory default code is: [0000]. To
avoid unauthorised use, enter your own PIN code.
Note: Choose a code you will easily remember,
since the HomeGuard will recognise this code only
for further operation.
1. Enter your current PIN (Personal Identification
Number). If you have never changed this code
4
before, the factory default code is [0000]. You will
hear three high tones and one low tone as confirmation. The green indicator will start flashing.
2. Press 5 on the keyboard of the HomeGuard: One
low tone is given for confirmation.
3. Enter a new 4-digit PIN code: You will get three
high tones and one low tone as confirmation
and the indicator stops flashing.
6. PROGRAMMING OF
TELEPHONE NUMBERS.
2. Press 2 on the keyboard of the HomeGuard: One
low tone is given for confirmation.
3. Press the [ * ] button: One high tone is given for
confirmation.
4. Enter the first telephone number you selected
(max. 16 digits). If a dialling pause is required
(e.g. with a certain type of PABX between 0 and
the number you want to dialled in order to
obtain an outside line) press another [ * ] for a
one second pause. One high tone is given for
confirmation of each number entered.
You may select up to three telephone numbers to
be contacted if the alarm is triggered. These numbers may include mobile (GSM) numbers, however
you are not allowed to use national emergency
numbers from e.g. police, paramedical, etc.
The numbers you chose should be have well
informed people, instructed by you and able to help
in case of an alarm (e.g. neighbours, friends, relatives or your own mobile).
5. Press #: One high tone is given for confirmation.
To enter telephone numbers:
1. Enter your PIN (Personal Identification Number).
Factory default is [0000]: You will hear three
high tones and one low tone as confirmation.
The green indicator starts flashing.
Note: All three numbers should be entered. You
may enter the same number more than once.
6. Press 1 to place the telephone number you just
entered in memory location 1. One short low tone
is given and the green indicator stops flashing.
Repeat this procedure with the two other selected
telephone numbers by pressing 2 and 3 for placing
these in memory positions 2 and 3 respectively.
Call Identification:
If you select telephone numbers of people who’s number
MARMITEK - NICOSHOP
has been entered by more than one HomeGuard, you can
transmit an extra audible signal with the pre-recorded
message in order to identify the HomeGuard calling. The
factory default is one beep at the end of the message.
To change the number of beeps (1, 2 or 3):
1. Enter your PIN
2. Press 4 on the keyboard
3. Press 1, 2 or 3 for the required number of
identification beeps.
7. REGISTERING REMOTE
CONTROLS (HANDSHAKE)
HomeGuard can be remotely controlled by up to
4 radio remotes (1 piece KR21 supplied). For security reasons, each remote selects a unique code (1
out of 65.536) after the battery has been installed.
Before using HomeGuard, the base station has to
learn this specific code from each remote:
1. Enter your PIN (Personal Identification Number).
Factory default is [0000] see (5): You will hear
three high tones and one low tone as confirmation. The green indicator starts flashing.
2. Press 1 on the keyboard of the HomeGuard: One
high tone is given for confirmation.
HOMEGUARD MS8000
3. Press the ARM button on your remote: One low
tone is given for confirmation.
high tones and one low tone as confirmation.
The green indicator starts flashing.
4. Repeat step 1-3 for a second up to fourth
remote if required.
2. Press 7 on the keyboard of the HomeGuard: One
low tone is given for confirmation.
5. Press any button on your HomeGuard keyboard
to finalise the registration procedure: One short
low tone is given and the green indicator stops
flashing.
3. Press [ * ] for Delay Arm or # for Instant Arm:
One tone is given for confirmation and the indicator stops flashing.
9. SIREN
If no successive commands are entered within a
period of 15 seconds, the base station returns to
normal operation. To restart the registration you
start the procedure from step1.
8. DELAY ARM
The alarm mode may be activated by either the
remote control or by the keyboard.
If the remote control is used, the HomeGuard arms
and disarms instantly.
If you require a delay, in order to allow yourself to
leave or enter the room before arming or disarming
the HomeGuard, you may set the HomeGuard to
Delay Arm:
1. Enter your PIN (Personal Identification Number).
Factory default is [0000]: You will hear three
Your HomeGuard is equipped with a built-in siren.
This siren will frighten intruders so they’ll leave the
house.
If you require a so-called silent alarm (without siren),
you can change the factory default:
1. Enter your PIN (Personal Identification Number).
Factory default is [0000]: You will hear three
high tones and one low tone as confirmation.
The green indicator starts flashing.
2. Press 3 on the keyboard of the HomeGuard: One
low tone is given for confirmation.
3. Press [ * ] for Siren On or # for Silent Alarm: One
tone is given for confirmation and the indicators
stops flashing.
5
10. DE-ACTIVATING THE BUILT-IN
MOTION SENSOR:
If you prefer to operate the HomeGuard only by
means of the external alarm contact rather than the
built-in motion sensor, you can de-activate the PIR:
1. Enter your PIN (Personal Identification Number).
Factory default is [0000]: You will hear three
high tones and one low tone as confirmation.
The green indicator starts flashing.
2. Press 6 on the keyboard of the HomeGuard: One
low tone is given for confirmation.
3. Press [ * ] for activating the PIR or # for de-activating the PIR: One tone is given for confirmation and the INDICATOR stops flashing.
Factory default is [0000]: You will hear three high
tones and one low tone as confirmation. The green
indicator starts flashing.
Press # in the keyboard: You will hear one low tone
as confirmation and the RED indicator lights up, the
GREEN indicator will flash during the delay (30 seconds).
After 30 seconds the HomeGuard is armed and will
generate one low tone for confirmation.
To disarm the HomeGuard via the keyboard:
1. Enter your PIN code: 4 short tones will be generated as confirmation.
2. Press [ * ] : One short tone will be generated and
the RED indicator will go out.
11. OPERATING INSTRUCTIONS:
Arm-Disarm
The HomeGuard may be armed and disarmed by
the remote control (option) or keyboard.
To activate the security system from the keyboard (always delayed):
To arm and disarm the HomeGuard with the
remote control (option):
1. Press ARM to activate the alarm.
2. Press DISARM to de-activate the HomeGuard.
If you use the remote, the arming and disarming
may be instant of delayed, depending on the settings of the HomeGuard.
To generate a panic call: press both PANIC
buttons at the same time (option).
To reset the alarm:
If an alarm has occurred it can be reset by:
1. The person called pressing 0 on the telephone
dialler just after the beep(s) in the message.
2. Disarming the system on the keyboard by
entering your PIN followed by [ * ]
3. Pressing DISARM on the remote control (option).
Alarm message:
During an alarm the telephone dialler will dial
the first number. It will start transmitting the
pre-recorder message as soon as the last digit
has been dialled. The message lasts 9 seconds
and will be repeated twice. The pre-recorded
message is followed by a beep. After this beep
the system will wait for call confirmation which
can be given by pressing 0 on a DTMF (touch tone)
telephone.
In case the confirmation is not received, the
HomeGuard will start dialling the second number
and follow the same procedure. If the second person does not give confirmation, the third number
will be dialled.
Enter your PIN (Personal Identification Number).
6
MARMITEK - NICOSHOP
NOTE:
Instruct the person who’s number has been entered
to give the confirmation 0 just after the beep(s).
Since telephone answering machines or voice mail
facilities will not generate the confirmation, these
will be ignored. It is recommended to do a test with
the people involved in order to let everyone get
aquatinted with the system.
12. TROUBLESHOOTING:
1. The base station does not react at all, the green
indicator is not on:
Check the power supply and/or the replace the
back-up battery.
2. The telephone dialler does not dial out:
Check that the telephone plug is connected
properly
Check that the telephone outlet is responding
to a normal analog telephone.
the battery if required.
Check if no other devices interfere on the same
frequency e.g. wireless headphones etc.
5. PIR or siren do not respond:
Check that PIR or SIREN has been activated.
6. The sensor HomeGuard does not react to the
remote:
Follow the registration procedure in order to
lock in the remote.
Check that the indicator on the remote comes
on. If not, replace the battery
7. Any other malfunction:
Disconnect the HomeGuards from mains and
back-up battery. This will reset the HomeGuard.
Re-install the HomeGuard according to the
instruction manual.
Do not open the power supply or
HomeGuard. No serviceable parts inside!
3. False alarms:
Reposition the HomeGuard, away from heating
elements, direct sunlight, etc.
Check that no pets can trigger the alarm.
4. Limited range of the remote (option):
Check the condition of the battery and replace
HOMEGUARD MS8000
7
PIR of sirene reageren niet:
Ga na of de PIR of SIRENE zijn ingeschakeld.
De sensor reageert niet op de
afstandsbediening:
Volg de instructies op voor het aanmelden van afstandsbedieningen.
Ga na of de indicator op de afstandsbediening aan
gaat wanneer u op de toetsen drukt. Wanneer dit
niet het geval is dient u de batterij te vervangen.
Bij andere problemen:
Haal de adapter uit het stopcontact en verwijder
de back-up batterij. De HomeGuard zal hierdoor
worden gereset en neemt de oorspronkelijke fabrieksinstellingen aan. Installeer de HomeGuard
opnieuw met behulp van de aanwijzingen in deze
gebruiksaanwijzing.
DECLARATION OF CONFORMITY
Hereby, Marmitek BV, declares that this HomeGuard MS8000 is in compliance with the
essential requirements and other relevant provisions of Directive 1999/5/EC.
Bij deze verklaart Marmitek BV, dat deze HomeGuard MS8000 voldoet aan de essentiële
eisen en aan de overige relevante bepalingen van Richtlijn 1999/5/EC.
Par la présente Marmitek BV déclare que l'appareil HomeGuard MS8000 est conforme
aux exigences essentielles et aux autres dispositions pertinentes de la directive 1999/5/CE
Hiermit erklärt Marmitek BV die Übereinstimmung des Gerätes HomeGuard MS8000 den
grundlegenden Anforderungen und den anderen relevanten Festlegungen der Richtlinie
1999/5/EG.
MARMITEK BV - PO. BOX 4257 - 5604 EG EINDHOVEN - NETHERLANDS
Maak de HomeGuard en de bijgeleverde
voedingsadapter niet open.
Deze apparatuur bevat geen vervangbare
onderdelen!
8
MARMITEK - NICOSHOP