1
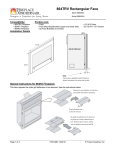
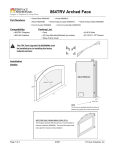
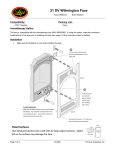
Hearthview (864) Wilmington Face
Pewter 99300495
Compatibility:
• 864TRV Fireplace
• 864ST Fireplace
• 864HO Fireplace
Black 99300496
Packing List:
• Face
• Glass Frame Cover
• Aromatherapy Bracket
• Face Baffle
• (2) Upper Face Brackets (w screws attached)
• (4) Fireplace Brackets (upper and lower)
• (16) Nuts (for Face Brackets & Aromatherapy Bracket))
• (2) 10-24 1-1/2" Screws
Aromatherapy Option
NOTE: Aromatherapy option is not compatible with the 864HO.
This face is compatible with the aromatherapy tray (sku 98500385) on the 864ST and 864TRV.
If using this option, make the necessary modifications to the face prior to installing the face
(see page 7 of this instruction sheet for details).
Installation Details
35-3/4"
SIDE OF FIREPLACE
1”
41”
0” TO 1”
NOTE:
This face has an adjustable bracket that allows for
different facing depths to be tucked under the face.
Page 1 of 10
17601408 - 8/31/10
© Travis Industries, Inc.
Hearthview (864) Wilmington Face
Pewter 99300495
Black 99300496
Special Instructions for 864HO Fireplaces
The Wilmington face requires the outer grill deflectors to be removed to allow for installation of the face mounting
brackets. Once the brackets are installed, replace the deflectors. See the instructions below.
Remove the outer deflector on both sides
(use needle-nose pliers if necessary).
These tabs bend down
to allow for removal.
Re-attach the deflectors once the
mounting brackets are in place. Bend the
tabs down, making sure the deflectors are
secure and flat.
Special Instructions for 864ST Fireplaces
The Wilmington face requires removal of the center deflector prior to installing the face.
NOTE: This deflector must be replaced to its original position if a different face or grill is used.
Remove the center deflector (use needlenose pliers if necessary).
These tabs bend down
to allow for removal.
Re-attach the deflector to the
louver. Bend the tabs as
shown, making sure the
deflector is secure and flat.
WARNING: The deflector must be
replaced in its original position if a
different face or grill is used.
Page 2 of 10
17601408 - 8/31/10
© Travis Industries, Inc.
Hearthview (864) Wilmington Face
Pewter 99300495
Black 99300496
Installation
1 Install the fireplace brackets onto the fireplace following the directions below.
Remove and discard the nuts and bushings
above and below the firebox.
Discard the stock
bushings and nuts.
Upper
Bracket
Place the upper and lower brackets in place
and secure using the nuts included with this
kit.
Discard the stock
bushings and nuts.
Lower
Bracket
Repeat these steps for the opposite side.
Upper
Upper
Left
Right
Bracket
Identification
Lower
Lower
Left
Page 3 of 10
Right
17601408 - 8/31/10
© Travis Industries, Inc.
Hearthview (864) Wilmington Face
Pewter 99300495
Black 99300496
2 Install the glass frame cover following the directions below.
Place the cover over the top of the door frame.
Push these pins inwards
to lock the cover in place.
Page 4 of 10
17601408 - 8/31/10
© Travis Industries, Inc.
Hearthview (864) Wilmington Face
Pewter 99300495
Black 99300496
3 Attach the face baffle and face brackets following the directions below.
Face
Baffle
Attach the upper face
brackets to the face with
the included nuts.
Loosen these upper
nuts and slide the
face baffle over the
studs. Tighten the
nuts to secure the
baffle.
Page 5 of 10
17601408 - 8/31/10
© Travis Industries, Inc.
Hearthview (864) Wilmington Face
Pewter 99300495
Black 99300496
4 Install the face following the directions below.
Slide the face into place.
The tabs on the upper
brackets insert into the slots
on the fireplace brackets,
holding the face in place
while the screws are
tightened.
Optional Facing (and/or hearth) -See the installation manual for details.
Plated Surfaces
Use denatured alcohol and a soft cloth to clean plated surfaces. Marks
left on the surface may damage the face.
Denatured
Alcohol
Soft Cloth
Page 6 of 10
17601408 - 8/31/10
© Travis Industries, Inc.
Hearthview (864) Wilmington Face
Pewter 99300495
Black 99300496
Aromatherapy Option - Modification Details
The instructions below details preparation of the aromatherapy tray and the installation of the
extension. Refer to the aromatherapy kit for details on use of this kit.
1 Prepare the aromatherapy bracket following the directions below.
Bend these clips on the aromatherapy bracket up.
2 Attach the aromatherapy bracket to the back of the face following the directions below.
Attach the
aromatherapy bracket to
the face with the
included nuts.
Page 7 of 10
Aromatherapy
Bracket
17601408 - 8/31/10
© Travis Industries, Inc.
Hearthview (864) Wilmington Face
Pewter 99300495
Black 99300496
3 Remove the keystone and discard the retainer plate following the directions below.
Remove and
Aromatherapy Tray
discard this plate.
Plate
Keystone
4
Attach the aromatherapy tray to the keystone following the directions below.
Aromatherapy Tray
NOTE: Hand-tighten these nuts.
Over-tightening may create dimples in
the keystone.
Page 8 of 10
17601408 - 8/31/10
Keystone
© Travis Industries, Inc.
Hearthview (864) Wilmington Face
Pewter 99300495
5
Black 99300496
Attach the extension assembly following the directions below.
Slide the extension assembly into
place (it is installed from behind the
face). Secure the extension
assembly with two 8-32 nuts
(included with the aromatherapy kit).
NOTE: The studs on the
aromatherapy bracket
insert into these holes.
Page 9 of 10
Extension Assembly
17601408 - 8/31/10
© Travis Industries, Inc.
Hearthview (864) Wilmington Face
Pewter 99300495
6
Black 99300496
Slide the tray into the extension assembly following the directions below.
a
Slide the extension assembly
all the way out.
b
An
ti-
c
Tilt the tray upwards and
insert this notch under the
rollers. Tilt the tray level to
complete the installation.
Se
ize
Use a cottom swab to apply a thin layer of anti-seize
bearings and sliding surfaces.
to the
NOTE: the anti-seize stains very easily - take care to prevent it
from contacting your skin, clothing, or other surfaces.
INSTALLATION NOTE:
Page 10 of 10
The aromatherapy bracket comes in close proximity to the upper center glass latch.
When installing the face, position the bracket above the glass latch.
17601408 - 8/31/10
© Travis Industries, Inc.