1
READ AND UNDERSTAND THESE INSTRUCTIONS BEFORE INSTALLING LUMINAIRE
INSTRUCTION SHEET NO.
This luminaire is intended for installation in accordance with the National Electrical Code and local regulations.
To assure full compliance with local codes and regulations, check with your local electrical inspector before
installation. To prevent electric shock, turn off electricity at fuse box before proceeding.
Retain these instructions for maintenance reference.
IS: C3MR
Page 1 of 2
B0206
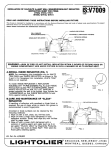
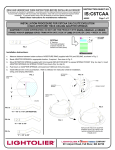
INSTALLATION PROCEDURE FOR CALCULITE® EVOLUTION TRIMS
WARNING: USE ONLY REFLECTOR TRIMS PROVIDED BY LIGHTOLIER. USE OF OTHER MANUFACTURER’S
REFLECTOR TRIMS MAY VOID THE UNDERWRITERS LABORATORIES LISTING AND COULD CONSTITUTE A FIRE HAZARD.
1. MAKE SURE THAT POWER TO THE LUMINAIRE IS OFF.
2. Select proper LAMP for application.
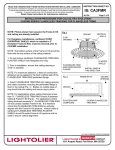
3. Remove TRIM FACEPLATE from TRIM BODY by
compressing TORSION SPRING. Fig. 1
4. Insert LAMP between LAMP SPRINGS of LAMP HOLDER
ASSEMBLY until face of LAMP sits firmly on GLASS LAMP
GUARD. Fig. 2
CAUTION! RISK OF FIRE. GLASS LAMP GUARD MUST BE
INSTALLED. Lamp manufacturers require the glass
lampguard be in place before energizing lamp, and that
great care must be taken that lamp is fully cooled before relamping. Avoid finger marks on the inside of the lamp, as it
may shorten lamp life or cause breakage.
5. Insert LAMP HOLDER ASSEMBLY into TRIM BODY until
LAMP SPRINGS snap into place. Fig. 3
6. Bring TRIM BODY to FRAME and attach SOCKET to bi-pin
prongs on LAMP ensuring LAMPHOLDER ASSEMBLY remains
in place. Fig. 3
Prior to installing your LIGHTOLIER TRIM, the horizontal rotation
can be preset within the luminaire. Note the BEAM CENTERING
NOTCH Fig.4 allows the installer to predetermine the direction
the lamp will point to illuminate a wall or object of interest (not
applicable to downlight trims). Once the notch is aligned with the
object of interest, simply tighten the ROTATIONAL BRAKE
SCREW until the spring is fully compressed Fig. 5.
Fig. 1
Trim Body
Torsion Spring
Trim Faceplate
Lamp
Fig. 2
Lamp Springs
Lamp Holder
Assembly
Lamp Removal
Spring
Fig. 3
Socket
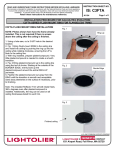
7. Ensure the two SECURING CLIPS are in the disengaged
position.Fig.1 on pg. 2. Align the two THICK CEILING READY
BRACKETS with the SECURING CLIPS and insert TRIM BODY
up until the bottom of TRIM BODY is flush or slightly recessed
from bottom of ceiling plane. Properly engage SECURING
CLIPS by pushing them into THICK CEILING READY
BRACKETS. Fig’s 2 & 3 on pg. 2
Rotational
Brake Screw
Fig. 4
Thick Ceiling
Ready Brackets
Fig. 5
Beam
Centering
Notch
U.S. AND FOREIGN PATENTS PENDING
A
COMPANY
631 Airport Road, Fall River, MA 02720
INSTRUCTION SHEET NO.
IS: C3MR
B0206
Page 2 of 2
READ AND UNDERSTAND THESE INSTRUCTIONS BEFORE INSTALLING LUMINAIRE
This luminaire is intended for installation in accordance with the National Electrical Code and local regulations.
To assure full compliance with local codes and regulations, check with your local electrical inspector before
installation. To prevent electric shock, turn off electricity at fuse box before proceeding.
Retain these instructions for maintenance reference.
INSTALLATION PROCEDURE FOR CALCULITE® EVOLUTION TRIMS
8. Install TRIM FACEPLATE by compressing TORSION SPRING
into corresponding detail of TRIM BODY then pushing TRIM
FACEPLATE up flush to ceiling. Fig’s 4 & 5
Securing Clips in
the disengaged
position
Fig. 1
TRIM MAINTENANCE
RELAMPING - Make sure that power to luminaire is OFF.
To relamp, simply swing TRIM FACEPLATE down allowing
TORSION SPRING to hold in place. Pull down on LAMP
REMOVAL SPRING. Disconnect LAMP from LAMP
SPRINGS and SOCKET. Install new LAMP following steps
4, 5, and 6 above.
CARE OF ALZAK REFLECTOR- Wipe with a soft, clean,
dry, lint-free cloth, or wipe with a soft clean cloth
dampened in mild detergent solution, then rinse and
dry with a lint-free soft cloth.
Trim Body Flush or
slightly recessed
Fig. 2
Fig. 3
Engage Clip
Insert Trim Body
Fig. 4
Fig. 5
U.S. AND FOREIGN PATENTS PENDING
A
COMPANY
631 Airport Road, Fall River, MA 02720