1
Lightolier
45 INDUSTRIAL WAY, WILMINGTON, MA 01887
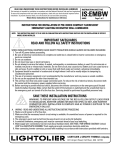
INSTALLATION INSTRUCTIONS FOR EYE-QLB LUMINAIRES
1
Preparation
• Rotate Side Reflectors to an open position.
• Remove Louver or Lens Assembly.
• Remove Side Reflectors by removing Tabs
from Slots.
2
Continuous Row
• For continuous row mounting, remove End Cover.
Screw
End
Cover
Louver
Assembly
(Illustrated)
Side Reflector
Housing
End
Cover
Side
Reflector
3
End
Plate
Tabs/Slots
Continuous Row Mounting
• With Fixture on its back, align Coupler holes with
second and third holes in Housing.
• From inside Coupler and Outside Fixture, drive
(2) Screws into First Housing.
• Assemble Stem Sets or Cable Sets.
• For Continuous Row Mounting use Stem Sets or
Cable Sets at the joints.
• Hang First Fixture and secure Second Fixture with
Coupler and Screws.
• Make wiring connections, install T5/T8 lamps (by
others).
Fixtures shown in hanging position.
Cable
Set
Screw
Stem Set
Second
Fixture
Screw
Second Fixture
Screw
Screw
Screw
First
Fixture
Screw
First
Fixture
Coupler
Coupler
Screw
Screw
© a Genlyte company 2005
59-31147-000
Printed in U.S.A.
4
Chain Hanger
• For Chain Hanger, use 2 chains for 4ft or 8ft,
or for individual or continuous row mounting.
Housing is supported by inserting Hook into
Slots in housing with ends of Hooks up
through next set of slots.
Occupancy Sensor
• Occupancy Sensor is supplied assembled to
End Cover and is secured to Housing with Screw
as shown.
Screw
S Hook
Chain
Hanger
End
Cover
Hook
Occupancy
Sensor
Housing is supported by
inserting Hook into Slots
in Housing with ends of
Hooks up thru next set
of slots.
Housing
Slots
End
Plate
Housing
End Plate
4-3/8”
(111mm)
S Hook
Slots (8)
7/8” Dia. K.O.
4-3/8”
(111mm)
7/8” Dia. K.O.
(2 places)
S Hook
Slots (8)
3-1/8”
(81mm)
3-1/8”
(81mm)
11/16” Dia. K.O.
(2 Places)
11/16” Dia. K.O.
(2 Places)
48” (1220mm)
39-3/8” (999mm)
41-3/4” (1059mm)
87-3/8” (2219mm)
89-3/4" (2279mm)
96" (2441mm)
48” (1220mm)
5
Final Assembly (Louver)
• Replace Side Reflectors–put Tabs into Slots.
• Hang Louver Assembly on one Side Reflector.
• Attach Safety Chain (both ends of fixture) to hole
on the side of the louver.
• Rotate free side of Louver Assembly upward until
Louver Assembly rests evenly on both Side
Reflectors.
Fixture End
Safety
Chain
Safety
Chain
Louver Blade
Side
Reflector
Fixture
End
Side
Reflector
Side
Reflector
Final Assembly (Prismatic DR Acrylic Lens)
• Replace Side Reflectors–put Tabs into Slots.
• Hang Prismatic DR Acrylic Lens on one Slot Reflector.
• Attach each Safety Cable “S” Hook to hole in Side
Reflector.
• Rotate free side of Prismatic DR Acrylic Lens upward
until lens rests evenly on both Side Reflectors.
Side
Reflector
Side
Reflector
Safety
Cable
Prismatic
DR Acrylic
Lens
"S"
Hook
Safety
Cable
Side Reflector