1
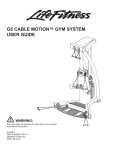
FIT 1.0 CM GYM SYSTEM USER GUIDE WARNING: Read and follow all directions for each step to insure proper assembly of this product. CLASS -S PART # 7946001 REV. A VERSION: FSFCM1-0102-001 DATE: 06-13-05 TABLE OF CONTENTS Safety Statement.............2 General Notes.................2 Gym Dimensions.............3 Components List.............4 Exploded View...............5 Tool Requirements and Hardware.................6 Assembly Instructions.....7-18 General Maintenance.......19-20 Warranty Statement.........21 Contact Information........22 IMPORTANT SAFETY INFORMATION THERE IS A RISK ASSUMED BY INDIVIDUALS WHO USE THIS TYPE OF EQUIPMENT. TO MINIMIZE RISK FOLLOW THESE RULES! 1. Before using, read all the warnings and instructions on the use of this machine including the wall chart and instructional DVD. Use only for intended exercise. DO NOT modify the machine. 6. Never pin the weights or prop plate into an elevated position. DO NOT use the machine if found in this condition. DO NOT attempt to fix. Notify your authorized Life Fitness dealer. 2. Obtain a medical exam before beginning any exercise program. 7. Inspect cables and their connections before using machine. Pay particular attention to the cable ends. DO NOT attempt to fix. Notify your authorized Life Fitness dealer before use and have repairs made by an authorized service technician. 3. Keep body and clothing free of all moving objects. 4. Inspect the machine before use. DO NOT use it if it appears damaged. DO NOT attempt to fix a broken or jammed machine. Notify your authorized Life Fitness dealer before use and have repairs made by an authorized service technician. 8. Make sure all spring loaded pull pins are fully engaged in the adjustment position before use. 9. Children and pets must not be allowed near this machine. Supervise teenagers. 5. Be certain that weight pin is completely inserted. Use only the pin provided by the manufacturer. If unsure, call your authorized Life Fitness dealer. Please note: * Thank you for purchasing the Life Fitness Fit 1.0 CM Gym System. Please read these instructions thoroughly and keep them for future reference. This product must be assembled on a flat, level surface to assure its proper function. * DO NOT securely tighten any frame connections until the entire frame has been assembled, unless otherwise stated. NOTE: In a continual effort to improve our products, specifications are subject to change © 2005 Life Fitness, a division of Brunswick Corporation. All rights reserved. Life Fitness is a trademark of Brunswick Corporation www.LifeFitness.com 2 GYM DIMENSIONS 3 COMPONENTS LIST ** ITEM NO. 1 2 3 4 5 6 7 8 9 10 11 12 13 14 15 16 17 18 19 20 21 22 23 24 25 26 27 28 29 30 31 32 33 34 35 36 37 38 39 40 41 42 43 44 45 46 47 48 49 QTY . 1 1 1 1 1 1 1 1 1 1 2 1 2 1 1 1 1 1 1 1 2 2 2 2 14 10 4 28 1 4 6 1 7 9 2 2 6 2 2 2 1 2 1 2 1 15 2 1 1 PA RT NO. LEA 7728202 LEA 7701602 LEA 7729802 LEA 7701702 LEA 7701802 LEA 7611702 LEA 7746102 LEA 7945902 LEA 7761602 LEA 7762402 LEA 7754502 LEA 7952301 LEA 7682002 LEA 7622001 LEA 7755301 LEA 7755401 LEA 7755501 LEA 7755601 LEA 7755701 LEA A K58-00245-0000 LEA 3245501 LEA 6920201 LEA 6020602 LEA 7749701 LEA 3223401 LEA 3226003 LEA 3249205 LEA 3102514 LEA 3102701 LEA 3245401 LEA 3249203 LEA 7705402 LEA 3102802 LEA 3249214 LEA 3249211 LEA 7749801 SEE PG. 14 LEA 7745601 LEA 7745701 LEA 7745501 LEA 7745801 LEA 7746001 LEA 7745402 LEA 7745401 LEA 7946001 LEA 7951001 LEA 7749901 LEA 7959401 LEA 7959501 DESCRIPTION PTD A SSY , FRONT UPRIGHT PTD A SSY , BA SE PLA TFORM PTD A SSY , ROLLER PA D A DJ. PTD A SSY , LEFT UPRIGHT PTD A SSY , RIGHT UPRIGHT WLDMT, GUIDE ROD PTD A SSY , TOP PULLEY S PTD A SSY , FRONT SHROUD PTD A SSY , TOP SHROUD PTD A SSY , HEA D PLA TE PULLEY PTD A SSY , FLOA TING PULLEY S PTD A SSY , HEA D PLA TE 20" GRA Y PLA TE, REA R BOTTOM A SSY , SELECTOR PIN COV ER TOP COV ER TOP BA CK COV ER TOP FRONT COV ER MID BA CK COV ER MID FRONT MEDA LLION;"BUG"; PUR COLLA R, 1" ID SHA FTA LUM GUIDE ROD, 1" O.D. 10GA X 73 BEA RING, FLG 1/2 ID X 5/8 OD X 1/2 CUSHION, WEIGHT STA CK SCREW, 10-32 X 6 PHL PA N TT ST BZ SCREW, 6-20 X 8 PHL PA N PLT BZ .375 HXS SOC CS X 1.00 WA SHER, 3/8 SA E NUT, HEX BSHNG, GUIDE ROD 1 ID X 1-1/2 .375 HXS SOC CS X .750 SHA FT, .50 DIA SLOTTED X 1.67 NUT, .375 - 16 NY LOCK .375 HXS SOC CS X 3.50 .375 HXS SOC CS X 2.50 BUMPER, HEA D PLA TE CA BLE CONNECT ENDS SHORT HA NDLE LONG HA NDLE A DJUSTA BLE HA NDLE FOOT STRA P GUIDE CA BLE UPPER CA BLE (SHORT) LOWER CA BLE (LONG) USER GUIDE WEIGHT PLA TE LA BELS 1-26 PLA CA RD, FIT 1.0 CM UPPER EXEC. PLA CA RD, FIT 1.0 CM LOWER EXEC. **SEE PAGE 13, FIGURE 7 FOR ADDITIONAL PART NUMBERS 4 EXPLODED VIEW PLACARD PLACEMENT SHROUD KIT SERIAL # SERIAL# (inside of cover) 5 HARDWARE: REQUIRED TOOLS: * 9/16” wrench * Ratchet and 9/16” socket * Adjustable wrench * Tape measure * Two 5/16” Allen wrenches * 4 mm Allen wrench * 3/4 Wrench * Phillups Screw Driver BOLT LENGTH 1/2 0 1/2 1 1/2 2 1/2 3 6 1/2 4 1/2 5 6 SECURLEY TIGHTEN 3/8 x 3/4 3/8 x 1” 3/8 x 3-1/2 FIGURE 1 STEP 1: LOOSELY assemble bottom of the LEFT UPRIGHT (4) and RIGHT UPRIGHT (5) to FRONT UPRIGHT (1) using four 3/8 x 3-1/2 BOLTS (34), eight 3/8 WASHERS (28) and four 3/8 NUTS (33) and TOP PULLEYS (7) LOOSELY assemble the top of the LEFT UPRIGHT (4) and RIGHT UPRIGHT (5) to FRONT UPRIGHT (1) and TOP PULLEYS (7), using four 3/8 x 1” BOLTS (27) for bottom four holes, two 3/8 x 3/4 BOLTS (31) for top two holes and six 3/8 WASHERS (28) as illustrated in FIGURE 1. SECURLEY TIGHTEN ONLY THE UPPER TWO 3/8 X 3/4” BOLTS NOTE: THE TOP PULLEY WELDMENT ATTACHES TO THE INSIDE OF THE UPRIGHT SIDES AND THE ORIENTATION SHOULD BE SO THE ARROW POINTS FORWARD AS SHOWN 1/2 0 1/2 1 1/2 2 1/2 3 7 1/2 4 1/2 5 6 DO NOT TIGHTEN LOWER FRAME COMPONENTS UNTIL TOP COVERS ARE INSTALLED 6-20 x 1/2 10-32 x 3/8 SECURELY TIGHTEN TOP PULLEY ASSEMBLY (7) AFTER INSTALLING COVER (16) !! DO NOT OVERTIGHTEN SCREWS (25) AND (26) 3/8 x 3-1/2 3/8 x 3/4 FIGURE 2 STEP 2: LOOSELY attach BASE PLATFORM (2) to front of FRONT UPRIGHT (1) using two 3/8 x 3/4” BOLTS (31), and two 3/8 WASHERS (28). LOOSELY attach the BASE PLATFORM (2) to the sides of UPRIGHTS (4) and (5) using two 3/8 x 3-1/2 BOLTS (34) and two 3/8 WASHERS (28) Assemble TOP BACK COVER (16) to UPRIGHT FRAMES using two METAL SCREWS (25) LOOSELY attach TOP FRONT (17) COVERS to UPRIGHT FRAME using two METAL SCREW (25) Then attach TOP FRONT COVER (17) to BACK TOP COVER (16) using six PLASTIC SCREWS (26) ADJUST FRAME UNTIL IT IS ALIGNED AND THEN SECURELY TIGHTEN ALL FRAME CONNECTIONS AND PLASTIC SCREWS. 8 BEFORE PROCEEDING TO STEP THREE, REFER TO SHROUD KIT ASSEMBLY INSTRUCTIONS. FRONT SHROUD AND BRACKETS WILL NEED TO BE INSTALLED AS PART OF STEP THREE 9 NOTE: REFER TO SHROUD KIT PRIOR TO STARTING STEP 3. FRONT SHROUD AND BRACKETS MUST BE INSTALLED 3/8 x 3-1/2 TIGHTEN SECURELY FIGURE 3 STEP 3: Insert two GUIDE ROD BUSHINGS (30) into bottom of FRONT UPRIGHT (1), slide one CUSHION (24) to bottom of each GUIDE ROD (22) and insert both GUIDE RODS (22) thru GUIDE ROD BUSHINGS (30) and holes located at bottom of FRONT UPRIGHT (1) CAREFULLY slide HEAD PLATE (12) over top of GUIDE RODS (22) followed by two HEAD PLATE BUMPERS (36), two COLLARS (21), two GUIDE ROD BUSHINGS (30) and position GUIDE ROD BRACKET (6) over top of GUIDE RODS (22) CAREFULLY slide guide rod assembly under top FRONT UPRIGHT (1) and place TOP SHROUD (9) over top of FRONT UPRIGHT (1) and assemble together using three 3/8 x 3-1/2 BOLTS (34), six 3/8 WASHERS (28) and three 3/8 NUTS (33). Slide ring of SELECTOR PIN (14) over stem of HEAD PLATE (12) screw HEX NUT (29) onto HEAD PULLEY (10) then screw HEAD PULLEY (10) into stem of HEAD PLATE (12). SECURELY TIGHTEN ALL FRAME CONNECTIONS NOTE: THREADED SHAFT OF HEAD PULLEY (10) SHOULD BE SCREWED INTO THE STEM APPROXIMATLY 1” AND HEX NUT SHOULD BE TIGHTENED SECURELY 10 NOTE: SHROUDS HAVE BEEN REMOVED FOR ILLUSTRATIONAL PURPOSES ONLY EYE HOOK ORIENTATION LEA7745402 FIGURE 4 MUST DISASSEMBLE ONE END OF CABLE AND REASSEMBLE AFTER ROUTING (SEE FIG 7 PAGE 14) STEP 4 NOTE: IF THE 50# ADD ON KIT WAS PURCHASED, USE THE CABLE FROM THAT KIT AND REFER TO KIT ASSEMBLY INSTRUCTION FOR HEAD PLATE ASSEMBLY Dimension between bottom of PULLEY BRACKET and top of JAM NUT approximately 1 inch. Taking one end of UPPER (SHORT) CABLE 7745402 (43) insert thru top front pulley and follow routing illustration to HEAD PLATE PULLEY (10) and continue to other side ending at the other top front pulley. CABLE MUST BE INSERTED BETWEEN PULLEY AND CABLE RETAINING CLIPS AND MOVE FREELY LEA 11 LEA7746001 FIGURE 5 STEP 5: Insert ball end of GUIDE CABLE 7746001 (42) through eye hook on FLOATING PULLEY BRACKET (11), insert and hook ball end of cable into slotted bushing located at the bottom of frame. Screw threaded end of cable into the FRONT UPRIGHT (1) and loosely tighten cable by screwing JAM NUT to top of FRAME REPEAT ABOVE PROCESS FOR OTHER GUIDE CABLE (42) 12 LEA7745401 FIGURE 6 MUST DISASSEMBLE ONE END OF CABLE AND REASSEMBLY AFTER ROUTING (SEE FIG 7 PAGE 14) STEP 6: Insert ball end of LONG CABLE 7745401 (44) under pulley #1 and thru slot in BASE PLATFORM (2). Run cable underneath and up the back side of pulley #2. Then run cable up and around the front and down the back side of pulley #3. Run cable to back side of pulley #4 around and up the front side to the back side and over the top of pulley #5 and out to the front. CABLE MUST BE INSERTED BETWEEN PULLEY AND PULLEY GUIDE AND MOVE FREELY 13 QUICK CONNECT ASSEMBLY - PART NUMBER 7872601 ITEM QTY. PART NO. DESCRIPTION 1 1 7726201 COUPLER, QUICK CONNECT LEA7726201 4 1 7726401 HSNG, QUICK CONNECT LEA7726401 3 1 7726301 SLEEVE, QUICK CONNECT LEA7726301 2 1 3249901 SPRING, COMPRESSION LEA3249901 5 2 3250002 M5 X 0.8 HXS SOC CS ST BZ X 8 LEA3250002 FIGURE 7 STEP 7: USE THIS ASSEMBLY AT THE END OF EACH CABLE Slide each item onto cable as follows: ITEM 1, ITEM 2, ITEM 3, and insert cable end into ITEM 4. Slide entire assembly over ITEM 4 and secure by screwing ITEM 5 into ITEM 4 and TIGTHEN SECURELY 14 3/8 x 2-1/2 10-32 x 3/8 FIGURE 8 STEP 8 Attach FRONT SHROUD (8) using two 3/8 X 2-1/2 SCREWS (35) and two 3/8 WASHERS (28) Attach REAR BOTTOM PLATE (13) using two 10-32 X 1/2 SCREWS (25) SECURELY TIGTHEN CABLE GUIDES (REFER TO FIG 5, PAGE 11) 15 3/8 x 3/4 PIN MUST BE LOCATED ON TOP SIDE FIGURE 9 STEP 9: Pre-assemble two FLANGE BEARINGS (23) and SHAFT (32) into ADJUSTMENT HUB as illustrated Attach ROLLER PAD ASSEMBLY (3) to center hole ADJUSTMENT HUB using two 3/8 WASHERS (28) and two 3/8 X 3/4 BOLTS (31) and tighten SECURELY. 16 !! DO NOT OVERTIGHTEN SCREWS 10-32 x 3/8 INSTALL SCREW (25) BEFORE SCREWS (26) 6-20 x 1/2 10-32 x 3/8 6-20 x 1/2 FIGURE 10 STEP 10: Attach TOP COVER (15) using four METAL SCREWS (25) Attach FRONT and BACK MID COVERS (18), (19) to each other using four PLASTIC SCREWS (26) as shown in illustration. Attach BACK MID COVER to FRONT UPRIGHT (1) using two METAL SCREWS (25) Finally align and stick MEDALLION (20) to front of MID COVER (19) as shown. AVOID DAMANING PLASTICS COMPONENTS. DO NOT OVERTIGTHEN SCREWS INTO PLASTIC PARTS. 17 REFER TO SHROUD KIT FIGURE 11 STEP 11: Lift HEAD PLATE ASSEMBLY and insert 15 or 20 W EIGHT PLATES (46). Apply W EIGHT STACK LABELS (47) starting with “1” on the HEAD PLATE and descending down. REFER TO SHROUD ASSEM BLY GUIDE TO ASSEM BLY REAR SHROUD Referencing step 7, push back on ITEM (3) at end of cable and attach SHORTER HANDLES (38) to top of frame Repeat process for attaching the ADJUSTABLE HANDLES (40 ) to the lower cable ends and the medium handles (39) to the middle ends. NOTE: THIS IS THE HANDLE CONFIGURATION THAT IS USED FOR M OST EXERCISES REFER TO W ALL CHART AND USER DVD. The FOOT STRAP (41) is to be attached to one of the mid section pulley cable ends for leg extensions and to one of the lower pulley cable ends for leg curl exercises. 18 MAINTENANCE Please note: * We recommend cleaning your product (pads and frame) on a regular basis, using warm soapy water. Touch-up paint can be purchased from your Life Fitness customer service representative at (800) 328-9714.(Outside of the U.S. and Canada, +1-847-288-3300) * Inspect equipment daily. Tighten all loose connections are replace worn parts immediately. Failure to do so may result in serious injury * Insure guide rods are lubricated. Lubricate every six months or as needed * PLEASE RECORD THE INFORMATION REQUESTED BELOW. IN THE EVENT YOU MAY NEED SERVICE YOU WILL BE ASKED FOR THIS INFORMATION. REMEMBER TO FILL OUT YOUR WARRANTY REGISTRATION CARD AND MAIL BACK. Important Customer Purchase Information: Model #: ____________________ Serial #’s: ____________________ Date of Purchase: ____________________ Authorized Life Fitness Dealer Purchased from: _______________________________ Address: Phone: ___________________ ___________________ Salesperson: _________________________ Thank you for purchasing the Life Fitness FIT 1.0 CM GYM SYSTEM 19 CAUTION-PLEASE READ There is a risk assumed by individuals who use this type of equipment. To minimize risk, please follow these rules: 1. Inspect equipment daily. Tighten all loose connections and replace worn parts immediately. Failure to do so may result in serious injury. 2. Do not allow minors or children to play on or around this equipment. 3. Exercise with care to avoid injury. 4. Consult your physician before beginning any exercise program. WARRANTY INFORMATION 10 YEARS 1 YEAR 1 YEAR 90 DAYS STRUCTURUAL FRAME PILLOW BLOCKS, PULLEYS, WEIGHT PLATES AND GUIDE RODS CABLES UPHOLSTERY PREVENTATIVE MAINTENANCE TIPS Action DAILY WEEKLY QUARTERLY BI-ANNUALLY AS NEEDED CLEAN Upholstery X Guide Rods X Hand Grips X INSPECT Visual Overall X Cables X Hardware X Frame X Hand Grips X LUBRICATE Guide Rods X Clean: • Upholstery with mild soap and water. • Guide rods with a cotton cloth. • Hand grips with mild soap and water. • Frame damage can be repaired with touch-up paint can be purchased from your LifeFitness customer service representative at (800) 351-3737 Inspect: • Cables for wear or damage and proper tension (should not exceed 3/4” deflection.) Pay close attention at bends and attachment points. • Hardware should be checked for looseness. Tighten as required. • Frames should be inspected for wear or damage. • Hand Grips should be checked for wear or damage Lubricate: • Lube the Guide Rods. Apply the lubricant to a cotton cloth, then run the cotton cloth up and down the guide rods as needed. Do not spray lubricant directly on the Guide Rods. Thank you for purchasing the LifeFitness FIT 1.0 CM . If unsure of proper use of equipment, call your local LifeFitness distributor or call the LifeFitness customer service department at (800) 351-3737. 20 LIMITED WARRANTY Life Fitness® FIT 1.0 CM Life Fitness extends the following LIMITED WARRANTY to the original owner (proof of purchase required, keep your receipt with this manual) of the Life Fitness product. The Warranty terms apply to IN HOME and LIGHT INSTITUTIONAL USE ONLY. 1. LIMITED WARRANTY ON FRAME AND WELDS. If the frame of the Life Fitness product or a weld should crack or break, it will be repaired or replaced by Life Fitness at its option. Repaired or replaced parts are warranted for the remaining portion of the original warranty period. Terms: LIGHT INSTITUTIONAL USE: Original owner, ten (10) years. 2. LIMITED WARRANTY ON PARTS. If the following parts are defective in material or workmanship, Life Fitness will supply replacement parts: all bolts, nuts, washers, bearings, bushings, pulleys, thumbscrews, collars, cable retaining clips, adjustable pre-stretch slides, roller pad shafts, allen head bolts, weight selector pin, weight stack shaft, set screws, protector caps, adjustment chain, cotter pin, plunger, spring and knob. Replacement parts are warranted for the remaining portion of the original warranty period. Terms: LIGHT INSTITUTIONAL USE: Original owner, one (1) year. 3. LIMITED WARRANTY ON CABLES AND UPHOLSTERY. If the coated cables or upholstery are defective in material or workmanship, Life Fitness will repair or replace them, at its option. Repaired or replaced parts are warranted for the remaining portion of the original warranty period. Terms: LIGHT INSTITUTIONAL USE: Original owner, ninety (90) days. 4. DEFINITION OF APPLICATIONS: LIGHT INSTITUTIONAL USE refers to the product being used in an application where multiple users have access to the product with no more than six hours of continual use on a daily basis. Such usage can include applications such as municipalities, small personal training studios, specialty athletic training studios, multiple housing, corporate fitness facilities, hospitality. 5. CONDITIONS AND EXCEPTIONS. Any product misuse, abuse, negligence, alteration or modification without Life Fitness’ written authorization, any attempt to repair by a person other than an authorized Life Fitness Service Center, any improper assembly or installation, accident, debris resulting from any construction activities on the premises where the product is located, rust or corrosion, failure on the Owner’s part to use, operate and maintain the product as set out in the product’s operation manual, or any other condition resulting from occurrences beyond the control of Life Fitness will void this Limited Warranty. THIS WARRANTY MAY VARY OR BE VOID (AT LIFEFITNESS’ OPTION) FOR PRODUCTS SHIPPED OUTSIDE OF THE UNITED STATES. 6. REPLACEMENT AND REPAIR EXPENSES. Life Fitness will provide only replacement parts or repair under this warranty. The Owner is responsible for all other costs. Such costs may include, but are not limited to: a. labor charges for service, removal, repair or reinstallation of the Life Fitness product or any component part; b. shipping, delivery, handling and administrative charges for returning parts to Life Fitness; and c. all necessary or incidental costs related to installation of the replacement parts. 7. SHIPPING. If shipping by the Owners is deemed necessary (in sole discretion of Life Fitness), parts should be shipped in their original carton or equivalent packaging, fully insured with shipping charges prepaid. Life Fitness will not assume any responsibility for any loss or damage incurred in shipping. 8. CLAIM PROCEDURES. If service on your Life Fitness product is required during the warranty period, please contact our Customer Service Department at 1-800-328-9714 (U.S. and Canada) or +1-847288-3300 (outside of U.S. and Canada) for instructions regarding returning or replacing parts. Please have available the following information: (i) the dealer’s name; (ii) the date of purchase; (iii) the serial # (s) of your product(s) (the serial number location is called out on the final assembly drawing included with your assembly instruction); (iv) a description of the nature of the problem. 9. OWNER’S RIGHT. This Limited Warranty gives you specific legal rights. You may also have other rights, which vary depending on local law. 10. LIMITATION OF IMPLIED WARRANTIES. All implied warranties, except to the extent prohibited by applicable law, shall have no greater duration than the warranty period set forth above. There are no warranties which extend beyond the description in this Limited Warranty. Because local laws do not allow limitations on how long an implied warranty lasts, the above limitations may not apply to you. 11. DISCLAIMER. No other express warranty has been made or will be made on behalf of Life Fitness with respect to any Life Fitness product or the operation, repair or replacement of any Life Fitness product. Life Fitness shall not be responsible for injury, loss of use of the Life Fitness product, inconvenience, loss or damage to personal property, whether direct or indirect, and incidental or consequential damages, so the above limitation or exclusion may not apply to you. 21 LIFE FITNESS 5100 NORTH RIVER ROAD. SCHILLER PARK, IL 60176 U.S.A. Tel: 1.847.288.3300 Fax: 1.800.216.8893 1.800.328.9714 (Toll-free within the U.S. and Canada) www.LifeFitness.com INTERNATIONAL OFFICES Life FitnessAtlantic BV Atlantic Headquarters Bijdorpplein 25-31 2992 LB Barendrecht The Netherlands Phone: (180) 646 666 Fax: (180) 646 703 Life Fitness (UK) Ltd. Queen Adelaide Ely, Cambs CB7 4UB United Kingdom Phone CSS: (01353) 665507 Fax CSS: (01353) 666719 Life Fitness EUROPE GmbH Siemensstrasse 3 85716 Unterschleissheim Germany Phone: (089) 31 77 51-0 Fax: (089) 31 77 51 99 Life Fitness Benelux N.V. Bijdorpplein 25-31 2992 LB Barendrecht The Netherlands Phone: 31 (180) 64 66 69 Fax: 31 (180) 64 66 99 Life Fitness Italia S.R.L. Via Elvas 92 39042 Bressanone Italy Phone: 39 (472) 835-470 Fax: 39 (472) 833-150 Life Fitness Japan 8/F, Nippon Brunswick Building 5-27-7 Sendagaya Shibuya-Ku, Tokyo 151-0051 Japan Phone: 81 (3) 3359-4309 Fax: 81 (3) 3359-4307 Life Fitness Do Brazil Al. Rio Negro, 433-Predio 2-Sala 2 3º andar (Confab) Aplhaville-Barueri-Sao Paulo CEP: 06454-904 Brazil Phone: 55 (11)7295-2217 Fax: 55 (11) 7295-2218 Life Fitness Asia Pacific Limited Room 2610, Miramar Tower 132 Nathan Road, Tsimshatsui Kowloon, Hong Kong Phone: (852) 2891-6677 Fax: (852) 2575-6001 22