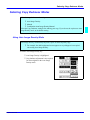
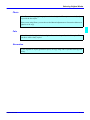
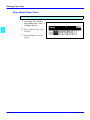
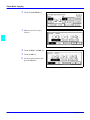
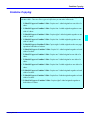
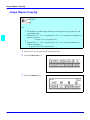
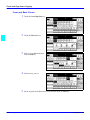
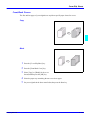
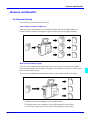
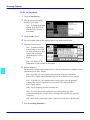
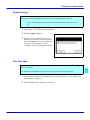
1
Operator Guide
5635/5645
Digital Copier
you r docu ment m an a ge m ent pa r tne r
When ordering supplies or requesting service for your
copier, you will need to provide the model and serial
number of your machine.
Please take a moment to enter your model and serial
numbers here.
MODEL NUMBER: __________________________
SERIAL NUMBER: __________________________
To order supplies, call: (
To request service, call:
)
(
)
Customer Vision® Our commitment to your
complete satisfaction
As an Energy Star Partner, Lanier Worldwide, Inc. has
determined that this product meets the Energy Star
guidelines for energy efficiency.
© 2001 Lanier Worldwide, Inc. March
Printed in the U.S.A.
Table of Contents
1
Table of Contents
2
Important Safeguards
3
Important Safeguards ...................................................................................1
Agency Certifications .......................................................................1
Making Copies
Applying Power ........................................................................................ 1-1
Main Power Switch ....................................................................... 1-1
Operation Key .............................................................................. 1-2
Selecting the Mode of Operation................................................................. 1-3
Making Copies.......................................................................................... 1-4
4
5
Component Identification
Control Panel ........................................................................................... 2-1
Control Panel - continued ........................................................................... 2-2
Component Locations - Front ..................................................................... 2-3
Component Locations - Rear ...................................................................... 2-4
Status Display Indicators ........................................................................... 2-5
Graphics Display ....................................................................................... 2-6
6
Copier Functions
7
Entering User Codes................................................................................. 3-1
Document Feeder...................................................................................... 3-2
Precautions when using Document Feeders ...................................... 3-2
RADF - Feeding Stack of Originals............................................................... 3-3
SADF - Feeding One Original at a Time ............................................ 3-3
Using Auto Start....................................................................................... 3-5
Selecting Copy Quantities .......................................................................... 3-6
Selecting Copy Darkness Modes ................................................................. 3-7
Using Auto Image Density Mode .................................................... 3-7
Using Manual Exposure Mode..................................................................... 3-8
Using Combination Auto Image Density/Manual Mode .................................. 3-9
Selecting Original Modes ......................................................................... 3-10
Text .......................................................................................... 3-10
Text - Photo ............................................................................... 3-10
Photo .................................................................................................... 3-11
Pale ........................................................................................... 3-11
Generation ................................................................................. 3-11
Selecting the Original Mode...................................................................... 3-12
Selecting Original Orientation ................................................................... 3-13
Special Originals ..................................................................................... 3-14
Batch (SADF) ............................................................................. 3-14
Selecting Mixed Sizes .................................................................. 3-14
Selecting Thin Mode .................................................................... 3-14
Selecting Special Original Mode ................................................................ 3-15
Selecting Custom Size Originals ................................................................ 3-16
Selecting Copy Paper .............................................................................. 3-17
8
I9
9
10
IGI
IG
I
i
Table of Contents
1
Using Auto Paper Select ...............................................................3-17
Using Manual Paper Select .......................................................................3-18
Enlargement and Reduction Ratios.............................................................3-19
Using Auto Reduce/Enlarge ...........................................................3-19
Using Preset Copy Ratio Keys ...................................................................3-20
Zoom Keys .............................................................................................3-21
Size Magnification ...................................................................................3-22
Horizontal/Vertical Sizing..........................................................................3-23
Directional Size Magnification - Inches ...........................................3-23
Directional Size Magnification ...................................................................3-25
Directional Size Magnification - 1% Increments ...............................3-25
Erase Center and Border...........................................................................3-27
Using Border Erase ......................................................................3-27
Using Center Erase ..................................................................................3-29
Using Center/Border Erase ............................................................3-30
Margin Adjustment ..................................................................................3-32
CenteringYour Copy ................................................................................3-33
Reversing Positive/Negative Copying .........................................................3-34
2
3
4
5
Copying Methods
Series/Book Copying................................................................................. 4-1
Series Copying ............................................................................. 4-1
Copying Book Originals ............................................................................. 4-5
Bypass Copying ....................................................................................... 4-9
Using Stack Feed Bypass .............................................................. 4-9
Standard Size Paper ................................................................................4-11
Custom Size Paper ..................................................................................4-12
Thick Paper, Thin Paper, Transparencies ....................................................4-14
Combine Copying ....................................................................................4-15
1 Sided 2 Pages to Combine 1 Side ...........................................................4-16
1 Sided 4 Pages to Combine 1 Side ...........................................................4-17
1 Sided 8 Pages to Combine 1 Side ...........................................................4-18
1 Sided 4 Pages to Combine 2 Side ...........................................................4-19
1 Sided 8 Pages to Combine 2 Side ...........................................................4-20
1 Sided 16 Pages to Combine 2 Side .........................................................4-21
2 Sided 2 Pages to Combine 1 Side ...........................................................4-22
2 Sided 4 Pages to Combine 1 Side ...........................................................4-23
2 Sided 8 Pages to Combine 1 Side ...........................................................4-24
2 Sided 4 Pages to Combine 2 Side ...........................................................4-25
2 Sided 8 Pages to Combine 2 Side ...........................................................4-26
2 Sided 16 Pages to Combine 2 Side .........................................................4-27
Double Copying ......................................................................................4-28
Duplex Copying ......................................................................................4-29
1-Sided to 2-Sided Copying ..........................................................4-29
2-Sided to 2-Sided Copying ......................................................................4-31
Image Repeat Copying .............................................................................4-32
Interrupt Copying ....................................................................................4-34
Overhead Transparencies and Thick Paper ..................................................4-35
Cover and Page Insert Copying .................................................................4-36
Front Cover ................................................................................4-36
Front and Back Covers .............................................................................4-38
Page Insert .............................................................................................4-39
Chapters ................................................................................................4-41
Scanning Documents ...............................................................................4-42
6
I
7
I8
I9
10
G
I
ii
Table of Contents
1
Cover/Slip Sheets ................................................................................... 4-43
Front Cover ................................................................................ 4-43
Front/Back Covers .................................................................................. 4-45
Designate .............................................................................................. 4-46
Chapter ................................................................................................. 4-47
Slip Sheets ............................................................................................ 4-48
Series Copying - Book to 1-Sided Copies ................................................... 4-49
Series Copying - 2-Sided to 1-Sided Copies ................................................ 4-50
2
User Tools Settings
3
System Settings ....................................................................................... 5-1
Basic Steps to Accessing System Settings ................................................... 5-2
Exiting from User Tools .................................................................. 5-2
General Features 1 of 2 ............................................................................. 5-3
General Features 2 of 2 ............................................................................. 5-5
Paper Size Setting 1 of 3 ........................................................................... 5-6
Paper Size Setting 2 of 3 ........................................................................... 5-7
Paper Size Setting 3 of 3 ........................................................................... 5-8
Timer Setting ........................................................................................... 5-9
Interface Settings ................................................................................... 5-11
Interface Settings/Parallel Interface ........................................................... 5-13
File Transfer ........................................................................................... 5-14
Key Operator Tools 1 of 2 ....................................................................... 5-16
User Code.............................................................................................. 5-18
Printing From the Counter ........................................................................ 5-26
Clearing the Counter ............................................................................... 5-28
Key Operator Tools 2 of 2 ....................................................................... 5-31
Entering Text ......................................................................................... 5-32
Available Characters .................................................................... 5-32
Keys .......................................................................................... 5-32
How to Enter Text ...................................................................... 5-32
Copy/Document Server Settings ............................................................... 5-33
Basic Steps to Accessing Copy/Document Server Settings ........................... 5-34
Exiting from User Tools ................................................................ 5-34
General Features 1 of 4 ........................................................................... 5-35
General Features 2 of 4 ........................................................................... 5-38
General Features 3 of 4 ........................................................................... 5-39
General Features 4 of 4 ........................................................................... 5-40
Reproduction Ratio 1 of 2 ........................................................................ 5-41
Reproduction Ratio 2 of 2 ........................................................................ 5-42
Edit 1 of 2 ............................................................................................. 5-43
Edit 2 of 2 ............................................................................................. 5-44
Stamp ................................................................................................... 5-45
Background Numbering ............................................................... 5-45
Preset Stamp 1 /4 to 4 /4 ............................................................ 5-45
User Stamp 1 /2-2 /2 .................................................................. 5-46
Date Stamp............................................................................................ 5-47
Page Numbering 1 /2-2 /2 ........................................................................ 5-48
Input/Output .......................................................................................... 5-50
4
5
6
7
G
8
9
10
I
II
G
Special Copier Functions
I
Energy Saving Modes ................................................................................ 6-1
Presetting the Next Copy Job ..................................................................... 6-2
Sample Copy............................................................................................ 6-3
iii
Table of Contents
1
Storing Copy Settings In Memory .............................................................. 6-4
Storing Your Settings .................................................................... 6-4
Changing a Stored Program ....................................................................... 6-6
Cancelling a Program ................................................................................ 6-7
Recalling a Program .................................................................................. 6-8
Screen Contrast ....................................................................................... 6-9
Original Beeper ........................................................................................ 6-9
Stamp ...................................................................................................6-10
Background Numbering ................................................................6-10
Preset Stamp ..........................................................................................6-12
User Stamp ............................................................................................6-14
Program/Delete User Stamp......................................................................6-16
Date Stamp ............................................................................................6-19
Page Numbering......................................................................................6-21
2
3
4
Using Finisher/Sorters
Using the Finisher Option ..........................................................................
Scanning Documents ....................................................................
Selecting Non-Sort Mode ...............................................................
Selecting Sort Mode .................................................................................
Selecting Stack Mode ...............................................................................
Selecting Staple Mode ..............................................................................
Selecting Punch Mode ..............................................................................
5
6
7-1
7-1
7-1
7-3
7-4
7-5
7-6
Document Server
Document Server ..................................................................................... 8-1
Process................................................................................................... 8-2
Features and Benefits ............................................................................... 8-3
On Demand Printing ...................................................................... 8-3
File Merge Printing ................................................................................... 8-4
Facsimile Resend...................................................................................... 8-6
Operation from a Computer ....................................................................... 8-7
Scanning Originals.................................................................................... 8-8
Scanning in Document Server Mode ............................................... 8-8
Scanning in Copy Mode ...........................................................................8-12
Printing Saved Documents........................................................................8-13
Sample Printing.......................................................................................8-15
Print First Page ...........................................................................8-15
Searching Saved Documents ....................................................................8-16
To Search by File NamePress the Document Server/New Job key. .....8-16
To Search by User Name..........................................................................8-17
To Check the Details of Stored Documents.................................................8-18
Deleting Saved Documents .......................................................................8-19
I
7
I8
I9
10
Service and Supplies
Loading Paper ......................................................................................... 9-1
Loading Paper in the Paper Tray ..................................................... 9-1
Loading Paper in the Large Capacity Cassette) ............................................. 9-2
Changing Paper Tray Sizes ........................................................................ 9-3
Changing Tray Paper Size .............................................................. 9-3
Adding Toner........................................................................................... 9-6
Removing Misfeeds .................................................................................. 9-9
When a Paper Misfeed Occurs ....................................................... 9-9
Finisher ..................................................................................................9-10
Adding Staples ............................................................................9-10
G
I
iv
Table of Contents
1
Removing Jammed Staples .......................................................... 9-16
Paper Punch........................................................................................... 9-20
Removing Chad .......................................................................... 9-20
Troubleshooting...................................................................................... 9-21
When the Machine Does Not Operate Properly............................................ 9-22
General ...................................................................................... 9-22
Document Server ........................................................................ 9-23
Document Server ........................................................................ 9-23
Display ...................................................................................... 9-24
When Copies are Not Clear ...................................................................... 9-25
Can Not Make Proper Copies .................................................................... 9-26
General ...................................................................................... 9-26
Adjust Image .............................................................................. 9-26
Stamp ................................................................................................... 9-27
Combine .................................................................................... 9-27
Duplex ....................................................................................... 9-27
When Memory is Full............................................................................... 9-28
Document Server ........................................................................ 9-28
Cleaning ................................................................................................ 9-29
Cleaning the Machine .................................................................. 9-29
Cleaning the Exposure Glass ......................................................... 9-29
Cleaning the Document Feeder Belt ............................................... 9-29
2
3
4
5
Specifications
6
Specifications......................................................................................... 10-1
Main Machine ............................................................................. 10-1
Document Feeder (Option) ....................................................................... 10-5
1000-Sheet Finisher (Option).................................................................... 10-6
2 Tray Finisher (Option) ........................................................................... 10-7
Punch Kit (Option) ....................................................................... 10-8
Internal tray 2 (1 bin tray)(Option)............................................................. 10-9
Extarnal Tray (Option) .................................................................. 10-9
Large Capacity Tray (LCT)(Option) .......................................................... 10-10
.Paper tray unit (Option) ............................................................. 10-10
Agency Certifications ............................................................................ 10-11
USA RFI ................................................................................... 10-11
Canada RFI .............................................................................. 10-11
UL ...................................................................................................... 10-12
EPA Energy Star ....................................................................... 10-12
Paper Sizes .......................................................................................... 10-13
Enlargement and Reduction Percentages .................................................. 10-14
7
G
8
9
10
I
Glossary
Copier Terms ...........................................................................................G-1
Index
II
G
Index Terms .............................................................................................. I-1
Warranty
New Machine Warranty and Limitation of Liability .........Inside Back Cover
I
v
Table of Contents
1
2
3
4
5
6
I
7
I8
I9
10
G
I
vi
Important Safeguards
Important Safeguards
Always follow these important safeguards:
1
2
Read all of these instructions before using the unit.
Plug the power cord into a 3-conductor
(grounded) outlet. Check the Specifications
chapter to make sure the outlet meets the ampere
rating of this unit.
•
•
•
•
3
Never ground the power cord to a gas pipe or
a water pipe.
Keep the power cord away from hot surfaces.
Avoid using an extension cord if possible.
If you must use an extension cord, use only a
3-conductor cord rated for the ampere rating
of your unit. Refer to the Specifications
Chapter for this value. Power cords rated for less can overheat and become a fire hazard.
Do not operate the unit if any part of it is damaged, or if any part has been dropped, until it
is checked by a authorized Lanier Service Technician.
4
The fusing area is hot. Exercise care in this area.
5
Do not install the unit in areas that are:
•
•
•
•
•
•
6
7
Damp or humid
Exposed to direct sunlight
Extremely dusty
Poorly ventilated
Close to machines generating ammonia such as diazo copy machines.
Subject to extreme temperature or humidity changes, for example, near an air
conditioner or heater
Place the unit on a firm, level surface.
For proper ventilation and cooling, keep the unit at least 4 inches back from the wall and
allow 32 inches of clearance on the left and right sides of the copier. If the optional sorter is
used, allow 48 inches on the left side of the copier.
Agency Certifications
Your unit complies with FCC rules, DOC requirements, and other agency certification
requirements. Refer to the Specifications chapter of this Operator Guide for further details.
1
Chapter 1
Making Copies
Chapter Overview
This chapter provides information on how to make a copy. It includes:
•
“Applying Power” on page 1-1
•
“Main Power Switch” on page 1-1
•
“Operation Key” on page 1-2
•
“Selecting the Mode of Operation” on page 1-3
For additional information on the more advanced features of the
copier, refer to: Chapter 3- Basic Copier Functions, and Chapter 4 Copying Methods.
Making Copies
Applying Power
Applying Power
Two switches control the machines power. The Main Power switch controls the power to the
machine. The Operation key turns the macine on and off. It is recommended that the Main
Power switch always be left in the On position. Information in memory may be lost if the
swtich is turned off.
Main Power Switch
Turning On the Main Power
The Main Power switch supplies power to the
copier. To supply power to the copier, press the
Main Power switch to On.
Note: The Message Display shows,
“Now loading....” After about 15 seconds
your copier comes to its Ready condition
and three beeps sound (if beep is turned
on.) This indicates the copier is ready for
you to begin copying.
Turning Off the Main Power
Press the Main Power switch to the Off position. The Main Power indicator turns off.
•
•
•
Making Copies
Turning the Main Power switch off when the indicator light is flashing may cause
damage to the hard drive or to memory.
Pulling out the power cord before turning off the Main Power switch may cause
damage to the hard disk or to memory.
When the Main Power swith is turned off or the power cord unplugged, any
documents stored in fax memory will be lost after approximately one hour.
1-1
Applying Power
Operation Key
The Operation key is on the far right side of
the Control Panel. It turns the copier
operation on and off while maintaining
power to the copier. If the On indicator
light is OFF and the Main Power indicator
light is ON, press the Operation key.
The On indicator light turns ON
and the Message Display lights
up.
To turn the copier OFF, press the
Operation key again. The On
indicator light turns OFF.
•
•
1-2
Making Copies
Selecting the Mode of Operation
Selecting the Mode of Operation
You can use this machine as a:
•
•
•
•
Copy machine
Fascimile machine
Printer
Scanner
Press one of the Function keys to select the desired
mode of operation.
The indicator next to the key is a status indicator.
•
•
•
Making Copies
Yellow indicates the mode of opertion is
selected.
Green indicates the mode of operation is
active.
Red indicates the mode of operation has
been interrupted.
1-3
Making Copies
Making Copies
1
2
3
Check the Function switch to be sure the
machine is in the copy mode. If not, press the
Copy key. See “Selecting the Mode of
Operation” on page 1-3.
If the User Code feature is activated, the
message "Input user code, then press #" is
displayed. Enter your User Code. .
Place original documents
•
•
4
1-4
Face-down on the Exposure Glass. Align
originals to the indicator mark that
represent the size of originals you are
going to copy.
Face-up on the Automatic Document
Feeder.
Select copy options from the Copy Options Table below.
Making Copies
Making Copies
Note: If you only want one copy with no options, proceed to Step 5..
Copy Options You Can Select
Copy Quantity
Using the keypad, enter the number of copies you
desire. The default quantity is 1 and the maximum
is 999. See “Selecting Copy Quantities” on page 36
Copy Darkness/Lightness
Automatic: Touch Auto Image Density on the
Message Display. Auto Image Density is highlighted
when activated. See “Using Auto Image Density
Mode” on page 3-7
Manual: Press either Lighter or Darker keys to
change contrast of copies. You may turn Auto
Image Density off if desired.See “Using Manual
Exposure Mode” on page 3-8
Combination: Touch Auto Image Density and press
Lighter or Darker. Use with colored background.
nSee “Using Combination Auto Image Density/
Manual Mode” on page 3-9
Original Mode
The selected mode is indicated above Original
Mode on the Message Display. You can select
from: Text, Text/Photo, Photo, Pale, and
Generation Copy. Just touch Original Mode and
then touch the desired mode. See “Selecting the
Original Mode” on page 3-12
Copy Reduction or Enlargement
Touch Enlarge/Reduce to gain access to Preset
Ratios and Zoom keys.
Preset Ratios: Touch the desired ratio. See “Using
Preset Copy Ratio Keys” on page 3-20
Zoom Keys: Touch the + or - keys to enlarge your
original up to 400%, or reduce your original down
to 32% of the original size. See “Zoom Keys” on
page 3-21
Copying Methods
Refer to the Table of Contents or Chapter 4,
Copying Methods, for detailed information on the
many copying methods available.
Using optional Finishers
Refer to “Using the Finisher Option” on page 7-1
for information on using the optional Finishers.
5
Making Copies
Methods To Use For Copy Options
Press the Start key to begin copying.
1-5
Making Copies
Notes:
1-6
Making Copies
Chapter 2
Component Identification
Chapter Overview
This chapter describes the copier’s main components. Included in this
chapter are:
•
“Control Panel” on page 2-1
•
“Component Locations - Front” on page 2-3
•
“Component Locations - Rear” on page 2-4
•
“Status Display Indicators” on page 2-5
•
“Graphics Display” on page 2-6
Component Identification
Control Panel
1
2
20
1
2
3
19 18
8
User Tools/Counter key
9
4
10
Press to store copy settings.
6
Clear Modes key
Press to clear the previous entered copy mode settings.
7
Component Identification
9
11 10
Interrupt key
Main Power indicator
Operation switch
11
Sample Copy key
Use this key to make a single sample copy before starting a
long copy run. Check the sample copy and making any
necessary changes to the image quality settings before you
begin making multiple copies. This saves time and supplies.
12
Start key
Press to start copying, scannig, or printing.
13
Clear/Stop key
Clear: delets one digit when entering numbers.
Stop: Interrupts the current operation.
14
# key
Used as the Enter key.
Energy Saver key
Press to switch to and from Energy Saver mode.
8
Press this switch to turn the power on. To turn thepower off,
press this switch again.
Check Mode key
Program key
7
This indicator goes on when the main power switch is turned
on, and goes off when the sitch is turned off.
Press to review the copy settings
5
6
Press to interrupt a copy job to run another copy job.
Display Panel
Displays operation status, error messages, and function
menus.
5
17 16 15 14 13 12
Screen Contrast knob
Adjust the brightness of the Display Panel.
User Tools: Press to change the default settings and
conditions to meet your requirements.
Counter: Press the check or print the total number of copies
made.
3
4
2-1
Control Panel - continued
1
21 Touch Screen
20
3
19 18
15
10-digit keypad
Used to enter copy quantity and to enter numbers when
programming.
16
(.) key
Used to enter decimal points.
17
Facsimile keys
Start Manual RX
On Hook Dial
Pause/Redial
Tone
18
2-2
4
5
6
7
17 16 15 14 13
19
Functon Status Indicators
Displays the status of the Functions.
Yellow: function is selected
Green: function is active
Red: function has been interrupted
20
Status Display Indicators
8
9
12 11 10
Indicates the status of your machine. Refer to Status Display
Indicators.
Function keys
Press the appropriate key to select a function.
Copy
Document Server
Facsimile
Printer
Scanner
Component Identification
Component Locations - Front
1
2
3
4
5
6
7
8
1
2
Document Feed - RADF
Document feeder automatically feeds a stack of originals.
5
Exposure Glass
6
Open to access the inside of the machine.
Place originals face down on the exposure glass.
3
Operation key
Internal Tray
Copies are delivered to this tray.
Component Identification
Main Power Switch
Turns on the main power to the machine.
7
This turns power on.
4
Front Cover
Paper Drawers
Place paper in these drawers.
8
System Stand (optional)
Additional paper drawers.
2-3
Component Locations - Rear
1
2
4
3
1
2
Duplexer
This allows you to make copies of both sides of an original.
Open to gain access to paper feed access doors.
3
Bypass Tray
4
Bypass copying allows you to copy onto transparencies,
letter head, or other non-standard paper.
2-4
Paper Feed Access Door
Open to gain access to the paper feed area in case of a paper
misfeed.
Air Vent
Do not block this vent. It aids in air circulation in the
machine.
Component Identification
Status Display Indicators
1
2
3
4
8
5
7
6
1
2
Out of Staples
When this symbol flashes, the optional finisher is out of
staples.
6
Add Toner
7
When a confidential fax message is being received, this
indicator is on.
When this symbol flashes, the copier is low on toner.
3
Paper Empty
When this symbol, add paper to the selected paper drawer.
4
Confidential reception
Data In
Program input.
8
Call for Service
When this symbol flashes, a problem exist in the machine.
Call your authorized service center
Paper Misfeed
When this symbol flashes, a paper misfeed has occurred.
5
Door Open
When this symbol flashes, check for an open door and close
it.
Component Identification
2-5
Graphics Display
4
5
6
7
8
1
9
2
3
11
1
Original Mode
6
Select your original type.
2
Image Density
Program Ratios
Register up to three frequently used Reduced/Enlarge ratios.
7
Allows you to control the darkness of your copy, either
manually or automatically.
3
10
Job Number
Copy job number or identification of scanned document.
8
Special Original
Displays number of:
Scanned originals, copy sets, and copies
Used for special origianls.
4
5
9
Provides status of the machine.
10
Short cut keys displayed
Current Selected Function
11
Avaliable Functions
Displays the current funtion.
2-6
Sort, Stack, Staple, or Punch modes
Operation Status
A clip mark is displayed on the current selected function.
Component Identification
Chapter 3
Copier Functions
Chapter Overview
This chapter describes the basic copier functions. Included in this
chapter are:
•
“Entering User Codes” on page 3-1
•
“Document Feeder” on page 3-2
•
“Using Auto Start” on page 3-5
•
“Selecting Copy Quantities” on page 3-6
•
“Selecting Copy Darkness Modes” on page 3-7
•
“Selecting Original Modes” on page 3-10
•
“Selecting Original Orientation” on page 3-13
•
“Special Originals” on page 3-14
•
“Selecting Custom Size Originals” on page 3-16
•
“Enlargement and Reduction Ratios” on page 3-19
•
“Size Magnification” on page 3-22
•
“Horizontal/Vertical Sizing” on page 3-23
•
“Directional Size Magnification” on page 3-25
•
“Erase Center and Border” on page 3-27
•
“Margin Adjustment” on page 3-32
•
“CenteringYour Copy” on page 3-33
•
“Reversing Positive/Negative Copying” on page 3-34
Copier Functions
Entering User Codes
Entering User Codes
This feature prevents unauthorized use of the copier by limiting copier access to those persons
who know an assigned User Code. The User Code feature monitors copier usage by department,
project, or persons, and tracks the number of copies made with each User Code.
The Key Operator can activate the User Code feature. When this feature is active, the Key
Operator can program up to 50 User Codes into the copier’s memory. Each code can be from
one to eight digits in length. When this feature is turned ON, the user must enter an assigned
User Code, and press the (# Enter) key before the copier can be used.
The following instructions apply only when the User Code feature is turned ON.
1
Enter an assigned User Code using the key
pad.
•
•
2
3
4
If you enter an invalid User Code, the
Message Display continues to show eight
dashes.
If you do not know which User Code to
use, ask your Key Operator.
Make the copy requirement selections.
Press the Start key to begin copying.
When copying is complete, clear your User
Code by pressing the “Clear Modes/Energy
Saver” and Clear/Stop keys at the same time.
This prevents unauthorized use of your User
Code.
Copier Functions
3-1
Document Feeder
Document Feeder
The Reversing Automatic Document Feeder (RADF), feeds originals to the Exposure Glass for
copying and if Duplex Copying is selected, it turns the original over for copying the other side
of the original. Then, it exits the original onto the Document Tray.
•
•
You can place up to 100 originals in the Document Feeder for automatic feeding of
originals to the Exposure Glass for copying.
You may also select SADF which allows you to feed one original at a time into the
Document Feeder without having to press the Start key each time.
Precautions when using Document Feeders
1. Avoid using:
•
•
•
•
•
•
Badly wrinkled or folded originals.
Clipped or stapled originals.
Carbon paper.
Torn originals.
Taped originals.
Damp originals.
1. Folded or curled originals should be smoothed out before inserting into
the Document Feeder.
2. Feeding a stack of different width originals through the Document
Feeder is not recommended.
•
•
Feed them through one at a time.
You can, however, feed a stack of different length originals through the
Document Feeder.
3. If the surface of any two originals are so rough that they cannot be
moved when pinched between two fingertips, the friction between the
originals may obstruct paper separation even when the paper weight is
within specifications.
3-2
Copier Functions
Document Feeder
RADF - Feeding Stack of Originals
RADF allows you to stack feed up to 100 originals into the Document Feeder by pressing the
Start key one time. If you are feeding single sheets into the Document Feeder, switch the copy
mode to SADF and you will not have to press the Start key for each original. See SADFFeeding One Original at a Time, below.
1
2
3
4
When using the RADF, place your originals
face up in the Document Feeder.
Adjust the Paper Side Guides to fit the edge
of your originals.
Set any additional copier features desired.
Press the Start key.
SADF - Feeding One Original at a Time
SADF allows you to manually feed multiple single sheets into the Document Feeder without
having to press the Start key each time to make a copy. You can also stack feed up to 100
originals just as in the RADF mode.
1
2
3
Copier Functions
Touch Special Original key.
Touch the Batch (SADF) key.
Touch the OK key.
3-3
Document Feeder
4
5
6
Set your originals and make your copy
selections.
Press the Start key. The Auto Feed indicator
located on the rear of the RADF is ON.
When the Auto Feed indicator light turns
ON, you can feed the next original.The
second and subsequent originals can be fed
automatically without pressing the Start key.
Note: The SADF is on a time setting and
will return to the original RADF copy
mode after a preset time.
3-4
Copier Functions
Using Auto Start
Using Auto Start
When the copier is first turned ON, it takes five and one-half minutes for it to warm-up and
come to its Ready condition. During this time, you can set up your copy job, press the Start key
and walk away. You can even do this while your copier is in the Energy Saver mode. When the
copier comes to its Ready condition, it automatically copies your job.
1
2
3
4
Place the original document in the Document
Feeder or on the Exposure Glass.
Make your copy requirement selections.
Press the Start key.The indicator light in the
Start key flashes alternately green and red.
The copier automatically begins copying
when the copier comes to its Ready
condition.
When the copier comes to its Ready
condition, the indicator light in the Start key
turns green.
Note: To cancel Auto Start, press the
Clear/Stop key.
Copier Functions
3-5
Selecting Copy Quantities
Selecting Copy Quantities
The copier automatically selects a copy quantity of one copy.
•
•
If desired more than one copy, enter the number from the 10-key pad.
The maximum copy quantity that you can enter is 999.
If more than one copy of your original is required,
enter the number of copies you desire using the key
pad.
•
•
3-6
Press the Clear/Stop key to clear an entry
if you entered an incorrect quantity.
If no quantity is entered, one copy is
automatically selected by your copier.
Copier Functions
Selecting Copy Darkness Modes
Selecting Copy Darkness Modes
Select the copy darkness modes using:
•
•
•
Auto Image Density
Manual
Combination Auto Image Density/Manual
Select the Copy Darkness setting before making your copy. If you do not, the copier uses Auto
Image Density mode, as the default setting.
Using Auto Image Density Mode
Auto Image Density, automatically adjust the copier for the best quality copy.
•
For example, the dark background on newspapers or recycled paper is not copied
when using Auto Image Density.
Touch the Auto Image Density key.
•
•
Copier Functions
Auto Image Density is highlighted.
Copy darkness adjustment is not required
for most originals in the Auto Image
Density mode.
3-7
Selecting Copy Darkness Modes
Using Manual Exposure Mode
Manual Exposure mode allows you to manually adjust the image density darker or lighter.
1
2
Touch the Auto Image Density key.
The Auto Image Density indicator should be
off.
Touch the Lighter or Darker key to select
the lightness or darkness of the copy.
There are seven settings to choose from.
3-8
Copier Functions
Selecting Copy Darkness Modes
Using Combination Auto Image Density/Manual Mode
Combination Auto Image Density/Manual mode is used when originals have colored
background and you want to adjust the copy density without affecting the background.
1
2
Touch the Auto Image Density key. Auto
Image Density is highlighted.
Touch the Lighter or Darker key to select
the lightness or darkness of the copy.
There are seven settings to choose from.
Copier Functions
3-9
Selecting Original Modes
Selecting Original Modes
Identify the type of original you are copying by selecting:
•
•
•
•
•
Text
Text - Photo
Photo
Pale
Generation
The selected Original mode is shown above the Original Mode key.
Text
Select text when your original contains only text and no pictures.
Text - Photo
Select Text-Photo when your original contains photographs or picture with letters.
3 - 10
Copier Functions
Selecting Original Modes
Photo
Select Photo when copying photographs and colored originals. The copier automatically adjust
to provide the best copies.
When you are using Photo, you can also use the Manual adjustments to fine tune the darkness or
lightness of the copy.
Pale
Select this mode for originals that have lighter lines written in pencil, or for faint copies. The
faint lines will be clearly copied.
Generation
If your originals are copies (generation copies), the copy image can be reproduced sharply and
clearly.
Copier Functions
3 - 11
Selecting Original Modes
Selecting the Original Mode
1
If the desired mode is not shown above the
Original Mode, touch the desired Original
Mode key.
•
•
•
•
•
2
3
3 - 12
Test
Text-Photo
Photo
Pale
Genration
Select the desired Original Mode.
Then touch the OK key.
Copier Functions
Selecting Original Orientation
Selecting Original Orientation
Original orientation can be set in two ways:
•
•
1
Touch the Special Original key.
2
Select the original orientation.
•
•
3
Copier Functions
Standard Orientation: the original is in the same direction as the copy paper.
90 degree Turn: the copy image is automatically rotated 90 degrees. This works well
when copying on to larger paper.
Standard Orientation
90 degree Turn
Touch the OK key.
3 - 13
Special Originals
Special Originals
With your copier, you can select from three special original types:
•
•
•
Batch (SADF)
Mixed Sizes
Thin Originals
Batch (SADF)
Batch or (SADF) Single Automatic Document Feed, allows you to manually feed single
sheets into the Document Feeder without having to press the Start key each time to make a
copy.
Selecting Mixed Sizes
When originals of different sizes are placed on the Document Feeder at the same time,
your copier automatically checks the size of the originals and makes the appropriate copy.
Selecting Thin Mode
Use this mode when placing thin originals into the Document Feeder.
3 - 14
Copier Functions
Special Originals
Selecting Special Original Mode
1
Touch the Special Original key.
2
Touch the desired special original key.
•
•
•
3
Touch OK.
•
4
5
Copier Functions
Batch (SADF)
Mixed Sizes
Thin
The selected “Special Original” key is
displayed just above the Special Original
key.
Set your originals in place.
Press the Start key.
3 - 15
Special Originals
Selecting Custom Size Originals
3 - 16
1
Touch the Special Original key.
2
Touch the Custom Size Origi. key.
3
Enter the horizontal size of the original using the keypad. Then, touch the # key.
4
Enter the vertical size of the original using the keypad. Then, touch teh keypad.
5
Touch the OK key.
6
Press the Start key to begin copying.
Copier Functions
Selecting Copy Paper
Selecting Copy Paper
Your copier provides two ways to select copy paper:
•
•
Auto Paper Select
Manual Paper Select
Using Auto Paper Select
Your copier automatically detects the paper size and copies to the proper Paper Drawer.
1
2
3
Copier Functions
Touch Auto Paper Select.
Set up your copy requirements.
Press Start to copy.
3 - 17
Selecting Copy Paper
Using Manual Paper Select
You can manually select a desired paper size for copying.
1
2
3
3 - 18
Touch Paper Tray 1, Paper
Tray 2, Paper Tray 3, LCC, or
the Bypass Tray key.
Proceed with your copy set up
selections.
Press the Start key to begin
copying.
Copier Functions
Enlargement and Reduction Ratios
Enlargement and Reduction Ratios
Your copier allows you to enlarge or reduce your copies using:
•
•
•
Auto Reduce/Enlarge
Preset Copy Ratios
Zoom Key: with 1% increments
Using Auto Reduce/Enlarge
Auto Reduce/Enlarge allows the copier to select the appropriate ratio based on the original size
and paper size that you select.
1
2
3
4
Copier Functions
Touch the Auto Reduce/Enlarge key.
Select the copy paper tray you desire.
Set up your copy requirements.
Press the Start key to begin copying.
3 - 19
Enlargement and Reduction Ratios
Using Preset Copy Ratio Keys
The preset Copy Ratio keys allows you to select from thirteen preset reduction and enlargement
ratios.
•
•
•
1
2
3
4
5
6
7
3 - 20
There are five preset Enlarge ratios to choose from: 115%, 122%, 141%, 200%, and
400%.
There are six preset Reduce ratios to choose from: 87%, 82%, 71%, 61%, 50%, and
25%.
Full size preset ratio at 100%.
Touch the Full Size key.
Touch the Reduce/Enlarge key.
Select Enlarge or Reduce.
Select a copy ratio by touching the
appropriate ratio.
Touch OK.
Set your originals and make your copy set up
options.
Press the Start key to begin copying.
Copier Functions
Enlargement and Reduction Ratios
Zoom Keys
The Zoom key allows you to select a precise copy ratio selection from 32% to 400% in one
percent increments.
You can use the + or - keys, or the keypad to change the copy ratio.
1
2
3
Touch the Full Size key.
Touch the Reduce/Enlarge key.
Enter the percent ratio by
touching the + and - keys or
entering the percent using the
keypad.
•
•
4
5
Copier Functions
When using the +/- keys,
touching the key changes the
ratio in 1% increments.
Holding down the +/- keys
causes the ratio to change in
10% increments.
After you selected your desired Copy Ratio, touch the OK key.
To return to a 100% ratio, touch Full Size.
3 - 21
Size Magnification
Size Magnification
Calculate a ratio from the lengths of the original and copy for enlarging or reducing the copy.
1
2
3
4
5
6
7
Measure and specify the lengths of the
original and copy by comparing “A” with
“a”.
Touch the Reduce/Enlarge key
Touch the Specified Ratio key.
Enter the length of the original (A) using the
keypad.
Touch the # key in the display.
Enter the length of the copy (a) with the
keypad.
Touch the # key in the display.
•
•
8
3 - 22
To change length entered, touch the Clear
key or press the Clear/Stop key. Then
enter a new value.
To change a length entered after touching the # key, select original or copy and enter the
desired length.
Touch the OK key two times.
Copier Functions
Horizontal/Vertical Sizing
Horizontal/Vertical Sizing
This feature allows you to stretch and squeeze an image by independently changing the
horizontal and vertical reproduction ratios.
Directional Size Magnification - Inches
•
•
•
1
2
3
4
5
6
7
Copier Functions
When the original is on the Exposure Glass, the reproduction ratios are 25 to 400%.
When the original is on the Document Feeder the reproduction ratios are: Vertical 37
to 150%, Horizontal 25 to 400%.
When entering page size, use the (./*) key to enter the decimal.
Touch the Reduce/Enlarge key.
Touch the Specified Ratio key.
Touch the Dirc.Size Mag. In key.
Enter the horizontal size of the
original using the keypad.
Press the # key.
Enter the horizontal of the copy
using the keypad.
Touch the # key.
3 - 23
Horizontal/Vertical Sizing
8
9
10
3 - 24
Repeat the same for the veritcal sizes.
Touch the OK key.
Set your originals, then press the Start key.
Copier Functions
Directional Size Magnification
Directional Size Magnification
•
•
•
When your original is on the Exposure Glass, the reproduction ratios are 25 to 400%.
When your original is on the Document Feeder the reproduction ratios are: Vertical
37 to 150%, Horizontal 25 to 400%.
When entering page size, use the ./* key to enter the decimal.
Directional Size Magnification - 1% Increments
Copier Functions
1
Touch the Reduce/Enlarge key.
2
Touch the Specified Ratio key.
3
Touch the Direct Mag% key.
3 - 25
Directional Size Magnification
Enter the Ratios Using + /- Keys
1
2
3
4
5
6
Touch either the + or - key.
Touch the Horizontal key.
Touch either the + or - key to
change the ratio in 1%
increments.
Touch the Vertical key.
Touch either the + or - key to change the ratio in 1% increments.
Touch the OK key.
Enter the Ratios Using the Keypad
1
2
3
4
5
6
7
3 - 26
Touch the Horizontal key.
Enter the desired ratio using the
keypad.
Touch the Vertical key.
Enter the desired ratio using the
keypad.
Touch the OK key.
Touch the OK key.
Set your originals, then press the Start key.
Copier Functions
Erase Center and Border
Erase Center and Border
This function erases the center and/or all four sides of the original image. This is useful for
avoiding shadows on the copy image caused by the bound originals, such as books.
•
•
•
Border: erases the edge margin of the original image.
Center: erases the center margin of the original image.
Center/Border: erases both center and edge margins of the original image.
This feature is not active when you are using the Bypass Tray.
Margin width default is 0.4”, 10mm. Using the User Tools, you can change the margin from
0.1” to 2.0” in 0.1” steps (3 to 50mm in 1mm steps).
Using Border Erase
Copier Functions
1
Touch the Edit/Stamp key.
2
Touch the Erase key.
3 - 27
Erase Center and Border
3
4
Touch the Border key if it is not
already selected.
Set the border width by selecting
wither Same Width or Diff.
Width.
Selecting Same Width
1
2
If the Same Width key is not
selected, select it.
Set the erase border width using
the + and - keys.
•
3
Each touch of the key
changes the value by 0.1
inch.
Touch the OK key.
Selecting Different Width
1
2
Touch the Diff. Width key.
Set the erase border width using
the + and - keys.
•
3
3 - 28
Each touch of the key
changes the value by 0.1
inch.
Touch the OK key.
Copier Functions
Erase Center and Border
Using Center Erase
Copier Functions
1
Touch the Edit/Stamp key.
2
Touch the Erase key.
3
Touch the Center key.
3 - 29
Erase Center and Border
4
Set the center width using the +
and - keys.
•
5
Each touch of the key
changes the value by 0.1
inch.
Touch the OK key.
Using Center/Border Erase
1
Touch the Edit/Stamp key.
2
Touch the Erase key.
3
4
3 - 30
Touch the Center/Border key.
Set the erase margin.
Copier Functions
Erase Center and Border
Selecting Same Width
1
2
3
4
5
Touch the Center key.
Touch the Same Width key.
Touch the Border key
Set the erase border using the +
and - keys
Touch the OK key.
Selecting Different Width
1
2
3
Copier Functions
Touch the Diff. Width key.
Touch the key for the part you
wish to change and set an erase
margin width using the + and keys.
Touch the OK key.
3 - 31
Margin Adjustment
Margin Adjustment
You can shift the image on the page either left or right to make a binding margin. The default
setting is:
•
•
Front 0.2” left
Back 0.2” Right
You can change the default setting.
1
2
3
Touch the Edit/Stamp key.
Touch the Margin Adjustment
key.
Touch the left and right arrow
keys to set the left and right
margins for the front and back
side of the page.
•
4
Touch the up and down arrows
to set the top and bottom margins for the front and back side of the page.
•
5
6
7
3 - 32
Each touch of the arrow key
changes the value by 0.1
inch.
Each touch of the arrow key changes the value by 0.1 inch.
When your settings are complete, touch the OK key.
Touch the OK key.
Set your originals, then press the Start key.
Copier Functions
CenteringYour Copy
CenteringYour Copy
This feature allows you to center an image on a larger sheet of paper.
1
2
3
4
5
6
Copier Functions
Select paper size.
Touch the Edit/Stamp key.
Touch the Edit Image key.
Touch the Centering key.
Touch the OK key.
Press then Start key to begin
copying.
3 - 33
Reversing Positive/Negative Copying
Reversing Positive/Negative Copying
This feature reverses the balck and white images of the original.
1
Touch the Edit/Stamp key.
2
Touch the Edit Image key.
3
3 - 34
Touch the Positive/Negative
key.
4
Touch the OK key.
5
Touch the OK key.
6
Make your copy selections.
Copier Functions
Chapter 4
Copying Methods
Chapter Overview
This Chapter explains the various ways to make copies with the copier.
Included in this chapter are:
•
“Series/Book Copying” on page 4-1
•
“Bypass Copying” on page 4-9
•
“Combine Copying” on page 4-15
•
“Double Copying” on page 4-28
•
“Duplex Copying” on page 4-29
•
“Image Repeat Copying” on page 4-32
•
“Interrupt Copying” on page 4-34
•
“Overhead Transparencies and Thick Paper” on page 4-35
•
“Cover and Page Insert Copying” on page 4-36
•
“Scanning Documents” on page 4-42
•
“Cover/Slip Sheets” on page 4-43
•
“Series Copying - Book to 1-Sided Copies” on page 4-49
•
“Series Copying - 2-Sided to 1-Sided Copies” on page 4-50
Copying Methods
Series/Book Copying
Series/Book Copying
Series copies are made by separately copying the front and back of a 2-sided original or the two
facing pages of a spread original onto two sheets of paper. A book is made by copying two or
more originals in page order.
The following types of Series and Book modes can be used:
Series Copies
•
Book > 1 Sided: Copies the two facing pages of a spread original to make two 1- sided
copies.
•
Book > 2 Sided: Copies a spread two-page origi-nal onto both sides of a sheet.
•
Front & Back > 2 Sided: Copies each two-page spread original as it is onto both sides of
a sheet.
Booklet
•
1 Sided > Booklet: Make copies in page order for a folded booklet.
•
2 Sided > Booklet: Copies a 2-sided original in page order for a folded booklet.
•
1 Sided > Magazine: Copies two or more originals to make copies in page order (as
when they are folded and stacked).
•
2 Sided > Magazine: Copies 2-sided originals to make copies in page order (as when
they are folded and stacked)
Series Copying
Book to 1 Sided
This allows you to make one-sided copies from two facing pages of a bound original book.
1
Copying Methods
Touch the Duplex/Combine/
Series key.
4-1
Series/Book Copying
2
3
Make sure the Series key is
selected.
4
Touch the Book > 1 Sided key.
5
Touch the OK key.
6
4-2
Touch the Series/Book key.
Set the originals in place, then
press the Start key.
Copying Methods
Series/Book Copying
Book to 2 Sided
Book to 2 Sided allows you to copy two facing pages of a book to both sides of a sheet.
1
2
3
Touch the Series/Book key.
Make sure the Series key is
selected.
4
Touch the Book > 2 Sided key.
5
Touch the OK key.
6
Copying Methods
Touch the Duplex/Combine/
Series key.
Set the originals in place, then
press the Start key.
4-3
Series/Book Copying
Front and Back to 2 Sided
Copies each two-page spread original asit is onto both sides of a sheet.
1
2
3
4
4-4
Touch the Duplex/Combine/
Series key.
Touch the Series/Book key.
Make sure the Series key is
selected.
Touch the Front/Back >2 Sided
key.
5
Touch the OK key.
6
Select the paper source.
7
Set the originals in place, then press the Start key.
Copying Methods
Series/Book Copying
Copying Book Originals
1 Sided to Booklet
Make copies in page order for a folded booklet.
1
2
Touch the Series/Book key.
3
Touch the Book key.
4
5
6
Copying Methods
Touch the Duplex/Combine/
Series key.
Touch the 1 Sided > Booklet
key.
Touch the OK key.
Select the paper, set your
originals, and then press the
Start key.
4-5
Series/Book Copying
2 Sided to Booklet
Make 2 sided originals to copies in page order for a folded booklet.
1
Touch the Duplex/Combine/
Series key.
2
Touch the Series/Book key.
3
Touch the Book key.
4
5
Touch the 2 Sided > Booklet
key.
Touch the OK key.
Select the paper, set your originals, and
then press the Start key.
4-6
Copying Methods
Series/Book Copying
1 Sided to Magazine
Magazine copies two or more originals to make copies in page order when they are folded and
stacked.
1
Touch the Duplex/Combine/
Series key.
2
Touch the Series/Book key.
3
Touch the Book key.
4
5
Touch the 1 Sided > Magazine
key.
Touch the OK key.
Select the paper, set your originals, and
then press the Start key.
Copying Methods
4-7
Series/Book Copying
2 Sided to Magazine
Magazine copies two or more 2-sided originals to make copies in page order when they are
folded and stacked.
1
Touch the Duplex/Combine/
Series key.
2
Touch the Series/Book key.
3
Touch the Book key.
4
5
Touch the 2Sided > Magazine
key.
Touch the OK key.
Select the paper, set your originals, and
then press the Start key.
4-8
Copying Methods
Bypass Copying
Bypass Copying
If you want to make a copy on a transparency for overhead projection (OHP), or have the need
to use special paper, letterhead, or paper other than that which is in the copier Paper Tray, you
may feed this paper into the Stack Feed Bypass Tray. See “Using Stack Feed Bypass” on page
4-9.
•
•
Bypass does not work in the Duplex mode.
Bypass copying bypasses the Paper Trays and feeds copy paper from the Stack Feed
Bypass Tray.
Using Stack Feed Bypass
Use the Stack Feed Bypass to feed standard paper, transparency, label stock, tracing paper,
letterhead, and other special purpose papers measuring from 8.5” x 5.5” to 11” x 17”.
•
•
1
If Duplex mode is selected, touch the Duplex/Combine key and turn it OFF.
2
Place your original on the Document Feed Tray or on the Exposure Glass.
3
Open the Bypass Paper Tray.
•
•
4
The Bypass Tray indicator turns ON in
the display.
If the indicator does not turn ON, the
copy mode is set for duplex. Change the
copy mode to single side copying.
Adjust the Bypass Paper Guides to the width
of the copy paper.
•
Copying Methods
The copier automatically detects standard paper sizes: 11" x 17", 8.5" x 11", 5.5" x
8.5".
If you are using non-standard size paper, you should enter the paper size. See
“Custom Size Paper” on page 4-12.
Be sure to place the copy paper in the
same direction as the original.
4-9
Bypass Copying
5
Insert a single sheet or stack of paper all the
way into the Stack Feed Bypass Tray until a
beep is heard.
•
•
6
Press the Start key to begin copying.
•
•
4 - 10
A maximum of 50 sheets can be placed in
the Stack Feed Bypass Tray.
If necessary, pull out the paper extension
bar to support longer sheets of paper.
The sheet of paper in the Bypass Feed Slot feeds into the copier.
The copy exits to the Exit Tray or
Finisher.
Copying Methods
Bypass Copying
Standard Size Paper
Copying Methods
1
Press the # key.
2
Press the [Select Size] key.
3
Select the paper size.
4 - 11
Bypass Copying
Custom Size Paper
When using custom size paper, you should specify the paper size to avoid paper misfeeds..
1
Open the Bypass Paper Tray.
•
•
4 - 12
Adjust Paper Guides
Insert Paper
2
Press the # key on the keypad.
3
Touch the Custom Size key.
Copying Methods
Bypass Copying
4
5
6
Touch the Vert key.
Enter the vertical size of the
paper using the keypad.
Press the # key to enter this
value.
7
Touch the Horz key.
8
Enter the horizontal size of the paper using the keypad.
9
Press the # key to enter this value.
10
To register the non-standard size entered, touch the Store key.
Note: Only one non-standard value can be entered.
Copying Methods
11
Touch the OK key.
12
Set the originals in place, then press the Start key.
4 - 13
Bypass Copying
Thick Paper, Thin Paper, Transparencies
To make copies onto OHP transpar-encies or thick paper, you need to specify the paper type.
1
Open the bypass tray, and adjust the guides to the paper size.
Note: If the guides are not flush with the copy paper, a skew image or paper
misfeeds might occur.
2
Lightly insert the OHP transparencies or thick paper face down until the beeper sounds.
The indicator on the display automatically goes on.
•
•
3
4
5
6
When you set an OHP transparency, make sure that its front and back faces are properly
positioned.
To avoid paper misfeeds, fan the paper before setting it in the tray.
Press the # key.
Select [OHP Sheet]or [Thick
Paper].
Press the [OK]key.
Set your originals and press the
Start key.
Note: When copying onto
OHP transparencies, remove
copied sheets one by one.
7
4 - 14
When your copy job is finished, press the Clear Modes key to clear the settings.
Copying Methods
Combine Copying
Combine Copying
Combine copy, combines originals into one copy. You cannot use the Duplex or the Bypass Tray
with this feature. There are twelve types of copies that you can make in this mode:
1. 1 Sided 2 Pages to Combine 1 Side: Copies two 1-sided originals to one side of a
sheet.
2. 1 Sided 4 Pages to Combine 1 Side: Copies four 1-sided originals together to one
side of a sheet.
3. 1 Sided 8 Pages to Combine 1 Side: Copies eight 1-sided originals together to one
side of a sheet.
4. 1 Sided 4 Pages to Combine 2 Side: Copies four 1-sided original together to one
side of a sheet.
5. 1 Sided 8 Pages to Combine 2 Side: Copies eight 1-sided originals to the two-page
spread on both sides of a sheet.
6. 1 Sided 16 Pages to Combine 2 Side: Copies 16 1-sided originals together to both
sides of a sheet.
7. 2 Sided 2 Pages to Combine 1 Side: Copies one 2-sided original to one side of a
sheet.
8. 2 Sided 4 Pages to Combine 1 Side: Copies two 2-sided original to one side of a
sheet.
9. 2 Sided 8 Pages to Combine 1 Side: Copies four 2-sided originals to one side of a
sheet.
10. 2 Sided 4 Pages to Combine 2 Side: Copies two 2-sided originals together to both
sides of a sheet.
11. 2 Sided 8 Pages to Combine 2 Side: Copies four 2-sided originals together to both
sides of a sheet.
12. 2 Sided 16 Pages to Combine 2 Side: Copies eight 2-sided originals together to
both sides of a sheet.
Copying Methods
4 - 15
Combine Copying
1 Sided 2 Pages to Combine 1 Side
Copies two 1-sided originals to the two-pages spread of a sheet.
1
2
3
4
5
4 - 16
Touch the Duplex/Combine/
Series key.
Touch the 1-Sided key for
original, then touch the
Combine 1 Side key for your
copy.
Touch the 2 Originals key, then
touch the OK key.
Select the paper source.
Set the originals in place, then
press the Start key.
Copying Methods
Combine Copying
1 Sided 4 Pages to Combine 1 Side
Copies four 1-sided originals together to one side of a sheet.
1
2
3
4
5
Copying Methods
Touch the Duplex/Combine/
Series key.
Touch the 1-Sided key for
original, then touch the
Combine 1 Side key for your
copy.
Touch the 4 Originals key, then
touch the OK key.
Select the paper source.
Set the originals in place, then
press the Start key.
4 - 17
Combine Copying
1 Sided 8 Pages to Combine 1 Side
Copies eight 1-sided originals together to one side of a sheet.
1
2
3
4
5
4 - 18
Touch the Duplex/Combine/
Series key.
Touch the 1-Sided key for
original, then touch the
Combine 1 Side key for your
copy.
Touch the 8 Originals key, then
touch the OK key.
Select the paper source.
Set the originals in place then
press the Start key.
Copying Methods
Combine Copying
1 Sided 4 Pages to Combine 2 Side
Copies eight 1-sided original together to one side of a sheet.
1
2
3
Copying Methods
Touch the Duplex/Combine/
Series key.
Touch the 1-Sided key for
original, then touch the
Combine 2 Side key for your
copy.
Touch the 4 Originals key, then
touch the OK key.
4
Check the paper orientation.
5
Touch the OK key.
6
Select the paper source.
7
Set the originals in place, then press the Start key.
4 - 19
Combine Copying
1 Sided 8 Pages to Combine 2 Side
Copies eight 1-sided originals to the two-page spread on both sides of a sheet.
1
2
3
4 - 20
Touch the Duplex/Combine/
Series key.
Touch the 1-Sided key for
original, then touch the
Combine 2 Side key for your
copy.
Touch the 8 Originals key, then
touch the OK key.
4
Check the paper orientation.
5
Touch the OK key.
6
Select your paper source.
7
Set your originals and then press the Start key.
Copying Methods
Combine Copying
1 Sided 16 Pages to Combine 2 Side
Copies 16 1-sided originals together to both sides of a sheet.
1
2
3
Copying Methods
Touch the Duplex/Combine/
Series key.
Touch the 1-Sided key for
original, then touch the
Combine 2 Side key for your
copy.
Touch the 16 Originals key, then
touch the OK key.
4
Check the paper orientation.
5
Touch the OK key.
6
Select the paper source.
7
Set the originals in place, then press the Start key.
4 - 21
Combine Copying
2 Sided 2 Pages to Combine 1 Side
Copies one 2-sided original to one side of a sheet.
1
2
3
Touch the 2-Sided key for
original, then touch the
Combine 1 Side key for your
copy.
Touch the 2 Pages key, then
touch the OK key.
4
Check the paper orientation.
5
Touch the OK key.
6
Select the paper source.
7
4 - 22
Touch the Duplex/Combine/
Series key.
Set the originalsin place, then
press the Start key.
Copying Methods
Combine Copying
2 Sided 4 Pages to Combine 1 Side
Copies one 2-sided original to one side of a sheet.
1
2
3
Copying Methods
Touch the Duplex/Combine/
Series key.
Touch the 2-Sided key for
original, then touch the
Combine 1 Side key for your
copy.
Touch the 4 Pages key, then
touch the OK key.
4
Check the paper orientation.
5
Touch the OK key.
6
Select the paper source.
7
Set the originals in place, then press the Start key.
4 - 23
Combine Copying
2 Sided 8 Pages to Combine 1 Side
Copies four 2-sided originals to one side of a sheet.
1
2
3
4 - 24
Touch the Duplex/Combine/
Series key.
Touch the 2-Sided key for
original, then touch the
Combine 1 Side key for your
copy.
Touch the 8 Pages key, then
touch the OK key.
4
Check the paper orientation.
5
Touch the OK key.
6
Select the paper source.
7
Set the originals in place, then press the Start key.
Copying Methods
Combine Copying
2 Sided 4 Pages to Combine 2 Side
Copies two 2-sided originals together to both sides of a sheet.
1
2
3
Copying Methods
Touch the Duplex/Combine/
Series key.
Touch the 2-Sided key for
original, then touch the
Combine 2 Side key for your
copy.
Touch the 4 Pages key, then
touch the OK key.
4
Check the paper orientation.
5
Touch the OK key.
6
Select the paper source.
7
Set the originals in place, then press the Start key.
4 - 25
Combine Copying
2 Sided 8 Pages to Combine 2 Side
Copies four 2-sided originals together to both sides of a sheet.
1
2
3
4 - 26
Touch the Duplex/Combine/
Series key.
Touch the 2-Sided key for
original, then touch the
Combine 2 Side key for your
copy.
Touch the 8 Pages key, then
touch the OK key.
4
Check the paper orientation.
5
Touch the OK key.
6
Select the paper source.
7
Set the originals in place, then press the Start key.
Copying Methods
Combine Copying
2 Sided 16 Pages to Combine 2 Side
Copies eight 2-sided originals together to both sides of a sheet.
1
2
3
Copying Methods
Touch the Duplex/Combine/
Series key.
Touch the 2-Sided key for
original, then touch the
Combine 2 Side key for your
copy.
Touch the 16 Pages key, then
touch the OK key.
4
Check the paper orientation.
5
Touch the OK key.
6
Select the paper source.
7
Set the originals in place, then press the Start key.
4 - 27
Double Copying
Double Copying
Using Double Copy, you can make two copies of the same image on one
sheet.
•
•
4 - 28
You cannot use the Bypass Tray for this feature.
You can insert separated lines between the repeated images.
1
Touch the Edit/Stamp key.
2
Touch the Exit Image key
3
Touch the Double key.
4
Touch the OK key.
5
Select the paper.
6
Set the originals in place, then press the Start key.
Copying Methods
Duplex Copying
Duplex Copying
There are two ways to make duplex copies with this copier:
1-Sided to 2-Sided Copying: This mode makes two-sided copies from onesided originals.
2-Sided to 2-Sided Copying: This mode makes two-sided copies from twosided originals.
1-Sided to 2-Sided Copying
1
2
3
4
Copying Methods
Touch the Duplex/Combine/
Series key.
Touch the 1 Sided key for the
original.
Touch the 2 sided key for the
copy.
Touch the OK key.
4 - 29
Duplex Copying
Specify the Orientation of Bound Originals
•
•
1
2
3
4
4 - 30
If the binding is on the side, use Top to Top. This is the default setting.
If the binding is on the top of the page, use top to bottom. Your copies are automatically
orientated top to bottom.
Touch the Duplex/Combine/
Series key.
Touch the Orientation key.
Select an original and copy
orientation.
Touch the OK key.
Copying Methods
Duplex Copying
2-Sided to 2-Sided Copying
1
2
3
4
Copying Methods
Touch the Duplex/Combine/
Series key.
Touch the 2 Sided key for the
original.
Touch the 2 sided key for the
copy.
Touch the OK key.
4 - 31
Image Repeat Copying
Image Repeat Copying
Using Image Repeat, the same image can be copied repeatedly on the same
paper.
Note:
•
•
•
•
4 - 32
The number of repeated images depends on the original size, copy paper size, and
reproduction ratio.
Original Size: 5.5” x 8.5”, Copy Paper Size: 8.5” x 11.0” (landscape to landscape, or
portrait to portrait).
4 repeats (71%), 16 repeats (35%)
Original Size: 5.5” x 8.5”, Copy Paper Size: 8.5” x 11.0” (portrait to landscape, or
portrait to landscape).
2 repeats (100%), and 8 repeats (50%)
1
Select the size of copy paper and the reproduction ratio.
2
Touch the Edit/Stamp key.
3
Touch the Edit/Image key.
Copying Methods
Image Repeat Copying
4
Touch the Image/Repeat key.
•
•
Copying Methods
To repeat the whole original,
select All area.
To repeat selected areas,
select Select area and enter
the Horiz and Vert
dimensions.
5
Touch the OK key.
6
Set the originals in place, then press the Start key.
4 - 33
Interrupt Copying
Interrupt Copying
You can interrupt a copy job that is in progress to make a quick copy of another original,
without disrupting the original copy job settings or copy count. Do this by using the Interrupt
feature.
1
Press the Interrupt key.
2
When the copier stops:
•
•
3
4
5
Remove the remaining originals from the
Document Feeder.
Position the new original on the Exposure
Glass.
Make the copy requirement selections. See
“Selecting the Mode of Operation” on page 1-3.
Press the Start key.
When all Interrupt Copies are finished, press
the Interrupt key again to cancel the
Interrupt mode.
Note: The previous copy quantity, copy
ratio, copy darkness, and paper size are
automatically reset.
6
7
4 - 34
Put the remaining originals that you removed
in Step 2, back into the Document Feeder.
Press the Start key to continue the original
copy job.
Copying Methods
Overhead Transparencies and Thick Paper
Overhead Transparencies and Thick Paper
To make copies on OHP transparencies or thick paper, you need to specify the paper type. This
function is not available in Duplex mode.
1
2
3
4
5
6
7
8
9
10
Copying Methods
If Duplex mode is selected, touch the Duplex key to turn it OFF.
Place the original on the Document Feed
Tray or on the Exposure Glass.
Open the Bypass Paper Tray.
Adjust the Bypass Paper Guides to the width
of the transparencies.
Be sure to place the transparencies in the
same direction as your original.
Insert the OHP transparency or thick paper
face up until the beep sounds.
Press the # key on the keypad.
Select OHP or Thick Paper by
touching the appropriate key.
Touch the OK key.
With the originals set, press the
Start key.
4 - 35
Cover and Page Insert Copying
Cover and Page Insert Copying
There are four types of copying in this mode:
Front Cover: The first page of the original is copied on a specific paper
sheets for covers. You can specify it to copied on or left blank. Refer to
“Front Cover” on page 4-36.
Front and Back Covers: The first and last pages of the originals are copied
on specific paper sheets for covers. Refer to “Front and Back Covers” on
page 4-38.
Page Insert: Any specific page of the document is copied on specific paper
sheets for slip sheets. Refer to “Page Insert” on page 4-39.
Chapters: Separate one-sided originals into chapters of two-sided copies.
Refer to “Chapters” on page 4-41.
Note:
•
•
The cover or slip sheets should be identical in size and direction with the copy paper.
If Blank Cover mode is selected, the cover is not counted as a copy.
Front Cover
4 - 36
1
Touch the Cover/Slip Sheet key.
2
Touch the Front/ Cover key.
Copying Methods
Cover and Page Insert Copying
3
Copying Methods
Select Copy or Blank and then
touch the OK key.
4
Select the tray you use.
5
Set the originals in the Document Feeder and then press the Start key.
4 - 37
Cover and Page Insert Copying
Front and Back Covers
1
Touch the Cover/Slip Sheet key.
2
Touch the F/B Cover key.
3
4 - 38
Select Copy or Blank and then
touch the OK key.
4
Select the tray you use.
5
Set the originals in the Document Feeder and then press the Start key.
Copying Methods
Cover and Page Insert Copying
Page Insert
1
2
3
4
5
6
Copying Methods
Touch the Cover/Slip Sheet key.
Touch the Designate/Chapter
key.
Touch the key to select the
chapter number.
Using the keypad, enter the page
number of the original’s location
you want to copy onto a slip
sheet with.
Press the # key to enter the
value.
Select Copy of Blank for a slip sheet.
4 - 39
Cover and Page Insert Copying
7
8
9
10
4 - 40
Select the paper tray you wish to
use for the slip sheets.
Touch the OK key.
Select the paper tray containing
the non-slip sheet paper.
Set the originals in place, then
press the Start key.
Copying Methods
Cover and Page Insert Copying
Chapters
1
2
3
4
5
6
Copying Methods
Touch the Cover/Slip Sheet key.
Touch the Designate/Chapter
key.
Touch the Chapters key.
Using the keypad, enter the page
number of the first page of the
first chapter.
Press the # key.
To specify another page number,
repeat Steps 3-6.
7
When you wish to finish specifying page numbers, touch the OK key.
8
Set the originals in place, then press the Start key.
4 - 41
Scanning Documents
Scanning Documents
When you are using the Sort, Stack or Staple functions, the originals are scanned into memory.
See “Scanning Documents” on page 7-1.
To Stop Scanning Temorarily
Press the Clear/Stop key. This keeps original from being scanned into memory.
To Reume Scanning
Touch the No key to resume scanning.
Note: Scanned images in memory are not cleared.
To Clear Scanned Images of Originals
Touch the Yes key.
Note: Scanning is stopped and the images are cleared from memory
When Memory Reaches 0%
Scannig stops when the size of the scanned image data exceeds memory capacity.
However, you can cnahge this setting so that all th escanned pages are copied and
delivered to the tray first, then the machine automatically continues scanning the
remaining originals.
Press the Start key.
Scanned pages are delivered to the tray. Then, the image data in memory is cleared.
4 - 42
Copying Methods
Cover/Slip Sheets
Cover/Slip Sheets
Using this function,you can add or insert cover or paper designate.
There are four types in this function:
1. Front Cover:
The first page of your originals is copied on a specific paper sheet for covers.
2. Front/Back Cover:
The first and last pages of your originals are copied on specific pa-per sheets for
covers.
3. Paper Designate:
Use this function to have certain pages of your original copied onto slip sheets.
4. Chapter:
If you specify the first page of each chapter with this function,those pages will
always appear on the front of copies when using 1 sided.
Front Cover
The first page of your originals is copied on specific paper sheet for covers, or a cover sheet is
inserted before the first copy.
Copy
Copying Methods
4 - 43
Cover/Slip Sheets
Blank
4 - 44
1
Press the [Cover/Slip Sheet] key.
2
Press the [Front/Back Cover] key.
3
Select [Copy] or [Blank] for a cover sheet, and then press the [OK] key.
4
Select the paper tray containing the non-cover sheet paper.
5
Set your originals in the docu-ment feeder,then press the Start key.
Copying Methods
Cover/Slip Sheets
Front/Back Covers
The first and last pages of your originals are copied on specific paper sheets for covers.
Copy
Blank
1
Press the [Cover/Slip Sheet] key.
2
Press the [Front/Back Cover] key.
3
Copying Methods
Select [Copy] or [Blank] for the cover
sheets,and then press the [OK] key.
4
Select the paper tray containing the non-cover sheet paper.
5
Set your originals in the docu-ment feeder,then press the Start key.
4 - 45
Cover/Slip Sheets
Designate
Use this function to have certain pag-es of your original copied onto slip.
1
Press the [Cover/Slip Sheet] key.
2
Press the [Desig./Chapter] key.
3
Press the key to select the chapter number.
4
Enter the page number of the original's location you want to copy onto a slip sheet with the
number keys. Then, press the # key.
5
Select the paper tray for slip sheets.
6
To specify another page location, repeat steps 3 to 5.
Note: To select chapters 11 to 20, press the [1 11 111~ ~~ ~20] key.
7
When you wish to finish specify-ing page location,press the [OK] key.
This display shows example set-tings.
Note: To change the number entered, enter the new number in the same way as
steps 3 to 7 .
4 - 46
8
Select the paper tray containing the non-slip sheet paper.
9
Set your originals, then press the Start key.
Copying Methods
Cover/Slip Sheets
Chapter
The page locations you specify with this function will appear on the front of copy sheets.
1
Press the [Cover/Slip Sheet] key.
2
Press the [Desig./Chapter] key.
3
Press the [Chapter] key.
4
Enter the page location of the first page of the first chapter with the number keys. Then,
press the # key.
Note: To change the value entered, press the [Clear] or Clear/ Stop key and enter
the new value.
5
To specify another page location, repeat steps 3 to 5 .
Note: To select chapters 11 to 20, press the [1 11 111- 20] key.
6
When you finish specifying the page location, press the [OK] key. This display shows
example settings.
Note: To change the number entered, enter the new number in the same way as in
steps 3 to 5.
7
Copying Methods
Set your originals, then press the Start key.
4 - 47
Slip Sheets
Slip Sheets
This function can be used to insert a slip sheet automatically between every OHP transparencies
copied or used as a stack function. You can also copy onto the slip sheets if desired.
4 - 48
1
Touch the Cover/Slip Sheet key.
2
Touch the Slip Sheet key.
3
Select Copy or Blank.
4
Touch the OK key.
5
Select the paper tray containing the non-slip sheet paper.
6
Set the originals in place, then press the Start key.
Copying Methods
Series Copying - Book to 1-Sided Copies
Series Copying - Book to 1-Sided Copies
Use Series Copy, to make two separate one-sided copies from two facing
pages of a bound book or magazine.
1
Copying Methods
Touch the Duplex/Combine/
Series key.
2
Touch the Series/Book key.
3
Touch the Book > 1 Sided key.
4
Touch the OK key.
5
Touch the OK key again.
6
Make sure the Auto Paper Select is selected.
7
Set the originals in place, then press the Start key.
4 - 49
Series Copying - 2-Sided to 1-Sided Copies
Series Copying - 2-Sided to 1-Sided Copies
Use Series Copy, to make two separate one-sided copies from a 2-sided
original. You cannot use this feature in the Duplex Mode.
1
2
3
Touch the Duplex/Combine/
Series key.
Touch the 2 Sided key for
original. Then touch 1 Sided key
for copy.
Check the orientation.
•
•
4 - 50
Orientation is indicated as T
to T and T to B
Touch the orientation key to make changes
4
Touch the OK key.
5
Set the originals in place, then press the Start key.
Copying Methods
Chapter 5
User Tools Settings
Chapter Overview
This chapter covers User Tools for System and Copy operations.
Included in this chapter are:
•
“System Settings” on page 5-1
•
“Copy/Document Server Settings” on page 5-33
•
“Entering Text” on page 5-32
User Tools Settings
System Settings
System Settings
The following are the system settings.
User Tools Settings
•
“General Features 1 of 2” on page 5-3
•
“General Features 2 of 2” on page 5-5
•
“Paper Size Setting 1 of 3” on page 5-6
•
“Paper Size Setting 2 of 3” on page 5-7
•
“Paper Size Setting 3 of 3” on page 5-8
•
“Timer Setting” on page 5-9
•
“Interface Settings” on page 5-11
•
“Interface Settings/Parallel Interface” on page 5-13
•
“File Transfer” on page 5-14
•
“Key Operator Tools 1 of 2” on page 5-16
•
“Key Operator Tools 2 of 2” on page 5-31
•
“Entering Text” on page 5-32
5-1
System Settings
Basic Steps to Accessing System Settings
Step
1
2
3
4
5
Procedure to Perform
Press the User Tools/Counter key.
Touch the Systems Settings key.
Touch the desired Window Tab.
•
•
•
•
•
•
•
General Features - 2 Windows
Paper Size Settings - 3 Windows
Timer Settings
Interface Settings - 2 Windows
Interface Settings/Parallel Interface
Key Operator Tools - 2 Windows
User Codes
Touch the key for the desired item. Change settings by following the
instructions on the panel display.
Touch the OK key.
The tables on the following pages provide you with information necessary to access the System
Settings
Exiting from User Tools
After changing the User Tools settings, touch the Exit key, or press the User Tools/Counter key.
5-2
User Tools Settings
General Features 1 of 2
General Features 1 of 2
Panel Tone
The beeper (key tone) sounds when a key is pressed.
Default: ON
Warm Up Notice
Specify whether the beeper sounds when the machine becomes ready for copying after Energy
Saver mode is deactivated or the power is turned on.
Note: If the “Panel Tone” setting is “Off”, the beeper does not sound irrespective
of the “Warm Up Notice” setting.
Default: ON
Copy Count Display
The copy counter can be set to show the number of copies made (count up) or the number of
copies remaining to be made (count down).
Default: Up (count up)
Function Priority
You can specify the mode to be displayed immediately after the operation switch is turned on or
System Reset mode is turned on.
Default: Copier
Print Priority
Set print priority for each mode.
•
•
•
•
•
•
“Display mode”: Print priority is given to the mode displayed on the display.
“Copier”: Print priority is given to the copy function.
“Document Server”: Print priority is given to the Document server.
“Facsimile”: Print priority is given to the fax function.
“Printer”: Print priority is given to the printer function.
“Interleave”: Prints jobs in the order in which they are initiated regardless of mode/
function. Output from each function might be mixed. If you want to avoid such mixing,
specify an independent tray for each feature using “Output tray Prio”. When using
different functions, attaching internal tray 2 allows you to specify an independent tray
for each function. If you want to attach one, contact your local dealer.
Default: Display mode
User Tools Settings
5-3
General Features 1 of 2
Function Reset Timer
The length of time the machine waits before changing modes when using the multi-access
function. This is useful if you make many copies where you have to change the settings for each
copy. If you set a large value, you can prevent jobs from other functions interrupting the copy job.
This setting is ignored if “Interleave” is set for “Print Priority”.
Default: Set Time
•
•
When you select “Set Time”, enter the time (3~30seconds by 1 second steps) with the
number keys.
The default time setting is 3 seconds.
Output: Copier
You can specify a tray to which documents are delivered.
•
•
•
•
•
•
•
Internal tray 1
Internal tray 2 •
External tray
Finisher shift tray
Finisher shift tray 1
Finisher shift tray 2
Mailbox proof tray
Output: Document Server
You can specify a tray to which documents are delivered.
•
•
•
•
•
•
•
Internal tray 1
Internal tray 2
External tray
Finisher shift tray
Finisher shift tray 1
Finisher shift tray 2
Mailbox proof tray
Output: Facsimile
You can specify a trays to which documents are delivered.
•
•
•
•
•
•
•
5-4
Internal tray 1
Internal tray 2
External tray
Finisher shift tray
Finisher shift tray 1
Finisher shift tray 2
Mailbox proof tray
User Tools Settings
General Features 2 of 2
General Features 2 of 2
Output: Printer
You can specify a tray to which documents are delivered.
•
•
•
•
•
•
•
•
Internal tray 1
Internal tray 2
External tray
Finisher shift tray
Finisher shift tray 1
Finisher shift tray 2
Mailbox proof tray
Mailbox output tray 1-9
Prepare Stapling
Perform a test staple after replacing staples or removing jammed staples.
Note: Press [OK] to prepare stapling.
Output tray settings
•
•
•
You cannot interrupt a job when 1000–sheet Finisher is stapling jobs using paper larger
than legal. However, jobs received by fax will be printed and delivered to Internal tray 1.
If the staple function is selected when using 2 Tray Finisher, the job will be delivered to
Finisher shift tray 2 regardless of the setting.
When Print post is installed, even if the output tray selected is an internal tray, paper
longer than legal size is delivered automatically to the following output trays.
Installed option
More than B4 paper
Mailbox proof tray
Mailbox output tray
2 Tray Finisher + Mailbox
proof tray
Mailbox output tray Finisher
shift tray1
If Mailbox proof tray is installed on your machine and you often use paper larger than B4 specify
an output tray other than internal tray.
The paper which is smaller than letter will automatically be delivered to the Finisher shift tray.
User Tools Settings
5-5
Paper Size Setting 1 of 3
Paper Size Setting 1 of 3
Paper Tray Priority (Copy/Document Server)
You can specify the output tray for delivery.
Default: Internal tray 1
Paper Tray Priority (Fax/Printer)
You can specify the output tray for delivery.
Default: Internal tray 1
Tray Paper Size: (Tray 1–4)
Select the size of the copy paper set in the paper tray.
Note: If the specified paper size differs from the size of paper actually set in the
paper tray, a paper misfeed might occur because the paper size is not detected
correctly
•
•
•
•
5-6
The tray fence for the optional large capacity tray (LCC) is fixed. If you need to change
the paper size, contact your service representative.
If the paper size set for the dial in paper tray 1 and 2 is different to the paper size for this
setting, the paper size of the dial has priority.
If you load paper in tray 1 or 2 that is not available on the paper size dial, set the dial to
“*”.
The paper sizes you can set for (Tray1–4) are as follows:
16K L, 11" x 17” L, 8 1 /2” x 14" L, 8 1 /2” x 11" K, 8 1 /2” x 11" L, 8" x 13" L,
8 1 /2” x 13" L, 8 1 /4” x 13" L, 8 1 /4” x 14" L, 11" x 14" L, 7 1 /4” x 10 1 /2”L,
8" x 10 1 /2”K, 8" x 10 1 /2”L, 5 1 /2” x 8 1 /2”L
User Tools Settings
Paper Size Setting 2 of 3
Paper Size Setting 2 of 3
Paper Type (Bypass Tray)
Sets the display so you can see what type of paper is loaded in the bypass tray.
Default: No display
Paper Type (Tray1–4)
Sets the display so you can see what type of paper is loaded in each of the paper trays.This
information is used by the print function to automatically select the paper tray.
Default:
•
•
•
Paper Type: No display
Copying Method: 2 Sided Copy
Apply Auto Paper Select: Yes
A key mark is displayed next to the paper tray if No is selected.
Note: Auto paper select can only be selected for the Copy function if No display
and Recycled paper are selected. However, auto paper select is not used if No is
selected.
User Tools Settings
5-7
Paper Size Setting 3 of 3
Paper Size Setting 3 of 3
Paper Type (LCT)
Sets the display so you can see what type of paper is loaded in the large capacity tray.
Default:
•
•
•
Paper Type: No display
Copying Method in Duplex: 2 Sided Copy
Apply Auto Paper Select: Yes
A key mark is displayed next to the paper tray if No is selected.
Note: Auto paper select is only selected for the Copy function if No display and
Recycled paper are selected. However, auto paper select is not used if No is
selected.
Cover Sheet Tray (Copy/Document Server)
Default: Tray to program: NONE
The functions that use the Cover Sheet Tray setting are the front cover function and both
covers function.
When Mode Selected is selected, the cover settings options are only displayed when the
cover function or slip sheet function is selected.
You can only set the Copying Method in Duplex setting when At Mode selected is
selected.
•
•
•
Slip Sheet Tray (Copy/Document Server)
Default: Tray to program: NONE
When you use the Slip Sheet function, you can use the output tray specified in the Slip
Sheet Tray setting.
When At Mode selected is selected, the options are only displayed when the cover
function or slip sheet function is selected.
•
•
5-8
User Tools Settings
Timer Setting
Timer Setting
When entering Set Time mode, if a key operator code has already been set, you must enter the
code (up to 8 digits).Þ P.50 “User Code”.
Auto Off Timer
The machine turns off automatically to conserve energy after a specified amount of time has past
after a job. This function is called “Auto Off”. The Time can be set from 10 seconds to 240
minutes.
Default: 1 minute
•
•
•
Enter numbers with number keys
Use arrow keys to switch between minutes and seconds.
Auto off may not work while an error is displayed.
Panel Off Timer
Set the amount of time the machine waits before switching the panel off after copying has finished
or no operations are performed with the machine.
•
•
•
•
The default setting is the same time interval as Auto Off Timer, so the Panel Off Timer
is not used. This setting is only used if the Auto Off Timer setting is set to a longer
interval than the Panel Off Timer setting.
The warm up time for making a copy from standby mode is three seconds. The default
setting is 1 minute.
Enter a time interval between 10 seconds and 240 minutes with the number keys.
Press the arrow keys to move the cursor between minutes and seconds.
System Reset Timer
The System Reset setting is a setting that automatically switches to the screen for the function set
in Function Priority. This happens if no operations are performed or to when clearing an
interrupted job. This setting sets the system reset interval.
The time can be set from 10 to 999 seconds.
Default: Yes, 60 seconds
Copier/Document Server Auto Reset Timer
Set the time interval after which the copy function and document server function are reset.
•
If No is selected, the machine will not automatically switch the user code entry screen
and you will not be able to limit who uses the machine.
The time can be set from 10 to 999 seconds.
Default: Yes, 60 seconds
•
User Tools Settings
5-9
Timer Setting
Facsimile Auto Reset Timer
Set the time interval for when the fax function should be reset.
The time can be set from 30-999 seconds.
Default: 30 seconds
Scanner Auto Reset Timer
Set the time interval for when the scanner function should be reset.
•
If No is selected, the machine will not automatically switch the user code entry screen
and you will not be able to limit who uses the machine.
The time can be set from 10-999 seconds.
Default: Yes, 60 seconds
•
Set Date
Set the date for the copier's internal clock.
To change among year and month and day, press the arrow keys.
Set Time
Set the date for the copier's internal clock.
To change between minutes and seconds, press the arrow keys.
5 - 10
User Tools Settings
Interface Settings
Interface Settings
IP Address
Before using this machine with the network environment you must configure the IP address.
Default: 011.022.033.044
•
•
•
Do not use IP address that has been used for another machine. To get the addresses,
contact your network administrator.
Press arrow keys to move between each group of three numbers.
Press [Clear] if you enter the wrong number.
Sub-net Mask
A number used to mathematically “mask” or hide an IP address on the network by eliminating
those parts of the address that are alike for all the machine on the network.
Default: 000.000.000.000
•
•
Press arrow keys to move between each group of three numbers.
Press [Clear] if you enter the wrong number.
Gateway Address
A gateway is a connection or interchange point that connects two networks. Configure the gateway
address for the router or host computer used as a gate-way.
Default: 000.000.000.000
Note: To get the addresses, contact your network administrator.
Access Control and Access Mask
You can control the client access.Access control and Access mask set to be together.
Default: 000.000.000.000
•
•
If you do not want to set any limitation for this machine, use default settings.
Press [Clear] if you enter the wrong number.
Network Boot
Select how to set IP address from client.
Default: NONE
For details about settings consult your network administrator.
Effective Protocol
Select protocol, using in the network.
Default: TCP/IP: Effective, NetWare: Effective, NetBEUI: Effective, Platelike: Effective.
User Tools Settings
5 - 11
Interface Settings
NW Frame Type
Select the frame type when you use NetWare.
Default: Auto select
Ethernet Speed
Set the access speed for networks.
Default: Auto select
5 - 12
User Tools Settings
Interface Settings/Parallel Interface
Interface Settings/Parallel Interface
Parallel Timing
Specifies the timing setting for the parallel interface. Under normal circumstances, you will not
need to change this setting.
Default: ACK outside
Parallel Communication Speed
Specifies the communication speed for the parallel interface. If the communication speed is set too
fast, data transfers may not flow smoothly. If this occurs, change the setting to “Standard”.
Default: High speed
Selection Signal Status
Specifies the level for the select signal setting of the parallel interface.
Default: High
Input Prime
Specifies whether the prime signal is active or inactive when an input prime signal is sent. Under
normal circumstances, you will not need to change this setting.
Default: Invalid
Bidirectional Communication
Specifies the printer's response mode etc., for status request when using the parallel interface. If
you experience problems when using other manufacturers printers, set this to “Off”. However, if
this is set to “Off”, asynchronous functions will not work.
Default: Yes
Signal Control
Specifies the error processing settings for when an error occurs when printing from a computer or
sending faxes. Under normal circumstances, you will not need to change this setting.
Default: Job acceptance priority
User Tools Settings
5 - 13
File Transfer
File Transfer
Be sure to make these settings if you are using ScanRouter V2 Lite/Professional. Note r The
optional ScanRouter V2 Professional is required for distributing received fax documents.
Delivery Server IP Address
Specifies the IP address of the ScanRouter V2 Lite delivery server for distributing documents or
data from the machine.
Default: 000.000.000.000
•
•
Press arrow keys to move between each group of three numbers.
If you make a mistake, press the “Clear” key and enter the correct number.
Fax RX File Transmission
•
Setting per Line
Specifies whether or not received fax documents should be sent to the ScanRouter V2
Professional for each of the fax lines.
Default: G3 Port 1/Do not Deliver, G3 Port 2/Do not Deliver, G3 Port 3/Do not Deliver
•
Print at Delivery
Specifies whether or not received fax documents that are sent to the Scan-Router V2
Professional should also be printed by the machine at the same time.
Default: No
•
File to Deliver
Specifies whether all received fax documents or only received fax documents that
include delivery codes (documents with an ID and F code) should sent to the
ScanRouter V2 Professional.
Default: File with Dlvry Code
•
Delivery Failure File (Dlvry Failure File) If a received fax document cannot be sent to
the ScanRouter V2 Professional, the documents is stored in the machine's memory.To
print this stored data select “Print File”, to delete the data select “Delete File”.
If the machine can send data to the ScanRouter V2 Professional, data is sent automatically.
If you delete the data, you will not be able to distribute or print the data.
Recall Interval Time
Specifies the interval the machine waits before sending data or a document, if a data could not be
sent to the ScanRouter V2 Professional.
Default: 300 Seconds
•
•
5 - 14
Enter an interval within the range of “60 -999 seconds” (in one second intervals) with
the number keys.
This setting is for the Scanner function. The distribution of received fax documents will
User Tools Settings
File Transfer
still be performed.
Number of Recalls
Default: Yes
•
•
•
User Tools Settings
Enter a number of times within the range of “1-99” with the number keys.
The default setting is 3 times.
This setting is for the Scanner function.The distribution of received fax documents will
still be performed.
5 - 15
Key Operator Tools 1 of 2
Key Operator Tools 1 of 2
If an access code has been set, you cannot use the Key Operator Tools unless you enter the access
code (max.8 digits).
User Code Management
Allows you to control who uses the machine by setting user codes for users.
Default: Copier/OFF, Document Server/OFF, Facsimile/OFF, Scanner/OFF, Printer/OFF
Note: By using “Auto Registration” for the printer you can keep a print log for
each user code entered from the driver.
Key Counter Management
Use the key counter to specify whether users are limited or not.
Default: Copier/OFF, Document Server/OFF, Facsimile/OFF, Scanner/OFF, Printer/OFF
Key Operator Code
This specifies whether or not to use passwords (max.8 digits) to control use of the “Timer Setting”
or “Key Operator Tools” settings for the access codes.
Default: OFF
If you select “ON”, enter the access code (max.8 digits) with the number keys, then select “Partial
or “All Initial Settings” to set the access limit.
•
If you selected “Partial” An access code is only required for the “Timer Setting” and
“Key Operator Tools” initial settings and for “Key Operator Tools” for the fax initial
settings. “MENU PROTECT” will be set for “CHANGE/ CONTROL” in the printer
initial settings.
If you selected “All Initial Settings” An access code will be required to access all the
items in the System Settings, Copier/Document Server Features, Facsimile Features,
Printer Features, and Scanner Features.
If you select “All Initial Settings”, you will need to enter the access code to access the Key
Operator Code screen.
•
AOF (Always ON)
Makes the Auto Off Timer setting active. Leave this set to “ON”.
Default: ON
Program/Change/Delete User Code
Adds, changes or deletes user codes (max 8 digits).
•
5 - 16
You can register up to 100 user codes. If you add the optional extension module, you can
register up to 500 user codes.
User Tools Settings
Key Operator Tools 1 of 2
•
•
•
•
•
•
You can also register user codes from the SmartNet Monitor for Admin (printer option
required).
Even if you change the user codes, the counter values are not cleared.
If you clear a user codes, the counter values associated with it are also automatically
cleared.
[Program/Change] This registers new user codes, and changes the functions that can be
used with user codes and user names.
[Delete] Deletes a user code.
[Delete All] Deletes all the user codes.
Display/Print Counter
Allows you to view and print the various counters.
•
•
Display/Print Counter
Displays counters for each functions (Total, Copier, Facsimile, Printer).
Print Counter List
1. If you want to print Counter List, press [Print Counter List], and then press start.
If you do not want to print, then press [Cancel].
2. Press [Exit]
Display/Clear/Print Counter per User Code
Allows you to view and print the various counters accessed with user codes, and to set the values
to 0.
Note: If you use the “Delete All” for the user codes, the user code names (Fax
function), counter values, and communication settings will also be deleted. Be
sure to print the list of these settings before pressing the “OK” key.
Press [Up and DOwn arrow keys to show all counters.
•
•
Print Counter per User Code
Prints the counter values for each of the user codes.
Clear Counter per User Code
Sets the counter value for each of the user codes to 0.
Change User Name Order
Changes the order of the registered user codes.
•
•
User Tools Settings
You can rearrange the order of items on the same page, but you cannot move the items to
another page. For example, you cannot move an item from “PLANNING” to “DAILY”.
Select the user code you want to move and press the left, right, up, and down arrow keys
to change its position. To move it to the end, press “To End”.
5 - 17
Key Operator Tools 1 of 2
User Code
By registering user codes you can control which users can use which functions, and check
their use of a function.
Copier
Limits the users who can use the Copy function and manages the use of each user code.
Document Server
Limits the users who can use the Document Server function and manages the use of each user
code.
Facsimile
Limits the users who can use the Fax function and manages the use of each user code.
Printer
Limits the users who can use the Printer function and manages the use of each user code.
Scanner
Limits the users who can use the Scanner function and manages the use of each user code.
The functions associated each user code are the same. If you change or delete user codes, the
management data and limits associated with that user code will become invalid.
To Register a New User Code
1
Press the User Tools/Counter key.
2
Press the [System Settings] key.
3
Press the [Key Operator Tools] key.
4
5 - 18
Press the [Program/Change/
Delete User Code] key.
User Tools Settings
Key Operator Tools 1 of 2
5
6
Press [New Program key.
Press the key for the
classification you want to use
from “Title Select”.
The keys you can select are as
follows.
•
•
7
8
Enter the user code (8 digits
max), then press the [#] key.
If you make a mistake, press the
Cancel or Clear/ Stop key, and
then enter the code again.
Select the functions to be used
with the user code from
“Available Functions”.
The functions that can selected
are as follows.
•
•
User Tools Settings
[Freq.]…Added to the pages
that is displayed first.
[AB], [CD], [EF], [GH],
[IJK], [LMN], [OPQ], [RST], [UVW], [XYZ], …Added to the list of items in the title
selected.
You can only select one page for “Title Select”.
[Copier], [Facsimile TX],
[Printer], [Document
Server], [Scanner]
Select “Yes” for each
function of the user code.
5 - 19
Key Operator Tools 1 of 2
9
Press [Enter Name], then enter
the name for the user code.
This can be used to attach the
user name to documents in the
document server. You do not
need to enter a user code for this.
10
11
12
To continue registering user
codes, press [Continue to
Program], and then re-peat the
procedures from step 6.
Press the [OK] key.
Press the [Exit] key.
The display returns to the initial
settings screen.
To Change the User Code
5 - 20
1
Press the User Tools/Counter key.
2
Press the [System Settings] key.
3
Press the [Key Operator Tools] key.
User Tools Settings
Key Operator Tools 1 of 2
4
5
6
7
8
User Tools Settings
Press the [Program/Change/
Delete User Code] key.
Select the user code you want to
change.
Enter the new information for
the item that you want to change.
Press the [OK] key.
Press the [Exit] key.
The display returns to the initial
settings screen.
5 - 21
Key Operator Tools 1 of 2
To Clear a User Code
1
Press the User Tools/Counter key.
2
Press the [System Settings] key.
3
Press the [Key Operator Tools] key.
4
5
6
Press the [Program/Change/
Delete User Code] key.
Press the [Delete] key.
Select the user code you want to
delete.
Press [All on The Page] when
you want to select all the user
codes displayed on the page.
7
5 - 22
Press the [OK] key.
User Tools Settings
Key Operator Tools 1 of 2
8
Press “Yes” in the confirmation
screen.
If you don't want to quit
deleting, press [No].
9
Press the [Exit] key.
The display returns to the initial
settings screen.
To Delete All User Codes
Using “Print Counter”, you can check the user codes for each print job for the Copy/Document
Server function, Printer function, and Facsimile function.
Note: Using [Print Counter], you can check the user codes for each print job for
the Copy/Document Server function, Printer function, and Facsimile function.
1
Press the User Tools/Counter key.
2
Press the [System Settings] key.
3
Press the [Key Operator Tools] key.
4
User Tools Settings
Press the [Program/Change/
Delete User Code] key.
5 - 23
Key Operator Tools 1 of 2
5
Press the [Delete] key.
6
Press the [Delete All] key.
7
Press [Yes] in the confirmation
screen.
If you don't want to quit
deleting, press [No].
8
Press the [Exit] key.
The display returns to the initial
settings screen.
5 - 24
User Tools Settings
Key Operator Tools 1 of 2
To Display Counter for Each Code
Using “Print Counter”, you can check the user codes for each print job for the Copy/Document
Server function, Printer function, and Facsimile function.
Using “Transmission Counter” you can check the number pages sent by fax and the charge for
each fax sent.
1
Press the User Tools/Counter key.
2
Press the [System Settings] key.
3
4
5
Press the [Key Operator Tools]
key.
Press the [Display/Clear/Print
Counter per User Code] key.
Press the [Print Counter] Key or
[Transmission Counter] key.
The individual function counters
for each user code are displayed.
User Tools Settings
5 - 25
Key Operator Tools 1 of 2
Printing From the Counter
Printing the Number of Prints (Counter) for Each User Code
You can print out how many prints you used for Copier/Document Server, Printer, and Fax.
1
Press the User Tools/Counter key.
2
Press the [System Settings] key.
3
Press the [Key Operator Tools] key.
4
5
Press the [Program/Change/
Delete User Code] key.
Select User Code from the left
side of display.
Press [All on The Page] if you
want to select all user codes on
the page.
6
5 - 26
Press [Print All Codes] of Per
User Code.
User Tools Settings
Key Operator Tools 1 of 2
7
Press either [Print Counter] or
[Transmission Counter].
You can select both [Print
Counter] and [Transmission
Counter] at the same time.
8
Press [Print].
Printing the Number of Prints (Counter) for All User Codes
1
Press the User Tools/Counter key.
2
Press the [System Settings] key.
3
Press the [Key Operator Tools] key.
4
5
Press the [Program/Change/
Delete User Code] key.
Press [Print All Codes] of Per
User Code.
Press [All on The Page] if you
want to select all user codes on
the page.
6
Press either [Print Counter] or
[Transmission Counter].
You can select both [Print
Counter] and [Transmission
Counter] at the same time.
7
User Tools Settings
Press [Print].
5 - 27
Key Operator Tools 1 of 2
Clearing the Counter
Clearing the Number of Print (Counter) for Each User Code
1
Press the [User Tools/Counter] key.
2
Press the [System Settings] key.
3
Press the [Key Operator Tools] key.
4
5
Press the [Program/Change/
Delete User Code] key.
Select User Code from the left
side of display.
Press [All on The Page] if you
want to select all user codes on
the page.
6
5 - 28
Press [Clear] or Per User Code.
User Tools Settings
Key Operator Tools 1 of 2
7
Press either [Print Counter] or
[Transmission Counter].
You can select both [Print
Counter] and [Transmission
Counter] at the same time.
8
Press [OK].
The user code counter will be
clear.
If you want to cancel the
operation, press [Cancel].
Clearing the Number of Print (Counter) for All User Codes
1
Press the User Tools/Counter key.
2
Press the [System Settings] key.
3
Press the [Key Operator Tools] key.
4
5
User Tools Settings
Press the [Program/Change/
Delete User Code] key.
Press [Clear] for [All User
Codes].
5 - 29
Key Operator Tools 1 of 2
6
Press either [Print Counter] or
[Transmission Counter].
You can select both [Print
Counter] and [Transmission
Counter] at the same time.
7
Press [OK].
All user code counters will be
clear.
If you want to cancel the
operation, press [Cancel].
5 - 30
User Tools Settings
Key Operator Tools 2 of 2
Key Operator Tools 2 of 2
Auto Delete File
You can select whether the files on the document server will be deleted after a specified amount of
time or not.
Default: No
If you select [Yes], you can set the time interval from 1 to 180 days by one day steps.
Delete All Files
•
•
You can delete all stored files on the document server.
You can delete stored files even if password is set for a file.
Display Password with Stored File
You can select whether the documents which have passwords will be temporarily displayed or not.
If you forget the password, press [Yes].
User Tools Settings
5 - 31
Entering Text
Entering Text
This section describes how to enter characters.When you enter a character, it is shown at the
position of the cursor.If there is a character at the cursor position, the entered character is shown
before the character.
Available Characters
•
•
•
Alphabetic characters
ABCDEFGHIJKLMNOPQRSTUVWXYZabcdefghijklmnopqrstuvwxyz
Symbols
Numerals
012345689
Keys
When entering uppercase or lowercase continuously, use the [Shift Lock] to lock the case.
How to Enter Text
Entering Letters
1
Press the [Shift] to switch between uppercase and lowercase.
2
Press letter you want to enter.
Deleting Characters
Press [Backspace] or [Delete All] to delete characters.
5 - 32
User Tools Settings
Copy/Document Server Settings
Copy/Document Server Settings
The following are the Copy/Document Server Settings.
User Tools Settings
•
“General Features 1 of 4” on page 5-35
•
“General Features 2 of 4” on page 5-38
•
“General Features 3 of 4” on page 5-39
•
“General Features 4 of 4” on page 5-40
•
“Reproduction Ratio 1 of 2” on page 5-41
•
“Reproduction Ratio 2 of 2” on page 5-42
•
“Edit 1 of 2” on page 5-43
•
“Edit 2 of 2” on page 5-44
•
“Stamp” on page 5-45
•
“Input/Output” on page 5-50
5 - 33
Copy/Document Server Settings
Basic Steps to Accessing Copy/Document Server Settings
Step
1
2
3
4
5
Procedure to Perform
Press the User Tools/Counter key.
Touch the Copier/Document Server key.
Touch the desired Window Tab.
Touch the key for the desired item. Change settings by following the
instructions on the panel display.
Touch the OK key.
The tables on the following pages provide you with information necessary to access the Copy/
Document Server Settings
Exiting from User Tools
After changing the User Tools settings, touch the Exit key, or press the User Tools/Counter key.
5 - 34
User Tools Settings
General Features 1 of 4
General Features 1 of 4
Auto Paper Select Priority
As a default setting, Auto Paper Select is selected. You can cancel this setting.
Default: Yes
Auto Tray Switching
If you load paper of the same size in two or more trays, the machine automatically shifts to another
tray when the tray in use runs out of paper (when Auto Paper Select is selected.) This function is
called “Auto Tray Switching”. This setting specifies whether to use “Auto Tray Switching” or not.
Default: With image rotation
•
•
•
With image rotation: Use this when copying with Auto Tray Switching.
Without image rotation: Only copies with Auto Tray Switching if you load paper of the
same size and in the same direction in two or more trays. If the paper is not the same size
or in the same direction, the message “Load paper.” is displayed.
OFF: When a paper tray runs out of paper, copying is interrupted and the message “Load
paper.” is displayed.
Paper Display
You can choose whether the available paper trays/sizes are shown on the initial display at Auto
Paper Select mode.
Default: Display
•
•
If you choose “Hide”, the display is shown as below.
When the [Auto Paper Select] key is pressed, paper sizes appear on the display.
Original Type Priority
As a default setting, Text is selected as the Originals Type. You can change it to Text/Photo,
Photo, Pale, or Generation Copy.
Default: Text
Original Type Display
You can choose whether the original modes are shown on the initial display.
Default: Display
If you choose “Hide”, the display is shown as below.
Auto Image Density Priority
You can turn the Auto Image Density on or off for each of the original types (Text, Text/Photo,
Photo, Pale, and Generation Copy).
Default: Text: On, Text/Photo: On, Photo: Off, Pale: On, Generation Copy: On
User Tools Settings
5 - 35
General Features 1 of 4
Copy Quality
You can adjust the quality level of copies for each of the original types (Text, Text/Photo, Photo,
Pale, Generation Copy).
Text
Adjust the sharpness of text.
Default: Normal
•
•
[Custom Setting] is the value set during service setup.
Choosing [Sharp] or [Sort] affects the outline sharpness of text.
Text/Photo
When there are photo(s) and text on the original, determine whether the photo or text takes
priority.
Default: Normal
•
•
[Custom Setting] is the value set during service setup.
[Normal] achieves a good balance between text and photos.
Photo
For a photo original, adjust the finish quality level to match the type of photo original.
Default: Print Photo
•
•
•
[Custom Setting] is the value set during service setup.
Select [Print Photo] for printed photo originals, and [Glossy Photo] for printed photo
originals with fine dots.
Select [Normal] for printed photo and text originals.
Pale
Adjust the quality level for the finish of a pale original with normal density.
Default: Normal
[Custom Setting] is the value set during service setup.
Generation Copy
Adjust the quality level so as not to thicken the lines of the finish image.
Default: Normal
[Custom Setting] is the value set during service setup.
5 - 36
User Tools Settings
General Features 1 of 4
Image Density
You can select one of seven original image density levels for each of the original types
(Text, Text/Photo, Photo, Pale, Generation Copy).
Default:
•
•
•
•
•
User Tools Settings
Text: Normal
Text/Photo: Normal
Photo: Normal
Pale: Normal
Generation Copy: Normal
5 - 37
General Features 2 of 4
General Features 2 of 4
Duplex Mode Priority
You can select the type of the Duplex function effective when the machine is turned on, Energy
Saver mode is off, or Auto Reset is on.
Default: 1 Sided > 2 Sided
Copy Orientation in Duplex Mode
You can set the copy orientation when making two-sided copies.
Default: Top to Top
Original Orientation in Duplex Mode
You can set the original orientation when making two-sided copies.
Default: Top to Top
Change Initial Mode
You can select the initial mode or Program No.10 as the mode effective when the machine is
turned on, or modes are cleared.
Default: Standard
Max.Copy Quantity
The maximum copy quantity can be set between 1 and 999.
Default: 999Sheets.
Tone: Original remains
The beeper (key tone) sounds when you forgot to remove originals after copying.
Default: On
If the “Panel Tone” of the User Tools (System Settings) setting is “Off”, the beeper does not sound
irrespective of the “Tone: Original on Platen” setting. “Panel Tone” in the System Settings
manual.
Job End Call
You can choose whether or not the beeper sounds when copying is complete. If the “Panel Tone”
of the User Tools (System Settings) settings is “Off”, the machine beeps to notify you that the
machine did not complete a job for reasons such as copying was interrupted, the paper tray ran out
of paper or a paper jam occurred.
Default: On
5 - 38
User Tools Settings
General Features 3 of 4
General Features 3 of 4
Copy Function Key: F1-F5
You can register frequently used functions in Function Keys F1 to F5.
Note r Default:
•
•
•
•
•
User Tools Settings
Copy Function Key: F1: 1 Sided > 2 Sided: T to T
Copy Function Key: F2: 2 Sided: T to T > 2 Sided: T to T
Copy Function Key: F3: 1 Sided > 1 Sided Combine:2 Originals
Copy Function Key: F4:1 Sided > 1 Sided Combine:4 Originals
Copy Function Key: F5: Create Margin
5 - 39
General Features 4 of 4
General Features 4 of 4
Document Server Storage Key: F1–F5
You can register frequently used functions in Function keys F1 to F5. You can also change the
registered functions.
Default
•
•
•
•
•
5 - 40
Document Server Storage Key: F1:2 Sided Original Top to Top
Document Server Storage Key:F2:1 Sided > 1 Sided Combine
Document Server Storage Key: F3:1 Sided > 1 Sided Combine:4 originals
Document Server Storage Key: F4:1 Sided > 1 Sided Combine:8 originals
Document Server Storage Key: F5: Create Margin
User Tools Settings
Reproduction Ratio 1 of 2
Reproduction Ratio 1 of 2
Shortcut R/E
You can register up to three frequently used Reduce/Enlarge ratios other than the fixed Reduce/
Enlarge ratio and have them shown on the initial display.
You can also change the registered Reduce/Enlarge ratios. If no Reduce/Enlarge ratio has been set
when selecting [Shortcut R/E 1], [Short-cut R/E 2], or [Shortcut R/E 3], enter the desired Reduce/
Enlarge ratio using the number keys.
Enlarge 1-5
You can customize the enlargement ratios available when you press the [Reduce/ Enlarge] key
followed by the [Enlarge] key.
Default:
•
•
•
•
•
Enlarge 1: 121%
Enlarge 2: 129% •
Enlarge 3: 155%
Enlarge 4: 200%
Enlarge 5: 400%
When selecting [User Enlrg. Ratio], enter a ratio using the number keys (in the range of 101 to
400%).
Priority Setting: Enlarge
You can set the ratio with priority when the [Reduce/Enlarge] key is pressed, followed by the
[Enlarge] key.
Default: 155%
User Tools Settings
5 - 41
Reproduction Ratio 2 of 2
Reproduction Ratio 2 of 2
Reduce 1-6
You can customize the reduction ratios available when you press the [Reduce/ Enlarge] key
followed by the [Reduce] key.
Default:
•
•
•
•
•
•
Reduce 1: 25%
Reduce 2: 50%
Reduce 3: 65%
Reduce 4: 73%
Reduce 5: 78%
•Reduce 6: 85%
When selecting [User Redc.Ratio], enter a ratio using the number keys (in the range of 25 to 99%).
Priority Setting: Reduce
You can set the ratio with priority when the [Reduce/Enlarge] key is pressed, followed by the
[Reduce] key.
Default: 73%
Ratio for Create Margin
You can set a Reduce/Enlarge ratio when registering “Create Margin” in a Shortcut Key.
Default: 93%
R/E Priority
Specify which Reduce, Enlarge or Input Ratio is shown on the display panel with priority when the
[Reduce/Enlarge] key is pressed.
Default: Reduce
5 - 42
User Tools Settings
Edit 1 of 2
Edit 1 of 2
Front Margin: Left/Right
You can specify left and right margins on the front side of copies in Margin Adjust mode.
Default: Left 0.2"
Back Margin: Left/Right
You can specify left and right margins on the back side of copies in Margin Adjust mode.
Default: Right 0.2"
Front Margin: Top/Bottom
You can specify front top and bottom margins on the front side of copies in Margin Adjust mode.
Default: Bottom 0.0"
Back Margin: Top/Bottom
You can specify back top and bottom margins on the front side of copies in Margin Adjust mode.
Default: Bottom 0.0"
1 sided >2 sided Auto Margin: T to T
In 1 sided > 2 sided Duplex mode, you can specify whether to automatically set the margins on the
back side. The margin is set to the same value of “Back Margin: Left/Right”.
Default: Right 0.2"
1 sided >2 sided Auto Margin: T to B
In 1 sided > 2 sided Duplex mode, you can specify whether to automatically set the margins on the
back side. The value set for “Back Margin: Top/Bottom” is used.
Erase Border Width
The default setting of the width of the erased margins in Erase Border mode can be changed as
follows: 0.1"– 2.0" in 0.1" steps
Default: 0.4"
Erase Original Shadow in Combine
In Combine Copy or Booklet/Magazine Copy mode, you can specify whether to erase a 0.1"
bounding margin around all four edges of each original.
Default: Yes
Erase Center Width
The default setting of the width of the erased margins in Erase Center mode can be changed as
follows: 0.1"– 3.9" in 0.1" steps. Default: 0.4"
User Tools Settings
5 - 43
Edit 2 of 2
Edit 2 of 2
Image Repeat Separation Line
You can select a separation line in Image Repeat mode from None, Solid, Broken A, Broken B, or
Crop Marks.s
Default: None
Double Copies Separation Line
You can select a separation line in Double Copy mode from None, Solid, Broken A, Broken B, or
Crop Marks.
Default: None
Separation Line in Combine
You can select a separation line in Combine mode from None, Solid, Broken A, Broken B, or Crop
Marks.
Default: None
Front Cover Copy in Combine
You can specify whether to make a combined copy on the front cover sheet when you select Front
Cover copy mode.
Default: Combine
Designated Slip Sheet Copy in Combine
You can specify whether to make a combined copy on the inserted slip sheets in Desig./Chapter
Copy mode.
Default: Combine
Copy on Designated Paper
You can specify whether to copy on the designate.
Default: Yes
Orientation: Booklet, Magazine
You can select the type of originals for Booklet or Magazine mode.
Default: Open to Left
Copy Order in Combine
You can set the copy order in Combine mode to “Left to Right” or “Top to Bottom”.
Default: From left to right
5 - 44
User Tools Settings
Stamp
Stamp
Background Numbering
Size
You can set the size of the numbers.
Default: Normal
•
•
•
Small
Normal
Large
Density
You can set the density of the numbers.
Default: Normal
Preset Stamp 1 /4 to 4 /4
Stamp Priority
You can select the stamp type priority detected in Stamp mode.
Default: Copy
Stamp Language
You can select the language of the message that is printed in Stamp mode.
Default: English
Stamp Position
You can set the position at which the stamp is printed. Press the arrow keys to adjust the position.
Default:
•
•
•
Position: Top right
Top Margin: 1.0" •
Right Margin: 1.0"
Stamp Format
You can adjust the size, density and print page for the stamp.
Size
You can set the size of the stamp.
Default: 1X
User Tools Settings
5 - 45
Stamp
Density
You can set the pattern used to print the stamp.
Default: Normal
•
Normal: The stamp is printed on the image. You cannot confirm which parts overlap the
image.
Lighter: The image can be seen through the stamp.
Light: You can see the image even clearer than in the “Lighter” setting.
Print Page
•
•
You can select whether the stamp is printed on the first page or all pages.
Default: All Pages
User Stamp 1 /2-2 /2
Program/Delete Stamp
You can register up to 4 custom stamps with your favorite design.You can register/change/delete
your favorite design as a user stamp.
You can set the position at which the stamp is printed. Press the arrow keys to adjust the position.
Stamp Position
You can set the position at which the stamp is printed. Press the arrow keys to adjust the position.
Default:
•
•
•
Position: Top right
Top Margin: 1.0"
Right Margin: 1.0"
Stamp Format
You can adjust the print page for User Stamp 1 to 4 you registered.
Default: All Pages
5 - 46
User Tools Settings
Stamp
Date Stamp
Format
You can select the date format for Date Stamp mode.
Default: MM/DD/YYYY
Font
You can select the Date Stamp font.
Default: Font 1
This setting is linked with Page Numbering.
Stamp Position
You can set the position at which the stamp is printed. Press the arrow keys to adjust the position.
Default:
•
•
•
Position: Top left
Top Margin: 0.3"
Left Margin: 0.8"
Stamp Setting
You can select whether the date is printed on the first page or all pages.
Default: All Pages
Size
You can set the Date Stamp size.
Default: Auto
This setting is linked with Page Numbering.
Superimpose
You can select whether the Date Stamp is printed negative when it overlaps black parts of the
image.
Default: No
This setting is linked with Page Numbering.
User Tools Settings
5 - 47
Stamp
Page Numbering 1 /2-2 /2
Stamp Format
You can select the page number format priority detected in Page Numbering mode.
Default: P1,P2
Font
You can select the font of the page number that is printed in Page Numbering mode.
Default: Font 1
This setting is linked with Date Stamp.
Size
You can set the size of the stamp that is printed in Page Numbering mode.
Default: Auto
This setting is linked with Date Stamp.
Duplex Back Page Stamping Position
You can set the position of the duplex back page number that is printed in Duplex mode.
Default: Opposite Position
Page Numbering in Combine
You can set how the pages are numbered when you use the Combine function and Page
Numbering function together.
Default: Per original
Stamp on Designated Slip Sheet
You can select whether to print the page number onto slip sheets when you use the Designate
function set to “Copy” and Page Numbering function together.
Default: No
Stamp Position:P1,P2...Stamp Position:1/5,2/5...Stamp Position:—1–,—2–
...Stamp Position:P.1,P.2...Stamp Position:1,2...Stamp Position:1–1,1–2...
You can set the position at which the stamp is printed. Press the arrow keys to adjust the position.
Default:
•
•
•
5 - 48
Position: P1, 1/5, P.1,1: Top right, -1-, 1-1: Bottom center
Top/Bottom Margin: P1, 1/5, P.1, 1: 0.5", -1-,1-1: 0.3"
Left/Right Margin: P1, 1/5, P.1, 1: 0.5", -1-, 1-1: 0.0"
User Tools Settings
Stamp
Superimpose
You can select whether page numbers are printed negative when they overlap black parts of the
image.
Default: No
This setting is linked with Date Stamp.
User Tools Settings
5 - 49
Input/Output
Input/Output
Switch to Batch (SADF)
You can select Batch mode or SADF mode when you press the Special Original key.
SADF Auto Reset
When you set one original at a time in the document feeder, the Auto Feed indicator lights for a
selected time after an original is fed to show that the document feeder is ready for another original.
You can adjust this time from 3 seconds to 99.
Default: 5 sec.
Rotate Sort: Auto Paper Continue
You can specify whether to continue copying when the paper of the required orientation has run
out during rotate-sorting.
“Sort”
•
If you select [No]:
When paper of the required orientation runs out, the machine stops copying and prompts
you to supply copy paper. When you load paper, the machine will continue copying.
If you select [Yes]:
Copying continues using copy paper of a different direction. The copy job will finish
even if you have left the machine.
Default: No
•
Auto Sort
You can specify whether Sort mode is selected when the machine is turned on or the mode is
cleared.
Default: No
Memory Full Auto Scan Restart
When the memory becomes full while scanning originals, the machine can make copies of the
scanned originals first, then automatically proceed scanning the remaining originals. You can
enable or disable this function.
•
If you select [No]:
When the memory becomes full, the machine stops operation allowing you to remove
the copy pages delivered on the output tray.
If you select [Yes]:
You can leave the machine unattended to make all the copies, but the resulting sorted
pages will not be sequential.
Default: No
•
5 - 50
User Tools Settings
Input/Output
Select Stack Function
Specify which Stack or Rotate Sort is shown on the initial display with priority.
Default: Stack
The optional finisher or booklet finisher is required to use this function.
Select Stapling Position
Specify which Top 2 staples or Bottom is shown on the initial display with priority.
Default: Top 2 staples
Letterhead Setting
If you want to copy on the direction-fixed (top to bottom or 2-sided paper, the machine rotates the
image correctly. To use this function, select “Yes”.
Default: No
User Tools Settings
5 - 51
Input/Output
5 - 52
User Tools Settings
Chapter 6
Special Copier Functions
Chapter Overview
Included in this chapter are:
•
“Energy Saving Modes” on page 6-1
•
“Presetting the Next Copy Job” on page 6-2
•
“Sample Copy” on page 6-3
•
“Storing Copy Settings In Memory” on page 6-4
•
“Screen Contrast” on page 6-9
•
“Original Beeper” on page 6-9
•
“Stamp” on page 6-10
Special Copier Functions
Energy Saving Modes
Energy Saving Modes
The copier has three types of Energy Saving modes.
•
•
•
Energy
Saver
Modes
Low Power
Timer
Energy
Savings
25%
Low Power Timer: saves 25% power
Low Power Shift Time: saves 30% power
Auto Shut-Off Mode: Shuts down your copier while maintaining a low voltage to
maintain information in your copiers memory.
How To Put Copier
Into Energy Saver
Mode
How to Return To
Ready Condition
Display Conditions
When Energy Saver
Mode is Active
Manual Mode:
Press Energy Saver/
Clear Modes key.
Automatic Mode:
Enters Energy Saver
automatically after the
preset time of the Low
Power Timer. Set from
0, 10-999 seconds. See
“General Features 1 of
2” on page 5-3.
Human Sensor detects
presence of the copier
operator and
automatically turns the
copier ON.
Message Display: OFF
Start Key Indicator: OFF
Operation Switch: ON
OR
Press the Energy Saver/
Clear Modes key.
Low Power
Shift Time
30%
Automatically goes into
Low Power Shift Time
mode after the preset
time of the Low Power
Shift Time. Set from 1240 minutes.See
“General Features 1 of
2” on page 5-3.
Human Sensor detects
presence of the copier
operator and
automatically turns the
copier ON.
OR
Press the Energy Saver/
Clear Modes key.
Message Display: OFF
Start Key Indicator: OFF
Operation Switch: ON
Auto Off
100%
Manual Mode:
Press the Operation key.
Automatic Mode:
Automatically goes into
an OFF condition after
the preset time of the
Auto Off Timer. Set
from 1-240 minutes.
See “General Features 1
of 2” on page 5-3.
Press the Operation
Switch.
Main Power Indicator:
ON
All other Indicators:
OFF.
Special Copier Functions
6 1
Presetting the Next Copy Job
Presetting the Next Copy Job
After the first copying job has been scanned, you can set up the next copy job while the first job
is copying. The maximum number of copy jobs that can be preset at one time is eight.
1
2
3
4
Press the Copy New Job key
while the current copy job is
running. The message “Please
set modes and press the start
key”, is displayed in the
Message Display.
Select the next copy job settings.
Set the originals in the Document Feeder and press the Start key.
All originals are scanned.
Press the To printing key.
•
•
•
6-2
After the current copy job,
the next copy jobs
automatically begins.
You can switch the display to
the current copy job by
pressing the Return to menu
in printing or Return to menu
in scanning key.
You can switch the display to the preset copy job by pressing the Return to menu in
setting new job key.
Special Copier Functions
Sample Copy
Sample Copy
When copying sets of copies to the Finisher, you can run one sample set to verify that all of
your copy settings are as you want them. Then you can run the rest of your copy job. This saves
paper and time, by not having to throw out your entire copy job if you do not like the way it was
set up.
1
Set the functions to be used with the Sort function. See “Using the Finisher Option” on page
7-1.
2
Enter the number of copies to be made.
3
Set the originals in place.
4
5
6
7
Special Copier Functions
Press the Sample Copy key. One copy set is
delivered for proof copying.
Check the proof copy to make sure it is what
you want.
If it is acceptable and you want to continue the copy job, touch the Yes key. To make
changes, touch the No key.
The number of copy sets you requested are made, excluding the one proof copy.
6 3
Storing Copy Settings In Memory
Storing Copy Settings In Memory
All of the functions such as copy quantity, percent reduction, copy darkness, margin shift, etc.,
for frequently used copy jobs can be stored in Memory Copy.
•
•
Recall these copy job settings in the future with the press of a button.
Store up to ten copy jobs in the copiers memory.
Storing Your Settings
1
Edit the copy settings so that all of the function you want to store in this program are
selected.
2
Press the Program key.
3
Touch the Store key.
4
Touch the Program Number
you want to store these copy
settings to.
•
•
6-4
If the Program Number has
programmed setting in it, the
Program-In symbol appears
in front of the Program
Number.
You will be asked if you wish to overwrite it. Touch either Yes or No.
Special Copier Functions
Storing Copy Settings In Memory
5
Enter the program name using
the letter keys.
•
•
6
Special Copier Functions
Up to 25 character can be
used.
If no program name is
desired, proceed to Step 6.
Touch the OK key.
6 5
Storing Copy Settings In Memory
Changing a Stored Program
1
2
Touch the stored program number key and make setting changes.
Edit the copy settings so that all of the function you want to store in this program are
selected.
3
Press the Program key.
4
Touch the Register key.
5
Touch the Program Number
you want to store these copy
settings to.
•
•
If the Program Number has
programmed setting in it, the
Program-In symbol appears
in front of the Program
Number.
You will be asked if you wish to overwrite it. Touch either Yes or No.
To Overwrite Program
1. Touch the Delete key.
4. Enter the Program
Name using the
letter keys.
•
•
Up to 25 character can be
used.
If no program name is
desired, repeats Steps 5 and 6
in Storing Your Settings.
5. Touch the OK key.
Not to Overwrite a Program
Touch the Do Not Register key.
6-6
Special Copier Functions
Storing Copy Settings In Memory
Cancelling a Program
1
Press the Program key.
2
Touch the Delete key.
3
Touch the Program Number you want to cancel. Touch the Yes key.
4
Special Copier Functions
To cancel another program.
repeat steps 3 and 4.
6 7
Storing Copy Settings In Memory
Recalling a Program
1
Touch the Program key.
2
Touch the Recall key.
3
4
6-8
Touch the Program Number you
want to recall.The stored settings
of the selected Program Number
are displayed.
Set the originals in place, then press the Start key.
Special Copier Functions
Screen Contrast
Screen Contrast
The copy control panel uses a LCD to display the functions and operations or the copier.
Condition under which the copier is placed, may make it necessary for you to adjust the contrast
of the LCD panel.
1
2
Adjust the brightness of the LCD panel using the Display Adjust Knob.
Rotate the knob clockwise to lighten the display. Rotate the knob counter clockwise to
darken the display.
Original Beeper
About two seconds after the copy job is done, a beeper beeps twice and an error message is
displayed when you leave your originals on the Exposure Glass.
You can adjust when the beeper sounds using the Auto Response Sensor setting.
•
•
If set to YES the beeper sounds as soon as you leave the copier after copying.
If set to NO, the beeper sounds two seconds after copying.
You can also cancel this feature. See “General Features 1 of 2” on page 5-3.
•
•
•
Special Copier Functions
The Display Panel shows: Connect Copying.
After all originals are scanned, copying begins.
If the copy quantity is an odd number, the extra copy is copies on the master copier.
For example: Copy quantity of 5 is selected. Three copies are printed on the master
copier and two copies are printed on the secondary copier.
6 9
Stamp
Stamp
The Stamp feature printsa stamp on the copies. The following are the five stamp modes
available.
•
•
•
•
•
Background Numbering
Preset Stamp
User Stamp
Date Stamp
Page Numbering
Background Numbering
32 MB of memory is required to use this function. If the unit is equipped with a printer unit, the
32 MB of memory is not required.
•
•
•
•
1
Touch the Edit/Stamp key.
2
Touch the Stamp key.
3
6 - 10
Use this function to have numbers printed on the background of copies.
The backgrounding of numbers can help keep track of confidential documents.
The size of the numbers can be changed with User Tools.
The density of the numbers can be changed with User Tools.
Touch the Backgrounding
Numbering key.
Special Copier Functions
Stamp
4
Enter the number to start
counting from. Then, touch the
OK key.
•
•
Numbers can be set from1 to
999.
To change an entered
number, press teh Clear or
Clear/Stop key and enter a
new number.
5
Touch the OK key.
6
Touch the OK key.
7
Special Copier Functions
Make your copy selection
settings.
6 11
Stamp
Preset Stamp
32 MB of memory is required to use this function. If the unit is equipped with a printer unit, the
32 MB of memory is not required.
•
•
•
•
1
Touch the Edit/Stamp key.
2
Touch the Stamp key.
3
Touch the Preset Stamp key.
4
Select the desired message.
5
6
6 - 12
This feature does not use the Bypass Tray.
Only one message can be stamped at a time.
Eight preset messages can be stamped on your copies.
COPY
URGENT
PRIORITY
For Your Info
Preliminary
For Internal Use
CONFIDENTIAL
DRAFT
The default settings for the position, size and density of the stamp can be changed
using User Tools
Touch the All Pages or 1st Page
only key.
Change the stamp position, size,
or density as desired. See
“Changing Stamp Position, Size,
or Density” on page 6-13.
Special Copier Functions
Stamp
Changing Stamp Position, Size, or Density
1
2
3
4
5
6
Special Copier Functions
Touch the Change key.
Select the desired position, size,
or density.
Touch the OK key.
After all desired settings are
made, touch the OK key.
Touch the Cancel key.
Make any desired copy settings,
place your originals, then press
the Start key.
6 13
Stamp
User Stamp
32 MB of memory is required to use this function. If the unit is equipped with a printer unit, the
32 MB of memory is not required.
•
•
•
•
Up to four messages which you use frequently can be stored in memory and stamped
on copies.
Only one message can be stamped at a time.
The Bypass Tray can not be used with this function.
The stamp position and default settings can be changed.
1
Touch the Edit/Stamp key.
2
Touch the Stamp key.
3
Touch the User Stamp key.
4
Select the desired stamp.
5
Touch the All Pages or 1st Page
only key to select the print page.
To Change Stamp Position
1
6 - 14
Touch the Change key.
Special Copier Functions
Stamp
2
Select the desired position.
3
Touch the OK key.
4
After all settings are selected,
touch the OK key.
Note: To cancel the settings,
touch the Cancel key.
5
6
Special Copier Functions
Touch the OK key.
Set the originals and press the
Start key.
6 15
Stamp
Program/Delete User Stamp
1
2
3
6 - 16
Make sure the copier is in the Copy mode.
Press the User Tools/Counter
key.
Touch the Copy/Document
Server key.
4
Touch the Stamp key.
5
Touch the User Stamp key.
Special Copier Functions
Stamp
6
Touch the Program/Delete
Stamp key.
Programming the User Stamp
1
2
Press the Program key.
Touch the stamp number from 14 that you want to program.
•
•
3
Enter the stamp name using the
letter keys in the message
display.
•
4
5
6
7
Up to 10 character can be
entered.
Touch the OK key.
Enter the horizontal size of the
stamp using the keypad. Then
touch the # key.
Touch the Veritcal key, and
enter the vertical size of the
stamp using the keypad. Then,
touch the # key.
Set the User Stamp on the exposure glass and then touch the Start Scanning key.
•
Special Copier Functions
Stamp numbers with the data
in symbol in front of it are
already in use.
If the stamp number is being
used, the message on the
display asks if you want to overwrite it. Select either Yes of No.
The machine scans the original three times. Do not lift the document feeder until the
6 17
Stamp
•
8
main menu of the Copy/Document Server is displayed.
If you touch the Exit key, the main memnu of the Copy/Document Server is
displayed with nothing programmed.
Touch the Exit key.
Deleting the User Stamp
1
2
6 - 18
Touch the Delete key.
Touch the stamp number you
wish to delete (1-4).
3
Touch the Delete key.
4
Touch the Exit key.
5
Touch the Exit key again.
6
Touch the Exit key.
Special Copier Functions
Stamp
Date Stamp
With date stamp, you can select the following date formats:
•
•
•
•
•
•
MM/DD/YYYY
MM.DD.YYYY
DD/MM/YYYY
DD.MM.YYYY
YYYY.MM.DD
DD.JUN.YYYY
Style and position changes can be made to the date stamp.
1
Touch the Edit/Stamp key.
2
Touch the Stamp key.
3
Touch the Date Stamp key.
4
Select either All Pages or 1st
Page only.
To Change the Style of Date
1
Special Copier Functions
Touch the Change Format key.
6 19
Stamp
2
Select the date format.
3
Touch the OK key.
To Change the Stamp Position
1
2
3
4
5
6
6 - 20
Touch the Change key.
Select the desired positoin of the
Date Stamp.
Touch the OK key.
Touch the OK key after
specifiying all the desired
settings.
Touch the OK key.
Set the originals and press the
Start key.
Special Copier Functions
Stamp
Page Numbering
Page numbering allows you to have page numbers printed on your copies. There are six Page
Numbering formats to select from. (n is the total number of pages in your original)
•
•
•
•
•
•
P1,P2,...Pn
1/n,2/n,...n/n
-1-,-2-,...-nP.1,P.2,...P.n
1,2,...n
1-1,1-2,...1-n
Style and position changes can be made to Page Numbering.
1
Touch the Edit/Stamp key.
2
Touch the Stamp key.
3
4
5
Special Copier Functions
Touch the Page Numbering
key.
Select the page number format.
Touch the Change key to
change the stamp position.
6 21
Stamp
6
7
8
Select the stamp position, then
touch the OK key.
To change the first printing page
and start number, touch
theChange key.
Specify the page and number.
If Selecting Formats (P1, P2, .., -1-, -2-,...P.1,P.2,...1,2,...)
1
2
3
4
5
6
6 - 22
Touch the First Printing Page
key.
Touch the # key.
Touch the Numbering from/to
key. Then, enter the starting
number.
Touch the # key.
Touch the Last Number key.
Then enter the last page number.
Touch the # key.
Special Copier Functions
Stamp
If Selecting Formats (1/5,2/5,...)
1
2
3
4
5
6
7
Touch the First Printing Page
key. Then enter the starting page
number.
Touch the # key.
Touch the Numbering from/to
key. Then enter the starting page
number.
Touch the # key.
Touch the Last Number key.
Then enter the last page number.
Touch the # key.
Touch the Total Pages key.
Then, enter the total number of
original pages.
8
Touch the # key.
9
Touch the OK key.
Special Copier Functions
6 23
Stamp
If Selecting Formats (1-1, 1-2,...)
1
2
3
4
5
Touch the # key.
Touch the First Chapter No.
key. Then enter the chapter
number.
Touch the # key.
Touch the Numbering from/to
key.
6
Touch the # key.
7
Touch the OK key.
8
Touch the OK key.
9
Touch the OK key.
10
6 - 24
Press the First Printing Page
key. Then enter the starting page
number.
Set the originals, then press the
Start key.
Special Copier Functions
Chapter 7
Using Finisher/Sorters
Chapter Overview
This Chapter covers the use of the optional Sorter/Finishers. Included
in this chapter are:
•
“Using the Finisher Option” on page 7-1
•
“Selecting Non-Sort Mode” on page 7-1
•
“Selecting Sort Mode” on page 7-3
•
“Selecting Stack Mode” on page 7-4
•
“Selecting Staple Mode” on page 7-5
•
“Selecting Punch Mode” on page 7-6
Using Finisher/Sorters
Using the Finisher Option
Using the Finisher Option
The Finisher functions available when using the optional Finisher are:
•
•
•
•
•
Making Non-Sorted Copies: All copies exit to the Finisher Proof Tray (top tray).
Making Sorted Copy Sets: One copy of each original exits into the Finisher Shift
Tray. Each set (or the top sheet only of each set in the saddle stitch finisher) is shifted
for ease of separation when you retrieve your copies.
Making Stacked Copy Sets: The copies of each original are stacked together in the
Finisher Shift Tray. Each stack is shifted for ease of separation when you retrieve
your copies.
Stapling your copy sets.
Three hole punching copy sets with optional Punch. (not available with the saddle
stitch finisher).
Scanning Documents
When you are using the Sort, Stack or Staple functions, the originals are scanned into
memory. See “Scanning Documents” on page 4-42.
Selecting Non-Sort Mode
Non-Sort copying is the default setting. Non-Sort copying is for making copies that require no
stacking or sorting.
1
Using Finisher/Sorters
If either the Sort, Rotate Sort,
Stack, or Staple Indicator are
highlighted, touch the
highlighted key(s) until all Sort,
Stack, and Staple keys are OFF.
2
Place the originals face-up in the Document Feeder or face-down on the Exposure Glass.
3
Make the copy requirement selections. See “Selecting the Mode of Operation” on page 1-3.
7-1
Using the Finisher Option
4
7-2
Press the Start key to begin copying. Your
copies exit into the Finisher Proof Tray (top
bin) of the Finisher.
Using Finisher/Sorters
Using the Finisher Option
Selecting Sort Mode
Sorting mode can save you a lot of time. You can have your copies automatically sorted in two
ways:
Rotate Sort: Every other copy set is rotated by 90 degrees and
delivered to the exit tray. Note: the same size paper must be in two
different paper trays and one must e landscape and the other portrait.
Shift Sort: Every other copy set is shifted for ease of separation. The
saddle stitch finisher shifts only the top sheet of each set.
Note: The optional finisher and bridge unit must be installed to use this function.
1
Touch the Sort or Rotate Sort
key.
Note: If Rotate Sort is not
shown, it may be selected
with User Tools.
2
3
Using the keypad, enter the
number of copy sets you desire.
Set the originals in place, then press the Start key.
Note: If an original is misfed during sort copying, reset your originals in the
Document Feeder, according to the instructions on the display. The display will
indicate the number of scanned originals.
Using Finisher/Sorters
7-3
Using the Finisher Option
Selecting Stack Mode
Stacking keeps the copies of each original together. Every other page set
is shifted for ease of separation. The shift tray of the Finisher provides
this function by sliding from side to side. The saddle stitch finisher shifts
only the top sheet of each set.
Note: The optional finisher and bridge unit must be installed to use this function.
1
Touch the Stack key.
Note: If Stack is not shown,
it may be selected with User
Tools.
2
3
7-4
Using the keypad, enter the
number of copies you desire.
Set the originals in place, then
pess the Start key.
Using Finisher/Sorters
Using the Finisher Option
Selecting Staple Mode
Depending on the finisher that you have, the following staple positions are available:
Top: Staples on the upper left corner, left margin.
Top: Staples on the upper left corner, diagonal.
Top: Staples on the lower left corner, left margin.
Double: Staples on the left margin in two places.
Note: The optional finisher and bridge unit must be installed to use this function.
1
2
3
Using Finisher/Sorters
Touch the desired Staple
Position key.
Using the keypad, enter the number of copy sets you require.
Set the originals in place, then press the Start key. Your copy sets are stapled and exit to the
Finisher Shift Tray.
7-5
Using the Finisher Option
Selecting Punch Mode
With the optional punch installed, you can have three holes punched into your copy sets.
Note: The optional finisher and bridge unit must be installed to use this function.
1
Touch the Punch key.
2
Enter the number of copy sets.
3
7-6
Set the originals in place, then
press the Start key. Your copies
will exit on the Finishers Shift
Tray with holes punched in
them.
4
Press the Start key.
5
To remove the paper punch outs from the finisher, refer to “Removing Chad” on page 9-20
Using Finisher/Sorters
Chapter 8
Document Server
Chapter Overview
This chapter provides information on the Document Server.
•
“Document Server” on page 8-1
•
“Process” on page 8-2
•
“Features and Benefits” on page 8-3
•
“Scanning Originals” on page 8-8
•
“Printing Saved Documents” on page 8-13
•
“Searching Saved Documents” on page 8-16
•
“Deleting Saved Documents” on page 8-19
Document Server
Document Server
Document Server
The Document Server enables you to save documents in the machine memory and then edit and
print them as required.
There are three ways to save documents.
•
•
•
Document Server
Scanning from the document feeder
Scanning from the exposure glass
Data sent from a computer
8-1
Process
Process
1
2
3
Prepare the documents you want to save by copying, fax transmitting, scanning, and PC
data.
Save the documents.
The documents are saved in the machine memory.
Print the documents, send a fax, and transfer documents and the data to the PC.
•
•
•
8-2
You can print saved documents with any settings you desire at any time.
Scanned document data can be transferred to the PC.
Saved documents can be resent at any time you desire.
Document Server
Features and Benefits
Features and Benefits
On Demand Printing
Use to print any saved document as required.
Your current situation might be…
When you need to print multiple sets of documents double-sided and stapled together, you
normally print the originals, make duplex copies and then staple them together manually.
With the Document Server
If you save your document in the Document Server, you can print it out at any time with the
necessary print settings, such as duplex and stapling. Your documents will not be confused with
those of others in the exit tray.
You can store fax documents, document data, so they can be printed whenever necessary.
•
•
•
Document Server
Stapling requires the installation of the optional finisher.
Punching requires the installation of the optional punch kit in the finisher.
You can use a password to prevent others from printing saved documents.
8-3
Features and Benefits
File Merge Printing
You can combine multiple scanned documents to print them in one set.
Your current situation might be…
You want to combine several originals that are different in density, size, and paper weight, e.g.
Documents can be merged that were created with different applications or that were created
separatley on different computers.
Documents can also be merged that were sent from a computer with paper originals that have been
scanned.
•
•
•
•
8-4
Scrapped and pasted originals
Photo originals
One sided originals
Two sided originals
Document Server
Features and Benefits
With the Document Server
You can save the originals individually by making the best settings for each original, and edit them
as a file.
It does not matter whether the originals were scanned using the document feeder or the exposure
glass. As you can specify the print order for several files, you can combine them as you want, and
print them as a file.
You can check the print result by printing a sample set before making a large print run by pressing
the Sample Copy key.
If you are not satisfied with the print result of some pages of the set, you have only to scan that part
again.
Document Server
8-5
Features and Benefits
Facsimile Resend
A document received by fax, may be printed or resent. This is useful when you want to send a
large document that needs to be sent several times, since the document does not have to be
scanned each time.
Your current situation might bee ...
When you need to resent multiple sets of the same documents.
With the Document Server
You can send the original dat stored in memory whenever necessary. YOu can merge and
send data stored from a previous fax with additional scanned originals.
8-6
Document Server
Features and Benefits
Operation from a Computer
With Desk Top Binder V2 Professional or Desk Top Binder V2 Lite installed on your
computer, you can:
•
•
•
•
•
Check the display of electronic data
Select the finish settings and print it
Delete data stored in the Document Server
Exposrt documents stored in the Document Server as a file on your computer
Perform tasks on the data stored in the Document Server from your computer rather
than form the machine.
You can operate from your computer as follows:
•
•
•
•
•
•
•
Search by File Name and User Name
Indicate easily 1st Page of your document
Indicate the document information, change the file name and the password
Delete documents
Copy documents to your computer
Print documents
Send stored facsimile documents
Optional Network interface board and 32 MB of memory or Printer Scanner unit are required
for operating from your computer. Desk Top BInder V2 Professional or Desk Top Binder V2
Lite must be installed on your computer.
Document Server
8-7
Scanning Originals
Scanning Originals
You can scan the originals you want to save in the Document Server using the control panel of
the machine.
The originals can be set either on the exposure glass or into the document feeder.
The saved documents will automatically be named in the order of scanning as “Scan001”,
“Scan002”….
•
•
•
You can set the timer to delete the documents stored in the Document Server with the
User Tools. See “Auto File Delete”.
You can change the file names that are assigned automatically.
You can use a password to prevent others from printing saved documents.
Scanning in Document Server Mode
1
2
Press the Document Server/New Job key.
The “Document Server: Files” display
appears.
Touch the Scan Originals key.
The “Doc. server: Scanning” display
appears.
3
Enter a file name.
•
•
8-8
If you do not wish to register a file name, go to step 4.
If you do not register a file name, it is stored automatically.
Document Server
Scanning Originals
To Set the File Name
1
2
Touch the File Name key.
Enter the new file name using
the letter keys on the display
panel.
Note: You can enter up to 8
letters.
Note: To switch to the
capital letter mode or small
letter mode, press the Upper
Case or Lower Case key.
Note: To change the letter entered, press the Back Space, Clear, or Clear/Stop key
and enter new letters. To delete the entered letters in 1 letter steps, press the
BackSpace key. To delete all the entered letters, press the Clear or Clear/Stop key.
3
Touch the OK key.
Note: If you do not wish to enter a password, go to step 4.
To Set User Name
1
2
Document Server
Press the [User Name] key.
Enter the new user name using
the letter keys on the display
panel
8-9
Scanning Originals
To Set the Password
1
2
Touch the Password key.
Enter the password using the
number keys (4 digits).
Note: To change the number
entered, press the Clear or
Clear/Stop key and enter a
new number.
3
Touch the OK or # key.
4
Set your originals either on the exposure glass or into the document feeder.
5
Make any desired settings.
Note: Touch the Scanning
Complete key to cancel the
file name, password, or print
settings and return to the
“Document Server: Files”
display.
Note: For details, see the
explanations of each function in this manual.
6
Press the Start key.
The document is saved in the Document Server. The saved documents are displayed on the
“Document Server: Files” display.
Note: If you have set your originals in the document feeder, the “Document
Server: Files” display appears automatically after all originals have been scanned.
Note: If you have set your originals on the exposure glass, press the Scanning
Complete key after all originals have been scanned. The “Document Server:
Files” display appears.
Note: To stop scanning, press the Clear/Stop key.
Note: To resume the paused scanning job, press the [Resume] key in the
confirmation dialog box. To delete the saved images and cancel the job, press the
Cancel key.
Note: When storing a password symbol, appears on the left side of the file name.
7
8 - 10
Press the Scanning Finished key.
Document Server
Scanning Originals
To Change the File Name or Password
1
2
3
4
5
6
Document Server
Touch the line of the document
whose file name or password
you want to change.
If you select a document which
requires a password, the “Input
the Password” window appears.
Input the password using the
number keys, then press the OK
key.
Touch the File Management key.
Touch the Change File Name,
Change User Name, or Change
Password key.
Enter the new file name or
password using the letter keys or
number keys.
Touch the OK key.
8 - 11
Scanning Originals
Scanning in Copy Mode
1
Press the Copy key.
2
Touch the Stored File key.
3
Enter a file name, user name, or password if necessary.
4
Set you originals.
5
Make scanning settings for the original.
6
Press the Start key.
•
•
•
•
8 - 12
To stop scanning, press the Clear/Stop key.
To resume the paused scanning job, touch the Resume key.
To delete the saved images and cancel the job, touch the Cancel key.
To check if the document has been stored, press the Document Server key.
Document Server
Printing Saved Documents
Printing Saved Documents
You can print any of the documents saved in the Document Server. Follow these steps to select
a document and print it out.
1
2
Press the Document Server/New Job key.
The “Document Server: Files” display appears.
Touch the line for the document
you want to print.
The selected line is highlighted.
•
•
•
•
•
•
3
Document Server
You can search the document
you desire by the file name.
You can sort the files in order
of File Name, Time, or Print
order. Press the key you want
to sort by.
If the desired file name is not
shown, see the next or previous screen using the Next and Prev. keys.
If you cannot choose the desired document by its name, you can print the first page to
check the contents. Press the line for the desired document, and press the Print 1st Page
key followed by the Start key.
Touch the selected line again to cancel the print job.
If you select a document which requires a password, the “Input the Password” window
appears. Enter your password using the number keys, then press the OK key. To delete
the value entered, press the Clear or Clear/Stop key. To cancel a selected document,
press the Cancel key.
To print more than one document, repeat step 2 to select the desired documents in the order
you want to print them out. The selected order is shown in the priority column next to the
selected document(s).
8 - 13
Printing Saved Documents
4
To change any of the print
settings, touch the Print
Settings key.
•
•
•
•
5
Enter the required number of prints using the keypad.
•
•
6
Up to 999 can be entered.
To change the value entered, press the Clear/Stop key.
Press the Start key.
•
8 - 14
Print settings remain in the
machine after printing.
The print setting of the
document you select fiorst
are applied to the merged
documents.
If you select multiple files, you can confirm the file names or print order of the files by
scrolling through the list using the up and down arrow keys.
Touch the Select File key to return to the Select Files to Print display.
To pause the print job, press the Clear/Stop key. In the confirmation dialog box, press
the Resume key to resume it, or press the Cancel key to cancel it.
Document Server
Printing Saved Documents
Sample Printing
If you print multiple sets using the Sort function, you can check if the print order or the print
settings are correct by printing out only the first set using the Sample Copy key.
Note: This function can be used only when the Sort function has been turned
on.
1
Follow steps 1 to 5 of the preceding procedure.
2
Press the Sample Copy key.
3
After the first set is printed out, press the
Resume key to print the rest of the print job.
Press the Cancel key to cancel it and return
back to the “Document Server: Print
Conditions” menu for changing the setting.
Print First Page
You can print the first page of the document selected in the “Document Server: Files” display to
check the contents.
If more than one document is selected, the first page of each document is printed.
1
2
Document Server
Touch the line for the desired document(s) in the “Document Server: Files” display, and
press the Print 1st Page key.
Press the Start key.The first page is printed out.
8 - 15
Searching Saved Documents
Searching Saved Documents
You can use either the Search by File Name or Search by User Name keys to search for
documents stored on the document server. You can also list teh stored documents in the order
you prefer. If yo install Desk Top Binder V2 Professional or Desk Top Binder V2 Lite on your
computer, you can search and rearrange the documents from your computer.
To Search by File NamePress the Document Server/New Job key.
You can search the document stored in the Document Server by the file name.
1
The “Document Server: Files” display appears.
2
Touch the File Name key.
3
Enter the file name using the letter keys.
•
•
•
4
Touch the OK key.
Only the files beginning with the letters appear in the “Document Server: Files” display.
•
8 - 16
You can enter up to 8 letters.
To switch to the capital letter mode or small letter mode, press the Upper Case or Lower
Case key.
To change the letter entered, press the Back Space, Clear, or Clear/Stop key and enter
new letters. To delete the entered letters in 1 letter steps, press the Back Space key. To
delete all the entered letters, press the Clear or Clear/Stop key.
To display all the files saved in the Document Server, press the All the files key.
Document Server
Searching Saved Documents
To Search by User Name
This searches for documents on the document server that match a user name.
1
Press the Document Server key.
2
Touch the search byy User Name key.
3
Enter the user name using the letter keys.
4
Touch the OK key.
•
•
Document Server
Only files beginning with the
letters appear in the Select
Files to Print display.
To display all files saved in
the Document Server, touch
the All the Files key.
8 - 17
Searching Saved Documents
To Check the Details of Stored Documents
1
2
Select the documents for which
you want detailed information.
Touch the Detail key.
•
•
8 - 18
Detailed information about
the document is displayed.
If you have selected several
documents, use the up and
down arrow keys to view the
detail of each document.
Document Server
Deleting Saved Documents
Deleting Saved Documents
You should delete any of the saved documents using the control panel of the machine.
This section describes how to delete saved documents.
•
You can save up to 200 documents in the Document Server. No more documents can
be saved, when there are 200 documents in the Document Server. You should delete
unnecessary documents.
You can set the timer to delete the documents stored in the Document Server with the
User Tools. See “Auto File Delete”.
You can delete all the saved documents at a time with the User Tools. See “Delete All
The Saved Files”.
Follow these steps to delete saved documents.
•
•
1
2
Press the Document Server/New Job key. The “Document Server: Files” display appears.
Select a document you want to
delete by pressing the name of
it.The selected name is
highlighted.
•
•
•
•
•
•
3
Document Server
You can search the document
you desire by the file name.
You can sort the files in order
of File Name, Time, or Print
order. Press the key you want
to sort by.
If the desired file name is not shown, see the next or previous screen using the Next and
Prev. keys.
If you cannot choose the desired document by its name, you can print the first page to
check the contents. Press the line for the desired document, and press the Print 1st Page
key followed by the Start key.
Touch the selected line again to cancel the print job.
If you select a document which requires a password, the “Input the Password” window
appears. Enter your password using the number keys, and press the OK key. To delete
the value entered, press the Clear or Clear/Stop key. To cancel a selected document,
press the Cancel key.
Repeat SAtep 2 if you want to select more than one document.
8 - 19
Deleting Saved Documents
4
5
8 - 20
Touch the Delete key.
A confirmation dialog box
appears.
Press the Delete key to delete it.
To cancel the delete operation,
press the Stop key.
Document Server
Chapter 9
Service and Supplies
Chapter Overview
This Chapter explains how to add supplies and remove misfeeds from
your copier. Remember, the use of Lanier supplies gives the best
results over the life of your copier. The use of unauthorized supplies
may cause damage to the copier.
Included in this chapter are:
•
“Loading Paper” on page 9-1
•
“Changing Paper Tray Sizes” on page 9-3
•
“Adding Toner” on page 9-6
•
“Removing Misfeeds” on page 9-9
•
“Finisher” on page 9-10
•
“Paper Punch” on page 9-20
•
“Troubleshooting” on page 9-21
Service and Supplies
Loading Paper
Loading Paper
To save space, this copier is designed with an adjustable, front-loading Paper Trays, which
easily open for paper loading.
The Add Paper Indicator turns ON when there is no copy paper in the selected Paper Tray, or
when the Paper Tray is not fully closed.
Loading Paper in the Paper Tray
1
Gently pull out the Paper Tray until it stops.
•
If the paper is of a different size, it may
benecessary to remove the back paper
guide.
Back Paper Guide
2
Fan the copy paper and insert it into the
Paper Tray.
•
•
•
•
3
Service and Supplies
When adding paper to the Paper Tray,
first remove remaining paper, combine it
with the paper to be added and then
reload the paper as a single stack.
The tray holds up to 500 sheets of 20 lb.
bond paper.
Do not load paper above the maximum
height line.
If the back paper guide was removed, set
it back in place.
Push the Paper Tray fully back into the copier.
9-1
Loading Paper
Loading Paper in the Large Capacity Cassette)
You can load up to 3500 sheets of paper in the LCC. When the LCC is out of paper, the Paper
Down key flashes. Also, the indicator in the Message Display next to the (LCT) LCC paper
size, shows a paper out condition
1
2
3
4
5
9-2
Open the Top Cover of the LCC.
Place the paper in the tray along the edge on
the left.
Press the Down key.
Load paper by repeating steps 2 and 3.
Close the Top Cover.
Service and Supplies
Changing Paper Tray Sizes
Changing Paper Tray Sizes
You can change the paper size in Tray 2 to accept additional sizes of paper. To change the size
of paper you use in Tray 1 and Tray 3, you must call your Lanier Service Technician.
Changing Tray Paper Size
1
2
3
Pull the Paper Tray out until it stops.
While pushing the Release Lever, adjust the
Paper Side Guides and the Rear Guide to the
new paper size.
Fan the copy paper and insert it into the
Paper Tray.
•
•
Service and Supplies
The tray holds up to 550 sheets of 20 lb.
bond paper.
Do not load paper above the maximum
height line.
9-3
Changing Paper Tray Sizes
4
Set the Paper Size Selector at the innermost
part of the Tray to the new paper size.
To adjust the paper size to one not available
with the paper size selector:
•
•
•
•
•
•
•
•
Set the Paper Size Selector to the * mark
on the right.
Press the Users Tool/Counter key.
Touch the System Settings key.
Touch the Paper Size Setting key.
Touch the Tray 2: Paper Size Setting
key.
Select your desired paper size.
Touch the OK key.
Touch the Exit key.
Changing Paper SIze inthe System Stand
1
2
Make sure that the paper tray is not being used.
Pull the paper tray out,and then lift and remove it.
Note: Remove any remaining copy paper.
3
Remove the screws fastening the side fences
using the screwdriver.
Note: A screwdriver is contained in the
front area of the top tray.
9-4
Service and Supplies
Changing Paper Tray Sizes
4
5
6
Reposition the side fences to the paper size
you want to use.
Fasten the fences with screws.
Square the paper and load it into the tray.
Note: Do not stack paper over the limit
mark
Note: Shuffle the paper before setting it
in the tray.
Note: r Make sure the leading corners of
the paper are under the cor-ners.
7
Adjust the back fence to the new paper size.
Note: For 11”´ 17”paper,put the back fence inside 1.
8
9
Service and Supplies
Push the paper tray in until it stops.
Select the paper size with the user tools.
9-5
Adding Toner
Adding Toner
The Add Toner Indicator turns ON when toner is needed. If copying is continued while the
Toner Indicator is ON, copies will gradually become lighter until the copier stops and the Add
Toner Indicator begins flashing.
The Add Toner Indicator may also begin flashing during long copy runs of multiple dark
originals, even though there is toner left. Should the Add Toner Indicator begins to flash, the
copier stops making copies. Open and close the Front Cover. When sufficient toner has been
fed, the Add Toner Indicator turns OFF and the Ready Indicator in the Start key turns ON. Press
the Start key to resume copying.
For best copying results, use only Lanier supplies which are designed, engineered, and tested to
maximize the life and performance of Lanier copiers.
1
2
3
9-6
Open the Front Cover.
Pull out on the handle on the Toner Bottle
Holder until the Toner Bottle holder is fully
opened.
Pull the green lever and gently pull the Toner
Bottle out.
Service and Supplies
Adding Toner
4
Hold a new Toner Bottle horizontally and
shake it five or six times to loosen the toner.
Note: Do Not remove the cap before
shaking the Toner Bottle.
5
Remove the outer cap.
Note: Do Not remove the Inner Cap.
6
Service and Supplies
Place the new Toner Bottle in position, turn
it clockwise, then return the green lever back
to its closed position.
9-7
Adding Toner
7
8
9-8
Return the Toner Bottle Holder to its original
position.
Close the Front Cover of the copier.
Service and Supplies
Removing Misfeeds
Removing Misfeeds
When a misfeed occurs:
•
•
•
•
The copier stops.
The Misfeed Indicator turns ON.
The Message Display indicates a paper misfeed and provides a letter designator of the
location of the paper misfeed.
Inside the Front Cover identifies the locations of the letter designators.
When a Paper Misfeed Occurs
1
2
Check the Message Display to see where the misfeed is located.
Open the Front Cover and identify the
location of the misfeed letter designator.
•
•
•
•
•
•
•
3
Service and Supplies
Misfeed in the Paper Path: B, C, D, E
Misfeed in the Duplexer: A
Misfeed in the Document Feeder: P
Misfeed in the Bypass Feeder: Z
Misfeed in the System Stand: Y
Misfeed in the Sorter: R
Misfeed in the LCC: U
Remove the paper misfeed following the
instructions on the inside Front Cover.
9-9
Finisher
Finisher
On the inside of the front cover of the Finisher, are pictorial instructions for:
•
•
•
Adding staples
Removing staple jams
Removing a paper misfeed
When adding staples, removing a staple jam , or a paper misfeed, refer to the pictorial
instructions.
Adding Staples
F-535 (1,000 sheet finisher)
1
Open the Front Cover of the Finisher.
•
2
9 - 10
Locate the pictorial instructions.
Remove the Staple Cartridge.
Service and Supplies
Finisher
3
Service and Supplies
Remove the empty refill in the direction of
the arrow.
4
Push in the new refill until it clicks in place.
5
Pull out the ribbon.
9 - 11
Finisher
9 - 12
6
Reinstall the Staple Cartridge.
7
Close the Front Cover of the Finisher.
Service and Supplies
Finisher
F-565 (2 Tray Finisher)
1
2
3
4
Service and Supplies
Open the front cover of the finisher.
Hold the green lever and pull out the
cartridge gently.
Hold the both sides of the cartridge.
Pull up the upper unit of the cartridge.
9 - 13
Finisher
5
6
7
9 - 14
Take out the empty refill in the arrow
direction.
Align the arrows on the new refill and the
cartridge, and then push in the refill until it
clicks.
Hold down the upper unit to the cartridge
gently.
Service and Supplies
Finisher
8
9
10
Service and Supplies
Pull out the ribbon.
Hold the green lever and reinstall the
cartridge until it clicks.
:Close the front cover of the finisher.
9 - 15
Finisher
Removing Jammed Staples
F-535 (1,000 sheet finisher)
1
Open the Front Cover of the Finisher.
•
9 - 16
Locate the pictorial instructions for
removing staple jams on the outside of
the Finisher Front Cover.
2
Remove the Staple Cartridge.
3
Remove the Face Plate.
Service and Supplies
Finisher
Service and Supplies
4
Remove the jammed staples.
5
Reinstall the Staple Cartridge.
6
Close the Front Cover of the Finisher.
9 - 17
Finisher
F-545 (3,000 sheet finisher)
1
2
3
9 - 18
Open the front cover of the finisher.
Hold the green lever and pull out the
cartridge gently.
Pull up the knob of the cartridge.
Service and Supplies
Finisher
4
5
6
7
Service and Supplies
Take out all staples slid from the car-tridge.
Pull down the knob of the cartridge until it
clicks.
Hold the green lever and reinstall the
cartridge until it clicks.
Close the front cover of the finisher.
9 - 19
Paper Punch
Paper Punch
The optional 3-hole punch is located inside of the Finisher. The punch outs fall into a container
which is easily removable for emptying.
Removing Chad
1
2
3
9 - 20
Open the Front Cover of the Finisher.
Pull out the Punch-out container and
properly dispose of the punch-outs.
Slide the Punch-out Container back into the
Finisher and close the Front Cover.
Service and Supplies
Troubleshooting
Troubleshooting
Cover in this section are basic troubleshooting for problems you may incurr and thier solutions.
Included are:
•
•
•
Service and Supplies
“When the Machine Does Not Operate Properly” on page 9-22
“When Copies are Not Clear” on page 9-25
“Can Not Make Proper Copies” on page 9-26
9 - 21
When the Machine Does Not Operate Properly
When the Machine Does Not Operate Properly
General
Machine Status
Problem/Cause
Action
Please wait
A message appears when you
turn on the Operatorion key or
change the toner bottle.
Wait for the machine.
Cannot detect original size.
Improper original is set
SSet custom size original onthe
exposure glass
Input the horizontal and vertical
size of the custom original.
Select paper manually, not in
Auto Paper Select mode.
Do not use Auto Reduce/Enlarge
mode/
9 - 22
Original is not set.
Set your originals.
Check original orientation.
There is no copy paper that is in
the same direction as the
original.
Set teh original in the dame
direction as the copy paper.
Check paper size.
Improper paper size is set.
If you press the Start key, copy
job starts.
Rotate Sort is not available with
this image size.
The size of paper for which no
rotate-sorting is abailable is
selected.
Select theproper size.
Cannot punch paper of this size.
The punch function cannot be
used for the paper size selected.
The following paper sizes are
available for punch mode.
•
•
Ledger,
Legal
It is over stapling capacity.
The number of sheets per set is
over the staple capacity.
Check the staple capacity.
Hole punch receptacle is full.
Open the door as shown and
empty receptical.
Chad receptacal is full.
Check the chad waste box and
remove the chad.
Cannot staple paper of this size.
The Staple function cannot be
used for the paper size selected.
Select the proper paper size that
can be used in staple mode.
Duplex is not available with this
size paper.
A paper size in duplex mode is
not available.
Select a paper size that can be
used in duplex mode.
Maximum number of sets is *
The number of copies exceeds
the maximum copy quantity.
The following paper sizes are
available for duplex mode.
•
A3,B4,A4,B5,A5
Service and Supplies
When the Machine Does Not Operate Properly
Document Server
Machine Status
Scanned pages exceeded
maximum number. Do you want
to store the scanned pages as a
file?
Problem/Cause
The number of scanned pages
exceeds the capacity per file of
thedocument server.
Action
If you want to store the scanned
originals as a file, touch the
Store File key. The originals re
stored as a file in the document
server. If you do not want any
scanned originals to be stored,
touch the Not to Store key. The
scanning data will be cleared.
Document Server
Problem
Action
You forgot your password.
You can confirm your password.
Touch the Yes key onto “Display Password with Stored file”
temporarily, you can check the password when you select
the file.
Without the password, you cannot edit or print the
document. Scan the document again.
You can delete all the saved documents at once with the
User Tools.
Make sure that no important document is saved in the
Document Server before deleting all saved files.
You cannot find out what is saved in a
file.
Check the date or time column in the Document Server
Files display.
Check the contents of the document by printing the first
page of it. Press the line for the desired document in the
“Document Server: Files” display, and press the Print 1st
Page key, followed by the Start key.
Memory becomes full frequently.
Select the document that you want to delete, and then
press the Delete File key.
You want to check the print results
before making a large print run.
Check the print result by printing out only the first set.
Yo want to save a document which
cannot be saved automatically.
Turn “Auto File Delete” off, then save the document in the
Document Server.
If you turn “Auto File Del;ete” on after saving the
document, this function is applied to the nexed saved
document.
Service and Supplies
9 - 23
When the Machine Does Not Operate Properly
Display
Problem
The display panel is off.
Nothing happens when the
operation switch is turned on.
9 - 24
Problem/Cause
Action
The screen contrast knob is
turned to the dark position.
Set the screen contrast knob to
the light position for proper
viewing of the display panel.
The machine is in Energy Saver
mode.
Press the Energy Saver key to
cancel Energy Saver mode.
The Operation swith is turned
off.
Press the Opertion switch to
turn it on.
The Main Power switch is
turned off.
Turn the Main Power switch on.
Service and Supplies
When Copies are Not Clear
When Copies are Not Clear
Problem
Copies appear dirty.
The reverse side of an original
image is copied.
A shadow appears on copies if
you use pasted originals.
Cause
Action
The image density is set too
dark
Adjust the image density.
Auto Image Density is not
selected.
Select Auto Image Density.
The image density is set too
dark.
Adjust the image density.
Auto Image Density is not
selected.
Select Auto Image Density.
The image density is too dark.
Adjust the image density.
Change the direction of the
originals.
Put tape on the pasted part.
The same copy area is dirty
whenever making copies.
The exposure glass or document
feeder is dirty.
Clean them.
Copies are too light.
The image density is set too
high.
Adjust the image density.
The paper size is not
appropriate.
Use the recommended paper.
Toner cartridge is almost empty.
ADD TONER.
The original is not set correctly.
Set the orignal correctly.
An improper paper size is
selected.
Select proper paper size.
Copies are blank.
The original is not set properly.
When using the exposure glass,
set the originals face down.
When using the document
feeder, set the originals face
down.
A watery or wavy pattern is
produced on copies.
Your original has a dot pattern
image or many lines.
Place the original on the
exposure glass at a slight angle.
Parts of the image is not copied.
Service and Supplies
9 - 25
Can Not Make Proper Copies
Can Not Make Proper Copies
General
Problem
Copies are not stapled.
Cause
Action
The stapler is jammed.
Remove the jammed staples.
The number of copies exceeds
teh capacity of the stapler.
Check the stapler capacity.
Copy paper is curled.
Turn the copy paper over inthe
paper tray.
Staples are not positioned
correctly.
Originals are not set correctly.
Place the original on the upper
left corner of the exposure
glass.
Misfeeds occur frequently.
Copy paper size setting is not
correct.
Set theproper paper size.
You cannot combine several
functions.
Selected functions cannot be
used together.
Check combination functions.
When sorting the pages are
divided into two blocks.
The memory became full in the
middle of sorting and the pages
were ejected in two blocks.
You can interrupt the copying
when the memory becomes full.
Adjust Image
Problem
9 - 26
Cause
Action
In Double Copy mode, parts of
the original image are not
copied.
Combination of original and
copy paper is not correct.
Select proper paper.
In Border, Center, or Center/
Border modes, parts of the
origianl image are not copied.
Wide erase margins are set.
Set narrow margins.
In Margin Adjustment mode,
parts of the original image are
not copied.
Wide erase margins are set.
In Image Repeat mode, the
orignal image is not copied
completely.
You selected the same size copy
paper as the originals and did
not select theproper
reproduction ratio.
Orignals ar not scanned
correctly.
Set narrow margins.
There is a lack of margin space
on the oppossite side of the
binding position.
Delect copy paper larger than
the origianls.
Select the proper reproduction
ratio.
Service and Supplies
Can Not Make Proper Copies
Stamp
Problem
The stamp position is not
correct.
Cause
Paper orientation is not correct.
Action
Check the paper orientation and
stamp position.
Combine
Problem
Cause
Action
You cannot make a book from a
booklet or magazine by folding
copies.
Combine Original Booklet format
or Combine Original Magazine
format is not correct
Change setings.
Parts of the image are not
copied.
You specified an improper
reproduction ratio that does not
meet the sizes of your originals
and copy paper.
When you specify a
reproduction ratio using Manual
Paper Select mode, make sure
the ratio matches your originals
and the copy paper.
NOTE: Select the correct
reproduction ratio before using
Combine mode.
When you use staple and punch
together, extra marginn may
appear.
Sometimes stapling andthe
punch hole may not work well
together. In this case, change
the direction of the originals.
You set originals in the incorrect
order.
When setting a stack of
originals inthe document feeder,
the last page should be on the
bottom.
Order of copies is not correct.
If originals are set on the
exposure glass, start with the
first page to be copied.
Duplex
Problem
Order of copies is not correct.
Cause
Originals were set incorrectly.
Action
When setting a stack of
originals inthe document feeder,
the last page should be on the
bottom.
If you set an original on the
exposure glass, start with teh
first page to be copied.
Orientation of copies (Top to
Top, or Top to Bottom) is not
correct.
Service and Supplies
Originals were set incorrectly or
orientation setting is incorrect.
Select the correct orientation or
set originals correctly.
9 - 27
Can Not Make Proper Copies
When Memory is Full
Machine Status
Action
Memory is full.
Touch the Output key to copy scanned originals and clear
the scanning data. Press the Clear key to clear the scanning
data and not copy.
Press (Resume) to scan and copy
remaining originals.
To continue copying, remove all copies then touch the
Resume key. To stop copying, touch the Stop key.
Document Server
Machine Status
Memory is full.
9 - 28
Action
Delete any unnecessary files and then scan the document
again.
Service and Supplies
Cleaning
Cleaning
A dirty Exposure Glass or Document Feeder Belt may have an effect on the quality of your
copies. Inspect them and clean as necessary.
Cleaning the Machine
Wipe the copier with a soft, damp cloth and then dry it.
Do not use chemical cleaner or organic solvent, such as thinner or benzene. If they get into the
copier of melt plastic parts, a failure might occur.
Do not clean parts other than those specified in this Operator Guide. Such parts should be cleaned
by your service representative.
Cleaning the Exposure Glass
Clean the Exposure Glass using a clean dry cloth.
Cleaning the Document Feeder Belt
Clean the Document Feeder Belt using a dry clean
cloth.
Service and Supplies
9 - 29
Cleaning
Notes:
9 - 30
Service and Supplies
Chapter 10
Specifications
Chapter Overview
This chapter lists the specifications for the copier and its accessories.
Please note that some of these accessories are optional. Specifications
are subject to change for improvement without notice. Included in this
chapter are:
•
“Specifications” on page 10-1
•
“Agency Certifications” on page 10-11
•
“Paper Sizes” on page 10-13
•
“Enlargement and Reduction Percentages” on page 10-14
Specifications
Specifications
Specifications
Main Machine
Configuration:
Desktop
Photosensitivity type:
OPC drum (F100)
Original scanning:
One-dimensional solid scanning system through CCD
Copy process:
Dry electrostatic transfer system
Development:
Dry two-component magnetic brush development system
Fusing:
Heating roll pressure system
Resolution:
600 dpi
Exposure glass:
Stationary original exposure type
Original reference position:
Rear left corner
Warm-up time:
•
5635: Less than 15 seconds (20°C)
(When Facsimile or Printer is installed: Less than 18 seconds (20°C))
5645: Less than 20 seconds (20°C)
Originals:
•
Sheet/book/objects
Maximum original size:
11"´ 17"
Specifications
10 - 1
Specifications
Copy paper size:
•
•
•
Trays: 11"x 17", 5 1 /2"´ 8 1 /2"
Bypass: 11"x 17", 5 1 /2"x 8 1 /2"
Bypass (custom size):
Vertical: 4.0"–11.7"
Horizontal: 5.9"–23.6"
Duplex: 11" x 17", 5 1 /2" x 8 1 /2" (impossible on 5 1 /2" x 8 1 /2")
LCC: , 8 1 /2" x 11"
Copy paper weight:
•
•
•
•
Paper tray: 17 –28 lb.
Bypass tray: 14 lb.–43 lb.
Non-reproduction area:
•
•
•
•
Leading edge: Less than 3 ± 2mm
Trailing edge: Less than 2 ± 2mm
Left edge: Less than 2 ± 1.5mm
Right edge: Less than 2 +2.5/-1.5mm
First copy time:
•
5635: 4.3 seconds or less (face up feed, 100%, feeding from tray 1, on the
exposure glass, Text·Photo mode, Auto Image Density)
5645: 3.6 seconds or less (face down feed, 100%, feeding from tray 1, on the
exposure glass, Text·Photo mode, Auto Image Density)
Copying speed-5635:
•
•
•
19 copies/minute (11" x 17")
35 copies/minute (8 1 /2" x 11" )
Copying speed-5645:
•
•
22 copies/minute (11" x 17"ø )
45 copies/minute (8 1 /2" x 11")
Reproduction ratio:
Preset reproduction ratios:
400%, 200%, 155%, 129%, 121%, 100%
93%, 85%, 78%, 73%, 65%, 50%, 25%
Zoom: From 25 to 400%in 1%steps.
Maximum continuous copy run:
999 sheets
Copy paper capacity:
•
•
10 - 2
Tray 1,2: 500 sheets (20 lb.)
Bypass tray: 50 sheets (,20 lb.)
Specifications
Specifications
Power consumption
5635/5645 (Mainframe only)
Warm-up: approximately1.5 kw
Stand-by: approximately 0.3 kw
During Printing: approximately 1.0 kw
Maximum: less than 1.5 kw
5635/5645 (Complete system)
Warm-up: approximately1.5 kw
Stand-by: approximately 0.5 kw
During Printing: approximately 1.3 kw
Maximum: less than 1.5 kw
Note: The Complete System consists of the mainframe,finisher and large capacity
cassette (LCC).
Dimensions
(W x D x H up to exposure glass): 26.4"´ 25.6"´ 28.3"
Space for mainframe
(W x D): 38.6"´ 25.6" (Bypass tray extender is used for large size paper)
Noise Emission
Sound Power Level:
Mainframe only
•
•
Stand-by less than 51 dB (A)
Copying: less than 67 dB (A)
Complete System
•
•
Stand-by less than 52 dB (A)
Copying: less than 70 dB (A)
Sound Pressure
Mainframe only
•
•
Specifications
Stand-by less than 37 dB (A)
Copying: less than 54 dB (A)
10 - 3
Specifications
Complete System
•
•
•
Stand-by less than 37 dB (A)
Copying: less than 55 dB (A)
*1The above measurements made in accordance with ISO 7779 are actual value.
*2 It is measured at the position of the bystander.
*3 The Complete System consists of the mainframe, finisher and large capacity tray (LCT).
Weight
Approximately: 172 lb
HDD
10 GB or more
•
•
•
10 - 4
Capacity for Document Server 4.2 GB
Capacity for Memory sorting 1.5 GB
Capacity for others 4.3 GB or more
Specifications
Specifications
Document Feeder (Option)
Mode
ADF mode, Batch mode, Mixed Size mode, Custom Size originals mode
Original size
11" x 17", 5 1 /2" x 8 1 /2"
Original weight
•
•
1-sided originals: 11 –34 lb.
2-sided originals: 14 –28 lb. (Duplex)
Number of originals to be set
80 sheets (20 lb.) or less than 0.43"
Maximum power consumption
Less than 60W (power is supplied from the main frame)
Dimensions
(W x D x H): 22.4" x 20.3" x 5.9"
Weight
Approx. 26.5lb
Specifications
10 - 5
Specifications
1000-Sheet Finisher (Option)
Paper size
11" x 17", 8 1 /2" x 14", 8 1 /2" x 11", 5 1 /2" x 8 1 /2"
Paper weight
14 –42 lb.
Stack capacity
•
•
1,000 sheets 8 1 /2" x 11", 20 lb.)
500 sheets (8 1 /2" x 14" or larger, 20 lb.)
Staple capacity
•
•
30 sheets (8 1 /2" x 11" or smaller, 20 lb.)
20 sheets (8 1 /2"´ 14", 20 lb.)
Staple paper size
•
•
•
11" x 17"
8 1 /2" x 14"
8 1 /2" x 11"
Staple paper weight
17 –20 lb.
Staple position
1 position (upper left)
Power consumption
48W (power is supplied from the main frame.)
Dimensions
(W x D x H): 22.4"´ 20.5"´ 24.6"
Weight
Approximately: 46.3 lb
10 - 6
Specifications
Specifications
2 Tray Finisher (Option)
Finisher Shift Tray 1:
Paper size
11" x 17", 8 1 /2" x 14", 8 1 /2" x 11", 5 1 /2" x 8 1 /2"
Paper weight
14 –42 lb.
Stack capacity
•
•
•
500 sheets (8 1 /2" x 11", 20 lb.)
250 sheets (8 1 /2" x 14", 11" x 17", 20 lb.)
100 sheets (5 1 /2" x 8 1 /2", 20 lb.)
Paper size
11" x 17", 8 1 /2" x 14", 8 1 /2" x 11"
Paper weight
14 –42 lb.
Stack capacity
No Staple:
Staple:
•
•
•
•
2,000 sheets (8 1 /2" x 11", 20 lb.)
750 sheets (11" x 17", 8 1 /2" x 14", 8 1 /2" x 11", 20 lb.)
500 sheets (5 1/2" x 8 1/2", 20 lb.)
100 sheets (5 1 /2" x 8 1 /2", 20 lb.)
•
•
•
•
1,500 sheets (8 1 /2" x 11", 20 lb.)
750 sheets (11" x 17" ,8 1 /2" x 14", 8 1 /2" x 11", 20 lb.)
500 sheets (5 1/2" x 8 1/2", 20 lb.)
100 sheets (5 1 /2" x 8 1 /2", 20 lb.)
Staple capacity
•50 sheets (8 1 /2" x 11", 20 lb.)
•30 sheets (11" x 17", 8 1 /2" x 14", 20 lb.)
Staple paper size
11" x 17", 8 1 /2" x 14", 8 1 /2" x 11"
Staple paper weight
17 –24 lb
Specifications
10 - 7
Specifications
Staple position
•
•
1 staple –3 positions
2 staples –1 position
Power consumption
Less than 60W (power is supplied from the main frame.)
Dimensions
(W x Dx H): 26.7"´ 24.4"´ 40.5"
Weight: Approximately
121.2 lb
Punch Kit (Option)
Paper size
•
•
•
2 holes: 11" x 17", 8 1 /2" x 14", 5 1 /2" x 8 1 /2"
3 holes: 11" x 17", 8 1 /2" x 11"
4 holes: 11" x 17", 8 1 /2" x 11"
Scandinavian version: 11" x 17", 8 1 /2" x 14", 5 1 /2" x 8 1 /2"
Paper weight
•
•
4 holes: 14 lb.–43 lb.
2 or 3 holes: 14 lb.–43 lb.
Power consumption
26.4 W (power is supplied from the mainframe.)
Dimensions
(W x Dx H): 55.9" x 179.5" x 36.2"
Weight
Approximately 6.4 lb
10 - 8
Specifications
Specifications
Internal tray 2 (1 bin tray)(Option)
Number of bins
1
Available paper size
11" x 17", 8 1 /2" x 14", 8 1 /2" x 11", 5 1 /2" x 8 1 /2"
Paper capacity
125 sheets (20 lb.)
Copy paper weight
(16 –28lb.
Maximum power consumption
Less than 15 W (power is supplied from the main frame.)
Dimensions
(Wx D x H): 18.6" x 21.7" x 4.4"
Weight
Approximately 8.9lb
Extarnal Tray (Option)
Dimensions
(Wx D x H): 10.4" x 15.5" x 2.5"
Weight
Approximately 1.3 lb
Specifications
10 - 9
Specifications
Large Capacity Tray (LCT)(Option)
Paper size
8 1 /2" x 11"
Paper weight
16 –24 lb.
Paper capacity
1,500 sheets (20 lb.)
Power consumption
Maximum.40 W (power is supplied from the mainframe.)
Dimensions
(Wx D xH,option unit): 15.3" x 19.6" x 15.3"
Weight
Approximately 37.5 lb.
.Paper tray unit (Option)
Copy paper weight
16 –28 lb.
Available paper size
11"x 17" ls, 8 1 /2"x 14ls , 8 1 /2"x 11"ls/p, 5 1 /2"x 8 1 /2"ls, 8 1 /4"x 14" ls,11"x 14" ls,
7 1 /4"x 10 1 /2" ls, 8"x 13" ls, 8"x 10 1 /2" ls/p, 8 1 /2"x 13", 8"x 10 1 /2" ls/p, 8 1 /4"x 13" ls
Maximum power consumption
Less than 50 W (power is supplied from the main frame.)
Paper capacity
550 sheets (20 lb.) 2 trays
Dimensions
(W x D x H): 21.3" x 23.7" x 10.7"
Weight
Approximately 55.2 lb.
Note r Specifications are subject to change without notice.
10 - 10
Specifications
Agency Certifications
Agency Certifications
USA RFI
This equipment generates and uses radio frequency energy. If not installed and used properly, i.e.,
in strict accordance with these operating instructions, it may cause harmful interference to radio
communications. It has been tested and found to comply with the limits for a Class A computing
device pursuant to Subpart J of Part 15 of FCC rules, which are designed to provide reasonable
protection against such interference when operated in a commercial environment.
Operation of this equipment in a residential area is likely to cause interference, in which case the
user will be required to take whatever measures may be required to correct the interference at their
own expense.
Canada RFI
This digital apparatus does not exceed the Class A limits for radio noise emissions from digital
apparatus as set out in the Radio Interference Regulations of the Canadian Department of
Communications.
Cet appareil numerique ne depasse pas les limites de Categorie A pour les emissions de bruit radio
emanant d'appareils numereques, tel que prevu dans les Reglements sur I'Interference Radio du
Department Canadien de Communications.
This product complies with the requirements of the EMC Directive 89/336/EEC, Low
Voltage Directive 73/23/EEC, and the Harmonisation Directive 93/68/EEC.
Lanier Worldwide, Inc.
Im Taubental 6
41468 Neuss 1
Germany
Specifications
10 - 11
Agency Certifications
UL
The 5635 AG and 5645 AG digital copiers are intended for use in areas with 120V, 60 Hz, AC line
voltage. 5635 AH and 5645 AH digital copiers are intended for use in areas with 230V, 50 Hz, AC
line voltage. You should ensure you are connecting your equipment into the proper line voltage.
EPA Energy Star
The United States Environmental Protection Agency (EPA) has introduced a voluntary program,
the Energy Star Program, to encourage the widespread and voluntary use of energy-efficient
technologies that enhance the workplace, improve product performance, and prevent pollution. As
an Energy Star Partner, Lanier Worldwide, Inc. has determined Lanier’s 5635/5645 copiers meet
the Energy Star guidelines for energy efficiency. Energy Star guidelines require that all Energy
Star copiers have an ’OFF MODE’ feature that automatically turns the copier off after a period of
inactivity, ensuring night and weekend shut-off.
In addition to the above requirements, the 5635/5645 copiers have been successfully been tested
with the following recycled paper:
•
Lanier Recycled Copy Paper: 50% of Fiber Weight recycled with minimum 20% postconsumer waste.
Note: Specifications are subject to change without notice.
10 - 12
Specifications
Paper Sizes
Paper Sizes
Type
Size
Size
USA
STATEMENT
LETTER
LEGAL
COMPUTER
LEDGER
FOOLSCAP and
OFFICIO
5.5 x 8.5 inches
8.5 x 11 inches
8.5 x 14 inches
10.125 x 14 inches
11 x 17 inches
8.5 x 13 inches
140
216
216
257
279
216
UK
FOOLSCAP
8 x 13 inches
203 x 330mm
EUROPE
FOLIO
8.25 x 14 inches
210 x 356mm
DIN
A0=841
1189mm
A1=594
A2=420
A3=297
A4=210
A5=148
A6=105
B0=1000 x
1414mm
B1=707 x 1000mm
B2=500 x 707mm
B3=353 x 500mm
B4=250 x 353mm
B5=176 x 250mm
B6=125 x 176mm
C0=917 x 1297mm
C1=647 x 917mm
C2=458 x 648mm
C3=324 x 458mm
C4=223 x 324mm
C5=162 x 223mm
C6=114 x 162mm
B-FORMAT
Specifications
Paper
x
x
x
x
x
x
x
841mm
594mm
420mm
297mm
210mm
148mm
ISO 216
JAPAN
B4=353 x 250mm
B4=364 x 257mm
ISO 216
JAPAN
B5=250 x 176mm
B5=257 x 182mm
ISO 216
JAPAN
B6=176 x 125mm
B6=182 x 129mm
x
x
x
x
x
x
216mm
279mm
356mm
356mm
432mm
330mm
10 - 13
Enlargement and Reduction Percentages
Enlargement and Reduction Percentages
Type
Enlargement
10 - 14
Inch Version
Metric Version
400%
400%
200%
200%
155%
141%
129%
122%
121%
115%
Full Size
100%
100%
Reduction
93%
93%
85%
87%
78%
82%
73%
71%
65%
65%
50%
50%
32%
35%
25%
25%
Specifications
Glossary
Chapter Overview
Definitions for the most often used terms are listed here.
Copier Terms
% (percentage)
The ratio of the original image size to the copied image size. If the copy
image is larger than the original, the % number is larger. A copied image
that is twice the size of the original is said to be 200%. If the copy image
is smaller than the original, the % number is lower. A copied image that is
half the size of the original is said to be 50%.
10-key pad
The portion of the Control Panel with numerical keys. These keys are
used primarily to input the desired number of copies and are also used to
input numerical data into the copier during programming.
Book Originals
Any bound original that cannot be fed through the Feeder. Because the
pages cannot be separated, they must be copied manually from the
Exposure Glass. The Book Original features can be used to make the
book copying process more efficient.
Bypass Feed Tray
A Tray used to feed single sheets of special or transparent stock into the
copier to be copied. Because sheets from this tray feed straight through
the copier paper path, the Tray is especially useful for feeding heavy
stock. See also: Stack Feed Bypass Tray.
Casual Operator
An operator that uses the copier to make copies but does not have Key
Operator responsibilities such as adding Toner or calling for service.
Charge Corona
A device located near the Drum that activates the light sensitivity of the
Drum and prepares it to be exposed and imaged.
Cleaning Unit
An assembly that cleans any residual image toner from the Drum in
preparation for the next image.
CLEAR/STOP Key
The Key used to stop a copy job while it is still running. It may also be
used to clear program functions from a previous job and return to the
default settings.
Control Panel
The surface at the front of the copier containing Keys used to control the
operation of the copier. It usually also contains the display that shows the
status of the copier or the job in progress.
Copies
The imaged paper output from a copier. It might be a direct reproduction
of the input document or it can contain any number of changes as
programmed into the copier such as Enlargement/Reduction, Trim/Mask,
etc.
Copies in Progress
This display or part of a display shows how many copies of the total have
been made.
Copies Selected
This display is the same as Copy Quantity, in that it shows the number of
copies requested.
G-1
G-2
Copy Paper
See: paper
Copy Quantity
This display or part of a Touch Screen shows the requested number of
copies.
Copy Size Keys
Keys used to input the desired size of the copy.
Darker Copies
This term refers to the amount of toner placed on the copy through the
imaging process. The amount of toner is controlled by the “darkness” of
the original and the amount of light used during the exposure process;
more light means less toner or image density.
Developer Material
This is a supply used in the copier. It usually consists of two parts; a
carrier material and the toner. The developer material is only used by a
technician when installing a new unit or when cleaning a Developer Unit.
Developer Unit
An assembly located near the drum inside the copier that delivers the
toner to the drum. It allow the correct amount of toner to be placed on the
drum for each image.
Document Feed Tray
The Tray where an original document is placed to feed into an ADF for
automatic feeding and copying.
Document Guide
These Guides are located in the Document Feed Tray. When correctly
positioned against the sides of an original document, they help to position
the pages of the document.
Document Receiving
Tray
A Tray used to accumulate the pages of an original document that have
completed the copying process.
Document Scale
Two scales located to the front and left of the Exposure Glass intended to
help locate original documents placed on the Glass for manual copying
and to identify a part of an original during the Editing process.
Documents
The set of pages either placed on the Exposure Glass or in the ADF to be
copied.
Drum Assembly
The unit located inside the copier that receives the image during the
exposure and imaging process and transfers this image to the copy paper.
It is light sensitive and should be protected from bright lights.
Duplexed Copies
Copies that have been imaged on both sides of the sheet.
Energy Saver Key
A Key used to place the copier into, or bring it out of an Energy Saver
Mode. In the Energy Saver Mode, the amount of energy consumed by the
copier is reduced.
Energy Star
A voluntary program introduced by the United States Environmental
Protection Agency (EPA) intended to encourage the use of energy-
efficient technologies in the workplace. Requirements to qualify for
certification vary based on the speed of a Copier. For specifics on your
Copier, check the Specifications section of this Guide.
Exit Tray
A tray attached to the output end of the copier to collect copies. This tray
is usually removed when a Sorter or Finisher is installed. In this case, the
top tray of the Sorter or Finisher serves as the Exit Tray.
Exposure Glass
The glass surface located under the Document Cover or Document
Feeder. The original is placed here to make a copy. If an RADF is present,
it transports the original to this location. Once here, the original is
exposed by the Exposure Lamp located directly below the glass.
Exposure Lamp
The light source located directly below the Exposure Glass. It is the light
from this lamp that exposes the original, reflects off the original, travels
through the optics and exposes the Drum.
Exposure Pad
A Pad located on the bottom side of a Document Cover used to hold an
original in place on the Exposure Glass during the exposure process.
Factory Default
A setting in the copier that is set at the factory. You can change some of
these settings. Others can be changed by a Service Technician. See also
Initial Setting.
Front Cover
The Cover located at the front of the copier designed to allow access to
the interior of the copier. This allows the operator to add supplies, remove
paper misfeeds, or perform other maintenance as prescribed by the
Operator Guide.
Fused Toner
The image, usually black, that adheres to the surface of the copy paper.
This Toner is “Fused” to the surface of the paper using pressure and heat.
Fuser Assembly
The unit located inside the exit area of the copier that provides heat and
pressure to attach the toner to the paper surface.
Fuser Cleaning Pad
In certain copiers, it is necessary to clean toner residue and paper dust
from the Fuser Rollers. This provides extended life of the Rollers and
cleaner copies. At certain intervals, this pad must be replaced.
Graphic Display
A Display that shows icons related to service or supply related error
condition. In some copiers, these icons may be incorporated into a graphic
representation of the copier to show the approximate position of an error.
Gray Scale
A term referring to the shades of gray between the black and the white
areas on an original or copy. Normal copies reduce the shades of gray to
produce very dense blacks and clean whites. During the photo copy
modes, the copier is set to reproduce the shades of gray more faithfully,
but usually at the expense of the black density.
Initial Settings
Those settings displayed by a copier when it comes to the READY
G-3
condition. These settings may be either the Factory Default settings, or
Factory Default settings that have been modified permanently by either
you or your Service Technician to better fit your application.
G-4
Interrupt Key
The Key used to interrupt a long copy job in process in order to run a
single copy. Interrupt copies are limited to one, and the interrupt original
must be copied from the Exposure Glass.
Key Operator
The main operator responsible for the copier. This individual performs all
operator prescribed maintenance and is the main contact in the event of a
service call.
Lighter Copies
This term refers to the amount of toner placed on the copy through the
imaging process. The amount of toner is controlled by the “darkness” of
the original and the amount of light used during the exposure process;
more light means less toner or image.
Message Display
This display or part of a Touch Screen shows messages related to the
status of the copier, Help messages and program information.
On/Stand by Switch
A switch located on the exterior of the copier used to control the power to
the copier.
Original Cover
On copiers not equipped with a Document Feeder, a Cover protects the
Exposure Glass and prevents stray light from entering the copier during
the copy process. Unless copying a 3-dimensional object, the cover
should be down.
Original Direction
Indicator
This icon instructs the operator which direction to place the document in
the Document Feeder or on the Exposure Glass. This is particularly
helpful when different paper sizes are available and when certain features
are used such as; when reducing a legal sheet to letter-size paper, the icon
would instruct you to feed the original lengthwise.
Paper Tray
A paper carrier designed as part of the base of the copier. It is used to
store and feed a stack of paper of one size. Some are designed to be
adjusted but can only accommodate one size at a time.
paper weight
Throughout the Operator Guide there are references to 20 lb. or 24 lb.
paper. This refers to a standard measuring technique. A certain number of
sheets cut to a particular size weighs 20 or 24 pounds. The weight
specification usually correlates with the thickness of the paper. It also
generally implies stiffness with the lighter papers being more limber and
the heavier papers being stiffer. Copiers are designed to feed certain
weight papers through the Drawers or Cassettes. Heavier stock, such as
cover stock, can be fed through the Bypass Feed Tray.
Power Cord
The cord used to connect the copier to the power receptacle. The plug
design is specified depending on the amount of power the copier requires.
Make sure the receptacle is the correct one for your copier.
READY Indicator
This is an indicator that shows when the copier has warmed up and is
ready to make copies. It appears in several forms; a light, an icon, and the
message itself.
Release Lever
The lever located inside the Front Cover used to release the Upper Unit
for access to the paper path.
Separation Corona
One of the Coronas inside the copier. It is usually located near the Drum
and separates the paper from the Drum. Because it attracts the toner, and
since it is located below the paper, it has a tendency to get dirty. This can
require the Key Operator to either clean the coronas or call for service.
Sheet Feed Bypass
A tray that opens from the side of the machine, usually just above the
Primary Paper Tray or LCC. It is designed to feed a single sheet at a time.
This tray can be used to feed paper or transparency stock that would
normally not be placed in the Feed Drawers. Since it bypasses the normal
paper feeding mechanism and feeds straight through the paper path,
heavier stocks (like cover stock) feed better.
Sorter
An accessory attached to the output of a copier designed to perform a
sorting function. The sort function allows you to make multiple copy sets
of an original in such a way that the pagination matches the original
document.
Stack Feed Bypass
Feed Tray
A tray that opens from the side of the machine, usually just above the
LCC or Primary Paper Tray, and is designed to feed a stack of paper. This
tray can be used to feed paper or transparency stock that would normally
not be placed in the Feed Drawers. Since it bypasses the normal paper
feeding mechanism and feeds straight through the paper path, heavier
stocks (like cover stock) feed better.
Stack Key
This key is used to program the Stack functions. This is available only if a
Sorter or Finisher is present. In the stack mode, multiples of a single page
of a document are placed in separate Sorter Trays or are offset in the
Finisher Tray.
Start Key
This Key is used to start the copying process once all selections have been
made. On a Lanier copier, it is always green in color.
Toner
The black powder that is used to form the image on copy paper. In a color
copier, it would be colored. PLEASE NOTE: Toners are designed to
operate specifically in a copier and differ greatly on the copier
requirements. Toner from other copiers should never be mixed. At best,
the image would be too light or too dark. At worst, it can damage your
copier and require a service call to have the toner cleaned out and
replaced with the correct toner.
Toner Container
A container designed to simplify the reloading of toner in your copier.
G-5
Make sure the toner you add is correct for your copier before loading. See
the NOTE above.
G-6
Transparencies
A clear plastic stock used to make an overhead transparency. Because
they are clear, they don’t feed from paper Drawers or Cassettes. However,
many Bypass Feed Trays are designed to handle transparency stock. Place
your transparency stock in the Bypass Feed Tray and use a normal copy
procedure.
Transport Belt
The rubber surface on the under side of an ADF. It grips an original and
moves it across the Exposure Glass and returns it to the Document Exit
Area of the Document Feeder. To keep it operating correctly and to
prevent the buildup of dirt which can cause dirty copies, it must be
cleaned periodically.
User Codes
An option, usually built into a copier that, when activated by a
Technician, requires the operator to enter a User Code to make copies.
The copier can contain many accounts thereby allowing the Key Operator
to track copies made by individuals or departments.
Zoom Keys
The Zoom Keys are actually several keys that control the Enlargement or
Reduction of the image on the copy. In most cases, there is a 100% (actual
size) key, a key representing the highest Enlargement ratio, and a key
representing the lowest Reduction ratio. Pressing these last two keys steps
the copier optics in 1% increments. Pressing the 100% key returns the
copier to the actual size mode.
Index
Chapter Overview
This index provides page references to many terms and features of this
machine.
Index Terms
Numerics
B
1 sided 16 pages to combine 2 side copying 4-21
1 sided 2 pages to combine 1 side copying 4-16
1 sided 4 pages to combine 1 side copying 4-17
1 sided 4 pages to combine 2 side copying 4-19
1 sided 8 pages to combine 1 side copying 4-18
1 sided 8 pages to combine 2 side copying 4-20
1-sided to 2-sided copying 4-29
2 4-6
2 sided 16 pages to combine 2 side copying 4-27
2 sided 2 pages to combine 1 side copying 4-22
2 sided 4 pages to combine 1 side copying 4-23
2 sided 4 pages to combine 2 side copying 4-25
2 sided 8 pages to combine 1 side copying 4-24
2 sided 8 pages to combine 2 side copying 4-26
2-sided to 1-sided copies 4-50
2-sided to 1-sided copying 4-50
2-sided to 2-sided copying 4-31
Batch (SADF) 3-12, 3-14
Book copying 4-1
Book to 1-sided copies 4-49
Book to 2 Sided copying 4-1
Booklet 4-6
Border erase 3-27
Bound originals
orientation 4-30
Bypass
copying 4-9
stack feed 4-9
A
Access codes 3-1
Add toner indicator 9-6
Agency certifications
Canada RFI 10-11
EPA energy star 10-12
USA RFI 10-11
Auto image density/manual 3-9
Auto paper select 3-16
Auto reduce/enlarge 3-19
Auto start 3-5
C
Center erase 3-29
Centering copy 3-33
Certifications
Canada rfi 10-11
EPA energy star 10-12
USA rfi 10-11
Changing paper size of tray 2 9-3
Chapters 4-41
Cleaning
copier 9-21
document feeder 9-21
exposure glass 9-21
Combine copying 4-15
1 sided 16 pages to combine 2 side
copying 4-21
1 sided 2 pages to combine 1 side
copying 4-16
1 sided 4 pages to combine 1 side
copying 4-17
1 sided 4 pages to combine 2 side
copying 4-19
1 sided 8 pages to combine 1 side
copying 4-18
1 sided 8 pages to combine 2 side
copying 4-20
16 pages booklet 4-15
2 pages 1 sided 4-15
2 sided 16 pages to combine 2 side
4-27
2 sided 2 pages to combine 1 side
4-22
2 sided 4 pages to combine 1 side
4-23
2 sided 4 pages to combine 2 side
4-25
2 sided 8 pages to combine 1 side
4-24
2 sided 8 pages to combine 2 side
4-26
4 pages 1 sided 4-15
4 pages 2 sided 4-15
8 pages 2 sided 4-15
Copy
centering 3-33
darkness/lightness 1-5
option table 1-5
quantity 1-5
reduction/enlargement 1-5
series 4-50
slip sheet 4-42
transparencies 4-35
Copy darkness modes
auto image density 3-7
combination auto image density/
manual 3-9
manual 3-7
Copy paper
selecting 3-16
Copy quantities 3-6
Copy ratio keys 3-20
Copying
book 4-1
book to 2 sided 4-1
booklet 4-6
combine 4-15
duplex 4-29
magazine 4-7, 4-8
multi to 2 sided 4-4
Copying methods
2-sided to 2-sided copying 4-31
bypass copying 4-9
chapters 4-41
combine copying 4-15
double copying 4-28
duplexing 4-29
front and back covers 4-38
front cover 4-36
image repeat 4-32
interrupt 4-34
page insert 4-39
I-1
series copying 4-49, 4-50
slip sheet 4-42
Cover and page insert copying 4-36
D
Deleting saved documents 8-15
Directional size magnification 1% increments 3-25
Directional size magnification, inches
3-23
Document
placing original 1-3
Document feeder
precautions 3-2, 3-23
SADF feeding 3-3
Document server 6-9
change file name 8-10, 8-11
change password 8-10, 8-11
deleting saved documents 8-15
file merge printing 8-4
on demand printing 8-3
print first page 8-15
printing saved documents 8-13
sample printing 8-15
scanning originals 8-8
search by file name 8-15
setting file name 8-8, 8-9
setting password 8-10
Double copying 4-28
Duplex copying 4-29
1-sided to 2-sided 4-29
2-sided to 2-sided 4-31
E
Energy saver mode
entering 6-1
Energy star
explained 10-12
Enlargement / reduction percentages
10-14
Enlargement reduction ratios
auto reduce/enlarge 3-19
preset copy ratio keys 3-19
Erase center/border 3-27
Exposure modes 3-7
F
Feeding
stack of originals 3-3
File Merge Printing 8-4
File merge printing 8-4
Finisher 9-10
non-sort mode 7-1
sort mode 7-3
stack mode 7-4
staple mode 7-5
Front and back covers 4-38
Front cover 4-36
G
General 5-5
Glossary G-1
H
Horizontal sizing 3-23
I
Image repeat copying 4-32
Important safeguards 1
Indicator
add toner 9-6
paper misfeed 9-9
Insert copying 4-36
Interrupt
copying 4-34
key 4-34
L
LCC (LCT) 9-2
LCT (LCC) 9-2
Loading paper
in large capacity cassette 9-2
M
Magazine copying 4-7, 4-8
I-2
Main power switch 1-1, 1-3
turning copier power ON 1-3
Making copies 1-3
Margin adjustment 3-32
Misfeeds
identifying 9-9
Mixed sizes
selecting 3-12, 3-14
Multi to 2 sided 4-4
N
Non-sort mode 7-1
O
OHP 4-35
On Demand Printing 8-3
Operation key 1-2, 1-3
Option 7-1
Orientation of bound originals 4-30
Original
special 3-12
Original mode
selecting 3-12
Original type
generation 3-10
pale 3-10
photo 3-10
selecting 3-10
text 3-10
text-photo 3-10
Originals
special 3-14
Overhead transparencies 4-9, 4-35
P
Page insert 4-36, 4-39
Paper
international sizes 10-13
loading 9-1
size comparisons 10-13
thick 4-35
Paper punch
removing punch-outs 9-20
Paper select
auto 3-16
manual 3-16
Paper sizes
table 10-13
Paper tray 9-1
Paper tray sizes
changing sizes 9-3
Power switch 1-3
Preset copy ratio keys 3-20
Print first page 8-15
Printing saved documents 8-13
Punch mode 7-6
R
RADF
stack feeding 3-3
Ratios
enlargement and reduction table
10-14
Removing jammed staples 9-16, 9-18
S
SADF 3-12, 3-14
SADF feeding
one original at a time 3-3
Sample printing 8-15
Scanning originals 8-8
Series copy
2-sided to 1-sided copies 4-50
book to 1-sided copies 4-49
Size 3-22
Size magnification 3-22
Sizes
standard paper sizes 10-13
Sizing
directional size magnification - 1%
increments 3-25
directional size magnification inches 3-23
horizontal/vertical 3-23
Slip sheets 4-42
Sort mode 7-3
Special originals 3-12, 3-14
Specifications 10-1
Stack mode 7-4
Staple mode 7-5
Staples
adding to F-535 9-10
adding to F-545 9-13
removing jammed 9-16, 9-18
System setting
window 1 of 6 5-3
window 2 of 6 5-3
System settings
accessing 5-1
exiting 5-1
selecting 3-12, 3-14
Toner
adding 9-6
Toner cartridge 9-6
Transparencies 4-9, 4-35
Turning on copier 1-3
U
UL 10-11
User codes
entering 3-1
User tools
copy 5-1
system 5-1
V
Vertical sizing 3-23
Z
Zoom keys 3-21
T
Thick paper 4-35
Thin mode
I-3
I-4
Warranty
New Machine Warranty and Limitation of Liability
Warranty — 90 days
Lanier warrants that its equipment and accessories will be free from
defective parts and workmanship for a period of ninety (90) days from the
date of first installation by Lanier’s Authorized Dealer. Customers must
notify a Lanier servicing dealer or Lanier of a warranty claim within the
warranty period. For a listing of authorized Lanier servicing dealers or to
notify Lanier of a warranty claim, write to Lanier Worldwide, Inc., 2300
Parklake Drive, N.E., Atlanta, Georgia 30345-2979.
Warranty Exclusions
THE FOREGOING EXPRESS WARRANTY IS MADE IN LIEU OF ALL
OTHER PRODUCT WARRANTIES, EXPRESS OR IMPLIED,
INCLUDING MERCHANTABILITY AND FITNESS AND THOSE
ARISING FROM A COURSE OF DEALING OF USAGE OF TRADE.
The Express Warranty will not apply to drums, cleaning blades, fuser
cleaning felts, toner, developer or paper or to defects of damage incurred in
transportation, or due to accident; neglect; misuse such as use of harmful or
unapproved supplies; alterations; operator error; power surges; failure to
properly install, clean, maintain, or repair; improper operating environment;
or failure to provide proper utilities. The Express Warranty also will not
apply to used or refurbished Lanier equipment unless Lanier expressly
authorizes resale with its original equipment warranty.
Limitation of Liability
Fulfillment of Lanier’s warranty obligation shall be the Customer’s
exclusive remedy and Lanier’s and the Lanier Dealer’s limit of liability for
any breach of warranty or otherwise. In no event will Lanier or Lanier’s
Dealers be responsible or liable for special, incidental or consequential
losses or damages.
Customer Vision® _
our commitment to your
complete satisfaction
www.lanier.com
your document management partner
Lanier Worldwide, Inc. | 2300 Parklake Drive, N.E. | Atlanta, GA USA 30345
T1202-5318