Download La Crosse Technology 515-1316 User's Manual
Transcript
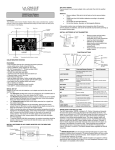
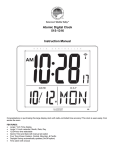
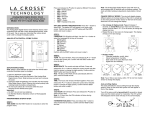
When the tower icon flashes, but does not set the time or the WWVB tower does not appear at all, take note of the following: Recommended distance to any interfering sources like computer monitors or TV sets is a minimum of 6 feet (2 meters). Within ferro-concrete rooms (basements, superstructures), the received signal is naturally weakened. In extreme cases, please place the unit close to a window and/ or point its front or back towards the Fort Collins, Colorado, transmitter. During nighttime, the atmospheric disturbances are usually less severe and reception is possible in most cases. A single daily reception is adequate to keep the accuracy deviation below 1 second. Atomic Digital Clock 515-1316 Quick Setup Guide Note: On rare occasions, the atomic clock is not able to detect the WWVBsignal (disturbances, transmitting distance, etc.); the time can be manually set. TIME SET: First set the Time Zone. TIME ZONE: This clock has four Time Zones. E-Eastern time, C- Central Time, M- Mountain Time, or P-Pacific Time. Hold the 12/24 button for 5 seconds to change a time zone. Release then hold the 12/24 button again to change the time zone a second time. Congratulations on purchasing this large display clock with radio-controlled time accuracy! This clock is seen easily, from across the room. FEATURES: Large 7 inch Time display. Large 3 ¼-inch calendar: Month, Date, Day 12/24-hour time selectable Atomic Time and Date with manual set option Four Time Zones: Eastern, Central, Mountain, & Pacific Daylight Saving automatically updates (On/Off option). Time alarm with snooze IMPORTANT: - Do Not Mix Old and New Batteries - Do Not Mix Alkaline, Standard, or Rechargeable Batteries SETUP: Lay the clock face down, on a clean soft towel or newspaper to prevent scratching. Open the battery cover. Insert a finger in each of the indentations at the bottom of the battery cover. Push up then pull out to open the cover. Insert three “C” alkaline batteries according to polarity markings. Do not press buttons for four minutes to allow the clock to search for a WWVB signal. The tower icon will flash. Note: If only the bottom of the tower icon is showing and the top of the icon is not there or partially there, reposition the clock for better signal reception. When WWVB signal reception occurs, the time and date will set and the tower icon will show solid above the seconds. WWVB Radio Controlled Time The NIST radio station, WWVB, is located in Ft. Collins, Colorado and transmits the exact time signal continuously throughout the United States at 60 kHz. The signal has a range of up to 2,000 miles. However, due to the nature of the Earth’s Ionosphere, reception is very limited during daylight hours. The atomic clock will search for a signal every night when reception is best. The clock receives the time signal via its built-in antenna and adjusts automatically to the selected time zone. Once the correct time is set, the clock continues running with an internal quartz-controlled mechanism. The internal quartz-mechanism is very accurate; therefore, it does not matter if the clock is occasionally, unable to receive the time signals. HOUR: From normal display hold the MODE/SET button for 5 seconds and the hour will flash. Press and release the PLUS button or the MINUS button to adjust the hour. Press and release the MODE/SET button to confirm and continue to the next menu item. MINUTES: The minutes will flash. Press and release the PLUS button or the MINUS button to adjust the minutes. Press and release the MODE/SET button to confirm and continue to the next menu item. SECONDS: The seconds will flash. Press and release the PLUS button or the MINUS button to adjust the seconds. Press and release the MODE/SET button to confirm and continue to the next menu item. YEAR: The year will flash. Press and release the PLUS button or the MINUS button to adjust the year. Press and release the MODE/SET button to confirm and continue to the next menu item. DATE FORMAT: M and D will flash by the date. Press and release the PLUS button or the MINUS button to select the date displayed in Month/Day or Day/Month format. Press and release the MODE/SET button to confirm and continue to the next menu item. MONTH: The month will flash. Press and release the PLUS button or the MINUS button to adjust the month. Press and release the MODE/SET button to confirm and continue to the next menu item. DATE: The date will flash. Press and release the PLUS button or the MINUS button to adjust the date. Press and release the MODE/SET button to confirm and continue to the next menu item. DST: DST (Daylight Saving Time) will flash with ON or OF in the second display. Press and release the PLUS button or the MINUS button to turn the DST indicator OF (off) or ON. This indicator is defaulted to ON and will only need to be turned off is you live in an area that does not observe DST. Press and release the MODE/SET button to confirm and exit the program menu. OTHER SETTINGS: begin from normal time display. 12/24-HOUR TIME: From a normal display press and release the 12/24 button to switch from 12-hour time format to a 24-hour time format. WWVB SEARCH: Hold the tower button for 5 seconds to activate the WWVB signal search. Press and release the tower button to turn the search off. RESET: If the display numbers appear jumbled, use a small object such as a paperclip and gently press the RESET button one time. The clock will beep four times then revert to default settings. ALARM SET: Press and release the MODE/SET button once to enter Alarm Mode. “AL” should appear after the alarm time. HOUR: From Alarm Mode hold the MODE/SET button for 5 seconds and the hour will flash. Press and release the PLUS button or the MINUS button to adjust the hour. Press and release the MODE/SET button to confirm and continue to the minutes. MINUTES: The minutes will flash. Press and release the PLUS button or the MINUS button to adjust the minutes. Press and release the MODE/SET button to confirm and exit the alarm set mode. above. All replaced parts and products become the property of La Crosse Technology, Ltd and must be returned to La Crosse Technology, Ltd. ACTIVATE/DEACTIVATE ALARM: Press and release the AL ON/OFF button to turn the time alarm on. The alarm icon will show above the seconds. Press and release the AL ON/OFF button to turn the time alarm off. The alarm icon will disappear when the alarm is off. Replacement parts and products assume the remaining original warranty, or ninety (90) days, whichever is longer. La Crosse Technology, Ltd will pay all expenses for labor and materials for all repairs covered by this warranty. If necessary repairs are not covered by this warranty, or if a product is examined which is not in need or repair, you will be charged for the repairs or examination. SNOOZE TIME: When the alarm sounds, press the SNOOZE button to trigger snooze alarm for 5 minutes. The alarm icon Zz will flash when the snooze feature is active. To stop alarm for one day, press AL button, while in snooze mode. The alarm icon will remain solid. The owner must pay any shipping charges incurred in getting your La Crosse Technology, Ltd product to a La Crosse Technology, Ltd authorized service center. POSITION THE CLOCK: When positioning the clock it is always best to have the front or the back facing Ft. Collins, Colorado for best WWVB signal reception. Wall Mount: Insert three screws (not included) into the desired wall, about 3.9 inches (10 cm) apart. Leave the head of the screws extended out by about 0.2” (5mm). Carefully hang the clock on the screws, using the hanging holes on the back of the clock. Note: Always ensures that the unit locks onto the screws before releasing. Table Stand: Pull out the table-stand from the rear of the clock. Pull out from the bottom. Place on table or desk as desired. Wall Hanging Holes Function Buttons Battery Compartment Your La Crosse Technology, Ltd warranty covers all defects in material and workmanship with the following specified exceptions: (1) damage caused by accident, unreasonable use or neglect (including the lack of reasonable and necessary maintenance); (2) damage occurring during shipment (claims must be presented to the carrier); (3) damage to, or deterioration of, any accessory or decorative surface; (4) damage resulting from failure to follow instructions contained in your owner’s manual; (5) damage resulting from the performance of repairs or alterations by someone other than an authorized La Crosse Technology, Ltd authorized service center; (6) units used for other than home use (7) applications and uses that this product was not intended or (8) the products inability to receive a signal due to any source of interference. This warranty covers only actual defects within the product itself, and does not cover the cost of installation or removal from a fixed installation, normal set-up or adjustments, claims based on misrepresentation by the seller or performance variations resulting from installation-related circumstances. LA CROSSE TECHNOLOGY, LTD WILL NOT ASSUME LIABILITY FOR INCIDENTAL, CONSEQUENTIAL, PUNITIVE, OR OTHER SIMILAR DAMAGES ASSOCIATED WITH THE OPERATION OR MALFUNCTION OF THIS PRODUCT. THIS PRODUCT IS NOT TO BE USED FOR MEDICAL PURPOSES OR FOR PUBLIC INFORMATION. THIS PRODUCT IS NOT A TOY. KEEP OUT OF CHILDREN’S REACH. This warranty gives you specific legal rights. You may also have other rights specific to your State. Some States do no allow the exclusion of consequential or incidental damages therefore the above exclusion of limitation may not apply to you. Base Stand For warranty work, technical support, or information contact: SPECIFICATIONS: Dimensions: 15.35 inches H x 19.09 inches W x 1.57 inches D (39 cm H x 48.5 cm W x 4 cm D) Power: Requires three “C” IEC LR14 alkaline batteries (not included). CARE AND MAINTENANCE: Replace batteries promptly when needed. Important: Do Not Mix Old and New Batteries Do Not Mix Alkaline, Standard, or Rechargeable Batteries Remove batteries when clock is not in use or when in storage. Clean only with a soft cloth or paper towel. Do not use corrosive cleanser or chemical solutions on the clock. Avoid placing clock in high humidity environments such as poolside or in a bathroom. Keep clock clean and dry to avoid problems. Do not expose clock to direct sunlight or extremely hot or cold temperatures. La Crosse Technology 2817 Losey Blvd. S. La Crosse, WI 54601 Contact Support: 1-608-782-1610 Product Information: www.lacrossetechnology.com/515-1316 Product Registration: WARRANTY INFORMATION: La Crosse Technology, Ltd provides a 1-year limited warranty on this product against manufacturing defects in materials and workmanship. This limited warranty begins on the original date of purchase, is valid only on products purchased and used in North America and only to the original purchaser of this product. To receive warranty service, the purchaser must contact La Crosse Technology, Ltd for problem determination and service procedures. Warranty service can only be performed by a La Crosse Technology, Ltd authorized service center. The original dated bill of sale must be presented upon request as proof of purchase to La Crosse Technology, Ltd or La Crosse Technology, Ltd’s authorized service center. La Crosse Technology, Ltd will repair or replace this product, at our option and at no charge as stipulated herein, with new or reconditioned parts or products if found to be defective during the limited warranty period specified www.lacrossetechnology.com/support/register All rights reserved. This handbook must not be reproduced in any form, even in excerpts, or duplicated or processed using electronic, mechanical or chemical procedures without written permission of the publisher. This handbook may contain mistakes and printing errors. The information in this handbook is regularly checked and corrections made in the next issue. We accept no liability for technical mistakes or printing errors, or their consequences. All trademarks and patents are acknowledged.


