1
KRU PS
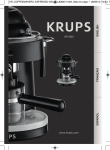
Espresso Bravo Plus
Model #872
Modhle #872
Modelo #872
@ Instructions for Use
@ Manuel d’instructions
@ lnstrucciones de USO
IMPORTANT SAFEGUARDS
When using electrical appliances, basic safety precautions
should always be followed to reduce the risk of fire, electric
shock, and/or injury to persons, including the following:
0 Read all instructions and information in this instruction
book and any other literature included in this carton
referring to this product before operating or using this
appliance.
0 Do not touch hot surfaces. Use handles or knobs.
0 To protect against fire, electric shock and personal injury
do not immerse cord, plugs, or appliance in water or
other liquid.
0 Close supervision is necessary when any appliance is
used by or near children.
0 Unplug from outlet when not in use and before cleaning.
Allow to cool before putting on or taking off parts, and
before cleaning the appliance.
0 Do not operate any appliance with a damaged cord or
plug or after the appliance malfunctions, or has been
damaged in any manner. Return appliance to your
nearest authorized KRUPS Service Center for
examination, repair or adjustment (see GUARANTEE OF
PERFORMANCE).
0 The use of accessory attachments not recommended by
the appliance manufacturer may result in fire, electric
shock or personal injury.
0 Do not use outdoors.
0 Do not let cord hang over edge of table or counter, or
touch hot surfaces.
0 Do not place on or near a hot gas or electric burner, or in a
heated oven.
0 Always attach plug to appliance first, then plug cord into
the wall outlet. To disconnect, turn any control to “off”,
then remove plug from wall outlet.
0 Do not use appliance for other than intended use.
0 Do not unscrew or remove boiler cap while the machine
is in operation. Wait until brewing cycle is completed
and all water and steam has been released.
0 Appliances with Glass Carafes.
A. The carafe is designed for use with this appliance.
It must never be used on a range top.
B. Do not set a hot carafe on a wet or cold surface.
C. Do not use a cracked carafe or a carafe having a loose
or weakened handle.
D. Do not clean carafe with cleansers, steel wool pads,
or other abrasive material.
SAVE THESE INSTRUCTIONS
CAUTION
This appliance is for household use. Any servicing other
than cleaning and user maintenance should be
performed by the nearest authorized KRUPS Service
Center (see GUARANTEE OF PERFORMANCE).
Do not immerse base in water.
To reduce the risk of fire or electric shock, do not remove
the base. No user servicable parts inside. Repair should
be done by an authorized KRUPS Service Center only.
0 Check voltage to be sure that the voltage indicated on
the name plate agrees with your voltage.
0 Never use warm or hot water to fill the water container!
Use cold water only!
0 Keep your hands and the cord away from hot parts of the
appliance during operation.
0 Never clean with scouring powders or hard implements.
SPECIAL CORD SET INSTRUCTIONS
Regarding your cord set:
A. A short power-supply cord is provided to reduce risks
resulting from becoming entangled in or tripping over
a longer cord.
B.
Longer extension cords are available and may be used
if care is exercised in their use.
C.
If a long extension cord is used, (1) the marked
electrical rating of the extension cord should be at
least as great as the electrical rating of the appliance,
(2) if the appliance is of the grounded type, the
extension cord should be a grounding-type 3 wire
cord, and (3) the longer cord should be arranged so
that it will not drape over the counter top or table top
where it can be pulled on by children or tripped over.
D. This appliance has a polarized plug lone blade is
wider than the other). As a safety feature, this plug
will fit in a polarized outlet only one way. If the plug
does not fully fit in the outlet, reverse the plug.
If it still does not fit, contact a qualified electrician.
Do not attempt to defeat this safety feature.
Krups Espresso Bravo Plus
k-
i
h
a: Hinged water container lid
(boiler cap inside)
b: Steam nozzle with “Perfect Froth”
attachment
c: Filter holder
d: Carafe lid
e: Glass carafe
f: Removable overflow grid
g: Measuring spoon
h: Two cup adapter
i:
j:
Filter basket
ON/OFF indicator light
rp = Espresso
‘0’
=Off
@ = Steam
a: Deposit0 de agua con tapa abatible
(tapa de la caldera dentro)
b: Tubo vaporizador con accesorio
“perfect Froth”
c: Porta filtro
d: Tapa de jarra
e: Jarra de vidrio
f: Rejilla removible
g: Cuchara dosificadora
h: Adaptador para dos tazas
Filtro
Luz pilot0 ON/OFF
k:
Selector de tres vias:
e = Espresso
‘0’ = off
@
6
b: Buse de vapeur avec accessoire
“mousse parfaite”
c:
d:
8:
f:
g:
h:
i:
j:
Porte-filtre
Couvercle de verseuse
Verseuse en verre
Grille de trop-plein amovible
Cuiller a mesurer
Adaptateur de tasse
Panier-filtre
Voyant de marche/arret
k: Commutateur a 3 fonctions:
k: 3 way selector switch:
i:
-.
I.
a: Couvercle du r&ervoir d’eau
(celui du chauffe-eau a I’interieur)
=Vapor
rp
‘0’
= Express0
Q!Y
= Vapeur
= Arret
-
!
8
I5
A
B
C
8
I0
Preparing espresso or cappuccino is
different than brewing regular drip coffee.
One main difference is that water will come
to a boil and will be forced through ground
coffee. An Espresso machine works under
pressure and needs special attention. Read
all instructions, Cautions, Notes and
Attentions.
We recommend that you get familiar with
all the parts of your “Espresso Bravo Plus”
before operating the machine:
Insert the filter basket in the filter holder, fit
the filter holder into the filter rings, remove
and replace the boiler cap. Switch the
selector switch to the three different
positions. Wash all loose parts in warm
soapy water, rinse thoroughly and dry.
A CAUTION - PRESSURE:
NEVER open boiler cap or remove the
filter holder (c) while your “Espresso
Bravo Plus” is turned “ON” or as long
as there is pressure in the boiler
container.
NEVER move or remove the filter
holder while the “Espresso Bravo
Plus” is in operation and under
pressure.
Please follow the instructions listed
below to see if the machine is still
under pressure. Follow these safety
precautions while your machine is in
use and ten to fifteen minutes after
last use.
In case there is water left in the boiler turn
the machine upside down to empty the
boiler.
Be careful, the water can still be hot.
Always use caution when operating the
boiler cap and remove it slowly.
Espresso is a far richer and stronger brew
than regular coffee. It should be deep, dark
and delicious. Most people find that they
enjoy it in small quantities because of its
richness, and for that reason, espresso is
usually served in small (2-2 l/2 oz)
demitasse cups.
The mark of real espresso is its wonderful
inviting fragrance and its rich flavor. Your
“Espresso Bravo Plus” properly used, will
always produce espresso that is deep, dark,
and delicious. Just follow the instructions
and use fresh, well roasted, pre-ground
espresso or espresso beans you grind
yourself.
1. Place your ‘Espresso Bravo Plus” near an
electrical outlet, and plug in the machine.
Make sure the selector switch (k) is in the
OFF position “0”.
2. Place your filter basket (i) into the filter
holder (cl (see figure 1).
1. Turn the selector switch to the “0”
position.
The basket is marked on the inside
indicating 2 cups or 4 cups.
2. Unplug machine.
3. Fill the filter basket with ground espresso
coffee. Pack the coffee lightly and clear
any excess coffee from the rim of the
filter holder. This will ensure a proper fit
into the filter rings (see figure 2).
3. Hold a pitcher with cold water underneath
the steam nozzle and insert the nozzle
into the pitcher.
4. Once the steam nozzle is immersed in the
pitcher of water, turn the selector switch
to the I @ ” position until steam no
longer comes out.
5. Turn the selector switch back to the “0”
position.
6. Now you can remove the boiler cap and
filter holder.
ATTENTION:
Do not pack coffee tightly.
Do not fill more coffee than indicated by the
~-CUP marking. This might cause clogging or
overflow (see under section “Problems and
Causes”).
9
To insert the filter holder, line up the arrow
located on the thumb guard of the filter
holder with the arrow on the left side of the
machine.
- 5 cups of water yields 4 cups of espresso,
plus steam for frothing milk for
cappuccino. (= upper rim of metal band on
glass carafe)
Raise the filter holder up into brewing head
and turn the filter holder firmly to the right,
until it can go no further.
6. Place the boiler cap securely on the
machine and turn it clockwise until it is
secure (see figure 7).
The arrow on the filter holder should be as
far right in the lock range as possible. If the
arrow is not at least in the middle of the lock
range, do not operate the machine.
7. Place the carafe lid (dj on the carafe (e)
so that the lid opening points toward the
pouring spout of the carafe (see figure 8).
Rather, remove the filter holder and reinsert
it as described above until the arrow is
within the lock range (see figure 3).
Once the filter holder is properly in place, it
should never be moved or attempted to be
removed while the “Espresso Bravo Plus” is
in operation and under pressure.
4. Open the hinged lid (see figure 4).
Unscrew the boiler cap by turning it
counter clockwise (see figure 5).
5. Using the glass carafe, fill the boiler
container with fresh, cold water
(see figure 61.
A CAUTION:
Never fill the boiler while your
“Espresso Bravo Plus” is in the u p y
or ” @?I ” position. ft should
only be in the ‘0” OFF position.
Never fill the water past the top of the
metal band on the glass carafe.
NOTE:
You may want to add a little extra water
(approx. l/4 cup) to compensate for
evaporation and absorption during the
brewing process.
However, do not fill past the top of the
metal band on the glass carafe.
The glass carafe (e) has markings on it for
2 cups and 4 cups of espresso and
steaming:
- 2 cups of water yields 2 cups of espresso.
- 3 cups of water yields 2 cups of espresso,
plus steam for frothing milk for
cappuccino.
- 4 cups of water yields 4 cups of espresso.
10
8. Place carafe under the filter holder. Make
sure that the nozzle in the filter holder
points through the opening of the carafe
lid (see figure 9).
ATTENTION:
Make sure that the overflow grid (fj is in
place.
9. To make espresso directly into one or
two cups, clip the cup adapter (hj onto
the filter holder before brewing
(see figure 10).
Place cups directly under the two spouts
(see figure 11).
10. Now you are ready to make espresso.
Simply turn the selector switch to the
” Q ” position (see figure 12).
The ON/OFF indicator light ljj will
illuminate.
11. After approximately 2 minutes the water
will have reached the proper
temperature.
The water will automatically pass
through the coffee grinds, producing
espresso in the glass carafe or in the
cups, whichever you selected.
12. Initially. the coffee will drip very slowly.
If, after 4 minutes, no water passes
through the coffee grinds, turn Off the
machine, release pressure by following
the instructions under CAUTIONPRESSURE listed below, then remove
the filter holder, empty coffee grinds and
start from the beginning.
ATTENTION:
Depending on the degree of finess of the
coffee ground it can occur that the brewing
process will be interrupted once.
13. Once the coffee has stopped the
complete brewing process, turn OFF the
machine by moving the switch to the
“0” position. The control light will go
out, indicating that the machine is OFF.
14. Before you remove the filter holder for
cleaning, make sure that the boiler is no
longer under pressure (see section
CAUTION-PRESSURE).
A CAUTION:
Use caution, when removing the filter
holder, metal parts may still be hot.
To remove the filter holder, turn the
filter holder to the left, past the “lock”
markings until the holder dislodges
from the unit.
Al-lENTlON:
Metal parts might still be hot. Cool down by
running under cold water.
To make more espresso, proceed as follows:
n Check to see if the boiler is empty and not
under pressure (see section “CAUTION PRESSURE”).
n Remove filter holder (c).
:
1. The first step in making cappuccino is to
make espresso: Therefore, fill the glass
carafe with the amount of water which is
required to make the amount of espresso
plus additional water for frothing milk
(see section “Making Espresso”).
2. Fill a small stainless steel frothing pitcher
l/3 to l/2 full with fresh, cold milk and set
aside. Skim or 1% low fat milk will
produce the best results.
3. Turn the machine to the ” G ” position.
As soon as the brewing espresso reaches
the steaming mark on the glass carafe,
turn the selector switch to the “0”
position. At that time the boiler has
created enough pressure and steam to
start frothing the milk. Frothing the milk
before finishing the espresso prevents
you from running out of steam, which can
happen if you froth towards the end of the
brewing process.
4. Now take your pitcher with milk and
insert the steam nozzle half way into the
pitcher. Turn the selector switch to the
” @3 ” position and leave in for
approximately 45-60 seconds, depending
on how much froth you want and the type
of milk you are using (see figure 14).
n Empty filter basket (i).
ATTENTION:
W Repeat steps 1-12 of this section.
Do not bring milk to a boil (this will happen
if large bubbles start forming at the surface
of the milk).
Cappuccino takes its name from the
chocolate hues of the robes worn by the
Capuchin monks who favored this delicious
dessert coffee. While cappuccino is
traditionally made up of espresso and
frothed milk, it can be tailored to one’s own
taste with cinnamon, sugar, chocolate flakes
or even liquor. Its versatility makes
cappuccino a worldwide gourmet choice.
Preparation of cappuccino:
KRUPS “Perfect Froth” attachment lets you
froth milk perfectly for making cappuccino.
n Note: If the “Perfect Froth” attachment is
not in place, do so at this time
(see figure 13).
Do not let the “Perfect Froth” attachment
touch the bottom of the pitcher (this will
prevent you from frothing milk).
5. Turn the three way selector switch back to
the “0” position while the nozzle is still
immersed in the milk. This will prevent
splattering of hot milk.
6. After the milk is frothed set the pitcher
aside and allow the frothed milk to settle.
7. Then turn the three way selector switch
back to the ” D ” position to finish
making the espresso.
8. Pour the espresso into a cup which has
the capacity of at least (5 oz.). Add the
steamed milk to the espresso and spoon
on the frothed milk. The proportion
between espresso and milk is to taste; in
Italy it is normally l/3 espresso,
l/3 steamed milk plus l/3 froth.
11
ATTENTION:
Cleaning the brewing sieve
W The top closure of the “Perfect Froth”
attachment (see figure 15 Part A) has a
very fine hole which draws air into the milk.
W If the brewing sieve becomes very dirty,
screw it out of the brewing head with the
aid of a coin and then clean it. Wipe down
the brewing head with a moist cloth and
then screw the sieve with the seal firmly
back into position (see figure 17).
If this tiny hole gets clogged, “Perfect Froth’
will not work properly. So never immerse
the top closure in milk or foam.
A CAUTION:
Pj
Do not try to open or disassemble the main
body of the machine.
Before cleaning, turn OFF the machine,
unplug it, and allow to cool down.
The filter basket, carafe, carafe lid and the
overflow grid can be put in the dishwasher’s
upper rack away from the heating/drying
element.
Do not put the filter holder and the cup
adapter in the dishwasher. Wash with soap
and water under the faucet.
The espresso machine must be decalcified
regularly. The frequency depends on the
hardness of your water and how often you
use the espresso machine.
Never immerse the body of your “Espresso
Bravo Plus” in water or any other liquid.
Before descaling, the brewing sieve on the
brewing head MUST first be screwed off.
Clean the filter ring with a damp cloth and
remove ground coffee. If there is water left
in the boiler container, let the machine cool
down, remove all loose parts and empty
through the top opening.
1. Remove all lime and coffee residues from
the brewing sieve and the brewing head.
Cleaning the steam nozzle
Clean the steam nozzle each time after you
have immersed it in the milk, otherwise the
inside of the nozzle becomes clogged and
milk deposits on the outside harden and
become difficult to remove.
Wipe off the outside with a wet cloth.
n For a thorough cleaning, unscrew the
nozzle (see figure 16) and remove all milk
particles (use a needle and rinse under
faucet), replace nozzle, and be sure to
screw on tightly.
Cleaning the “Perfect Froth” attachment
n For a thorough cleaning of the “Perfect
Froth’ attachment remove part C
(see figure 15).
All parts should be rinsed in warm water.
If the small suction opening in part A is
clogged it can be opened with a fine needle.
12
2. Pull off the “Perfect Froth” attachment.
For ecological and health reasons, we
recommend the exclusive use of biological
materials such as citric acid, which can be
obtained from Krups Consumer Service
Department or drugstores.
3. Dissolve 2 tablespoonfuls of citric acid in
10 fluid ounces of lukewarm water and
pour it into the boiler container. Put one
receptacle under the brewing head and
another under the steam nozzle (Note:
Do not use the filter holder during
decalcification).
4. Turn the selector switch to steam
position I @3 ” and wait until steam
comes out of the steam nozzle. Let steam
run for approximately 30 seconds.
5. Then turn the selector switch to espresso
position u p ” and allow the descaling
solution to pass through the brewing head.
6. After each brewing cycle, switch off the
appliance and allow the appliance to cool
down.
7. Repeat this operation once again.
Following this, allow 2 boiler containerfuls
of clear water to run through the system.
Problem:
Switch off the appliance.
Cause:
Allow the appliance to cool down. Insert the
brewing sieve into the brewing head again
and push the “Perfect Froth” onto the steam
nozzle.
n “Perfect Froth” attachment touches the
bottom of the pitcher.
Not enough froth when frothing the milk.
m “Perfect Froth” tip (see figure 15) is
clogged (part A) (see “Cleaning the
Perfect Froth”).
W Steam nozzle is clogged (see “Cleaning”).
(Always check if machine is plugged in and
if machine is in the proper ON position.)
W Not enough water left in boiler to steam
for 45-60 seconds.
Problem:
Coffee leaking from filter holder.
Cause:
Filter holder not properly inserted.
Filter holder not pushed in far enough.
W Internal gasket is dirty, clean gasket.
W Gasket without elasticity, replace.
W Coffee powder not cleaned off the edge of
the filter holder.
Problem:
Coffee does not come out.
Cause:
n No water in boiler container.
W No coffee in filter holder.
H Filter clogged up because coffee mixture
is too fine or pressed down too hard.
Problem:
Steam does not come out of steam nozzle.
Cause:
n No water or not enough water in the
boiler container.
l Steam nozzle is clogged (see “Cleaning”).
I “Perfect Froth” attachment is clogged
(see “Cleaning the Perfect Froth”).
Your KRUPS #872 is covered by the
following warranty:
If from date of purchase within one year this
KRUPS product fails to function because of
defects in materials or workmanship,
KRUPS North America will, at its option,
repair or replace the unit without charge,
provided the owner has a proof of date of
purchase.
This warranty will be void if malfunction
was caused by damage to the product by
accident, misuse, use on frequency or
voltage other than marked on the product
and/or described in the instructions, abuse
including tampering, damage in transit, or
use for commercial purposes. This warranty
gives you specific legal rights, and you may
also have other rights which may vary from
state to state.
GUARANTEE OF PERFORMANCE
This fine KRUPS product is manufactured according to a rigid
code of quality standards, and, with minimum care, should
give years of satisfying service. However, should the need
arise for repairs or for replacement parts within or after the
warrantv period, please call our CONSUMER SERVICE
DEPARTMENT:
(800) 526-5377
24-hours a day, 7 days a week
You will be provided with specific instruction on how to get
your product repaired, as well as the name and address of your
nearest authorized KRUPS Service Center. The department will
also be able to answer any general product questions you may
have.
Before calling the Consumer Service Department, please have
the type number of your KRUPS appliance available.
You must have this information before calling our Consumer
Service Department so that we may better answer your
questions. The type number can be located by looking at the
bottom of your appliance.
This product is Type #872
Any general correspondance can be addressed to:
KRUPS North America, Inc.
P.O. Box 3900
Peoria, IL 61612
14