1
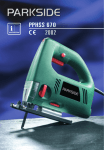
PPHSS 670
2002
Operating instructions
Kompernaß Handelsgesellschaft mbH
Burgstraße 21 · D-44867 Bochum (Germany)
Page
4- 7
a
b
c
d
PARKSIDE
PPHSS 670 PENDULUM ACTION JIGSAW
For sawing wood, plastic and metal
Dear Customer! We are delighted that you have decided to purchase our high quality PPHSS 670 pendulum action jigsaw. Please make sure
you familiarise yourself fully with the way the equipment works before you use it for the first time and that you understand how to handle
electrical power tools correctly. Please read the operating instructions
below and the accompanying safety advice carefully.
Use the equipment only as described and for the indicated purposes. By doing this you will be able to work in complete safety and produce
better results. We hope you enjoy using your jigsaw.
FEATURES OF THE PPHSS 670
ON - OFF switch
Continuous operation locking button
Chip extraction nozzle
Speed control wheel
Adjustable clear-view cover for dust extractor
Base plate (with removable rubber shoe)
Chip guard
Pendulum action control
No-tool quick adjustment
of base plate
Parallel guide with mm scale
TECHNICAL DATA
Nominal power consumption:
Nominal voltage:
No load speed:
Oscillation lift:
Bevel cut up to:
Weight:
Maximum cutting depth in:
670 W
230 V ~ 50 Hz
n0 400 – 3200 rpm
20 mm
45°
2.8 kg
aluminium: 030 mm
steel:
010 mm
hardwood: 080 mm
softwood: 100 mm
SPECIFIC SAFETY ADVICE
The A weighted noise level of the equipment is typically
Sound pressure level: 87.4 dB(A) ·Sound power level 100.4 dB(A)
Hand/arm vibration is typically 4.1 m/s2
To be read in conjunction with the advice in the accompanying booklet on safety.
Before doing any work on the machine, for example changing the saw blade, always remove the plug from its socket.
Only connect the machine to the socket when it is switched off.
Never remove chips or splinters while the equipment is operating - always remove the plug from the socket.
Always wear ear protectors and safety glasses when using the jigsaw. In addition we recommend safety gloves, robust anti-slip footwear
and an industrial apron.
Before using the jigsaw, check the mains lead and plug for damage. Have any damaged parts repaired or replaced at a specialist repair centre.
Always keep the power cable well out of the jigsaw's working area and fed to the rear of the machine.
4
If you are working for long periods on wood or materials which give rise to dangerous dusts, fit the jigsaw with a suitable tested vacuum
extraction device.
Always use the integrated safety devices on the jigsaw.
Do not drill into the jigsaw's housing as that will break the protective insulation (Use stick-on labels, plates etc.).
Cracked or deformed saw blades are not to be used.
INSTALLING THE SAWBLADE
Push the saw blade shaft as far as the stop into the blade holder. Take the Allan key (from its holder in the case) and tighten both bolts.
To release saw blade unscrew both bolts (counter clockwise).
See Figure :
a) Oscillating rod
b) Blade holder
c) Hexagon socket head cap bolt
d) Saw blade
SETTING THE BASE PLATE
The base plate can be set at an angle of up to 45° to the left or right.
Angled setting for mitres / bevels (see Figure ):
Release the HTF quick release base plate and pull the base plate to the rear to disengage from the multi-purpose teeth. With the base
plate at the desired angle (15°, 30°, 45°, which can be read from the scale) engage it with the multi-purpose teeth and tighten the HTF quick
release base plate again. You can set other angles up to 45° not using the multi-purpose teeth arrangement.
We recommend for very accurate bevelling that you carry out a test cut first.
CHIP GUARD
The chip guard stops almost all chips at the cutting edge when working with wood. From the underside of the base plate , place the
chip guard into the recess in the base plate (see figures, page 3).
WARNING: Take note that this can only be done if the base plate is in its furthest forward position and the anti-slip shoe is removed.
Cutting with the chip guard in place can only be done in the 9O° position.
SWITCHING ON AND OFF
When using the jigsaw you can select between continuous and non-continuous operation. For short periods of work use the non-continuous
setting and for longer periods of work the continuous setting. Select your chosen setting as follows:
SWITCH ON NON-CONTINUOUS OPERATION:
SWITCH OFF NON-CONTINUOUS OPERATION:
press ON/OFF switch .
release ON/OFF switch .
SWITCH ON CONTINUOUS OPERATION:
press ON/OFF switch and with it still pressed fix it in place
by pressing the continuous operation locking button .
press on/off switch and release it again.
SWITCH OFF CONTINUOUS OPERATION:
5
SETTING THE SPEED
The speed of oscillation (movements of the saw blade per minute) can be set to any value in the range with the speed control wheel .
The speeds are shown with the numbers 1 – 6 on the control wheel. The numbers mean: 1 = the lowest speed, 6 = the highest speed.
Use the following advisory settings as a guide and choose the most suitable setting on the speed control wheel for the material to be sawn.
Material
Rubber
Aluminium
Steel
Wood
Speed
1-3
4-5
4-5
6
SETTING THE PENDULUM ACTION
Use the following advisory settings as a guide (for reference only) to the pendulum action settings and choose an appropriate pendulum
setting on the pendulum action control for the material to be sawn.
Setting the pendulum action increases or reduces the penetrating effect of the saw blade into the material. The following rules of thumb apply:
Soft material = large pendulum action
Hard material = small or no pendulum action
Clean cut edge = no pendulum action
Material
Rubber
Aluminium
Steel
Wood
Plastic
Ceramic
Pendulum Setting
0
0-1
0
1-3
1
0
Note: the pendulum action setting on the pendulum action control can be altered whilst the machine is operating.
PLUNGING CUTS
Plunging (interior cutting or plunge sawing) is only possible in softer materials such as for example wood or light-weight building materials.
For harder materials you must insert the saw blade into a suitably sized hole in the material to be sawn. Set the base plate (see "Setting
the base plate") into the rearmost position so that a good angle for plunging is achieved. See Figure :
1. Set the pendulum action on the pendulum control to "0"
2. With the machine switched off, place it with the front edge of the base plate at the cutting position.
3. Switch the machine on and plunge the oscillating saw carefully into the material.
USE OF THE PARALLEL GUIDE
The PPHSS 670 pendulum action jigsaw is equipped with a parallel guide . This allows you to make accurate parallel cuts
using the mm scale.
Release the quick set mechanism on the parallel guide. Put it into the required position and lock quick set mechanism again. Slide the parallel
guide in from the appropriate side, the left or right accordingly. Make sure that the guide surface of the parallel guide points downwards.
6
VACUUM CHIP EXTRACTOR
Caution!: Only use the equipment with a compatible vacuum chip extractor.
The vacuum chip extraction nozzle has a standard internal diameter of 35 mm.
Connect a household vacuum cleaner or a wet and dry vacuum cleaner to the nozzle as follows:
1. Rotate the vacuum hose on to the extraction nozzle and test whether it is securely held in place.
2. Slide the clear-view cover downwards for optimum chip extraction.
MAINTENANCE OF THE JIGSAW
1. Clean the jigsaw regularly (remove chips and bits of wood etc.). For the best results do this straight after the work has been completed.
2. Do not allow liquids to get inside the jigsaw. Use a soft cloth for cleaning the housing. Do not use petrol, solvents or cleaners
that may attack the plastic.
3. Air vents must always be clear and clean.
ADVICE ON WORKING METHODS, TIPS AND TRICKS
Here is some advice on adjustment of the clear-view cover to give you optimum chip extraction: the chip blower blows the chips away
from the cut. This is particularly effective when sawing along a marked line. The distribution of vibration makes operation smoother because of
weights moving in opposite directions on the foot.
The base plate can be set at an angle of up to 45° in both directions. For plunging cuts and sawing near an edge, the base plate can be
set towards the rear.
Here is some advice on the pendulum action control : the saw blade is only pressed against the material on the return stroke / working
stroke. It is moved away from the material on the forward stroke. The result is better removal of chips, less friction and therefore a higher output.
To avoid the jigsaw springing up and down when sawing sheets, support the sheet on timbers. When sawing metal, apply a coolant like oil
or kerosene along the cutting line.
Adjust the speed and the pendulum action settings to suit the material to be sawn. We always recommend that you carry out a test cut first.
To use the jig saw put the front end of the base plate on the material and turn the machine on. Press the machine from above on to the
material and guide the jigsaw along the cutting line.
Do not use too much pressure; to achieve the best progress when sawing, use light pressure on the saw blade.
When sawing along a marked line use the marking on the splitting guard as a guide.
For exact cutting, clamp a timber batten on to the material as an aid or use the parallel guide .
For mitres / bevels, set the base plate in the required position.
Set the base plate to its rearmost position for cutting close to an edge.
The PPHSS 670 pendulum action jigsaw features HIGH TECHNOLOGY FIXING.
This allows you to work simply and easily adjusting the jigsaw without any tools.
All you need are your hands.
The PPHSS 670 pendulum action jigsaw is equipped with INTELLIGENT POWER CONTROL
This automatic power control ensures that within a certain oscillation range the output
from the jigsaw remains constant even when cutting harder and more resistant materials.
Further practical tips for power tools can be found in the accompanying booklet on safety advice.
We reserve the right to make technical modifications in the course of further development.
7
WARRANTY
This piece of equipment is covered by a 36-month warranty as of the date of purchase. The equipment was produced with the greatest of
care and underwent thorough testing before delivery. In the unlikely event of detecting a functional defect, please return the equipment in its
original packaging with the proof of purchase (if available) to the closest service address.
Damage caused due to improper handling as well as regular wear of the parts are not covered by this warranty.
Beaver Electronic Services · The Lodge, Premier Business Park
Long Street, Walsall · West Midlands, WS2 9DY
Tel.: 0 19 22/72 55 54 · Fax: 0 19 22/72 54 17
WARRANTY
This piece of equipment is covered by a 36-month warranty as of the date of purchase. The equipment was produced with the greatest of
care and underwent thorough testing before delivery. In the unlikely event of detecting a functional defect, please return the equipment in its
original packaging with the proof of purchase (if available) to the closest service address.
Damage caused due to improper handling as well as regular wear of the parts are not covered by this warranty.
Irish Web Specialists
1 Verbena Avenue · Dublin 13
Tel.: 01/8 32 04 92 · Fax: 01/8 39 68 29
8
9
STATEMENT OF CONFORMITY
We, Kompernaß Handelsgesellschaft mbH, Burgstr. 21, D-44867 Bochum, Germany, hereby declare that this product conforms with the following
EC regulations:
(98/37 EWG), (91/368 EWG), (93/44 EWG), (93/68 EWG)
(73/23/EWG), (93/68 EWG)
EC low voltage regulations:
(89/336 EWG), (92/31 EWG), (93/68 EWG)
Electromagnetic compatibility:
EN 50144-1:1998, EN 50144-2-10:1996, EN 55014:1993+A1:1997
Applicable harmonised standards:
EN 60555-2/1987, EN 61000-3-3:1995, EN 55014-2:1997
Description / Model type:
Bochum, 31.10.2002
PARKSIDE PPHSS 670 PENDULUM ACTION JIGSAW
Hans Kompernaß
- Managing Director -
10
11
© graphic design, photos, translations by ORFGEN Marketing & Communication
Essen / Germany · www.orfgen-nm.de