1
CFI230J
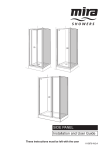
Indigo Quadrant
Enclosure
with integrated
Mira Magna Shower System
(646)
Slide Rail
Fixed Head
4
3
2
1
4
3
2
1
Kohler Daryl Limited
Alfred Road, Wallasey, Wirral, CH44 7HY England
Tel 44 (0)151 606 5000 Fax 44 (0)151 638 0303
www.daryl-showers.co.uk
E-mail [email protected]
Fitting + User Instructions
Fit top cap - Water delivery side
Fit top cap - Non Water delivery side
C
C
Introduction
C
The following pages aim to provide comprehensive installation instructions, plus
advice on how to care and maintain your product.
We recommend that the unit is installed by a qualified Plumber or Engineer.
Please retain this document for future reference.
Note: Due to our desire to always improve our products, Daryl reserve the right to
change specification without prior notice
Safety Precautions
Caution: Care should be taken when drilling into walls and floors to avoid any
hidden pipes or wires.
STEP
47
STEP
46
Fit the door seal to the back edge of the door.
When the door is closed the edge of the seal
should touch the side panel along it’s length.
Apply a thin bead of sealant along the outside
edge of the wall channels.
We strongly recommend that all glass panels are moved by a minimum of two
people and that protective packaging along the glass edges is kept in place for
as long as possible to prevent damage before installation
Wear protective
footwear when
lifting panels
Wear Safety
glasses when
drilling
People not familiar with the fitting of Daryl Products may require
the assistance from another person at certain stages of the
procedure. We have indicated these points in the process with
the Caution Symbol.
Caution
Care & Maintenance
24hrs
STEP
48
26 CFI230J
Do not use the enclosure for
at least 24 hours.
STEP
49
The unit should be cleaned regularly.
Use a non abrasive cleaner (ideally with a pH
value of 4 to 8) applied with a soft cloth.
Under no circumstances should scourers or
powerful detegents be used as these can damage
the metallic surface of the frame and also tarnish
the glass coating.
If fitted correctly the unit should not require any
maintenance other than cleaning. If problems do
occur contact the Daryl Technical Helpline
Tel: 0151 606 5000
CFI230J
3
COMPONENTS
Fixed Head Water Delivery Only
Carefully lift the Water
Delivery System column
and place the bottom
into the wall jamb
Standard Top Caps
Lintel
LH
Seal
Cap
x2
Be very careful not
to scratch or damage
the tray
Parking
Block
Side Panel
Support the weight of the column. Plug the
electrical cable into the connector on the cable
from the Water Delivery System
Caution
RH
Door
Nylon Grub
Screw
x2
STEP
42
Blanking
Cap
Support the weight of the column. Connect
the water pipe to the connector from
at the top of the column.
STEP
43
Push top of column
into the wall jamb
until it locks in place
Caution
Fixed Roller
Cap
Splashguard
4 CFI230J
STEP
44
STEP
45
CFI230J
25
Fit the Suppression Ferrite close to
the Water Delivery connector
COMPONENTS
Slide Rail Water Delivery Only
(See Step 42 for the Fixed Head Water Delivery)
Note:
The Suppression Ferrite is packed with the
Digital Mixer
Place the cable in the
suppression ferrite. Wrap
the cable around the cover
and through the ferrite
again and then close the
cover until it snaps shut
Carefully lift the Water
Delivery System column
and place the bottom
into the wall jamb
Be very careful not
to scratch or damage
the tray
LH
Roller Securing Caps
Fixed Head
Water Delivery
System
STEP
38
STEP
39
Water Delivery
Top Caps
RH
Slide Rail
Water Delivery
System
Glass Panel
Water Delivery Wall
Jamb, Wall Channel
& Glass Clamp
OR
Door
Stop Vinyl
(except 800)
(419)
Support the weight of the column. Connect
the water pipe to the connector from
at the top of the column.
Push top of column
into wall jamb
until it locks in place
Plug the electrical cable into the connector
from the Water Delivery System at the top
of the column.
5mm
3mm
NOTE:
The Water Delivery
System is supplied
attached to the
Wall Jamb
Caution
x9(+4) x4(+1) x3
A
B
C
x13
Splashguard
2m Pipe and
Connector
STEP
40
24 CFI230J
PROCEED TO
STEP 47
STEP
41
Electrical
Cable
3mm
6mm
CFI230J
5
ENCLOSURE INSTALLATION
Non Water Delivery Side only
Loosely fit wall channel into glass panel jamb
Fit roller securing caps to both top roller brackets.
Caps will ‘click’ and lock in place
Carefully lift the assembly onto the tray. The end
of the glass panel fits into slot ‘A’ on the tray.
The wall channel end sits on the flat section of
the tray ‘B’
Lift bottom roller up and tighten the fixing
screw with a 3mm allen key.
Fit the cap to cover the screw
B
A
STEP
1
Adjust wall jamb until glass is parallel to the
edge of the tray ‘A’. When jamb is vertical mark
edge of wall channel on the wall ‘B’.
STEP
34
STEP
2
Remove wall channel from jamb and place
against mark on wall
STEP
35
Connect pipework
Cut the 2 metre pipe
to size. Measure from
the centre line of the
connector.
Bottom Entry
Top Entry
Bottom Entry
‘A’ = 1750mm
B
±0mm
Top Entry
‘A’ = 320mm
A
A
STEP
3
6 CFI230J
STEP
4
STEP
36
STEP
37
CFI230J
23
Loosen the screw fixing the bottom roller to
the glass with a 3mm allen key
Locate other side of glass door panel between
the roller and plastic glass guide
Check the wall channel is vertical and mark
through the 3 holes ‘A’
Drill 3 x 6mm holes
Fit the splash guard to the bottom of the panel.
Note: lip faces to the outside of Enclosure
and cutout is towards the wall end of the glass
A
Caution
Fit plugs
Loosely fit screws
Seal behind channel
and tighten screws
A
STEP
30
Whilst supporting the weight of the door slide
the bottom roller into the bottom track
STEP
31
Lift the glass door up and slide the rollers onto
the lintel
STEP
5
Slide glass panel into slot in tray “A’ and fit
jamb onto wall channel ‘B’
STEP
6
On the inside of the enclosure. pull the rubber
strip away from the wall jamb
Caution
Caution
B
A
STEP
32
22 CFI230J
STEP
33
STEP
7
STEP
8
CFI230J
7
Ensure glass panel is vertical
Drill 4 x 3mm holes
through jamb into wall
channel
Check glass is vertical. If not
remove screws, re-drill and
re-fit as required.
Re-fit rubber strip over
screws
±0mm
Fit the fixed roller to the tray on the same side as
lintel wall fixing, applying sealant on the edges.
Note: The seal ‘A’ on the glass panel will need
to be pulled away, to allow the roller to be fitted,
and re-fitted afterwards.
Push the roller onto the slot in the tray until it
locks in place ensuring the plastic glass
guide is retained inside the roller body
Fit the blanking cap on the other side
of the tray.
Note: The seal ‘A’ on the glass panel will need
to be pulled away, to allow the cover to be fitted,
and re-fitted afterwards.
A
Fit 4 x B screws
B
STEP
9
STEP
11
STEP
10
Carefully remove the Water Delivery System
from the Water Delivery Wall Jamb.
Slacken screws ‘A’. Push the glass panel between
the wall jamb and the glass clamp. The glass
should be 2mm lower than the top of the wall
jamb. Tighten screws ‘A’ when the glass is in
the correct position
Push the door stop vinyl into the track and
against the fixed roller (except 800)
A
STEP
12
8 CFI230J
STEP
27
STEP
26
Carefully lift door into the enclosure
Important: Requires a minimum of 2 people
Caution
STEP
13
STEP
28
STEP
29
CFI230J
21
Remove the lintel from glass and remove the parking block
1. Match parking block
to mark on wall
2. Spot drill hole positions
3. Drill holes with 6mm drill
Carefully lift the assembly onto the tray. The end
of the glass panel fits into slot ‘A’ on the tray.
The wall channel end sits on the flat section of
the tray ‘B’
Adjust wall jamb until glass is parallel to the
edge of the tray ‘A’ and vertical at ‘B’.
±0mm
B
4. Plug holes
5. Screw parking block to wall
6. Re-fit lintel to glass
and push wall mount
on to the parking block
7. Secure the lintel to
parking block by
tightening allen
screw ‘A’
B
A
A
A
A
STEP
24
Check the lintel is level.
If adjustment is required turn screw ‘A’
on the panel clamps to lift or lower the rail.
When the lintel is level tighten screw ‘B’ on
each panel clamp until it grips the glass.
IMPORTANT - DO NOT OVER TIGHTEN
Spot drill through 4 fixing holes in the
wall jamb and mark the wall. Only 4 of the
8 holes are using alternate sides ‘A’.
Carefully remove the panel from the tray
A
B
Note: If the lintel cannot be made level by
adjusting the clamps remove the grub screws
and fit the longer ones supplied in the parts pack.
Take care not to
damage pipe and
cable protruding STEP
from wall
14
STEP
15
Drill 4 x 8mm holes
Fit plugs
B
A
C
Carefully lift the panel
back into postion
Fit caps to lintel ‘C’
Loosely fit
4 x A screws
A
± 0mm
Seal behind
the wall channel
and tighten
screws
STEP
25
20 CFI230J
STEP
16
STEP
17
CFI230J
9
Check the wall channel and jamb is vertical.
Loosen screws ‘A’ to adjust from side to side.
Re-tighten screws
The edge of the glass should fit against the end
of the slot in the tray ‘B’. To adjust the glass
loosen the 4 screws ‘C’ and move the panel until
it is the correct postion. Re-tighten screws
C
Loosely fit the parking block into the wall mount ‘A’. Lift the lintel onto the glass. The panel clamps
fit over the top edge of the glass and should be equally spaced on each panel
A
Note:
The lintel is supplied as a RH unit.
For LH versions loosen the panel clamps
and turn them through 180o
A
Check end of
glass is vertical
B
STEP
19
STEP
18
If the any further adjustment is required to make
the glass panel vertical turn the 4 screws ‘D’
until the panel is in the correct position
Measure the distance of the glass between
the wall jamb and the tray ‘A’. Cut the
splashguard to size cutting at the wall jamb end.
Fit the splashguard to the bottom of the glass
Ensure glass panels
are parallel to each other
STEP
22
Check top rail is level. Draw around parking block
± 0mm
A
D
STEP
20
10 CFI230J
STEP
21
STEP
23
CFI230J
19
The Daryl Care Programme
USER INSTRUCTIONS
Hint - these User Instruction pages can be separated from the Fitting Instruction pages if desired
Keeping your enclosure beautiful throughout its lifetime is easy with
products from the Daryl care programme
Using state of the art bespoke machinery combined with the
latest technology, all Daryl doors and panels are coated with
a glass protector in highly controlled factory conditions.
The protector acts as an invisible barrier on the glass to
prevent build up of limescale, soap scum, stains and dirt.
The factory applied protector will last from months to years
depending on use and the hardness of water in your area.
It will never crack, peel, discolour or build up. Coated
surfaces are kept clean simply by rinsing or wiping with a
damp cloth and regular use of Daryl Glass Cleaner.
There are two separate elements to caring for your Daryl
shower door, enclosure or bath screen.
1 Daryl Glass Cleaner for the regular cleaning of your
shower door, enclosure or screen
2 Daryl Care Kit comprising of Glass Treatment and
Glass Protector suitable for use where glass protector
has not already been applied or for topping up factory
coated protector
Daryl Glass Cleaner
For occasional cleaning of glass treated with Daryl Glass
Protector or for more regular maintenance of untreated
surfaces, we recommend using Daryl Glass Cleaner. The
Cleaner cleans and polishes without smearing or streaking
and rejuvenates the Glass Protector.
Daryl Glass Treatment and Daryl Glass Protector
Available in one care kit, the Treatment and Protector are
used on new or existing shower installations where
Protector has not already been applied and for topping up
factory coated glass after a reasonable length of time. The
Treatment must always be used on existing shower
installations to prepare for the Protector. The Treatment is a
cleaning material that is applied to the glass to ensure it is in
the cleanest condition possible prior to application of the
Protector. If this process is not undertaken, there is the
likelihood of locking in dust, dirt and stains under the
Protector.
Daryl Protector acts as an invisible barrier on the glass to
prevent the build up of lime scale, soap scum, stains and
dirt. Applied like a polish, one application will last from
months to years depending on use and the hardness of
water in your area. It will never crack, peel, discolour or build
up. Coated surfaces are kept clean simply by rinsing or
wiping with a damp cloth and regular use of Daryl Glass
Cleaner.
18 CFI230J
Regular cleaning
Low, Medium or High Flow Button
- Buttons glow BLUE when pressed
• Mildew thrives in damp, unventilated areas. It is, therefore,
important to always wipe down, with a soft cloth or towel,
the glass and metal sections inside the shower every time
it is used
Temperature
Control Knob
• Do not allow water to remain on glass and metal sections
for long periods of time
• Every week or two, use Daryl Glass Cleaner to polish the
enclosure (including metal sections) ensuring all surfaces
are wiped down
• In hard water areas, do not allow lime scale to build up.
Stubborn deposits of lime scale can usually be removed
by using a 50:50 solution of vinegar and water, which
should be rinsed off thoroughly and dried after use
Warm Up/Stop Button
- glows BLUE
when powered
• Regular cleaning is required to remove the small
amounts of residue that are not repelled by the Protector
St
Everyday Care
Warm Up Function (Optional)
Wipe down the glass and metal sections with a soft cloth or
towel and warm water after each time the shower is used.
Do not allow water to remain on glass and metal sections
for long periods, do not allow the build up of lime scale and
do not use caustic cleaners or abrasives.
1. Press the Warm Up push-button.
2. The unit delays turning on to allow you to get out
of the shower.
3. The Warm Up push-button flashes for a number of
seconds until water comes out of the handset at the desired temperature.
4. When the water is at the desired temperature the unit turns off waiting for you to shower.
Daryl showers trays
If you have a Daryl shower tray scuffs and marks on acrylic
trays can often be removed by the light use of a mildly
abrasive cleaner applied with a damp cloth and polished off.
Other cleaning materials
Ensure that if you use a non-Daryl cleaning product, it has a
pH level between 4 & 8 and is non-abrasive. Prolonged use
of cleaners with a pH level outside the specified range can
cause damage to metal sections and possibly affect the
safe operation of your Daryl Shower. All cleaning material
(including Daryl’s) must be wiped down after application.
Do not use ‘spray and leave’ cleaning products on the metal
surface as these may cause damage to your door or
enclosure.
To Operate the Shower
1. Press the Low, Medium or High flow push-button.
2. Water will come out of the handset at the desired temperature.
3. To alter the showering temperature, turn the temperature control knob. Whilst the showering temperature
stabilises, the selected flow push-button will flash.
4. Press the Stop push-button at the end of your shower.
Caution!
Anyone who may have difficulty understanding or operating the controls of any shower should be attended
whilst showering. Particular consideration should be given to:
• the young
• the elderly
• the infirm
• the disabled
• anyone who suffers from a medical condition that can result in temporary incapacity (e.g. epilepsy or
blackouts).
• anyone inexperienced in the correct operation of the controls.
CFI230J
11
Spray Settings
CLEANING
The handset has three different spray actions: Start, Soothe and Massage and an Eco setting. To adjust the
spray setting turn the spray plate as follows:
1. Start - Water flows from the outer set of holes.
To select the Start setting, turn the spray plate
anticlockwise from the full clockwise position
until it clicks once.
The unit should be cleaned regularly.
Use a non abrasive cleaner (ideally with a pH value of 4 to 8)
applied with a soft cloth.
Under no circumstances should scourers or powerful
detegents be used as these can damage the metallic
surface of the frame and also tarnish the glass coating.
Spray Plate
2. Soothe - Water flows from the middle set of holes.
To select the Soothe setting, turn the spray plate
anticlockwise from the full clockwise position until it
clicks twice.
To avoid limescale, use your thumb or a soft cloth
to wipe any limescale from the soft rubber nozzles
and the front face of the showerhead.
3. Massage - Water flows from the inner set of holes.
To select the Massage setting, turn the spray plate
anticlockwise from the full clockwise position until
it clicks three times.
CUSTOMER SERVICE
Kohler Daryl and Kohler Mira
4. Eco - Water flows from the outer set of holes at a
reduced flow rate.
To select the Economy setting, turn the spray
plate fully clockwise.
We take the question of customer service seriously. Consequently, there is one initial point of contact – Daryl
Showering Technical Services (0151-606-5000). This team will ensure that the quality of support you require is
provided by specialists appropriate to that field; i.e. for matters relating to the shower enclosure, you will be
aided by Daryl Showering and for the shower system (including the Digital Mixer), your call will be supported by
Mira Showers personnel.
Your contact for all queries is Daryl Showering Customer Services (0151-606-5000)
If, when you first use your shower it does not function correctly, first contact your installer to check that
installation and commissioning are satisfactory and in accordance with the instructions in this manual.
If, over time, the performance of your shower declines, consult this manual to see whether simple home
maintenance is required. Please call our Technical Services Department to talk the difficulty through, request
service under guarantees (if applicable) or take advantage of our after-sales service.
12 CFI230J
CFI230J
17
TROUBLESHOOTING
The information below gives details on what you can do as a user should you encounter difficulties whilst
operating the shower.
If there is a problem with the shower control some of the push buttons will flash very fast.
Malfunction
Push buttons are
flashing on the shower
control and / or the
shower will not operate
Cause
Water supply isolated
Check water supply
Damaged or broken cable
connection
Check cable connections
Electrical supply isolated
or fuse blown
Check electrical supply
Digital Mixer Valve
breakdown
No flow or low flow rate
from the Shower Fittings
Remedy
Refer to Cleaning
Hose blocked or twisted
Clear blockage or
release twist in hose
Contact Customer Services
B
Handset Adjustment
To adjust the height of the handset press
the release button ‘A’ and slide the clamp
bracket assembly up or down to the
desired position.
Isolate product and turn
back on after 30 seconds
If the problem still
persists note the
sequence of the flashing
push buttons and
contact Customer
Services
Spray plate assembly
blocked
The handset can be moved both vertically
and horizontally until the desired position
is reached ‘B’. A friction mechanism in the
clamp bracket will hold the handset in
place.
Drip from spray plate
assembly on handset
Incorrect shower
temperature
16 CFI230J
A small amount of water
may be retained in the
shower fitting after the
shower control has been
turned off. This may drain
over a few minutes
This is quite normal.
Changing the angle of
the shower fitting may
vary the draining time
Digital Mixer Valve
malfunction
Solenoid fault. May
require cleaning or
replacement. Contact
Customer Services
Maximum temperature
incorrectly set
Refer to Commissioning,
Maximum temperature
setting
Digital Mixer Valve incorrectly
fitted
Make sure that the hot
and cold water supplies
are connected correctly
1
2
3
4
Digital Mixer Valve malfunction
A
Fixed Head Adjustment
Move the spray head to the required
position. The spray head is adjustable in
both the horizontal and vertical
directions.
CFI230J
13
COMMISSIONING/SETTING
1. General
1.1. Turn on the water supply to the Digital Mixer.
1.2. Check for leaks over the complete system.
1.3. Turn on the electrical supply to the Digital Mixer.
For the Pumped Version with the Slide Rail System, pump priming can be helped by removing the handset
and lowering the end of the hose into the shower tray.
2. Set the Maximum Temperature
Note! The maximum temperature of the unit can only be set when the unit has not been used for a period of
10 minutes or after switching the unit’s electrical supply OFF and ON.
2.1. Temperature Selection - Set the temperature control knob to the desired position, as per the table
below.
Temperature Control
Knob Position
Temperature Selection °C
1
Factory Set 45°C
2
45°C
3
36°C
4
38°C
5
40°C
6
42°C
7
Setting Option 1
Operate the shower and set the desired flow and temperature, then press and momentarily hold the
Warm Up/Stop and Medium push-buttons at the same time. The Medium push-button will flash and
beep three times to confirm the selection is successful.
The mixer is locked to your selected temperature and flow. Pressing any flow push-button turns the
mixer ON. Pressing the Warm Up/Stop push-button turns the mixer OFF.
Caution! If the temperature control knob is altered while the mixer is in standby mode or while
the shower is in operation, the water temperature settings will be changed to the new setting next time
the shower is used.
Note! Selecting the Warm Up/Stop and Medium push-buttons at the same time again, cancels the
lock mode option set. The Medium push-button will flash and beep three times
Setting Otion 2
Note! This can only be set when the mixer has not been used for a period of 10 minutes. Switching the
unit’s electrical supply OFF and ON cancels the lock mode.
Press and momentarily hold the Warm Up/Stop and Medium push-buttons at the same time. The
Medium push-button will flash and beep three times to confirm the selection is successful. The
interfaces are locked.
Note! Selecting the Warm Up/Stop and Medium push-buttons at the same time again, cancels the
lock mode option set. The Medium push-button will flash and beep three times
4. Timeout
Note! Timeout allows you to run the shower for a set period of time before it automatically shuts off. This can
only be set when the unit has not been used for a period of 30 minutes or after switching the unit‘s electrical
supply OFF and ON.
4.1. Timeout Selection - Set the temperature control knob to the desired position, as per the table below.
Timeout (Minutes)
45°C
Temperature Control
Knob Position
8
47°C
1
30
9
48°C
2
30
3
3
4
4
5
5
6
6
7
7
8
8
9
9
2.2. Enabling - Press and momentarily hold the Warm Up/Stop and High push-buttons at the same time.
Release the push-buttons and press them again within 2 seconds. The High push-button will flash and beep
three times to confirm the selection is successful.
3. Lock Mode
Note! Allows you to lock the unit during operation.
3.1. There are two Safety Lock Modes
Option 1 - Locks the mixer to your flow and temperature settings.
Option 2 - Locks the interface so no push-buttons can be used.
Note! The Warm Up/Stop push-button will be illuminated on the interface used to set the lock mode, no
other interface will be illuminated.
4.2. Enabling - Press and momentarily hold the Warm Up/Stop and Low push-buttons at the same
time. The Low push-button will flash and beep three times to confirm the selection is successful.
14 CFI230J
CFI230J
15