Download Klipsch Stereo System 2.1 User's Manual
Transcript
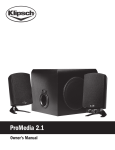
ProMedia 2.1 Wireless
Owner's Manual
IMPORTANT SAFETY INFORMATION
SPEAKER PLACEMENT
1.
2.
3.
4.
5.
6.
7.
8.
1. The ProMedia 2.1 Wireless system uses a short-range, line-of-sight
transmitter. It was not designed to be used through walls or at distances
greater than about 30 feet.
2. For best imaging with movies and games, the two satellite speakers should
be positioned on each side the video monitor. For music listening, the satellite
speakers can be placed in any convenient location within 30 feet of the
computer with the USB Transmitter. For best sound and imaging place the
speakers near ear level and 3-5 feet apart. To wall mount, the pedestal stands
may be removed by unscrewing the 1/4” 20-thread bolt, which accommodates
a wide variety of wall brackets available through stereo and appliance stores.
Klipsch WB-1 wall brackets are available at www.klipsch.com.
3. Place the subwoofer on the floor within the cables’ reach of the satellite speakers. The subwoofer must be placed on the floor near a wall with the rear panel
toward the wall. Do not cover up the sub driver or front port of the enclosure
and be sure to provide enough ventilation to the rear of the subwoofer. It
is normal for this panel to be warm to the touch. The subwoofer should be
at least 3 feet (1m) from a CRT monitor to avoid interference. Placing the
subwoofer in a corner can further enhance bass output. Subwoofer placement
will ultimately be determined by what sounds best to your ear.
4. Speaker or power cables running across an area of heavy foot traffic should
be positioned against a wall or corner and secured with tape.
READ these instructions.
KEEP these instructions.
HEED all warnings.
FOLLOW all instructions.
DO NOT use this apparatus near water.
CLEAN ONLY with dry cloth.
DO NOT block any ventilation openings. Install in accordance with the manufacturer’s instructions.
Do not install near any heat sources such as radiators, heat registers, stoves, or other apparatus (including amplifiers) that produce heat.
9. DO NOT defeat the safety purpose of the polarized or grounding type plug. A polarized plug has
two blades with one wider than the other. A grounding type plug has two blades and a third
grounding prong. The wider blade or the third prong are provided for your safety. If the provided
plug does not fit into your outlet, consult an electrician for replacement of the obsolete outlet.
10. PROTECT the power cord from being walked on or pinched, particularly at plugs, convenience
receptacles, and the point where they exit from the apparatus.
11. ONLY USE attachments/accessories specified by the manufacturer.
12. USE only with a cart, stand, tripod, bracket, or table specified by the manufacturer,
or sold with the apparatus. When a cart is used, use caution when moving the cart/
apparatus combination to avoid injury from tip-over.
13. UNPLUG this apparatus during lightning storms or when unused for long periods of time.
14. REFER all servicing to qualified service personnel. Servicing is required when the apparatus
has been damaged in any way, such as power-supply cord or plug is damaged, liquid has been
spilled or objects have fallen into the apparatus, the apparatus has been exposed to rain or
moisture, does not operate normally, or has been dropped.
15. DO NOT expose this apparatus to dripping or splashing and ensure that no objects filled with
liquids, such as vases, are placed on the apparatus.
16. To completely disconnect this apparatus from the AC Mains, disconnect the power supply cord
plug from the AC receptacle.
17. The mains plug of the power supply cord shall remain readily operable.
The exclamation point, within an equilateral triangle, is intended to alert the user to
the presence of important operating and maintenance (servicing) instructions in the
literature accompanying the product.
The lightning flash with arrowhead symbol within an equilateral triangle, is intended
to alert the user to the presence of uninsulated “dangerous voltage” within the
product’s enclosure that may be of sufficient magnitude to constitute a risk of
electrical shock to persons.
WARNING: To reduce the risk of fire or electrical shock, do not expose this apparatus to rain or moisture.
WARNING: No naked flame sources – such as candles – should be placed on the product.
WARNING
RISK OF ELECTRIC SHOCK.
DO NOT OPEN.
SPEAKER CONNECTION DIAGRAM
1.Do not plug in the AC power cord until your computer/audio system is set up.
2.Care should be advised concerning the cables at back of sub. Bumping them
could cause damage.
3.Connect the DIN plug to the sub from the control satellite preamp. Wire
should hang down from plug.
4.Connect the speakers by inserting the tinned wire leads into the subwoofer.
The solid black wires (-) connect to the black spring clips; the black wires
with red stripes (+) to the red spring clips.
5.Plug the AC power cord into a wall outlet.
6.Plug headphone mini stereo plug in headphone jack, if desired.
7.Plug stereo mini plug into MP3/Aux jack. Plug stereo mini plug into MP3
player (for example).
If you don’t want to use the wireless, connect computer to Aux In. See Control Pod Features.
Cable not included.
WARNING: Do Not Open! Risk of Electrical Shock. Voltages in this
equipment are hazardous to life. No user-serviceable parts inside.
Refer all servicing to qualified service personnel.
WARNING: This product is intended to be operated ONLY from the AC Voltages listed on the back
panel or included power supply of the product. Operation from other voltages other than those
indicated may cause irreversible damage to the product and void the products warranty. The use
of AC Plug Adapters is cautioned because it can allow the product to be plugged into voltages
in which the product was not designed to operate. If the product is equipped with a detachable
power cord, use only the type provided with your product or by your local distributor and/or
retailer. If you are unsure of the correct operational voltage, please contact your local distributor
and/or retailer.
CAUTION: Place the equipment near a main power supply outlet and make sure that you can
easily access the power breaker switch.
PACKING LIST
2 Satellite speakers with pedestals and wires attached
1 Control pod, attached to one satellite speaker
1 Subwoofer
1 USB Wireless Transmitter
1 4-inch USB Adapter Cable
1 Packet of rubber isolation feet
1 Owner’s manual
DOES NOT NEED SOFTWARE DISC FOR OPERATION
USB WIRELESS TRANSMITTER
1. Perform main system setup as described above.
a. Set up the system, plug in AC power cord and turn on power switch on rear
panel of subwoofer.
b. The red LED on rear panel of subwoofer should begin flashing.
2. Connecting the USB Wireless Transmitter.
a.The computer should already be up and running
b. Close the music player/DVD player software if it is running
c. Insert the USB wireless transmitter into a USB port on the computer.
NOTE: If there is interference between the computer case or transmitter can’t be fully inserted, or if you have other USB devices connected, and the transmitter will not fit in an adjacent USB port, try a different USB port or use the included 4" USB extension cable.
NOTE: Does not work with the USB output on gaming systems.
d. The first time the USB transmitter is plugged in, the computer should
recognize the new hardware and install the appropriate driver.
e. When plugged in, the LED on USB transmitter should begin to flash.
3. After several seconds the LEDs on both the subwoofer rear panel and USB
transmitter should stop flashing
a. The LEDs should remain on – this indicates that the USB transmitter and
subwoofer are now synchronized and audio from the computer is streaming to
the ProMedia 2.1 Wireless system.
b. The USB wireless transmitter and subwoofer are paired at the factory,
however if after 30 seconds the LEDs are still flashing, press the “SYNC” button
on the rear of the subwoofer and the button (with the chevron) on the USB
transmitter. The system will attempt to sync again.
4. If you are running Windows, open Control Panel, Sounds and Audio Devices,
Audio tab, and check to make sure that “Klipsch ProMedia 2.1 Wireless” is
listed as the default audio playback device.
5. If you are running a Mac OS, click the Apple icon, select System Preferences,
Sound, Output tab, and check to make sure the “Klipsch ProMedia 2.1
Wireless” is selected as the default output device.
6. Start the Music Player/DVD Player software (i.e. iTunes, Windows Media Player,
etc.) and play your music as normal.
NOTE: When removing the USB transmitter the computer should revert back to the computer’s built-in sound output device (the laptop’s built-in speaker or headphone output, for example). It may be necessary to close and restart the music player software for the change to take effect. Likewise when plugging in the USB transmitter, the Klipsch ProMedia 2.1 Wireless speakers should become the default output device, but the music player software may need to be restarted.
This is not a problem with the Klipsch system; it is a limitation of the computer’s
software and operating system.
If after restarting the music player/DVD player software the music does not play
through the ProMedia 2.1 Wireless system, check to make sure the LED indicators are on but not blinking, and that the operating system, as described above in
#4 and #5 has the Klipsch speakers selected as the active audio output device.
Also check that the computer’s volume control is not muted.
SOFTWARE AND HARDWARE GAIN CONTROLS
Software volume controls in Microsoft Windows
1. Click the Start button on your taskbar, then "All Programs"
2. Choose Accessories
3. Windows 95: Choose Multimedia
Windows 98/2000/XP/Vista: Choose Entertainment
4. Click on the Volume Control
5. Adjust the Wave Volume Elevator Button to approximately 70%
Alternatively, if your computer is not within arms reach of the speakers, you
may desire to set the volume setting higher on the Control Pod and use the
computer’s volume control to adjust the sound level. An initial setting of the
main volume of 11 to 12 o’clock is recommended. Adjustments may be needed
for best sound quality.
Volume Control Programs
Some soundcard and/or PC manufacturers may have software that must be
adjusted separately from the Windows volume control. Consult applicable
manual for specific hardware documentation.
Subwoofer Level
For CD or DVD output, the optimum position will be indicated by the mark at 10
o’clock on the sub level control. Optimum sub levels and user preference may
vary from source to source.
CONTROL POD FEATURES
Headphones: The 1/8” stereo headphone output jack, located on the
right-hand side of the control pod, turns off the two satellite speakers and the
subwoofer output. The main volume control will adjust the headphone output.
MP3/Aux: The MP3/Auxiliary input jack is used with portable audio players. This
signal will be mixed with the main source. The input has a +6dB input sensitivity
to help compensate for the lower output voltage of some portable players. If
using a computer output on the Aux Input you may need to compensate for
the additional gain by lowering the computer’s volume level to approximately
50%. To obtain the proper balance with the main signal, the level adjustments
in the computer software and in the portable player will need to be adjusted. An
example would be listening to an MP3 player while surfing the net and hearing
associated sounds from various websites. The mixed sound may not be desirable,
and you will ultimately determine how you use this feature.
NOTE: During playback of MP3s, overall sound quality may be perceptibly
degraded compared to other audio sources such as CD. This is caused by the
encoding method and quality of the MP3 file. It is recommended that MP3 files
be encoded at a minimum 128 bit rate.
SPECIFICATIONS
(Visit www.klipsch.com for more details)
Satellite Impedance:
4 ohms minimum
Preamplifier Control Pod:
Subwoofer and Main volume level controls
LED power indicator
MP3/Aux player line input with soundcard
mixing function
Headphone jack
Direct path interface
Satellite:
Sealed elliptical two-way enclosure
with 25mm polymer tweeter mated to
MicroTractrix™ Horn and
3" long-throw mid-bass driver
Subwoofer:
Bass-reflex enclosure with front port
and side-firing 6.5" long-throw driver;
sixth-order enclosure design
Amplifier:
High-efficiency power supply and linear
amplifiers designed for uncompressed full
power sound
Subwoofer Limiter:
Protective limiter function protects the
driver and amplifier from extremely high
volume playback
ACCESSORIES
FCC EMC COMPLIANCE INFORMATION:
All accessories are available at www.klipsch.com.
NOTE: This equipment has been tested and found to comply with the limits
for a Class B digital device, pursuant to part 15 of the FCC Rules. These limits
are designed to provide reasonable protection against harmful interference
in a residential installation. This equipment generates, uses and can radiate
radio frequency energy and, if not in-stalled and used in accordance with
the instructions, may cause harmful interference to radio communications.
However, there is no guarantee that interference will not occur in a particular
installation. If this equipment does cause harmful interference to radio or
television reception, which can be determined by turning the equipment off and
on, the user is encouraged to try to correct the interference by one or more of
the following measures:
WB-1 Wall Mount Brackets (While supplies last)
Versatile Wall Bracket 1 is made from high quality steel. The clean, simple
design affords the most extreme angle adjustment, with up to 160 degrees of
movement for precise speaker positioning in the horizontal plane. Wall stud
wood screws included.
TROUBLESHOOTING
If no sound, ensure that:
- DIN plug from Control Pod, AUX input (if desired), speaker cables, and AC power cord are securely attached.
- Soundcard software is properly installed and functioning correctly. (Software is provided by the sound card manufacturer.)
- The computer sound volume is turned up and not muted. Also ensure that the control pod volume is not turned to the minimum setting.
- USB transmitter is securely connected to the computer’s USB port, and
the LED on the USB transmitter is on (not blinking). It may be necessary to
close and restart the music player software. If you suspect a problem with
the USB wireless device, perform the checks as described below in the
section “WIRELESS TROUBLESHOOTING”.
- The LED on the Control Pod is on indicating the system has power. If the LED
is not on check the DIN plug and AC power cord connection. Also check that
the AC wall outlet or power strip has power.
- Headphones are not connected.
If one or more speakers have little or no sound, ensure that:
- All cables are connected properly
- Connectors are fully “seated” in soundcard and subwoofer.
- Main and subwoofer level controls are properly adjusted on control pod
- Computer software audio settings are adjusted for proper use
- Computer system’s sound (control panel) volume is turned up
If the satellites or subwoofer exhibit distortion or buzzing:
- Turn down computer’s volume (via control panel), and reduce control pod volume
- Turn down subwoofer’s volume, as program signal may be too strong
- Plug the subwoofer’s power cord into a surge protector
If there is noise or hissing and the volume is low even when the main volume is up:
- Turn up computer’s sound volume (via control panel)
- Turn down main volume on control pod to compensate
- Ensure that software/hardware is properly installed and operating
If there is computer monitor interference:
- Make sure the sub is positioned at least 3 feet (1m) from the computer monitor
- Increase the distance between the satellite speakers and the computer monitor
WIRELESS TROUBLESHOOTING
1) Make sure sound is not muted on computer.
2) Make sure volume level setting on computer & control pod is correct.
3) Make sure green LED on USB transmitter and Red LED on subwoofer
are not blinking. If they are press each sync button.
4) Restart your music player software.
5) Make sure "Klipsch ProMedia 2.1 Wireless" is selected as the audio playback device. If not select it, hit apply/save and restart your music player software.
6) If the above does not fix the problem leave the transmitter plugged in, restart
your computer and go to #1 above.
For more detailed information and FAQs, please visit www.klipsch.com.
· Reorient or relocate the receiving antenna.
· Increase the separation between the equipment and receiver.
· Connect the equipment into an outlet on a circuit different from that to which
the receiver is connected.
· Consult the dealer or an experienced radio/TV technician for help.
Approved under the verification provision of FCC Part 15 as a Class B
Digital Device.
Caution: Changes or modifications not expressly approved by the manufacturer
could void the user’s authority to operate this device.
WIRELESS TRANSMITTER COMPLIANCE INFORMATION:
This equipment complies with FCC radiation exposure limits set forth for an
uncontrolled environment. This equipment should be installed and operated
with minimum distance 20cm between the radiator and your body. This
transmitter must not be co-located or operating in conjunction with any other
antenna or transmitter.
Operation is subject to the following two conditions: (1) this device may not
cause interference, and (2) this device must accept any interference, including
interference that may cause undesired operation of the device.
To reduce potential radio interference to other users, the antenna type and
its gain should be so chosen that the equivalent isotropically radiated power
(e.i.r.p.) is not more than that permitted for successful communication.
PRODUCT REGISTRATION
Register your product online at www.klipsch.com/register
• Klipsch will keep you up-to-date on new products and promotions
• Your personal information will never be resold
• This registration information is not used for warranty purposes.
Please retain your receipt for warranty claims.
Power.
Detail.
Emotion.
For over 60 years, we’ve made speakers for people who are as passionate about great sound
as we are. That’s why every Klipsch speaker is horn-loaded to create a remarkably accurate
listening experience for your music and movies. From our smallest satellites to our acclaimed
professional theater installations, our speakers deliver sound that’s so lifelike, you have to feel
it to believe it.
www.klipsch.com


