1
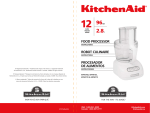
12 2.8 CUPS LITERS FOOD PROCESSOR Instructions and Recipes 5KFPCB700A Australia: 1800 990 990 New Zealand: 0800 881 200 KitchenAid.com.au KitchenAid.co.nz Proof of Purchase & Product Registration Always keep a copy of the sales receipt showing the date of purchase of your Food Processor. Proof of purchase will assure you of in-warranty service. Before you use your Food Processor, please fill out and mail your product registration card packed with the unit. This card will enable us to contact you in the unlikely event of a product safety notification and assist us in complying with the provisions of the Consumer Product Safety Act. This card does not verify your warranty. Please complete the following for your personal records: Model Number _______________________________________________________________ Serial Number ________________________________________________________________ Date Purchased _______________________________________________________________ Store Name and Location_______________________________________________________ Table of Contents INTRODUCTION Proof of Purchase & Product Registration............................................... Inside Front Cover Food Processor Safety......................................................................................................2 Important Safeguards......................................................................................................3 Electrical Requirements....................................................................................................4 FEATURES AND OPERATION Food Processor Features...................................................................................................5 Preparing the Food Processor for Use Before First Use........................................................................................................6 Work Bowl Assembly................................................................................................6 Multipurpose Blade and Dough Blade Assembly.......................................................7 Using the Food Processor Before Use................................................................................................................8 Maximum Liquid Level..............................................................................................8 Turning the Food Processor On and Off....................................................................8 Using the Pulse Control............................................................................................8 The 2-Piece Food Pusher...........................................................................................9 Disassembling the Food Processor.................................................................................. 10 CARE AND CLEANING Cleaning the Food Processor.......................................................................................... 11 Troubleshooting.............................................................................................................12 FOOD PROCESSING TIPS Using the Multipurpose Blade........................................................................................ 13 Using the Dough Blade.................................................................................................. 13 Helpful Hints.................................................................................................................. 14 WARRANTY AND SERVICE INFORMATION KitchenAid® Household Food Processor Warranty...........................................................15 Service Centers...............................................................................................................16 How to Arrange for Service after the Warranty Expires...................................................16 How to Order Accessories and Replacement Parts..........................................................17 Food Processor Safety Your safety and the safety of others are very important. We have provided many important safety messages in this manual and on your appliance. Always read and obey all safety messages. This is the safety alert symbol. This symbol alerts you to potential hazards that can kill or hurt you and others. All safety messages will follow the safety alert symbol and either the word “DANGER” or “WARNING.” These words mean: DANGER WARNING You can be killed or seriously injured if you don’t immediately follow instructions. You can be killed or seriously injured if you don’t follow instructions. All safety messages will tell you what the potential hazard is, tell you how to reduce the chance of injury, and tell you what can happen if the instructions are not followed. Important SafeGUARDS When using electrical appliances, basic safety precautions should always be followed, including the following: 1. Read all instructions. 2. To protect against risk of electrical shock do not put Food Processor in water or other liquid. 3. Unplug from the outlet when not in use, before putting on or taking off parts, and before cleaning. 4. Avoid contacting moving parts. 5. Do not operate any appliance with a damaged cord or plug, or after the appliance malfunctions, or is dropped or damaged in any manner. Return appliance to the nearest Authorized Service Facility for examination, repair, or electrical or mechanical adjustment. 6. The use of attachments not recommended or sold by the manufacturer may cause fire, electric shock or injury. 7. Do not use outdoors. 8. Keep hands and utensils away from moving blades or discs while processing food to reduce the risk of severe injury to persons or damage to the Food Processor. A scraper may be used but must be used only when the Food Processor is not running. 9. Blades are sharp. Handle carefully. 10. To reduce the risk of injury, never place cutting blade or discs on base without first putting bowl properly in place. 11. Be certain cover is securely locked in place before operating appliance. 12. Never feed food by hand. Always use the food pusher. 13. Do not attempt to defeat the cover interlock mechanism. 14. This product is designed for household use only. 15. This appliance is not intended for use by persons (including children) with reduced physical sensory or mental capabilities, or lack of experience and knowledge, unless they have been given supervision or instruction concerning use of the appliance by a person responsible for their safety. 16. Children should be supervised to ensure that they do not play with the appliance. 17. Switch off the appliance and disconnect from supply before changing accessories or approaching parts that move in use. Save These Instructions Electrical Requirements Model 5KFPCB700A: WARNING Volts: 230-240 V.A.C. Hertz: 50 Hz NOTE: Model 5KFPCB700A has a 3 prong grounded plug. To reduce the risk of electrical shock, this plug will fit in an outlet only one way. If the plug does not fit in the outlet, contact a qualified electrician. Do not modify the plug in any way. Electrical Shock Hazard Plug into a grounded 3 prong outlet. Do not use an extension cord. If the power supply cord is too short, have a qualified electrician or serviceman install an outlet near the appliance. Do not remove ground prong. Do not use an adapter. Do not use an extension cord. Failure to follow these instructions can result in death, fire, or electrical shock. Food Processor Features 12-Cup (2.8 L) Work Bowl Heavy-Duty Base 2-Piece Food Pusher O | Pulse Dough Blade Work Bowl Cover with Tall Feed Tube Work Bowl Cover with Tall Feed Tube Feed tube accommodates long food items with a minimum of sectioning, so the entire length of the tube can be filled with food. Stainless Steel Multipurpose Blade 12-Cup (2.8 L) Work Bowl The durable bowl provides capacity for large jobs. Stainless Steel Multipurpose Blade Versatile blade chops, minces, blends, mixes, and emulsifies in a matter of seconds. 2-Piece Food Pusher Pusher moves food through the tall feed tube smoothly and easily. A small hole in the bottom of the pusher insert makes it easy to drizzle oil into ingredients – just fill the insert with the desired amount of oil. For smaller items, simply remove the pusher insert and use the built-in small feed tube. With the insert removed, the pusher can also be used as a convenient 4 oz. (120 ml) measuring cup. Dough Blade The dough blade is specially designed for mixing and kneading yeast dough. Heavy-Duty Base The base features the ”O”, “I”, and pulse buttons along with the power shaft, which rotates the blades. Preparing the Food Processor for Use 4. Insert the mulitpurpose blade or dough blade into the work bowl. Place the blade on the power shaft. Rotate the blade so it falls into place on the shaft. 5. Place the work bowl cover on the work bowl with the feed tube just to the left of the work bowl handle. Grasp the feed tube and turn the cover to the right until it locks into place. WARNING Cut Hazard Handle blades carefully. Failure to do so can result in cuts. Before First Use Before using your Food Processor for the first time, wash the work bowl, work bowl cover, feed tube pusher, and blades either by hand or in the dishwasher (see “Cleaning the Food Processor” on page 11). Work Bowl Assembly 1. Place the Food Processor base on a dry, level countertop with the controls facing forward. Do not plug in the Food Processor until it is completely assembled. 2. With the handle just to the left of center, place the work bowl on the base, fitting the center opening over the power shaft. 3. Grasp the work bowl handle and turn the bowl to the right until it locks into position. NOTE: To avoid damage to the work bowl, do not attach the cover to the work bowl before the work bowl is locked on the base. 6. Fit the 2-piece food pusher into the feed tube. O | Pulse Preparing the Food Processor for Use WARNING WARNING Cut Hazard Handle blades carefully. Failure to do so can result in cuts. Multipurpose Blade and Dough Blade Assembly Place the blade on the power shaft. Rotate the blade so it falls into place on the shaft. Electrical Shock Hazard Plug into a grounded 3 prong outlet. Do not remove ground prong. Do not use an adapter. Do not use an extension cord. Failure to follow these instructions can result in death, fire, or electrical shock. 7. Plug into a proper electrical outlet (see “Electrical Requirements” on page 4). NOTE: Your Food Processor will not operate unless the work bowl and work bowl cover are properly locked on the base, and the pusher is inserted to the maximum fill line on the feed tube. Do not remove the work bowl from the base without first removing the work bowl cover. Damage to the work bowl may result. Off On Pulse Using the Food Processor Turning the Food Processor On and Off WARNING 1. To turn on the Food Processor, press the “I” Button. The Food Processor will run continuously and the indicator light will glow. Rotating Blade Hazard O | Always use food pusher. Pulse Keep fingers out of openings. Keep away from children. Failure to do so can result in amputation or cuts. 2. To stop the Food Processor, press the ”O” Button. The indicator light will go out and an automatic brake will stop the action of the blade within seconds. 3. Wait until the blade comes to a complete stop before removing the work bowl cover. Be sure to turn off the Food Processor before removing the work bowl cover, or before unplugging the Food Processor. NOTE: If the Food Processor fails to operate, make sure the work bowl and cover are properly locked on the base (see “Preparing the Food Processor for Use“ starting on page 6). Before Use Before operating the Food Processor, be sure the work bowl, blades, and work bowl cover are properly assembled on the Food Processor base (see “Preparing the Food Processor for Use” starting on page 6). Maximum Liquid Level This line on the work bowl indicates the maximum level of liquid (32 oz. [1.0 L]) that can be processed by the Food Processor. Using the Pulse Control The pulse control allows precise control of the duration and frequency of processing. It’s great for jobs which require a light touch. Just press and hold the PULSE Button to start processing, and release it to stop. The indicator light will glow each time the Pulse Button is pressed. Using the Food Processor The 2-Piece Food Pusher To slice or shred small items, insert the 2-piece food pusher into the feed tube, turn the top of the pusher left or right to unlock the small pusher, and lift to remove. Use the small feed tube and pusher to process small or slender items, like single carrots or celery stalks. When not using the small feed tube, be sure to lock the small pusher into place. To slowly drizzle oil or liquid into ingredients, just fill the small pusher with the desired amount of oil or liquid. A small hole in the bottom of the pusher will drizzle the oil or liquid at a constant rate. To prevent damage to the interlock system, always store the work bowl and work bowl cover in the unlocked position when not in use. Disassembling the Food Processor 5. The multipurpose blade can be removed from the work bowl before the contents are emptied. The blade can also be held in place as you remove food: grasp the work bowl from the bottom and place one finger through the center opening to grip the blade shaft. Then remove food from the bowl and blade with a spatula. WARNING Cut Hazard Handle blades carefully. Failure to do so can result in cuts. 1. Press the ”O” Button. 2. Unplug the Food Processor before Disassembling. 3. Turn the work bowl cover to the left and remove. 4. Turn the work bowl to the left to unlock it from the base. Lift to remove. O | Pulse 10 Cleaning the Food Processor 5. To prevent damage to the interlock system, always store the work bowl and work bowl cover in the unlocked position when not in use. WARNING Cut Hazard Handle blades carefully. Failure to do so can result in cuts. 1. Press the ”O” Button. 2. Unplug the Food Processor before Cleaning. 3. Wipe the base and cord with a warm, sudsy cloth, and wipe clean with a damp cloth. Dry with a soft cloth. Do not use abrasive cleansers or scouring pads. 4. All the other parts of the Food Processor are dishwasher safe. Be sure to load them away from exposed heating elements in the dishwasher. If washing the Food Processor parts by hand, avoid the use of abrasive cleansers or scouring pads. They may scratch or cloud the work bowl and cover. Thoroughly dry all parts after washing. O | Pulse 6. Wrap the power cord around the work bowl. Secure the plug by clipping it to the cord. 7. Dissassembled blades should be stored out of reach of children. 11 Troubleshooting – If the Food Processor still does not work, check the fuse or circuit breaker on the electrical circuit the Food Processor is connected to and make sure the circuit is closed. • If your Food Processor should fail to operate, check the following: – Make sure the work bowl and work bowl cover are properly locked on the base. – See if the Food Processor is plugged into a proper electrical outlet. If it is, unplug the Food Processor. Then plug into the same outlet again. • If the Food Processor shuts off while it is running: – The Food Processor may be overheated. If the motor exceeds a certain temperature, it will automatically shut off to prevent damage. This should be an extremely rare occurrence. If it happens, press the ”O” Button and wait 15 minutes for the Food Processor to cool before resuming. If the Food Processor still refuses to run, wait an additional 15 minutes for the Food Processor to cool. WARNING Electrical Shock Hazard Plug into a grounded 3 prong outlet. If the problem cannot be corrected with the steps in this section, see the KitchenAid Warranty and Service section on pages 15-17. Do not remove ground prong. Do not use an adapter. Do not use an extension cord. Failure to follow these instructions can result in death, fire, or electrical shock. WARNING Fire Hazard Do not use an extension cord. Doing so can result in death or fire. 12 Food Processing Tips Using the Multipurpose Blade To chop cooked or raw meat, poultry or seafood: To chop fresh fruits or vegetables: The food should be very cold. Cut in 1-inch (2.5 cm) pieces. Process up to 1 pound (455 g) at a time to desired size, using short pulses, 1 to 2 seconds each time. Scrape sides of bowl, if necessary. Peel, core, and/or remove seeds. Cut food in 1 to 11⁄2-inch (2.5-3.75 cm) pieces. Process food to desired size, using short pulses, 1 to 2 seconds each time. Scrape sides of bowl, if necessary. To make bread, cookie, or cracker crumbs: Break food into 11⁄2 to 2-inch (3.75-5 cm) pieces. Process until fine. For larger pieces, pulse 2 to 3 times, 1 to 2 seconds each time. Then process until fine. To puree cooked fruits and vegetables (except potatoes): Add 1⁄4 cup (60 ml) liquid from recipe per cup (235 ml) of food. Process food, using short pulses, until finely chopped. Then process continuously until reaching desired texture. Scrape sides of bowl, if necessary. To melt chocolate in a recipe: Combine chocolate and sugar from recipe in work bowl. Process until finely chopped. Heat liquid from recipe. With processor running, pour hot liquid through the feed tube. Process until smooth. To chop dried (or sticky) fruits: The food should be cold. Add 1⁄4 cup (60 ml) flour from recipe per 1⁄2 cup (120 ml) dried fruit. Process fruit, using short pulses, until reaching desired texture. To grate hard cheeses, such as Parmesan and Romano: Never attempt to process cheese that cannot be pierced with the tip of a sharp knife. You can use the multi-purpose blade to grate hard cheeses. Cut cheese in 1-inch (2.5 cm) pieces. Place in work bowl. Process, using short pulses, until coarsely chopped. Process continuously until finely grated. Pieces of cheese can also be added through the feed tube while the processor is running. To finely chop citrus peel: With sharp knife, peel colored portion (without white membrane) from citrus. Cut peel in small strips. Process until finely chopped. To mince garlic or to chop fresh herbs or small quantities of vegetables: With processor running, add food through the feed tube. Process until chopped. For best results, make sure work bowl and herbs are very dry before chopping. Using the Dough Blade The dough blade is specially designed for mixing and kneading yeast dough quickly and thoroughly. For the best results, do not knead recipes which use more than 2-3 cups (475-710 ml) of flour. To chop nuts or make nut butters: Process up to 3 cups (710 ml) of nuts to desired texture, using short pulses, 1 to 2 seconds each time. For a coarser texture, process smaller batches, pulsing 1 or 2 times, 1 to 2 seconds each time. Pulse more often for finer texture. For nut butters, process continuously until smooth. Store in refrigerator. 13 Helpful Hints 7.After removing the work bowl cover, place it upside down on the counter. This will help keep the counter clean. 8.To remove the contents of the work bowl without removing the multipurpose blade, grasp the work bowl from the bottom and place one finger through the center opening to hold the blade in place. Then remove food from the bowl and blade with a spatula. WARNING Cut Hazard Handle blades carefully. Failure to do so can result in cuts. 1.To avoid damage to the blade or motor, do not process food that is so hard or firmly frozen that it cannot be pierced with the tip of a sharp knife. If a piece of hard food, such as a carrot, becomes wedged or stuck on the blade, stop the processor and remove the blade. Gently remove food from the blade. 2.Do not overfill work bowl. For thin mixtures, fill work bowl up to 1 ⁄2 to 2⁄3 full. For thicker mixtures, fill work bowl up to 3⁄4 full. For liquids, fill up to the maximum level as described on page 8. When chopping, the work bowl should be no more than 1⁄3 to 1 ⁄2 full. 3.To capitalize on the speed of the processor, drop ingredients to be chopped through the feed tube while the processor is running. 4.When preparing a cake or cookie batter or quick bread, use the multipurpose blade to cream fat and sugar first. Add dry ingredients last. Place nuts and fruit on top of flour mixture to prevent overchopping. Process nuts and fruits, using short pulses, until blended with other ingredients. Do not overprocess. 5.Organize processing tasks to minimize bowl cleanup. Process dry or firm ingredients before liquid ingredients. 6.To clean ingredients from the multipurpose blade easily, just empty the work bowl, replace the lid, and pulse 1 to 2 seconds to spin the blade clean. 9.Your Food Processor is not designed to perform the following functions: •grind coffee beans, grains, or hard spices •grind bones or other inedible parts of food •liquefy raw fruits or vegetables 10.If any plastic parts should discolor due to the types of food processed, clean them with lemon juice. 11.When storing your Food Processor, wrap the power cord around the work bowl. Secure the plug by clipping it to the cord. 14 KitchenAid® Household Food Processor Warranty Length of Warranty: KitchenAid Will Pay For: KitchenAid Will Not Pay For: Australia and New Zealand: Three years Full Warranty from date of purchase on the Food Processor. Ten years Full Warranty from date of purchase on the motor. Replacement parts and repair labor costs to correct defects in materials or workmanship. Service must be provided by an Authorized KitchenAid Service Center. A.Repairs when Food Processor is used for operations other than normal household food preparation. B.Damage resulting from accident, alterations, misuse, abuse, or installation/ operation not in accordance with local electrical codes. KITCHENAID DOES NOT ASSUME ANY RESPONSIBILITY FOR INDIRECT DAMAGES. 15 Service Centers All service should be handled locally by an Authorized KitchenAid Service Center. Contact the dealer from whom the unit was purchased to obtain the name of the nearest Authorized KitchenAid Service Center. In New Zealand: Peter McInnes NZ Ltd PO Box 303 Drury Aukland New Zealand Ph: 0800 881 200 Fax: 0800 881 300 In Australia: Peter McInnes Pty Ltd PO Box 323 HRMC NSW 2310 Australia Email: [email protected] Website: www.kitchenaid.co.nz Ph: 1800 990 990 Fax: 0249 026501 Email: [email protected] Website: www.kitchenaid.com.au How to Arrange for Service after the Warranty Expires Before calling for service, please review the Troubleshooting section on page 12. For service information in New Zealand: Peter McInnes NZ Ltd PO Box 303 Drury Aukland New Zealand For service information in Australia: Peter McInnes Pty Ltd PO Box 323 HRMC NSW 2310 Australia Ph: 0800 881 200 Fax: 0800 881 300 Ph: 1800 990 990 Fax: 0249 026501 Email: [email protected] Website: www.kitchenaid.co.nz Email: [email protected] Website: www.kitchenaid.com.au 16 How to Order Accessories and Replacement Parts To order accessories or replacement parts for your Food Processor in Australia: Peter McInnes Pty Ltd PO Box 323 HRMC NSW 2310 Australia To order accessories or replacement parts for your Food Processor in New Zealand: Peter McInnes NZ Ltd PO Box 303 Drury Aukland New Zealand Ph: 1800 990 990 Fax: 0249 026501 Ph: 0800 881 200 Fax: 0800 881 300 Email: [email protected] Email: [email protected] Website: www.kitchenaid.com.au Website: www.kitchenaid.co.nz Accessories for Model 5KFPCB700A: Blades and Discs Bowls and Covers Disc Stem* 8211858 Multipurpose Blade KFP72BL Dough Blade KFP72DB 2 mm (Thin) Slicing Disc* KFP7SL2 Work Bowl Cover with Ultra Wide Mouth™ Feed Tube 2 mm (Thin) Shredding Disc* KFP7SH2 Work Bowl 4 mm (Med) Slicing Disc* KFP7SL4 Mini Bowl with Storage Lid** KFP7MB 4 mm (Med) Shredding Disc* KFP7SH4 Mini Blade (for Mini Bowl)** KFP7MBL 6 mm (Thick) Slicing Disc* KFP7SL6 Chef’s Bowl KFP72CB 6 mm (Thick) Shredding Disc* KFP7SH6 Other Accessories Work Bowl Cover with Standard Tall Feed Tube KFP7WC KFP7WWCWH KFP72WB Julienne Disc* KFP7JU Egg Whip French Fry Cutting Disc* KFP7FF Citrus Press KFP7CP Parmesan/Ice Grating Disc* KFP7PI 5 Disc Set • 6 mm slicing* • 6 mm shredding* • French fry* • Julienne* • Parmesan/Ice grating* KFP7DS 2-Piece Food Pusher for Standard Tall Feed Tube KFP7DP 2-Piece Food Pusher for Ultra Wide Mouth™ Feed Tube KFP7WP Spatula/Cleaning Tool KFP7SP Chef’s Accessory Case KFP7SC * Must order Disc Stem (8211858) to operate all Accessory Discs. ** Must order Mini Blade (KFP7MBL) to use with Mini Bowl (KFP7MB). 17 KFP72EW ® Registered trademark of KitchenAid, U.S.A. ™ Trademark of KitchenAid, U.S.A., © 2008. All rights reserved. 6366AdZw608