1
Montage- und Trainingsanleitung Rückentrainer „VITAL”
Art.-Nr. 07820-400
D
GB
F
NL
E
Der Umwelt zuliebe: wir drucken auf 100% Altpapier!
I
PL
D
Inhalt
.
.
.
.
.
.
.
.
.
.
.
.
.
.
.
.
.
.
.
.
.
.
.
.
.
.
.
.
.
.
.
.
.
.
.
.
.
.
.
.
.
.
.
.
.
.
.
.
.
.
.
.
.
.
.
.
.
.
.
.
.
.
.
.
.
.
.
.
.
.
.
.
.
.
.
. .3
.12
.12
.13
.16
Ersatzteilbestellung . .
Trainingsanleitung . .
Dehnübungen . . . . .
Übungsbeschreibung
.
.
.
.
.
.
.
.
.
.
.
.
.
.
.
.
.
.
.
.
.
.
.
.
.
.
.
.
.
.
.
.
.
.
.
.
.
.
.
.
.
.
.
.
.
.
.
.
.
.
.
.
.
.
.
.
.
.
.
.
.
.
.
.
.
.
.
.
.
.
.
.
.
.
.
.
.
.
.
.
.
.
.
.
.
.
.
.
.
.
.
.
.
.
.
.
.
.
.
.
.
.
.
.
.16
.20
.20
.21
.
.
.
.
.
.
.
.
.
.
.
.
.
.
.
.
.
.
.
.
.
.
.
.
.
.
.
.
.
.
.
.
.
.
.
.
.
.
.
.
.
.
.
.
.
.
.
.
.
.
.
.
.
.
.
.
.
.
.
.
.
.
.
.
.
.
.
.
.
.
.
.
.
.
.
. .4
.12
.12
.13
.16
Ordering Spare Parts
Training instructions .
Stretching exercises .
Exercise Description .
.
.
.
.
.
.
.
.
.
.
.
.
.
.
.
.
.
.
.
.
.
.
.
.
.
.
.
.
.
.
.
.
.
.
.
.
.
.
.
.
.
.
.
.
.
.
.
.
.
.
.
.
.
.
.
.
.
.
.
.
.
.
.
.
.
.
.
.
.
.
.
.
.
.
.
.
.
.
.
.
.
.
.
.
.
.
.
.
.
.
.
.
.
.
.
.
.
.
.
.
.
.
.
.
.16
.23
.23
.24
Observations importantes . . . . . . . . . . . . .
Liste de vérification (contenu de l’emballage)
Gabarit pour système de serrage . . . . . . . .
Instructions d’assemblage . . . . . . . . . . . . .
Indication relative à la manipulation . . . . . .
.
.
.
.
.
.
.
.
.
.
.
.
.
.
.
.
.
.
.
.
.
.
.
.
.
.
.
.
.
.
.
.
.
.
.
.
.
.
.
.
.
.
.
.
.
.
.
.
.
.
. .5
.12
.12
.13
.16
Commander de pièces de rechange
Instructions d’entraînement . . . . . . .
Exercices d'étirement . . . . . . . . . .
Description des exercices . . . . . . .
.
.
.
.
.
.
.
.
.
.
.
.
.
.
.
.
.
.
.
.
.
.
.
.
.
.
.
.
.
.
.
.
.
.
.
.
.
.
.
.
.
.
.
.
.
.
.
.
.
.
.
.
.
.
.
.
.
.
.
.
.
.
.
.
.16
.26
.26
.27
.
.
.
.
.
.
.
.
.
.
.
.
.
.
.
.
.
.
.
.
.
.
.
.
.
.
.
.
.
.
.
.
.
.
.
.
.
.
.
.
.
.
.
.
.
.
.
.
.
.
. .6
.12
.12
.13
.16
Onderdelenbestellingen
Trainingsaanwijzing . . .
Rekoefeningen . . . . . . .
Oefeningen . . . . . . . .
.
.
.
.
.
.
.
.
.
.
.
.
.
.
.
.
.
.
.
.
.
.
.
.
.
.
.
.
.
.
.
.
.
.
.
.
.
.
.
.
.
.
.
.
.
.
.
.
.
.
.
.
.
.
.
.
.
.
.
.
.
.
.
.
.
.
.
.
.
.
.
.
.16
.29
.29
.30
Informaciones importantes . . . . . . . . . . . . . . . . . . .
Lista de control (contenido del paquete) . . . . . . . . . .
Ayuda para la medición del material de atornilladura
Instrucciones para el montaje . . . . . . . . . . . . . . . . .
Instrucciones de manejo . . . . . . . . . . . . . . . . . . . .
.
.
.
.
.
.
.
.
.
.
.
.
.
.
.
.
.
.
.
.
. .8
.12
.12
.13
.16
Piezas de recambio . . . . . . . . . .
Instrucciones para el entrenamiento
Ejercicios de estiramiento . . . . . .
Descripción de los ejercicios . . . .
.
.
.
.
.
.
.
.
.
.
.
.
.
.
.
.
.
.
.
.
.
.
.
.
.
.
.
.
.
.
.
.
.
.
.
.
.
.
.
.
.
.
.
.
.
.
.
.
.
.
.
.
.
.
.
.
.
.
.
.
.
.
.
.
.
.
.
.
.16
.32
.32
.33
Wichtige Hinweise . . . . . . . . . . . . .
Checkliste (Packungsinhalt) . . . . . . .
Messhilfe für Verschraubungsmaterial
Montageanleitung . . . . . . . . . . . . .
Handhabungshinweis . . . . . . . . . . .
GB
Contents
Important information . . . . . . . . . . .
Checklist (contents of packaging) . . .
Measuring help for screw connections
Assembly instructions . . . . . . . . . . .
Handling . . . . . . . . . . . . . . . . . . .
F
NL
Contenu
Inhoud
Belangrijke instructies . . . . . . .
Checklijst (verpakkingsinhoud) .
Meethulp voor schroefmateriaal
Montageaanwijzing . . . . . . . .
Bedieningsinstruktie . . . . . . . .
E
I
.
.
.
.
.
.
.
.
.
.
.
.
.
.
.
.
.
.
.
.
.
.
.
.
.
.
.
.
.
.
.
.
.
.
.
.
.
.
.
.
.
.
.
.
.
.
.
.
.
.
.
.
.
.
.
.
.
.
.
Contenuto
.
.
.
.
.
.
.
.
.
.
.
.
.
.
.
.
.
.
.
.
.
.
.
.
.
.
.
.
.
.
.
.
.
.
.
.
.
.
.
.
.
.
.
.
.
.
.
.
.
.
.
.
.
.
.
.
.
.
.
.
.
.
.
.
.
.
.
.
.
.
. .9
.12
.12
.13
.16
Pezzi di ricambio . . . . . .
Istruzioni di allenamento .
Esercizi di stiramento . . .
Descrizione dell’esercizio
.
.
.
.
.
.
.
.
.
.
.
.
.
.
.
.
.
.
.
.
.
.
.
.
.
.
.
.
.
.
.
.
.
.
.
.
.
.
.
.
.
.
.
.
.
.
.
.
.
.
.
.
.
.
.
.
.
.
.
.
.
.
.
.
.
.
.
.
.
.
.
.
.
.
.
.
.
.
.
.
.
.
.
.
.
.
.
.
.
.
.
.
.16
.35
.35
.36
.
.
.
.
.
.
.
.
.
.
.
.
.
.
.
.
.
.
.
.
.
.
.
.
.
.
.
.
.
.
.
.
.
.
.
.
.
.
.
.
.
.
.
.
.
.
.
.
.
.
.
.
.
.
.
.
.
.
.
.
.
.
.
.
.
.
.
.
.
.
.10
.12
.12
.13
.16
Części zamiennych . . .
Instrukcja treningowa . .
Ćwiczenia rozciągające
Opis ćwiczeń . . . . . . .
.
.
.
.
.
.
.
.
.
.
.
.
.
.
.
.
.
.
.
.
.
.
.
.
.
.
.
.
.
.
.
.
.
.
.
.
.
.
.
.
.
.
.
.
.
.
.
.
.
.
.
.
.
.
.
.
.
.
.
.
.
.
.
.
.
.
.
.
.
.
.
.
.
.
.
.
.
.
.
.
.
.
.
.
.
.
.
.
.
.
.
.
.16
.38
.38
.39
Spis treści
Ważne informacje . . . . . . . . . . . . . .
Lista kontrolna (zawartość opakowania)
Wzornik do połączeń śrubowych . . . .
Instrukcja montażu . . . . . . . . . . . . . .
Wskazówki obsługowe . . . . . . . . . . .
2
.
.
.
.
.
Indice
Indicazioni importanti . . . . . . . . . . . .
Lista di controllo (contenuto del pacco)
Misura per materiale di avvitamento . .
Istruzioni di montaggio . . . . . . . . . . .
Avvertenze per il maneggio . . . . . . . .
PL
.
.
.
.
.
.
.
.
.
D
Wichtige Hinweise
Bitte lesen Sie diese Anleitung vor der Montage und der ersten Benutzung aufmerksam durch. Sie erhalten wichtige Hinweise für Ihre Sicherheit sowie den Gebrauch und die Wartung des Fitnessgerätes. Bewahren Sie die Anleitung zur Information bzw. für Wartungsarbeiten oder Ersatzteilbestellungen sorgfältig auf.
Zu Ihrer Sicherheit
■
■
■
■
■
■
Das Gerät darf nur für seinen bestimmungsgemäßen Zweck verwendet werden, d.h. für das Körpertraining erwachsener Personen.
Jegliche andere Verwendung ist unzulässig und möglicherweise
gefährlich. Der Hersteller kann nicht für Schäden verantwortlich
gemacht werden, die durch nicht bestimmungsgemäßen Gebrauch verursacht wurden.
Sie trainieren mit einem Gerät, das sicherheitstechnisch nach
neuesten Erkenntnissen konstruiert wurde. Mögliche Gefahrenstellen, die Verletzungen verursachen könnten, sind bestmöglich vermieden und abgesichert.
Das Gerät entspricht der Klasse H der Sicherheitsnorm DIN EN
957-1/-2/-4 und ist damit nicht für den therapeutischen Einsatz
geeignet.
Durch unsachgemäße Reparaturen und bauliche Veränderungen (Demontage von Originalteilen, Anbau von nicht zulässigen Teilen, usw.) können Gefahren für den Benutzer entstehen.
Beschädigte Bauteile können Ihre Sicherheit und die Lebensdauer des Gerätes beeinträchtigen. Tauschen Sie deshalb beschädigte oder verschlissene Bauteile sofort aus und entziehen
Sie das Gerät bis zur Instandsetzung der Benutzung. Verwenden Sie im Bedarfsfall nur Original KETTLER–Ersatzteile.
■
■
■
■
■
■
Führen Sie bei regelmäßigem und intensivem Trainingsbetrieb
ca. alle 1 – 2 Monate Kontrollen aller Geräteteile, insbesondere der Schrauben und Muttern durch.
Um das konstruktiv vorgegebene Sicherheitsniveau dieses Gerätes langfristig garantieren zu können, sollte das Gerät regelmäßig vom Spezialisten (Fachhandel) geprüft und gewartet werden (einmal im Jahr).
Weisen Sie anwesende Personen (insbesondere Kinder) auf
mögliche Gefährdungen während der Übungen hin. Dies gilt im
besonderen Maße für den Bewegungsbereich der Hantelscheiben.
Lassen Sie vor Aufnahme des Trainings durch Ihren Hausarzt
klären, ob Sie gesundheitlich für das Training mit diesem Gerät
tauglich sind. Der ärztliche Befund sollte Grundlage für den Aufbau Ihres Trainingsprogramms sein. Falsches oder übermäßiges
Training kann zu Gesundheitsschäden führen.
Alle hier nicht beschriebenen Eingriffe/Manipulationen am
Gerät können eine Beschädigung hervorrufen oder auch eine
Gefährdung der Person bedeuten. Weitergehende Eingriffe sind
nur vom KETTLER–Service oder von KETTLER geschultem Fachpersonal zulässig.
Im Zweifelsfall und bei Fragen wenden Sie sich bitte an Ihren
Fachhändler.
Zur Handhabung
■
■
■
■
■
Achten Sie bei der Wahl des Aufstellungsortes auf eine ausreichend große Belastbarkeit des Bodens!
Stellen Sie sicher, dass der Trainingsbetrieb nicht vor der ordnungsgemäßen Ausführung und Überprüfung der Montage aufgenommen wird.
Achten Sie darauf, daß während des Trainings alle notwendigen Sicherungselemente angelegt sind bzw. sich nicht lockern
können. Kontrollieren Sie vor jeder Benutzung des Gerätes immer alle Schraub– und Steckverbindungen sowie die jeweiligen
Sicherungseinrichtungen auf ihren korrekten Sitz.
Ein Aufstellen des Geräts in stark begangenen Räumen bzw. in
der Nähe von Hauptlaufrichtungen (Türen, Durchgänge usw.) ist
nicht zulässig.
Eine Verwendung des Gerätes in direkter Nähe von Feuchträumen ist wegen der damit verbundenen Rostbildung nicht zu
empfehlen. Achten Sie auch darauf, dass keine Flüssigkeiten
(Getränke, Schweiss, usw.) auf Teile des Gerätes gelangen. Dies
könnte zu Korrosionen führen.
■
■
■
■
■
Das Gerät sollte auf einem ebenen, schlagfesten Untergrund
aufgestellt werden. Legen Sie zur Stoßdämpfung geeignetes Puffermaterial unter (Gummimatten, Bastmatten oder dgl.). Vermeiden Sie harte Aufschläge der Gewichte.
Das Gerät ist als Trainingsgerät für Erwachsene konzipiert und
keinesfalls als Kinderspielgerät geeignet. Bedenken Sie, daß
durch das natürliche Spielbedürfnis und Temperament von Kindern oft unvorhergesehene Situationen entstehen können, die
eine Verantwortung seitens des Herstellers ausschließen. Wenn
Sie dennoch Kinder an das Gerät lassen, sind diese auf die
richtige Benutzung hinzuweisen und zu beaufsichtigen.
Grundsätzlich bedarf das Gerät keiner besonderen Wartung.
Verwenden Sie zur Säuberung und Pflege umweltfreundliche,
keinesfalls aggressive oder ätzende Mittel.
Bewahren Sie die Originalverpackung des Gerätes gut auf, damit sie später u.U. als Transportverpackung verwendet werden
kann.
Montagehinweise
■
■
Die Montage des Gerätes muß sorgfältig und von einer erwachsenen Person vorgenommen werden. Nehmen Sie im
Zweifelsfall die Hilfe einer weiteren, technisch begabten Person
in Anspruch.
Bitte prüfen Sie sofort nach Erhalt, ob alle zum Lieferumfang
gehörenden Teile vorhanden sind (s. Checkliste) und ob Transportschäden vorliegen. Sollte es Anlaß für Beanstandungen geben, wenden Sie sich bitte an Ihren Fachhändler.
■
■
Beachten Sie, dass bei jeder Benutzung von Werkzeug und bei
handwerklichen Tätigkeiten immer eine mögliche Verletzungsgefahr besteht. Gehen Sie daher sorgfältig und umsichtig bei
der Montage des Gerätes vor!
Sorgen Sie für eine gefahrenfreie Arbeitsumgebung, lassen Sie
z. B. kein Werkzeug umherliegen. Deponieren Sie z. B. Verpackungsmaterial so, dass keine Gefahren davon ausgehen
können. Bei Folien/Kunststofftüten für Kinder Erstickungsgefahr!
3
D
■
■
■
Wichtige Hinweise
Sehen Sie sich die Zeichnungen in Ruhe an, und montieren Sie
das Gerät entsprechend der Bilderfolge. Innerhalb der einzelnen Abbildungen ist der Montageablauf durch Großbuchstaben
vorgegeben.
Das für einen Montageschritt notwendige Verschraubungsmaterial ist in der dazugehörigen Bildleiste dargestellt. Setzen Sie
das Verschraubungsmaterial exakt entsprechend der Abbildungen ein. Alles erforderliche Werkzeug finden Sie im Kleinteilebeutel.
Bitte verschrauben Sie zunächst alle Teile lose und kontrollieren
Sie deren richtigen Sitz. Drehen Sie die selbstsichernden Muttern bis zum spürbaren Widerstand zuerst mit der Hand auf,
GB
■
■
anschließend ziehen Sie sie gegen den Widerstand (Klemmsicherung) mit einem Schraubenschlüssel richtig fest. Kontrollieren
Sie alle Schraubverbindungen nach dem Montageschritt auf
festen Sitz. Achtung: wieder gelöste Sicherheitsmuttern werden
unbrauchbar (Zerstörung der Klemmsicherung) und sind durch
Neue zu ersetzen.
Aus fertigungstechnischen Gründen behalten wir uns die Vormontage von Bauteilen (z.B. Rohrstopfen) vor.
Bei Geräten mit Seilführungen: achten Sie darauf, dass alle Seile korrekt befestigt sind. Dies gilt insbesondere für Latissimusstangen.
Assembly Instructions
Before assembling or using this fitness product, please read the following instructions carefully. They contain important
information for use and maintenance of the equipment as well as for your personal safety. Keep these instructions in a
safe place for maintenance purposes or for ordering spare parts.
For Your Safety
■
■
■
■
■
■
■
The unit should be used only for its intended purpose, i.e. for
physical exercise by adult persons.
Any other use of the equipment is prohibited and may be dangerous. The manufacturer cannot be held liable for damage or
injury caused by improper use of the equipment.
The unit has been designed in accordance with the latest standards of safety. Any features which may have been a possible
cause of injury have been avoided or made as safe as possible.
The unit complies with class H of the standard EN 957-1/-2-4.
It is therefore unsuitable for therapeutic use.
Incorrect repairs and structural modifications (e.g. removal or replacement of original parts) may endanger the safety of the user.
Damaged components may endanger your safety or reduce the
lifetime of the equipment. For this reason, worn or damaged
parts should be replaced immediately and the equipment taken
out of use until this has been done. Use only original KETTLER
spare parts.
If the equipment is in regular use, check all its components thor-
■
■
■
■
■
oughly every 1 – 2 months. Pay particular attention to the tightness of bolts and nuts.
To ensure that the safety level is kept to the highest possible standard, determined by its construction, this product should be
serviced regulary (once a year) by specialist retailers.
Instruct persons using the equipment (in particular children) on
possible sources of danger during exercising. This applies in
particular to the use of the weight-bar weights.
Before beginning your program of exercise, consult your doctor
to ensure that you are fit enough to use the equipment. Base
your program of exercise on the advice given by your doctor.
Incorrect or excessive exercise may damage your health.
Any interference with parts of the product that are not described
within the manual may cause damage, or endanger the person
using this machine. Extensive repairs must only be carried out
by KETTLER service staff or qualified personnel trained by KETTLER.
In case of enquiry, please contact your KETTLER dealer.
Handling the equipment
■
■
■
■
■
4
When choosing a place for the equipment please ensure that
the floor can withstand the additional weight/load.
Before using the equipment for exercise, check carefully to ensure that it has been correctly assembled.
During exercise, ensure that all the necessary safety elements
are in place and that they cannot work loose. Before use, always check all screws and plug-in connections as well as respective safety devices fit correctly.
Do not set the equipment up in rooms which are frequently used
or close to doors, entries etc.
It is not recommended to use or store the apparatus in a damp
room as this may cause it to rust. Please ensure that no part of
the machine comes in contact with liquids (drinks, perspiration
etc.). This may cause corrosion.
■
■
■
■
■
The surface on which the unit is placed must be firm and even.
Place rubber or straw mats under it to deaden any noise or impacts. Do not allow the weights to drop from a height.
The unit is designed for use by adults and children should not
be allowed to play with it. Children at play behave unpredictably and dangerous situations may occur for which the manufacturer cannot be held liable. If, in spite of this, children are
allowed to use the equipment, ensure that they are instructed in
its proper use and supervised accordingly.
Basically this equipment does not need any special maintenance.
Do not use corrosive or abrasive materials to clean the equipment. Ensure that such materials are not allowed to pollute the
environment.
Please keep original packaging of this article, so that it may be
used for transport at a later date, if necessary.
GB
Assembly Instructions
Instructions for Assembly
■
■
■
■
■
The equipment must be assembled with due care by an adult
person. If in doubt call upon the help of a second person, if possible technically talented.
Ensure that you have received all the parts required (see check
list ) and that they are undamaged. Should you have any cause
for complaint, please contact your KETTLER dealer.
Please note that there is always a danger of injury when working with tools or doing manual work. Therefore please be careful when assembling this machine.
Ensure that your working area is free of possible sources of danger, for example don’t leave any tools lying around. Always dispose packaging material in such a way that it may not cause
any danger. There is always a risk of suffocation if children
play with plastic bags!
Before assembling the equipment, study the drawings carefully
and carry out the operations in the order shown by the dia-
F
■
■
■
■
grams. The correct sequence is given in capital letters.
The fastening material required for each assembly step is shown
in the diagram inset. Use the fastening material exactly as instructed. The required tools are supplied with the equipment.
Bolt all the parts together loosely at first, and check that they
have been assembled correctly. Tighten the locknuts by hand until resistance is felt, then use spanner to finally tighten nuts completely against resistance (locking device). Then check that all
screw connections have been tightened firmly. Attention: once
locknuts have been unscrewed they no longer function correctly
(the locking device is destroyed), and must be replaced.
For technical reasons, we reserve the right to carry out preliminary assembly work (e.g. addition of tubing plugs).
For machines with rope systems: please ensure that all ropes are
fixed correctly. This is especially important for latissimus bars.
Instructions de montage
Lire attentivement les présentes instructions avant le montage et la première utilisation de l'appareil. Elles contiennent
des renseignements importants relatifs à la sécurité des personnes ainsi qu'à l'emploi et à l'entretien de la station d'entraînement. Conserver soigneusement lesdites instructions pour d'éventuels renseignements ainsi que pour effectuer
l'entretien de l'appareil ou commander des pièces de rechange.
Pour votre sécurité
■
■
■
■
■
■
L'appareil ne doit être utilisée que pour les fins auxquelles elle
est destinée, c'est-à-dire pour l'entraînement des adultes.
Tout autre emploi est interdit, voire dangereux. Le fabricant ne
pourra être rendu responsable de dommages causés par l'emploi inadéquat de l'appareil.
Vous vous entraînez avec un appareil dont la technique et la sécurité correspondent aux exigences modernes. Les sources possibles de danger qui pourraient entraîner des blessures ont été
soit supprimées, soit sécurisées.
L´appareil est conforme à la classe H de la norme EN 957-1/2/-4 et convient donc pour soins thérapeutiques.
Les réparations inadéquates et les modifications apportées à la
construction de l'appareil (démontage des pièces d'origine,
montage de pièces non autorisées, etc.) peuvent entraîner des
risques imprévus pour l'utilisateur.
Les composants endommagés peuvent affecter votre sécurité et
la durée de vie de l'appareil. On remplacera donc sans tarder
les composants usés ou endommagés et on interdira l'emploi de
l'appareil aussi longtemps qu'ils n'auront pas été remplacés.
N'utiliser que des pièces de rechange KETTLER d'origine.
■
■
■
■
■
■
En cas d'entraînement régulier et intensif, il y a lieu de contrôler, tous les mois ou tous les 2 mois, toutes les pièces de l'appareil et en particulier les vis et les écrous.
Afin de garantir de sécurité indiqué par le construction à long
terme, l’appareil devrait être contrôlé et révisé réulièrement (une
fois par ans) par un spécialiste (revendeur spécialisé).
Attirer l'attention des personnes présentes, surtout des enfants,
sur les dangers qu'ils courent pendant les exercices. Cela est
surtout valable pour la zone de mouvement des haltères.
Avant de commencer, consulter son médecin traitant pour s'assurer que l'entraînement avec l'appareil n'est pas nuisible à la
santé. Son diagnostic devrait servir de base pour la composition
de son programme de travail. Un entraînement exagéré ou mal
organisé peut être nuisible à la santé.
Touts manipulation/modification á l’appareil peut provoquer
des dommage ou représenter un danger de la personne. Des
modifications ne peuvent être apportées que par du personnel
qualifié formé par la Ste. KETTLER.
On cas de doute, on est prié de s'adresser à son concessionnaire KETTLER.
5
F
Instructions de montage
Utilisation
■
■
■
■
■
Avant le début du montage, prévoir une surface au sol importante!
Veiller à ce que l'on ne commence pas à s'entraîner avant que
le montage n'ait été effectué complètement et contrôlé.
S'assurer que pendant l'entraînement, les dispositifs de sécurité
nécessaires sont en fonction et qu'ils ne puissent se desserrer.
Avant chaque utilisation, vérifier toujour les vis et les parties emboîtables, afin que les éléments correspondent et soient sécurisés.
Il n'est pas permis de monter l'appareil dans des lieux très fréquentés ni dans les environs de passage de la circulation (tels
que portes, passages, etc.).
Il n’est pas recommandable d’utiliser cet appareil dans des endroits humides, car à la longue, la rouille attaquerait en particulier la surface frottante du volant d’inertie. Veillez à ce qu'aucun liquide (boisson, sueur etc.) n'entre en contact avec des parties de l'appareil. Cela pourrait entraîner de la corrosion.
■
■
■
■
■
L'appareil devrait être monté sur un sol plat et ferme. Pour amortir les chocs poser sous l'appareil soit (un tapis de caoutchouc,
de raphia ou autre semblable). Eviter les coups durs avec les
disques.
L'appareil a été conçu pour l'entraînement des adultes et ne doit
pas servir de jouet aux enfants. On ne doit jamais perdre de
vue que de par leur tempérament et leurs besoins naturels de
jouer, les enfants peuvent être confrontés subitement à des situations imprévues, lesquelles excluent toute responsabilité de la
part du constructeur de l'appareil. Si, cependant, on autorise
les enfants à se servir de l'appareil, il y a lieu de leur donner
tous les renseignements nécessaires et de les surveiller.
Pas d'entretien particulier sur l'appareil.
Pour nettoyer et entretenir l'appareil, n'utiliser que des produits
écophiles, à l'exclusion de tout produit agressif ou caustique.
Conservez l’emballage d’origine du produit afin de pouvoir
l’utiliser ultérieurement comme emballage de transport.
Consignes de montage
■
■
■
■
■
L'appareil doit être monté soigneusement par une personne
adulte. Dans le doute, demandez de l'aide à une personne techniquement versée.
S´assurer que toutes les pièces (liste récapitulative) ont été fournies et que l'envoi n'a subi aucun dommage pendant le transport. En cas de réclamation, on est prié de s'adresser á son
concessionnaire.
N'oubliez pas que toute utilisation d'outils et toute activité artisanale présente toujours des risques de blessure. Travaillez
avec soin et soyez prudents lors du montage de l'appareil!
Assurez que la zone de travail ne présente aucun risque. Ne
laissez pas traîner par exemple des outils et rangez p. ex. le
matériau d'emballage de manière à ce qu'il ne constitue pas de
dangers. Des feuilles / sacs plastiques présentent un risque
d'étouffement pour les enfants!
Etudier les illustrations et procéder au montage dans l'ordre prévu par les différentes figures. Dans chacune d'elles l'ordre de
montage est marqué par des majuscules.
NL
■
■
■
■
La visserie nécessaire à chacune des opérations est représentée
en bordure de chacune des figures. Observer strictement l'ordre
d'utilisation des vis et écrous.L'outillage nécessaire se trouve
dans le sachet avec les petites pièces.
D'abord, assemblez toutes les parties sans serrer les vis et
contrôlez leur bonne mise en place. Serrez à la main les écrous
indesserrables jusqu'à perception de la résistance. Ensuite, serrez-les à fond contre la résistance (sûreté de serrage) à l'aide
d'une clé. Après cet étape de montage, contrôlez le serrage de
tous les assemblages à vis. Attention: des écrous de sûreté desserrés ne peuvent pas être réutilisés (destruction de la sûreté de
serrage) et sont à remplacer.
Nous nous réservons le droit de monter certains composants
(tels que les bouchons des tubes), et ce, pour des raisons techniques.
Sur les appareils munis de câble, vérifier que tous les câbles
soient bien fixés. Principalement sur la barre latissimus.
Montagehandleiding
Lees vóór montage en ingebruikname van het apparaat eerst deze instructies en bewaar ze zorgvuldig als informatiemateriaal, voor onderhoudswerkzaamheden en voor het bestellen van onderdelen.
Voor uw veiligheid
■
■
■
6
Het apparaat dient alleen gebruikt te worden voor het doel,
waarvoo het gemaakt is, n.l. voor de lichaamstraining van volwassen personen.
Ieder ander gebruik is niet toegestaan en kan mogelijkerwijze
gevaar opleveren. De fabrikant draagt generlei verantwoording
voor schade, die door onoordeelkundig gebruik is ontstaan.
U traint met een apparaat dat veiligheidstechnisch volgens de
nieuwste ontwikkelingen werd gekonstrueerd. Eventueel gevaarlijke delen, welke verwondingen zouden kunnen veroorzaken, zijn zoveel mogelijk vermeden of beveiligd.
■
■
■
Het apparaat komt met de klasse H van de norm EN 957-1/2/-4 overeen. Het apparaat is dan oak niet geschikt voor therapeutisch gebruikonderhoudsvrij.
Onoordeelkundige reparatie en of wijzigingen aan het apparaat (demontage van originele onderdelen, aanbrengen van
niet toegestane onderdelen enz.) kunnen gevaar voor de gebruiker opleveren.
Beschadigde delen kunnen uw veiligheid in gevaar brengen en
een negatieve invloed hebben op de levensduur van het apparaat). Verwissel daarom onmiddellijk beschadigde of versleten
NL
■
■
■
Montagehandleiding
onderdelen en gebruik het apparaat niet meer totdat de nieuwe
onderdelen zijn aangebracht.
Kontroleer bij regelmatig en intensief gebruik van het apparaat
elke maand of elke twee maanden alle onderdelen. Bijzondere
aandacht verdienen daarbij de bouten en moeren.
Om het construktief bepaalde veililgheidsniveau van dit apparaat langdurig te kunnen garanderen, dient het aparaat regelmatig door één specialist (vakhandelaar) gecontroleerd en onderhouden te worden (één keer per jaar).
Wijs (vooral kinderen) op mogelijk gevaar tijdens de training.
Dit geldt vooral voor de oefeningen met halters.
■
■
■
Raadpleeg alvorens met de training te beginnen uw huisarts en
vraag of de training met dit apparaat voor u geschikt is. Zijn
diagnose is belangrijk voor het bepalen van de intensiviteit van
uw training. Een verkeerd uitgevoerde of te intensieve training
kan uw gezondheid negatief beïnvloeden.
Alle ingrepen en manipulaties aan het apparaat die hier niet
beschreven worden kunnen een beschadiging veroorzaken of
een gevaar voor de persoon opleveren. Grotere ingrepen mogen alleen door KETTLER–service of door KETTLER geschoold
vakpersoneel uitgevoerd worden.
Wend u in geval van twijfel tot uw vakhandelaar.
Handleidinag
■
■
■
■
■
■
Let bij de keuze van de opstelplaats erop, dat de bodem een
grote belasting kan dragen.
Overtuig u ervan dat alle belangrijke schroefverbindingen goed
vastzitten en niet los kunnen raken.
Controleer altijd voor elk gebruik van het apparaat of alle
schroef– en steekverbindingen nog vast zitten en of de desbetreffende veiligheidsvoorzieningen nog voorhanden zijn.
Het apparaat mag niet daar, waar veel mensen langs komen,
bijvoorbeeld in de buurt van looppaden, deuren en doorgangen, worden opgesteld.
Het it niet aan te raden het apparaat langdurig in een vochtige
ruimte te gebruiken in verband met roestvorming. Let u erop, dat
er geen vloeistoffen (drank, transpiratie etc.) op onderdelen van
het apparaat terechtkomen. Dit kan tot roesten leiden.
Het apparaat dient op een geëgaliseerde, harde ondergrond te
■
■
■
■
worden opgesteld. Leg om de schokken te breken geschikt buffermateriaal (rubber of rieten matten en dergelijke) onder het
apparaat.
Het apparaat is bedoeld voor training van volwassenen en is
geen speelgoed. Door de natuurlijke speelsheid van kinderen
kunnen vaak situaties en gevaren ontstaan, die buiten de verantwoordelijkheid van de fabrikant vallen. Wanneer u desondanks kinderen van het apparaat gebruik wilt laten maken,
dient u hen op een juist gebruik te wijzen en ervoor te zorgen
dat een volwassene toezicht houdt.
In principe heeft het aparaat geen bijzonder onderhoud nodig.
Gebruik voor reiniging van het apparaat milieuvriendelijke, in
geen geval agressieve of bijtende schoonmaakmiddelen.
Bewaar de originele verpakking, zodat u deze later indien nodig als transportverpakking kunt gebruiken.
Montagehandleiding
■
■
■
■
■
Het apparaat dient door een volwassene gemonteerd te worden. In geval van twijfel de hulp van een extra, technisch aangelegde persoon inroepen.
Controleer bij ontvangst of het apparaat kompleet is (zie checklijst) en of het toestel tijdens het transport niet beschadigd is.
Voor reklamaties gelieve u zich tot uw vakhandelaar te wenden.
Let erop dat bij elk gebruik van gereedschap en bij handenarbeid er altijd kans op blessure is. Werk daarom zorgvuldig en
voorzichtig bij het monteren van het apparaat!
Zorg voor een gevarenvrije werkomgeving, laat bijvoorbeeld
geen gereedschap slingeren. Deponeer bijv. verpakkingsmateriaal zo, dat geen gevaren daaruit voort kunnen kommen. Bij
folies/plastic zakken bestaat verstikkingsgevaar!
Bekijk eerst rustig de tekeningen en monteer vervolgens het apparaat in de volgorde van de afbeeldingen. Op de afzonderlijke tekeningen wordt het montageverloop met hoofdletters
aangegeven c.q. wordt er door middel van een verwijzing in
de tekst op schriftelijke uitleg geattendeerd.
■
■
■
■
Het voor een bepaalde handeling benodigde schroefmateriaal
wordt in het bijbehorende kader afgebeeld. Gebruik het
schroefmateriaal precies zoals aangegeven op de afbeeldingen. Het benodigde gereedschap vindt u in het bijgeleverde gereedschapzakje.
Schroef eerst alle onderdelen losjes vast en controleer of ze op
de juist plek zitten. Draai de borgmoeren met de hand vast tot
u weerstand voelt, vervolgens schroeft u ze met een sleutel tegen de weerstand in (klemborg) goed vast. Controleer na elke
montagestap of de schroefverbindingen goed vast zitten. Pas
op: borgmoeren die weer los zijn gegaan zijn onbruikbaar (de
klemborg is vernield) en moet door een nieuwe vervangen worden.
Om productietechnische redenen behouden wij ons het recht
voor sommige delen (bij-voorbeeld buisstoppen) vóór te monteren.
Bij aparaaten met koorden: let erop, dat alle korden goed bevestigd zijn. Dit geldt vooral voor de latissimusstangen.
7
E
Indicaciones importantes
Lea detenidamente las presentes instrucciones antes de proceder al montaje y utilizar por primera vez el producto. Estas
instrucciones contienen importantes normas de seguridad, utilización y mantenimiento de este aparato de fitness. Guarde este folleto cuidadosamente como información y para llevar a cabo los trabajos de mantenimiento necesarios y para
pedir piezas de recambio.
Para su seguridad
■
■
■
■
■
■
Este aparato sólo debe ser utilizado con los fines especificados,
es decir, para el entrenamiento físico de una persona adulta.
Cualquier otra utilización no está autorizada y puede ser peligrosa. El fabricante declina cualquier responsabilidad por los
daños que pudieran resultar por la utilización no autorizada
del aparato.
Este aparato de entrenamiento físico ha sido construido con las
técnicas de seguridad más modernas. Aquellos posibles puntos
de peligro, que podrían provocar lesiones, se han evitado en
la medida de lo posible.
El aparato cumple con la norma de seguridad DIN EN 957-1/2/-4, clase H, por lo que no puede ser considerado como un
aparato con fines terapéuticos.
Cualquier reparación o modificación del aparato no autorizada (desmontaje de piezas originales, ampliación con piezas no
autorizadas etc.) puede representar un peligro para el usuario.
Cualquier pieza defectuosa puede ser un riesgo para su seguridad y reducir la duración del aparato. Por este motivo, cualquier
pieza defectuosa o desgastada debe ser inmediatamente reemplazada. No utilice el aparato antes de haberlo reparado. Utilice exclusivamente piezas de recambio originales de KETTLER.
■
■
■
■
■
■
Cuando el aparato es utilizado regularmente y se entrena intensamente con él, todas las piezas deben ser controladas
cada 1–2 meses, especialmente los tornillos y las tuercas.
Con el fin de asegurar permanentemente el nivel de seguridad,
este aparato debería ser controlado y mantenido periódicamente (una vez al año) por un especialista (comercio especializado).
Advierta a las personas presentes (sobre todo niños) de los posibles riesgos relacionados con la utilización del aparato, sobre
todo en el área de movimiento de los discos (pesas).
Antes de utilizar el aparato, consulte con su médico de cabecera si su estado de salud permite un entrenamiento de este
tipo. El diagnóstico médico debería ser la base de su programa
de entrenamiento. Un entrenamiento erróneo o exagerado puede representar un peligro para la salud.
Cualquier intervención / manipulación del aparato que no haya
sido descrita en el presente folleto puede ocasionar daños materiales y físicos. Cualquier modificación en el aparato sólo deberá ser realizada por el servicio técnico de KETTLER o por personal debidamente instruido por KETTLER.
En caso de duda o de tener preguntas, póngase en contacto
con su comerciante especializado.
Manejo del aparato
■
■
■
■
■
¡Asegúrese de que el suelo sobre el que ha colocado el aparato tiene la resistencia suficiente!
Asegúrese de que el aparato no sea utilizado antes de haber
concluido completamente con el montaje y de haber controlado el correcto funcionamiento del aparato.
Asegúrese de que durante la utilización del aparato todos los
elementos de seguridad estén colocados y que no se puedan
soltar. Antes de utilizar el aparato, asegúrese siempre de que
todos los tornillos estén correctamente apretados y que los dispositivos de seguridad estén colocados como corresponde.
No está permitido instalar el aparato en espacios muy concurridos o cerca de puertas, pasillos etc.
No se recomienda instalar el aparato cerca de fuentes de humedad, ya que éste podría oxidarse. Evite que líquidos (refrescos, sudor etc.) puedan acceder a piezas del aparato, ya que
éstas podrían corroerse.
■
■
■
■
■
El aparato debe montarse sobre una superficie plana y resistente a los golpes. Para amortiguar los golpes, utilice un material apropiado (láminas de goma, alfombrillas de fibra etc.).
Evitar dar fuertes golpes con los pesos.
Este aparato ha sido concebido como aparato de entrenamiento de personas adultas y no como juego de niños. Tenga
en cuenta que el temperamento y afán natural de jugar de los
niños a veces puede llevarlos a situaciones impredecibles, de
las cuales no se puede responsabilizar al fabricante. Si a pesar
de ello usted deja que los niños utilicen el aparato, instrúyalos
antes y vigílelos mientras lo utilizan.
En principio, este aparato no precisa un mantenimiento especial.
Para limpiar el aparato, utilice productos respetuosos con el medio ambiente, que no sean agresivos o corrosivos.
No tire el embalaje original del aparato, ya que podría necesitarlo más adelante para un eventual transporte.
Instrucciones de montaje
■
■
8
El montaje debe ser cuidadosamente llevado a cabo por una
persona adulta. En caso de dudas, se recomienda consultar
con otra persona con conocimientos técnicos.
Controle inmediatamente después de la recepción, si el embalaje contiene todas las piezas (ver lista de chequeo) y si el aparato no ha sufrido daños durante el transporte. Si hay un problema, póngase en contacto con el comercio especializado.
■
■
Tenga en cuenta que al realizar un trabajo manual y al utilizar
cualquier herramienta siempre existe el riesgo de lesionarse.
¡Sea cuidadoso durante el montaje del aparato!
Procure eliminar los riesgos durante el montaje. No deje las herramientas por el suelo, deseche el material del embalaje de tal
manera que no represente un riesgo. Recuerde que las bolsas
de plástico representan un peligro para los niños (¡peligro de
asfixia!).
E
■
■
■
Indicaciones importantes
Estudie las ilustraciones detenidamente y monte el aparato en
la secuencia indicada en las figuras. En cada dibujo, la secuencia de montaje está indicada por letras mayúsculas.
Los tornillos y las tuercas necesarias para el montaje del aparato están representados en el dibujo correspondiente. Utilice
los tornillos y las tuercas exactamente según las instrucciones indicadas. Encontrará todas las herramientas necesarias en la
bolsa de pequeños accesorios.
Haga primero las uniones sin apretar las tuercas, controlando
la posición correcta de los elementos ensamblados. Apriete primero las tuercas de seguridad a mano hasta que note que ofrecen una cierta resistencia y seguidamente apriételas contra la
I
■
■
resistencia (seguridad de apriete) con una llave apropiada. Una
vez terminado el montaje del aparato, controle otra vez si ha
apretado todas las tuercas. Atención: Las tuercas sólo pueden
utilizarse una sola vez, ya que su dispositivo de seguridad queda destruido después de apretarlas. Utilice tuercas nuevas.
Por razones de fabricación, nos reservamos suministrar ciertos
elementos previamente montados (p. ej. los tapones de los tubos).
En los aparatos con guías de cables: asegúrese de que todos
los cables están correctamente montados, sobre todo las barras
“latissimus”.
Informazioni importanti
Leggere attentamente le presenti istruzioni prima del montaggio e dell'uso. Esse contengono importanti informazioni per
la Vostra sicurezza nonché per l'uso e la manutenzione dell'attrezzo ginnico. Custodire accuratamente queste istruzioni
per informazione ossia per i lavori di manutenzione nonché per l'ordinazione di ricambi.
Per la Vostra sicurezza
■
■
■
■
■
■
L'attrezzo ginnico deve essere impiegato esclusivamente per lo
scopo previsto, vale a dire per l'allenamento fisico di persone
adulte.
Non è ammesso nessun altro impiego, anche perché altrimenti
non sarebbero da escludere imminenti pericoli. Il costruttore
non potrà essere reso responsabile per eventuali danni attribuibili ad un impiego non appropriato.
Questo attrezzo ginnico è stato costruito secondo le nozioni tecniche più attuali ed è pertanto sicuro. I possibili punti di pericolo, che possono causare delle lesioni, sono ampiamente protetti, per prevenire qualsiasi pericolo.
L'attrezzo ginnico corrisponde alla classe H della norma di sicurezza DIN EN 957-1/-2/-4 e non è dunque adatto per applicazioni terapeutiche.
In seguito a riparazioni o trasformazioni costruttive non appropriate (smontaggio di componenti originali, applicazione di
componenti non approvati, ecc.), non sono da escludere imminenti pericoli per l'utente.
I componenti danneggiati possono pregiudicare la Vostra sicurezza e la durata dell'attrezzo ginnico. Pertanto, si raccomanda
di sostituire subito i componenti danneggiati esclusivamente con
dei ricambi originali e di non utilizzare più l'attrezzo ginnico,
finché non sono stati completati i necessari lavori di riparazione.
Utilizzare esclusivamente ricambi originali della KETTLER.
■
■
■
■
■
■
In un regolare allenamento fisico si raccomanda di controllare
accuratamente almeno ogni 1–2 mesi tutti i componenti dell'attrezzo ginnico, in particolare le viti e i dadi.
Al fine di poter garantire a lungo il livello di sicurezza dell'attrezzo ginnico, sarebbe opportuno incaricare uno specialista
(commercio specializzato) ad eseguire periodicamente (una
volta all'anno) i controlli e i necessari lavori di manutenzione.
Avvisare anche le altre persone presenti circa i possibili pericoli
a cui sono esposte durante l'allenamento fisico (in particolare i
bambini). Ciò vale particolarmente per le zone dei componenti mobili e dei bilancieri nonché dei pesi.
Prima di iniziare gli allenamenti fisici si raccomanda di consultare un medico, per chiarire se queste attività sono anche adatte dal punto di vista della salute. Il referto medico dovrebbe essere un fondamento per il programma d'allenamento. Un allenamento sbagliato oppure eccessivo può comunque causare dei
danni alla salute.
Tutti gli interventi / manipolazioni non qui descritti per l'attrezzo ginnico possono causare dei danni nonché costituire imminenti pericoli per le persone. Gli interventi periodici devono essere assolutamente effettuati solo da parte del servizio di assistenza della KETTLER o dal personale appositamente addestrato e specializzato della stessa.
In caso di dubbi o altre questioni, non esitate a consultare il Vostro rivenditore di fiducia.
Impiego
■
■
■
Accertarsi che il pavimento su cui installare l'attrezzo ginnico
mostri una sufficiente capacità di carico!
Non iniziare le attività d'allenamento finché non sono stati eseguiti correttamente nonché controllati tutti i lavori di montaggio.
Accertarsi durante l'allenamento che siano applicati correttamente tutti i necessari elementi di sicurezza e che non possano
distaccarsi o allentarsi. Prima di utilizzare l'attrezzo ginnico si
■
raccomanda di controllare sempre tutti i collegamenti a vite e
ad innesto nonché i rispettivi dispositivi di sicurezza, affinché si
possa essere certi che abbiano una sede fissa e sicura.
Non è ammesso installare l'attrezzo ginnico in luoghi molto frequentati ovvero in prossimità di corridoi principali o vie di fuga
(porte, passaggi, ecc.).
9
I
■
■
Informazioni importanti
Evitare di installare l'attrezzo ginnico in prossimità di ambienti
umidi, a causa della formazione di ruggine. Evitare inoltre la
penetrazione di liquidi (bevande, sudore, ecc.) nei componenti
dell'attrezzo ginnico. Ciò potrebbe causare delle notevoli corrosioni.
L'attrezzo ginnico è stato concepito come attrezzo di allenamento per adulti e non è un giocattolo per bambini. Non dimenticate che, dato l'istinto naturale di giocco e il temperamento dei bambini, spesso si possono produrre situazioni che
escludono la responsabilità del costruttore. Se, ciononostante, i
bambini usano l'attrezzo, bisogna informarli sull'uso corretto
dello stesso e sorvegliarli.
■
■
■
■
L'attrezzo ginnico deve essere sistemento su terreno piano e solido. Per l’ammortizzazione mettete sotto materiale tampone
adeguato (stuoie di gomma, rafia o simili). Evitate di far sbattere i pes.
L’attrezzo non ha bisogno di una manutenzione particolare.
Per la pulizia e la cura usate sostanze ecologiche e mai sostanze corrosive e aggressive.
Conservate bene l’imballaggio originale del veicolo per usarlo
in eventuali trasporti successivi.
Istruzioni di montaggio
■
■
■
■
■
L'attrezzo ginnico deve essere montato accuratamente da parte di una persona adulta. In caso di dubbi, si raccomanda di
farsi aiutare da un'altra persona, che sia in possesso dei necessari requisiti tecnici.
Controllare immediatamente dopo la ricezione se sono presenti tutti i componenti appartenenti alla dotazione (si veda la lista
di controllo) e se sono presenti dei danni di trasporto. In caso
di eventuali contestazioni, Vi preghiamo di rivolgerVi al Vostro
rivenditore di fiducia.
Ogni volta che si utilizzano degli utensili e durante l'esecuzione dei lavori non sono mai da escludere dei possibili pericoli di
riscontrare delle lesioni. Pertanto, si raccomanda di procedere
sempre con la massima prudenza durante le operazioni di montaggio dell'attrezzo ginnico!
Lavorare sempre in ambienti esenti da qualsiasi pericolo e non
lasciare ad esempio in giro inutilmente gli utensili di lavoro. Deporre ad esempio il materiale d'imballaggio in maniera tale da
escludere qualsiasi pericolo. Mantenere al di fuori della portata dei bambini pellicole o sacchetti di materiale sintetico. Pericolo d'asfissia!
Osservare attentamente e con calma i disegni e montare l'attrezzo ginnico secondo l'ordine delle illustrazioni. Il procedi-
PL
■
■
■
■
mento di montaggio viene riprodotto nelle singole illustrazioni
che sono inoltre evidenziate in lettere maiuscole.
Il materiale d'avvitatura necessario per il montaggio è illustrato
nella rispettiva barra delle figure, e deve essere impiegato
come mostrato nelle rispettive illustrazioni. Tutti i necessari utensili si trovano nel sacchetto dei componenti più piccoli.
Avvitare dapprima tutti i componenti, senza serrarli definitivamente, e controllarne successivamente la sede fissa. Avvitare i
dadi autobloccanti a mano fino ad un sensibile punto di resistenza e serrarli successivamente oltre questo punto di resistenza (sicura bloccante) con un'apposita chiave. Controllare tutti i
raccordi filettati dopo il montaggio, per accertarsi che abbiano
una sede fissa. Attenzione: i dadi di sicurezza allentati non
sono più utilizzabili (distruzione della sicura bloccante) e devono perciò essere sostituiti con dei nuovi.
Per motivi tecnici di produzione ci riserviamo il premontaggio
dei componenti costruttivi (ad esempio tappi per tubi).
Negli attrezzi provvisti di guide funicolari: accertarsi che tutte
le funi siano correttamente fissate. Ciò vale in particolare per le
aste da latissimus.
Ważne informacje
Przed montażem i pierwszym użyciem prosimy uważnie przeczytać niniejszą instrukcję. Zawiera
ona ważne informacje dotyczące bezpieczeństwa, stosowania i konserwacji przyrządu. Instrukcję
radzimy zachować, aby również później możliwe było skorzystanie z zawartych w niej informacji
dotyczących choćby konserwacji lub zamawiania części zamiennych.
Bezpieczeństwo
■
■
■
Przyrząd wolno stosować wyłącznie zgodnie z jego przeznaczeniem, to znaczy do treningu fizycznego osób dorosłych.
Każde inne zastosowanie jest niedopuszczalne i może być niebezpieczne. Producenta nie można pociągać do odpowiedzialności za szkody spowodowane niewłaściwym stosowaniem.
Trening wykonywany jest na przyrządzie skonstruowanym na
podstawie najnowszej wiedzy z dziedziny techniki bezpieczeństwa. Ewentualne niebezpieczne elementy mogące być
źródłem obrażeń zostały możliwie najlepiej wyeliminowane i
zabezpieczone.
10
■
■
■
Przyrząd odpowiada klasie H według norm bezpieczeństwa
DIN EN 957-1/-2/-4. Nie nadaje się on zatem do stosowania
terapeutycznego.
Nieprawidłowe naprawy i zmiany konstrukcyjne (demontaż
oryginalnych części, montowanie niedozwolonych części itp.)
spowodować mogą zagrożenia dla użytkownika.
Uszkodzone części mogą zagrozić bezpieczeństwu i skrócić
okres użytkowania przyrządu. Uszkodzone lub zużyte części
należy zatem natychmiast wymienić, a przyrząd aż do naprawy wycofać z użytku. Stosować wyłącznie oryginalne części
zamienne firmy KETTLER.
PL
■
■
■
■
Ważne informacje
W około jedno– lub dwumiesięcznych odstępach czasu należy
kontrolować wszystkie elementy przyrządu, a zwłaszcza śruby,
wkręty i nakrętki.
Celem trwałego zapewnienia konstrukcyjnie określonego poziomu bezpieczeństwa przyrząd powinien być regularnie (raz
do roku) sprawdzany i konserwowany przez specjalistę (specjalistyczne placówki handlowe).
Obecne przy treningu osoby (zwłaszcza dzieci) należy uprzedzić o ewentualnych zagrożeniach. Dotyczy to zwłaszcza
strefy ruchu pierścieni sztangi.
Przed rozpoczęciem treningu należy skonsultować się z lekarzem i wyjaśnić, czy nie ma przeciwwskazań zdrowotnych do tre-
■
■
ningu na tym przyrządzie. Opinia lekarza powinna stanowić
podstawę dla opracowania indywidualnego programu treningowego. Niewłaściwy lub nadmierny trening może być szkodliwy dla zdrowia.
Wszelkie nie opisane tu ingerencje / manipulacje na przyrządzie mogą prowadzić do uszkodzenia lub nawet stanowić zagrożenie dla osób. Dalej idących zmian dokonywać może tylko
i wyłącznie serwis firmy KETTLER lub wyspecjalizowany personel przeszkolony przez firmę KETTLER.
Wątpliwości i pytania należy kierować do specjalistycznej
placówki handlowej.
Obsługa
■
■
■
■
■
Przy wyborze miejsca ustawienia należy pamiętać o tym, aby
podłoga miała dostateczną nośność!
Natychmiast po otrzymaniu przyrządu sprawdzić, czy są wszystkie części należące do zakresu dostawy (patrz lista kontrolna) i czy nie nastąpiły szkody transportowe. W przypadku
zastrzeżeń należy zwrócić się do specjalistycznej placówki
handlowej, w której przyrząd został zakupiony.
Proszę mieć na uwadze, że przy każdym używaniu narzędzi i
pracy ręcznej zawsze zachodzi niebezpieczeństwo skaleczenia się. Przyrząd należy zatem montować starannie i z zachowaniem wszelkiej ostrożności!
Ustawianie przyrządu w ruchliwych pomieszczeniach lub w pobliżu głównych tras ruchu (drzwi, przejścia itp.) nie jest dozwolone.
Ze względu na możliwość rdzewienia nie zaleca się stosowania przyrządu w pobliżu wilgotnych pomieszczeń. Proszę też
zwracać uwagę na to, by do elementów przyrządu nie przedostawały się płyny (napoje, pot itp.), gdyż może to doprowadzić do korozji.
■
■
■
■
■
Przyrząd należy ustawiać na równym podłożu odpornym na
uderzenia. Do amortyzacji uderzeń stosować odpowiedni
podkład (maty gumowe lub z łyka, itp.). Unikać silnych uderzeń
ciężarów.
Przyrząd jest przeznaczony do treningu dla osób dorosłych i w
żadnym razie nie jest zabawką dla dzieci. Z naturalnej potrzeby zabawy oraz temperamentu dzieci wyniknąć mogą nieprzewidywalne sytuacje, wykluczające odpowiedzialność producenta. Jeżeli mimo to pozwoli się dzieciom używać przyrządu, to należy je zapoznać z prawidłowym stosowaniem i nadzorować.
Przyrząd nie wymaga w zasadzie żadnej szczególnej konserwacji.
Do czyszczenia i konserwacji stosować należy środki przyjazne dla środowiska, w żadnym razie nie używać środków agresywnych lub żrących.
Radzimy zachować oryginalne opakowanie przyrządu, by w
przyszłości można było je wykorzystać, na przykład do transportu.
Montaż
■
■
■
■
■
Montaż przyrządu musi być wykonany starannie i przez osobę
dorosłą. W przypadku wątpliwości zwrócić się o pomoc do
osoby bardziej uzdolnionej technicznie.
Natychmiast po otrzymaniu przyrządu sprawdzić, czy są wszystkie części należące do zakresu dostawy (patrz lista kontrolna) i czy nie nastąpiły szkody transportowe. W przypadku
zastrzeżeń należy zwrócić się do specjalistycznej placówki
handlowej, w której przyrząd został zakupiony.
Proszę mieć na uwadze, że przy każdym używaniu narzędzi i
pracy ręcznej zawsze zachodzi niebezpieczeństwo skaleczenia się. Przyrząd należy zatem montować starannie i z zachowaniem wszelkiej ostrożności!
Należy zatroszczyć się o bezpieczne otoczenie miejsca pracy,
na przykład nie rozkładać bezładnie narzędzi. Przykładowo
opakowanie należy tak zdeponować, by nie stanowiło ono
źródła zagrożeń. Uwaga: folie i torby z tworzywa sztucznego
stwarzają dla dzieci niebezpieczeństwo uduszenia się!
Należy dokładnie przypatrzyć się rysunkom i zmontować przyrząd zgodnie z kolejnością przedstawioną na ilustracji. Kolejność montażu zaznaczona jest na poszczególnych ilustracjach wielkimi literami.
■
■
■
■
Materiał montażowy potrzebny do danej operacji montażowej
przedstawiony jest na odpowiedniej ilustracji. Stosować materiał montażowy dokładnie według ilustracji. Potrzebne
narzędzia znajdują się w torebce z drobnymi częściami.
Na początku należy poprzykręcać wszystkie części luźno i
sprawdzić ich prawidłowe osadzenie. Nakrętki samozakleszczające dokręcić ręcznie aż opór stanie się odczuwalny, a
następnie mocno dokręcić je kluczem przeciwko oporowi (zabezpieczenie zaciskowe). Po tej fazie montażu skontrolować wszystkie połączenia śrubowe pod względem prawidłowego zamocowania. Uwaga: poluzowane ponownie nakrętki samozakleszczające stają się bezużyteczne (następuje zniszczenie
zabezpieczenia zaciskowego) i należy je wymienić na nowe.
Ze względów technologicznych zastrzegamy sobie wstępny
montaż niektórych elementów (na przykład zatyczek rurowych).
W przypadku przyrządów z prowadnicami linek należy zatroszczyć się o to, by wszystkie linki były prawidłowo zamocowane. Dotyczy to zwłaszcza sztang wyciągu górnego.
11
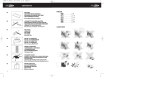
Checkliste (Packungsinhalt)
GB
F
NL
Checklist (contents of packaging)
E
Lista de control (contenido del paquete)
Liste de vérification (contenu de l’emballage)
I
Lista di controllo (contenuto del pacco)
PL
Checklijst (verpakkingsinhoud)
Lista kontrolna (zawartość opakowania)
2
1
1
M8x65
2
M8x70
2
M5x20
6
M8
4
ø16
4
ø25
2
ø21
2
1
2
1
2
2
1
2
Messhilfe für Verschraubungsmaterial
GB
Measuring help for screw connections
E
Ayuda para la medición del material de atornilladura
F
Gabarit pour système de serrage
I
Misura per materiale di avvitamento
NL
Meethulp voor schroefmateriaal
PL
12
Wzornik do połączeń śrubowych
1
Achten Sie bitte darauf, die Schraubenverbindung nur so fest anzuziehen, dass sich die
Rohre leichtgängig drehen lassen.
Ensure that the bolt joint is tightened just
enough to allow the tubings to turn easily.
Veiller à ce pue la visserie ne soit pas trop serree, por ue les tubes puissent tourner.
A
Let erop dat de schroefverbinding mag worden aangedraaid, dat de set buizen makkelijk gedraaid kan worden.
Atornille los tornillos de manera que el ensamblaje permita una rotación suave de los
tubos.
Far sì che i raccordi a vite vengano stretti in
modo tale da consentire di girare facilmente i
tubi.
B
Proszę pamiętać, że połączenia śrubowe
należy dokręcać tylko tak silnie, by rury
mogły się lekko obracać.
A
M8x70 ø16
B
ø16
M8x70 ø16
2
B
A
13
3
M8x65 ø21 ø25
4
14
5
M5x20
6
15
7
Handhabungshinweis
GB
F
NL
Handling
Indication relative à la manipulation
Bedieningsinstruktie
E
Instrucciones de manejo
I
Avvertenze per il maneggio
B
PL
Wskazówki obsługowe
A
Typenschild – Seriennummer
Type label – Serial number
Plaque signalétique – Numèro de serie
Typeplaatje – Seriennummer
Placa identificativa – Número de serie
Targhetta tecnica – Numero di serie
Tabliczka identyfikacyjna – Numer serii
HEINZ KETTLER
GmbH & Co. KG
D-59463 Ense-Parsit
Trainingsgerät nach
DIN EN 957-1, 5
Nicht für therapeutische Zwecke geeignet
Art.-Nr. 07961-800
Serien-Nr.: 1-334 O - 1801 00001
max Belastung 130 kg
Made in Germany
1
2
3
4
D
Ersatzteilbestellung
Geben Sie bei Ersatzteilbestellungen bitte die vollständige Artikelnummer, die Ersatzteilnummer, die benötigte Stückzahl sowie
die Seriennummer an.
Bestellbeispiel: Art.-Nr. 07820-400/Ersatzteil-Nr. 10100016/
Stück /Seriennummer: ........
Wichtig: Zu verschraubende Ersatzteile werden grundsätzlich
ohne Verschraubungsmaterial berechnet und geliefert. Falls Bedarf an entsprechendem Verschraubungsmaterial besteht, ist dieses durch den Zusatz „mit Verschraubungsmaterial“ bei der Ersatzteilbestellung anzugeben.
5
Heinz KETTLER GmbH & Co. KG · Postfach 1020 ·
D–59463 Ense-Parsit
A KETTLER Austria GmbH · Gewerbestraße 2 · A–5322 Hof
bei Salzburg
CH Trisport AG · Im Bösch · CH–6331 Hünenberg
www.kettler.net
D
16
GB
Ordering Spare Parts
F
Commander de pièces de rechange
When ordering spare parts, always state the full article number,
spare-partnumber, the quantity required and the S/N of the product.
En cas de commande de pièces de rechange, nous vous prions
de mentionner la référence article, le numéro de pièce de rechange, la quantité demandée et le numéro de série de l’appareil.
Example order: Art. no. 07820-400 / spare-part no. 10100016
/ 2 pieces / S/N......
Important: spare part prices do not include fastening material; if
fastening material (bolts, nuts, washers etc.) is required, this
should be clearly stated on the order by adding the words „with
fastening material“.
GB KETTLER GB Ltd. · KETTLER House, Merse Road · North
Moons Moat · Redditch, Worcestershire B98 9HL
USA KETTLER International Inc. · P.O. Box 2747 · Virginia Beach,
VA 23450-2747
http://www.kettler.net
Exemple de commande : no. d'art. 07820-400 / no. de pièce de
rechange 10100016 / no. de série ...
Important : les pièces de rechange visser sont toujours facturèes
et livrèes sans matèriel de vissage. Si vous avez besoin du matèriel de vissage correspondant, ceci doit être indiquè par le supplèment «avec matèriel de vissage» lors de la commande des
pièces de rechange.
NL KETTLER Benelux B.V. · Indumastraat 18 · NL–5753 RJ Deurne
B KETTLER Benelux B.V.
filiaal België · Brandekensweg 9 · B–2627 Schelle
F KETTLER France
5, Rue du Chateau · Lutzelhouse · F–67133 Schirmeck Cedex
http://www.kettler.net
NL
Onderdelenbestellingen
E
Piezas de recambio
Vermeld bij de onderdelenbestellingen a.u.b. het volledige artikelnummer, het onderdeelnummer, het benodigde aantal en het
serienummer van het apparaat.
Indicar con los pedidos de piezas de repuesto el número completo del artículo, el número de la pieza de repuesto, las unidades solicitadas y el número de serie del aparato.
Bestelvoorbeeld: artikelnr. 07820-400 / onderdeelnr. 10100016
/ 2 stucks / serienummer........
Belangrijk: Vast te schroeven onderdelen worden in principe zonder schroefmateriaal berekend en geleverd. Indien er behoefte
aan dit schroefmaterial bestaat, dan kan dit door de toevoeging
„met schroefmateriaal“ bij de bestelling worden vermeld.
Ejemplo: Nº del artículo: 07820-400 / Nº de la pieza de recambio: 12802003 / 1 pieza / Nº de serie: ...
Importante: las piezas de recambio que se debe atornillar siempre se suministran y facturan sin tornillos. Si necesita los tornillos
correspondientes, indíquelo en el suplemento “con tornillos” cuando haga el pedido.
KETTLER Benelux B.V. · Indumastraat 18 · NL–5753 RJ Deurne
KETTLER Benelux B.V.
filiaal België · Brandekensweg 9 · B–2627 Schelle
http://www.kettler.net
BM Sportech S.A. · C/ Terracina, 12 PLA-ZA · 50197 Zaragoza
http://www.bmsportech.es
NL
B
I
Parti di ricambio
Per l’ordinazione di parti di ricambio indicate il completo numero di articolo, della parte di ricambio, il numero di unit necessario nonchè il numero di serie dell’apparecchio.
Esempio di ordinazione: n. art. 07820-400 /n. parte di ricambio
70121840 / 2 unit /n. di serie...
Importante: le parti di ricambio da avvitare vengono fatturate e
fornite di principio senza materiali di avvitamento. Qualora si dovesse necessitare dell’apposito materiale di avvita-mento, questo
va indicato in occasione dell’ordinazione della parte di ricambio
aggiungendo „con materiale di avvitamento“.
KETTLER SRL
Strada Per Pontecurone 5 · I–15053 Castelnuovo Scriva (AL)
http://www.kettler.net
I
E
PL
Części zamiennych
Przy zamawianiu części zamiennych proszę podawać kompletny
numer artykułu, numer części zamiennej i numer serii urządzenia.
Przykład zamówienia: nr artykułu 07820-400 / nr części zamiennej 67000170 / 2 sztuki / nr kontrolny .........
Uwaga: Przykręcane części zamienne zasadniczo rozlicza i dostarcza się bez materiału montażowego. Jeżeli potrzebny jest stosowny materiał montażowy należy przy zamawianiu części zamiennych zaznaczyć to dopiskiem "mit Verschraubungsmaterial"
("z materiałem montażowym").
KETTLER Polska · al. Piastow 3 · PL–64-920 Pila
http://www.kettler.net
PL
17
Ersatzteilzeichnung und –liste
GB
F
NL
Spare parts drawing and list
E
Designación y lista de las piezas de recambio
Dessin et liste des pièces de rechange
I
Disegno ed elenco dei pezzi di ricambio
PL
Reserveonderdeeltekening en –lijst
Rysunek i lista części zamiennych
13
12
14
11
10
16
1
3
18
16 5
4
17 7
2
6
8
9
Ersatzteilzeichnung und –liste
GB
F
NL
Spare parts drawing and list
E
Designación y lista de las piezas de recambio
Dessin et liste des pièces de rechange
I
Disegno ed elenco dei pezzi di ricambio
Reserveonderdeeltekening en –lijst
Teil
Nr.
Bezeichnung
1
2
3
4
5
6
7
8
9
10
11
12
13
14
15
16
17
Standrohr vorne
Bodenschoner mit Aussparung (unten)
Bodenschoner mit Aussparung (seitlich)
Vierkantpuffer
Standrohr hinten
Abstandsrohr
Bodenschoner mit Aussparung
Polster 190mm
Tellerstopfen ø25 mm
Griffbügel
Griffschlauch
Lamellenstopfen
Abdeckkappe
Armpolster
Schraubenbeutel
Sicherungsbügel
U-Scheibe gewölbt ø21 mm
PL
Rysunek i lista części zamiennych
Stück
1
4
1
4
1
1
1
2
2
1
2
2
1
2
1
1
1
Ersatzteil-Nr.
für 7820-400
(silber/schwarz/rot)
94314116
70113600
70121432
10122005
94314409
94314256
70113610
10118044
10100044
97100445
10118080
10100016
70121434
94360151
94380390
97100324
97201270
19
D
Trainingsanleitung
Der Rückentrainer „VITAL“ ist speziell für das wirbelsäulenschonende Training der Rückenmuskulatur entwickelt worden. Gerade
in der heutigen Zeit, wo häufiges Sitzen vielfach zu muskulären
Schwächen im Rumpfmuskelbereich führt, ist ein regelmäßiges
Training der Rückenmuskulatur gesundheitlich wertvoll.
Grundsätzliches zu Dehnübungen:
■ Langsam in die Dehnstellung begeben
■ Maximale Dehnstellung unterhalb der Schmerzgrenze einnehmen
■ In der Dehnstellung 10 – 20 Sekunden verbleiben
■ Während der Dehnübung nicht „wippen“ oder „federn“
Wichtiger Hinweis
Lassen Sie vor Aufnahme des Trainings durch Ihren Hausarzt
klären, ob Sie gesundheitlich für das Training mit diesem Gerät
geeignet sind. Der ärztliche Befund sollte Grundlage für den Aufbau Ihres Trainingsprogramms sein. Falsches oder übermäßiges
Training kann zu Gesundheitsschäden führen.
Die folgenden Übungshinweise gelten nur für gesunde Personen.
Trainingshinweise/–planung:
Trainieren Sie im Anfängerbereich die Rückenübungen 1a, b, c
(Seite 21) in den ersten 3 Wochen 3x wöchentlich mit individuell
8 – 12 Wiederholungen. Im Fortgeschrittenenbereich trainieren
Sie die Übungen 1d, 2, 3 (Seiten 21 – 22). Zwischen zwei Trainingseinheiten sollte ein trainingsfreier Tag geplant werden. In
den darauffolgenden Wochen können Sie den Trainingsumfang
allmählich zuerst über die Wiederholungszahl auf 12 – 15 Wiederholungen erhöhen und später auch über die Satzzahl (ein Satz
beinhaltet eine definierte Anzahl von Wiederholungen) auf 2 – 3
Sätze mit jeweils 12 – 15 Wiederholungen steigern. Pausieren
Sie während des Trainings nach jedem Satz ca. 60 – 90 Sekunden und nutzen Sie die Pausen ebenfalls zu Lockerungs– und
Dehnübungen.
Führen Sie alle Bewegungen gleichmäßig, nicht ruckhaft und
schnell durch. Eine Übungsausführung dauert ca. 6 Sekunden: 2
Sekunden Oberkörper heben, 2 Sekunden halten, 2 Sekunden
Oberkörper senken. Achten Sie stets auf einen gleichmäßigen
Atemrhythmus, vermeiden Sie in jedem Fall Preßatmung.
Eine langsame Steigerung des Trainingsumfangs gilt als wichtige
Regel, denn nur so vermeiden Sie Überlastungserscheinungen und
unangenehme körperliche Reaktionen, wie z.B. Muskelkater.
Aufwärmen/Stretching
Beginnen Sie Ihr Training mit leichten gymnastischen Übungen.
Nutzen Sie die Dehnübungen 1 – 5 zur Trainingsvor– und –nachbereitung. Dehnübungen gehören grundsätzlich zum Aufwärmprogramm des Muskeltrainings. Hierdurch werden Spannungszustände der Muskulatur gelöst und die Blutversorgung der Muskulatur optimiert. Wir möchten Ihnen einige Dehnübungen präsentieren, die Sie zur Trainingsvor– und –nachbereitung einsetzen
sollten. Die Dehnübungen sind bestimmten Muskelbereichen zugeordnet, so daß Sie diese gezielt während Ihres Rückentrainings
einsetzen können.
D
Dehnübungen
1. Dehnung für den Rückenstrecker
Aus der Rückenlage die Beine anziehen und den Kopf Richtung Knie
führen. Die Hände fassen die Unterschenkel.
Wirkung: Rückenstrecker und Gesäßmuskulatur
2. Dehnung für die Oberschenkelrückseite
Stand frontal vor einem Hocker. Ein
Bein mit der Ferse auf dem Hocker
abstützen. Um das Gleichgewicht
zu halten, mit der Hand evtl. an einer Wand abstützen. Das Kniegelenk des aufgestützten Beines ist
leicht gebeugt, die Fußspitze anziehen. Den Oberkörper bei geradem
Rücken langsam nach vorne beugen. Anschließend Seitenwechsel.
Wirkung: Oberschenkelrückseite
3. Dehnung für den Hüftbeuger
In weiter Schrittstellung einen Fuß
auf einen Hocker stellen. Beide Fußspitzen zeigen nach vorne. Zum Abstützen können die Hände auf das
gebeugte Knie gelegt werden. Das
gebeugte Knie zusammen mit der
Hüfte langsam nach vorne schieben. Anschließend Seitenwechsel.
Wirkung: Hüftbeuger
20
4. Dehnung für die Schultermuskulatur
Im Stand oder geradem Sitz den
rechten Arm Richtung Boden ziehen. Den Kopf zur linken Seite neigen. Der Kopf bleibt dabei mit
Blickrichtung nach vorn, so daß das
linke Ohrläppchen Richtung Schulter
zeigt. Anschließend Seitenwechsel.
Wirkung: Nackenmuskulatur
5. Dehnung für die Brustmuskulatur
Seitlicher Stand zur Wand. Mit der
rechten Hand und leicht im Ellenbogen gebeugtem Arm an der Wand
abstützen. Die Fingerspitzen zeigen
rückwärts. Langsam den Oberkörper nach links drehen. Anschließend den Arm wechseln. Griffhöhe variieren.
Wirkung: Brustmuskulatur
D
Übungsbeschreibung
Abb. 1a
Abb. 1c
Abb. 1b
Abb. 1d
Übung 1a – d Oberkörper rückheben
Ausgangsposition: Das Gerät standsicher aufstellen. Das Beinauflagepolster entsprechend der Oberschenkellänge justieren, so
daß die Oberschenkel knapp unterhalb der Beckenknochen aufliegen und der Oberkörper noch frei beweglich ist. Die Füße stehen auf den Bodenrohren. Die Hände fassen die Haltegriffe. Die
Beine werden durch die Beinpolster fixiert.
Bewegungsausführung: Die abgebildeten 4 Übungsvarianten (a –
d) stellen die Rückenübungen in der Reihenfolge ihrer Belastungsintensität (Armhaltung) dar.
Anfänger und bewegungsunsichere Personen können zur Unterstützung der Bewegung die Haltegriffe fassen. Fortgeschrittene
nehmen beim Training die Hände in den Nacken oder in
Über–Kopf–Position. Der Oberkörper wird aus der Schrägstellung
langsam nach vorne gebeugt bis zur abgebildeten Endposition
(Bild 1c). Danach den Oberkörper wieder aufrichten bis zur Körperstreckung, jedoch keinesfalls in die Überstreckung. Die Wirbelsäule bildet mit der Beinachse eine Linie. Den Rücken während
der gesamten Bewegungsausführung gerade halten.
Wirkung: Rückenstreckmuskulatur, oberer Rücken, Gesäßmuskulatur, Muskulatur der Oberschenkelrückseite
21
D
Übungsbeschreibung
Abb. 2
Abb. 3
2. Oberkörper rückheben mit Drehung
3. Oberkörper seitheben
Ausgangsposition: wie Übung 1
Bewegungsausführung: wie Übung 1, jedoch beim Aufrichten
den Oberkörper langsam wechselseitig nach links und rechts drehen.
Wirkung: wie Übung 1, zusätzlich die Rückenrotatoren
Ausgangsposition: Das Auflagepolster entsprechend der Oberschenkellänge justieren, so daß der Oberschenkel knapp unterhalb des Beckenknochens aufliegt und der Oberkörper noch frei
beweglich ist. Die Füße stehen seitlich auf den Bodenrohren. Die
Hände fassen die Haltegriffe. Die Beine werden durch die Beinpolster fixiert.
Bewegungsausführung: Die Hände hinter den Kopf nehmen. Den
Oberkörper aus der Schrägstellung seitlich beugen und danach
wieder anheben. Nach den Übungswiederholungen Seitenwechsel.
Wirkung: seitliche Rumpfbeugemuskulatur, Rückenstrecker
22
GB
Training Instructions
The back trainer „VITAL“ has been designed especially to exercise the muscles of the back without putting too much strain on the
spine. Nowadays, where sedentary occupations are widespread,
regular exercise of the back muscles is especially important to
avoid weakening of the lower torso muscles.
Important points concerning stretch exercises:
■ Assume the stretch position gradually.
■ The maximum stretch position should be well below the pain level.
■ Hold the stretch position for 10 – 20 seconds.
■ Do not „rock“ or „balance“ the body during the stretch phase.
Important Indications
Before beginning your training program, consult your doctor to
ensure that you are fit enough to use the unit. Base your program
on the result of his medical examination. Incorrect or excessive
training may have an adverse affect on your health.
The following training instructions are only suitable for healthy
people.
Training instructions/planning
For the first three weeks as a beginner, carry out the back exercise 1a, b, c (page 24) three times a week doing between 8 – 12
repetitions. When you are advanced you can carry out the back
exercises 1d, 2, 3 (pages 24 – 25). Between two training sessions there should be one resting day. After the first three weeks you
can intensify the training gently. First by increasing the number of
repetitions to 12 – 15 and later by increasing the number of sets
(a set is a defined number of repetitions carried out without a break) to 2 – 3 with 12 –15 repetitions each. After each set make
sure you rest for about 60 – 90 seconds and use these breaks for
relaxing and/or stretching.
All movements should be carried out evenly, not rapidly or jerky.
One repetition should take approximately 6 seconds: raising torso (2 seconds), holding that position (2 seconds), releasing torso
into starting position (2 seconds). Make sure you always breathe
regularly. Excessive training that makes you gasp for breath is to
be avoided in all instances.
The amount of training done in a particular session should be increased gradually to avoid strain and other unpleasant physical
complaints e.g. stiffness of the muscles.
Warm up/Stretching
Begin each training session with light gymnastic exercises.
Stretch exercises 1 – 5 should be carried out before and after
exercising. Stretch exercises are an essential part of the warm-up
phase of fitness training. They release tension in the muscles and
improve the circulation. We would like to suggest some stretch
exercises that should be carried out before and after exercising.
They are each intended to target a certain group of muscles and
can be used during your back muscle training.
GB
Stretching exercises
1. Stretch exercise for the back muscles
In a tucked position, pull the knees
upwards and move the head towards the knees. The hands grasp
the lower legs.
Benefits: Back and buttock muscles
2. Stretch exercise for the back of your thighs
Stand in front of a stool. Place one
heel on the stool, holding the leg
slightly bent and pull the toes towards you. Now move your upper
body slighty forward while keeping
the back straight. Then change the
leg.
Benefits: back of your thighs
4. Stretch exercise for the shoulder muscles
In a standing or upright seated position, pull the right arm towards the
floor. Tilt the head to the left hand
side. The head is not turned, the
eyes look straight ahead, so that the
left ear moves towards the shoulder.
Benefits: Shoulder and neck muscles
5. Stretch exercise for the chest muscles
Stand with the wall on right hand
side. Lean against the wall with your
right hand and the arm slightly bent
at the elbow. The fingertips point
backwards. Then turn the upper
body slowly towards the left. Then
repeat the exercise with the other
arm.
Benefits: chest muscles
3. Stretch exercise for the hips
Place one foot flat on a stool in front
of you using a wide stance. Both
feet pointing forward. For additional support the hands might rest on
the bent knee. Now move the bent
knee and the hips slowly forward.
Then change the leg.
Benefits: hips
23
GB
Exercise Description
fig. 1a
fig. 1c
fig. 1b
fig. 1d
Exercise 1a – d Raise the upper body
Starting position: Adjust the length of your upper leg so that your
upper legs lie just below the pelvic bone and the upper part of
your body can still be freely moved. Place your feet on the bottom
tubes. Grip the handles and secure your legs by means of the leg
pads.
Performing the movements: The following 4 exercise variations (a
– d) represent the back exercises in the sequence of their loading
intensity (arm position).
Beginners and people with hesitant movements may grip the
handles to support their movement. The more advanced should
place their hands on the neck or in the over-head position during
24
training. Slowly bend your upper body forward out of the oblique
position until the shown end (fig. 1c) position is reached. Then
straighten your upper body again until the body is stretched, but
do not strain. The vertebral column forms one line with the leg
axis. Keep your back straight throughout these movements.
Action on: Back extensor, gluteal and back of the upper leg muscles.
GB
Exercise Description
fig. 2
fig. 3
2. Raise the upper body, with rotation
3. Raise upper part of body to the side
Starting position: as Exercise 1
Performance of movement: as Exercise 1, but slowly rotate the upper part of your body to the left and right on both sides.
Action on: as Exercise 1, also the back rotator muscles.
Starting position: Adjust the back support pad for the lateral training. Adjust the support pad according to the length of your upper leg so that the upper leg lies just underneath the pelvic bone,
and the upper part of your body can be freely moved. Place your
feet on the side of the bottom tubes. Grip the handles with your
hands. Secure your legs using the leg pads.
Performance of movement: Place your hands behind your head.
Bend the upper part of your body from the oblique position to the
side towards the back support pad, then raise again. Change sides after the exercise repetitions.
Action on: lateral torso flexor muscles.
25
F
Notice d’utilisation
Le banc dorsal VITAL a été spécialement conçu pour l’entraînement des muscles dorsaux en ménageant la colonne vertébrale.
Les positions sédentaires (position assise) sont à la source des déficiences musculaires et aujourd’hui, les muscles du bas du dos ne
sont pas assez entraînés.
Remarque importante:
Avant de débuter un entraînement, consultez votre médecin pour
savoir si l’exercice avec le banc VITAL est compatible avec votre
bilan de santé. L’avis et les conseils de votre médecin doivent être
à la base de votre entraînement. Un entraînement mal adapté ou
excessif peut nuire à votre santé.
Les conseils d’utilisation indiqués ci-dessous s’adressent à des personnes en bonne santé.
Exercices d’échauffement / Stretching.
Débutez votre entraînement par de petits exercices de gymnastique. Utilisez les exercices d’étirement 1 – 5 en début et en fin
d’entraînement. Ces exercices sont nécessaires pour un échauffement efficace avant votre entraînement de fitness. Le respect de
ces règles éliminera les tensions musculaires et optimisera l’afflux
sanguin. Nous souhaitons vous présenter quelques mouvements
d’étirement, que vous pourrez appliquer en début et en fin d’entraînement. Ces mouvements sont spécifiques à certains groupes
musculaires et peuvent faire partie de votre programme d’entraînement.
F
Instructions d’entraînement – Programmes
Au début, entraînez-vous en suivant les exercices 1a, b, c (page
27) durant les trois premières semaines, à raison de trois fois par
semaine, par série de 8 – 12. Dans un stade avancé, faites les
exercices 1d, 2, 3 (page 27 – 28). Entre deux entraînements il
convient de respecter une journée de repos. Dans les semaines
suivantes, vous pouvez intensifier votre entraînement en augmentant les séries à 12 – 15. Faites une pause de 60 – 90 secondes
après chaque série; utilisez ce temps pour détendre vos muscles.
Effectuez tous vos mouvements avec progressivité et sans à-coups.
Un mouvement dure 6 secondes environs: relevé de buste 2 secondes, maintien de la position 2 secondes, abaissement du buste 2 secondes. Veillez à avoir une respiration régulière (ne bloquez pas votre respiration).
Exercices d'étirement
1. Etirement des muscles dorsaux
Les jambes tendues, ramenez votre
tête en direction des genoux, vos
mains s'agrippent derrière vos cuisses.
Muscles sollicités : Muscles dorsaux
et muscles de l'assise
2. Etirement des muscles des cuisses
Placez vous face à une chaise, une
jambe en appui sur l'assise, prenez
éventuellement appui sur un mur
pour conserver l'équilibre. Le genou
de votre jambe en appui est légèrement fléchi.
La pointe des pieds tendue vers vous,
fléchissez lentement votre buste vers
l'avant, votre dos reste bien droit.
Muscles sollicités : muscles de l'arrière de la cuisse
3. Etirement du fléchisseur des hanches
Toujours face à une chaise, placez
un pied sur l'assise, les deux pointes
des pieds vers l'avant.
Les deux mains peuvent venir en appui votre genou plié. Fléchissez votre genou et poussez votre hanche
vers l'avant. Changez de côté
Muscles sollicités : fléchisseur des
hanches
26
Exercices d’étirement : généralités
■ Mettez-vous progressivement en position d’étirement
■ Atteignez la position maximale d’étirement avant la sensation
de douleur
■ Tenez la position durant 10–20 secondes
■ Ne vous cambrez pas et ne donnez pas d’àcoups pendant les
mouvements.
4. Etirement des muscles des épaules
En positon debout ou assis, tendez
votre bras droit vers le sol, inclinez
la tête sur le côté gauche, le regard
reste fixe vers l'avant, votre oreille
gauche essaie de toucher l'épaule.
Changez de côté une fois le premier
mouvement terminé.
Muscles sollicités : Muscles de la nuque
5. Etirement des muscles de la poitrine
En position latérale contre un mur.
Avec la main droite, le bras légèrement fléchis au niveau du coude,
prenez appui sur le mur. Vos doigts
en appui, effectuez une rotation du
buste vers la gauche. Changez de
côté et variez la hauteur de la prise.
Muscles sollicités : muscles de la poitrine
F
Description des exercices
fig. 1a
fig. 1c
fig. 1b
fig. 1d
Exercice 1a – d Relèvement du haut du corps
Position initiale : installer l’appareil pour qu‘il soit bien stable. Ajuster la partie capitonnée pour les jambes en fonction de la grandeur des cuisses, de manière à ce que les cuisses reposent plus
bas que les os du bassin. Les pieds reposent sur les marches
pieds, les mains saisissent les poignées, les jambes sont fixées par
la partie capitonnée.
Mouvement : Ce qui fait varier les 4 exercices (a – d) suivants
c’est l’intensité de l’effort que vous fournirez en changeant la position des bras. Pour soutenir le mouvement, les débutants et les
personnes qui manquent de confiance dans leurs mouvement, saisissent les poignées, les personnes bien entraînées croisent les
mains sur la nuque ou derrière la tête. A partir de la position oblique, incliner lentement le tronc vers l’avant, jusqu’à atteindre la
position representée sur le dessin (1c). Redresser ensuite le tronc
jusqu’à ce que le corps soit en extension sans toutefois aller au
delà, la colonne vertébrale doit former une ligne avec l’axe des
jambes. Garder le dos bien droit tout le long de l’exercice.
Muscles sollicités : les dorsaux, les muscles des fesses, les muscles
des cuisses.
27
F
Description des exercices
fig. 2
fig. 3
2. Relèvement oblique du haut du corps
3. Relèvement latéral du haut du corps
Position initiale : comme dans le premier exercice.
Mouvement : comme dans le premier exercice pour le début du
mouvement, mais lors du redressement tourner doucement le haut
du corps vers la droite et vers la gauche.
Muscles sollicités : en complément de l’exercice numéro 1 pour les
muscles de rotation du tronc.
Position initiale : adapter le coussin capitonné à la longueur des
jambes pour que la taille et le haut du corps soient libres. La hanche repose sur le coussin, les pieds sont posés sur le pied du
banc, et les jambes sont maintenues par les rouleaux de mousse.
Mouvement : les mains derrière la tête, le haut du corps s’incline
latéralement et remonte dans la position initiale. Après une série
de cet exercice, changer de côté.
Muscles sollicités : muscles le long de la colonne vertébrale.
28
NL
Trainingshandleiding
De rugtrainer "VITAL" is speciaal ontwikkeld voor een training van
de rugspieren, die de wervelkolom ontziet. Vooral in de huidige
tijd, waarin veelvuldig zitten dikwijls tot spierverzwakking bij de
rompspieren leidt, is een regelmatige training van de rugspieren
waardevol voor de gezondheid.
Fundamenteel bij rekoefeningen:
■ Langzaam in de stretchpositie gaan.
■ Maximale stretchpositie onder de pijngrens innemen.
■ De positie 10 – 20 seconden aanhouden.
■ Tijdens de stretchoefening niet "wippen" of "veren".
Belangrijke aanwijzingen:
Raadpleeg voor begin van de training uw huisarts of training met
dit apparaat voor u geschikt is. Zijn diagnose dient als basis voor
de opbouw van uw trainingsprogramma. Verkeerde of te intensieve training kan schadelijke gevolgen voor de gezondheid hebben.
Volgende trainingsadviezen gelden alleen voor gezonde personen.
Trainingsadviezen/–opbouw:
Doe in het begin de rugoefeningen 1a, b, c (pag. 30) tijdens de
eerste 3 weken 3 x per week met individueel 8 –12 herhalingen.
Later kunt u de oefeningen 1d, 2, 3 (pag. 30 – 31) proberen. Tussen twee trainingssessies dient u een rustdag in te plannen. In de
daarop volgende weken mag de training langzaam van 12 naar
15 herhalingen worden verhoogd en later ook het setaantal (een
set is een bepaald aantal herhalingen) naar 2 – 3 sets met telkens
12 – 15 herhalingen. Pauseer gedurende de training na iedere
set ca. 60 – 90 seconden en gebruik de pauzes ook voor ontspannings– en rekoefeningen. Voer alle bewegingen gelijkmatig
uit, niet rukkend en snel. Een beweging duur ca. 6 seconden: 2
seconden het bovenlichaam opheffen, 2 seconden vasthouden, 2
seconden ontspannen. Let steeds op een gelijkmatige ademhaling, vermijd te allen tijde persademing.
Als belangrijkste regel geldt een langzame opbouw van de training, alleen zo vermijdt u overbelastingsverschijnselen en onaangename lichamelijke reacties, zoals bijv. spierpijn.
Opwarmen/stretchen
Begin uw training met lichte gymnastiekoefeningen. Benut de rekoefeningen 1 – 5 voor de voorbereiding of afsluiting van de training. Rekoefeningen behoren tot het opwarmingsprogramma van
de spiertraining. Hierdoor worden spanningen in de spieren los
gemaakt en wordt de bloedverzorging van de spieren optimaal.
Wij zullen enkele rekoefeningen voorstellen, die u voor de voorbereiding of afsluiting van de training kunt gebruiken. De rekoefeningen zijn bestemd voor bepaalde spiergroepen, zodat u de
rekoefeningen gedurende uw rugtraining specifiek kunt gebruiken.
NL
Rekoefeningen
1. Rekken voor de rugstrekker
uit de rugpositie de benen aantrekken en het hoofd in richting knie voeren.
Effect: Rugstrekker en zitvlakspieren.
2. Rekken voor de bovenbeenrugzijde
Stand frontaal tegenover een kruk.
Een been met de hiel op de kruk
steunen. Om het evenwicht te houden, met de hand evtl. aan de muur
vasthouden. Het kniegewricht van
het gesteund been is licht gebuigd,
de voetspits aantrekken. Het bovenlichaam bij rechte rug langzaam
naar voren buigen. Aansluitend zijde wisselen.
Effect: bovenbeenrugzijde.
4. Rekken voor de schouderspieren
Staande of in rechte zitpositie de
rechte arm richting bodem trekken.
Het hoofd naar de linke hand neigen. Het hoofd blijft daarbij met blikrichting naar voren zodat het linke
oorlelletje richting schouder wijst.
Aansluitend zijde wisselen.
Effect: nekspieren.
5. Rekken voor de borstspieren
Zijdelijk stand naast de muur. Met
de rechte hand en licht in de ellenboog gebuigde arm zich aan de
muur afduwen. De vingertoppen wijzen achteruit. Langzaam het bovenlichaam naar links draaien. Dan
de andere arm nemen. Greephoogte varieren.
Effect: borstspieren.
3. Rekken voor de heupbuiger
In wijde stappositie een voet op een
kruk zetten. Bijde voetspitsen wijzen
naar voren. Voor het evenwicht kunnen de handen op de gebuigde
knie worden gelegd. De gebuigde
knie tesamen met de heup lanzaam
naar voren schuiven. Dan zijde wisselen.
Effect: heupbuiger.
29
NL
Oefeningen
afb. 1a
afb. 1c
afb. 1b
afb. 1d
Oefening 1a – d Oplichten van het bovenlichaam
Uitgangspositie: het apparaat stevig opstellen. Deze beensteun
op de lengte van uw dijbeen instellen, zodat het dijbeen net onder het bekken op de beensteun ligt en het bovenlichaam nog vrij
te bewegen is. De voeten staan op de bodemsteunen. De handen
pakken de handgrepen vast. De benen worden door de beensteunen ingeklemd.
Beweging: de volgende 4 oefeningen (a – d) tonen de rugoefeningen in volgorde van belastingsintensiteit (armhouding).
30
Beginners en bewegingsonzekere personen kunnen ter ondersteuning van de beweging de handgrepen vastpakken. Gevorderden
leggen tijdens de training de handen in de nek of houden ze boven het hoofd. Het bovenlichaam wordt langzaam naar voren gebogen tot een horizontale positie (1c) bereikt is. Vervolgens het
bovenlichaam weer oprichten, echter onder geen voorwaarde te
ver terug buigen. De wervelkolom vormt één lijn met de beenas.
Houd tijdens de beweging de rug recht.
Werking: rugstrekspieren, bilspieren en achterste dijbeenspieren.
NL
Oefeningen
afb. 2
afb. 3
2. Oplichten van het bovenlichaam met draaiing
3. Zijwaarts opheffen van het bovenlichaam
Uitgangspositie: zie oefening 1.
Beweging: zie oefening 1, echter bij het oprichten van het bovenlichaam langzaam afwisselend naar links en rechts draaien.
Werking: zie oefening 1, tevens de rugdraaispieren.
Uitgangspositie: De beensteun op de lengte van uw dijbeen instellen, zodat het dijbeen net onder het bekken op de steun ligt en
het bovenlichaam vrij beweegbaar is. De voeten staan zijwaarts
op de bodemsteunen. De handen pakken de handgrepen vast. De
benen worden door de beensteun ingeklemd.
Beweging: de handen achter het hoofd houden. Het bovenlichaam vanuit de zijwaartse positie buigen en weer opheffen. Na de
herhalingen van zijde wisselen.
Werking: zijdelingse rompbuigspieren.
31
E
Instrucciones para el entrenamiento
El entrenador dorsal “VITAL” ha sido especialmente desarrollado
para el entrenamiento de la musculatura dorsal, preventivo y protector de la columna vertebral. El entrenamiento de la musculatura dorsal, con regularidad, resulta muy importante para la salud
debido a que en la actualidad estamos frecuentemente sentados
y dicha posición es muchas veces la causa de las debilitaciones
musculares en la zona muscular del tronco.
Informaciones fundamentales sobre los ejercicios de estiramiento:
■ Colocarse lentamente en la posición de estiramiento
■ La posición máxima de estiramiento no debe alcanzar el límite
de dolor
■ Permanecer 10 – 20 segundos en la posición de estiramiento
■ No “balancear” ni “saltar” durante la realización de los ejercicios de estiramiento
Nota importante
Antes de iniciar el entrenamiento consulte su doctor de cabecera
para saber ciertamente si el entrenamiento con este aparato es
conveniente para su salud. Organice su programa de entrenamiento ateniéndose a los resultados de su reconocimiento médico. Un entrenamiento erróneo o excesivo puede resultar nocivo
para la salud.
Las informaciones siguientes rigen exclusivamente para personas
sanas.
Indicaciones / planificación del entrenamiento:
Durante el período de tiempo como principiante, realice los ejercicios para la espalda 1a, b, c (página 33), 3 x semanalmente
durante las 3 primeras semanas con 8 – 12 repeticiones individuales. Cuando ya esté en el área de los avanzados, haga los
ejercicios 1d, 2, 3 (páginas 33 – 34). Entre dos ejercicios de entrenamiento se debería proyectar un día libre de entrenamiento.
En las semanas siguientes se puede aumentar el entrenamiento
paulatinamente, aumentando primero el número de repeticiones
de 12 – 15 y luego – a través del número de series – (una serie
se compone de un definido número de repeticiones) aumentar a
2 – 3 series compuestas de 12 – 15 repeticiones respectivamente. Realice una pausa de unos 60 – 90 segundos después de
cada serie y aproveche las pausas para realizar ejercicios de relajamiento y dilatación.
Realice todos los movimientos a un mismo ritmo. No los realice
bruscamente y con rapidez. La realización de un ejercicio dura
unos 6 segundos: 2 segundos para elevar el tronco, 2 segundos
de descanso, 2 segundos para descender el tronco. Observe
siempre un ritmo de respiración uniforme y evite siempre la respiración forzada.
El aumento paulatino de los ejercicios de entrenamiento es una
regla importante puesto que sólo así pueden evitar síntomas de
exceso y reacciones desagradables para el cuerpo, tales como
las agujetas.
Calentamiento/Estiramiento
Comience su entrenamiento con ejercicios de gimnasia fáciles.
Aproveche los ejercicios de estiramiento 1 – 5 para el entrenamiento inicial y posterior. Por regla general, los ejercios de estiramiento forman parte del programa de calentamiento para el
entrenamiento de la musculatura. Con ellos se eliminan las tensiones musculares y se optima el abastecimiento sanguíneo de la
musculatura. A continuación deseamos presentarles algunos ejercicios de estiramiento que deberían ser realizados antes y después del entrenamiento. Los ejercicios de estiramiento están coordinados con determinadas partes musculares y debido a ello
pueden ser realizados directamente durante su entrenamiento
dorsal.
E
Ejercicios de estiramiento
1. Estiramiento para el extensor dorsal
En decúbito llevar las piernas y la
cabeza hacia las rodillas. Las manos arragadas a las piernas
Efecto sobre: el extensor dorsal y la
musculatura de los glúteos
2. Estiramiento para la parte posterior de los muslos
En posición erecta frente a un taburete. Apoyarse al taburete con el talón
de un pie. Para mantener el equilibrio
apoyarse, en caso necesario, con
una mano a la pared. La articulación
de la rodilla del pie apoyado está ligeramente doblada. Estirar la punta
del pie. Doblar el tronco lentamente
hacia adelante con la espalda derecha. A continuación, repetir el ejercicio con el otro lado.
Efecto sobre: la parte posterior de
los muslos.
32
3. Estiramiento para el flexor de la cadera
Colocar, con un paso largo, un pie
sobre un taburete. Las dos puntas
de los pies indican hacia adelante.
Para apoyarse se pueden colocar
las manos sobre la rodilla doblada.
Empujar la rodilla doblada, con la
cadera, lentamente hacia adelante.
A continuación, repetir el ejercicio
con el otro lado.
Efecto sobre: el flexor de la cadera
E
Ejercicios de estiramiento
4. Estiramiento para la musculatura escapular
5. Estiramiento para la musculatura pectoral
En posición erecta o sentado rectamente estirar el brazo derecho hacia el suelo. Inclinar la cabeza hacia el lado izquierdo. Mantener la
cabeza mirando hacia adelante de
forma que el lóbulo de la oreja izquierda indique hacia el hombro izquierdo. A continuación, repetir el
ejercicio con el otro lado.
Efecto sobre: la musculatura cervical.
E
En posición erecta de lado hacia la
pared. Apoyarse a la pared con la
mano derecha y el brazo ligeramente doblado en el codo. Las puntas de los dedos indican hacia
atrás. Girar lentamente el tronco hacia la izquierda. A continuación, repetir el ejercicio con el otro brazo.
Variar la altura de apoyo.
Efecto sobre: la musculatura pectoral.
Descripción de los ejercicios
figura 1a
figura 1b
Ejercicios 1a – d Levantamiento del busto
Posición de salida: Situar el aparato en forma estable. El cojín
para el apoyo de las piernas se debe ajustar de acuerdo con la
longitud de los muslos, de manera que éstos descansen justo debajo de los huesos de la pelvis y la parte superior del cuerpo todavía se pueda mover libremente. Los pies han de estar apoyados sobre los tubos de la base. Las manos agarrando los asideros. Las piernas quedan fijadas por los cojines.
Ejecución del movimiento: Las 4 variantes siguientes de ejercicios,
representan los ejercicios para la espalda, según la secuencia de
su intensidad de carga (posición del brazo).
Los principiantes y las personas con movimientos inseguros, pue-
figura 1c
figura 1d
den empuñar los asideros. Los avanzados ponen las manos detrás de la nuca o en una posición encima de la cabeza. La parte
superior del cuerpo, desde su posición oblicua, se inclina lentamente hacia adelante hasta alcanzar la posición final inidcada
en la figura 1c. Después se vuelve a levantar el busto hasta que
quede estirado, pero de ninguna manera hasta llegar al sobreestiramiento. La espina dorsal forma una línea con el eje de la pierna. Hay que mantener la espalda recta durante todo el desarrollo del movimiento.
Acción sobre: Estiramiento de la musculatura de la espalda, de la
musculatura de las nalgas y de la musculatura de los bíceps femorales y gemelos.
33
E
Descripción de los ejercicios
figura 2
figura 3
2. Levantamiento del busto con rotación
3. Levantamiento lateral del busto
Posición de salida: como el ejercicio 1.
Ejecución del movimiento: como en el ejercicio 1, pero durante el
levantamiento, girar el busto lentamente de izquierda a derecha
alternativamente.
Acción sobre: como en el ejercicio 1, añadiendo la rotación de
la espalda
Posición de salida: Ajustar los cojines de acuerdo con la longitud
del muslo, de manera que éste descanse justo por debajo de los
huesos de la pelvis y el busto todavía se pueda mover libremente. Los pies se colocan lateralmente sobre los tubos de la base.
Las manos agarrando los asideros. Las piernas quedan fijadas
por los cojines.
Ejecución del movimiento: Poner las manos detrás de la cabeza.
Desde la posición oblicua, inclinar el busto y, después, volver a
levantarlo. Después de las repeticiones, cambiar de lado.
Acción sobre: La musculatura de inclinación lateral del busto.
34
I
Istruzioni di allenamento
L‘apparecchio per l‘allenamento della schiena “VITAL” è concepito specialmente per l‘allenamento della muscolatura della schiena
senza affaticare la spina dorsale. Proprio ai tempi d‘oggi, dove
la vita sedentaria comporta molto spesso debolezze fisiche nel
settore del muscolo del tronco, un allenamento regolare della muscolatura della schiena è di grande valore per la salute. Evitando
sopraffaticamenti non fisiologici della spina dorsale, l‘apparecchio
per l‘allenamento della schiena “VITAL” rende possibile l‘allenamento appropriato delle diverse zone della muscolatura della
schiena, specialmente quelle della muscolatura di stiramento.
Nota importante
Prima di cominciare con l‘allenamento consultate il Vostro medico
per assicurarvi che le Vostre condizioni di salute siano adatte
all‘allenamento con questo apparecchio. Il referto medico deve
essere la base per la composizione del Vostro programma di allenamento. Un allenamento sbagliato o eccessivo può essere nocivo alla Vostra salute.
Le seguenti istruzioni di allenamento valgono solo per le persone
in salute.
Esercizi di riscaldamento/Stretching
Iniziate il vostro allenamento con leggeri esercizi ginnici. Usate
gli esercizi di estensione 1 – 5 prima e dopo l‘allenamento. Gli
esercizi di stiramento appartengono fondamentalmente al programma di riscaldamento dell‘allenamento muscolare. Qui vengono sciolti stati di tensione della muscolatura e viene ottimizzata l‘alimentazione di sangue della muscolatura. Vorremmo presentarVi alcuni esercizi di stiramento che dovreste inserire prima
e dopo l‘allenamento. Gli esercizi di stiramento sono riservati a
specifiche zone dei muscoli così che Voi li possiate introdurre in
modo mirato nell‘allenamento della schiena.
I
Cenni fondamentali per gli esercizi di stiramento:
■ Mettersi lentamente nella posizione di stiramento
■ Assumere la massima posizione di stiramento senza superare la
soglia del dolore
■ Rimanere nella posizione di stiramento 10 – 20 secondi
■ Durante lo stiramento non “dondolare” né “molleggiare”
Indicazioni e pianificazione dell‘allenamento:
Come principiante, eseguite gli esercizi per la schiena 1a, b, c
(p. 36) tre volte alla settimana nelle prime tre settimane con 8 –
12 ripetizioni per ognuno. Gli avanzati eseguono gli esercizi 1d,
2, 3 (pp. 36 – 37). Ogni due unità di allenamento si dovrebbe
programmare un giorno di pausa. Nelle settimane seguenti potete gradualmente aumentare il volume di allenamento dapprima
nel numero delle ripetizioni a 12 – 15 e, successivamente, nel numero delle serie (una serie comprende un numero definito di ripetizioni) a 2 – 3 con ogni volta 12 – 15 ripetizioni. È molto sensato fare 60 –90 secondi di pausa dopo ogni serie utilizzandoli
per esercizi di stiramento e rilassamento.
Eseguite tutti i movimenti in modo uniforme e non bruscamente.
L‘esecuzione di un esercizio dura circa 6 secondi: 2 secondi sollevare il busto, 2 secondi tenere il busto in posizione sollevata, 2
secondi riabbassare il busto. Badate sempre ad avere un ritmo di
respirazione uniforme ed evitate in ogni caso una respirazione
trattenuta.
Esercizi di stiramento
1. Stiramento della muscolatura di stiramento della
schiena
Dalla posizione supina ritirare le
gambe e portare la testa in direzione delle ginocchia. Le mani prendono le gambe.
Effetto: muscolatura di stiramento
della schiena e del bacino.
3. Stiramento della muscolatura dell'articolazione del
bacino
Con un passo lungo appoggiare un
piede su un seggiolino. Ambedue le
punta dei piedi puntano in avanti.
Come aiuto si possono appoggiare
le mani sul ginocchio piegato.
Spostare lentamente in avanti il ginocchio piegato e i fianchi. Poi
cambiare la gamba.
Effetto: muscolatura dell'articolazione del bacino
2. Stiramento della muscolatura della parte posteriore
del femore
Posizione eretta davanti a un seggiolino. Appoggiare una gamba con il
calcagno sul seggiolino. Per tenere
l'equilibrio eventualmente appoggiarsi al muro. Il ginocchio della gamba
appoggiata è leggermente piegato e
le dita del piede puntano in su. Piegare lentamente in giù il busto con la
schiena eretta. Poi cambiare il lato.
Effetto: muscolatura della parte posteriore del femore
35
I
Esercizi di stiramento
4. Stiramento della muscolatura delle spalle
5. Stiramento della muscolatura del petto
In posizione eretta oppure stando
seduto con le busto eretto tirare il
braccio destro verso il suolo. Abbassare la testa verso la sinistra. La
direzione dello sguardo rimane verso l'avanti così che il lobo
dell'orecchio sinistro indica verso la
spalla sinistra. Poi cambiare il lato.
Effetto: muscolatura della nuca
I
Descrizione dell’esercizio
figura 1a
figura 1c
figura 1b
figura 1d
Esercizio 1a – d Sollevamento posteriore
Posizione di partenza: Disporre l'attrezzo in modo stabile; Regolare il cuscino di supporto gambe in base alla lunghezza della
coscia, cosicché le cosce poggino appena al di sotto delle ossa
del bacino e il busto possa muoversi liberamente. I piedi si trovano sul tubo a pavimento. Le mani afferrano le manopole. Le gambe vengono fissate dal l’apposito cuscino.
Esecuzione del movimento: Le seguenti 4 varianti dell'esercizio (a
– d) rappresentano gli esercizi per la schiena nell'ordine di intensità di carico (controllo del braccio).
I principianti e le persone che non sono sicure nei movimenti pos36
Posizione eretta con un lato al
muro. Appoggiarsi al muro con la
mano destra e il braccio leggermente piegato. Le punta delle dita
puntati all'indietro. Girare lentamente il busto verso la sinistra.
Dopo cambiare il braccio. Variare
l'altezza della mano.
Effetto: muscolatura del petto
sono afferrare le apposito manopole per sostenersi. I non principianti durante l'allenamento portino le mani alla nuca o in posizione sopra la testa. Il busto, dalla posizione obliqua, viene piegato lentamente in avanti fino a raggiungere la posizione finale
illustrata (figura 4).
Quindi raddrizzare nuovamente il busto fino a tendere il corpo,
ma non oltre il massimo dell'allungamento. La colonna vertebrale
forma una linea con l'asse delle gambe. Mantenere diritta la
schiena durante l'intera esecuzione del movimento.
Effetto sui muscoli estensori della schiena, sulla muscolatura dei
glutei, sulla muscolatura della parte posteriore delle cosce.
I
Descrizione dell’esercizio
figura 2
figura 3
2. Sollevamento posteriore del busto
3. Sollevamento laterale del busto
Posizione di partenza: come esercizio 1
Esecuzione del movimento: come esercizio 1, però durante il sollevamento ruotare il busto lentamente in modo alternato verso sinistra e verso destra.
Effetto come esercizio 1, e inoltre sui muscoli natatori della schiena.
Posizione di partenza: Regolare il cuscino di appoggio in base
alla lunghezza delle cosce, in modo che la coscia poggi appena
al di sotto delle ossa del bacino e il busto sia ancora libero di
muoversi. I piedi poggiano lateralmente sul tubo a pavimento. Le
mani afferrano le manopole. Le gambe vengono bloccate dall’apposito cuscino per le gambe.
Esecuzione del movimento: Portate le mani dietro la nuca. Piegare lateralmente il busto dalla posizione obliqua, quindi sollevarsi
nuovamente. Dopo aver ripetuto l'esercizio cambiare lato.
Effetto sui muscoli flessori laterali del busto.
37
PL
Instrukcja treningowa
Trenażer "VITAL" został skonstruowany specjalnie do oszczędzającego kręgosłup treningu mięśni grzbietu. Szczególnie w dzisiejszych czasach, gdy częste siedzenie w wielu przypadkach prowadzi do osłabienia mięśni tułowia, bardzo wartościowy dla
zdrowia staje się regularny trening tych partii mięśni.
Ważna informacja
Przed rozpoczęciem treningu należy skonsultować się ze swoim
lekarzem i wyjaśnić, czy nie ma przeciwwskazań zdrowotnych
do treningu na tym przyrządzie. Opinia lekarza powinna stanowić podstawę dla opracowania indywidualnego programu treningowego. Niewłaściwy lub nadmierny trening może być szkodliwy dla zdrowia.
Zamieszczone niżej wskazówki treningowe obowiązują wyłącznie dla osób zdrowych.
Rozgrzewka / stretching
Trening zaczyna się od lekkich ćwiczeń gimnastycznych. Do przygotowania do treningu oraz na jego zakończenie dobrze jest
stosować ćwiczenia rozciągające 1 - 5. Przy treningu mięśni
ćwiczenia rozciągające zasadniczo należą do programu
rozgrzewającego. Dzięki temu następuje rozluźnienie stanu
napięcia mięśni i optymalizuje się ich ukrwienie. Proponujemy
kilka ćwiczeń rozciągających, które powinno się wykonywać w
trakcie przygotowania do treningu oraz na jego zakończenie.
Ćwiczenia rozciągające przyporządkowane są do określonych
grup mięśni, a zatem mogą one być stosowane w sposób ukierunkowany podczas indywidualnego treningu mięśni grzbietu.
PL
Podstawowe zasady dla ćwiczeń rozciągających:
■ Powoli przechodzić w pozycję rozciągniętą.
■ Przyjąć maksymalną pozycję rozciągniętą poniżej granicy bólu.
■ Pozostać przez 10 - 20 sekund w pozycji rozciągniętą.
■ Podczas ćwiczenia rozciągającego nie "kiwać się" i nie
"sprężynować".
Wskazówki / planowanie treningu
Początkujący powinni w pierwszych trzech tygodniach wykonywać ćwiczenia mięśni grzbietu 1a, b, c (strona 39) 3 razy
tygodniowo przy indywidualnej liczbie powtórzeń od 8 do 12.
Dla osóbzaawansowanych trening prowadzi się z zastosowaniem ćwiczeń 1d, 2, 3 (strony 39, 40). Między dwoma jednostkami treningowymi należy zaplanować jeden dzień wolny od treningu. W następnych tygodniach zakres treningu można stopniowo zwiększać przez podwyższenie liczby powtórzeń do 12 -15,
a później podnosząc liczbę zestawów (jeden zestaw obejmuje
określoną liczbę powtórzeń) do 2 - 3 zestawów po 12 - 15 powtórzeń każdy. Podczas treningu po każdym zestawie należy
zrobić przerwę trwającą 60 - 90 sekund i wykorzystać ją również do ćwiczeń rozluźniających i rozciągających.
Ruchy wykonywać równomiernie, nie raptownie i nie szybko.
Wykonanie ćwiczenia trwa około 6 sekund: 2 sekundy unoszenie
tułowia, 2 sekundy utrzymanie postawy, 2 sekundy opuszczanie
tułowia.
Proszę stale pamiętać o równomiernym rytmie oddychania,
należy bezwzględnie unikać oddychania wymuszonego.
Sukcesywne zwiększanie zakresu treningu jest sprawą zasadniczą, ponieważ tylko w ten sposób można uniknąć zjawisk przeciążenia i nieprzyjemnych reakcji organizmu, jak na przykład
bólów mięśni.
Ćwiczenia rozciągające
1. Rozciąganie mięśnia prostownika grzbietu
Z leżenia na plecach nogi przyciągnąć oburącz do klatki piersiowej, a głowę skłonić w kierunku kolan. Dłonie obejmują golenie.
Działanie: prostownik grzbietu i
mięśnie pośladkowe
3. Rozciąganie mięśni zginacza biodra
W dużym wykroku postawić jedną
stopę na stołku. Palce stóp zwrócone do przodu. Dla podparcia dłonie
położyć można na zgięte kolano.
Zgięte kolano i biodra powoli przesuwać do przodu. Potem zmiana
stron.
2. Rozciąganie mięśni strony grzbietowej uda
Stanąć przodem do stołka. Nogę
oprzeć piętą na stołku. Dla utrzymania równowagi ewentualnie oprzeć się ręką o ścianę. Opartą nogę
lekko zgiąć w kolanie. Grzbietowo
zgiąć stopę. Trzymając proste plecy
powoli nachylać tułów do przodu.
Potem zmiana stron.
Działanie: mięśnie strony grzbietowej uda
38
Działanie: mięśnie zginacza biodra
PL
Ćwiczenia rozciągające
4. Rozciąganie mięśni barku
5. Rozciąganie mięśni piersiowych
Stojąc lub siedząc prosto ciągnąć
prawe ramię w kierunku podłogi.
Głowę przechylić w lewo. Głowa
zwrócona przy tym w przód w ten
sposób, że płatek małżowiny usznej
skierowany jest do barku. Potem
zmiana stron.
Działanie: mięśnie karku
PL
Stanąć bokiem do ściany. Prawą
ręką lekko ugiętą w łokciu oprzeć
się o ścianę. Czubki palców wskazują do tyłu. Obracać tułów powoli
w lewo. Następnie zmienić rękę.
Zmieniać wysokość chwytu.
Działanie: mięśnie piersiowe
Opis ćwiczeń
Ilustracja 1a
Ilustracja 1c
Ilustracja 1b
Ilustracja 1d
Ćwiczenia 1a - 1d skłon tułowia
Pozycja wyjściowa: Stabilnie ustawić przyrząd. Tapicerowaną
powierzchnię pod nogi ustawić odpowiednio do długości ud w
ten sposób, że uda przyłożone są tuż poniżej kości miednicy, a
tułów może się jeszcze swobodnie poruszać. Stopy oparte są na
rurach podporowych. Dłońmi ująć uchwyty. Nogi unieruchomione są przy pomocy tapicerowanych drążków.
Wykonanie ruchu: Przedstawione na ilustracjach 4 warianty ćwiczenia (a - d) są ćwiczeniami mięśni grzbietu w kolejności intensywności ich obciążania (sposób trzymania rąk).
Początkujący oraz osoby, które ruchy takie wykonują jeszcze nie-
pewnie, mogą pomóc sobie trzymając się za uchwyty. Zaawansowani splatają dłonie na karku lub trzymają ręce nad głową.
Tułów z pozycji skośnej powoli odchylać do przodu aż do pozycji końcowej jak na ilustracji (ilustracja 1c). Następnie tułów ponownie wyprostować. Rozciągnąć się, unikać przy tym nadmiernego rozciągnięcia ciała. Kręgosłup tworzy z osią nóg jedną
linię. Podczas wykonywania ruchu plecy trzymać cały czas prosto.
Działanie: prostowniki grzbietu, górne partie grzbietu, mięśnie
pośladkowe, mięśnie strony grzbietowej uda
39
PL
Opis ćwiczeń
Ilustracja 2
Ilustracja 3
3. Skłon tułowia w bok
Pozycja wyjściowa: jak w ćwiczeniu 1
Wykonanie ruchu: jak w ćwiczeniu 1, lecz prostując tułów lekko
go skręcać na przemian w lewo i w prawo
Działanie: jak w ćwiczeniu 1, dodatkowo mięsień skręcający
Pozycja wyjściowa: Nastawić powierzchnię tapicerowaną odpowiednio do długości ud w ten sposób, że udo przyłożone jest tuż
poniżej kości miednicy, a tułów może się jeszcze swobodnie
poruszać.
Stopy stoją bokiem na rurach podporowych. Dłońmi ująć uchwyty. Nogi unieruchomione są przy pomocy tapicerowanych
drążków.
Wykonanie ruchu: Dłonie spleść za głową. Tułów z pozycji
skośnej odchylić ku dołowi w bok i potem znowu unieść. Po kilkakrotnym powtórzeniu ćwiczenia zmienić strony
Działanie: boczne zginacze tułowia, prostownik grzbietu
docu 1000d/06.05
2. Skłon tułowia ze skrętem