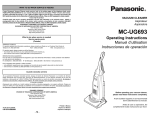
1
Use & Care Guide
Manual de Uso y Cuidado
English / Español
Models/Modelos:
116.21714
Kenmore
®
Canister Vacuum
Aspiradora
P/N C01ZDPTØØUØØ - KCØ1ZDPTZØUØ
Sears Brands Management Corporation
Hoffman Estates, IL 60179 U.S.A
www.kenmore.com
www.sears.com
TM
TABLE OF CONTENTS
Before Using Your New
Vacuum Cleaner . . . . . . . . . . . . . . . . . . 2
Packing List . . . . . . . . . . . . . . . . . . . . 2
Vacuum Cleaner Help Line . . . . . . . . . . . 3
Kenmore Vacuum Cleaner Warranty . . . 3
Important Safety Instructions . . . . . . . . . 4
Parts and Features . . . . . . . . . . . . . . . 5-7
Assembly Instructions . . . . . . . . . . . . . 8-9
Operating Instructions . . . . . . . . . . . . . . 10
How to Start . . . . . . . . . . . . . . . . . 10-11
Vacuuming Tips . . . . . . . . . . . . . . 12-13
Suggested Height Adjust Settings . . . 13
Attachments . . . . . . . . . . . . . . . . . 14-16
Attachment Use Table . . . . . . . . . . . 17
Attachment Storage . . . . . . . . . . . . . .18
Performance Features . . . . . . . . . . . . 19
Canister Care . . . . . . . . . . . . . . . . . . . . 20
Removing Clogs . . . . . . . . . . . . . . . . 20
Cleaning Exterior and Attachments . 20
Dust Bag Changing . . . . . . . . . . . . . . 21
Motor Safety Filter Changing . . . . . . 22
Hood and Tool Storage Cover
Installation . . . . . . . . . . . . . . . . . . . . 22
Exhaust Filter Changing . . . . . . . . . . 23
PowerMate® Care . . . . . . . . . . . . . . . . . 24
Belt Changing and Agitator
Cleaning . . . . . . . . . . . . . . . . . . . 24-25
Bulb Changing . . . . . . . . . . . . . . . . . 26
Dirt Sensor . . . . . . . . . . . . . . . . . . . . 27
Agitator Servicing . . . . . . . . . . . . . . 28
Troubleshooting . . . . . . . . . . . . . . . . 29-30
Master Protection Agreements . . . . . . . . 31
Requesting Assistance
Or Service . . . . . . . . . . . . . . . Back Cover
BEFORE USING YOUR NEW VACUUM CLEANER
Please read this guide. It will help you assemble and operate your new Kenmore vacuum
cleaner in the safest and most effective way.
For more information about vacuum cleaner care and operation, call your nearest Sears
store. You will need the complete model and serial numbers when requesting information.
Your vacuum cleaner’s model and serial numbers are located on the Model and Serial
Number Plate.
Use the space below to record the model number and serial number of your new Kenmore
vacuum cleaner.
Model No.____________________________________________
Serial No. ____________________________________________
Date of Purchase ______________________________________
PACKING LIST
Your KENMORE VACUUM CLEANER is packaged
nents assembled separately in the carton:
1 Canister Vacuum Cleaner
1
1 PowerMate®
1
1 Hose & Handle Assembly
1
1 Floor Brush*
1
1 Crevice Tool**
1
1 Combination Brush
with the following parts and compoPet Tool*
Pet PowerMate®
Telescoping Wand
Use & Care Guide
Repair Parts List
Each of the above assemblies are shown in detail inside the Repair Parts List.
*These items are found under the Tool Storage Cover.
**These items are found on the hose & handle assembly.
2
ESPAÑOL
Keep this book and your sales check (receipt) in a safe place for future reference.
ACUERDOS MAESTROS DE PROTECCIÓN
Acuerdos Maestros de Protección
Enhorabuena por hacer una compra inteligente. Su nuevo producto Kenmore® está diseñado y
fabricado para ofrecerle años de funcionamiento confiable. Pero al igual que todos los productos
pueden precisar un mantenimiento preventivo o alguna reparación de vez en cuando. Por este motivo,
tener un Acuerdo Maestro de Protección puede ahorrarle dinero e inconvenientes.
El Acuerdo Maestro de Protección también le ayuda a prolongar la vida útil de su nuevo producto. A
continuación indicamos lo que el Acuerdo* incluye:
[
[
[
[
[
[
[
[
[
[
Una vez que compre el Acuerdo, sólo bastará una simple llamada telefónica para que pueda programar
un servicio. Puede llamar a cualquier hora del día o de la noche, o concertar una cita de servicio en
línea.
El Acuerdo maestro de protección es una compra libre de riesgos. Si por cualquier razón cancela
durante el período de garantía del producto, le devolveremos todo el dinero. O, un reembolso
prorrateado después del período de vencimiento de la garantía. ¡Compre su Acuerdo maestro hoy!
Aplican algunas limitaciones y exclusiones. Para precios y más información en EE.UU., llame al 1-800827-6655.
* La cobertura en Canadá varía en algunos artículos. Para obtener todos los detalles, llame a Sears
Canadá 1-800-361-6665.
Servicio de instalación de Sears
Para la instalación profesional por parte de Sears de electrodomésticos, abridores de puertas de
garajes, calentadores de agua y otros artículos principales para el hogar, en EE.UU. o Canadá llame al
1-800-4-MY-HOME®.
30
1-877-531-7321
8:00am-5:00pm EST, M-F
(U.S.A. and Canada)
KENMORE VACUUM CLEANER WARRANTY
One Year Limited Warranty
When assembled, operated and maintained according to all instructions supplied with
the product, if this vacuum cleaner fails due to a defect in material or workmanship
within one year from the date of purchase, return it to any Sears store, Sears Parts &
Repair Center or other Kenmore outlet for free repair.
If this vacuum cleaner is used for other than private family purposes, this warranty
applies for only 90 days from the date of purchase.
This warranty covers only defects in material and workmanship. Sears will NOT pay for:
1. Expendable items that can wear out from normal use, including but not limited to
filters, belts, light bulbs, and bags.
2. A service technician to instruct the user in correct product assembly, operation or
maintenance.
3. A service technician to clean or maintain this product.
4. Damage to or failure of this product if it is not assembled, operated or maintained
according to all instructions supplied with the product.
5. Damage to or failure of this product resulting from accident, abuse, misuse or use for
other than its intended purpose.
6. Damage to or failure of this product caused by the use of detergents, cleaners,
chemicals or utensils other than those recommended in all instructions supplied with
the product.
7. Damage to or failure of parts or systems resulting from unauthorized modifications
made to this product.
Disclaimer of implied warranties; limitation of remedies
Customer's sole and exclusive remedy under this limited warranty shall be product
repair as provided herein. Implied warranties, including warranties of merchantability or
fitness for a particular purpose, are limited to one year or the shortest period allowed
by law. Sears shall not be liable for incidental or consequential damages. Some states
and provinces do not allow the exclusion or limitation of incidental or consequential
damages, or limitations on the duration of implied warranties of merchantability or
fitness, so these exclusions or limitations may not apply to you.
This warranty applies only while this vacuum cleaner is used in the United States and
Canada.
This warranty gives you specific legal rights, and you may also have other rights which
vary from state to state.
Sears Brands Management Corporation, Hoffman Estates, IL 60179 U.S.A
3
ENGLISH
[
Partes y mano de obra necesarios para ayudar a que estos productos funcionen correctamente
bajo condicionales normales de uso, no simplemente defectos. Nuestra cobertura va mucho más
allá de la garantía del producto. Ningún deducible, ninguna avería funcional queda excluida de
la cobertura- protección real.
Servicio experto ofrecido por una lista de más de 10.000 técnicos autorizados del servicio técnico
de Sears, lo que significa que alguien en quien usted puede confiar estará trabajando en su
producto.
Número ilimitado de llamadas al servicio técnico y servicio en toda la nación, tan continuo como
usted nos lo solicite, sin importar donde esté.
Garantía seria de sustitución del producto. La sustitución de su producto cubierto si se producen
cuatro o más averías en doce meses.
Sustitución del producto por otro nuevo si su producto cubierto no puede repararse.
Revisión y mantenimiento anual preventivo siempre que lo desee y sin cargo alguno.
Ayuda rápida por teléfono - Nosotros lo llamamos Resolución rápida. Soporte telefónico de un
representante de Sears en todos los productos. Piense en nosotros como un "manual del usuario
parlante".
Protección contra subidas de tensión que provoquen daños eléctricos causados por las
fluctuaciones de la corriente.
$250 de protección contra la pérdida de alimentos anualmente en caso de que se estropee algún
alimento como resultado de una avería mecánica de cualquier congelador o refrigerador
cubierto.
Reembolso del alquiler si la reparación de su producto cubierto toma más tiempo del prometido.
10% de descuento en el precio regular de cualquier servicio de reparación no cubierto y de las
piezas instaladas relacionadas.
VACUUM CLEANER HELP LINE
IMPORTANT SAFETY INSTRUCTIONS
Read all instructions in this guide before assembling or using your vacuum cleaner.
WARNING:
El indicador de CHECK
BAG (indicator
electrónico de la bolsa)
enciende.
1. Bolsa para polvo llena o atascada.
2. Filtros sucios.
3. Vías de flujo de aire atascadas.
4. Ciertos accesorios.
1. Cambie la bolsa. (pág 20)
2. Cambie los filtros. (pág 21-22)
3. Desbloquee las vías de flujo de
aire. (pág 19)
4. Esto es normal. El indicador debe
ser normal cuando la herramienta
está quitada.
La aspiradora levanta
tapetes o es difícil
empujar la PowerMate.
1. Ajuste incorrecto de nivel de
pelo de la alfombra.
2. Aspiración demasiado potente.
El cordón no se enrolla.
1. Cordón eléctrico sucio.
2. Cordón atascado.
1. Limpie el cordón eléctrico.
2. Tire del cordón y después
enróllelo. (pág 9)
La aspiradora deja
marcas en la alfombra.
1. Estilo de limpieza incorrecta.
1. Consulte SUGERENCIAS PARA
ASPIRAR. (pág 11)
Indicador verde encendido continuamente
en el detector de polvo.
1. La vía de paso de tierra o la
bolsa depolvo están bloqueadas.
2. Lente sucia.
1. Determine si están bloqueadas las
vías de aire. (pág 19)
2. Limpie las lentes. (pág 26)
No se encienden los
indicadores verde o rojo
de detección de tierra.
1. El switch no esta en la posición
CARPET (alfombra).
2. No hay suminsitro de energia al
tablero detector.
1. Mover el switch a la posición
CARPET (alfombra). (pág 10)
2. Acuda al Centro de Servicio de
Sears más cercano.
La luz roja para el BELT
RESET (Protector contra
sobrecarga) PowerMate
se prende.
1. BELT RESET de la PowerMate
botado.
1. Retire cualquier objeto atorado o
atascado, luego restablezca. Si la
aspiradora arranca pero se vuelve
a se prende. apagar, limpie el agi
tador y los tapas del extremos de
éste, luego restablezca.
(pág 18, 23-24)
1. Ajuste el nivel. (pág 9, 12)
2. Seleccionar nivel de poder
bajo. (pág 10)
Línea de ayuda de aspiradoras:
1-877-531-7321
8:00am-5:00pm EST, M-F
(U.S.A. and Canada)
SAVE THESE INSTRUCTIONS
Proper assembly and safe use of your vacuum cleaner are your responsibilities. Your vacuum
cleaner is intended for Household use. Read this Use & Care Guide carefully for important
use and safety information. This guide contains safety statements under warning and
caution symbols.
4
POSIBLE SOLUCIÓN
POSIBLE CAUSA
29
ESPAÑOL
Your safety is important to us. To reduce the risk of fire, electrical shock, injury to
persons or damage when using your vacuum cleaner, follow basic safety
precautions including the following:
Use extra care when cleaning on stairs.
Use your vacuum cleaner only as described
Do not put on chairs, tables, etc. Keep on
in this guide. Use only with Sears
floor.
recommended attachments.
Do not use vacuum cleaner to pick up
Disconnect electrical supply before
flammable or combustible liquids (gasoline,
servicing or cleaning out the brush area.
cleaning fluid, perfumes, etc.), or use in
Failure to do so could result in brush
areas where they may be present. The
unexpectedly starting causing personal
fumes from these substances can create a
injury from moving parts.
fire hazard or explosion.
Do not leave vacuum cleaner when plugged
Do not pick up anything that is burning or
in. Unplug from outlet when not in use and
smoking, such as cigarettes, matches, or hot
before performing maintenance.
ashes.
To reduce the risk of electrical shock - Do
Do not use vacuum cleaner without dust
not use outdoors or on wet surfaces.
bag and/or filters in place.
Do not allow to be used as a toy. Close
Always change the dust bag after
attention is necessary when used by or near
vacuuming carpet cleaners or freshener,
children.
powders, and fine dust. These products
Do not use with a damaged cord or plug.
clog the bag, reduce airflow and can cause
If vacuum cleaner is not working as it
the bag to burst. Failure to chage the bag
should, has been dropped, damaged, left
could cause permanent damage to the
outdoors, or dropped in water, return it to a
vacuum cleaner.
Sears Service Center.
Do not use the vacuum cleaner to pick up
Do not pull or carry by cord, use cord as a
sharp hard objects, small toys, pins, paper
handle, close a door on cord, or pull cord
clips, etc. They may damage the vacuum
around sharp edges or corners. Do not run
cleaner.
vacuum cleaner over cord. Keep cord
Do not operature the vacuum cleaner
away from heated surfaces.
without the exhaust filter or filter door in
Do not unplug by pulling on cord. To
place.
unplug, grasp the plug, not the cord.
The hose contains electrical wires. Do not
Do not handle plug or vacuum cleaner with
use when damaged, cut, or punctured.
wet hands.
Replace if cut or worn. Do not pick up
sharp objects.
Do not put any objects into openings.
Always turn off and unplug vacuum cleaner
Do not use with any opening blocked; keep
before connecting or disconnecting either
free of dust, lint, hair, and anything that
hose, wand, Pet PowerMate®, or nozzle.
may reduce air flow.
Hold plug when rewinding onto cord reel.
Keep hair, loose clothing, fingers, and all
Do not allow plug to whip when rewinding.
parts of body away from openings and
moving parts.
You are responsible for making sure that
your vacuum cleaner is not used by anyone
Turn off all controls before unplugging.
unable to operate it properly.
PROBLEMA
PARTS AND FEATURES
RECONOCIMIENTO DE PROBLEMAS
Revise este recuadro para encontrar soluciones a problemas que puede corregir usted mismo.
Cualquier otro servicio debe ser realizado por SEARS u otro agente de servicio calificado.
It is important to know your vacuum cleaner’s parts and features to ensure its proper and
safe use. Review these before using your vacuum cleaner.
ADVERTENCIA
Apagué y desconecté la aspiradora antes de efectuar el mantenimiento a su aspiradora. De lo contrario podría producirse un choque eléctrico o causar lesión corporal.
PROBLEMA
POSIBLE CAUSA
1. Está desconectada.
No aspira
satisfactoriamente.
2. Cortacircuitos botado o fusible
quemado en el tablero de servicio
de la residencia.
3. Conexiones eléctricas de la
manguera sueltas.
1. Bolsa para polvo llena o atascada.
2. Vías de flujo de aire atascadas.
1. Conecte bien, presione el botón
ON/OFF.
2. Restablezca el cortacircuitos o
cambie el fusible.
La PowerMate no funciona
cuando está instalada.
1. Conexiones eléctricas de la manguera
o de la tapa.
1.
2. BELT RESET de la PowerMate
botado.
2.
3. Protector termal botado
en el receptáculo.
3.
1. Conexiones de la PowerMate
desconectadas.
2. Correa desgastada o rota.
3. Agitador o tapas de extremos de
éste sucios.
4. BELT RESET de la PowerMate
botado.
1.
5. El switch no esta en la posición
CARPET (alfombra).
28
Telescoping
Wand
3. Vuelva a conectar los extremos de
la manguera. (pág 7-8)
1. Cambie la bolsa. (pág 20)
2. Limpie las vías de flujo de aire.
(page 19)
3. Cambie los filtros. (pág 21-22)
4. Ajuste el nivel. (pág 9, 12)
3. Filtros sucios.
4. Ajuste incorrecto de nivel de
pelo de la alfombra.
5. Incorrecta selección de nivel de poder.
5.
6. Manguera rota.
6.
7. Agitador de la PowerMate
7.
desgastados.
8. Correa desgastada o rota.
8 & 9.
9. Agitador o tapas de los extremos
sucios.
10. BELT RESET de la PowerMate
10.
botado.
La aspiradora arranca,
pero se apaga.
Canister
POSIBLE SOLUCIÓN
ENGLISH
La aspiradora no arranca.
Handle &
Hose Assembly
Ajuste el control. (pág 10)
Cambie la manguera.
Cambie la agitador. (pág 23-24)
Consulte CAMBIO DE LA CORREA Y
LIMPIEZA DEL AGITADOR.
(pág 23-24)
Retire cualquier objeto atorado o
atascado, luego restablezca. Si la
aspiradora arranca pero se vuelve a
apagar, limpie el agitador y los tapas
del extremos de éste, luego
restablezca. (pág 18, 23-24)
Examine las conexiones eléctricas,
vuelva a conectar los extremos
de la manguera. (pág 7-8)
Retire cualquier objeto atorado o
atascado, luego restablezca. Si la
aspiradora arranca pero se vuelve a
apagar, limpie el agitador y los tapas
del extremos de éste, luego
restablezca. (pág 18, 23-24)
Consulte CARACTERÍSTICAS DE
RENDIMIENTO - “Protector Termal.”
(pág 18)
Conecte bien.
2 & 3. Consulte CAMBIO DE LA CORREA Y
LIMPIEZA DEL AGITADOR.
(pág 23-24)
4. Retire cualquier objeto atorado o
atascado, luego restablezca. Si la
aspiradora arranca pero se vuelve a
apagar, limpie el agitador y los tapas
del extremos de éste, luego
restablezca. (pág 18, 23-24)
5. Mover el switch a la posición
CARPET (alfombra). (pág 10)
PowerMate®
REPLACEMENT PARTS
Style No.
Part No.
in USA
Part No.
in Canada
Belt
CB-3
20-5218
20-40118
Headlight Bulb
-----
20-5248
20-40601
Q
20-50557
20-50410
Dust Bag *
-----
KC16KDRGZ0U0 *
-----
Exhaust Filter
EF-1
20-86889
20-40324
Exhaust Filter *
-----
KC38KCEN1000 *
-----
Motor Safety Filter
CF-1
20-86883
20-40321
Object
Dust Bag
* Use the parts noted above to maintain AAFA certification for this model. Order online at
www.searspartsdirect.com or call 1-800-252-1698.
5
CANISTER
CUIDADO DEL AGITADOR
®
Pet PowerMate
®
Pet PowerMate
Storage Cover ®
(Pet PowerMate inside)
Pet
Tool
Floor
Brush
Check Bag Indicator
Cord Rewind Button
Exhaust Filter Cover
(Exhaust Filter inside)
Tool Storage Cover
(Attachment
storage inside)
Power Cord
Motor Safety Filter
PARA CAMBIAR EL AGITADOR
ADVERTENCIA
1. Retire la cubierta, correa y ensamble
del agitador de la PowerMate. Consulte
“Para retirar la correa” bajo CAMBIO DE
LA CORREA Y LIMPIEZA DEL AGITADOR
(pág 23-24).
Peligro de choque eléctrico o lesión corporal
Desconecte la corriente antes de efectuar el mantenimiento a su aspiradora.
De lo contrario podría producirse un
choque eléctrico o causar lesión corporal si la aspiradora arranca de manera
imprevista.
2. Reemplace el agitador. Ver por
separado su lista de partes de reparacion
para el numero de parte.
3. Instale la correa, y la cubierta de la
PowerMate. Consulte “Para cambiar la
correa” bajo CAMBIO DE LA CORREA Y
LIMPIEZA DEL AGITADOR (pág 23-24).
PARA REVISAR LOS CEPILLOS
Cuando los cepillos estén gastados al nivel de
las barras de soporte en la base, cambie el
agitador completo.
Canister Hood
(Dust Bag and Motor
Safety Filter Inside)
Dust Bag
Cepillos Nuevos
Cepillos Desgastado
Carry Handle
Hood Release
Storage
Hook Slot
Barra de
soporte
de la base
Stair Grip
Canister Model/
Serial Label
6
27
HANDLE AND HOSE ASSEMBLY
DETECTOR DE POLVO
Aunque la función de detección de polvo de la
aspiradora Kenmore está diseñada para
brindar muchos años de funcionamiento
interrumpido, el paso de polvo a través del
sistema de las vías de aire puede causar una
escama en las lentes, haciendo que se
encienda y continúe encendido el indicador
verde, sin cambiar nunca a rojo. Cuando esto
suceda, se tienen que limpiar las lentes.
2. Como se ve en el diagrama los dos indicadores de polvo están colocados dentro de
la articulación giratoria, aproximadamente 4
pulgadas o 10 cm abajo, Observe las flechas). Para llegar a los elementos del detector, use un cepillo pegueño, como por ejemplo
para botellas. Cepille cada detector varias
veces para eliminar la tierra y el polvo.
Electronic
Suction
Control
3-Way On/Off Switch
Off/Floor/Carpet
Handle
TELESCOPING
WAND
Corte transversal
No utilice nunca agua ni solución limpiadora
para limpiar las lentes. El residuo del agua o
del limpiador causará que las lentes se
cubran de tierra más rápido, requiriendo
limpieza con mayor frecuencia.
Approx.
4 pulgadas
o 10 cm
Crevice
Tool
Combination
Brush
Wand Length
Adjust Button
Hose Swivel
PARA LIMPIAR LAS LENTES
Elementos
del detector
1. Remueva la extensión pisando el pedal de
liberación rápida del tubo y jale del tubo
hacia arriba para desprenderlo de la
PowerMate.
Storage
Hook
Wand Light
Dirt Sensor
Headlight
and Lens
POWERMATE
Wand Quick
Release Pedal
Furniture
Guard
Pedal de
liberación
rápida
del tubo
2. Vuelva a instalar el tubo después de
limpiar los detectores.
PowerMate
Model/Serial
Number
(On Bottom)
Height Adjust
Indicator
Belt Reset Light
Belt
Handle
Release Pedal
Height
Adjust Pedal
26
Belt Reset
Button
Edge Cleaner
(Not Shown)
7
ENGLISH
CUIDADO
CAMBIO DE LA BOMBILLA
Please pay special attention to these hazard alert boxes, and follow any instructions given. WARNING statements alert you to such dangers as fire, electric
shock, burns and personal injury. CAUTION statements alert you to such dangers as personal injury and/or property damage.
ASSEMBLY INSTRUCTIONS
PET POWERMATE
WARNING
1. Open the Pet PowerMate storage cover.
Electrical Shock Hazard
DO NOT plug into electrical supply until
assembly is complete. Failure to do so
could result in electrical shock or injury.
ADVERTENCIA
2. Insert the Pet PowerMate and press down
until it clicks into place.
3. Close the lid securely.
Before assembling vacuum cleaner, check
the PACKING LIST (page 2). Use this list
to verify that you have received and
identified all the components of your new
Kenmore vacuum cleaner.
Pet
PowerMate
Storage
Cover
POWERMATE
Align wand and insert onto PowerMate until
the wand locks into place.
3. Quite la bombilla
vieja del portalámparas
jalando derecho hacia
fuera.
Peligro de choque eléctrico o lesión corporal
Apagué y desconecte la unidad antes de
limpiarla o darle servicio. De lo contrario podría producirse un choque eléctrico
o causar lesión corporal si la aspiradora
arranca de manera imprevista.
CUIDADO
No use una bombilla de más de 9W (13V).
Cuando se use la aspiradora por un largo
periodo de tiempo, el calor de la bombilla
puede calentar las partes de plastico
cerca.
CUIDADO
No conecte o encende la aspiradora antes
de armarla completamente.
4.
Para reemplazar la
bombilla cuidadosamente insértela seguramente en la ranura.
NOTA: Use el reemplazo de la bombilla
numero 20-5248, ver en detalle el número
de parte en PARTES DE REEMPLAZO (Pág
4).
1. Apagué y desconecté la aspiradora.
Destornillador
plano
Ranuras
HOSE TO CANISTER
Line up the hose latch tab and notch in
canister hood and insert hose into canister
until it snaps into place.
Lente
de luz
5. Substituya la cubierta de la lente insertando la parte inferior de
la lente en la ranura.
2. Extraiga el
lente de la hendidura insertando el desarmador en la
rendija, empuje
hacia abajo el
lente y girelo
con el desa
mador en
diracción hacia
la unidad.
6. Un sonido “pop”
indica que la lente está
colocada correctamente en su lugar.
ESPAÑOL
Hose
Latch
Tab
CANISTER
Notch
To remove: Do not
open hood before
removing hose.
With hood closed,
depress hose latch
tab. Pull upward
on hose.
1. Check to see that the dust bag is
properly installed. See DUST BAG
CHANGING (page 21) for instructions.
2. Check to see that the motor safety filter
is properly installed. See MOTOR SAFETY
FILTER CHANGING (page 22) for
instructions.
8
25
LIMPIEZA DEL AGITADOR:
PARA CAMBIAR LA CORREA
HANDLE ASSEMBLY
NOTA: Para mantener una alta eficiencia
de limpieza y evitar daños a la aspiradora, hay que limpiar el agitador cada vez
que se cambia la correa.
NOTA: Use el reemplazo de la correa
ESTILO CB-3, ver en detalle el número de
parte en PARTES DE REEMPLAZO (Pág 4).
También hay que limpiar el agitador
según el siguiente calendario:
1.Instale una
correa nueva
sobre el eje
del motor y
luego sobre
la polea del
agitador.
The combination brush can be stored on
the hose handle by placing on hose
handle before attaching wand. Slide the
combination brush firmly onto the handle.
Limpie el
agitador
Frecuente (usada diariamente)
cada semana
Moderado (usada 2 o 3 veces
por semana)
cada mes
Agitador
Tapa del
extremo
2. Coloque otra vez
la unidad del agitador en la
PowerMate .
Ligero cada 2 meses
(usada 1 vez por semana)
IMPORTANTE
3. NOTA: Asegúrese que la tarjeta del sensor
de polvo este colocada en las ranuras y todo
el cableado este ubicado en su lugar.
Apagué y desconecté la aspiradora. Examine frecuentemente el agitador y las
áreas de soporte del mismo en la
PowerMate y elimine todo cabello, hilo y
pelusa acumulada.
4. Alinee la parte frontal de la cubierta con
la base. Coloque la cubierta sobre el borde
delantero de la base como se muestra.
Retire todo indicio de basura o suciedad
de la ruta de la correa y del rodillo del
agitador.
ENSAMBLE DEL AGITADOR
Combination
Brush
Insert wand into handle until lock button
snaps in place. Be sure hose is not
twisted.
To remove: Press wand release button
and pull up on handle.
To store: Disconnect hose from wand and
canister to prevent stress on hose during
storage. Store hose in a loosely coiled
position so the hose covering is not
stressed.
6. Cerciórese que no hay espacio entre la
cubierta y la base.
Ruta de
la correa
Unidad del
cepillo
Brush
Release
5. Rote la cubierta
hacia atrás.
Apriete con poca
fuerza hasta que
las lengüetas
laterales y traseras
encierren
seguramente.
Con cuidado
saque las tapas
y quite el hilo o
los restos
ubicados en el
agitador.
Tapa del
extremo
Wand
Release
7. Coloque la PowerMate con la parte
inferior hacia arriba e inserte los cuatro (4)
tornillos en la cubierta.
Tapa del
extremo
24
Combination
Brush
ENGLISH
El uso de la
aspiradora
Handle
Impulsor
del motor
Ruta de
la correa
9
OPERATING INSTRUCTIONS
CUIDADO DE LA POWERMATE
Siempre deberán seguirse todas las precauciones de seguridad antes de efectuar el
mantenimiento a la PowerMate.
CAUTION
Moving parts! To reduce the risk of personal injury, DO
NOT touch the agitator when vacuum cleaner is on.
Contacting the agitator while it is rotating can cut,
bruise or cause other injuries. Always turn off and
unplug from electrical outlet before servicing.
ADVERTENCIA
Peligro de choque eléctrico o lesión corporal
Apagué y desconecté la aspiradora
antes de efectuar el mantenimiento a su
aspiradora. De lo contrario podría producirse un choque eléctrico o causar
lesión corporal si la aspiradora arranca
de manera imprevista.
Use caution when operating near children.
HOW TO START
2. Plug the polarized power cord into a 120
Volt outlet located near the floor.
WARNING
Personal Injury and Product Damage
Hazard
To rewind: Turn off
and unplug the
vacuum cleaner.
Hold the plug while
rewinding to
prevent damage or
injury from the
moving cord. Push
cord rewind button.
• DO NOT plug in if switch is in ON
position. Personal injury or property
damage could result.
• The cord moves rapidly when
rewinding. Keep children away
and provide a clear path when
rewinding the cord to prevent
personal injury.
PARA RETIRAR LA CORREA
Pedal de
liberación
rápida
del tubo
3. Lower wand from upright position by
pressing on the handle release pedal.
• DO NOT use outlets above counters.
Damage from cord to items in
surrounding area could occur.
Handle
Release
Pedal
• When any abnormality/failure occurs,
stop using the product immediately and
disconnect the power plug.
Height Adjust
Indicator
HEIGHT
ADJUST
Pedal
1. Pull cord out of
canister to desired
length. The cord
will not rewind
until the cord
rewind button is
pushed.
4. Select a height adjust setting by pressing
the HEIGHT ADJUST pedal on the rear of
the PowerMate. The height adjust setting
shows on the indicator. See SUGGESTED
HEIGHT ADJUST SETTINGS (page 13).
NOTE: To reduce the risk of electric shock,
this vacuum cleaner has a polarized plug;
one blade is wider than the other. This plug
will fit in a polarized outlet only one way. If
the plug does not fit fully in the outlet,
reverse the plug. If it still does not fit,
contact a qualified electrician to install the
proper outlet. Do not change the plug in
any way.
Attention: Refer to your carpet
manufacturers cleaning recommendations.
Some more delicate carpets may require
that they be vacuumed with the PowerMate
agitator turned off to prevent carpet
damage.
10
3. Gire la
PowerMate para
mostrar la parte
inferior hacia
arriba y
desatornille cuatro
(4) tornillos de la
cubierta.
1. Apagué y
desconecté la
aspiradora.
6. Jale hacia
fuera y levante
los cierres
posteriores.
Pise el pedal de
liberación rápida
del tubo y tire del
tubo hacia arriba
para desprenderlo
de la PowerMate.
2.
Pestillos
traseros
7. Agarre los
cierres laterales
y jale hacia a
fuera y levante.
Tornillos
8. Levante la
cubierta hacia
arriba y
quedara
liberada la
cubierta.
9. Observe la
posición de todo el
cableado y la
tarjeta del sensor
de polvo. Quite el
agitador y la correa
gastada.
4. Gire la
PowerMate con la
parte superior
hacia arriba.
Pedal de
liberación
del mango
Pestillos
laterales
5. Apriete el
pedal del
mango de
liberación y baje
la articulación
giratoria
Base
Tapa del
extremo
10. Examine y
limpie las áreas de tapa del extremo. En la
ENSAMBLE DEL AGITADOR (pág 24) se
proporciona una ilustración de todo el
ensamble del agitador.
23
ESPAÑOL
Rewind
Button
CAMBIO DE LA CORREA Y LIMPIEZA DEL AGITADOR
CAMBIO DEL FILTRO DE ESCAPE
Este filtro de escape debe ser reemplazado regularmente. Cambie el filtro de escape cuando el
área superficial esté cubierta por completo. El filtro de escape no se puede lavar pues perdería
su capacidad para atrapar polvo.
NOTA: Use el reemplazo del filtro de escape ESTILO EF-1 o KC38KCEN1000, ver en detalle
el número de parte en PARTES DE REEMPLAZO (Pág 4).
ADVERTENCIA
Peligro de fuego o choque eléctrico
No opere con un filtro de escape bloqueado
o sin el filtro de escape instalados. No
opere sin la cubierta del filtro de escape
instalada.
1. Jale y baje la
cubierta del filtro de
escape para quitarla
de la aspiradora y
colóquela a un lado.
Filtro de
escape
2. Jale el filtro de
escape hacia
arriba y hacia
fuera de la parte
posterior de la
aspiradora.
Ranura
Lengüetas
Filtro de
escape
4. Monte la
cubierta del filtro
de escape
colocando las dos
lengüetas en la
cubierta del filtro
en las ranuras de
la aspiradora y
gire en su lugar
hasta que cierre
completamente.
WAND (TELESCOPING)
CARPET - turns on
both the canister and
the PowerMate motors.
Headlight and agitator
will come on.
The wand length
is adjustable and
requires no
assembly. To
adjust, simply push
on the wand
adjust button and
slide the upper
wand to the
desired height.
CARPET
FLOOR
FLOOR - turns on the
canister motor only.
OFF - Turns vacuum
cleaner off.
NOTE - When this switch is in the FLOOR
position the nozzle headlight DOES NOT
function since no electricity flows to the
PowerMate.
CAUTION
DO NOT leave the PowerMate running in
one spot for any length of time. Damage
to carpet may occur.
NOTE: When
adjusting the
wand length
you may have
to hold the
PowerMate with
your hand or
foot.
ELECTRONIC SUCTION CONTROL
The electronic suction control allows you to
change the power of the vacuum cleaner
suction motor.
SUCTION
CONTROL
Increase suction
Increase for upholsteries
Suction and carpets.
Decrease suction
Decrease for draperies and
Suction lightweight rugs.
22
Wand
Length
Adjust
Button
ENGLISH
3. Reemplace el
filtro del escape.
Coloque el filtro de
escape nuevo en la
aspiradora con el
lado de esponja en
dirección a la
aspiradora.
5. Select a position on the handle threeway On/Off switch.
11
VACUUMING TIPS
CAMBIO DEL FILTRO DE SEGURIDAD DEL MOTOR
SUGGESTED SWEEPING PATTERN
POWERMATE STEERING
For best cleaning action, the PowerMate
should be pushed straight away from you
and pulled straight back. At the end of
each pull stroke, the direction of the
PowerMate should be changed to point into
the next section to be cleaned. This pattern
should be continued across the carpet or
floor with slow, gliding motions.
The nozzle swivel rotates left and right for
improved maneuvering in tight spaces and
around corners.
Este filtro se tiene que cambiar cuando esté sucio. Debe cambiarse periódicamente según las
condiciones de uso. El filtro de seguridad del motor no se puede lavar pues perdería su capacidad para atrapar polvo.
NOTA: Use el reemplazo del filtro de seguridad del motor ESTILO CF-1 o 8175084, ver en
detalle el número de parte en PARTES DE REEMPLAZO (Pág 4).
3. Reemplace el filtro de seguridad del motor,
instale la superficie blanca de el lado de la
bolsa de polvo deslizando este en las costillas
de la cavidad. Meta el filtro de seguridad del
motor para que quepa por completo debajo
del dispositivo de retención de goma.
ADVERTENCIA
Peligro de choque eléctrico
NOTE: Fast,
random strokes
do not provide
complete
cleaning.
WAND UPRIGHT LOCKED
POSITION
CAUTION
When the wand is
returned to the
upright position,
the wand rotation
lock holds the
wand in place.
This prevents
rotation of wand
and hose handle
for better stability.
Product Damage Hazard
Use care if the PowerMate and wand is
left in the upright position as it may tip
over easily. Property damage can occur if
tipped.
WARNING
Apagué y desconecté la aspiradora. No
opere la aspiradora sin el filtro de seguridad
del motor. Asegéurese de que el filtro esté
seco e instalado adecuadamente para
impedir que el motor falle y/o que se produzca un choque eléctrico.
1. Para quitar la bolsa, siga las instrucciones
en CAMBIO DE LA BOLSA DE POLVO (pág
20).
Dispositivo de
retención de goma
2. Levante el dispositivo de retención de
goma y saque el filtro de seguridad como se
ve en el diagrama.
Personal Injury and Product Damage
Hazard
4. Véase CAMBIO DE LA BOLSA DE POLVO
(pág 20) para cambiar la bolsa.
Dispositivo de
retención de goma
• DO NOT run over power cord with
PowerMate. Personal injury or product
damage could result.
UNDER FURNITURE
To maximize the
reach of the
PowerMate under
furniture, turn the
handle to either
side and lower the
wand close to the
floor.
12
ENSAMBLE DE LA TAPA Y LA CUBIERTA
Es normal que la tapa del receptáculo se
desprenda al ser abierta más de lo necesario.
Para colocar nuevamente la tapa, alinee las
ranuras de la bisagra, insértelas y cierre la
tapa.
CUIDADO
Nunca debe abrir la capucha del
contenedor estando la tapa abierta. Así
se evitará daños a la capucha del
contenedor y/o a la tapa.
21
ESPAÑOL
• DO NOT pull plug from wall by
the power cord. If there is damage to
the cord or plug, personal injury or
property damage could result.
CAMBIO DE LA BOLSA DE POLVO
La bolsa de polvo debe cambiarse seguido para lograr los mejores resultados de limpieza. El indicador CHECK BAG prendera cuando esta necesite ser cambiada o cuando el fluido de aire este
bloqueado.
NOTA: Use el reemplazo de la bolsa de polvo ESTILO Q o KC16KDRGZ0U0, ver en detalle el
número de parte en PARTES DE REEMPLAZO (Pág 4).
STAIRS
EDGE CLEANER
Active brush edge
cleaners are on both
sides of the
PowerMate. Guide
either side of the
PowerMate along the
wall or next to
furniture to help
remove dirt trapped
at carpet edges.
WARNING
Personal Injury Hazard
Use care if canister is placed on stairs. It
may fall, causing personal injury or
property damage.
CAUTION
REEMPLAZANDO LA BOLSA DE
POLVO
Product Damage Hazard
HOSE SWIVEL
1. Apagué y desconecté la aspiradora.
NOTA: NO doble ni pliegue el centro del
cartón al instalar la bolsa de polvo en las
ranuras del montaje de la bolsa bolsa de
polvo.
1. Verifique que la aspiradora este
desconectada.
Do not pull on the hose to move the
canister from one stair to the next. When
finished cleaning in one area use the
handle grip on the canister to move the
vacuum cleaner to a new location for
further cleaning.
2. Gire hacia abajo
el soporte para la
bolsa roja y para
insertar la bolsa de
polvo en las ranuras
empuje hacia abajo
hasta que las
lengüetas de cartón
encierren
seguramente en las posiciones apropiadas
como se ve en el diagrama.
STAIR GRIP
The 360° hose
swivel allows the
hose to turn without
moving the canister.
This is helpful for
cleaning in small
areas. Check hose
for twisting before
pulling canister.
2. Quite la manguera de la aspiradora. (Ver
INSTRUCCIONES DE ENSAMBLE, pág 7).
3. Tire del pestillo de la tapa hacia fuera y
hacia arriba.
Pestillo
de la tapa
4. Levante la tapa del receptáculo.
5. Saque la bolsa de
polvo del montaje
rojo.
NOTA: Revise y
cambie el filtro de
seguridad del motor,
cuando sea necesario.
(Ver CAMBIO DEL
FILTRO DE
SEGURIDAD DEL
MOTOR, pág 21).
4. Baje la cubierta del receptáculo y cierre el
pestillo.
In order to prevent
the canister from
slipping on stairs,
the STAIR GRIP
feature
automatically locks
the caster wheel in
position when the
canister is placed on
residential stairs.
5. Introduzca la manguera en el receptáculo
hasta que quede fija en posición (Ver
ENSAMBLE, pág 7).
NOTE: Be sure the canister is resting
securely on the stairs and the caster is in a
locked position before using.
3. Empuje la bolsa de polvo asegurándola
dentro de la cavidad para evitar que sea
trabada por la tapa de la aspiradora.
Pestillo
de la tapa
CUIDADO
NUNCA VACIÉ Y REUTILICE UNA
BOLSA PARA POLVO. Los materiales
muy finos, tales como desodorantes
para alfombras, talco facial, polvo
fino, yeso, hollín, pelusa de alfombras nuevas, etc., pueden atascar la
bolsa y causar que se rompa antes
de que esté llena y puede dañar el
motor de la aspiradora. Cambie la
bolsa más seguido cuando aspire
este tipo de materiales.
Montage
rojo
NOTA: El montaje rojo de la bolsa de polvo
se inclinará hacia adelante después de que
retire la bolsa. Esto impedirá que la tapa se
cierre antes de instalar una bolsa nueva.
20
The stair grip located on the caster will aid
in preventing the canister from slipping
when used on stairs. During normal
operation while the canister is in the
horizontal position, the caster wheel rotates
freely 360°.
SUGGESTED HEIGHT ADJUST SETTINGS
Suggested settings are:
For best deep down cleaning, use the XLO
height adjust setting. However, you may
need to raise the height to make some jobs
easier, such as scatter rugs and some deep
pile carpets, and to prevent the vacuum
cleaner from shutting off.
HI – Shag, deep pile, or scatter rugs.
MED – Medium to deep pile.
LO – Low to medium pile.
XLO – Most carpets and bare floors.
13
ENGLISH
REMOVIENDO LA BOLSA DE
POLVO
CUIDADO DEL RECEPTÁCULO
ATTACHMENTS
Handle
CAUTION
DO NOT attach or remove handle or
wands while vacuum cleaner is ON. This
could cause sparking and damage the
electrical contacts or electronic controls.
Pet PowerMate
1. Press wand
release button
and pull up on
handle.
2. Slide attachments firmly on handle as
needed. See ATTACHMENT USE TABLE
(page 17).
NOTE:
To remove combination brush, press the
brush release button and slide off.
Handle
Brush
Release
Combination
Brush
Handle
Filtro de
escape
Bolsa de
polvo
PARA CHECAR OBSTRUCCIONES:
· Checar la bolsa de polvo y cambiar al
estar llena. Ver CAMBIO DE LA BOLSA
DE POLVO (pág 20).
· Checar filtro de seguridad del motor y el
filtro de escape y cambielo si esta sucio.
Ver CAMBIO DE FILTRO DE SEGURIDAD
DEL MOTOR (pág 21) y CAMBIO DE
FILTRO DE ESCAPE (pág 22).
· Checar Power Mate sobre cualquier
suciedad u obstruccion en el area de la
banda o el area del agitador.
Cuidadosamente remueva cualquier
obstruccion u objeto locatizados en el
agitador o sus tapas. Ver LIMPIEZA DEL
AGITADOR (pág 24).
Si la aspiradora aun tiene una baja succion,
haga lo siguiente.
1. Conecte la maguera a la aspiradora y
enciendala. Cheque el final de la
manguera para la succion. Si hay buena
succion en el mango de la manguera, no
hay obstruccion en la manguera. Si la
succion es mala, remueva cualquier
suciedad u objeto en la maguera y
mango.
2. Conecte la manguera al tubo telescopico.
Cheque el final del tubo telescopico para
la succion. Si hay buena succion al final,
significa que no hay obstruccion en el
tubo telescopico. Si la succion es mala,
remover cualquier suciedad u objeto en
el tubo telescopico.
3. Revisar el conducto de succion del
Power Mate. Remover cualquier
suciedad u objeto.
Wand
Release
LIMPIEZA DEL EXTERIOR Y DE LOS ACCESORIOS
Pet Tool
Handle
Wand
Release
Crevice
Tool
14
1. Apagué y desconecte el cordón eléctrico de
la clavija de la pared. NO rocíe agua sobre la
aspiradora.
CUIDADO
No use los accesorios si están mojados. Los
accesorios que se utilicen en áreas sucias,
debajo del refrigerador, no deben usarse en
otras superficies sin antes ser lavados.
Podrían dejar marcas.
2. Para limpiar el exterior o reducir la
electricidad estática y acumulación de
polvo, limpie la superficie exterior de la
aspiradora y los accesorios. Use un trapo
suave y limpio, mójelo en una solución de
agua y detergente líquido, y exprímalo
seco. Séquela después de limpiar.
19
ESPAÑOL
NOTE:
To remove floor brush and/or Pet
PowerMate, press the wand release button
and slide off.
DE
FL
UJ
O
Wand
Release
Filtro de
seguridad
del motor
A
Handle
Para lograr los mejores resultados de
limpieza, mantenga abiertas las vías
de aire. Examine periódicamente
las áreas indicadas con asteriscos
(★) para asegurarse de que no
estén bloqueadas. Apagué y
desconecte del
receptáculo antes de
revisarlo.
VÍ
Floor
Brush
DE
AI
RE
La aspiradora crea succión o aspiración que levanta
la tierra. La tierra es impulsada a través de las
vías de flujo aire hasta la bolsa por una rápida
corriente de aire. La bolsa para polvo permite
el flujo de aire, pero atrapa la tierra.
ATTACHMENTS ON HANDLE
NOTE: If the
PowerMate is
attached, turn
vacuum cleaner
off before
removing handle
from wand.
QUITAR DE LOS RESIDUOS DE BASURA EN LOS CONDUCTOS
ATTACHMENTS ON WAND
CARACTERÍSTICAS DE RENDIMIENTO
INDICADOR DE CHECK BAG
ADVERTENCIA
PROTECTOR CONTRA SOBRECARGAS
La PowerMate cuenta con protección
incorporada contra daño del motor y la
correa en caso de
Botón de
atascamiento del
BELT RESET
agitador. Si el
Luz de protector
agitador funciona
de sobrecarga
más despacio o se
atasca, el botón de
BELT RESET se
activa y la luz roja
se enciende. El motor del receptáculo
continuará funcionando.
Para corregir el problema: Véase el diagrama
RECONOCIMIENTO DE PROBLEMAS (pág 2829).
Floor
Brush
Pet PowerMate
2. Press wand quick release pedal with foot
and pull the wand straight up and out of
PowerMate.
Wand
NOTE:
To remove combination brush, press the
brush release button and slide off.
Wand
Quick
Release
Pedal
Brush
Release
Nota: Es posible que La luz del indicador de
CHECK BAG encienda al usar los accesorios
porque el flujo de aire es reducido por los
accesorios. La luz del indicador de CHECK
BAG puede que no prenda cuando la
aspiradora es usada con la succión baja
debido a la reducción de aire.
Para corregir el problema: Apagué y
desconecté la aspiradora, limpie la
obstrucción, y después presione el botón de
BELT RESET (protector de sobrecarga).
TAPA Y ALMACENAMIENTO
PARA POWERMATE
Si el problema persiste, busque un técnico
calificado que haga el servicio de la
aspiradora.
NOTE:
To remove floor brush and/or Pet
PowerMate, press the tool release button
and slide off.
3. Put attachments on wand as needed. See
ATTACHMENT USE TABLE (page 17).
El tubo tiene un reborde en forma de “U”
se desliza dentro en una ranura en forma
de “U” de la aspiradora.
PROTECTOR TERMAL
Tool
Release
La ranura permite almacenar los tubos y
la PowerMate con el tubo para economizar el espacio requerido para su
almacen-amiento. Para usar esta característica es necesario almacenar el receptáculo en forma vertical.
Esta aspiradora tiene un protector termal
que se ajusta automáticamente para
proteger a la aspiradora del sobrecalentamiento. Si una obstrucción impide el
flujo normal de aire al motor, el protector
termal apaga el motor automáticamente
para permitir que el motor se enfríe a fin
de evitar posibles daños a la aspiradora.
Para corregir el problema: Apagué y
desconecté la aspiradora para permitir que
la aspiradora se enfríe y que el protector
termal se reajuste. Busque y saque las
obstrucciones, si es necesario. Examine
también y reemplace/limpie cualquier filtro
obstruido. Véase QUITAR DE LOS
RESIDUOS DE BASURA EN LOS
CONDUCTOS (pág 19). Espere
aproximadamente treinta (30) minutos y
enchufe la aspiradora y voltéela para
checar si el protector termal se ha
reajustado.
Wand
La PowerMate
debe estar en la
posición llana.
Use el mango del
pedal de
liberación para
moverla a esta
Ranura
posición.
18
El tubo se sale de
la ranura al ser
levantado para
usarlo y se desliza dentro de ésta
al bajarlo para
almacenarlo.
Wand
Combination
Brush
Tool
Release
Reborde
Wand
Pet Tool
Crevice
Tool
Wand
15
ENGLISH
Cuando la aspiradora Indicator de
esté funcionando con CHECK BAG
el flujo normal de aire,
el indicador de CHECK
BAG está apagado.
Se enciende la luz
cuando la bolsa esta
llena, el flujo de aire esté obstruido, o si hay
una obstruccion. Si esto sucede, revise la
bolsa para polvo, el filtro de la seguridad del
motor y otros lugares posibles por residuos de
basura. Véase QUITAR DE LOS RESIDUOS
DE BASURA EN LOS CONDUCTOS (pág
19).
Peligro de lesiones personales
Apagué y desconecte siempre la aspiradora
antes de limpiar las áreas de la agitador
pues éstos podrían arrancar de manera
imprevista. El no hacerlo, podría resultar en
lesiones personales.
1. To remove
wand from
PowerMate,
lock wand in
straight-up
position.
COMBINATION BRUSH
CREVICE TOOL
The combination brush uses two tools, the
dusting brush and the pet tool. Each is for
use on various surfaces. See ATTACHMENT
USE TABLE (page 17).
To attach the crevice tool to the handle:
To remove dusting
brush or pet tool,
release by
pressing tab and
lifting off the
holder.
Dusting
Brush
1. Place the
round end of
the crevice tool
onto the tab on
the handle as
shown.
Holder
Tab
2. Align the slot on the flat end of crevice
tool with the tab on the handle.
Tab
3. Press the crevice tool onto the handle
until the crevice tool snaps into place.
To attach, insert
tab on holder
into slot on
dusting brush or
pet tool and
press until tab
snaps into place.
Slot
Pet
Tool
ALMACENAJE DEL PET POWERMATE Y ACCESORIOS
CEPILLO PARA PISOS Y CEPILLO
PARA ANIMALES
PET POWERMATE
Está aspiradora esta equipada con
almacén a bordo para el accesorio Pet
PowerMate.
Está aspiradora esta equipada con
almacén a bordo para accesorios.
Para almacenar:
1. Abra la cubierta de almacenaje del Pet
PowerMate.
Para almacenar:
1. Abra la cubierta de almacenaje del
accesorios.
2. Inserte el Pet PowerMate, presiónelo en
su lugar hacia abajo.
2. Coloque el cepillo para pisos y el cepillo
para animales, presiónelo en su lugar hacia
abajo.
3. Cierre la cubierta con seguridad.
Pet
PowerMate
3. Cierre la cubierta con seguridad.
Cubierta
Cepillo para
pelo de
animales
Cubierta
Tab
Cepillo
para pisos
When stored, the brush shield can be slid
over the brush.
Para quitar:
1. Abra la cubierta de almacenaje.
Para quitar:
1. Abra la cubierta de almacenaje.
2. Levante el Pet PowerMate de su lugar.
2. Levante los accesorios de su lugar.
3. Utilícelo como sea necesario. Véase
ACCESORIOS (pág 13-15) y CUADRO DE
USO DE LOS ACCESORIOS (pág 16).
Brush
Shield
16
17
ESPAÑOL
3. Utilícelo como sea necesario. Véase
ACCESORIOS (pág 13-15) y CUADRO DE
USO DE LOS ACCESORIOS (pág 16).
CUADRO DE USO DE LOS ACCESORIOS
ATTACHMENT USE TABLE
Area de Limpieza
ACCESORIO
Cepillo para sacudir
Cepillo para
animales 2
Herramienta
para hendiduras
Muebles1
Entre
cojines1
Cortinas1
✔
✔
✔
✔
✔
Pisos
Pisos
Escalones descubiertos alfombrados/ Paredes
Alfombras
✔
✔
✔
✔3
PowerMate
Pet
PowerMate 4
✔
✔
✔
✔
✔
✔
1. Siempre limpie los accesorios antes de usar sobre telas.
2. Use el cepillo para pelo de animales para remover los cabellos de superficies delicadas,
como lo son tapicerias y cortinas. NO se utilice en animales.
3. El interruptor de 3 posiciones debe estar en la posición FLOOR (PISO).
4. Pet PowerMate incluyen sus propias instrucciones para uso de accesorios.
16
ATTACHMENT
Furniture1
Between
Cushions1
Drapes1
Dusting Brush
✔
✔
Pet Tool 2
✔
✔
Crevice Tool
✔
Stairs
Carpeted
Floors/Rugs
Walls
✔
✔
Floor Brush
✔
✔
✔3
PowerMate
Pet PowerMate 4
Bare
Floors
✔
✔
✔
✔
✔
1. Always clean attachments before using on fabrics.
2. Use the pet tool to remove pet hair from delicate surfaces, such as upholstery and
drapes. DO NOT use on a pet.
3. 3-way On/Off switch should be in FLOOR position.
4. Pet PowerMate attachment instructions are included with the product.
17
ENGLISH
Cepillo para pisos
CLEANING AREA
ATTACHMENT STORAGE
CEPILLO PARA COMBINACIÓN
HERRAMIENTA PARA HENDIDURAS
Para conectar la herramienta para
hendiduras:
Pet PowerMate
Floor Brush & Pet Tool
This canister is equipped with an on-board
storage area for a Pet PowerMate
attachment.
This canister is equipped with an on-board
storage area for attachments.
El cepillo de combinación tiene dos
accesorios, el cepillo para polvo y el cepillo
para pelo de animales. estos se utilizan en
diferentes superficies. ver CUADRO DE USO
DE LOS ACCESORIOS (pág 16).
To Store:
1. Open the tool storage cover.
Para remover el cepillo para polvo o el
cepillo para pelo de animales, presione la
lengüeta y desprenda el cepillo
To Store:
1. Open the Pet PowerMate storage cover.
2. Insert the Pet PowerMate and press down
until it clicks into place.
3. Close the lid securely.
3. Close the lid securely.
Pet
PowerMate
Cepillo
para
sacudir
2. Insert the tool and press down until it
clicks into place.
Storage
Cover
Pet
Tool
Floor
Brush
2. Alinear la ranura en la parte plana del
tubo equinero con la lengüeta en el mango.
Supporte
Lengüeta
3. Presione el tubo esquinero en el mango
hasta que quede fijo.
Storage
Cover
Para conectarlo,
inserte la lengüeta
superior en la
ranura del cepillo
para polvo o el
cepillo para pelo
de animales,
presione hasta que
este quede fijo.
Lengüeta
Ranura
Cepillo
para
animales
To Remove:
1. Open the storage cover.
To Remove:
1. Open the storage cover.
1. Poner la base
del tubo
esquinero dentro
del la lengüeta
en el mango
como se muestra.
Lengüeta
Cuando se guarde, la cubierta del cepillo se
desliza sobre el cepillo
2. Remove attachment from the storage
area.
2. Remove Pet PowerMate from the storage
area.
ESPAÑOL
3. Use as needed. See ATTACHMENTS
(page 14-16) and ATTACHMENT USE TABLE
(page 17).
3. Use as needed. See ATTACHMENTS
(page 14-16) and ATTACHMENT USE TABLE
(page 17).
Cubierta
de cepillo
18
15
ACCESORIOS DEL TUBO
PERFORMANCE FEATURES
1. Para retirar
los tubos de la
PowerMate,
colóquelos en
la posición
vertical de
bloqueo.
Tubo
telescopico
CHECK BAG INDICATOR
WARNING
2. Pise el pedal de liberación rápida del tubo
y tire del tubo hacia arriba para desprenderlo
de la PowerMate.
BELT RESET
Pet PowerMate
NOTA:
Para remover el cepillo de combinación,
presione el botón de liberador del cepillo
y sepárelo.
Botón de liberación
del cepillo
3. Coloque el accesorio deseado sobre el
tubo. Consulte la CUADRO DE USO DE LOS
ACCESORIOS (pág 16).
NOTA:
Para remover el cepillo de piso y/o el
cepillo para pelo de mascotas, presione el
botón liberador del accesorio y sepárelo.
Tubo
telescopico
Botón de liberación
del accesorio
Cepillo para
combinación
Botón de liberación
del accesorio
Tubo
telescopico
Cepillo para
pelo de animales
Herramienta
para hendiduras
Tubo
telescopico
14
The PowerMate has built-in protection
against motor and belt damage should the
agitator jam. If the agitator slows down or
stops, the BELT RESET shuts off the
PowerMate and the red belt reset light will
turn on. The canister motor will continue to
run.
To correct problem: See the TROUBLESHOOTING table (page 29-30).
BELT RESET
Button
NOTE: The CHECK BAG indicator light may
come on when using certain attachments,
due to reduced airflow through attachment.
The CHECK BAG indicator light may not
turn on when the vacuum cleaner is used in
low suction power level due to reduced air
power.
Belt
Reset Light
POWERMATE STORAGE
To correct problem: Turn off and unplug
vacuum cleaner, remove obstruction, then
press BELT RESET button.
The wand has a “U” shaped storage hook
that slides into the “U” shaped slot on the
canister.
If the problem persists, have the vacuum
cleaner serviced by a Sears or other
qualified service agent.
The storage hook allows the wands and
PowerMate to be stored with the canister to
conserve storage space. The canister must
be stored on end for this feature to be used.
THERMAL PROTECTOR
To attach the
PowerMate, it
must be in the
flat position. Use
the handle
release pedal to
place it in this
position.
This vacuum cleaner has a thermal
protector which automatically trips to
protect the vacuum cleaner from
overheating. If a clog prevents the normal
flow of air to the motor, the thermal
protector turns the motor off
automatically. This allows the motor to
cool in order to prevent possible damage
to the vacuum cleaner.
The wand will
slip out of the
slot as it is lifted
up for use and
will slide into the
slot as it is
lowered for
storage.
To correct problem: Turn off and unplug
vacuum cleaner to allow the vacuum
cleaner to cool and the thermal protector
to reset. Check for and remove clogs, if
necessary. See REMOVING CLOGS (page
20). Also check and replace any clogged
filters. Wait approximately thirty (30)
minutes and plug the vacuum cleaner in
and turn back on to check if the thermal
protector has reset.
19
Storage
Hook
Slot
ENGLISH
Wand
Pedal de
liberación
rápida
del tubo
When the vacuum cleaner is running with
normal airflow, the CHECK BAG light is
off. The light comes on whenever the
dust bag is full, airflow becomes blocked,
or if there is a clog. If that occurs, first
check the
disposable dust
CHECK BAG
bag. Then check Indicator
the motor safety
filter and other
possible clog
locations shown in
REMOVING
CLOGS (page 20).
Personal Injury Hazard
Always turn off and unplug the vacuum
cleaner before cleaning the agitator area
as agitator may suddenly restart. Failure
to do so can result in personal injury.
Cepillo
para pisos
CANISTER CARE
ACCESORIOS
REMOVING CLOGS
The vacuum cleaner creates suction that
picks up dirt. Rapidly moving air carries
the dirt to the dust bag through the airflow
passages. The dust bag lets the air pass
through, while it traps the dirt.
GE
NO instale ni retire el mango ni los tubos
cuando la aspiradora esté encendida. Esto
podría causar chispas y dañar los contactos eléctricos o control electronico.
RF
LO
W
PA
S
SA
Motor
Safety Exhaust
Filter
Filter
AI
For best cleaning results, keep the
airflow passage open. Check the
starred (★) areas occasionally
for clogs. Turn off and unplug
vacuum cleaner from outlet
before checking.
Mango
CUIDADO
Dust Bag
TO CHECK FOR CLOGS:
If the vacuum cleaner still has poor
suction, do the following:
· Check dust bag and change if full. See
DUST BAG CHANGING (page 21).
· Check motor safety filter and exhaust
filter and replace if dirty. See MOTOR
SAFETY FILTER CHANGING (page 22)
and EXHAUST FILTER CHANGING
(page 23).
1. Connect the hose to the canister and
turn vacuum cleaner on. Check the end
of the hose for suction. If there is good
suction on the hose handle, there is no
clog in the hose. If the suction is bad,
remove any dirt or debris in the hose
and handle.
· Check PowerMate for any dirt or debris
in the belt path area or in the agitator
area. Carefully remove any string or
debris located on the agitator or end
caps. See TO CLEAN AGITATOR (page
25).
2. Connect hose handle to wand. Check
the end of the wand for suction. If
there is good suction at the end of the
wand, there is no clog in the wand. If
the suction is bad, remove any dirt or
debris in the wand.
Cepillo
para pisos
NOTA: Si tiene instalada la
PowerMate, apague la aspiradora antes de
quitar el mango de los tubos.
1. Oprima el
botón de
liberación rápida
del mango para
liberar el mango
y tire del mango
hacia arriba.
Mango
Pet PowerMate
Botón de
liberación
del tubo
NOTA:
Para remover el cepillo de combinación,
presione el botón liberador y sepárelo.
2. Deslice el accesorio deseado con firmeza
sobre el mango. Consulte: CUADRO DE USO
DE LOS ACCESORIOS (pág 16).
Botón de
liberación
del cepillo
Mango
NOTA:
Para remover el cepillo de piso y/o el
cepillo para pelo de mascotas, presione
el botón liberador del tubo y sepárelo.
Cepillo para
combinación
Mango
Botón de
liberación
del tubo
CLEANING EXTERIOR AND ATTACHMENTS
1. Turn off and unplug vacuum cleaner. DO
NOT drip water on vacuum cleaner.
CAUTION
2. To clean exterior, or to reduce static
electricity and dust build-up, wipe outer
surface of vacuum cleaner and attachments. Use a clean, soft cloth that has
been dipped in a solution of mild liquid
detergent and water, then wrung dry. Wipe
dry after cleaning.
Do not use attachments if they are wet.
Attachments used in dirty areas, such as
under a refrigerator, should not be used
on other surfaces until they are washed.
They could leave marks.
20
Cepillo para
pelo de animales
Mango
Botón de
liberación
del tubo
Herramienta
para hendiduras
13
ESPAÑOL
3. Check PowerMate swivel. Remove any
dirt or debris.
ACCESORIOS DEL MANGO
ESCALERAS
LIMPIADOR DE ORILLAS
Los activos cepillos
limpiadores de orillas
estan en cada lado
de la PowerMate.
Pase la PowerMate
junto a las paredes o
junto a los muebles
para ayudar a eliminar la tierra
acumulada en las orillas de la alfombra.
ADVERTENCIA
Peligro de lesión personal
Tenga cuidado si coloca el receptáculo sobre
escalones. Si se cae, podría causar lesión
personal o daño a la propiedad.
CUIDADO
SOSTÉN PARA LA ESCALERA
El sostén para la escalera esta situado en el
cuerpo y ayudará a evitar que la
aspiradora se deslice cuando se está
utilizado en las escaleras. Durante la
operación normal de la aspiradora mientras
que está en la posición horizontal, las
ruedas del cuerpo giren libremente 360°.
For best cleaning results, the dust bag should be changed often. The CHECK BAG indicator
light will come on when the dust bag needs to be changed or the airflow is blocked.
NOTE: Use replacement dust bag STYLE Q or KC16KDRGZ0U0, see part number detail in
REPLACEMENT PARTS (page 5).
REMOVING DUST BAG
REPLACING DUST BAG
2. Remove hose from canister. (See
ASSEMBLY INSTRUCTIONS, page 8).
Note: DO NOT bend or crease the
middle of the cardboard when installing
the dust bag into the bag mount slots.
3. Pull hood release out and up.
1. Verify that vacuum cleaner is
unplugged.
1. Turn off and unplug vacuum cleaner.
2. Rotate red bag
mount down and
install dust bag into
slots per illustration,
pushing down until
the cardboard tab
locks into position
and the holes align.
Hood
Release
3. Tuck the dust bag securely into the bag
cavity so that none of the dust bag is able
to be pinched by the hood.
4. Lift canister hood.
La característica del
STAIR GRIP (Sostén
para la Escalera)
permite que las
ruedas del cuerpo se
traben automaticamente en posición
cuando la aspiradora esta
colocada en escaleras
residenciales.
4. Close and latch canister hood.
Hood
Release
5. Insert hose into canister until it snaps in
place. (See ASSEMBLY INSTRUCTIONS,
page 8).
CAUTION
NOTA: Asegúrese que la aspiradora esté
descansando con seguridad sobre las
escaleras y el base para piso está en la
posición bloqueada antes de usarla.
SUGERENCIAS SOBRE EL AJUSTE DE NIVEL DE PELO DE LA ALFOMBRA
Use el ajuste XLO (bajo) para obtener la
mejor limpieza a fondo. Por otra parte, quizás
se requiera elevar el nivel para facilitar algunas tareas, como por ejemplo cuando se trata
de tapetes y algunas alfombras de pelo
largo, y para impedir que la aspiradora se
apague. Se sugieren los siguientes ajustes:
HI – Pelo muy largo y suelto, tapetes, alfombras muy acojinadas.
MED – Pelo mediano a largo.
LO – Pelo corto a mediano.
XLO – La mayoría de las alfombras y pisos
descubiertos.
12
NEVER EMPTY OUT AND REUSE A DUST
BAG. Very fine materials, such as carpet
freshener, face powder, fine dust, plaster,
soot, new carpet lint, etc. can clog the
dust bag and cause it to burst before it is
full and may cause damage to vacuum
cleaner motor. Change dust bag more
often when vacuuming these materials.
5. Pull dust bag out
of the red bag
mount and dispose
of dust bag.
NOTE: Check the
motor safety filter
and replace, if
necessary. (See
MOTOR SAFETY
FILTER CHANGING,
page 22).
Red Bag
Mount
NOTE: The red bag mount will flip forward
after removing dust bag. This will prevent
the hood from closing until a new dust bag
is installed.
21
ENGLISH
El dispositivo giratorio
de la manguera 360°
permite que ésta gire
sin necesidad de mover el receptáculo.
Esto es muy útil para
limpiar en áreas pequeñas. Asegúrese de
que la manguera no
esté torcida antes de jalar el receptáculo.
Peligro de lesión personal y daño al
producto
No jale de la manguera para mover la
aspiradora de un escalón al siguiente.
Cuando termine de limpiar un área use la
manija en la aspiradora para moverla a
otro lugar para continuar la limpieza.
DUST BAG CHANGING
MOTOR SAFETY FILTER CHANGING
SUGERENCIAS PARA ASPIRAR
The motor safety filter must be replaced when dirty. It should be replaced regularly
depending on use conditions. The motor safety filter CANNOT be washed as it will lose its
dust trapping ability.
NOTE: Use replacement motor safety filter STYLE CF-1 or 8175084, see part number detail in
REPLACEMENT PARTS (page 5).
3. Replace the motor safety filter, white
side facing toward dust bag, by sliding it
back into place under the ribs in the bag
cavity. Tuck motor safety filter in so that it
fits completely under the rubber retainer.
WARNING
Electrical Shock Hazard
Turn off and unplug vacuum cleaner from
electrical outlet. Do not operate the
vacuum cleaner without the motor safety
filter. Be sure the filter is dry and properly
installed to prevent motor failure and/or
electrical shock.
1. Remove the dust bag as outlined in the
DUST BAG CHANGING section (page 21).
Rubber
Retainer
2. Lift the rubber retainer and pull out motor
safety filter as shown.
Estilo de limpieza sugerido.
DISPOSITIVO GIRATORIO DEL
POWERMATE
Para obtener la mejor acción de limpieza se
recomienda empujar la PowerMate en dirección directamente opuesta a usted y jalarla en
línea recta. Al final de cada pasada de
regreso, cambie la dirección de la PowerMate
hacia la siguiente sección a limpiar. Continúe
así a través de toda la alfombra o piso de una
manera lenta y deslizante.
El dispositivo giratorio gira a la izquierda y
a la derecha para maniobrar mejor en
espacios reducidos y alrededor de
esquinas.
NOTA: Las
pasadas rápidas y
al azar no logran
una limpieza
completa.
SUJETADOR DE TUBO
TELESCOPICO EN POSICIÓN
Cuando el tubo
telescopico es
retornado a la
posición vertical, el
seguro de rotación
engancha el tubo
telescopico en su
lugar. esto previene
la rotación del
tubo telescopico y
el mango de la
manguera para
una mejor
estabilidad.
CUIDADO
Peligro de lesión personal y daño al
producto
4. Replace the dust bag as outlined in the
DUST BAG CHANGING section (page 21).
Rubber
Retainer
Tenga cuidado si el PowerMate y la
manguera se dejan en posición vertical pues
pueden caerse fácilmente. Si se voltean
puede haber daño de propiedad.
ADVERTENCIA
Peligro de lesión personal y daño al
producto
It is normal for the canister hood and tool
storage cover to come off when opened
further than needed. Line up the hinge slots,
insert the hinges into the slots, and close
the hood and tool storage cover to
reinstall.
CAUTION
Never open canister hood with the tool
storage cover open. This will help to
prevent damage from occurring to the
canister hood and/or tool storage cover.
22
POR DEBAJO DE LOS MUEBLES
Para maximizar
el alcance de la
PowerMate por
debajo de los
muebles, voltear
el mango para
el lado deseado
y bajar el tubo
telescopico
cerca del piso.
11
ESPAÑOL
HOOD AND TOOL STORAGE COVER INSTALLATION
• No atropelle el cordón eléctrico con la
PowerMate. Hay un peligro de lesión
corporal o daños de propiedad.
• No tire del cordón eléctrico para
desenchufarlo de la pared. Si hay daños
en el cordón eléctrico o el enchufe, hay un
peligro de lesión corporal o daños de
propiedad.
5. Seleccione una posición del interruptor de
tres-posiciones en el mango.
CARPET (ALFOMBRA)enciende los motores del
receptáculo y de la
PowerMate. La bombilla
delantera y el agitador se
encenderan.
TUBO TELESCÓPICO
EXHAUST FILTER CHANGING
CARPET
La extensión del
tubo es ajustable y
no requeire el
Botón de
montaje. Para
ajuste de
ajustar, empuje el
botón de ajuste de extensión
extensión y mueva
el tubo superior a la
posición dedeada
FLOOR
FLOOR (PISO) - sólo
enciende el motor del
receptáculo.
OFF (APAGADO) - Apague la aspiradora.
The exhaust filter must be replaced regularly. Replace the exhaust filter when the entire surface area is covered evenly. The exhaust filter CANNOT be washed as it will lose its dust
trapping ability.
NOTE: Use replacement exhaust filter STYLE EF-1 or KC38KCEN1000, see part number detail
in REPLACEMENT PARTS (page 5).
Fire and/or Electrical Shock Hazard
Do not operate with a clogged exhaust
filter or without the exhaust filter installed.
Do not operate without filter cover
installed.
NOTA - Cuando este control está en la
posición FLOOR (PISO), la luz de PowerMate,
no funciona porque la electricidad no fluye al
PowerMate.
CUIDADO
NOTA: Cuando
ajuste la
longitud de la
vara hay que
tener el
PowerMate con la
mano o el pie.
NO deje la PowerMate funcionando en un
lugar durante ningún espacio de tiempo: se
puede dañar la alfombra.
CONTROL ELECTRONICO DE
ASPIRACIÓN
1. Pull out and down on
the exhaust filter cover
to remove from the
canister and lay aside.
2. Pull the exhaust
Exhaust filter up and out
Filter
Slots
from the rear of
the canister.
El control electronico de aspiración le
permite cambiar la potencia de succión
de la aspiradora.
SUCTION
CONTROL
Aumento la
succión para
limpiar muebles y
Aumentar alfombras.
aspiración
Disminución de la
Disminuir succión para
aspiración limpiar cortinas y
tapetes delgados.
10
23
Tabs
Exhaust
Filter
4. Replace the
exhaust filter cover
by placing the two
tabs on the filter
cover into the slots
on the canister and
rotate into place
until it snaps closed.
ENGLISH
3. Replace the
exhaust filter.
Place the new
exhaust filter
into the
canister with
the foam seal
facing towards
the canister.
WARNING
POWERMATE CARE
INSTRUCCIONES DE OPERACIÓN
Always follow all safety precautions when performing maintenance to the PowerMate.
CUIDADO
¡Partes en movimiento! Para reducir el riesgo de daños
corporales, no toque el agitador cuando la aspiradora
está encendida. El tocar el agitador mientras que está
girando puede cortar, contusionar o causar otras
lesiones. Siempre apague y desconecte del
tomacorriente antes de dar mantenimiento. Tenga
cuidado al aspirar cerca de niños.
WARNING
Electrical Shock Or Personal Injury Hazard
Always turn off and unplug vacuum
cleaner before performing maintenance
to the vacuum cleaner. Failure to do so
could result in electrical shock or personal
injury from vacuum cleaner suddenly
starting.
PARA COMENZAR
BELT CHANGING AND AGITATOR CLEANING
TO REMOVE BELT
Wand
Quick
Release
Pedal
2. Remove the
wand by pressing
the quick release
pedal and lifting
up on the wand.
Rear
Latches
7. Grasp the side
latches and pull
out.
Screws
8. Lift cover
upward from
back to remove.
5. While holding
the swivel, press
handle release
pedal and lower
the swivel.
Base
End Cap
10. Check and clean end cap areas. See
AGITATOR ASSEMBLY (page 25) for picture
of complete agitator assembly.
24
Para enrollar: Apagué y
desconecté la aspiradora.
Sujete el enchufe mientras
enrolla el cordón para
impedir daño o lesión corporal por el movimiento
del cordón. Oprima el
botón del cordón eléctrico
con la mano o con el pie.
3. Baje el tubo desde la posición vertical
pisando el pedal de liberación del mango
(HANDLE RELEASE).
• Cuando alguna anormalidad/desperfecto ocurra, pare de usar el producto
inmediatamente y desconéctelo del
toma corriente.
Botón de
retracción
9. Note the
position of all
wiring and dirt
sensor board. Lift
agitator assembly
out and remove
worn belt.
4. Turn PowerMate
right side up.
Peligro de lesión personal y daño al
producto
• SIEMPRE apague ante de desconectar.
• El cordón eléctrico se mueve
rápidamente durante el enrollamiento.
Mantenga alejados a los niños y
asegure espacio libre suficiente para
evitar lesiones personales al enrollar
el cordón.
• NO use los enchufes localizados sobre
los muebles. Los objetos cercanos
podrían resultar dañados.
Pedal de
liberación
del mango
1. Tire del cordón
para sacarlo del
receptáculo hasta
tener la longitud
deseada. El cordón
no se enrollará hasta
que oprima el botón
para enrollarlo.
Indicador de
nivel de pelo
de la alfombra
Pedal de
HEIGHT
ADJUST
(selección de
nivel del pelo
de la alfombra)
4. Seleccione una altura del pelo de la
alfombra usando el pedal pequeño
ubicado en la parte posterior de la
PowerMate. El nivel del pelo la alfombra se
muestra en el indicador. Consulte
SUGERENCIAS SOBRE EL AJUSTE DE NIVEL
DE PELO DE LA ALFOMBRA (pág 12).
NOTA: Para reducir el riesgo de choque
eléctrico, esta aspiradora cuenta con una
clavija polarizada, uno de los contactos es
más ancho que el otro. La clavija sólo puede
introducirse de una manera en el enchufe. Si
la clavija no cabe bien en el enchufe,
inviértala. Si aún no cabe, llame a un
electricista para que instale un enchufe
correcto. No altere la clavija de ninguna
manera.
Atención: Refiérase a las recomendaciones
del fabricante para limpiar su alfombra.
Algunas alfombras más delicadas pueden
requerir el uso de la aspiradora con el
agitador PowerMate desconectado para
prevenir que la alfombra sea dañada.
9
ESPAÑOL
3. Turn
PowerMate
upside down and
unscrew four (4)
PowerMate cover
screws.
Handle
Release
Pedal
Side
Latch
6. Lift rear
latches up.
1. Turn off and
unplug vacuum
cleaner.
2. Conecte el cordón eléctrico polarizado en
un enchufe de 120 voltios que se encuentre
cerca del piso.
ADVERTENCIA
MANGO
TO CLEAN AGITATOR:
El Cepillo de combinacion puede ser
almacenado en el mango de la manguera,
colocandolo en el mango antes de
conectar el tubo telescopico. Desliza el
cepillo de combinación firmemente dentro
del mango.
NOTE: In order to keep cleaning efficiency
high and to prevent damage to your
vacuum cleaner, the agitator must be
cleaned every time the belt is changed.
The agitator must also be cleaned
according to the following schedule:
Vacuum Cleaner Use
Clean Agitator
HEAVY every week
(used daily)
MODERATE every month
(used 2-3 times/week)
LIGHT every 2 months
(used 1 time/week)
Mango
Botón de
liberación
del cepillo
Introduzca el tubo en el mango hasta que el
botón quede en posición. Asegúrese de que la
manguera no esté torcida.
Cepillo para
combinación
NOTE: Use replacement belt STYLE CB-3,
see part number detail in REPLACEMENT
PARTS (page 5).
1. Install new
belt over
motor drive,
then over
belt path.
Para Guardar: Para prevenir la presión de la
manguera mientras se guarda, desuna la
manguera del tubo de la aspiradora. Guarde
la manguera en una posición enrollada y floja
de tal manera que la tapa de la manguera no
se estire.
Belt Path
Agitator
End Cap
2. Place agitator
assembly into
PowerMate .
IMPORTANT
Disconnect vacuum cleaner from electrical
outlet. Check and remove hair, string and
lint build-up frequently in the PowerMate
agitator and end cap areas.
Para retirar: Oprima el botón de liberación
rápida del mango para liberar el mango y
tire del mango hacia arriba.
Motor
Drive
3. NOTE: Be sure that the dirt sensor
board is positioned in slots and all wiring is
tucked back in place.
Remove any dirt or debris in the belt
path area or in the brush roller area.
Carefully remove
any string or
debris located
on the agitator
or end caps.
4. Line up front of cover and base. Rest
cover on front edge of base as shown.
5. Rotate cover
back. Press cover
firmly until side
latches snap into
place.
AGITATOR ASSEMBLY
End Cap
6. Make sure there is no gap between the
cover and base and that the rear latches
are snapped in place.
Belt Path
7. Turn PowerMate upside down and replace
four (4) cover screws.
Brush Unit
8
End Cap
25
ENGLISH
Cepillo para
combinación
Botón de
liberación
del tubo
TO REPLACE BELT
BULB CHANGING
WARNING
Por favor ponga especial atención a éstos recuadros con alerta de riesgo.
ADVERTENCIA: Esta información le alertará del peligro de fuego, choque eléctrico,
quemaduras y lesiones. CUIDADO: Esta información le alertara de peligros como
lesiones y daños a la propiedad.
3. Remove the
light bulb by
pulling straight
out.
Electrical Shock Or Personal Injury
Hazard
Turn off and unplug vacuum cleaner
before performing maintenance to the
vacuum cleaner. Failure to do so could
result in electrical shock or personal
injury from the vacuum cleaner
suddenly starting.
INSTRUCCIONES DE ENSAMBLE
CAUTION
Do not use a bulb rated over 9W
(13V). During extended use, heat from
the bulb could overheat surrounding
plastic parts.
CAUTION
Do not plug in or turn on until the vacuum
cleaner is completely reassembled.
4. To replace the
light bulb, carefully
insert fully into slot.
NOTE: Use replacement bulb number
20-5248, see part number detail in
REPLACEMENT PARTS (page 5).
Slots
Peligro de choque eléctrico
1. Abra la cubierta de almacenaje del Pet
PowerMate.
No conecte la aspiradora hasta que termine
de armarla. De lo contrario podría causar un
choque eléctrico o lesión corporal.
2. Inserte el Pet PowerMate, presiónelo en
su lugar hacia abajo.
3. Cierre la cubierta con seguridad.
Antes de armar la aspiradora, reivise la
LISTA DE EMBALAJE (pág 1). Use esta lista
para verificar e identificar que ha recibido
todos los componentes de su nueva aspiradora Kenmore.
Pet
PowerMate
Cubierta
POWERMATE
1. Turn off and unplug vacuum cleaner
from electrical outlet.
Flat
Screwdriver
PET POWERMATE
ADVERTENCIA
5. To replace light
lens, place tab at
front of lens into slot.
2. Pry light
lens out at
slots as shown
on both sides.
Rotate lens up
and lift off.
6. Rotate lens down
and firmly snap into
place.
Alinar el tubo telescopico y introduzca en la
PowerMate hasta que el
pedal de liberación
quede fijo en posición.
MANGUERA
Headlight
Lens
Alinee la pestaña de sujeción de la manguera
y la ranura de la cubierta del receptáculo e
introduzca la manguera en el receptáculo
hasta que quede fija en posición.
RECEPTÁCULO
1. Abra la tapa del receptáculo.
Pestaña
de sujeción
de la
manguera
Ranura
3. Examine que el filtro de seguridad del
motor que este instalado correctamente.
Consulte las instrucciones de instalación en:
CAMBIO DEL FILTRO DE SEGURIDAD DEL
MOTOR (pág 21).
Para retirar:
No abra la cubierta
antes de desprender
la manguera. Con la
cubierta cerrada, tire
hacia arriba la
lengüeta de
seguridad y jale de
la manguera.
26
7
ESPAÑOL
2. Examine que la bolsa para polvo este
instalada correctamente. Consulte las instrucciones de instalación en: CAMBIO DE LA
BOLSA DE POLVO (pág 20).
TUBO TELESCOPICO
MANGUERA & ACCESORIOS
Interruptor de encendido/
apagado de tres posiciones
(OFF/FLOOR/CARPET)
(Apagado/Piso/Alfombra)
Control de
succión
electrónico
Dispositivo
giratorio de
la manguera
Reborde
Luz
Pedal de
liberación
del mango
Pedal de selección
de nivel de pelo
de la alfombra
Approx.
4 inches
or 10 cm
TO CLEAN THE LENSES
Sensor
Elements
Pedal de
liberación
rápida del
tubo
Protector de
muebles
Números de serie
y modelo de
PowerMate
(Parte inferior)
Cross Section View
1. Remove the wand from the PowerMate
by pressing the quick release pedal and
lifting up on the wand.
Detector de polvo
Luz y Lente
CAUTION
Never use water or any cleaning solution
when cleaning the lenses. The residue of
the water or cleaners will accelerate the
recoating of the lenses and make cleaning
necessary sooner.
ENGLISH
Botón de
ajuste de
extensión
Herramienta
para hendiduras
POWERMATE
2. As indicated by the illustration, the two
dirt sensor elements are located on the
inside of the swivel, approximately 4
inches/10 cm down, (note the arrows).
Each element should be cleaned periodically. To reach the sensor elements, use a
small brush such as a bottle brush. Brush
each sensor element several times to
remove dust and dirt.
Although the dirt sensor feature in your
Kenmore PowerMate® is designed for
years of trouble free use, the passage of
dirt through the air passage system can
coat the lenses causing the green light to
come on and stay on - never switching to
red. When this happens the lenses must
be cleaned.
Mango
Cepillo para
combinación
DIRT SENSOR
Wand
Quick
Release
Pedal
Indicador de nivel
de pelo de la alfombra
Luz de
BELT RESET
2. Reinstall the wand after cleaning the
sensors.
Correa
Botón de
BELT RESET
6
Limpiador de
orillas (no mostrado)
27
AGITATOR SERVICING
TO REPLACE AGITATOR
ASSEMBLY
WARNING
Electrical Shock Or Personal Injury
Hazard
Always turn off and unplug vacuum
cleaner before performing maintenance
to the vacuum cleaner. Failure to do so
could result in electrical shock or personal
injury from vacuum cleaner suddenly
starting.
1. Remove PowerMate cover, belt and
agitator assembly. See “To Remove Belt” in
BELT CHANGING AND AGITATOR
CLEANING (page 24-25).
2. Replace agitator assembly. See your
separate repair parts list for part number.
Cubierta de
almacenamiento
®
para Pet PowerMate
(Pet PowerMate® adentro)
Cepillo para
pelo de
animales Cepillo
para pisos
®
Pet PowerMate
Botón de
retracción
Cubierta del filtro
de escape (Filtro
de escape adentro)
Cordón
eléctrico
Cubierta de
almacenamiento
de accesorios
(accesorios
adentro)
Filtro de protección
del motor (detrás de
la bolsa de polvo)
3. Reinstall belt and PowerMate cover. See
“To replace belt” in BELT CHANGING AND
AGITATOR CLEANING (page 24-25).
TO CHECK THE BRUSHES
When brushes are worn to the level of the
base support bars, replace the agitator
assembly.
New Brushes
RECEPTÁCULO
Tapa de la aspiradora
(Bolsa de polvo y Filtro de
protección del motor adentro)
Bolsa de
polvo
Worn Brushes
Manija de transportaión
Pestillo de la tapa
Ranura del gancho
de almacenamiento
Base
Support
Bar
Sostén para
la escalera
Número de serie y
modelo de receptáculo
ESPAÑOL
28
5
PIEZAS Y CARACTERÍSTICAS
TROUBLESHOOTING
Es importante conocer las piezas y características de su aspiradora para asegurar su uso adecuado y seguro. Examínelas antes de usar su aspiradora.
Review this table to find do-it-yourself solutions for minor performance problems. Any other
service needed should be performed by a Sears or other qualified service agent.
WARNING
Mango y
Manguera
Always turn off and unplug vacuum cleaner before performing maintenance to the
vacuum cleaner. Failure to do so could result in electrical shock or personal injury.
Aspiradora
Vacuum cleaner won’t
start.
POSSIBLE CAUSE
1. Unplugged at wall outlet.
2. Tripped circuit breaker/blown
fuse at household service panel.
3. Loose hose electrical
connections.
Poor job of dirt
pick-up.
PowerMate®
Vacuum cleaner starts
but shuts off.
1.
2.
3.
4.
5.
6.
7.
8.
9.
10.
Full or clogged dust bag.
Clogged airflow passages.
Dirty filters.
Wrong height adjust setting.
Wrong power level selected.
Hole in hose.
Worn PowerMate agitator.
Worn or broken belt.
Dirty agitator or end caps.
Tripped belt reset in PowerMate.
1. Hose or hood electrical
connections.
2. Tripped belt reset in PowerMate.
PARTES DE REEMPLAZO
Objeto
Estilo No.
Pieza Nº
en EUA
Pieza Nº
en Canadá
Correa
CB-3
20-5218
20-40118
Bombilla
-----
20-5248
20-40601
Q
20-50557
20-50410
-----
KC16KDRGZ0U0 *
-----
Bolsa de polvo
Bolsa de polvo *
Filtro de escape
EF-1
20-86889
20-40324
Filtro de escape *
-----
KC38KCEN1000 *
-----
Filtro de seguridad
del motor
CF-1
20-86883
20-40321
3. Tripped thermal protector
in canister.
PowerMate will not
run when attached.
1. PowerMate connections
unplugged.
2. Worn or broken belt.
3. Dirty agitator or end caps.
4. Tripped belt reset in PowerMate.
5. Switch not in CARPET position.
* Utilizar las partes mencionadas anteriormente para mantener certificación AAFA para este
modelo. Pedir en línea en www.searspartsdirect.com o llamar al 1-800-252-1698.
4
29
POSSIBLE SOLUTION
1. Plug in firmly, push ON/OFF switch
to on.
2. Reset circuit breaker or replace fuse.
3. Reconnect hose ends. (page 8-9)
1.
2.
3.
4.
5.
6.
7.
8 & 9.
Change bag. (page 21)
Clear airflow passages. (page 20)
Change filters. (page 22-23)
Adjust setting. (page 10, 13)
Adjust control. (page 11)
Replace hose.
Change agitator. (page 24-25)
See BELT CHANGING AND
AGITATOR CLEANING (page 24-25).
10. Remove any items that may be
caught or jammed, then reset. If
vacuum cleaner starts and stops
again, clean agitator and end caps,
then reset. (page 19, 24-25)
1. Check connections, reconnect hose
ends. (page 8-9)
2. Remove any items that may be
caught or jammed, then reset. If
vacuum cleaner starts and stops
again, clean agitator and end caps,
then reset. (page 19, 24-25)
3. See PERFORMANCE FEATURES –
“Thermal Protector” (page 19).
1. Plug in firmly.
2 & 3. See BELT CHANGING AND
AGITATOR CLEANING (page 24-25).
4. Remove any items that may be
caught or jammed, then reset. If
vacuum cleaner starts and stops
again, clean agitator and end caps,
then reset. (page 19, 24-25)
5. Move switch to CARPET position.
(page 11)
ENGLISH
PROBLEM
Tubo
Telescopico
PROBLEM
CHECK BAG Indicator
activates.
POSSIBLE CAUSE
1. Full or clogged dust bag.
2. Dirty filters.
3. Blocked airflow passage.
4. Certain attachment tools.
POSSIBLE SOLUTION
1. Change bag. (page 21)
2. Change filters. (page 22-23)
3. Clear blockage from airflow
passage. (page 20)
4. This is normal. Light should go off
when tool is removed.
Vacuum cleaner picks up
moveable rugs -orPowerMate pushes
too hard.
1. Wrong height adjust setting.
2. Suction too strong.
1. Adjust setting. (page 10, 13)
2. Select lower power Level. (page 11)
Cord won’t rewind.
1. Dirty power cord.
2. Cord jammed.
1. Clean the power cord.
2. Pull out cord and rewind. (page 10)
Vacuum cleaner leaves
marks on carpet.
1. Wrong vacuuming pattern.
1. See VACUUMING TIPS (page 12).
Constant green light on
in dirt sensor.
1. Dirt passage is clogged.
1. Check for clogs in air passages.
(page 20)
2. Clean lenses. (page 27)
2. Lenses are dirty.
No green or red dirt
sensor lights.
1. Switch not in CARPET position.
2. No power to sensor board.
Red light for BELT
RESET is lit on the
PowerMate.
1. Tripped belt reset in PowerMate.
1. Move switch to CARPET position.
(page 11)
2. Take to your nearest Sears Service
Center.
1. Remove any items that may be
caught or jammed, then reset. If
vacuum cleaner starts and stops
again, clean agitator and end caps,
then reset. (page 19, 24-25)
Vacuum Cleaner Help Line:
1-877-531-7321
8:00am-5:00pm EST, M-F
(U.S.A. and Canada)
INSTRUCCIONES IMPORTANTES DE SEGURIDAD
Lea las instrucciones en este manual antes de armar o usar su aspiradora.
ADVERTENCIA:
Su seguridad es muy importante para nosotros. Para reducir el riesgo de incendio, choque
eléctrico, lesión corporal o daños al utilizar su aspiradora, actúe de acuerdo con precauciones
básicas de seguridad, entre ellas:
GUARDE ESTAS INSTRUCCIONES
El armado y uso seguro de su aspiradora son su responsabilidad. Esta aspiradora ha sido diseñada
exclusivamente para uso doméstico. La aspiradora deberá almacenarse en un lugar seco y en el
interior. Lea este Manual de Uso y Cuidado detenidamente, pues contiene información importante
sobre seguridad y uso. Esta guia contiene información sobre seguridad debajo de símbolos de
advertencia cuidado.
30
3
ESPAÑOL
Apague todos los controles antes de
desenchufar.
Tenga cuidado especial al utilizar la aspiradora
en escalones. No la coloque sobre sillas, mesas,
etc. Manténgala en el piso.
No use la aspiradora para aspirar líquidos
inflamables o combustibles (gasolina, líquidos
para limpieza, perfumes, etc.) ni la use en
lugares donde éstos podrían estar presentes. Los
vapores de estas sustancias pueden crear un
peligro de incendio o explosión.
No levante ninguna cosa que se esté quemando
o emitiendo humo, como cigarrillos, cerillos o
cenizas calientes.
No use la aspiradora sin tener instalada la bolsa
para polvo y/o los filtros.
Cambie siempre a bolsa de polvo para el polvo
después de aspirar limpiadores o refrescantes
de alfombra, polvos, y polvo fino. Estos
productos atascan la bolsa de polvo, reducen la
circulación de aire y pueden causar que reviente
la bolsa de polvo. La falla de cambiar la bolsa
puede causar daño permanente a la aspiradora.
No use la aspiradora para levantar objetos
agudos, juguetes pequeños, alfileres,
sujetapapeles, etc. Podrían dañar la aspiradora.
No opere sin el filtro de escape ni la cubierta
del filtro de escape instalados.
La manguera contiene cables eléctricos. No la
use cuando está dañada, cortada, o
perforada. Reemplace si está cortada o
desgastada. No levante objetos afilados.
Siempre apagué y desconecte la aspiradora
antes de conectar o desconectar la
manguera, el tubo, Pet HandiMate, o la
boquilla.
Sujete el enchufe con la mano al enrollar el
cordón eléctrico. Para desconectarla, jale el
enchufe, no el cordón.
Usted es responsable de asegurar que su
aspiradora no sea utilizada por ninguna persona
que no pueda manejarla correctamente.
Use su aspiradora únicamente en la forma
descrita en este manual. Use únicamente con
accesorios recomendados por Sears.
Desconecte el cordón eléctrico antes de
componer o limpiar el área del cepillo. La falla
de hacer esto puede resultar en choque
eléctrico o en el súbito arranque del cepillo.
No abandone la aspiradora cuando esté
conectada. Desconéctela cuando no la esté
usando y antes de darle mantenimento.
Para reducir el riesgo de choque eléctrico, no
use su aspiradora al aire libre ni sobre
superficies mojadas.
No permita que sea utilizada como juguete. Se
requiere tener mayor cuidado cuando sea
utilizada en la proximidad de niños o por niños.
No use la aspiradora si el cordón o el enchufe
están dañados. Si la aspiradora no está
funcionando adecuadamente o si se ha dejado
caer, está dañada, se ha dejado expuesta a la
intemperie o se ha dejado caer en agua,
devuélvala a un Centro de servicio de Sears.
No jale ni transporte la aspiradora por el
cordón; no use el cordón como mango; no cierre
puertas sobre el cordón; no jale el cordón sobre
rebordes agudos ni esquinas. No pase la
aspiradora sobre el cordón. Mantenga el cordón
alejado de superficies calientes.
No desconecte la aspiradora tirando del cordón
eléctrico. Para desconectarla, jale el enchufe, no
el cordón.
No toque la aspiradora ni el enchufe con las
manos mojadas.
No coloque objetos en las aberturas.
No utilice la aspiradora si alguna abertura está
bloqueada; manténgala libre de polvo, pelusa,
cabellos y cualquiera cosa que podría disminuir
el flujo de aire.
Mantenga el cabello, ropa suelta, dedos y todas
las partes del cuerpo alejados de las aberturas
y piezas mecánicas.
Línea de ayuda de aspiradoras
1-877-531-7321
8:00am-5:00pm EST, M-F
(U.S.A. and Canada)
GARANTIA DE LA ASPIRADORA DE KENMORE
Master Protection Agreements
Congratulations on making a smart purchase. Your new Kenmore® product is designed and
manufactured for years of dependable operation. But like all products, it may require
preventive maintenance or repair from time to time. That’s when having a Master Protection
Agreement can save you money and aggravation.
The Master Protection Agreement also helps extend the life of your new product. Here’s what
the Agreement* includes:
[
Parts and labor needed to help keep products operating properly under normal use, not
just defects. Our coverage goes well beyond the product warranty. No deductibles, no
functional failure excluded from coverage — real protection.
[
Expert service by a force of more than 10,000 authorized Sears service technicians,
which means someone you can trust will be working on your product.
Esta garantía es válida solamente durante 90 días desde la fecha de compra,
si la aspiradora se utiliza para otros fines que no sean el uso familiar privado.
[
Unlimited service calls and nationwide service, as often as you want us, whenever you
want us.
Esta garantía cubre exclusivamente los defectos de materiales y fabricación. Sears NO
pagará:
1. Los elementos desechables que puedan desgastarse con un uso normal, incluyendo
sin carácter excluyente, filtros, correas, lámparas y bolsas.
2. Un técnico del servicio técnico para que enseñe al usuario a instalar, manejar o
mantener correctamente el producto.
3. Un técnico del servicio técnico para limpiar o mantener este producto.
4. Daños o avería de este producto si no se ha instalado, manejado o mantenido
siguiendo todas las instrucciones incluidas con el producto.
5. Daños o avería a este producto originados por accidente, abuso, uso incorrecto o
uso del producto para otros fines distintos de los indicados.
6. Daños o avería de este producto causados por el uso de detergentes, limpiadores,
productos químicos o utensilios diferentes a los recomendados en todas las
instrucciones que se incluyen con el producto.
7. Daños o averías de las piezas o sistemas causados por modificaciones no
autorizadas que se hayan hecho a este producto.
[
“No-lemon” guarantee – replacement of your covered product if four or more product
failures occur within twelve months.
[
Product replacement if your covered product can’t be fixed.
[
Annual Preventive Maintenance Check at your request – no extra charge.
[
Fast help by phone – we call it Rapid Resolution – phone support from a Sears
representative on all products. Think of us as a “talking owner’s manual.”
[
Power surge protection against electrical damage due to power fluctuations.
[
$250 Food Loss Protection annually for any food spoilage that is the result of
mechanical failure of any covered refrigerator or freezer.
[
Rental reimbursement if repair of your covered product takes longer than promised.
[
10% discount off the regular price of any non-covered repair service and related
installed parts.
Limitación de responsabilidad de las garantías implícitas; limitación de remedios
Él único y exclusivo remedio del cliente bajo esta garantía limitada será la reparación
del producto según lo indicado en este documento. Las garantías implícitas, incluyendo
las garantías de comerciabilidad o idoneidad para un propósito específico, se limitan a
un año o el período más corto permitido por la ley. Sears no será responsable por
daños incidentales ni consecuenciales. Algunos estados o provincias no permiten la
exclusión o limitación de daños incidentales o consecuenciales, ni limitaciones en la
duración de las garantías implícitas de comerciabilidad o idoneidad, por lo que estas
exclusiones o limitaciones podrían no aplicar en su caso.
Esta garantía aplica solamente cuando esta aspiradora se utiliza en Estados Unidos o
Canadá.
Esta garantía le otorga derechos legales específicos, y usted podría tener otros
derechos que varían en función de cada estado.
Sears Brands Management Corporation, Hoffman Estates, IL 60179
2
Once you purchase the Agreement, a simple phone call is all that it takes for you to schedule
service. You can call anytime day or night, or schedule a service appointment online.
The Master Protection Agreement is a risk free purchase. If you cancel for any reason during
the product warranty period, we will provide a full refund. Or, a prorated refund anytime after
the product warranty period expires. Purchase your Master Protection Agreement today!
Some limitations and exclusions apply. For prices and additional information in the U.S.A. call
1-800-827-6655.
* Coverage in Canada varies on some items. For full details call Sears Canada at 1-800-3616665.
Sears Installation Service
For Sears professional installation of home appliances, garage door openers, water heaters,
and other major home items, in the U.S.A. or Canada call 1-800-4-MY-HOME®.
31
ENGLISH
Garantía limitada de un año
Si esta aspiradora falla por un defecto en sus materiales o fabricación en el período de
un año desde la fecha de compra, cuando se instala, maneja y mantiene siguiendo
todas las instrucciones incluidas con el producto, devuélvala a cualquier tienda Sears,
Sears Parts & Repair Center (Centro de Reparaciones y Piezas Sears) o a otro
distribuidor Kenmore para que reparen el aparato de forma gratuita.
MASTER PROTECTION AGREEMENTS
TABLA DE CONTENIDO
Antes de usar su aspiradora nueva . . . 1
Lista de embalaje . . . . . . . . . . . . . . . 1
Línea de ayuda de aspiradoras . . . . . . 2
Garantía de la aspiradora
de Kenmore . . . . . . . . . . . . . . . . . . . . 2
Instrucciones importantes
de seguridad . . . . . . . . . . . . . . . . . . . . 3
Piezas y características . . . . . . . . . . .4-6
Instrucciones de ensamble . . . . . . . .7-8
Instrucciones de operación . . . . . . . . .9
Para comenzar . . . . . . . . . . . . . . 9-10
Sugerencias para aspirar . . . . . 11-12
Sugerencias sobre el ajuste de
nivel de pelo de la alfombra . . . . . 12
Accesorios . . . . . . . . . . . . . . . . .13-15
Cuadro de uso de los accesorios . . 16
Almacenaje del Pet PowerMate y
accesorios . . . . . . . . . . . . . . . . . . . .17
Características de
rendimiento . . . . . . . . . . . . . . . . . . 18
Cuidado del receptáculo . . . . . . . . . . 19
Quitar de los residuos de basura
en los conductos . . . . . . . . . . . . . . 19
Limpieza del exterior y de los
accesorios . . . . . . . . . . . . . . . . . . . 19
Cambio de la bolsa de polvo . . . . 20
Cambio del filtro de seguridad
del motor . . . . . . . . . . . . . . . . . . . . 21
Ensamble de la tapa y la
cubierta . . . . . . . . . . . . . . . . . . . . 21
Cambio del filtro de escape . . . . . 22
Cuidado de la PowerMate® . . . . . . . . 23
Cambio de la correa y limpieza
del agitador . . . . . . . . . . . . . . . 23-24
Cambio de la bombilla . . . . . . . . . .25
Detector de polvo . . . . . . . . . . . . . 26
Cuidado del agitador . . . . . . . . . . 27
Reconocimiento de problemas . . . 28-29
Acuerdos maestros de protección . . . 30
Información de asistencia
o servicio . . . . . . . . . . Posterior Cubierta
ANTES DE USAR SU ASPIRADORA NUEVA
Por favor lea esta guía que le ayudara a ensamblar y operar su aspiradora nueva de Kenmore
en una manera más segura y efectiva.
Para mas información acerca del cuidado y operación de esta aspiradora, llame a su tienda
Sears mas cercana. Cuando pregunte por información usted necesitará el número completo de
serie y modelo de la aspiradora que está localizado en la placa de los números de modelo y
serie.
Use el espacio de abajo para registrar el número de modelo y serie para su nueva aspiradora
Kenmore.
Número de Modelo___________________________________________
Número de Serie____________________________________________
Mantenga este libro y su recibo en un lugar seguro para referencias futuras.
LISTA DE EMBALAJE
Su ASPIRADORA KENMORE se empaca con las siguientes piezas y componentes por
separado:
1 Receptáculo
1 Cepillo para combinación*
1 PowerMate®
1 Cepillo para animales*
1 Manguera
1 Pet PowerMate®
1 Cepillo para pisos*
1 Tubo telescopico
1 Herramienta para
1 Manual de uso y cuidado
hendiduras**
1 Lista de partes
Cada uno de estos ensambles es mostrado detalladamente en la lista de piezas para
reparación.
*Estos artículos se encuentran bajo la cubierta de almacenamiento para accesorios.
**Estos artículos se encuentran en el ensamble del mango y la manguera.
1
ESPAÑOL
Fecha de Compra ___________________________________________