1
Use & Care Guide
Manual de Uso y Cuidado
high
Para obtener los mejores resultados, deberá
utilizarse un detergente HE para lavadoras de
baja espuma.
alta
English / Español
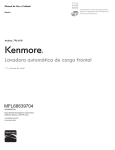
Model/Modelo: 796.4157#
Kenmore Elite
Front-Loading
®
Automatic Washer
Lavadora automática de carga frontal
# = color number, numero de color
P/N MFL67360448
Sears Brand Management Corporation
Hoffman Estates, IL 60179 U.S.A.
www.kenmore.com
www.sears.com
ency
PROTECTION AGREEMENTS
TABLE OF CONTENTS
IMPORTANT SAFETY INSTRUCTIONS.......................... 3-5
GROUNDING REQUIREMENTS....................................... 5
FEATURES AND BENEFITS
Key Parts and Components..................................................6
Included Accessories............................................................ 6
Optional Accessories............................................................6
INSTALLATION REQUIREMENTS
Key Dimensions and Specifications....................................7
Choose the Proper Location................................................ 7
Flooring...................................................................................7
Clearances.............................................................................7
INSTALLATION INSTRUCTIONS
Unpacking and Removing Shipping Bolts.......................... 8
Connecting the Water Lines................................................. 9
Connecting the Drain Hose................................................ 10
Connect to the Power Supply..............................................10
Leveling the Washer............................................................ 11
Installation of Non-Skid Pads (optional)............................11
HOW TO USE
Control Panel Features......................................................... 12
Operating the Washer Using Detergent
Amount Indicator....................................................................13
Cycle Guide..................................................................... 14-15
Sorting Wash Loads............................................................. 16
About the Dispenser Drawer...............................................17
Detergent and Dispenser Use..............................................18
Time and Status Display..................................................... 19
Cycle Modifier Buttons........................................................20
Steam Cycles and Options................................................. 21
Option Buttons..................................................................... 22
Special Functions..................................................................23
CARE AND CLEANING
Regular Cleaning........................................................... 24-25
Maintenance...................................................................26-27
Cleaning the Water Inlet Filters.....................................26
Cleaning the Drain Pump Filter......................................27
KENMORE CONNECT™ System......................................... 28
TROUBLESHOOTING GUIDE
Normal Sounds You May Hear..........................................29
Before Calling for Service............................................ 29-31
WARRANTY.................................................................. 32
PRODUCT RECORD
In the space below, record the date of purchase, model,
and serial number of your product. You will find the model and
serial number printed on an identification plate located inside
the washer door. Have these items of information available
whenever you contact Sears concerning your
product.
Model No.
Date of Purchase
Serial No.
Save these instructions and your sales receipt for future
reference.
2
Master Protection Agreements
Congratulations on making a smart purchase. Your new
Kenmore® product is designed and manufactured for
years of dependable operation. But like all products, it
may require preventive maintenance or repair from time
to time. That’s when having a Master Protection
Agreement can save you money and aggravation.
The Master Protection Agreement also helps extend the
life of your new product. Here’s what the
Agreement* includes:
•Parts and labor needed to help keep products
operating properly under normal use, not just defects.
Our coverage goes well beyond the product warranty.
No deductible, no functional failure excluded from
coverage – real protection.
•Expert service by a force of more than 10,000
authorized Sears service technicians, which means
someone you can trust will be working on your product.
•Unlimited service calls and nationwide service, as
often as you want us, whenever you want us.
•“No-lemon” guarantee – replacement of your
covered product if four or more product failures occur
within twelve months.
•Product replacement if your covered product can not
be fixed.
•Annual Preventive Maintenance Check at your request
– no extra charge.
•Fast help by phone – we call it Rapid Resolution.
Phone support from a Sears representative on all
products. Think of us as a “talking owner’s manual.”
•Power surge protection against electric damage due to
power fluctuations.
•$250 food loss protection annually for any food
spoilage that is the result of mechanical failure of any
covered refrigerator or freezer.
•Rental reimbursement if repair of your covered
product takes longer than promised.
•10% discount off the regular price of any non-covered
repair service and related installed parts.
Once you purchase the Agreement, a simple phone
call is all that it takes for you to schedule service. You
can call at any time day or night or schedule a service
appointment online.
The Master Protection Agreement is a risk-free purchase.
If you cancel for any reason during the product
warranty period, we will provide a full refund, or a
prorated refund any time after the product warranty
period expires. Purchase your Master Protection
Agreement today!
Some limitations and exclusions apply.
For prices and additional information in the U.S.A.
call 1-800-827-6655.
*Coverage in Canada varies on some items.
For full details call Sears Canada at 1-800-361-6665.
Sears Installation Service
For Sears professional installation of home appliances,
garage door openers, water heaters, and other major
home items, in the U.S.A. or Canada call:
1-800-4-MY-HOME®.
SAFETY MESSAGES
There are many important safety messages in this manual and on your appliance. Always read and obey
all safety messages.
This is the safety alert symbol. This symbol alerts you to potential hazards that can result in property
damage and/or serious bodily harm or death.
All safety messages will follow the safety alert symbol and either the word DANGER or WARNING.
These words mean:
Indicates a hazardous situation which, if not avoided, will result in death or serious
injury.
Indicates a hazardous situation which, if not avoided, could result in death or serious
injury.
All safety messages will tell you what the potential hazard is, tell you how to
reduce the chance of injury, and tell you what can happen if the instructions are
not followed.
IMPORTANT SAFETY INSTRUCTIONS
WARNING
WARNING
•Do not install or store the washer where it will be
exposed to the weather or freezing temperatures.
•Do not tamper with controls.
•Do not repair or replace any part of the washer or
attempt any servicing other than as described in this
manual. We strongly recommend that any service be
performed by a qualified technician.
•See Installation Instructions for grounding requirements.
•ALWAYS follow the fabric care instructions supplied by
the garment manufacturer.
•Do not place items exposed to cooking oil in your
washer. Items contaminated with cooking oils may
contribute to a chemical reaction that could cause a
load to catch fire.
•Use fabric softeners or products to eliminate static only
as recommended by the manufacturer.
•This washer is not designed for maritime use or for
mobile installations such as in RVs, aircraft, etc.
•Turn OFF the water faucets and unplug the washer if
the machine is to be left for an extended period of
time, such as during vacations.
•Packaging material can be dangerous for children.
There is a risk of suffocation. Keep all packaging
from children.
•Always check the inside of the washer for foreign
objects before loading laundry. Keep the door closed
when not in use.
•WARNING: This product contains chemicals known
to the State of California to cause cancer and birth
defects or other reproductive harm. Wash hands after
handling.
To reduce the risk of fire, electric shock, or injury to
persons when using this appliance, follow basic
precautions, including the following.
•Before use, the washer must be properly installed as
described in this manual.
•Do not wash articles that have been previously cleaned
in, washed in, soaked in, or spotted with gasoline, dry
cleaning solvents, or other flammable or explosive
substances, as they give off vapors that could
ignite or explode.
•Do not add gasoline, dry cleaning solvents, or other
flammable or explosive substances to the wash water.
These substances give off vapors that could ignite
or explode.
•Under certain conditions, hydrogen gas may be
produced in a hot water system that has not been
used for two weeks or more. HYDROGEN GAS IS
EXPLOSIVE. If the hot water system has not been used
for such a period, before using the washer, turn ON
all hot water faucets and let the water flow from each
for several minutes. This will release any accumulated
hydrogen gas. As the gas is flammable, do not smoke
or use an open flame during this time.
•Do not allow children to play on or in the washer. Close
supervision of children is necessary when the washer is
used near children.
•Before the washer is removed from service or
discarded, remove the door to prevent children from
climbing inside.
3
IMPORTANT SAFETY INSTRUCTIONS
WARNING
WARNING
appliance from the power supply. Failure to follow this
warning can cause serious injury, fire, electric shock,
or death.
•Do not combine detergents, fabric softeners, and/or
other laundry products from different manufacturers
for use in a load, unless specified on the fabric label.
•Do not mix chlorine bleach with ammonia or acids
such as vinegar. Follow package directions when
using laundry products. Incorrect usage can produce
poisonous gas, resulting in serious injury or death.
•Do not reach into the washer while parts are moving.
Before loading, unloading, or adding items, push in the
cycle selector knob and allow the drum to coast to a
complete stop before reaching inside. Failure to follow
this warning can cause serious injury, fire, electric shock
or death.
To reduce the risk of fire, electric shock, or injury to
persons when using this appliance, follow basic
precautions, including the following.
•Unplug the washer before cleaning to avoid the risk of
electric shock.
•Never use harsh chemicals, abrasive cleaners, or
solvents to clean the washer. They will damage
the finish.
•Do not put oily or greasy rags or clothing on top of
the washer. These substances give off vapors that
could ignite the materials.
•Do not wash items that are soiled with vegetable or
cooking oil. These items may contain some oil after
laundering and may catch fire.
•Disconnect this appliance from the power supply
before attempting any user maintenance. Turning the
controls to the OFF position does not disconnect this
WARNING
WARNING
•Refer to INSTALLATION INSTRUCTIONS for detailed
grounding procedures. Installation instructions are
packed in the washer for the installer’s reference. If the
washer is moved to a new location, have it checked
and reinstalled by a qualified service technician. Failure
to follow this warning can cause serious injury, fire,
electric shock, or death.
•Do not, under any circumstances, cut or remove the
third (ground) prong from the power cord. Failure to
follow this warning can cause serious injury, fire, electric
shock, or death.
•For personal safety, this appliance must be properly
grounded. Failure to follow this warning can cause
serious injury, fire, electric shock, or death.
•The power cord of this appliance is equipped with a
3-prong (grounding) plug which mates with a standard
3-prong (grounding) wall outlet to minimize the possibility
of electric shock hazard from this appliance.
•This washer must be plugged into a 120VAC, 60Hz
grounded outlet. Failure to follow this warning can
cause serious injury, fire, electric shock, or death.
•Have the wall outlet and circuit checked by a
qualified electrician to make sure the outlet is properly
grounded. Failure to follow this warning can cause
serious injury, fire, electric shock, or death.
•Where a standard 2-prong wall outlet is encountered,
it is your personal responsibility and obligation to
have it replaced with a properly grounded 3-prong
wall outlet. Failure to follow this warning can cause
serious injury, fire, electric shock, or death.
•Do not install on carpet. Install the washer on a solid
floor. Failure to follow this warning can cause serious
leak damage.
•Do not remove grounding prong. Do not use an
adapter or extension cord. Plug into a grounded
3-prong outlet. Failure to follow these warnings can
cause serious injury, fire, electric shock, or death.
•The washer should always be plugged into its own
individual electrical outlet which has a voltage rating
that matches the rating plate. This provides the best
performance and also prevents overloading house
wiring circuits which could cause a fire hazard from
overheated wires.
•Never unplug your washer by pulling on the power
cord. Always grip plug firmly and pull straight out
from the outlet. Failure to follow this warning can
cause serious injury, fire, electric shock, or death.
•Immediately repair or replace all power cords that
have become frayed or otherwise damaged. Do not
use a cord that shows cracks or abrasion damage
along its length or at either end. Consult with a
qualified service technician. Failure to follow this
warning can cause serious injury, fire, electric shock,
or death.
•When installing or moving the washer, be careful not
to pinch, crush, or damage the power cord. Failure
to follow this warning can cause serious injury, fire,
electric shock, or death.
•The washer must be installed and electrically
grounded by a qualified service technician in
accordance with local codes to prevent shock hazard
and assure stability during operation.
•The washer is heavy. Two or more people may be
needed to install and move the appliance. Failure
to do so can result in damage to property or serious
bodily injury.
•Store and install the washer where it will not be
exposed to temperatures below freezing or exposed
to outdoor weather conditions. Failure to follow this
warning can cause serious leak damage.
•To reduce the risk of electric shock, do not install
the washer in humid spaces. Failure to follow this
warning can cause serious injury, fire, electric shock, or
death.
4
IMPORTANT SAFETY INSTRUCTIONS
WARNING:WARNING
RISK TO CHILDREN
•Keep laundry products out of children’s reach. To
prevent personal injury, observe all warnings on
product labels. Failure to comply with these warnings
could result in serious personal injury.
•Before your washer is removed from service or
discarded, remove the door to the washing compartment
to avoid the danger of children or small animals
getting trapped inside. Failure to do so can result in
serious personal injury or death.
•Do not allow children to play on or in the washer. Close
supervision of children is necessary when the washer is
used near children. As children grow, teach them the
proper, safe use of all appliances. Failure to comply with
these warnings could result in serious personal injury.
•Destroy the carton, plastic bag, and other packing
materials after the washer is unpacked. Children
might use them for play. Cartons covered with rugs,
bedspreads, or plastic sheets can become airtight
chambers. Failure to comply with these warnings could
result in serious personal injury.
GROUNDING REQUIREMENTS
IMPORTANT: Please read carefully.
TO CONNECT ELECTRICITY
GROUNDING INSTRUCTIONS
This appliance must be grounded. In the event of
malfunction or breakdown, grounding will reduce the
risk of electric shock by providing a path of least
resistance for electric current. This appliance is equipped
with a cord having an equipment-grounding conductor
and grounding plug. The plug must be plugged into
an appropriate outlet that is properly installed and
grounded in accordance with all local codes
and ordinances.
WARNING
Improper connection of the equipment-grounding
conductor can result in risk of electric shock. Check
with a qualified electrician or service technician
if you are in doubt as to whether the appliance
is properly grounded. Do not modify the plug
provided with the appliance. If it does not fit the
outlet, have a proper outlet installed by a qualified
electrician. Failure to follow these warnings can
cause serious injury, fire, electric shock, or death.
3-prong
grounding type
wall receptacle
3-prong
grounding
plug
Ensure proper
ground exists
before use.
5
FEATURES AND BENEFITS
KEY PARTS AND COMPONENTS
A DETERGENT DISPENSER
There are four compartments. One each for prewash,
main wash, liquid bleach, and liquid fabric softener.
B CONTROL PANEL WITH LED DISPLAY
The easy-to-read LED display shows cycle options,
settings, cycle status, and estimated time remaining during
operation.
NOTE: Sensors in the washer automatically detect the
size of the wash load to optimize washing time, based
on the selected cycle and options.
C DIRECT-DRIVE MOTOR
The direct-drive motor provides improved performance
and reliability while increasing energy efficiency.
(Motor is not visible.)
D LARGE-CAPACITY STAINLESS STEEL DRUM
The ultra-large stainless steel drum offers extreme
durability and is tilted to improve efficiency and allow
easier access for large items.
E EASY-ACCESS LOCKING DOOR
The extra-large door locks during operation. The door
will not open until it is safe to do so.
F FILTER ACCESS PANEL
Provides easy access to the drain pump filter, which allows
you to clean the filter or retrieve lost items without a
service call.
G LEVELING FEET
Four leveling feet (two in the front and two in the back)
adjust to improve washer stability on uneven floors. Feet
are adjusted and locked in place using the adjusting
wrench included with the washer.
H HIGH-EFFICIENCY STEAM CYCLES
During high-efficiency steam cycles, hot steam interacts
with fabrics to help remove tough stains.
I DOOR MAGNET
Safely and conveniently keeps the door ajar with the door
magnet. There are two door closed positions, fully closed
and slightly ajar. In the latter position, the door is only closed
to the door magnet to keep the door slightly open when the
washer isn’t in use. This will promote air circulation and allow
the interior of the machine to dry. To use this feature, close
the door just until it contacts the door magnet.
Included
Accessories
Included
Accessories
Cold and Hot Water Inlets
Power
Cord
Drain
Hose
Rear of Washer
Shipping Bolts/Retainers (4)
NOTE: Bolts/Retainers MUST be removed prior to
operation. Keep for future use.
Optional
Accessories
Optional
Accessories
Hot
andWater
Cold Water
Hot and
Cold
Hoses Hoses
Non-skid
Non-skid
pads pads
DrainExtension
Hose Extension
Drain Hose
Caps (4)
Caps (4)
(for covering
shipping
bolt holes)
(for covering
shipping
bolt holes)
P/N 5215ER2002K
P/N 5215ER2002K
Wrench
(for removing
Wrench
(for removing
shipping
bolts and
shipping
bolts and
adjusting
and locking
adjusting
and locking
levelingleveling
feet) feet)
Tie Strap
Tie Strap
(for securing Elbow Elbow
BracketBracket
(for securing
(for securing
drain hose) (for securing
drain hose)
drain hose)
drain hose)
Wrench appearance may vary.
6
Pedestal
Pedestal
Stacking
(For dryer)
Stacking
kit (Forkit
dryer)
51022 51022
(White)(White)
(Metallic
51023 51023
(Metallic
Silver) Silver)
D26 (Chrome
17013 (Chrome
D26 17013
Look) Look)
INSTALLATION REQUIREMENTS
KEY DIMENSIONS AND SPECIFICATIONS
Description Rated Voltage/Frequency Dimensions Net Weight Front-Loading Washer
120VAC, 60Hz
26 ¼ in. (W) X 30 ⅓ in. (D) X 38 15/16 in. (H), 54 ⅜ in. (D, door open)
66.8 cm (W) X 76.8 cm (D) X 98.5 cm (H), 138.1 cm (D, door open)
204.6 lbs(92.8Kg)
CHOOSE THE PROPER LOCATION
CLEARANCES
WARNING
24 1/8"
(61.3 cm )
•This washer is heavy. Two or more people are
required when moving and unpacking the washer.
Failure to do so may result in damage to property or
serious bodily harm.
•Store and install the washer where it will not be
exposed to temperatures below freezing or exposed
to outdoor weather conditions. Failure to follow this
warning can cause serious injury, fire, electric shock,
or death.
•Properly ground washer to conform with all electric
governing codes and ordinances. Failure to follow this
warning can cause serious injury, fire, electric shock, or
death.
•To reduce the risk of electric shock, do not install the
washer in humid spaces. Failure to follow this warning
can cause serious injury, fire, electric shock, or death.
•To ensure proper air flow, do not block the large
opening on the bottom of the washer with carpeting
or other materials.
•Do not remove ground prong. Do not use an adapter
or extension cord. Plug into a grounded 3-prong
outlet. Failure to follow this warning can cause serious
injury, fire, electric shock, or death.
30 1/3"
(76.8 cm )
54 3/8"
(138.1 cm )
4"
(10 cm )
To ensure sufficient clearance for water lines and airflow,
allow minimum clearances of at least 1 in. (2.5 cm) at the
sides and 4 in. (10 cm) behind the unit. Be sure to allow
for wall, door, or floor moldings that may increase the
required clearances.
Power Outlet
•The power outlet must be within 60 in. (1.5 m) of either
side of the washer.
•The appliance and outlet must be positioned so that
the plug is easily accessible.
•Do not overload the outlet with more than
one appliance.
•The outlet must be grounded in accordance with
current wiring electric codes and regulations.
• Time-delay fuse or circuit breaker is recommended.
NOTE: It is the personal responsibility and obligation of
the product owner to have a proper outlet installed by a
qualified service technician.
1"
(2.5 cm )
26 1/4"
(66.8 cm )
1"
(2.5 cm )
Allow at least 21 ¼ in. (54 cm) in front of
the washer to open the door.
FLOORING
•To minimize noise and vibration, the washer MUST be
installed on a solidly constructed floor. See the NOTE
to your right.
•Allowable slope under the entire washer is a maximum
1 in. difference from side to side or from front to back.
•Installing on carpeting and soft tile surfaces is
not recommended.
•Never install the washer on a platform or weakly
supported structure.
NOTE: The floor must be strong and rigid enough to
support the weight of the washer, when fully loaded,
without flexing or bouncing. If your floor has too much
flex, you may need to reinforce it to make it more rigid.
A floor that is adequate for a top-loading washer may
not be rigid enough for a front loading washer, due to
the difference in the spin speed and direction. If the
floor is not solid, your washer may vibrate and you may
hear and feel the vibration throughout your house.
7
INSTALLATION INSTRUCTIONS
UNPACKING AND REMOVING SHIPPING BOLTS
When removing the washer from the carton base, be sure
to remove the foam drum support in the middle of the
carton base. See drawing below.
If you must lay the washer down to remove the base
packaging materials, always protect the side of the
washer and lay it carefully on its side. DO NOT lay the
washer on its front or back.
To prevent internal damage during transport, the washer
is equipped with four shipping bolts and plastic retainers.
IMPORTANT:
•These shipping bolts and retainers MUST NOT be
removed until just before moving the washer into its
final position.
•These bolts and retainers MUST be removed before
operating the washer.
•Failure to remove shipping bolts and retainers may
cause severe vibration and noise, which can lead to
permanent damage to the washer.
NOTE: The power cord is secured to the back of the
washer with a shipping bolt to help prevent operation
with shipping bolts in place.
Shipping
Bolts
Power
Cord
1. Starting with the bottom two shipping bolts, use the
wrench (included) to fully loosen all four shipping
bolts by turning them counterclockwise.
Shipping Bolts
Hole Cap
Foam Tub
Support
2. Remove the bolt assemblies by wiggling them
slightly while pulling.
3. Locate the four hole caps included in the accessory
pack and install them in the shipping bolt holes.
NOTE: Save the bolt assemblies for future use. To prevent
damage to internal components, DO NOT transport the
washer without reinstalling the shipping bolts.
Carton
Base
8
INSTALLATION INSTRUCTIONS
CONNECTING THE WATER LINES
•IMPORTANT: Use new hoses when installing the
washer. Do NOT reuse old hoses.
•Water supply pressure must be between 14.5 psi and
116 psi (100~800 kPa). If the water supply pressure is more
than 116 psi, a pressure reducing valve must be installed.
•Periodically check the hose for cracks, leaks, and wear,
and replace the hose if necessary.
•Make sure that the water lines are not stretched,
pinched, crushed, or kinked.
•The washer should never be installed or stored in a
location subject to freezing temperatures. Damage to the
water lines and internal mechanisms of the washer can
result. If the washer was exposed to freezing temperatures
prior to installation, allow it to stand at room temperature
for several hours before use and check for leaks prior
to operation.
•For optimal wash performance, the hot water temperature
should be set at 120°-135°F (48-57°C) and the cold water
at 60°F (15°C).
Rubber Seal
3. Always run a gallon or two of water through each
inlet hose to flush dirt, scale and other debris out
of the water lines. Doing so will help prevent future
problems with clogged filter screens, and will also
allow you to verify which hose is hot and which
is cold.
Rubber Seal
Cold
Water
Inlet
Water Hose
(to water inlet
on washer)
Hot
Water
Inlet
Water Hose
(to tap)
1. Inspect the threaded fitting on each hose and make
sure there is a rubber seal in place in both ends.
WARNING: Do not overtighten the hoses. Overtightening
can damage the valves resulting in leaking and property
damage.
4. Attach the (red) hot water line to the hot water inlet on
the back of the washer. Attach the (blue) cold water line
to the cold water inlet on the back of the washer.
Tighten the fittings securely.
NOTE: When installing the hoses onto the water inlet valves, be careful not to cross-thread the hose fittings. DO NOT overtighten the hoses; this could cause
damage to internal components, the valve or the hose
gasket. Overtightening could result in property damage
from leaks.
Water Faucet
2. Connect the water supply hoses to the HOT and
COLD water faucets tightly by hand and then tighten
another ⅔ turn with pliers.
9
INSTALLATION INSTRUCTIONS
CONNECTING THE DRAIN HOSE
Option 2: Laundry Drum
•The drain hose should always be properly secured.
Failure to properly secure the drain hose can result in
flooding and property damage.
•Do not install the end of the drain hose higher than 96
in. (243.8 cm) above the bottom of the washer.
•The drain must be installed in accordance with any
applicable local codes and regulations.
•Make sure that the drain hose is not stretched, pinched,
crushed, or kinked.
NOTE:
A drain hose extension kit is
available if the drain hose is not
long enough. Do not extend the
drain hose more than 6 feet, as
this will cause poor draining,
which will result in poor wash
and spin performance.
Utility Sink
Elbow
Bracket
Drain Hose Extension
Tie Strap
Drain Hose
P/N 5215ER2002K
The elbow bracket should be installed near the end of
the drain hose. Hang the end of the drain hose over the
side of the utility sink. Use a tie strap to secure the drain
hose in place.
Option 1: Standpipe
Option 3: Floor Drain
Elbow Bracket
Elbow
Bracket
Tie
Tie
Strap
Strap
Drain Hose
Drain Hos
e
Drain Hose
Floor Drain
Install the end of the drain hose into the elbow bracket.
Do not extend the drain hose more than 4 inches past the
end of the elbow bracket. Use a tie strap to secure the
drain hose in place.
NOTE:
•Total height of the hose end should not exceed 96 in.
(243.8 cm) from the bottom of the washer.
•The drain hose should be inserted no more than 8–12
inches into the standpipe. Inserting more than 8-12
inches can cause mold or microorganisms to spread to
the inside of the washer.
Insert the end of the drain hose into the floor drain.
If possible, secure the hose to prevent it from moving or
coming out of the drain.
CONNECT TO THE POWER SUPPLY
Washer should be plugged into a 120-VAC, 60-Hz
grounded 3-prong outlet.
Plug in the washer.
10
INSTALLATION INSTRUCTIONS
LEVELING THE WASHER
The drum of your new washer spins at very high speeds.
To minimize vibration, noise, and unwanted movement,
the floor must be a level, solid surface.
NOTE: Adjust the leveling feet only as far as necessary to
level the washer. Extending the leveling feet more than
necessary can cause the washer to vibrate.
NOTE: Before installing the washer, make
sure that the floor is clean, dry and free of
dust, dirt, water and oils so the washer feet
cannot slide easily. Leveling feet that
move or slide on the floor can contribute
to excess vibration and noise due to
poor contact with the floor. See
INSTALLATION OF NON-SKID PADS
for more information.
NOTE: If a drip pan must be used, make sure to follow the
instructions provided with the drip pan and make sure the
leveling feet are adjusted for firm and even contact with
the pan. Use of drip pans and failure to properly level the
machine may result in increased vibration and noise
during operation.
All four leveling feet must rest solidly on the floor. Rock
the washer from corner to corner to make sure that all
four leveling feet are in firm and even contact with the floor.
Tighten all 4 lock nuts
securely using the
wrench.
3. Once the washer is level from side to side and front to
back, use the adjusting wrench to tighten all four lock
nuts securely to prevent the legs from getting out of
adjustment during operation. Make sure that all four
leveling feet are in firm contact with the floor.
NOTE: To make sure that the washer is properly level, run
the washer with a test load: place a medium-sized load
of laundry in the machine. Then, press POWER, select
RINSE & SPIN, and press the START/PAUSE button.
See the following sections for additional information on
cycle selection and operation. Verify that the washer does
not rock or vibrate excessively during the spin cycle. If the
washer vibrates or shakes, adjust the leveling feet, while
the washer is spinning, until the vibrations are reduced.
Level
INSTALLATION OF NON-SKID PADS
(optional)
Some floor surfaces are too slippery to prevent the
washer from moving on the floor during heavily
unbalanced loads. While it is normal for an occasional
load to be out of balance, excess noise and vibration can
result from the washer moving out of position. If these
conditions are encountered, follow the instructions below
for installation of the non-skid pads. These pads will help
prevent the washer from moving during heavy, out of
balance conditions, thereby reducing noise and vibration.
NOTE: The non-skid pads are included in the installation
packet
Leveling
Feet
Leveling Feet
1. Position the washer in its final location, taking special
care not to pinch, strain, or crush the water and drain
lines. Place a level across the top of the washer.
Non-skid pads
This side up
Stick adhesive side to floor
Remove backing
Raise
Lower
2. Loosen the locknuts on all four leveling feet with
the wrench until you can adjust the feet (wrench
appearance may vary). Use the wrench to turn the feet
clockwise to raise the washer, and counterclockwise
to lower the washer. Using a level, adjust the feet until
the washer is level from side to side and front to back.
Make sure that all four feet are in firm contact with the
floor.
NOTE: If you are installing the washer on the optional
pedestal, the washer leveling feet should be fully retracted.
Use the leveling feet on the pedestal to level the washer.
Place the pads under both front feet.
11
HOW TO USE
WARNING: To reduce the risk of fire, electric shock, or injury to persons, read and follow this
entire Use & Care Guide, including the Important Safety Instructions, before operating this washer.
CONTROL PANEL FEATURES
F
A
B
H
E
D
A POWER (ON/OFF) BUTTON
Press to turn the washer ON or OFF.
NOTE: Pressing the POWER button during a
cycle will cancel that cycle and any load
settings will be lost. The door will unlock after a
brief pause, unless the water level or
temperature is too high.
G
C
E SPECIAL CYCLE AND OPTION BUTTONS
These buttons are used to activate special cycles
or options.
F DETERGENT AMOUNT INDICATOR (Dtg Amt)
The detergent amount indicator bars light up to
indicate the size of dry load sensed by washer
control. Follow the detergent manufacturer’s
recommendations for amount of detergent to use
based on load size. Indicator will not be accurate
if any wet clothes are placed in the washer.
NOTE: The detergent amount indicator icon does
not represent an actual detergent measuring cup
or cap. This feature is not available on all cycles.
B CYCLE SELECTOR KNOB
Turn this knob to select the desired cycle. Once the
desired cycle has been selected, the standard presets
will appear in the display. These settings can be
adjusted using the cycle setting buttons anytime
before starting the cycle.
G TIME AND STATUS DISPLAY
The display shows the cycle status, door lock
status and estimated time remaining.
C START/PAUSE BUTTON
Press this button to start the selected cycle.
If the washer is running, use this button to pause
the cycle without losing the current settings.
NOTE: If you do not press the START/PAUSE
button within four minutes of selecting a cycle,
the washer automatically turns OFF.
H STEAM TREAT BUTTON
Select the STEAM TREAT button to add steam to
the selected cycle for added cleaning power.
NOTE: The steam option is not available on all
cycles.
D CYCLE MODIFIER BUTTONS
Use these buttons to adjust the settings for the
selected cycle. The settings light up above the
buttons to show the current selection.
NOTE: To protect your clothing, not all settings are available on all cycle selections.
12
HOW TO USE
OPERATING THE WASHER USING DETERGENT AMOUNT INDICATOR
IMPORTANT: DO NOT add detergent before beginning the wash cycle (step 5 below) when using detergent
amount indicator.
1
SORT LAUNDRY AND LOAD WASHER
Sort laundry by fabric type, soil level, color and load size, as needed.
Open the door and load selected items into the washer.
2 TURN ON THE WASHER
Press the POWER button to turn ON the washer. The lights around the
cycle selector knob will illuminate and a chime will sound.
3 SELECT A CYCLE
Turn the cycle selector knob in either direction to select the desired cycle.
The preset Wash Temperature, Spin Speed, Soil Level,
and Option settings for that cycle will be shown.
4 SELECT CYCLE MODIFIERS & OPTIONS
Default settings for the selected cycle can now be changed if desired.
Use the cycle modifier buttons.
NOTE: To protect your fabrics, not all modifiers are available on all
cycles. Cycle options can also be added by using the option buttons.
NOTE: Not all options are available on all cycles. A different chime will
sound and the LED will not come on if the selection is not allowed.
5 BEGIN CYCLE
Press the START/PAUSE button to begin the cycle. The door will lock,
and the washer will briefly tumble the load without water to measure its
weight. Washer will stop tumbling and the detergent amount
indicator bar(s) will light up indicating the size of the load. One bar
indicates a small load, two bars medium, three bars large, and four bars
an extra-large load.
6 PAUSE CYCLE
When the detergent amount indicator lights up, press the
START/PAUSE button to pause the cycle.
7 ADD DETERGENT
Add High-Efficiency (HE) detergent to the detergent dispenser drawer
based on the number of illuminated bars in the detergent amount
indicator.
8 RESUME CYCLE
Press the START/PAUSE button to resume the wash cycle.
NOTE: If you choose not to use the detergent amount indicator feature, add detergent before Step 5 (BEGIN CYCLE).
13
HOW TO USE
CYCLE GUIDE
The cycle guide below shows the default settings, available options and recommended fabric types
for each cycle. Allowable modifier adjustments are shown below the default setting for each cycle.
Cycle
Fabric or
Load Type
Normal
Cotton, linen,
towels, shirts,
sheets, jeans,
mixed loads
Bulky/
Bedding
Large items
such as
blankets and
comforters
Kids
Wear
Specifically
designed to
clean and
thoroughly
rinse kids
wear
Heavy
Duty
Heavily
soiled
cotton fabrics
Sanitize
Heavily
soiled items,
such as work
clothes,
diapers, etc.
Whitest
Whites
Heavily to
normally
soiled white
cottons
Rugged
Heavily
soiled hard
and thick
items such
as jeans and
construction
work wear.
Display
Time
(Min.)
39-59
Load
Sensing
Yes
Wash
Wash
Motion Temperature
Yes
Spin
Speed
Soil
Level
Warm
High
Normal
Hot
Tap Cold
Cold
Extra
High
No Spin
Low
Medium
Heavy
Light
Warm
56
86-96
83-98
98-107
66-76
No
Yes
Yes
Yes
Yes
Yes
Yes
Yes
Yes
Steam Extra
Treat Rinse
Auto Save
Soak Energy
PreWash
Medium Normal
Tap Cold
Cold
Warm
No Spin
Low
Heavy
Light
Hot
High
Heavy
Hot
Tap Cold
Cold
No Spin
Low
Light
Heavy
Warm
Extra
High
Heavy
Tap Cold
Cold
Warm
Extra
High
No Spin
Low
Medium
Heavy
Light
Extra Hot
High
Normal
Extra
High
No Spin
Low
Medium
Heavy
Light
Hot
High
Normal
Tap Cold
Cold
Warm
Extra
High
No Spin
Low
Medium
Heavy
Light
Yes
AccelaWash
= Available Option
= Default Setting
High
99-132
Yes
Yes
Extra
High
No Spin
Low
Medium
NOTE:
•To protect your garments, not every wash temperature, spin speed, soil level, or option is available with every cycle. A chime will sound and the LED will not light if the selection is not allowed.
•The washer automatically adjusts the wash time for the amount of laundry, water pressure, water heating time and
other operating conditions.
•These cycles use various wash motions to enhance cleaning and/or fabric care performance. The wash motions may
sound different at different stages of the wash cycle. This is normal.
•The recommended load size for the Sanitize cycle is 10 lbs.
•When the Accela-wash option is selected, the drum spins to rinse the clothes. To use the No Spin option, you must
deselect the Accela-wash option.
14
HOW TO USE
CYCLE GUIDE (continued)
= Available Option
= Default Setting
The cycle guide below shows the default settings, available options and recommended fabric types
for each cycle. Allowable modifier adjustments are shown below the default setting for each cycle.
Cycle
Fabric or
Load Type
Casual
Dress shirts/
pants,
wrinkle-free
clothing,
poly/cotton
blend
clothing,
tablecloths
Display
Load
Wash
Time
Sensing Motion
(Min.)
35-44
Yes
Yes
Express
Wash
Lightly soiled
clothing and
small loads
Cold Clean
Small loads
of cotton,
linen, towels,
shirts, sheets,
jeans, mixed
loads
73-82
Yes
Yes
Delicates
Dress shirts/
blouses,
nylons, sheer or
lacy garments
41
No
Yes
Workout
Wear
Permanent
press,
synthetic
items
15
57
No
No
Yes
Yes
Wash
Temperature
Spin
Speed
Soil
Level
Warm
Medium
Normal
Hot
Tap Cold
Cold
High
No Spin
Low
Heavy
Light
Hot
Extra
High
Light
Tap Cold
Cold
Warm
No Spin
Low
Medium
High
Normal
Heavy
Cold
High
Normal
Tap Cold
Extra
High
No Spin
Low
Medium
Light
Cold
Medium
Normal
Warm
Tap Cold
No Spin
Low
Heavy
Light
Warm
Medium
Normal
Tap Cold
Cold
No Spin
Low
Heavy
Light
Accela- Steam
Wash
Treat
Extra
Rinse
Auto Save
Soak Energy
PreWash
High
Rinse and
Spin
Small Load
Loads that
only need to
be rinsed
Normally
soiled and
small loads
18
45
No
Yes
Extra
High
No Spin
Low
Medium
No
Yes
Warm
High
Normal
Hot
Tap Cold
Cold
Extra
High
No Spin
Low
Medium
Heavy
Light
NOTE:
•To protect your garments, not every wash temperature, spin speed, soil level, or option is available with every cycle. A chime will sound and the LED will not light if the selection is not allowed.
•The washer automatically adjusts the wash time for the amount of laundry, water pressure, water heating time and
other operating conditions.
•These cycles use various wash motions to enhance cleaning and/or fabric care performance. The wash motions may
sound different at different stages of the wash cycle. This is normal.
•The recommended load size for the Sanitize cycle is 10 lbs.
•When the Accela-wash option is selected, the drum spins to rinse the clothes. To use the No Spin option, you must
deselect the Accela-wash option.
15
HOW TO USE
SORTING WASH LOADS
Fabric Care Labels
Loading the Washer
Many articles of clothing include a fabric care label.
Using the chart below, adjust the cycle and option
selections to care for your clothing according to the
manufacturer’s recommendations.
•Check all pockets to make sure that they are empty.
Items such as clips, matches, pens, coins, and keys can
damage both your washer and your clothes.
•Close zippers, hooks, and drawstrings to prevent these
items from snagging or tangling on other clothes.
•Pretreat heavily stained areas for best results.
•Combine large and small items in a load. Load large
items first.
•Large items should not be more than half of the total
wash load.
•The drum should not be tightly packed with items. The
door of the washer should close easily.
•To prevent an out-of-balance load, do not wash
single items. Add one or two similar items to the load.
Large, bulky items, such as a blanket, comforter, or
bedspread, should be washed individually.
•Do not wash or spin waterproof items, such as rain
coats, sleeping bags, etc.
•When unloading the washer, check under the door seal
for small items.
NOTE: Make sure that the door seal area is clear when
closing the door. Overloading the washer can cause items
to get caught between the door and the seal. This can
damage both the items and the seal.
Grouping Similar Items
For the best washing results, and to reduce the possibility of
damage to clothing, care should be taken to sort the
clothing into loads that are made up of similar items.
Mixing different fabric types and/or soil levels can result
in poor wash performance, color transfer or discoloration,
fabric damage or linting. Fabrics should be sorted into
groups as described below.
Colors
Sort articles by color. Wash dark clothes together in a
separate load from light colors or whites. Mixing dark
clothes with light clothes can result in dye transfer or
discoloration of the lighter clothes.
Soil Level
Wash heavily soiled clothing together. Washing lightly
soiled clothing in the same load with heavily soiled
clothing could result in poor wash performance for the
lightly soiled clothing.
Fabric Type
• DO NOT OVERLOAD THE DRUM
• MAKE SURE CLOTHING IS NOT
CAUGHT IN THE DOOR GASKET
Delicate articles should not be mixed with heavier or
sturdier fabric types. Washing delicates in a load with
heavy fabrics can result in damage to the more delicate
fabrics. Washing heavier fabrics in a delicate load can
result in poor wash performance for the heavier fabrics
and possible damage to the delicates.
Sort Laundry...
Lint Type
by Colors
Whites
Lights
Darks
Some fabrics attract and bind lint to them while others
give off lint in the laundry process. Avoid mixing these
lint collectors and lint producers in the same load. Mixing
these fabrics will result in pilling and linting on the lint
collectors. (For example, lint collector – knit sweater; lint
producer – terrycloth towels.)
16
by Soil
Heavy
Normal
Light
by Fabric
Delicates
Easy Care
Sturdy
by Lint
Lint Producer
Lint Collector
HOW TO USE
ABOUT THE DISPENSER DRAWER
Liquid Chlorine
Bleach
Compartment
The automatic dispenser consists of four compartments
which hold:
•Liquid chlorine bleach.
•Liquid fabric softener.
•Liquid or powdered detergent for prewash.
•Liquid or powdered detergent and color-safe bleach
for main wash.
Liquid Fabric
Softener
Compartment
Liquid
Detergent
Cup
Prewash
Detergent
Compartment
Main Wash Detergent
Compartment
Pre-Wash Detergent Compartment
Liquid Bleach Compartment
Add liquid or powdered detergent to this compartment
when using the Pre-Wash option. Always use HighEfficiency (HE) detergent with your washing machine.
The amount of detergent added for the Pre-Wash
option should be ½ the amount recommended for the
main wash cycle. For example, if the main wash cycle
requires ½ measure of detergent, add ¼ measure to the
Pre-Wash compartment.
NOTE: If using liquid detergent for the main wash when
using the Pre-Wash option, the liquid detergent cup
accessory must be used in the main wash dispenser. This
will prevent the main wash liquid detergent from being
dispensed immediately.
This compartment holds liquid chlorine bleach, which is
dispensed automatically at the proper time during the
wash cycle.
•Do not add powdered or liquid color-safe bleach to
this compartment. The bleach compartment is designed
to dispense liquid chlorine bleach only. Powdered or
liquid color-safe bleach will not dispense properly.
•Always follow the manufacturer’s recommendations
when adding bleach. Do not exceed the maximum fill
line since this can cause the bleach to be dispensed
immediately, causing damage to fabrics. Using too much
bleach can damage fabrics.
•Never pour undiluted liquid chlorine bleach directly
onto the load or into the drum. Fabric damage can occur.
Main Wash Detergent Compartment
Fabric Softener Compartment
This compartment holds laundry detergent for the main
wash cycle. The detergent is added to the load at the
beginning of the cycle. Always use High-Efficiency (HE)
detergent with your washing machine. Either powdered
or liquid detergent may be used.
Never exceed the manufacturer’s recommendations
when adding detergent. Using too much detergent can
result in detergent buildup in clothing and the washer.
NOTE: Liquid or powdered color-safe bleach may be
added to the main wash compartment with detergent of
the same type. DO NOT add liquid or powdered
color-safe bleach to the bleach dispenser. DO NOT mix
liquid and powdered cleaning agents within the same
compartment.
This compartment holds liquid fabric softener, which is
automatically dispensed during the final rinse cycle.
Never exceed the manufacturer’s recommendations when
adding softener. Using too much fabric softener can result
in buildup in clothing and the washer. Either powdered or
liquid fabric softener may be used.
•Always follow the manufacturer’s recommendations
when adding fabric softener. Do not exceed the
maximum fill line. Using too much fabric softener may
stain clothes.
•Dilute concentrated fabric softeners with warm water.
Do not exceed the maximum fill line.
•Never pour fabric softener directly onto the load or
into the drum.
17
HOW TO USE
DETERGENT AND DISPENSER USE
A Word About Detergents
Detergent Amount
High-Efficiency (HE) detergents produce fewer suds,
dissolve more efficiently to improve washing and rinsing
performance, and help to keep the interior of your
washer clean. Using detergent that is not HE may cause
oversudsing and unsatisfactory performance which
could result in error codes, cycle failure, and
machine damage.
Use the detergent amount indicator to help
determine the correct amount of detergent to use.
Bars light up to indicate the size of the dry load sensed
by the washer control. Follow the detergent manufacturer’s
recommendations for the amount of detergent based on
load size. The indicator will not be accurate if any wet
clothes are placed in the washer.
NOTE: The detergent amount indicator icon does not
represent an actual detergent measuring cup or cap.
Maximum
Normal Load Amount
Liquid
Detergent
Filling the Dispenser
Powdered
Detergent
To add detergent, bleach, and fabric softener to the
automatic dispenser:
For proper wash performance, always measure the
detergent using the measurements provided by the
detergent manufacturer.
The normal amount of HE detergent needed, for average
loads, is less than ½ of the recommended maximum.
Use less detergent for soft water, light soil or smaller
loads. Never use more than the maximum amount
recommended by the detergent manufacturer.
1
Open the dispenser drawer.
2
Load the laundry products into the
appropriate compartments.
3
Close the drawer before starting the cycle.
NOTE: It is normal for a small amount of water to
remain in the bleach and softener compartments at the
end of the cycle.
IMPORTANT: Do not place or store laundry products,
such as detergent, bleach, or liquid fabric softener, on top
of your washer or dryer. Wipe up any spills immediately.
These products can damage the finish and controls.
Designed to use only
High-Efficiency (HE) detergent
IMPORTANT: Your washing machine is designed for use
with only High-Efficiency (HE) detergents. HE detergents
are formulated specifically for front-load washers and
contain suds-reducing agents. Always look for the HE
symbol when purchasing detergent.
1 bar = small load
IMPORTANT: Not all detergents are the same. Pay
careful attention to the amount of detergent used to
avoid oversudsing, poor rinsing and detergent buildup in
clothing, and residue buildup that can contribute to odors
in the machine. NEVER use a cup or scoop other than the
one supplied by the manufacturer of the detergent you
are using. Never use more than the maximum amount of
detergent recommended by the manufacturer.
Always measure the detergent amount. While HE
detergents are designed for this type of washing
machine, be careful when measuring the detergent. For
most normal loads, no more than 1/4 to 1/2 of cap or
scoop of HE detergent should be used.
NOTE: Extra care must be exercised when using 2X and
3X concentrated detergents because even a little bit extra
can contribute to the problems mentioned above.
NOTE: Detergents designated as HE compatible may not
provide optimal results.
2 bars = medium load
3 bars = large load
4 bars = extra-large load
18
HOW TO USE
TIME AND STATUS DISPLAY
The time and status display shows the estimated time remaining, cycle progress, and door lock status.
C
E
D
A
B
A ESTIMATED TIME REMAINING
When the START/PAUSE button is pressed, the
washer will automatically detect the load size for
cycles that use load sensing. The control will then
optimize the wash and rinse times, based on the selected cycle, modifiers and options. When the load
size has been determined, the display will change
from dashes (- - -) to the estimated time for that
cycle. For non-load sensing cycles, the estimated
time will display when the cycle is selected.
NOTE:
•The time shown is only an estimate. For example,
the time displayed may pause for a period of time
while the machine is heating the water or balancing
the load. Under certain conditions, the machine can
pause for extended periods of time.
•Estimated time is based on normal operating
conditions. Several external factors (load size, room
temperature, incoming water temperature, etc.) also
affect the length of estimated time vs. actual time.
B LOAD-SENSING INDICATOR
At the beginning of cycles that use the load sensing
feature, the LOAD SENSING light will blink while the
load size is being measured. Once the size has been
determined, the control adjusts the cycle for
optimum performance. Estimated time remaining will
not display until the load size has been determined,
and may be different for each load.
19
C CYCLE STATUS INDICATOR
These status LEDs illuminate to indicate which
stage of the cycle is currently running. A blinking
light indicates the active stage of the cycle. When
that stage is complete, the light will remain steady.
D DOOR LOCK INDICATOR
Indicates that the door is locked. The washer door
will lock while the washer is operating. The door can
be unlocked by pressing START/PAUSE to pause
the washer.
NOTE:
•If the temperature in the washer is too high, the
door cannot be unlocked until the washer
has cooled.
•If the water level is too high, the door will not
unlock. To drain the water, press POWER, then press
the SPIN SPEED button without selecting a cycle.
Press START/PAUSE and the water will drain and
the clothes will spin out. Do not try to force the door
open, as it will damage the door.
E DETERGENT AMOUNT INDICATOR
The detergent amount indicator displays the
suggested amount of detergent for the load. Fewer
lit bars indicate a smaller load; therefore, less
detergent should be used.
HOW TO USE
CYCLE MODIFIER BUTTONS
NOTE: To protect your garments, not every wash
temperature, spin speed, soil level, or option is available
with every cycle. A chime will sound and the LED will not
light if a selection is not allowed.
Each cycle has default settings that are selected
automatically. You may also customize these settings
using the cycle modifier buttons. Press the button for the
desired modifier until the indicator light for the desired
value is lit. The washer automatically adjusts the water
level for the type and size of wash load for best results
and maximum efficiency. Due to the high-efficiency
nature of this product, water levels may be much lower
than expected. This is normal operation and cleaning/
rinsing performance will not be compromised.
A
C
B
A WASH TEMP
Wash Temp selects the wash and rinse temperature
combination for the selected cycle. Press the Wash
Temp button until the indicator light for the desired
setting is lit.
•Your washer features a heating element to boost
the hot water temperature for Extra Hot settings.
This provides improved wash performance at
normal water heater settings.
•Select the water temperature suitable for the type
of load you are washing. Follow the garment fabric
care labels for best results.
•Cold rinses use less energy. The actual rinse
temperature depends on the temperature of the
cold water at the faucet.
•Cold water is used for all rinse cycles.
D
B SPIN SPEED
Higher spin speeds extract more water from clothes,
reducing drying time and saving energy.
Press the SPIN SPEED button until the desired speed
is selected. Some fabrics, such as delicates, require
a slower spin speed. To protect your clothing, not all
spin speeds are available for all cycles.
The Drain & Spin cycle:
1. Press the POWER button to turn ON the washer.
2. Press the SPIN SPEED button to select the desired
spin speed. For drain only, select the
NO SPIN option.
3. Press the START/PAUSE button. The water will
drain and the clothes will tumble before
the spin routine begins.
C SOIL LEVEL
Adjusting the soil level setting will modify the cycle
to allow more time for heavily soiled clothes or less
time for lightly soiled clothes. Press the SOIL LEVEL
button until the desired soil level is selected.
D CHIME
Press repeatedly to adjust the volume of the chime
and keypad tones. You may turn the end-of-cycle
chime and keypad tones ON or OFF with the CHIME
button.
20
HOW TO USE
STEAM CYCLES AND OPTIONS
STEAM TREAT
CAUTION:
The door may be very warm during steam cycles. This
is normal.
Do not attempt to override the door lock mechanism or
reach into the washer during a steam cycle. Steam can
cause severe burns.
IMPORTANT NOTES ABOUT STEAM CYCLES:
•Steam may not be visible during the steam cycles. This
is normal.
•Do not use steam with delicate fabrics such as wool,
silk, or easily discolored fabrics.
Select the STEAM TREAT button to add steam
to the selected cycle for added cleaning power.
Adding steam to cycles helps provide improved cleaning performance. By creating
steam, fabrics get the benefit of a deep
clean. The steam option is not available on
all cycles.
To add steam to a cycle:
1
Turn ON the washer and turn the cycle selector knob to
select a cycle that allows the steam option.
2
Press the STEAM TREAT button. The washer will
automatically adjust the cycle settings.
3
Set any other desired options.
4
Press the START/PAUSE button to start the cycle.
21
HOW TO USE
OPTION BUTTONS
STAY FRESH
Your washing machine features several additional cycle
options that customize cycles to meet your individual needs.
This feature helps keep wrinkles from setting in clothes and helps keep them fresh if they
are not removed from the washer as soon as
the cycle is complete. Press the STAY FRESH
button to tumble the clothes intermittently
and circulate fresh air through the drum for up to eight hours.
Press the POWER button or the START/PAUSE button to
remove clothes at any time.
1
Turn ON the washer and turn the cycle selector knob to
select the desired cycle.
2 Use the cycle modifier buttons to adjust the settings for
that cycle.
3 Press the cycle option button(s) for the option(s) you
would like to add. The button will light when that option
is selected. For secondary functions, press and hold the button for five seconds. The LED will blink when the secondary option is selected. Both options cannot be selected together.
4 If the selected option is not allowed for the selected
cycle, the chime will sound twice to alert you and the LED will not illuminate.
Press the START/PAUSE button to start the cycle. After a
brief delay, the door will lock and the cycle will begin.
NOTE: To protect your garments, not every option is
available with every cycle.
NOTE: If the START/PAUSE button is not pressed within four
minutes, the control will shut off and the settings will be lost.
PRE WASH
Select this option to add a 16-minute prewash, rinse and spin cycle to the chosen
cycle. This is especially useful for heavily
soiled items.
DELAY START
Once you have selected the cycle and other
settings, press this button to delay the start of
the wash cycle. Each press of the button
increases the delay time by one hour, for up
to 19 hours. Once the desired delay time is set, press the
START/PAUSE button to start the delay time.
EXTRA RINSE
This option will add an extra rinse to the
selected cycle. Use this option to help
ensure the removal of detergent or bleach
residue from fabrics.
ACCELA-WASH
The Accela-Wash option uses a twin spray
water and detergent injection which
reduces cycle time while maintaining wash
performance in a normal cycle.
DRUM LIGHT
The drum is equipped with a blue LED light
that illuminates when the washer is turned
on. This light automatically turns off when
the door is closed and the cycle starts.
To turn on the light during a cycle, press and hold the
EXTRA RINSE button for five seconds. The drum light will illuminate and then turn off automatically after four minutes.
22
HOW TO USE
SPECIAL FUNCTIONS
CONTROL
LOCK
MY CYCLE
Use this option to disable the controls. The
washer can only be locked during a cycle.
This feature can prevent children from
changing cycles or operating the machine.
Once set, the controls remain locked and
must be turned OFF before the controls can be used again.
Once the washer has shut off, the power button will allow
the machine to be turned ON, but the controls will still be
locked. When the controls are locked, the STAY FRESH LED
will illuminate and “CL” will display alternately with the
estimated time remaining.
Press and hold the STAY FRESH button for five seconds to
activate or deactivate the controls.
MY CYCLE allows you to store a customized
wash cycle for future use. It allows you to
save favorite temperature, spin speed, soil
level, and other options for a cycle, and
then recall them at the touch of a button.
NOTE: You can only save a setting for one cycle at a
time. Pressing and holding the MY CYCLE button will
overwrite any previously saved cycle.
To save a MY CYCLE:
1 Press the POWER button to turn on the washer.
2 Turn the cycle selector knob to select the desired cycle.
CLEAN WASHER
3 Press the CYCLE MODIFIER button to change the desired setting.
Detergent residue can build up in the wash
drum over time and can lead to a mildewy
or musty smell. The CLEAN WASHER cycle is
specially designed to remove this buildup
using bleach or another cleaner designed specifically for
cleaning front load washers. Run the CLEAN WASHER cycle
once a month, or more often under heavy use conditions or if
odor is present. See complete instructions in the CARE AND
CLEANING section.
1 Turn ON the washer and press and hold the ACCELAWASH button for five seconds. Selecting any other cycle
after CLEAN WASHER has been selected will cause the
CLEAN WASHER cycle to be cancelled.
2 Fill the bleach dispenser to the MAX line with liquid
chlorine bleach. Do not overfill the bleach dispenser.
Overfilling will cause the bleach to dispense immediately.
4 Press the CYCLE OPTION button to add the desired options.
5 Press and hold the MY CYCLE button.
To recall a MY CYCLE:
1 Press the POWER button to turn on the washer.
2 Press the MY CYCLE button. The stored settings will be
displayed.
3 Press the START/PAUSE button to start the cycle.
NOTE: MY CYCLE can be adjusted the same as any
other cycle. However, once any other button is pressed,
the LED will turn off indicating that the settings are no
longer those of your saved cycle.
NOTE: For other drum cleaning products, follow the cleaner manufacturer’s instructions and recommendations. For powdered cleaning products, add the cleaner to the main wash compartment of the dispenser drawer. Place tablet cleaners directly into the drum.
3 Press the START/PAUSE button to start the cycle.
4 After the cycle has ended, secure the door slightly ajar with the door magnet. This will promote air circulation and allow the interior of the machine to dry. To use this feature, close the door just until it contacts the door
magnet.
NOTE: Do NOT use this cycle with clothes, and do
NOT add detergent or fabric softener.
AUTO SOAK
Use the AUTO SOAK option to presoak
garments to help remove difficult spots or
stains on fabric. This option provides a 30
minute presoak prior to the start of the
selected cycle. At the end of the presoak
time, the selected cycle will use the same water.
To use the AUTO SOAK feature, press and hold the
STEAM TREAT button for five seconds.
SAVE ENERGY
This option saves energy by using cooler
water while increasing the wash and rinse
times to maintain wash performance. This
feature is only available with the NORMAL
and HEAVY DUTY cycles as listed below.
To use the Save Energy option, press and hold the Pre Wash
button for five seconds.
•NORMAL – Hot becomes Warm
•NORMAL – Warm becomes Cold
•HEAVY DUTY – Hot becomes Warm
23
CARE AND CLEANING
WARNING: To reduce the risk of fire, electric shock, or injury to persons, read and follow this
entire Use & Care Guide, including the Important Safety Instructions, before operating this washer.
• Unplug the washer before cleaning to avoid the risk of electric shock. Failure to follow this warning can cause serious injury, fire, electric shock, or death.
• Never use harsh chemicals, abrasive cleaners, or solvents to clean the washer. They will damage the finish.
REGULAR CLEANING
Cleaning the Exterior
Door Seal and Glass Cleaning
Proper care of your washer can extend its life. The outside of
the machine can be cleaned with warm water and a mild,
nonabrasive household detergent.
Immediately wipe off any spills with a soft, damp cloth.
IMPORTANT: Do not use solvents, cleaning alcohols, or similar products. Never use steel wool or abrasive cleaners
because they can damage the surface.
Due to the location and nature of the door seal, some
detergent and soil residue may build up on the door glass
and seal. Periodic cleaning with a bleach solution can help
remove buildup and stains, and can help sanitize the seal to
prevent odors.
NOTE: Wear rubber gloves and eye protection while
performing the following procedure:
Care and Cleaning of the Interior
1
Dilute ¾ cup (177 ml) liquid chlorine bleach in 1
gallon (3.8 L) of warm/hot water.
2
Use this solution to wipe down
all surfaces of the gasket and
door glass to remove any
deposits. Be sure to fold back the
lip of the gasket to get under
the inner edge where residue
can build up.
3
Dry the gasket and glass with a dry cloth.
4
To allow the gasket to dry completely, secure the door slightly ajar with the door magnet. This will promote air circulation and allow the interior of the machine to dry. To use this feature, close the door just until it contacts the door magnet.
Use a towel or soft cloth to wipe around the washer door
opening, door seal, and door glass. These areas should be
kept clean to ensure a watertight seal. Be sure to wipe
under the inside rubber seal to remove any moisture or soil.
Always remove items from the washer as soon as the cycle
is complete. Leaving damp items in the washer can cause
wrinkling, color transfer, and odor. Run the CLEAN WASHER
cycle once a month, or more often if needed, to remove
detergent buildup and other residue.
Clean Washer
1 Remove any clothing in the drum.
2 Open the dispenser drawer.
3 Add liquid chlorine bleach or another drum cleaner
designed specifically for cleaning front load
washers.
- If using liquid chlorine bleach
Add liquid chlorine bleach to the bleach
compartment of the drawer. (NOTE : Do not exceed the maximum fill line and do not pour undiluted liquid bleach directly into the wash drum.)
- If using powder cleaner
Remove the liquid detergent cup and add powder
cleaner to the main wash compartment of the
dispenser drawer.
- If using tablet cleaner
Add tablet cleaner directly to the wash drum.
NOTE:
•Follow the manufacturer’s instructions for proper use
of bleach.
•To avoid damaging the gasket, NEVER use undiluted
bleach to clean the gasket.
Removing Mineral Buildup
If you live in an area with hard water, mineral scale can form
on internal components of the washer. Use of a water softener
is recommended in areas with hard water.
Use a descaler, such as Washer Magic®, to remove visible
mineral buildup. After descaling, always run the CLEAN
WASHER cycle before washing clothing. Do NOT use steel
wool or abrasive cleaners.
NOTE:
•Do not add tablet cleaner to the dispenser drawer.
•Do not add any laundry detergent or fabric softener to
the drawer when using CLEAN WASHER.
4 Turn ON the washer and press and hold the
ACCELA-WASH button for five seconds, and the LED will blink. Selecting any other cycle after CLEAN
WASHER has been selected will cause the CLEAN WASHER cycle to be cancelled.
5 After the cycle ends, open the door and allow the drum interior to dry completely.
NOTE: Run the CLEAN WASHER cycle once a month. If a
mildewy or musty smell is present, run the CLEAN
WASHER cycle once a week for three consecutive weeks.
24
CARE AND CLEANING
REGULAR CLEANING (continued)
Storing the Washer
5 Press the POWER button, then press the SPIN SPEED button without selecting a cycle. Press the START/PAUSE button to activate the drain pump. This will expel some of the antifreeze, leaving enough to protect the washer from damage.
6 Unplug the power cord, dry the drum interior with a soft
cloth, and close the door.
If the washer will not be used for an extended period of time
and is in an area that could be exposed to freezing
temperatures, perform the following steps to protect the
washer from damage.
1 Turn OFF the water supply.
2 Disconnect hoses from water supply and drain water from hoses.
3 Plug the power cord into a properly grounded
electrical outlet.
4 Add 1 gallon of nontoxic recreational vehicle (RV)
antifreeze to the empty wash drum and close the door.
7 Refer to the instructions below to clean and dry the dispenser drawer.
8 Store the washer in an upright position.
9 To remove the antifreeze from the washer after
storage, run the EXPRESS WASH cycle. Do not add laundry to this cycle.
Cleaning
the Dispenser
The dispenser should be cleaned periodically to remove buildup of detergent and other laundry products that can
cause the dispenser not to dispense the laundry product properly.
2 Press down the lock tab located between the bleach
and softener compartments and slide the drawer out.
1 Pull the dispenser drawer out until it stops.
3 Remove the liquid detergent box, softener and bleach inserts from their compartments.
4 Clean the dispenser compartments and inserts with warm soapy water.
25
CARE AND CLEANING
MAINTENANCE
Cleaning the Water Inlet Filters
If the washer does not fill properly, an error message will
show on the display. The inlet valve filter screens could
be plugged by hard water scale, sediment in the water
supply, or other debris.
NOTE: The inlet screens protect the delicate parts of the
inlet valve from being damaged by particles that could
enter the valves with the water supply. Operating the
washer with these filters removed could cause a valve to
fail to open, resulting in flooding and/or
property damage.
Inlet Filter
11. Turn OFF both water faucets completely. Unscrew the hot and cold water lines from the back of the washer.
2 Carefully remove the filters from the water valves and soak them in white vinegar or a lime scale
remover, following the manufacturer’s instructions. Be careful not to damage the filters while cleaning.
3 Rinse thoroughly before reinstalling. Press the filters back into place.
4 Before reattaching the hoses, flush the hoses and
water lines by running several gallons of water through the hoses and into a bucket or drain.
26
CARE AND CLEANING
MAINTENANCE (continued)
Cleaning
the Drain Pump Filter
Your Washer is equipped with a filter that helps prevent excess
lint and foreign objects like buttons, keys, and coins from
causing damage to the pump. If the washer fails to drain
properly, unplug the washer and allow the water to cool, if
necessary, before proceeding.
Plug
1.1 Open the drain pump filter access panel.
3 Remove the plug from the drain hose, and allow the
water to drain completely.
NOTE: If there is a large amount of water in the drum,
you may have to empty your container several times.
Pump Filter
Drain Hose
2 Unclip the drain hose and pull it out. Place the end of the drain hose into a shallow pan or a floor drain. Make sure not to pull the hose out too far, or it may not drain properly.
4 Twist the pump filter counterclockwise to remove.
Remove any lint and foreign objects from the pump
filter. Insert pump filter back into opening and twist clockwise to secure. Be sure to close the drain pump filter access panel.
27
Kenmore Connect™ System
If you experience problems with your washer, call
1-800-4-MY-HOME ® . Only use the Kenmore Connect
System feature when instructed to do so by the
Kenmore Connect Team. The transmission sounds that
you will hear are normal and sound similar to a fax
machine.
Kenmore Connect cannot be activated unless your
washing machine is turned on by pressing the POWER
button. If your washing machine is unable to turn
on, then troubleshooting must be done without using
Kenmore Connect.
Should you experience any problems with your
washing machine, it has the capability of transmitting
data via your telephone to the Kenmore Connect
Team. This gives you the capability of speaking
directly to our specially trained technicians. The
technician records the data transmitted from your
machine and uses it to analyze the issue, providing a
fast and effective diagnosis.
Using the Kenmore Connect™ System
Follow the technician’s instructions and perform
the following steps when requested.
HOLD the mouthpiece of your phone over the POWER button, when instructed to do so by
the call center, no more than one inch from (but not touching) the machine.
NOTE: Do not press any other buttons or turn the cycle selector knob.
PUSH and hold the WASH TEMP button while continuing to hold your phone to the
POWER button.
LISTEN for three beeps. After you hear the three beeps, release the WASH TEMP button.
Keep the phone in place until the tone transmission has finished. This takes about 17 seconds,
and the display will count down the time. Once the countdown is over and the tones have
stopped, resume your conversation with the technician, who will then be able to assist you in
using the information transmitted for analysis.
NOTE:
•For best results, do not move the phone while the tones are being transmitted.
•If the call center agent is not able to get an accurate recording of the data, you may be
asked to try again.
•Pressing the POWER button during the transmission will shut off Kenmore Connect.
28
TROUBLESHOOTING GUIDE
NORMAL SOUNDS YOU MAY HEAR
The following sounds may be heard while the washer is
operating. They are normal.
Clicking:
Door locking mechanism clicks when the door locks and
unlocks.
Humming or gurgling:
Drain pump is pumping water from the washer at times
during a cycle.
Spraying or hissing:
Water spraying or circulating during the cycle.
Splashing:
Clothes tumbling in the drum during the wash and rinse
cycles.
BEFORE CALLING FOR SERVICE
If your washer does not function properly or does not function at all, check the following before you call for service.
Problem
Possible Cause
Rattling and clanking
noise
Foreign objects, such as keys, coins, or safety
pins, may be in drum or pump.
Thumping sound
Heavy wash loads may produce a
thumping sound.
Vibrating noise
Water leaking around
washer
Excessive sudsing
Solutions
Stop washer, check drum and drain filter for
foreign objects. If noise continues after washer is
restarted, call for service.
This is normal. If sound continues, washer is
probably out of balance. Stop and
redistribute wash load.
Washer load may be out of balance.
Washing shoes or tightly tangled clothes.
Shipping bolts and/or packaging materials
were not removed.
Pause the cycle and redistribute the load
after the door unlocks.
See the UNPACKING AND REMOVING SHIPPING BOLTS section in the installation requirements.
Wash load may be unevenly distributed in
the drum.
Pause the cycle and redistribute the load after
the door unlocks.
Not all leveling feet are resting firmly and
evenly on the floor.
See Leveling the Washer in the Installation
Instructions.
Floor not rigid enough.
Make sure that the floor is solid and does
not flex. See Flooring in the Installation
Requirements.
Check hoses. Check and tighten hose
connections.
Inlet hose connection is loose at tap
or washer.
House drain pipes are clogged.
Unclog drain pipe. Contact a plumber if
necessary.
Drain hose has come out of drain.
Drain hose is not inserted far enough.
Tie drain hose to inlet hose or standpipe to
prevent it from coming out during drain. It
should be inserted about 8-12 inches into
the standpipe.
Door glass is dirty.
Inspect door glass periodically to make
sure there is no buildup of residue or other
foreign matter. Follow cleaning instructions.
Too much detergent or incorrect detergent.
29
Only use detergent with the HighEfficiency (HE) logo. See Detergent
Use in the How to Use section.
TROUBLESHOOTING GUIDE
BEFORE CALLING FOR SERVICE (continued)
Problem
Staining
Possible Cause
Solutions
Bleach or softener dispensed
too soon.
Dispenser compartment is overfilled causing
bleach or softener to dispense immediately.
Dispenser drawer closed too quickly causing
bleach or softener to dispense immediately.
Bleach or softener was added
Laundry chemicals must be loaded into the
directly to the wash load in the drum. dispenser.
Washer will not turn ON
Washer was not unloaded promptly.
Always remove items from the washer as soon
as possible after the cycle is complete.
Clothes were not properly sorted.
Always wash dark colors separately from light
colors and whites to prevent discoloration.
Never wash heavily soiled items with lightly
soiled items.
Power cord is not properly plugged in. Make sure that the plug is plugged securely into
a grounded, 3-prong, 120-VAC, 60-Hz outlet.
House fuse is blown, circuit breaker
has tripped, or power outage has
occurred.
Reset circuit breaker or replace fuse. Do not
increase fuse capacity. If the problem is a circuit
overload, have it corrected by a qualified
electrician.
House fuse is blown, circuit breaker
has tripped, due to multiple
appliances on one outlet.
Door will not unlock
when cycle is stopped or
paused
Reset circuit breaker or replace fuse. If more
than one appliance is connected to the outlet,
call an electrician to have an additional circuit
installed.
Interior temperature of washer is too high. The washer door has a safety feature to prevent
personal injury. For example, if the washer is
paused during the hot wash stage of a sanitize
cycle, the interior temperature of the drum will
be very hot, so the door will not unlock. This
is normal. Allow the washer to cool until the
DOOR LOCK indicator turns OFF on the display.
Water level in washer is too high.
Wash cycle time is longer
than usual
Musty or mildewy odor in
washer
To drain the water, press POWER, then press the
SPIN SPEED button without selecting a cycle.
The washer automatically adjusts the
This is normal. The washer adjusts cycle time autowash time for the amount of laundry,
matically to provide optimal results for the selected
water pressure, water heating time and cycle. The time remaining shown in the display is only
other operating conditions.
an estimate. Actual time may vary.
Incorrect or too much detergent has Use only High-Efficiency (HE) detergent in
been used.
accordance with the manufacturer’s instructions.
Inside of drum was not cleaned prop- Run the CLEAN WASHER cycle regularly. Be
erly.
sure to wipe around and under the door seal
frequently. See Care and Cleaning of the Interior.
Wrinkling
Washer not unloaded promptly.
Clean around door seal/glass to prevent odor.
Always remove items from the washer as soon
as the cycle is complete.
Washer overloaded.
When washing large loads, do not overstuff the
drum. The washer can be fully loaded, but the
drum should not be tightly packed and the door
should close easily.
Hot and cold water inlet hoses are
reversed.
Hot water rinse can set wrinkles in garments.
Check the inlet hose connections.
30
TROUBLESHOOTING GUIDE
BEFORE CALLING FOR SERVICE (continued)
Your washing machine is equipped with an automatic error-monitoring system to detect and diagnose problems at an
early stage.
Problem
Water in the washer
drains slowly or not at
all, or the
display shows:
Washer fills with water
slowly or not at all, or
the display shows:
Cycle won’t start, or the
display shows:
The display shows:
The display shows:
The display shows:
Possible Cause
Solutions
Drain hose is kinked, pinched, or clogged.
Make sure the drain hose is free of clogs, kinks,
etc., and is not pinched behind or under the
washer.
The drain pump filter is clogged.
Clean the drain pump filter. See Maintenance in
the Care and Cleaning section.
Drain discharge is more than 96 inches
Adjust or repair drain. Maximum drain height is
above bottom of washer.
96 inches.
Water supply faucets are not open fully.
Make sure that the water faucets are fully open.
Water line hoses are kinked, pinched, or
Make sure the hoses are not kinked or pinched.
crushed.
Be careful when moving the washer during
cleaning and maintenance
Water inlet filters are clogged.
Clean the inlet filters. See Maintenance in the
Care and Cleaning section.
Water supply pressure to faucet or house is Check another faucet in the house to make sure
too low.
that household water pressure is adequate and
flow is not restricted.
Water supply connected with leak-limiting Hoses designed to limit leaks can trip falsely
hoses.
and prevent the washer from filling. The use of
leak limiting hoses is not recommended.
The door is not closed properly.
Make sure that the door is closed properly and
press the START/PAUSE button. After starting
a cycle, it may take a few moments before the
drum begins to turn or spin. The washer will not
operate unless the door is locked.
If the door is closed and locked and the open
door error message is displayed, call
for service.
Load is too small.
Add 1 or 2 similar items to help balance the load.
Load is out of balance.
The washer has an imbalance detection and
correction system. If individual heavy articles are
loaded (bath mat, bath robe, etc.) and the imbalance is too great, the washer will make several
attempts to restart the spin cycle. If an imbalance
is still detected, the washer will stop and the error
code will display.
Control error.
Unplug the washer and wait 60 seconds. Reconnect
power and try again. If the error reappears, call for
service.
Water level is too high due to a faulty
Close the water faucets, unplug the washer, and
water valve.
call for service.
The display shows:
The water level sensor is not working
correctly.
Close the water faucets, unplug the washer, and
call for service.
The display shows:
A motor error has occurred.
The display shows:
A power failure has occurred.
Allow the washer to stand for 30 minutes and
then restart the cycle. If the LE error code persists, call for service.
If the power to the washer has been interrupted
during a cycle, the PF error code will display
the next time the washer is turned ON. This will
alert you to the fact that the previous cycle may
not have been completed. Select any cycle to
clear the error code and use the washer.
31
WARRANTY
Kenmore Elite Limited Warranty
When installed, operated and maintained according to all instructions supplied with the product, if this
appliance fails due to a defect in material and workmanship within one year from the date of purchase, call
1-800-4-MY-HOME® to arrange for free repair.
If this appliance is ever used for other than private family purposes, this warranty applies for only 90 days
from the date of purchase.
This warranty covers only defects in material and workmanship. Sears will NOT pay for:
1. Expendable items that can wear out from normal use, including but not limited to filters, belts, light bulbs,
and bags.
2. A service technician to instruct the user in correct product installation, operation or maintenance.
3. A service technician to clean or maintain this product.
4. Damage to or failure of this product if it is not installed, operated or maintained according to all the
instructions supplied with the product.
5. Damage to or failure of this product resulting from accident, abuse, misuse or use for other than its
intended purpose.
6. Damage to or failure of this product caused by the use of detergents, cleaners, chemicals or utensils
other than those recommended in all instructions supplied with the product.
7. Damage to or failure of parts or systems resulting from unauthorized modifications made to this product.
Disclaimer of implied warranties; limitation of remedies
Customer’s sole and exclusive remedy under this limited warranty shall be product repair as provided herein.
Implied warranties, including warranties of merchantability or fitness for a particular purpose, are limited to
one year or the shortest period allowed by law. Sears shall not be liable for incidental or consequential
damages. Some states and provinces do not allow the exclusion or limitation of incidental or consequential
damages, or limitation on the duration of implied warranties of merchantability or fitness, so these exclusions
or limitations may not apply to you.
This warranty applies only while this appliance is used in the United States or Canada.
This warranty gives you specific legal rights, and you may also have other rights which vary from state to state.
Sears Brands Management Corporation, Hoffman Estates, IL 60179
32