1
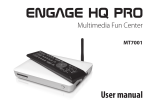
Quick Start Guide
Designed & Engineered by Karuma
Product Specifications 2
Your Device 3
Use of Memory Card & Battery 4
Home Screen 5
USB Connection 6
Wi-f Setup 7
Language & Keyboard 8
Application Management 9
Photos & Videos 10
Audio 11
Product Safety Information 12
C ongratulations on your purchase of PlayBase! Your package comes with the following items. If
any of them is missing, please contact [email protected].
•
•
•
•
•
Device
USB cable
DC adapter
Earphones
Quick Start Guide
PRODUCT SPECIFICATIONS
•
•
•
•
•
•
•
•
•
Model
:
Panel
:
Resolution :
RAM
:
Camera
:
Output
:
Adapter :
Battery
:
Dimension :
PBGO1
7 inch capacitive
800 x 480
1G DDR3
0.3MP front
Micro SD, micro USB, Earphones
5V, 2A
4h wifi / video playback, 60h standby
204mm(L) × 122mm(W) × 9.7mm (H)
Your Device
Power key
Home key
Press and hold to power on/off the device.
Short press to put device into standby mode and again to
awaken device.
Press to return to the Home screen from anywhere.
Menu key
Press to open a list of actions available on the current screen.
Return key
Press to go back to the previous screen or to dismiss a dialog
box or menu.
USE OF MEMORY CARD
Insert Memory Card
Insert microSD card with the gold contacts facing up until “click” sound is heard.
Browse Files In Memory Card
Run “Explorer” program, showing all the files under the root directory. Select “SD card” open to
browse the contents in card.
Removal Of Memory Card
Close all applications or files, which have been opened from the card. Push card lightly to eject
it from the slot.
Do not remove the memory card while the device is turned on. Sudden removal of the memory
card may cause data loss or unpredictable system hang up.
CHARGING BATTERY
Connect one end of DC adapter to micro USB of the device and the other to the wall outlet to
begin charging.
*** Charging time with in-box 5V/2A DC adapter, less than 3 hours (power-off mode).
Battery life may vary depending on user usage. Battery can also be charged when device
(backlight off) connects to computer through USB cable.
HOME SCREEN
From Home screen, you can quickly access common applications, view notifications and check
connection status.
Applications can be added to/removed from Home Screen by long pressing the respective icons.
Status Bar
At the top of your screen is the status bar. On the left side, icons will appear, notify you of new
messages, alerts, alarms, and more. On the right side of the status bar, you will see the
connection status icons.
Return & Exit
Downloading
SD card is full
Content downloaded
Battery charge
indicators
Wi-Fi service connected
No SD card
Battery is charging
USB connected
Wireless services are off
Warning
Silent mode
USB CONNECTION
1.
2.
3.
4.
5.
Connect device to computer via provided micro
USB cable.
You will see a USB icon in the status bar. Tap the
bar and slide your finger down the screen to open
the list of notifications.
Select USB connected to turn on USB connection
between the device and your computer.
Turn off the USB connection when you are done with the device internal storage data
access.
Disconnect USB connection.
Wi-Fi SETUP
1.
2.
3.
4.
5.
6.
Tap on Settings icon.
Select Wireless & networks > Wi-Fi to activate.
Select Wi-Fi settings > Network notification to start detecting networks. Available
networks will be listed. Select the Wi-Fi network you would like to connect to.
Select Add Wi-Fi network to add a connection.
When internet connection is successful, the wireless connection icon in the status bar will
appear.
Go back to Home screen/application list to click on Browser icon to start surfing internet.
NOTE: Connecting to a secured network will prompt for password. Enter password then select
Connect.
LANGUAGE & KEYBOARD
You can select your language and the keyboard to use under Settings > Language &
Keyboard.
Keyboard Settings
To turn on/off sound effects or vibration for the touch pad and keyboard,
1. Select the keyboard to be used.
2. Edit the settings to your preferred selection.
NOTE: APK for other keyboards have to be installed and Turn on prior to usage.
APPLICATION MANAGEMENT
Install
1.
2.
3.
4.
Tap on ApkInstaller icon
Select Install and find the path which you have
placed your APK. APK available for installation
will be shown on the right hand box.
To install third party APK, select Settings >
turn on Unknown Sources
Select the APK you like to install and press Install.
Uninstall
1.
2.
3.
Tap on ApkInstaller > Manage.
Select the application you like to uninstall and there will be a pop up window.
Select Uninstall > OK to confirm.
PHOTOS & VIDEOS
Photo and Videos playback
1.
2.
3.
4.
5.
Tap Gallery icon to view image and video files.
Select the file to playback.
To view previous/next image, swipe left/right of the
screen.
To play slideshow, tap Menu > Slideshow.
For videos, tap to rewind/pause/fast forward the video
clip.
Camera and video record
Device is equipped with 0.3 megapixels camera to take
photos and videos.
1. Tap > Camera and aim device at the subject.
2. Tap on the lower right circle to take photo.
3. To record video, slide the right scroll bar upwards.
4. Aim the device at the subject.
5. Tap lower right circle to start recording.
6. Tap again to stop.
AUDIO
Music playback
1.
2.
Tap on Music icon to view all music. Your
audio files are categorized into Artists,
Albums and Songs.
Select the desired music file under the
category to playback.
Sound Recorder
1.
2.
3.
Tap on Sound Recorder icon for audio recording.
Tap on the icons below to stop /play / stop the record.
You can also view the recordings under Music > Playlists > My recordings.
PRODUCT SAFETY INFORMATION
1.
2.
Do NOT place objects on top of the Device, as objects may scratch the screen.
Do NOT expose Device to dirty or dusty environments or place Device on an uneven or
unstable surface.
3. Do NOT insert any foreign objects into the Device.
4. Do NOT expose Device to strong magnetic or electrical field.
5. Do NOT expose Device to direct sunlight as it can damage the LCD Screen. Keep it away
from heat sources.
6. Device should only be used in environments with ambient temperatures between 5°C (41°F)
- 35°C(95°F).
7. Do NOT use the Device in the rain.
8. The Device and the adapter may produce some heat during normal operation or charging.
Do NOT leave the Device on your lap to prevent discomfort or injury from heat exposure.
9. POWER INPUT RATING: Refer to the rating label on the Device and be sure that the power
adapter complies with the rating. Only use accessories specified by the manufacturer.
10. Clean the touch screen with a soft cloth. If needed, dampen the cloth slightly before
cleaning.
Never use abrasives or cleaning solutions.
11. Disconnect the Device from an electrical outlet and power off before cleaning Device.
12. Do NOT disassemble the Device, only a certified service technician should perform repair.