1
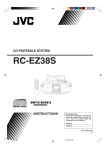
CD PORTABLE SYSTEM
CHAINE PORTABLE A CD
RS-WP1WT
VOLUM
CD
E
CD PORTABLE SYSTEM RS-WP1
STANDBY
PE
TA
VOLUM
T
T
I- S
K PRO
A
. P.
OFF
N
TI
A
TE
SH
OP
E
FF
R E SIS
A NT
ONE
N
C
RE
OC
TIMER
ASP
UCH
TO
A
TU
E
MULTI CONTROL
H
CLOCK
AUX
BAND
REW
C
TIMER
ON/OFF
STANDBY/ON
R
NE
SP
ON
L
STAND BY/ON
SLEEP
DOWN
UP
SET
PROGRAM
RANDOM
AUTO
PRESET
REPEAT
TUNER
AUX
CD
TAPE
REVERSE MODE
REW
MULTI CONTROL
BAND
FM MODE
FF
DISPLAY
BASS/
TREBLE
AHB PRO
VOLUME
RM-SRSWP1J
REMOTE CONTROL
INSTRUCTIONS
INSTRUCTIONS D’UTILISATION
For Customer Use:
Enter below the Model No. and Serial
No. which are located either on the rear,
bottom or side of the cabinet. Retain this
information for future reference.
Model No.
Serial No.
LVT0682-001B
[J]
English
Warnings, Cautions and Others /
Mises en garde, précautions et indications diverses
(For U.S.A)
CAUTION
RISK OF ELECTRIC
SHOCK
CAUTION: TO REDUCE THE RISK OF ELECTRIC SHOCK
WARNING: TO REDUCE THE RISK
OF FIRE OR ELECTRIC SHOCK, DO
NOT EXPOSE THIS APPLIANCE TO
RAIN OR MOISTURE.
DO NOT REMOVE COVER (OR BACK)
NO USER SERVICEABLE PARTS INSIDE
REFER SERVICING TO QUALIFIED SERVICE PERSONNEL.
The lightning flash with arrowhead
symbol, within an equilateral triangle is
intended to alert the user to the presence
of uninsulated “dangerous voltage” within
the product’s enclosure that may be of
sufficient magnitude to constitute a risk of
electric shock to persons.
The exclamation point within an
equilateral triangle is intended to alert the
user to the presence of important
operating and maintenance (servicing)
instructions in the literature accompanying
the appliance.
INFORMATION
This equipment has been tested and found to comply
with the limits for a Class B digital device, pursuant to
Part 15 of the FCC Rules. These limits are designed
to provide reasonable protection against harmful
interference in a residential installation. This
equipment generates, uses, and can radiate radio
frequency energy and, if not installed and used in
accordance with the instructions, may cause harmful
interference to radio communications. However, there
is no guarantee that interference will not occur in a
particular installation. If this equipment does cause
harmful interference to radio or television reception,
which can be determined by turning the equipment
off and on, the user is encouraged to try to correct the
interference by one or more of the following measures:
G-2
This System (except for the AC adaptor and remote control unit)
is provided with water drop-resist function.
However, this function is inactive in any of the following
conditions.
• When any of the caps on the headphones, DC IN and AUX
IN connectors is removed.
• When the door is open.
• When the battery cover is removed.
In case the unit is moistened, wipe it with a soft, dry cloth before
reusing it. Also take care of the following points.
• Do not leave the unit under high humidity, for example in a
bathroom.
• Keep the unit away from direct moistening by tap water etc.
• Do not change the tape or CD with wet hands. (Otherwise,
the water drop may fall from your hand and penetrate inside
the unit.)
– Reorient or relocate the receiving antenna.
– Increase the separation between the equipment
and receiver.
– Connect the equipment into an outlet on a
circuit different from that to which the receiver is
connected.
– Consult the dealer or an experienced radio/TV
technician for help.
CAUTION: TO PREVENT ELECTRIC
SHOCK, MATCH WIDE BLADE OF
PLUG TO WIDE SLOT, FULLY INSERT.
THIS DIGITAL APPARATUS DOES NOT EXCEED THE
CLASS B LIMITS FOR RADIO NOISE EMISSIONS FROM
DIGITAL APPARATUS AS SET OUT IN THE
INTERFERENCE-CAUSING EQUIPMENT STANDARD
ENTITLED “DIGITAL APPARATUS,” ICES-003 OF THE
DEPARTMENT OF COMMUNICATIONS.
PRECAUTION: POUR EVITER LES
CHOCS ELECTRIQUES, INTRODUIRE
LA LAME LA PLUS LARGE DE LA
FICHE DANS LA BORNE
CORRESPONDANTE DE LA PRISE ET
POUSSER JUSQUAU FOND.
English
For Canada/Pour le Canada
Français
For Canada/pour le Canada
CET APPAREIL NUMERIQUE RESPECTE LES LIMITES
DE BRUITS RADIOELECTRIQUES APPLICABLES AUX
APPAREILS NUMERIQUES DE CLASSE B
PRESCRITES DANS LA NORME SUR LE MATERIEL
BROUILLEUR: “APPAREILS NUMERIQUES”, NMB-003
EDICTEE PAR LE MINISTRE DES COMMUNICATIONS.
1. CLASS 1 LASER PRODUCT
2. DANGER: Invisible laser radiation when open and
interlock failed or defeated. Avoid direct exposure to
beam.
3. CAUTION: Do not open the top cover. There are no user
serviceable parts inside the unit; leave all servicing to
qualitied service personnel.
1. PRODUIT LASER CLASSE 1
2. ATTENTION: Radiation laser invisible quand l’appareil est
ouvert ou que le verrouillage est en panne ou désactivé.
Eviter une exposition directe au rayon.
3. ATTENTION: Ne pas ouvrir le couvercle du dessus. Iln’y a
aucune pièce utilisable à l’intérier. Laisser à un personnel
qualifié le soin de réparer votre appareil.
CAUTION
ATTENTION
To reduce the risk of electrical shocks, fire, etc.:
Afin d’èviter tout risque d’électrocution, d’lncendie. etc.:
1. Do not remove screws, covers or cabinet.
2. Do not expose this appliance to rain or moisture.
1. Ne pas enlever les vis ni les panneaux et ne pas ouvrir le
coffret de l’appareil.
2. Ne pas exposer l’appareil à la pluie ni à l’humidité.
This System (except for the AC adaptor and remote control
unit) is provided with water drop-resist function.
However, this function is inactive in any of the following
conditions.
• When any of the caps on the headphones, DC IN and
AUX IN connectors is removed.
• When the door is open.
• When the battery cover is removed.
Cet appareil (à l’exception de l’adaptateur secteur et de la
télécommande) est fourni avec une fonction étanche aux gouttes.
L’étanchéité n’est néanmoins plus garantie dans les
conditions suivantes:
• Si l’un des capuchons de protection des prises casque,
DC IN et AUX IN est absent.
• Si le volet est ouvert.
• Lorsque le couvercle de la batterie est détaché.
In case the unit is moistened, wipe it with a soft, dry cloth
before reusing it. Also take care of the following points.
• Do not leave the unit under high humidity, for example in a
bathroom.
• Keep the unit away from direct moistening by tap water etc.
• Do not change the tape or CD with wet hands. (Otherwise,
the water drop may fall from your hand and penetrate
inside the unit.)
Si l’appareil est humide, essuyez-le avec un chiffon doux et
sec avant de le réutiliser. Respectez également les conseils
suivants:
• Ne laissez pas cet appareil dans une pièce à forte
humidité, p. ex. dans une salle de bain.
• Tenir l’appareil à l’écart de l’humidité (robinet d’eau etc).
• Ne changez pas la cassette ou le CD avec les mains
humides. (L’eau pourrait s’écouler de votre main et
pénétrer à l’intérieur de l’appareil.)
Caution — POWER switch!
Attention — Commutateur POWER!
Disconnect the mains plug to shut the power off
completely. The POWER switch in any position does
not disconnect the mains line. The power can be
remote controlled.
Déconnecter la fiche de secteur poru couper
complètement le courant. Le commutateur POWER
ne coupe jamais complètement la ligne de secteur,
quelle que soit sa position. Le courant peut être
télécommandé.
G-3
Notes
•
This Unit may generate noise depending on the positioning of the AC adaptor.
Place the Unit and AC adaptor as shown in the figure.
•
This Unit has two remote sensors, one on the front panel and the other on the rear panel.
When remote controlling this Unit while carrying it piggyback, point the Remote Control to the remote sensor on the rear panel.
The Remote Control of this Unit uses the infrared transmission system.
As a result, Remote Control may be unavailable when the remote sensors of the Unit are exposed to direct sunlight. Please
note that this is not a malfunction.
If you record on a tape with the volume level kept at a high level, recorded sounds may be distorted.
To avoid this, turn down the volume level before you start recording.
•
•
Remarques
•
Cet appareil est susceptible d’être bruyant en fonction de la position de l’adaptateur secteur.
Installez l’appareil et l’adaptateur CA comme indiqué sur la figure.
•
Cet appareil est équipé de deux capteurs de signaux de télécommande: un sur le panneau avant et l’autre sur le panneau arrière.
Si vous utilisez la télécommande pour piloter votre appareil alors que vous le portez sur votre dos, dirigez-la vers le capteur
situé sur le panneau arrière.
La télécommande de cet appareil fonctionne par transmission infrarouge.
C’est pourquoi il peut être impossible d’utiliser la télécommande lorsque les capteurs infrarouges sont exposés directement
aux rayons solaires. Cela n’est pas un dysfonctionnement.
Si vous enregistrez sur une cassette avec le niveau de volume réglé sur une position élevée, le son enregistré peut être distordu.
Pour éviter ceci, réduisez le volume avant de commencer l’enregistrement.
•
•
LV42605-001B
English
Thank you for purchasing the JVC CD Portable System.
We hope it will be a valued addition to your home as well as your outdoor life, giving you years of enjoyment.
Be sure to read this instruction manual carefully before operating your new stereo system.
In it you will find all the information you need to set up and use the system.
If you have a query that is not answered by the manual, please contact your dealer.
Features
Here are some of the things that make your System both powerful and simple to use.
■ Built-in 40 seconds shock proof memory (CD Player)
■ Powerful bass sound by dual passive speakers
■ Water drop-resist design
■ Double shoulder strap and waist belt for carrying on your back
■ The controls and operations have been redesigned to make them very easy to use, freeing you to just enjoy the music.
• With JVC’s COMPU PLAY you can turn on the System and automatically start the CD Player, Cassette Deck, or Radio with a
single touch. (Only when AC power or car battery (DC12V) is used.)
■ A 45-station preset capability (30 FM and 15 AM) in addition to Auto Tuning and Manual Tuning.
■ CD options include Program, Random and Repeat Play.
■ Auto-reverse tape function
■ Timer functions; set the system to automatically come on, switch off.
How This Manual Is Organized
•
Basic information that is the same for many different functions - e.g. setting the volume - is given in the section ‘Basic Operations’,
and not repeated under each function.
• The names of buttons/controls and display messages are written in all capital letters: e.g. TUNER BAND, “NO DISC”.
• System functions are written with an initial capital letter only: e.g. Normal Play.
Use the table of contents to look up specific information you require.
We’ve enjoyed making this manual for you, and hope it serves you in enjoying the many features built into your System.
IMPORTANT CAUTIONS
1. Where to place the System
• Select a place which is level, dry and neither too hot nor too cold. (Between 0˚C and 40˚C or 32˚F and 104˚F.)
• Leave sufficient distance between the System and a TV.
• When installing the System, completely spread the stand until it clicks to prevent the System from toppling down.
• Do not lean against the System.
• If you place the System on a desk, do not place it on the side near you.
• If you have small children in your house, do not let them play near the System or install it within the reach of children.
• Do not leave the System in a place subject to direct sunlight or a closed automobile under the sun.
• To prevent an accident, do not install the System on a high or unstable surface.
• In case a lightning storm occurs during outdoor use of the System, fold the antenna and get yourself apart from the System to avoid
danger caused by lightning.
2. AC adaptor
• Do not handle the AC adaptor with wet hands!
• Some power is always consumed as long as the AC adaptor is connected to the wall outlet.
• When unplugging the System from the wall outlet, always pull the plug, not the AC adaptor cord.
3. When carrying the System
• Disconnect all the cords from the System.
• Fold the antenna and stand. Be careful not to catch your finger when folding the stand.
• Do not carry the System by holding the stand.
• Be sure to carry the System by holding the carrying handle.
• Do not use headphones while walking.
• Do not use the System while driving a vehicle, etc.
4. Malfunctions, etc.
• There are no user serviceable parts inside. In case of System failure, unplug the AC adaptor and consult your dealer.
• Do not insert any metallic object into the System.
Table of Contents
2
Features ....................................................................... 2
How This Manual Is Organized .................................. 2
IMPORTANT CAUTIONS ............................................. 2
Getting Started ............................................................ 3
Basic Operations ......................................................... 7
Using the Tuner ........................................................... 9
Using the CD Player .................................................. 11
Using the Cassette Deck (Listening to a Tape) ...... 13
Using the Cassette Deck (Recording) ..................... 14
Listening to an Auxiliary Equipment ....................... 16
Using the Timers ....................................................... 17
Care And Maintenance ............................................. 19
Troubleshooting ........................................................ 20
Specifications ............................................................ 21
English
Getting Started
Accessories
Check that you have all of the following items, which are supplied with the System.
AC adaptor (1)
Remote Control (1)
Shoulder Strap (1)
If any of these items are missing, contact your dealer immediately.
How To Carry the System
To carry the System, attach the supplied shoulder strap to the System as shown in the figure.
To remove the strap, reverse the attaching procedure.
The shoulder strap is adjustable in length and has the remote control case.
Finished view
Pass the extremity of the strap
through the shaft by inserting the strap
from the upper side of the shaft.
Pass the extremity of the strap
through the remote controller holder
(left shoulder side only).
Pass the extremity of the strap
through the shoulder pad.
Pass the extremity of the strap
through the adjustor. Adjust the
strap length by adjusting the
extremity.
Press in the metal fitting
of the shoulder strap and
hook it over the shaft.
N
D
Adjust the strap length by
adjusting the extremity.
BY/O
STAN
ERF
TIM
/OF
ON
P
EE
SL
ER
TIM
CL
OC
M
RA
OG
PR
K
SET
OM
ND
RA
UP
Remote control
unit
N
T
PEA
RE
DOW
O
AUT
SET
PRE
Shoulder strap
R
NE
TU D
BAN
TA
C
AU
D
TI
MUL
X
PE
FM
/
SS
BA LE
EB
TR
Y
PLA
DIS
VO
B
AH
E
MOD
FF
L
TRO
CON
W
RE
DE
E MO
ERS
REV
O
PR
LU
ME
L
RO
NT
CO
TE
MO
RE
P1U
SW
-SR
RM
Remote control
case
Fit and fasten the connector.
Notes:
• To prevent hazards, do not let a small child carry the unit on the back.
• To prevent hazards, do not act violently while you carry this System on your back. Also be sure to tighten the belt firmly.
• Do not carry the System on your naked back.
• The waist belt corresponds to waist 120 cm (4 feet) or less.
3
Match the polarity (+ and –) on the batteries with the + and – markings in the battery compartment.
Batteries are not supplied
with this system.
R6P(SUM-3)/AA(15F)
CAUTION: Handle batteries properly.
To avoid battery leakage or explosion:
• Remove batteries when the Remote Control will not be used for a long time.
• When you need to replace the batteries, replace both batteries at the same time with new ones.
• Don’t use an old battery with a new one.
• Don’t use different types of batteries together.
Using the Remote Control
The Remote Control makes it easy to use many of the functions of the System.
You need to point the Remote Control at the remote sensor on the System’s front panel within 7 m (23 feet) or another remote sensor on the
System’s rear panel within 1 m (3.3 feet). When remote controlling this Unit while carrying it piggyback, point the Remote Control to the
remote sensor on the rear panel.
Notes:
• If you point the Remote Control from the slant direction, the above distance will be shortened.
• When you use the Remote Control from a short distance while receiving broadcasting, noise may occur. However, this is not malfunction.
• The Remote Control of this Unit uses the infrared transmission system. As a result, Remote Control may be unavailable when the remote
sensors of the Unit are exposed to direct sunlight. Please note that this is not a malfunction.
Remote sensor
CARRYING HNDLE
VOLUM
CD
E
CD PORTABLE SYSTEM RS-WP1
STANDBY
PE
TA
Remote sensor
VOLUM
TU
E
STANDBY/ON
R
NE
AUX
12V
DC IN
BAND
AUX IN
ASP
C
RE
ONE
MULTI CONTROL
UCH
TO
REW
OP
E
English
How To Put Batteries In the Remote Control
FF
A
. P.
OFF
N
Connecting Auxiliary Equipment
Connect a signal cord (not supplied) between the AUX IN terminal on the back of the System and the output terminals of your auxiliary
equipment (e.g. turntable or MD player). You can listen to this source.
AUX IN
Signal cord (not supplied)
Stereo mini plug
Pin-plug x 2
Turntable (with built-in equalizer) or
MD player (not supplied)
CARRYING HANDLE
12V
DC IN
AUX IN
CAUTION: Make all connections before plugging the System into an AC power outlet.
4
English
Connecting the AC Adaptor Cord
Firmly insert the supplied AC adaptor cord into the DC IN jack on the back of the System.
12V
AC adaptor cord
DC IN
To wall outlet
Note:
This Unit may generate noise depending on the positioning of the AC adaptor.
Place the Unit and AC adaptor as shown in the figure.
CAUTIONS:
• ONLY USE THE JVC AC ADAPTOR PROVIDED WITH THIS SYSTEM TO AVOID MALFUNCTION OR
DAMAGE TO THE SYSTEM.
• BE SURE TO UNPLUG THE AC ADAPTOR FROM THE OUTLET WHEN GOING OUT OR WHEN THE
SYSTEM IS NOT IN USE FOR AN EXTENDED PERIOD OF TIME.
Now you can plug the AC adaptor into the wall outlet, and your System is at your command!!
How To Operate the System on Batteries
You can operate the System on 8 batteries.
1. Open the battery cover on the back of the System by pulling it toward you while pressing the tab.
2. Put 8 batteries (not supplied) in the battery compartment.
• Match the polarity (+ and –) on the batteries with the + and – marking in the battery compartment.
3. Securely close the battery cover while pressing the tab.
“R20/D (13F)” size batteries
Notes:
• When you operate the System on AC power or car battery (DC12V), the power source automatically switches from batteries to AC or
DC12V. However, you should remove the 8 batteries when operating on AC power or car battery (DC12V).
• When the batteries are exhausted, mistracking will occur during CD playback or sound will be distorted intermittently during tape
playback. You need to replace the batteries at a time.
• It is recommended that the AC adaptor be used when recording important material or listening to a CD.
• When inserting batteries in the System, lay it on a soft surface so as not to damage it and facilitate insertion.
CAUTION: Handle batteries properly.
To avoid battery leakage or explosion:
• Remove 8 batteries when the System will not be used for a long time.
• When you need to replace the batteries, replace all batteries at the same time with new ones.
• Don’t use an old battery with new ones.
• Don’t use different types of batteries together.
5
English
How To Operate the System on Car Battery (DC12V)
You can operate the System on car battery (DC12V).
1. First, connect the car adaptor to the DC IN jack on the back of the System, to avoid a short-circuit
of the car adaptor.
2. Next, connect the car adaptor to the cigarette lighter socket (DC12V) of the car.
CARRYING HNDLE
To car’s cigarette lighter socket (DC12V)
2
12V
DC IN
12V
DC IN
AUX IN
1
Optional exclusive car adaptor
(JVC model CA-R120)
OPTICAL DIGITAL OUT
CAUTION: Use the System in a car properly.
• Be sure to use the specified car adaptor (JVC model CA-R120) to prevent mishaps or damage resulting from different polarity design.
• For safety, stop the car before performing operations.
• Be sure to start the engine when you use the car adaptor, otherwise the car battery will be exhausted.
• During transport, stabilize the System in a box, etc.
• To prevent malfunctions, do not leave the System in a car for a long time.
Attaching the removed door
To prevent the unit from toppling down accidentally, the door has been designed to come off when it is pushed with a strong force from the
upper direction while it is open. When the door comes off in this way, attach it as shown in the figure.
Hook the claw around the projected part.
COMPU PLAY
JVC’s COMPU PLAY feature lets you control the most frequently used System functions with a single touch.
With One Touch Operation you can play a CD, a tape, or turn on the radio with a single press of the play button for that function. One Touch
Operation turns the power on for you, then starts the function you have specified. If the System is not ready (no CD in place, for example),
the System still powers on so you can insert a CD.
How One Touch Operation works in each case is explained in the section dealing with that function.
The COMPU PLAY buttons are:
On the Unit
CD 6 button
TAPE 23 button
TUNER BAND button
AUX button
On the Remote Control
CD 6 button
TAPE 23 button
TUNER BAND button
AUX button
Note:
The COMPU PLAY feature is ineffective when the System is operated on batteries.
6
CLOCK
TIMER
TIMER
ON/OFF
STAND BY/ON
English
Basic Operations
STANDBY/ON
PHONES
SLEEP
DOWN
UP
SET
PROGRAM
RANDOM
AUTO
PRESET
PHONES
REPEAT
TUNER
AUX
CD
TAPE
REVERSE MODE
REW
MULTI CONTROL
BAND
FM MODE
FF
DISPLAY
DISPLAY
AHB PRO
BASS/
TREBLE
BASS/TREBLE
VOLUME + / –
AHB PRO
VOLUME
VOLUM
CD
E
RM-SRSWP1U
REMOTE CONTROL
CD PORTABLE SYSTEM RS-WP1
STANDBY
VOLUM
TU
E
STANDBY
indicator
PE
TA
VOLUME +/–
STANDBY/ON
R
NE
AUX
BAND
STANDBY/ON
ASP
C
RE
ONE
MULTI CONTROL
UCH
TO
OP
E
REW
Turning the Power On and Off
FF
A
. P.
A.P.OFF
OFF
N
■ Some power is always consumed even though power is turned
off (called Standby Mode).
Note:
The lighting condition for the “STANDBY” indicator and the display
differs depending on the power source being used, as follows:
Power source
“STANDBY” indicator/Display
AC power or car • The “STANDBY” indicator lights when the power is turned
battery (DC12V)
off.
• Backlighting of the display is illuminated when power is
turned on.
Batteries
• The “STANDBY” indicator does not light.
• Backlighting of the display is not illuminated. However, the
backlighting is illuminated for a few seconds after operation.
Turning the System On —————
Press the
STANDBY/ON button on the Unit or
the Remote Control.
•
When the System is operated on batteries, press the
STANDBY/ON button on the Unit. It cannot be turned on with
the Remote Control.
The “STANDBY” indicator goes out when the System is operated
on AC power or car battery (DC12V).
The display comes on and the System is ready to continue in the
mode it was in when the power was last turned off.
STAND BY/ON
STANDBY/ON
STANDBY
or
■ For example, if the last thing you were doing was listening to a
CD, you are now ready to listen to a CD again. If you wish, you
can change to another source.
■ If you were listening to the Tuner last, the Tuner comes on
■ To switch off the System completely, unplug the AC adaptor
from the AC outlet. If no battery is loaded in the System and it
left with the AC adaptor unplugged (or when there is a power
failure) for more than 5 minutes, the clock will be reset to
“AM 12:00”.
AUTO POWER OFF function
This System incorporates the AUTO POWER OFF function which
automatically turns the System off when no sound has been
produced for more than 10 minutes. In consequence, when 10
minutes have elapsed without any operation after completion of CD
or Tape operation, the power of the System is turned off
automatically.
When the playback or recording operation is performed within 10
minutes, the count by the AUTO POWER OFF function is disabled,
but it starts again as soon as the playback or recording completes.
When operations other than playback or recording is performed, the
count by the AUTO POWER OFF function starts after the last
operation of this kind, and the system is turned off in 10 minutes if
no more operation is performed.
At 1 minute before the system is turned off by the AUTO POWER
OFF function, message “P.OFF” blinks in the display.
The AUTO POWER OFF function is not available in Tuner mode or
AUX mode.
To enable the AUTO POWER OFF function
Press the A.P.OFF button on the Unit for more than two seconds so
that “A.P.OFF” appears in the display.
To disable the AUTO POWER OFF function
Press the A.P.OFF button on the Unit for more than two seconds so
that “A.P.OFF” disappears from the display.
playing the station it was last set to.
Turning the System Off —————
Press the
STANDBY/ON button again.
The “STANDBY” indicator lights up when the System is operated
on AC power or car battery (DC12V).
The contents of the display changes to the clock, and “CLOCK”
indicator and the time are displayed without backlighting.
STAND BY/ON
STANDBY/ON
STANDBY
or
7
English
Adjusting the Volume
You can adjust the volume level between 0 and 50.
Press the VOLUME + button to increase the
volume or press the VOLUME – button to decrease
it.
When you keep pressed the VOLUME + or – button, the volume
changes rapidly.
CAUTION: DO NOT start playing any source
without first setting the volume to minimum, as a
sudden blast of sound can damage your hearing,
speakers and/or headphones.
For private listening
Connect a pair of headphones to the PHONES jack. No sound comes
out of the speakers.
Be sure to turn down the volume before connecting or putting on
headphones.
Note:
Do not pull the headphone cord with a strong force when
headphones are connected to the System. Otherwise, the System may
fall down.
Active Hyper Bass Pro
You can enhance the bass level. You can use this effect only for
playback.
Press the AHB PRO button on the Remote Control.
Each time you press the button, the display changes as follows:
BASS 1 → BASS 2 → OFF → (back to the beginning)
BASS indicator appears on the display.
Tone Control (BASS/TREBLE)
You can control the tone by changing the bass and the treble
between –5 and +5. (0: Flat)
1. Press the BASS/TREBLE button on the Remote
Control to select BASS or TREBLE.
Each time you press the button, the display changes as follows:
BASS → TREBLE → Current sound source → (back to
the beginning)
2. Press the VOLUME + or VOLUME – button
within five seconds to adjust the bass or treble
level.
BASS/
TREBLE
VOLUME
(Within 5 seconds)
8
Showing the Time (DISPLAY)
In Standby mode, the backlight of the display goes out, and the
“CLOCK” indicator and the current time (clock) appear on the
display.
While the power is turned on, you can see the current time (clock) at
any time, as follows:
Press the DISPLAY button on the Remote Control.
Each time you press the button, the display changes as follows:
Current sound source (e.g. FM103.5 MHz) → Clock → (back
to the beginning)
Note:
To let work the clock, you need to set the clock first. (See “Setting
the Clock” on page 17.)
CLOCK
TIMER
TIMER
ON/OFF
English
Using the Tuner
STAND BY/ON
SLEEP
DOWN
UP
SET
PROGRAM
Number keys
RANDOM
AUTO
PRESET
AUX
CD
REPEAT
TUNER
TAPE
BAND
FM MODE
REVERSE MODE
REW
MULTI CONTROL
FF
VOLUM
CD
E
4
AUTO PRESET
TUNER BAND
¢
CD PORTABLE SYSTEM RS-WP1
STANDBY
DISPLAY
PE
TA
VOLUME
TU
E
BASS/
TREBLE
AHB PRO
VOLUM
TUNER BAND
Band, Frequency,
Preset number
STANDBY/ON
R
NE
AUX
BAND
REW
OP
E
4
ASP
UCH
TO
C
RE
REMOTE CONTROL
ONE
MULTI CONTROL
RM-SRSWP1U
FF
A
. P.
OFF
7/(Preset Tuning)
¢
STEREO
N
You can listen to FM and AM stations. Stations can be tuned in
manually, automatically, or from preset memory storage.
■ Before listening to the radio:
• Fully extend the FM telescopic antenna.
One Touch Radio ————————
STEREO
indicator
MHz
■ Preset Tuning (Possible only after presetting
stations)
Select the desired preset number (displayed as “P-XX” on the
display) using the 7 button on the Unit or the number keys on
the Remote control. After 1 second, the display will show the
preset number’s band and frequency.
• This operation is effective only when the System is operated on
AC power or car battery.
Just press the TUNER BAND button to turn on the System and start
playing the station you were last tuned to.
VOLUM
CD
E
CD PORTABLE SYSTEM RS-WP1
STANDBY
PE
TA
VOLUM
R
NE
AUX
SHOC
BAND
K
MULTI CONTROL
P
REW
. P.
OFF
N
RE
SI
RO
OF
OP
E
A
FF
S
K
For AM
VOLUM
CD
E
CD PORTABLE SYSTEM RS-WP1
STANDBY
VOLUM
E
PE
TA
AUX
ASP
EC
CK
P
OF
ONE
MULTI CONTROL
RE
SHO
BAND
REW
FF
A.
P.O FF
N
RE
RO
OF
OP
E
& SPLASH
& SPLASH
ER
UN
UCH R
TO
SIS
TA N
T
T
STANDBY/ON
RO
If you press and hold the 4 or ¢ button for one second or
more, the frequency changes down, or up, automatically until a
station is found.
OR
P
For an AM broadcast, turn the Unit to obtain the best reception.
Placing the Unit near the window, for example, will improve
AM reception.
Press the 4 or ¢ button repeatedly to move from frequency
to frequency until you find the station you want.
OR
■ Auto Tuning
& SPL AS H
C
RE
ONE
ASP
UCH
TO
RE
TU
E
STANDBY/ON
& SPL ASH
■ Manual Tuning
For FM
OF
2. Select a station using one of the following
methods.
3. Turn the FM antenna for the best reception.
RO
1. Press the TUNER BAND button.
The Band and Frequency you were last tuned to appear on the
display.
Each time you press the button, the band and FM mode change
as follows:
FM → FM-MONO → AM → (back to the beginning)
• When you tune in an FM broadcast in FM mode, the
“STEREO” indicator lights up and you can hear stereo
effects. If an FM stereo broadcast is hard to receive or noisy,
select FM-MONO mode. The “STEREO” indicator will go
out. Reception improves, but you lose any stereo effect.
Each time you press the button, the preset
number increases.
On the Remote Control
Number keys: To select P-5, press 5.
To select P-15, press +10 then 5.
To select P-20, press +10 once then press 10.
NT
Tuning In a Station
On the Unit
7 button:
STA
pressing the TUNER BAND button.
SI
■ You can switch from any other sound source to the radio by
SIS
TA N
T
SHO
CK
P
Note:
When transporting the System, fold and store the antenna in place
before carrying the System on your back.
9
English
Presetting Stations
You can preset up to 30 FM stations and up to 15 AM stations.
Note:
Preset numbers may have been set to factory test frequencies prior to
shipment. This is not a malfunction. You can preset the stations you
want into memory by following one of the presetting methods
below:
Manual Presetting
1. Select a band (either AM or FM/FM-MONO) by
pressing the TUNER BAND button.
TUNER
BAND
FM MODE
2. Press the 4 or ¢ button to tune in a station.
REW
MULTI CONTROL
FF
3. Press the number key for more than 3 seconds
to store in memory for the desired preset
number.
The preset number blinks for four seconds and then the preset
station for the preset number appears.
Example: To preset the tuned station to the preset number 15,
press +10 then 5 for more than 3 seconds. The
display changes as follows.
(Tuned station)
(For 3 seconds)
4. Repeat above steps 1 to 3 for each station you
want to store in memory with a preset number.
To change the preset stations, repeat the same steps as
above to overwrite a new station.
Auto Presetting —————————
In each band, you can automatically preset FM-30, AM-15 stations.
Preset numbers will be allocated as stations are found, starting from
the lowest station and moving up the frequency.
1. Select a band (either AM or FM/FM-MONO) by
pressing the TUNER BAND button.
TUNER
BAND
FM MODE
2. Press the AUTO PRESET button on the Remote
Control for more than 2 seconds.
AUTO
PRESET
(For 2 seconds)
3. Repeat steps 1 and 2 for the other band.
■ If you want to change the preset stations, carry out the Manual
Presetting for the desired preset numbers.
CAUTION: If no battery is loaded in the unit and it
left with the AC adaptor unplugged (or when there
is a power failure) for more than 24 hours, preset
stations will be eliminated. Store all stations
again after connecting the AC adaptor cord (or
after electric power failure restores).
10
CLOCK
TIMER
TIMER
ON/OFF
English
Using the CD Player
STAND BY/ON
SLEEP
DOWN
UP
SET
Number
keys
PROGRAM
RANDOM
AUTO
PRESET
CD 6
4
REPEAT
TUNER
AUX
CD
TAPE
REVERSE MODE
REW
MULTI CONTROL
BAND
FM MODE
FF
PROGRAM
RANDOM
REPEAT
7
¢
DISPLAY
CD 6
VOLUM
CD
E
BASS/
TREBLE
Track number, Playing time,
Preset number
CD PORTABLE SYSTEM RS-WP1
STANDBY
PE
TA
TRACK
VOLUM
TU
VOLUME
RM-SRSWP1U
Repeat
indicator
STANDBY/ON
R
NE
AUX
BAND
REMOTE CONTROL
ASP
UCH
TO
C
RE
REW
OP
E
ONE
MULTI CONTROL
4
FF
A
. P.
OFF
N
7
ASP
¢
Door knob
You can use Normal, Program, Random or Repeat Play. Repeat Play
can repeat all the tracks or just one of the tracks on the CD.
Here are the basic things you need to know to play a CD and locate
the different tracks on it.
The Quickest Way To Start a CD Is With the One
Touch Operation (effective only when the System
is operated on AC power or car battery (DC12V))
■ Press the CD 6 button.
• The power is automatically turned on. If a CD is already
inserted, it will start playing from the first track.
• If no CD is inserted, “NO DISC” appears on the display and the
CD Player remains in Stop mode.
• When the System is operated on batteries, press the
STANDBY/ON button on the Unit before operation.
Setting a CD
1. Turn the door knob counterclockwise to open
the door.
2. Hold the CD with its label side as shown below
and push fit it in place until it clicks.
ASP
indicator
Play mode indicator
ALL PRGM RND
E
AHB PRO
ASP
When the System is in use, the display shows
other items as well.
For simplicity, we show here only the items
described in this section.
To stop playing the CD, press the 7 button.
The following information for the CD is displayed.
TRACK
Total track
number
Total playing time
To pause, press the CD 6 button. The playback time blinks on
the display.
To cancel pause, press the same button again. Play continues
from the point where it was paused.
Note:
Do not open the CD cover during playback.
Locating a Track with Remote
Control Directly —————————
During playback or in Stop mode, press the number keys on the
Remote Control to directly play a track.
To directly play the track 5, press 5.
To directly play the track 15, press +10 then 5.
To directly play the track 20, press +10 once then press 10.
A.S.P. (Anti-Shock Protection)
To minimize skipping of audio due to vibrations, all audio data (for
up to 40 sec.) is stored in the buffer so as to use it in case audio
skipping is going to occur.
To enable A.S.P.:
3. Close the door until it clicks.
To remove the CD, open the door in Stop mode.
■ You can place an 8 cm (3”) CD without an adaptor.
■ If the CD cannot be read correctly (because it is scratched, for
example), “no disc” appears on the display.
■ You can place a CD while listening to the other source.
Basics of Using the
CD Player-Normal Play
To Play a CD
——————————
1. Set a CD.
2. Press the CD 6 button.
The first track of the CD begins playing.
Press the ASP button during stop or playback so that the “ASP”
indicator appears in the display.
To disable A.S.P.:
Press the ASP button again so that the “ASP” disappears from the
display.
Notes:
• When the A.S.P. function is enabled, the audio data in the CD
section to be played is read in advance with a rotation speed
which is slightly higher than the standard speed, and stored in a
buffer. As a result, this causes the battery power to consume
faster than usual.
• Every time the ASP button is pressed, the played sound is
interrupted. However, this is due to the change in the rotation
speed and not a malfunction.
• The sound may skip at high volume levels if the disc is scratched
or stained or depending on the recorded signal. In such a case,
switch the A.S.P. function ON.
TRACK
•
The CD Player automatically stops when the last track of the CD
has finished playing.
11
English
To Select a Track ————————
During playback, press the 4 or ¢ button to select the track you
want.
The selected track starts playing.
• Press the ¢ button once to skip to the beginning of the next
track.
• Press the 4 button to skip to the beginning of the track being
played. Press the 4 button twice quickly to skip to the
beginning of the previous track.
You can also select a track in Stop mode with the same buttons.
When the button is pressed, the selected track and its playback time
appear on the display. To play the CD after selecting a track, just
press the CD 6 button.
Search Play ———————————
Holding down the 4 or ¢ button, during playback, will fast
forward/backwards the CD so you can quickly find a particular
passage in the track you are listening to. During Search Play, you
can hear the sound of approx. one forth level.
Programming the
Playing Order of the Tracks
You can program the playing order of the tracks using the Remote
Control.
■ You can program up to 20 tracks in any desired order including
the same tracks.
■ You can only make a program when the CD Player is stopped.
7. Press the CD 6 button.
The System plays the tracks in the order you have programmed
them.
■ You can skip to a particular program track by pressing the 4
or ¢ button during Program Play.
To confirm the programmed tracks while the CD player is
stopped, each press the 4 or ¢ button; the tracks making up
the program successively will be displayed in the programmed order.
To delete all the tracks in the program, press the 7 button on
the Remote Control repeatedly until all the tracks are cleared.
Turning off the power or opening the door will also clear the
programmed tracks.
To exit Program mode, while the CD Player is stopped, press the
PROGRAM button to turn off the “PRGM” indicator. To restore
Program mode, in Stop mode, press the same button to light on the
“PRGM” indicator.
Notes:
• If the total playback time of the programmed tracks exceeds 99
minutes 59 seconds, “– –:– –” appears on the display.
• When the CD contains more than 21 tracks:
When you try to program a track number exceeding 20 (for
example the 25th track), the total playback time indication will
go out, though programming is possible.
To Modify the Program —————
Modify the contents of the program while the CD Player is stopped.
Each time you press the 7 button, the last track in the program is
deleted. To add new tracks to the end of the program, repeat above
steps 5 and 6.
1. Set a CD.
2. Press the CD 6 button to set the System
function to CD.
If the System function is already set to CD, go to step 4.
3. Press the 7 button to stop the CD.
4. Press the PROGRAM button.
The System enters the programming mode and the “PRGM”
indicator lights up.
PROGRAM
PRGM
5. Press the number keys to select the track to
program.
To select the track 5, press 5.
To select the track 15, press +10 then 5.
To select the track 20, press +10 once then press 10.
Example: for track 2, press 2.
Program order number
(After 2 seconds)
Total playback time of the programmed tracks
6. Repeat step 5 to select the other tracks for the
program.
You can see the total playback time of the programmed tracks
on the display.
• To cancel the last track programmed, press the 7 button
once.
Random Play
The tracks will play in no special order when you use this mode.
1. Press the RANDOM button on the Remote
Control.
The “RND” indicator lights up on the display.
2. Press the CD 6 button.
The tracks are played in random order once.
To skip a track during playback, press the ¢ button to jump
to the next track in the random sequence. Press the 4 button to
jump back to the start of a track being played.
To exit Random Play mode, press the RANDOM button to turn
off the “RND” indicator after pressing the 7 button to stop the CD
Player, or turn off the power.
Repeating Tracks
You can repeat the tracks or individual track as many times as you
like.
Press the REPEAT button on the Remote Control.
The Repeat indicator changes with each press of the button, as
shown below.
P → PALL → blank display → (back to the beginning)
P:
Repeats one track.
P ALL: In Normal Play mode, repeats all the tracks.
In Program Play mode, repeats all the tracks in the
program.
In Random Play mode, repeats all the tracks in random
order.
To exit Repeat mode, press the REPEAT button until the Repeat
indicator on the display goes out.
■ In Random Play, P cannot be selected.
■ Repeat mode remains in effect even when you change the play
mode.
12
CLOCK
TIMER
TIMER
ON/OFF
English
Using the Cassette Deck
(Listening to a Tape)
STAND BY/ON
SLEEP
DOWN
UP
Reverse mode indicator
SET
PROGRAM
Reverse
Forward
Tape direction
indicator
RANDOM
AUTO
PRESET
CD
TAPE
REVERSE MODE
REW
MULTI CONTROL
TAPE `
7
¢
BAND
FM MODE
FF
DISPLAY
VOLUM
CD
E
4
REVERSE
MODE
REPEAT
TUNER
AUX
BASS/
TREBLE
CD PORTABLE SYSTEM RS-WP1
STANDBY
TAPE `
TU
VOLUME
VOLUM
E
AHB PRO
PE
TA
AUX
7
REMOTE CONTROL
ASP
UCH
TO
C
RE
REW
OP
E
ONE
MULTI CONTROL
4
When the System is in use, the display shows other
items as well.
For simplicity, we show here only the items
described in this section.
STANDBY/ON
R
NE
BAND
RM-SRSWP1U
FF
A
. P.
¢
OFF
N
The Cassette Deck allows you to play and record audio tapes.
■ With Automatic Tape Detection, you can listen to type I, II or IV
tapes without having to change any settings.
The use of tapes longer than 120 minutes is not recommended,
since characteristic deterioration may occur and these tapes
easily jam in the pinch-rollers and the capstans.
One Touch Play —————————
This operation is effective only when the System is operated on AC
power or car battery (DC12V).
By pressing the TAPE 23 button on the System or the Remote
Control, the System will come on, “TAPE” appears on the display,
and if a tape is in the deck, it will start to play. If no tape is loaded,
insert a tape, or select other function.
Door
knob
To stop playing, press the 7 button.
To remove the tape, stop the tape, open the door by turning
door knob counterclockwise, and open the cassette holder by
pressing the 0 button.
To Fast-Wind A Tape ——————
Press the ¢ or 4 button to fast-wind the tape. The Tape
Direction indicator 3 or 2 will rapidly blink on the display.
• The Cassette Deck automatically stops when the tape reaches its
end.
The following table shows the relationship between the Tape
Direction indicator and the actual tape travelling direction in
each mode. The tape travelling direction is indicated by the
blinking indicator.
[Tape Direction indicator and tape travelling direction in each mode]
Regular Play
Forward
When the power is already on, you can use this basic procedure:
1. Turn the door knob counterclockwise to open
the door, and press the 0 button to open the
cassette holder.
2. Put the cassette in, with the side you want to
listen facing toward you.
0
Reverse
Stop
Playback
¢ FF
4 REW
3
3
3
2 3
(Slow)
(Rapid)
(Rapid)
2
2
2 3
(Slow)
(Rapid)
(Rapid)
2
*Blinking indicator shows the tape travelling direction.
Reverse Mode
You can set a tape to play just one side, both sides in succession, or
both sides continuously.
Press the REVERSE MODE button on the Remote
Control.
Each time you press the button, the Reverse mode indicator changes
as follows:
3. Push the holder to close, and close the door
gently until it clicks.
4. Press the TAPE 23 button.
The tape is played in the direction shown by the Tape Direction
indicator. The Tape Direction indicator 3 (Forward) or 2
(Reverse) blinks slowly.
3 (Forward playback):
The side of the tape facing you is played back.
2 (Reverse playback):
The opposite side of the tape is played back.
5. If you need to change the playback direction,
press the TAPE 23 button.
The opposite side Tape Direction indicator lights up and the
tape playback direction changes.
→
:
→
→ (back to the beginning)
The Cassette Deck automatically stops after playing one
side of the tape.
: The Cassette Deck automatically stops after playing both
sides of the tape. (Stops when playback in the reverse (2)
direction is finished.)
: The Cassette Deck continues to play both sides of the
tape until the 7 button is pressed.
13
English
Using the Cassette Deck
(Recording)
CLOCK
TIMER
TIMER
ON/OFF
Reverse
mode
indicator
STAND BY/ON
SLEEP
DOWN
UP
SET
PROGRAM
REC
RANDOM
AUTO
PRESET
CD
TAPE
REW
MULTI CONTROL
BAND
FM MODE
FF
DISPLAY
BASS/
TREBLE
TUNER BAND
TAPE `
CD 6
7
AHB PRO
STANDBY
VOLUM
STANDBY/ON
R
NE
AUX
BAND
MULTI CONTROL
ASP
UCH
TO
REW
FF
Things To Know Before You Start
Recording ————————————
■ It should be noted that it may be unlawful to re-record
pre-recorded tapes, records, or discs without the
consent of the owner of copyright in the sound or
video recording, broadcast or cable program and in
any literary, dramatic, musical, or artistic work
embodied therein.
■ Type I and Type II tapes can be used for recording.
■ When you want to record onto both sides of a tape, you can set
Reverse mode to do so. Recording automatically stops after
recording in the reverse (2) direction. Therefore, make sure that
the tape direction is forward (3) when recording with Reverse
mode on.
■ The recording level, which is the volume at which the new tape
is being made, is automatically set correctly, so it is not affected
by the VOLUME control on the System. Nor is it affected by
adjusting the sound effects. Thus, during recording you can
adjust the sound you are actually listening to without affecting
the recording level.
■ Two small tabs on the back of the cassette tape, one for side A
and one for side B, can be removed to prevent accidental erasure
or recording.
■ To record on a cassette with the tabs removed, you must cover
the holes with adhesive tape first. However, when a type II tape
is used, only cover part of the hole as shown, since the other part
of the hole (Type II detection slot) is used to detect the tape type.
Type II detection slot
Adhesive tape
■ Protect the System against vibrations during recording.
■ If you record on a tape with the volume level kept at a high
level, recorded sounds may be distorted. To avoid this, turn
down the volume level before you start recording.
A
. P.
OFF
N
Recording onto a tape from any of the sound sources is simple. Just
place a tape in the Cassette Deck, have the source ready, make one
or two settings, and you’re ready to record. For each source the
procedure is a little bit different so we explain each separately. But
first, here are a few things to make your recordings better.
14
7
C
RE
ONE
REMOTE CONTROL
TUNER BAND
4
ONE
TOUCH
REC
TU
VOLUME
RM-SRSWP1U
When the System is in use, the display shows
other items as well.
For simplicity, we show here only the items
described in this section
CD PORTABLE SYSTEM RS-WP1
PE
TA
E
TAPE `
VOLUM
CD
OP
E
TUNER
AUX
REVERSE MODE
E
CD 6
REVERSE
MODE
4
REPEAT
REC indicator
Forward
Tape
Direction
indicator
Reverse
CAUTION: If a recording you make has excessive
noise or static, the System may have been too
close to a TV which was on during the recording.
Either turn off the TV or increase the distance
between the TV and the System.
Standard Recording
You can record any sound source to tape.
The sources are CD, Tuner, and auxiliary equipment.
1. Insert a blank or erasable cassette tape into
the Cassette Deck.
Be sure that the Tape Direction indicator and the tape insertion
direction are as follows:
[Forward recording]
Tape Direction indicator
Tape insertion direction
3
(Forward)
(Front view)
* Recording will be made on the tape side facing you.
• If the Tape Direction indicator 2 (Reverse) is lit, press the
TAPE 23 button twice to change the direction. (In this
case, since the tape is played, you need to press the 7 button.)
Then, press the 4 button to rewind the tape.
• If the inserted tape is not fully rewound, press the 4
button to rewind it.
• At the start and end of cassette tapes, there is leader tape
which cannot be recorded onto. Thus, before recording, wind
on the leader tape first to ensure getting the beginning of the
recording.
2. If you want to record on both sides of the tape,
press the REVERSE MODE button on the
Remote Control to set the System in Reverse
mode.
Press the button until indicator is lit.
before starting
Even when the reverse mode is set to
recording, the tape stops automatically at the end of the reverse
side of tape. is indicated during recording.
3. Prepare the source, by, for example, tuning in a
radio station or turning on the connected
auxiliary equipment.
3. Set a CD.
Note:
For CD recording, refer to “CD Direct Recording” described
below.
4. Press the ONE TOUCH REC button on the Unit
for more than two seconds.
The “REC” indicator lights up and the System starts recording.
• If the tab of the cassette tape is removed to protect erasure or
recording, recording does not start.
TIP:
When you want to record in the reverse direction, you should set the
Tape Direction indicator and the cassette tape as follows in step 1.
Next, start from step 3.
[Reverse recording]
Tape Direction indicator
Tape insertion direction
2
(Reverse)
(Front view)
*Recording will be made on the opposite side tape.
To stop at any time during the recording process
Press the 7 button.
Recording an AM station to tape —
When recording an AM broadcast, beats may be produced which are
not heard when listening to the broadcast. If this happens, press the
ASP button on the Unit to eliminate the beats.
1. Set to AM station and start recording.
2. Press the ASP button to eliminate the beats.
Each time you press the button, the display changes as follows:
CUT-1→ CUT-2→ CUT-3→ CUT-4→ (back to the
beginning)
CD Direct Recording
Everything on the CD goes onto the tape in the order it is on the CD,
or according to the order you have set in a program.
1. Insert a blank or erasable cassette tape into
the Cassette Deck.
Be sure that the Tape Direction indicator and the tape insertion
direction are as follows:
(For details, refer to step 1 in “Standard Recording” on page
14.)
4. Press the CD 6 button to set the System
function to CD.
If the System function is already set to CD, go to step 6.
5. Press the 7 button to stop the CD.
6. If you want to record specific tracks only,
program the tracks.
You can check their total playback time on the display during
programming. (See page 12.)
7. Choose whether to have pauses between
recorded selections.
• If nothing is done, a non-recorded pause of about four
seconds will be automatically left between selections.
• If you do not want pauses between selections, do the
following before proceeding to the next step.
Press the CD 6 button twice to enter Pause mode.
8. Press the ONE TOUCH REC button on the Unit
for more than two seconds.
The “REC” indicator lights up and the System starts recording.
• If you make a recording with Reverse mode on, the System
will record the last song at the end of the first side onto the
next side from its beginning when the song has been
recorded more than 10 seconds on the first side.
If the last song has been recorded less than 10 seconds, then
the previous song will again be recorded on the next side as
it will not be completely recorded on the first side because of
leader tape.
• After the CD Player has played the entire CD, or all the
programmed tracks, the tape automatically stops.
To stop at any time during the recording process
Press the 7 button. The tape stops after four seconds.
Note:
When making SLEEP timer settings while doing CD Direct
recording, set enough time to allow for the CD to finish playing,
otherwise the power will go off before recording is completed.
One Track Recording ——————
You can record the one CD track being played.
1. Insert a blank or erasable cassette tape into
the Cassette Deck.
2. Play the track on the CD you wish to record.
3. Press the ONE TOUCH REC button on the Unit
for more than two seconds.
The CD Player returns to the beginning of that track and the
track is recorded on the tape. After recording, the CD Player
and the Cassette Deck automatically stop.
15
English
2. If you want to record on both sides of the tape,
press the REVERSE MODE button on the
Remote Control to set the System in Reverse
mode.
Press the button until indicator is lit.
before starting
Even when the reverse mode is set to
recording, the tape stops automatically at the end of the reverse
side of tape. is indicated during recording.
English
Listening to an Auxiliary Equipment
CLOCK
TIMER
TIMER
ON/OFF
STAND BY/ON
SLEEP
DOWN
UP
SET
PROGRAM
RANDOM
AUTO
PRESET
REPEAT
TUNER
AUX
CD
TAPE
REVERSE MODE
REW
MULTI CONTROL
BAND
VOLUM
CD
E
AUX
FM MODE
FF
CD PORTABLE SYSTEM RS-WP1
STANDBY
PE
TA
VOLUM
E
DISPLAY
TU
BASS/
TREBLE
STANDBY/ON
R
NE
AUX
AUX
BAND
AHB PRO
VOLUME
RM-SRSWP1U
ASP
C
RE
ONE
MULTI CONTROL
UCH
TO
REMOTE CONTROL
OP
E
REW
Listening to Auxiliary
Equipment
You can listen to an auxiliary equipment.
■ First make sure that the auxiliary equipment is properly
connected to the System. (See page 4).
1. Set the volume level to minimum.
2. Press the AUX button.
“AUX” appears on the display.
■ To listen to the auxiliary equipment, start playing the
auxiliary equipment.
3. Adjust the volume to the desired listening
level.
4. Apply sound effects, if you wish.
■ Adjust the BASS/TREBLE to control the tone. (See “Active
Hyper Bass Pro” and “Tone Control (BASS/TREBLE)” on
page 8.)
Note:
For operation of the auxiliary equipment, refer to its Instructions.
16
FF
N
A
. P.
OFF
TIMER
CLOCK
DOWN
UP
CLOCK
TIMER
TIMER
ON/OFF
STAND BY/ON
SLEEP
DOWN
UP
SET
PROGRAM
TIMER ON/OFF
SET
SLEEP
RANDOM
AUTO
PRESET
REPEAT
English
Using the Timers
ON time/OFF time indicator
TIMER indicator
SLEEP indicator
CLOCK indicator
TIMER REC
indicator
REC ON SLEEP CLOCK
OFF
TUNER
AUX
CD
TAPE
REVERSE MODE
REW
MULTI CONTROL
BAND
FM MODE
FF
DISPLAY
BASS/
TREBLE
ON time, OFF time, Source, Volume
AHB PRO
VOLUME
RM-SRSWP1U
When the System is in use, the display shows other items as well.
For simplicity, we show here only the items described in this section.
REMOTE CONTROL
The timers let you control listening and recording functions
automatically.
Setting the Clock
When you supply the power using one of the following ways, the
“CLOCK” indicator blinks and “AM12:00” appears on the display.
You need to set the clock.
• Plugging the AC adaptor into the wall outlet
• Loading 8 batteries into the Unit
• Connecting car battery (DC12V)
Use the Remote Control to set the clock.
Notes:
• The clock must be correctly set for the timers to work.
• The procedure must be completed within two minutes.
Otherwise, the setting is cleared and must be repeated from the
beginning.
CLOCK
DOWN
UP
Setting the Timer
Once you have set the Timer, the timer will be activated at the same
time every day, except for the Tuner REC timer which is used to
record a broadcast on the tape. It can be cancelled and reactivated
whenever you wish.
The Timer indicator ( ) on the display shows when the Timer you
have set is in effect.
Use the Remote Control to set the Timer.
Note:
Perform each setting within 30 seconds. Otherwise, setting is cleared
and the procedure must be repeated from the beginning.
1. Turn on the System.
2. Setting the ON time (Example: AM11:15).
1. Press the TIMER button on the Remote Control.
The Timer indicator ( ) and “ON” indicator light up and the
current ON time blinks on the display.
SET
ON
1. Turn on the System.
2. Press the CLOCK button on the Remote
Control.
The time indication blinks on the display.
3. Press the UP or DOWN button to set the time.
Press the UP or DOWN button to increase or decrease the time.
Pressing and holding the button will change the time rapidly.
4. Press the SET button.
The selected time is set and the seconds start counting from 0.
Then, the display returns to the original one.
CAUTION: If no battery is loaded in the unit and it
left with the AC adaptor unplugged (or when there
is a power failure) for more than 5 minutes,
CLOCK indicator will blink on the display. Set the
current time (clock) again.
2. Set the ON time by pressing the UP or DOWN button.
Pressing and holding the button will change the time rapidly.
ON
3. Press the SET button.
The current OFF time blinks on the display.
OFF
(To be continued on the next page)
17
English
3. Setting the OFF time (Example: PM1:30).
■
1. Set the OFF time by pressing the UP or DOWN button.
Pressing and holding the button will change the time rapidly.
OFF
CAUTION: If no battery is loaded in the unit and it
left with the AC adaptor unplugged (or power
failure) for more than 5 minutes, timer settings
will be erased from memory. If this happens, set
the current time (clock) and perform the timer
setting again.
Setting the Sleep Timer
2. Press the SET button.
The music source “TUNER” blinks on the display.
Use the Sleep Timer to turn the System off after a certain number of
minutes when it is playing. By setting the Sleep Timer, you can fall
asleep to music and know that your System will turn off by itself
rather than play all night.
1. Press the UP or DOWN button to select the music source
you want to listen to. The display changes as follows:
TUNER→TUNER REC→CD→TAPE→(back to the
beginning)
• When you select the TUNER REC, the TIMER REC
indicator appears on the display.
• When you select the TUNER REC, the timer will be
released after Tuner Recording has been finished.
2. Press the SET button.
The volume level set by the previous time setting blinks on
the display.
■ You can only set the Sleep Timer when the System is on and a
1. Press the UP or DOWN button to select the volume level.
– –:
The current volume level will be used.
0 to 50:When the timer is turned on, the Volume will be
automatically set to the selected level.
3. Set the length of time you want the source to
play before shutting off.
• Each time you press the SLEEP button, it changes the number of
minutes shown on the display in this sequence:
30 → 60 → 90 → 120 → Cancelled (Original display) →
(back to the beginning)
After setting the number of minutes for the Sleep Timer, the display
will stop blinking and return to the display as before setting the
Sleep Timer.
The System is now set to turn off after the number of minutes you
set.
To Confirm the Sleep Time:
When the SLEEP button is pressed, the remaining sleep time is
displayed. Wait until the display returns to the original display.
To Cancel the SLEEP Timer Setting:
Press the SLEEP button until the original display appears on the
display. Turning off the System also cancels the SLEEP Timer.
4. Selecting the music source.
■
source is playing.
1. Play a CD, tape, or tune in to the desired
station.
2. Press the SLEEP button on the Remote Control.
The SLEEP indicator lights up on the display.
SLEEP
5. Setting the volume level.
■
2. Press the SET button.
The timer setting is completed and the display returns to the
display before you set the timer. The Timer indicator ( )
remains lit.
6. Before turning off the System, prepare the
■
music source selected in step 4.
TUNER:
Tune in to the desired station.
TUNER REC: Tune in to the desired station and insert a
cassette tape for recording the station.
CD:
Set a CD.
TAPE:
Insert a tape.
7. Turn off the System.
• When the timer turns on, the volume level gradually
increases from 0 (zero) to the preset level in step 5.
To cancel the operation, press the TIMER button until the
display returns to the original one.
To cancel the timer, press the TIMER ON/OFF button. The
Timer indicator ( ) goes out on the display.
To reactivate the cancelled timer, press the TIMER ON/
OFF button to light the Timer indicator ( ).
To confirm the timer settings, press the TIMER button.
Then, press the SET button repeatedly to see the current
timer settings (ON time, OFF time, source, and volume).
To change the timer setting, repeat the setting procedure
from the beginning.
Note:
It is recommended to power the System from the AC adaptor when
you set recording by timer.
18
■ If you are setting the Daily Timer, the System will be turned on
at the set time to wake you up.
English
Care And Maintenance
Handle your CDs carefully, and they will last a long time.
Compact Discs
Moisture Condensation
•
Only CDs bearing this mark can be used with
this System. However, continued use of irregular
shape CDs (heart-shape, octagonal, etc.) can
damage the System.
•
Remove the CD from its case by holding it at the
edges while pressing the case’s center hole
lightly.
Do not touch the shiny surface of the CD, or
bend the CD.
•
•
•
•
•
Moisture may condense on the lens inside the System in
the following cases:
• After turning on heating in the room.
• In a damp room.
• If the System is brought directly from a cold to a
warm place.
Should this occur, the System may malfunction. In this
case, leave the System turned on for a few hours until the
moisture evaporates, unplug the AC adaptor, and then
plug it in again.
Cassette Tapes
Put the CD back in its case after use to prevent
warping.
Be careful not to scratch the surface of the CD
when placing it back in the case.
Avoid exposure to direct sunlight, temperature
extremes, and moisture.
A dirty CD may not play correctly. If a CD does
become dirty, wipe it with a soft cloth in a
straight line from center to edge.
CAUTION: Do not use any solvent (for example,
conventional record cleaner, spray thinner,
benzine, etc.) to clean a CD.
If the tape is loose, it may get stretched, cut, or
caught in the cassette. Take up the slack by inserting
a pencil in one of the reels and rotating.
•
Do not touch the tape surface.
•
Do not store the tape:
- In dusty places
- In direct sunlight or heat
- In moist areas
- On a TV or speaker
- Near a magnet
Cassette Deck
•
General Notes
•
In general, you will have the best performance by keeping your CDs
and the mechanism clean.
• Store CDs in their cases, and keep them in cabinets or on
shelves.
• Keep the System’s door closed when not in use.
•
Cleaning the lens
If the lens in the CD pickup is dirty, dropout, etc., could degrade
sound.
Open the door and clean the lens as shown.
• Use a blower (available from a camera store) to blow dust off the
lens.
If the heads, capstans, or pinch-rollers of the Cassette Deck
become dirty, the following may occur:
- Loss of sound quality
- Discontinuous sound
- Fading
- Incomplete erasure
- Difficulty recording
Clean the heads, capstans, and pinch-rollers using a cotton swab
moistened with alcohol.
Capstans
Erase head
Pinch-rollers
Record/play head
Blower
Lens
•
•
If there are fingerprints, etc. on the lens, gently wipe clean with a
cotton swab.
•
If the heads become magnetized, the System will produce noise
or lose high frequency notes.
To demagnetize the heads, turn off the System, and use a head
demagnetizer (available at electronics and record shops).
19
English
Troubleshooting
•
•
If you are having a problem with your System, check this list for a possible solution before calling for service.
If you cannot solve the problem from the hints given here, or the System has been physically damaged, call a qualified person, such as
your dealer, for service.
Symptom
No sound is heard.
Possible Cause
Action
•
Connections are incorrect, or loose.
•
•
Headphones are connected.
•
Check all connections and make corrections.
(See page 4.)
Disconnect the headphones.
Unable to record.
Cassette record protect tabs are removed.
Cover the holes on the back edge of the cassette
with tape.
Poor FM reception
The FM telescopic antenna is not properly
extended and positioned.
Fully extend the FM telescopic antenna and turn it
for the best reception.
The CD skips.
The CD is dirty or scratched.
Clean or replace the CD.
The CD does not play.
The CD is upside down.
Put the CD in with the label side up.
Unable to operate the Remote Control.
•
•
Remove the obstruction.
•
Replace the batteries.
•
The path between the Remote Control and the
sensor on the Unit is blocked.
The batteries have lost their charge.
Operations are disabled.
The built-in microprocessor has malfunctioned
due to external electrical interference.
Unplug the System then plug it back in after a few
minutes.
The cassette holder cannot be opened.
During tape playing, the AC adaptor was
unplugged.
Plug in the AC adaptor and press the
STANDBY/ON button.
20
Amplifier
Output Power 12 W per channel, min. RMS, at 4 Ω from 150 Hz to 15 kHz with no more than 10% total
harmonic distortion (for U.S.A.)
(Max.) 26 W (13 W + 13 W) at 4 Ω (full range) (for Canada)
Input Sensitivity/Impedance (1 kHz)
AUX IN 380 mV/47 kΩ
Output Sensitivity/Impedance (1 kHz)
Phones 16 Ω - 1 kΩ
0 - 12 mW/ch output into 32 Ω
Cassette Deck
Frequency Response
TypeII (CrO2) 60 Hz - 14 kHz
Wow and Flutter 0.15% (WRMS)
CD Player
Wow and Flutter Unmeasurable
Tuner
FM Tuner
Tuning Range 87.5 MHz - 108.0 MHz
AM Tuner
Tuning Range 530 kHz - 1 710 kHz
Antenna FM telescopic antenna
Ferrite core antenna for AM
Speakers
Full range 10 cm (4”) × 2, 4 Ω
Passive cone 10 cm (4”) × 2
General
Dimensions 411 mm × 456 mm × 234 mm (W/H/D)
(16-3/16” × 18” × 9-1/4”)
Mass 5.1 kg (11.3 lbs) (without batteries)
5.9 kg (13.1 lbs) (with batteries)
Accessories
AC adaptor (1)
Remote Control (1)
Shoulder Strap (1)
Power Specifications
Power Requirements DC 12 V (“R20/D (13F)” batteries (8))
External DC 12 V (AA-R1209 AC adaptor or car battery via optional CA-R120 car adaptor)
Power Consumption 18 W (power on mode)
1.5 W (in Standby mode)
Design and specifications are subject to change without notice.
21
English
Specifications
VICTOR COMPANY OF JAPAN, LIMITED
EN
0201SKMWSTJEM