1
KV-RA2
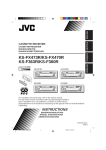
AMPLIFICADOR DE CONTROL DE A / V
KV-RA2
ESPAÑOL
AMPLIFICATEUR DE COMMANDE A / V
KV-RA2
FRANÇAIS
ENGLISH
A / V CONTROL AMPLIFIER
S
P
E P
A O
K W
E
R E
O R/
U
T
P
U
T
S
P
E
A
IN KE
P R
U
T R
O EM
U O
T T
E
IN
R
L
L IN
E
D
IS
P
LA
Y
K
V-R
A
C
H
A
N
G
E
R
T
EC
DIR
2
R V
E C
M R
O
T
E
A/V
CO
NTR
OL
AM
IFIE
K
LIN
A/V
PL
SE
/ I/
AT
T
L
VC
FU
R
NC
7/R
ND
/RP
T
3/D
ISC
R/
CD
-C
HC
OTR
OL
+
KV
-RA
2
For installation and connections, refer to the separate manual.
Para la instalación y las conexiones, refiérase al manual separado.
Pour l’installation et les raccordements, se référer au manuel séparé.
For customer Use:
INSTRUCTIONS
MANUAL DE INSTRUCCIONES
MANUEL D’INSTRUCTIONS
Enter below the Model No. and
Serial No. which are located on
the top or bottom of the cabinet.
Retain this information for future
reference.
Model No.
Serial No.
PIM15090M
[J]
COVER.KV-RA2[J]
3
99.1.8, 10:43 AM
ENGLISH
Thank you for purchasing this JVC product. Please read these instructions carefully before
starting operation to obtain optimum performance and a longer service life from the unit.
INFORMATION (For U.S.A.)
This equipment has been tested and found to comply with the limits for a Class B digital
device, pursuant to Part 15 of the FCC Rules. These limits are designed to provide
reasonable protection against harmful interference in a residential installation. This
equipment generates, uses, and can radiate radio frequency energy and, if not installed
and used in accordance with the instructions, may cause harmful interference to radio
communications. However, there is no guarantee that interference will not occur in a
particular installation. If this equipment does cause harmful interference to radio or television
reception, which can be determined by turning the equipment off and on, the user is
encouraged to try to correct the interference by one or more of the following measures:
– Reorient or relocate the receiving antenna.
– Increase the separation between the equipment and receiver.
– Connect the equipment into an outlet on a circuit different from that to which the receiver
is connected.
– Consult the dealer or an experienced radio/TV technician for help.
BEFORE USE
* For safety....
• Do not raise the volume level too much, as this will block outside sounds, making driving dangerous.
• Stop the car before performing any complicated operations.
* Temperature inside the car....
If you have parked the car for a long time in hot or cold weather, wait until the temperature in the car
becomes normal before operating the unit.
CONTENTS
FEATURES ................................................................... 2
LOCATION OF CONTROLS ...........................................3
BASIC OPERATIONS .................................................... 4
CD CHANGER OPERATIONS ........................................ 5
Playing CDs ..................................................................................... 5
Selecting CD playback modes........................................................ 6
VCR OPERATIONS....................................................... 7
LISTENING TO YOUR CAR RECEIVER ........................... 8
SOUND ADJUSTMENT ................................................. 9
MAINTENANCE......................................................... 10
TROUBLESHOOTING ................................................. 11
SPECIFICATIONS ....................................................... 12
FEATURES
2
The KV-RA2, when used with a JVC CD changer and VCR, provides high quality and highpowered sound from your existing receiver.
EN.02-06.KV-RA2[J]
2
99.1.8, 10:37 AM
Display unit
2
1
3
4
10 11 12
VCR / CD-CH CONTROL
SEL
/ I / ATT
KV-RA2
FUNC 7/RND/RPT 3/DISC+
9
8
7
6
7
8
9
2
BBE
VOL
BAS TRE
FAD BAL
RND RPT
6 5
5
1
NODISC
4
TRACK
3
10
1 Volume button (+, –): Adjusts the volume level or sound adjustment level.
2 ¢, 4 button: Used for various CD playback modes.
Fast-forwards or rewinds a video tape.
3 SEL (select) button: Calls up the sound adjustment mode.
4 Display
1 Disc number indicator (1–12)
7 FAD (fader) indicator
2 Track number indicator (1–99)
8 BAS (bass) indicator
3 TRACK indicator
9 VOL (volume) indicator
4 DISC/NO DISC indicator
0 BBE indicator
5 RPT (repeat) indicator
- TRE (treble) indicator
6 RND (random) indicator
= BAL (balance) indicator
5
button: Turns the power on or off.
Drops the volume in a moment.
6 FUNC (function) button: Selects a source (CD changer, VCR or car receiver (AUX)).
7 7/RND/RPT button:
While playing a CD : Performs random play or repeat play.
While playing a video tape: Stops video playback.
8 3/DISC + button:
While playing a CD: Plays the next disc.
While VCR is selected as the source: Plays a video tape.
9 Microcomputer reset button
p Remote sensor
Remote controller
1
1
4
2
5
3
6
4
7
5
2
3
6
7
EN.02-06.KV-RA2[J]
3
button:
Turns the power on or off.
Drops the volume in a moment.
DISC + (BAND PROG) button:
Plays the next disc.
• Does not function as a BAND or PROG button.
DISC – (PRESET) button:
Plays the previous disc.
• Does not function as a PRESET button.
FUNC (function) button:
Selects a source (CD changer, VCR or car receiver
(AUX)).
¢, 4 buttons:
Used for various CD playback modes.
• Do not function as
or
buttons.
Volume buttons (+, –):
Adjust the volume level or sound adjustment level.
•
: Turns on or off the VCR.
• 7 : Stops playing a video tape.
• 1 : Rewinds a video tape.
• 3 : Starts playing a video tape.
• ¡ : Fast-forwards a video tape.
3
99.1.8, 10:37 AM
ENGLISH
LOCATION OF CONTROLS
BASIC OPERATIONS
ENGLISH
Before operating this unit, see the instructions supplied with the other components
connected to this unit.
Display unit
1
3
2
SEL
/I
/ ATT
1
1
Remote controller
Display unit
When using the remote
controller, point it toward
the remote sensor on
the display unit, then
press buttons gently and
firmly.
FUNC 7/RND/RPT 3
3
2
Remote controller
/ I / ATT
Press
.
The unit turns on.
2
Press FUNC (function).
FUNC
Each time you press FUNC, the source
changes as follows:
CD changer
VCR
AUX
(Car receiver)
To operate the CD changer, see page 5.
To operate the VCR, see page 7.
To operate the car receiver, see page 8.
3
Adjust the volume with
the volume buttons (+, –).
Volume level appears.
BBE
VOL
BAS TRE
FAD BAL
RND RPT
4
NODISC
Adjust the sound as you want. (See page 9.)
To drop the volume in a moment
Press
briefly.
To resume the previous volume level, press the same button briefly again.
4
To turn off the power
for more than 1 second.
Press
EN.02-06.KV-RA2[J]
4
99.1.8, 10:37 AM
TRACK
CD CHANGER OPERATIONS
ENGLISH
You can connect one of the JVC CD changer CH-X series.
Playing CDs
Remote controller
Display unit
/I
/ ATT
FUNC 7/RN
Press FUNC (function) repeatedly
until the disc number and the track
number appear on the display.
Disc number
Track number
BBE
BAS TRE
FAD BAL
RND RPT
NODISC
TRACK
The CD changer starts playing from the first
track of the first disc.
Note:
When all the tracks on the first disc have been played, the second disc starts playing automatically
from the first track.
To stop CD playback
• Change the source by pressing FUNC.
for more than 1 second.
• Press and hold
To go to the next disc
Display unit
Remote controller
Press DISC +.
Each time you press DISC +, the disc
number increases in sequence.
FUNC 7/RND/RPT 3/DISC+
Note:
When you select a CD, its disc number flashes on
the display.
To go to the previous disc
Remote controller only
Press DISC –.
Each time you press DISC –, the disc
number decreases in sequence.
5
EN.02-06.KV-RA2[J]
5
99.1.8, 10:37 AM
ENGLISH
To go to the next or previous tracks
Display unit
Remote controller
Press ¢ briefly while playing a CD, to go
to the beginning of the next track.
Each time you press the button consecutively,
the beginning of succeeding tracks is located
and played back.
Press 4 briefly while playing a CD, to go to
the beginning of the current track.
Each time you press the button consecutively,
the beginning of previous tracks is located and
played back.
To fast-forward or reverse the track
Press and hold ¢ while playing a CD, to
fast-forward the track.
Press and hold 4 while playing a CD, to
reverse the track.
Selecting CD playback modes
To play the tracks at random
Display unit only
/I
/ ATT
FUNC 7/RND/RPT 3/DISC+
Mode
RND indicator
RND1
Lights
RND2
Flashes
Each time you press 7/RND/RPT while
playing a CD, CD random play mode changes
as follows.
RND1
RND2
(Random1)
(Random2)
OFF
Plays at random
All tracks of the disc being played.
All tracks of all discs inserted in the magazine.
To play the tracks repeatedly
/I
/ ATT
FUNC 7/RND/RPT 3/DISC+
Mode
RPT indicator
RPT1
Lights
RPT2
Flashes
Each time you press and hold 7/RND/RPT
while playing a CD, CD repeat play mode
changes as follows.
RPT1
RPT2
(Repeat1)
(Repeat1)
Plays repeatedly
The track being played.
All tracks of the disc being played.
6
EN.02-06.KV-RA2[J]
6
99.1.8, 10:37 AM
OFF
VCR OPERATIONS
ENGLISH
You can connect a JVC VCR (ex. KZ-V10).
Before you start....
• Turn on a monitor set or TV set connected to the VCR and set it to its external input to watch
picture from the VCR.
• Insert a video tape into the VCR.
1
Display unit
/I
/ ATT
Remote controller
Press FUNC (function) repeatedly
until “VCR” appears on the display.
FUNC 7/RN
BBE
BAS TRE
FAD BAL
RND RPT
2
Remote controller only
3
Press
Press 3.
.
The VCR turns on.
The VCR starts
playing a video
tape.
Note:
Even if you change the source to CD changer or car receiver (AUX) while watching a video tape, VCR
playback continues, but the sound does not come out of the speakers.
To stop video playback
Display unit
Remote controller
Press 7.
/I
FUNC 7/RND/RPT 3
/ ATT
To fast-forward or rewind a video tape
Press ¡ or ¢.
Press 1 or 4.
Note:
If you press the buttons while watching the video tape, you can search for a particular scene by fastforwarding or rewinding.
To turn off the VCR
Press
.
Notes:
• Even if you are selecting CD changer or car receiver (AUX) as the source, you can operate the VCR
by using the buttons of the remote controller.
• Use the remote controller supplied with the VCR for operations except the above operations. (See the
instructions supplied with the VCR.)
EN.07-12.KV-RA2[J]
7
99.1.8, 10:38 AM
7
ENGLISH
LISTENING TO YOUR CAR RECEIVER
1
2
Turn on your car receiver.
Display unit
/I
/ ATT
Remote controller
FUNC 7/RN
Press FUNC (function)
repeatedly until “AUX” appears
on the display.
BBE
BAS TRE
FAD BAL
RND RPT
3
NODISC
Operate your car receiver.
For details, refer to the instructions supplied with the car receiver.
Note:
Do not adjust the sound (bass, treble, fader and balance) on your car receiver.
When you want to adjust the sound, see page 9.
8
EN.07-12.KV-RA2[J]
8
99.1.8, 10:38 AM
TRACK
SOUND ADJUSTMENT
ENGLISH
You can adjust the sound characteristics to your preference.
Display unit only
1
Press SEL (select).
Each time you press SEL, the sound
adjustment mode changes as follows.
SEL
Indication
VOL
BAS
TRE
BBE
BAL
FAD
To do:
Range
VOL (volume) Adjusts the volume.
00 (min.) — 50 (max.)
BAS*(bass)
Adjusts the bass.
–06 (min.) — +06 (max.)
TRE*(treble)
Adjusts the treble.
–06 (min.) — +06 (max.)
FAD**(fader)
Adjusts the front and rear speakers balance. R06 (rear only) — F06 (front only)
BAL (balance) Adjusts the left and right speakers balance.
L06 (left only) — R06 (right only)
BBE*
on — oFF
*
See “What is BBE?” below.
Bass sound (BAS), treble sound (TRE) and BBE can be set for CD changer, VCR and
car receiver (AUX) separately.
When you are using a two-speaker system, set fader (FAD) to “00.”
**
Notes:
• Normally the volume level can be adjusted by pressing the volume buttons. (See page 4.)
• If your car receiver has the same sound adjustment modes as listed above, fix them to the center
positions or to “OFF” positions.
• For the volume level on your car receiver, fix it to such a level that you can adjust the volume level
properly only with the volume buttons of this unit.
2
Display unit
Remote controller
Adjust the level with the volume
buttons.
What is BBE?
The BBE function restores the brilliance and clarity of the original live sound in recording,
broadcasts, etc.
When a speaker reproduces sound, it introduces frequency-dependent phase shifting,
causing high-frequency sounds to take longer to reach the ear than low frequency sounds.
The BBE function adjusts the phase relationship between the low, mid and high frequencies
by adding a progressively longer delay time to the low and mid frequencies, so that all
frequencies reach the listener’s ears at the proper time.
In addition, the BBE function boosts low and high frequencies, which loudspeakers tend
to be less efficient in reproducing, through dynamic, program-driven augmentation. When
combined with the phase compensation feature, the resulting sound has a clearer, more
finely detailed “live” presence.
Under license from BBE Sound, Inc.
is a trademark of BBE Sound, Inc.
9
EN.07-12.KV-RA2[J]
9
99.1.8, 10:38 AM
ENGLISH
MAINTENANCE
Battery replacement
When the remote-controllable range becomes narrower, the battery should be replaced.
(Battery life is about 1 year with normal use.)
(Back side)
1. Remove the battery case.
1) Push in the direction indicated by the arrow
with your right hand thumbnail.
2) Remove the battery case.
2)
1)
Lithium coin battery
(Product number:
CR2025)
2. Replace the battery.
Put the battery in the case with the + side facing
upwards.
(Back side)
3. Return the battery case.
Insert the battery case. Push it in until you hear
a clicking sound.
WARNING:
• Store the battery in a place which children cannot reach.
If a child accidentally swallows the battery, immediately consult a doctor.
• Do not recharge, short, disassemble or heat the battery or dispose of it in a fire; otherwise,
the battery might give off heat, crack or start a fire.
• Do not leave the battery together with other metallic materials; otherwise, the battery might give
off heat, crack or start a fire.
• When throwing away or saving the battery, wrap it in tape to insulate; otherwise, the battery
might give off heat, crack or start a fire.
• Do not poke the battery with tweezers or similar tools; otherwise, the battery might give off heat,
crack or start a fire.
How to reset your unit
When this unit does not work at all, reset the unit.
Put a straight thin stick like a ball-point pen into the microcomputer reset button.
This will reset the built-in microcomputer.
VCR / CD-CH CONTROL
SEL
/ I / ATT
FUNC 7/RND/RPT 3/DISC+
KV-RA2
Microcomputer reset button
10
EN.07-12.KV-RA2[J]
10
99.1.8, 10:38 AM
What appears to be trouble is not always serious.
Check the following points before calling a service center.
Symptoms
Causes
• Sound cannot be heard from
the speakers.
The volume level is turned to the
minimum level.
Adjust it to the optimum level.
When you are listening to the
car receiver (AUX), the volume
level is set to the minimum level
on the car receiver.
Adjust the volume on the car
receiver.
Connections are incorrect.
Check the cords and
connections.
• Sound is distorted while you are
listening to the car receiver
(AUX).
The sound adjustment modes
on your car receiver are used.
Fix the sound adjustment to the
center positions or to “OFF”
positions on the car receiver.
• “NO DISC” appears on the
display.
No CD is in the magazine.
Insert CDs into the magazine.
CDs are inserted incorrectly.
Insert them correctly.
This unit is not connected to a
CD changer correctly.
Connect this unit and the CD
changer correctly and press
both the reset buttons of this
unit and the CD changer.
• “R–8” appears on the display.
• “R–1” to “R–7” appears on the
display.
• Remote controller does not
work.
• This unit does not work at all.
• The CD changer does not work
at all.
Remedies
ENGLISH
TROUBLESHOOTING
Press both the reset buttons of
this unit and the CD changer.
The battery is exhausted.
Replace the battery.
Battery polarity (+, –) is
reversed.
Put the battery correctly.
The operation is incorrect.
Point the remote controller
toward the display unit.
The built -in microcomputer may
function incorrectly due to noise,
etc.
Put a straight thin stick like a ballpoint pen into the microcomputer
reset button. (See page 10.)
* For CD changer, see the instructions supplied with the CD changer.
11
EN.07-12.KV-RA2[J]
11
99.1.8, 10:38 AM
ENGLISH
SPECIFICATIONS
AMPLIFIER SECTION
GENERAL
Maximum power output:
Front:
40 watts per channel
Rear:
40 watts per channel
Continuous power output (RMS):
Front:
15 watts per channel into 4 Ω,
40 to 20,000 Hz at no more
than 0.8% total harmonic
distortion.
Rear:
15 watts per channel into 4 Ω,
40 to 20,000 Hz at no more
than 0.8% total harmonic
distortion.
Load impedance: 4 Ω (4 to 8 Ω allowable)
Frequency response: 40 to 20,000 Hz
Line input sensitivity/Impedance:
0.5 V/20 kΩ
Speaker input sensitivity/Impedance:
4 V/1.5 kΩ
Signal-to-signal ratio: 70 dB
Power requirements:
Operation voltage:
DC 14.4 V (11 V – 16 V allowable)
Grounding system: Negative ground
Dimensions (W x H x D):
Amplifier unit: 200 x 162 x 30 mm
(7-7/8" x 6-7/16" x 1-3/16")
Display unit: 104 x 40 x 20 mm
(4-1/8" x 1-5/8" x 13/16")
Mass:
Amplifier unit: 750 g (1.7 lbs)
Display unit: 240 g (0.53 lbs)
Design and specification subject to change without
notice.
If a kit is necessary for your car, consult
your telephone directory for the nearest
car audio speciality shop.
12
EN.07-12.KV-RA2[J]
12
99.1.8, 10:38 AM
Having TROUBLE with operation?
Please reset your unit
Refer to "How to reset your unit"
Still having trouble??
USA ONLY
Call 1-800-252-5722
http://www.jvcservice.com
We can help you!
VICTOR COMPANY OF JAPAN, LIMITED
EN, SP, FR
COVER.KV-RA2[J]
0199MNMMDWTKR
2
99.1.8, 10:43 AM