1
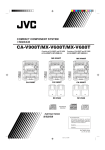
COMPACT COMPONENT SYSTEM
CA-MXJ777V/CA-MXJ787V
CA-MXJ777V
CA-MXJ787V
CD3
STANDBY
COMPACT
CD3
STANDBY
COMPACT
CD2
CD 3
CD 2
CD 2
CD1
CD 1
PLAY & EXCHANGER
NTSC / PAL COMPABILITY
NTSC / PAL COMPABILITY
VOLUME
PHONES
VOLUME
+
PHONES
–
PANEL
OPEN / CLOSE
–
PANEL
OPEN / CLOSE
MIC LEVEL
MIC LEVEL
SELECT
TAPE
CD
AUX
FM / AM
SELECT
MAX
1
MIN
MIC
SOUND
MODE
VOCAL
MASKING
ECHO
TAPE B
REC PAUSE
SHIFT
PREV
3 STEREO
SOUND
MODE
SLEEP
TAPE A
CENTER
LEVEL
+
CENTER MODE
TAPE B
–
REAR
LEVEL
+
DELAY TIME
REC PAUSE
KEY CONTROL
FM / AM
VOCAL
MASKING
ECHO
SLEEP
ON SCREEN V.INTRO HIGHTLIGHT SUBTITLE
TEST TONE
–
L BALANCE R
CD
AUX
2
ON SCREEN V.INTRO HIGHTLIGHT SUBTITLE
PRO LOGIC
TAPE
MAX
1
MIC
2
TAPE A
CD1
CD 1
PLAY & EXCHANGER
+
MIN
CD2
CD 3
SUPER VIDEO
SUPER VIDEO
FM MODE
SHIFT
NEXT
PREV
PLAY
PRO LOGIC
3 STEREO
TEST TONE
–
CENTER
LEVEL
+
CENTER MODE
–
REAR
LEVEL
+
DELAY TIME
L BALANCE R
KEY CONTROL
FM MODE
NEXT
REC/PLAY
PLAY
REC/PLAY
+
+
SELECT/STILL
SELECT/STILL
FADE
MUTING
FADE
MUTING
–
–
AUTO REVERSE
AUTO REVERSE
AUTO REVERSE
AUTO REVERSE
RM–SMXJ787U REMOTE CONTROL
RM–SMXJ777U REMOTE CONTROL
EJECT
EJECT
EJECT
COMPACT
SUPER VIDEO
COMPACT
DIGITAL VIDEO
EJECT
COMPACT
DIGITAL AUDIO
INSTRUCTIONS
For Customer Use:
Enter below the Model No. and Serial
No. which are located either on the rear,
bottom or side of the cabinet. Retain this
information for future reference.
Model No.
Serial No.
GVT0019-001A
[ UB, U, US, UT ]
Cover-MX-J777V/f
1
6/23/99, 5:30 PM
Warnings, Cautions and Others
Avisos, precauciones y otras notas
Advertências, precauções e outras notas
Caution ––
switch!
Disconnect the mains plug to shut the power off
completely. The
switch in any position does not
disconnect the mains line. The power can be remote
controlled.
!
Precaución –– Interruptor
Desconectar el cable de alimentación para desactivar
la alimentación totalmente. Cualquier que sea la posición
, la alimentación no es
de ajuste del interruptor
cortada completamente. La alimentación puede ser
controlada remotamente.
!
Precaução –– Interruptor
Desconectar o cabo de alimentação para desligar a
alimentação por completo. Qualquer que seja a posição
, a alimentação não é
de ajuste do interruptor
completamente cortada. A alimentação pode ser
controlada remotamente.
G-1
SAFETY-MX-J777V/f
1
6/23/99, 5:31 PM
CAUTION
To reduce the risk of electrical shocks, fire, etc.:
1. Do not remove screws, covers or cabinet.
2. Do not expose this appliance to rain or moisture.
PRECAUCIÓN
Para reducir riesgos de choques eléctricos, incendio,
etc.:
1. No extraiga los tornillos, los cubiertas ni la caja.
2. No exponga este aparato a la lluvia o a la
humedad.
PRECAUÇÃO
Para reduzir riscos de choques elétricos, incêndio, etc.:
1. Não remova parafusos e tampas ou desmonte a
caixa.
2. Não exponha este aparelho à chuva nem à
umidade.
G-2
SAFETY-MX-J777V/f
2
6/23/99, 5:31 PM
Caution: Proper Ventilation
To avoid risk of electric shock and fire, and to prevent damage, locate the apparatus as follows:
1 Front:
No obstructions and open spacing.
2 Sides/ Top/ Back: No obstructions should be placed in the areas shown by the dimensions below.
3 Bottom:
Place on the level surface. Maintain an adequate air path for ventilation by placing on a
stand with a height of 10 cm or more.
Precaución: el aparato debe estar bien ventilado
Para evitar posibles riesgos de descargas eléctricas e incendios y prevenir cualquier posible daño, coloque el
aparato del modo siguiente:
1 Parte delantera: No ponga nada delante, deje el espacio libre.
2 Laterales/ parte superior/ parte trasera: No se debería colocar nada en las áreas y las distancias que se
detallan a continuación.
3 Parte inferior:
Coloque el aparato sobre una superficie recta. Debe haber buena circulación de aire;
para ello, coloque el aparato sobre una base a una altura mínima de 10 cm.
Precaução: Ventilação adequada
Para evitar riscos de choques elétricos e incêndios, e prevenir avarias, instale o aparelho como segue:
1 Parte frontal:
Sem obstruções e espaços abertos.
2 Partes laterais/Tampa/Posterior: Nenhuma obstrução deverá ser colocada entre as áreas cujas dimensões
são indicadas abaixo.
3 Parte inferior:
Instale-o sobre uma superfície plana. Deverá ser mantido espaço suficiente para a
ventilação se este for instalado numa posição que tenha uma altura de 10 cm ou mais.
1 cm
15 cm
15 cm
15 cm
15 cm
1 cm
1 cm
15 cm
15 cm
15 cm
15 cm
1 cm
15 cm
CA-D3S
CA-MXJ777V
CA-MXJ787V
CA-D3S
CA-MXJ777V
CA-MXJ787V
10 cm
10 cm
G-3
SAFETY-MX-J777V/f
3
15 cm
6/23/99, 5:31 PM
IMPORTANT FOR LASER PRODUCTS / IMPORTANTE PARA PRODUCTOS LÁSER / IMPOTANTE
PARA PRODUTOS LASER /
/
REPRODUCTION OF LABELS / REPRODUCCIÓN DE ETIQUETAS / REPRODUÇÃO DE ETIQUETAS
/
1 CLASSIFICATION LABEL, PLACED ON REAR
ENCLOSURE
2 WARNING LABEL, PLACED INSIDE THE UNIT
1 ETIQUETA DE CLASIFICACIÓN, PEGADA EN LA PARTE
POSTERIOR DE LA CAJA
2 ETIQUETA DE ADVERTENCIA, PEGADA EN EL
INTERIOR DE LA UNIDAD
1 ETIQUETA DE CLASSIFICAÇÃO LOCALIZADA NA
PARTE POSTERIOR DA CAIXA DO APARELHO.
2 ETIQUETA DE ADVERTÊNCIA LOCALIZADA NA PARTE
INTERNA DA UNIDADE.
CLASS
LASER
1
PRODUCT
DANGER: Invisible laser
radiation when open and
interlock failed or defeated.
AVOID DIRECT EXPOSURE
TO BEAM.
(e)
VARNING: Osynlig laserstrålning när denna del är
öppnad och spärren är
urkopplad. Betrakta ej
strålen.
(s)
ADVARSEL: Usynlig laserstråling ved åbning, når
sikkerhedsafbrydere er ude
af funktion. Undgå udsættelse for stråling
(d)
1. CLASS 1 LASER PRODUCT
2. DANGER: Invisible laser radiation when open and interlock
failed or defeated. Avoid direct exposure to beam.
3. CAUTION: Do not open the top cover. There are no user
serviceable parts inside the Unit; leave all servicing to
qualified service personnel.
1. PRODUCTO LÁSER CLASE 1
2. PELIGRO: En el interior hay radiación láser invisible.
Evite el contacto directo con el haz.
3. PRECAUCIÓN: No abra la tapa superior. En el interior de
la unidad no existen piezas reparables por el usuario; deje
todo servicio técnico en manos de personal calificado.
1. PRODUTO LASER CLASSE 1
2. PERIGO: O laser emite uma rediação invisível que é
perigosa, caso o aparelho esteja aberto e a trava inoperante
ou danificada. Evite exposição direta ao feixe dos raios.
3. CUIDADO: Não abra a caixa do aparelho. Não existem
peças reparáveis pelo usuário na parte interna da unidade.
Solicite assistência técnica somente a pessoal técnico
qualificado.
G-4
SAFETY-MX-J777V/f
4
6/23/99, 5:31 PM
VARO: Avattaessa ja suojalukitus ohitettaessa olet
alttiina näkymättömälle
lasersäteilylle. Älä katso
säteeseen.
(f)
English
Introduction
We would like to thank you for purchasing one of our JVC products.
Before operating this unit, read this manual carefully and thoroughly to obtain the best possible
performance from your unit, and retain this manual for future reference.
About This Manual
Moisture condensation
This manual is organized as follows:
• The manual mainly explains operations using the buttons and
controls on the unit. You can also use the buttons on the remote
control if they have the same or similar names (or marks) as those
on the unit.
If operation using the remote control is different from that using
the unit, it is then explained.
• Basic and common information that is the same for many functions
is grouped in one place, and is not repeated in each procedure.
For instance, we do not repeat the information about turning on/
off the unit, setting the volume, changing the sound effects, and
others, which are explained in the section “Common Operations”
on pages 7 to 9.
• The following marks are used in this manual:
Moisture may condense on the lens inside the unit in the following
cases:
• After starting heating in the room
• In a damp room
• If the unit is brought directly from a cold to a warm place
Should this occur, the unit may malfunction. In this case, leave the
unit turned on for a few hours until the moisture evaporates, unplug
the AC power cord, and then plug it in again.
Others
• Should any metallic object or liquid fall into the unit, unplug the
unit and consult your dealer before operating any further.
• If you are not going to operate the unit for an extended period of
time, unplug the AC power cord from the wall outlet.
Gives you warnings and cautions to prevent from
a damage or risk of fire/electric shock.
Also gives you information which is not good for
obtaining the best possible performance from the
unit.
DO NOT disassemble the unit since there are no
user serviceable parts inside.
If anything goes wrong, unplug the AC power cord and consult your
dealer.
Gives you information and hints you had better
know.
Which compact discs can be used?
Many types of compact discs are sold for a variety of uses. The
player can play the following compact discs:
Precautions
Super VCD (SVCD) discs
• Better video resolution using MPEG2 and VBR
(Variable Bit Rate) technologies.
• Up to four languages can be included as subtitles
or song lyrics.
• Up to four languages can be included as audio.
Installation
• Install in a place which is level, dry and neither too hot nor too
cold — between 5˚C (41˚F) and 35˚C (95˚F).
• Install the unit in a location with adequate ventilation to prevent
internal heat built-up in the unit.
• Leave sufficient distance between the unit and the TV to avoid
interference.
• Keep the speakers away from the TV to avoid interference with
TV.
COMPACT
SUPER VIDEO
Video CD discs both with and without PBC
function.
DO NOT install the unit in a location near heat
sources, or in a place subject to direct sunlight,
excessive dust or vibration.
COMPACT
DIGITAL VIDEO
COMPACT
Audio CD discs
DIGITAL AUDIO
Discs you cannot play back
Any other discs than listed above (such as CD-ROM, DVD, CD-G
or CD-I Discs) cannot be played. Playing back such discs may
generate noise and damage your speaker.
Even though a logo listed above is printed on the disc, it may not be
played if it is a non-standard disc.
Power sources
• When unplugging from the wall outlet, always pull the plug, not
the AC power cord.
DO NOT handle the AC power cord with wet
hands.
1
EN1-5;MX-J777V/PM6
1
7/8/99, 9:13 AM
English
Table of Contents
Getting Started ............................................... 3
Listening to FM and AM Broadcasts ......... 17
Unpacking .................................................................. 3
Putting the Batteries into the Remote Control ........... 3
Connecting Antennas ................................................. 3
Connecting Speakers .................................................. 4
Connecting Auxiliary Equipment ............................... 5
Adjusting the Voltage Selector ................................... 6
To know the locations of Buttons and controls .......... 6
Tuning in a Station ................................................... 17
Presetting Stations .................................................... 17
Tuning in a Preset Station ........................................ 17
Playing Back Tapes ...................................... 18
Playing Back a Tape ................................................. 18
Locating the Beginning of a Song — Music Scan ... 18
Common Operations ..................................... 7
Using Dolby Surround ................................. 19
Setting the Clock ........................................................ 7
Setting the AM Tuner Interval Spacing ...................... 7
Turning On the Power and Selecting the Sources ...... 7
Adjusting the Volume ................................................. 8
Adjusting the Front Speaker Output Balance ............. 8
Reinforcing the Bass Sound ....................................... 8
Selecting the Sound Modes ........................................ 8
Creating Your Own Sound Mode
— Manual Mode .................................................... 9
Preparing for Dolby Surround .................................. 19
Enjoying Playback with Dolby Surround ................ 20
Recording ..................................................... 21
Recording Tapes on Deck B ..................................... 21
Dubbing Tapes .......................................................... 22
CD Direct Recording ............................................... 22
Auto Edit Recording ............................................... 23
Playing Back Audio CDs ............................. 10
Using the Microphones ................................ 24
Placing CDs .............................................................. 10
Playing Back the Entire Discs
— Continuous Play .............................................. 10
Basic CD Operations ................................................ 10
Programming the Playing Order of the Tracks
— Program Play ................................................... 11
Playing at Random — Random Play ....................... 12
Repeating Tracks or CDs — Repeat Play ................ 12
Prohibiting Disc Ejection — Tray Lock ................... 12
Singing Along ........................................................... 24
Singing Along with Multiplex Karaoke
Discs (MPX) ......................................................... 24
Recording Your Singing ........................................... 25
To apply an echo to your voice ................................ 25
Adjust the Music Key Control (for CD play only) .. 25
Microphone mixing .................................................. 25
Using the Timers .......................................... 26
Using Daily Timer .................................................... 26
Using Recording Timer ............................................ 27
Using Sleep Timer .................................................... 28
Timer Priority ........................................................... 28
Playing Back Video CDs/SVCDs ................ 13
Selecting Video Out ................................................. 13
Placing CDs .............................................................. 13
Playing a Video CD ................................................. 13
Playing Video CDs/SVCDs with PBC function
— Menu Play ..................................................... 14
Basic Concept of the PBC function ......................... 14
Playing Video CDs/SVCDs without the PBC
function — Continous Play ............................... 15
Resuming Play ......................................................... 15
Special Plays for a Video CD ................................... 15
Playing a multiplex sound CD ................................. 16
Using SUBTITLE .................................................... 16
Maintenance ................................................. 29
Troubleshooting ........................................... 29
Location of the Buttons and Controls ........ 30
Remote Control ........................................................ 30
Remote Sensor ......................................................... 30
Display Window ....................................................... 31
Front Panel ............................................................... 31
Specifications ................................................ 33
2
EN1-5;MX-J777V/PM6
2
7/8/99, 9:13 AM
English
Getting Started
Unpacking
Connecting Antennas
After unpacking, check to be sure that you have all the following
items.
The number in the parentheses indicates the quantity of the pieces
supplied.
FM antenna
1
AM loop antenna (1)
FM antenna (1)
Remote control (1)
Batteries (2)
AC plug adaptor (except for Vietnam, Hong Kong and The
People's Republic of China: 1)
• Video cord (1)
2
3
•
•
•
•
•
ANTENNA
FM antenna (supplied)
If any is missing, consult your dealer immediately.
AM LOOP
Putting the Batteries into the Remote Control
AM EXT
Insert the batteries — R6P(SUM-3)/AA(15F) — into the remote
control, by matching the polarity (+ and –) on the batteries with the
+ and – markings on the battery compartment.
When the remote control can no longer operate the unit, replace
both batteries at the same time.
FM
(75 )
Outdoor FM antenna
(not supplied)
FM
1
2
3
10 mm
(7/16 in. )
1
20 mm (13/16 in.)
2
R6P(SUM-3)/AA(15F)
Extend the FM antenna (supplied) horizontally.
If reception is poor
Connect the outdoor antenna.
Before attaching a 75-ohm coaxial cable (the kind with a round
wire going to an outdoor antenna), disconnect the supplied FM
antenna.
3
How to strip the 75-ohm coaxial cable and connect it
to the FM terminals
1. Strip off the outside covering of the 75-ohm coaxial cable to
expose the braided metallic mesh about 20 mm (13/16
inches).
2. Pull the mesh back and twist it into a single connector as
shown in the illustration above.
3. Strip the insulation about 10 mm (7/16 inches) back from
the central wire.
4. Insert the twisted mesh and the central wire to the FM
terminals, as shown in the illustration above.
• DO NOT use an old battery together with a
new one.
• DO NOT use different types of batteries
together.
• DO NOT expose batteries to heat or flame.
• DO NOT leave the batteries in the battery
compartment when you are not going to use
the remote control for an extended period of
time. Otherwise, it will be damaged from
battery leakage.
3
EN1-5;MX-J777V/PM6
3
Continued
7/8/99, 9:13 AM
1
English
Connecting Speakers
AM antenna
2
You can connect a pair of front speakers, one center speaker, a pair
of rear speakers and one subwoofer.
3
To connect front speakers
1
2, 3
ANTENNA
AM LOOP
Vinyl-covered wire
(not supplied)
AM EXT
Red
FM
Speaker cord
Speaker cord
FM
(75 )
SPEAKERS
RIGHT
LEFT
Black
AM loop antenna (supplied)
1 Connect the AM loop antenna to the AM LOOP
terminals as illustrated.
2 Turn the AM loop antenna until you have the best
Right
speaker
reception.
To connect an outdoor AM antenna
Left
speaker
1 Press and hold the clamp of the speaker terminal
When reception is poor, connect a single vinyl-covered wire to the
AM EXT terminal and extend it horizontally. (The AM loop antenna
must remain connected.)
on the rear of the unit.
2 Insert the end of the speaker cord into the terminal.
Match the polarity of the speaker terminals: Red (+)
to red (+) and black (–) to black (–).
For better reception of both FM and AM
3 Release the finger from the clamp.
• Make sure the antenna conductors do not touch any other
terminals and connecting cords.
• Keep the antennas away from metallic parts of the unit,
connecting cords, and the AC power cord.
IMPORTANT: Use only speakers with the same speaker
impedance as indicated by the speaker terminals on the rear of
the unit.
4
EN1-5;MX-J777V/PM6
4
Continued
7/8/99, 9:13 AM
English
To connect a center speaker and rear speakers
VCR or other equipment
By connecting a center speaker and rear speakers, you can enjoy
Dolby Surround equipped with this unit.
You can connect the following equipment to this system.
• TV with a video input jack: used as a monitor of video CD
playback.
• Audio/Video equipment.
Center speaker
To listen to this source, press AUX p, !.
Auxiliary Equipment
CD OPTICAL
DIGITAL
OUTPUT
TV
VIDEO
OUT
STEREO RECEIVER
MODEL NO. MX - J777V
UNIT NO. MX-J777V
ANTENNA
VIDEO
OUT
AC 110/127/220
/ 230 - 240V
50/60Hz 85W
AM LOOP
AM EXT
VOLTAGE
SELECTOR
110V
220V
FM
FM
(75 )
To video input
CD OPTICAL
DIGITAL
OUTPUT
230V
-240V
127V
AUX
RIGHT
LEFT
IN
SUB WOOFER
OUT
VIDEO
OUT
OUT
STEREO RECEIVER
MODEL NO. MX - J777V
SPEAKERS
UNIT NO. MX-J777V
ANTENNA
AC 110/127/220
/ 230 - 240V
50/60Hz 85W
RIGHT
LEFT
AM LOOP
RIGHT
AM EXT
LEFT
VOLTAGE
SELECTOR
110V
220V
FM
CAUTION:
SPEAKER IMPEDANCE
6 ~ 16
FM
(75 )
REAR
CENTER
230V
-240V
127V
AUX
RIGHT
LEFT
IN
SUB WOOFER
OUT
RIGHT
OUT
LEFT
REAR
SPEAKERS
RIGHT
CENTER
LEFT
CAUTION:
SPEAKER IMPEDANCE
6 ~ 16
RIGHT
LEFT
REAR
CENTER
AUX
RIGHT
LEFT
IN
OUT
To audio output
Left rear
speaker
Right rear
speaker
To audio input
Now you can plug the AC power cord into the wall outlet,
and your System is at your command!
• Connect the right rear speaker to the REAR RIGHT jack.
• Connect the left rear speaker to the REAR LEFT jack.
• Connect the center speaker to the CENTER jack.
Connecting Auxiliary Equipment
When connecting Auxiliary Equipment
• Connect the VIDEO OUT jack at the back panel of the System to
the video input jack on the TV via the supplied video cord.
• Connect the AUX jacks to the audio input and output of Audio/
Video equipment.
• The AUX OUT jacks will transmit audio signals from the selected
TAPE, CD or TUNER, to the connected equipment. No audio
signal is produced at the AUX IN jacks.
You can connect both analog and digital equipment.
• DO NOT connect any equipment while the
power is on.
• DO NOT plug in any equipment until all
connections are complete.
To connect a subwoofer
By connecting a subwoofer, you can enhance the bass.
CD OPTICAL
DIGITAL
OUTPUT
VIDEO
OUT
SUB WOOFER
OUT
STEREO RECEIVER
MODEL NO. MX - J777V
UNIT NO. MX-J777V
ANTENNA
AC 110/127/220
/ 230 - 240V
50/60Hz 85W
AM LOOP
AM EXT
FM
VOLTAGE
SELECTOR
110V
220V
FM
(75 )
230V
-240V
127V
AUX
RIGHT
LEFT
IN
SUB WOOFER
OUT
OUT
SPEAKERS
RIGHT
LEFT
CAUTION:
SPEAKER IMPEDANCE
6 ~ 16
RIGHT
LEFT
REAR
CENTER
To input
Connect the input jack of a powered subwoofer to the SUB
WOOFER OUT jack, using a monaural audio cord (not supplied).
5
EN1-5;MX-J777V/PM6
5
Continued
7/8/99, 9:13 AM
English
To connect audio equipment with an optical digital
input terminal
• DO NOT plug in before setting the voltage
selector on the rear of the unit and all
connection procedures are complete.
You can record CD sound onto the connected digital equipment.
CD OPTICAL
DIGITAL
OUTPUT
CD OPTICAL
DIGITAL
OUTPUT
VIDEO
OUT
STEREO RECEIVER
MODEL NO. MX - J777V
UNIT NO. MX-J777V
ANTENNA
NOW, you can plug in the unit and other connected
equipment FINALLY!
AC 110/127/220
/ 230 - 240V
50/60Hz 85W
AM LOOP
AM EXT
VOLTAGE
SELECTOR
110V
220V
FM
FM
(75 )
230V
-240V
127V
AUX
RIGHT
LEFT
IN
SUB WOOFER
OUT
OUT
SPEAKERS
RIGHT
Protective plug
LEFT
CAUTION:
SPEAKER IMPEDANCE
6 ~ 16
RIGHT
LEFT
REAR
CENTER
VIDEO
OUT
STEREO RECEIVER
MODEL NO. MX - J777V
UNIT NO. MX-J777V
ANTENNA
AC 110/127/220
/ 230 - 240V
50/60Hz 85W
AM LOOP
AM EXT
FM
VOLTAGE
SELECTOR
110V
220V
FM
(75 )
230V
-240V
Before connecting the
other equipment,
remove the protective
plug from the terminal.
127V
AUX
RIGHT
LEFT
IN
SUB WOOFER
OUT
OUT
SPEAKERS
RIGHT
LEFT
CAUTION:
SPEAKER IMPEDANCE
6 ~ 16
RIGHT
LEFT
REAR
CENTER
To a wall outlet
Audio equipment with
an optical digital input
If the wall outlet does not match the AC plug, use the supplied
AC plug adaptor.
To optical
digital input
When connecting the AC power cord into a wall outlet, the unit
automatically starts display demonstration.
Connect an optical digital cord (not supplied) between the optical
digital input terminal on the other equipment and the CD OPTICAL
DIGITAL OUTPUT terminal.
To stop the display demonstration, press any button on the unit or
the remote control.
CAUTION: CD OPTICAL DIGITAL OUTPUT can only be used
for playing or recording AUDIO CD. Noise might come out if you
play or record Video CD or SVCD. Disconnect optical digital cord
between other equipment and CD OPTICAL DIGITAL OUTPUT
terminal when playing or recording Video CD or SVCD.
To start the display demonstration manually
Press and hold DEMO / for more than 2 seconds.
DEMO
CANCEL
Adjusting the Voltage Selector
To stop the demonstration, press any button.
Before plugging in the unit, set the correct voltage for your area
with the voltage selector on the rear of the unit.
To know the locations of Buttons and controls
LINE VOLTS
220V
CD OPTICAL
DIGITAL
OUTPUT
Please refer to page 30, 31 and 32 for location of the buttons and
controls on your unit. The buttons and controls mentioned in the
steps in this manual have been inserted with numbers i.e 1, 2 (for
unit) or 1, 2 ( for remocon) for your easy reference.
110V
VIDEO
OUT
STEREO RECEIVER
MODEL NO. MX - J777V
UNIT NO. MX-J777V
ANTENNA
AC 110/127/220
/ 230 - 240V
50/60Hz 85W
AM LOOP
AM EXT
FM
VOLTAGE
SELECTOR
110V
220V
FM
(75 )
230V
-240V
127V
AUX
RIGHT
LEFT
IN
SUB WOOFER
OUT
OUT
230V
-240V
SPEAKERS
RIGHT
LEFT
CAUTION:
SPEAKER IMPEDANCE
6 ~ 16
RIGHT
LEFT
REAR
CENTER
127V
Voltage mark
Use a screwdriver to rotate the voltage selector so the voltage number
the voltage mark is pointing at is the same as the voltage where you
are plugging in the unit.
6
EN6-17;MX-J777V/PM6
6
7/8/99, 9:16 AM
English
Common Operations
Setting the Clock
Setting the AM Tuner Interval Spacing
Before operating the unit any further, first set the clock built in this
unit.
Some countries space AM stations 9 kHz apart, and some countries
use 10 kHz spacing.
1
On the unit ONLY:
PANEL
OPEN / CLOSE
Press PANEL OPEN/CLOSE 5.
You can only change the AM tuner interval spacing while tuning
into an AM station.
The unit is turned on and the Powered Rolling Panel
opens automatically.
2
Press FM/AM u while holding down 7
z.
• Each time you press the button, the AM tuner interval spacing
alternates between 9 kHz and 10 kHz.
TIMER
/CLOCK
Press TIMER/CLOCK h.
The hour digits start flashing on the display.
3
FM / AM
PRESET
Press 4 ; or ¢ ; to adjust the
hour, then press SET k.
PREV
NEXT
NOTE: Preset memory lost when the interval spacing is changed.
Turning On the Power and Selecting the Sources
SEA CONTROL
• If you want to correct the hour after pressing SET
k, press CANCEL /. The hour digits start
flashing again.
4
Press 4 ; or ¢ ; to adjust the
minute, then press SET k.
SET
When you press the play button for a particular source (FM/AM,
CD 6, AUX, and TAPE 2 3 ), the unit turns on, and the Powered
Rolling Panel opens automatically (and the unit starts playing the
source if it is ready — COMPU PLAY CONTROL).
PRESET
PREV
NEXT
To listen to the FM/AM broadcasts, press FM/AM u, ¡. (See
page 17.)
To play back CDs, press CD 6 y, _. (See pages 10 – 12.)
To play back tapes, press TAPE 2 3 7, =. (See page 18.)
To select the external equipment as the source, press AUX
p, !.
SEA CONTROL
SET
To adjust the clock again
If you have adjusted the clock before, you need to press TIMER/
CLOCK h repeatedly until the clock setting mode is selected.
• Each time you press the button, the timer/clock setting modes
change as follows:
DAILY
Cancelled
ON TIME
Clock
setting
FM / AM
CD
TAPE
AUX
2, @
To turn on the unit without playing, press
so that the STANDBY lamp goes off.
REC
STANDBY
ON TIME
(The hour digits start flashing.)
The Powered Rolling Panel opens automatically.
If there is a power failure
To turn off the unit (on standby), press
2, @
again so that the STANDBY lamp lights up.
The Powered Rolling Panel also closes.
A little power is always consumed even while the unit is
on standby.
The clock loses the setting and is reset to “0:00.” You need to set
the clock again.
STANDBY
To switch off the power supply completely, unplug the AC power
cord from the AC outlet.
When you unplug the AC power cord or if a
power failure occurs
The clock is reset to “0:00” right away, while the tuner preset stations
(see page 17) will be erased in a few days.
7
EN6-17;MX-J777V/PM6
7
Continued
7/8/99, 9:16 AM
English
Adjusting the Volume
Reinforcing the Bass Sound
You can adjust the volume level only while the unit is turned on.
The Signal Adaptive Bass function provided for this unit can enhance
the bass sound while listening to any source at low volume.
You can use this effect only for playback.
Turn VOLUME t clockwise to increase the
volume or counterclockwise to decrease it.
VOLUME
When using the remote control, press
VOLUME + ™ to increase the volume or press
VOLUME – ™ to decrease it.
+
To turn on the function, press S. A. BASS m
repeatedly until “SA-BASS1” or “SA-BASS2” appears
on the display.
–
S. A. BASS
The S. A. BASS lamp (the button itself) also lights up.
• Each time you press the button, the Signal Adaptive Bass level
applied to the playback sound changes as follows:
For private listening
SA-BASS1
Connect a pair of headphones to the PHONES jack 6. No sound
comes out of the speakers. Be sure to turn down the volume before
connecting or putting on headphones.
SA-BASS2
OFF
(Cancelled)
When you select “SA-BASS2,” the bass sound level is enhanced
much more than when you select “SA-BASS1.”
• While playing back some sources, the level difference between
“SA-BASS1” and “SA-BASS2” may not be distinct.
DO NOT turn off (on standby) the unit with the
volume set to an extremely high level; otherwise,
a sudden blast of sound can damage your hearing,
speakers and/or headphones when you turn on
the unit or start playing any source the next time.
REMEMBER you cannot adjust the volume level
while the unit is on standby.
To turn off the function, press the button repeatedly until “OFF”
appears on the display.
To turn down the volume level temporarily
Press FADE MUTING ~ on the remote control.
The volume level gradually decreases to “0.”
If you want to check the Signal Adaptive Bass
level currently selected
FADE
MUTING
While the S. A. BASS lamp is lit, press S. A. BASS once so that the
current level appears for a while.
To restore the sound, press the button again.
Selecting the Sound Modes
You can select one of the 6 preset sound modes (3 surround modes
and 3 SEA — Sound Effect Amplifier — modes). The sound modes
can be applied only to playback sounds, and cannot be used for
recording.
Adjusting the Front Speaker Output Balance
If the sounds you hear from the front right and left speakers are
unequal, you can adjust the speaker output balance.
To select the sound modes, press SOUND MODE ,,
2 until the sound mode you want appears on the display.
The SOUND MODE indicator also lights up on the display.
SOUND
MODE
On the remote control ONLY:
1
2
Press and hold SHIFT 9 button.
• Each time you press the button, the sound modes change as
follows:
Press BALANCE L/R button.
• Press BALANCE L decreases the right channel
output.
• Press BALANCE R decreases the left channel
output.
3
SHIFT
D.CLUB
HALL
STADIUM
POP
OFF
(Cancelled)
CLASSIC
Release SHIFT 9 button.
MANUAL3
MANUAL2
8
EN6-17;MX-J777V/PM6
8
ROCK
(Dance CLUB)
L BALANCE R
MANUAL1
Continued
7/8/99, 9:16 AM
English
2
Surround modes *:
D.CLUB:
HALL:
STADIUM:
Increases resonance and bass.
Adds depth and brilliance to the sound.
Adds clarity and spreads the sound, like in an
outdoor stadium.
SEA modes:
ROCK:
POP:
CLASSIC:
Adjust the SEA pattern.
PRESET
1) Press 4 ; or ¢ ; to select the frequency
range to adjust (LOW, MID, HIGH).
2) Press 1 x or ¡ x to adjust the level (–3
to +3) of the selected frequency range.
3) Repeat steps 1) and 2) to adjust the level of the
other frequency ranges.
Boosts low and high frequency. Good for acoustic
music.
Good for vocal music.
Good for classical music.
3
Press SEA CONTROL k again.
NEXT
PREV
TUNING
SEA CONTROL
SET
Manual modes:
MANUAL1/2/3: Your individual mode stored in memory. See
“Creating Your Own Sound Mode — Manual
Mode.”
OFF:
Cancels the sound mode.
* Surround elements are added to the SEA elements to create a
being-there feeling in your room.
When one of these modes is selected, the SOUND MODE
indicator lights up as —
SOUND MODE
4
Press 4 ; or ¢ ; to select one of the
MANUAL 1, 2 and 3 modes into which you want to
store the SEA pattern.
5
Press SEA CONTROL k again.
While one of the SEA modes including manual modes (SEA elements
without surround elements) is selected,
it lights up as —
SEA CONTROL
SET
SOUND MODE
SOUND MODE
Creating Your Own Sound Mode — Manual Mode
The SOUND MODE indicator also lights up.
The SEA pattern you have created are stored into the MANUAL
mode selected in the above step.
You can change SEA pattern to suit your preference. These changed
setting can be stored in the MANUAL 1, 2, and 3 modes.
• There is a time limit in doing the following steps. If the setting is
cancelled before you finish, start from step 1 again.
• If you want to add the surround elements in your SEA pattern,
select one of the surround modes (D.CLUB, HALL, or
STADIUM) before starting the procedure below.
To use your own sound mode
select MANUAL 1, 2 or 3 mode when using the sound modes. See
"Selecting the Sound Modes".
On the unit ONLY :
1
Press and hold SEA CONTROL k until “SEA
CONT” appears on the display.
SEA CONTROL
SET
Current level appears.
9
EN6-17;MX-J777V/PM6
9
7/8/99, 9:16 AM
Placing CDs
Playing Back the Entire Discs — Continuous Play
1
You can play CDs continuously.
Press 0 e for the disc tray (CD 1 to 3)
you want to load a CD onto.
The unit automatically turns on and the disc tray
comes out. The Powered Rolling Panel also opens
automatically.
2
Place a disc correctly on the circle of the disc tray,
with its label side up.
1
Place CDs.
2
Press one of the disc number buttons
(CD 1, CD 2, and CD 3) r, 1 for the
disc you want to play.
CD play starts from the first track of the selected
disc.
CD3
CD2
CD1
Tracks of the currently playing disc
1
CORRECT
1
5
9
13
INCORRECT
Track number
• When using a CD single (8 cm), place it on the inner circle of
the disc tray.
3
3
2 3 4
6 7 8
10 11 12
14
Elapsed playing time
• Pressing CD 6 y, _ instead of the disc number buttons
starts playing back if a CD is in the trays.
Press the same 0 e you have pressed
in step 1.
To stop during play, press 7
The disc tray closes, and the corresponding disc
number indicator (CD 1 to CD 3) lights up on the
display.
4
2
z, +.
To remove the disc, press 0 e for the corresponding disc tray.
Repeat steps 1 to 3 to place other CDs.
CD playback sequence
When 3 CDs are loaded on the disc trays, they are played in one of
the following sequences.
• When CD 1 is pressed : CD 1 ] CD 2 ] CD 3 (then stops)
• When CD 2 is pressed : CD 2 ] CD 3 ] CD 1 (then stops)
• When CD 3 is pressed : CD 3 ] CD 1 ] CD 2 (then stops)
* When only 2 CDs are loaded, they are played in the same order,
but the disc tray without a CD is skipped.
When placing more than one CD continuously
When you press 0 e for the next tray you want to place another
CD onto, the first disc tray automatically closes and then the next
tray comes out.
NOTE: When placing another CD, wait until current CD
playing or stop playing.
Basic CD Operations
While playing a CD, you can do the following operations.
About the disc indicators
Each disc indicator corresponds to the disc tray of the same number.
To exchange CDs during playback of another
Disc number
1
2
Press 0 e corresponding to a CD, not playing or selected currently,
to eject and exchange the CD.
If you exchange CDs during play, the current play will not stop
until all CDs you have exchanged are played.
3
Disc indicator
Disc marker
To stop play for a moment
Press CD 6 y, _.
While pausing, the elapsed playing time flashes on
the display.
• The disc marker lights up for the disc number you have selected.
• The disc indicator flashes while the corresponding CD is being
played.
• The disc indicator goes off when the unit has detected that there
is no CD on the corresponding disc tray.
To resume play, press CD 6 y, _ again.
10
EN6-17;MX-J777V/PM6
10
CD
Continued
7/8/99, 9:16 AM
English
Playing Back Audio CDs
English
To locate a particular point in a track
• Each time you press the button, CD play mode changes as
follows:
TUNING
During play, press and hold 1 x or ¡ x.
• 1: Fast reverses the disc.
• ¡: Fast forwards the disc.
When using the remote control, press and hold
1 / 4 0 or ¢ / ¡ (.
Continuous Play
3
To go to another track
Press 4 ; or ¢ ; repeatedly before or during
playback.
• 4: Goes back to the beginning of the current
or previous tracks.
• ¢: Skips to the beginning of the next or
succeeding tracks.
When using the remote control, press 1 / 4 0
or ¢ / ¡ ( during or before playing.
PRESET
NEXT
PREV
1
4
Pressing the number button(s) & before or during play allows you
to start playing the track number you want.
3 STEREO
CENTER
LEVEL
+
Select a track from the CD selected in the above
step.
On the unit:
SEA CONTROL
SET
TEST TONE
CENTER MODE
PRO LOGIC
3 STEREO
TEST TONE
On the remote control:
–
REAR
LEVEL
+
Press the number buttons &.
• For how to use the number buttons,
see “To go to another track directly
using the number buttons” described
to the left.
DELAY TIME
L BALANCE R
PROGRAM
5
• To use Repeat play (see page 12) for Program play, press REPEAT
n after starting Program play.
6
Load discs.
+
CENTER MODE
–
REAR
LEVEL
+
DELAY TIME
2
3
13
Program other tracks you want.
Press CD 6 y, _.
The tracks are played in the order you have programmed.
To stop during play, press 7
z, +.
PROGRAM
/ RANDOM
Press PROGRAM/RANDOM v button
repeatedly until “PROGRAM”
appears on the display.
2
CENTER
LEVEL
• To program tracks from the same disc, repeat step 4.
• To program tracks from a different disc, repeat steps 3 and 4.
• If the current playing source is not the CD player, press CD
6 y, _, then 7
z, + before going to the next step.
1
–
L BALANCE R
1
You can arrange the order in which the tracks play before you start
playing. You can program up to 32 tracks.
2
3
Program step number
Programming the Playing Order of the Tracks —
Program Play
1
2
Press 4 ; or ¢ ; to select the track number, then press
SET k.
PRESET
To go to another track directly using the number buttons
–
CD1
PROGRAM
You can change the tracks continuously.
PRO LOGIC
CD2
Track number
If you press and hold 4 / ¢ ; (or 1 /
4 0 or ¢ / ¡ ( before playing)
For track number 5, press 5.
For track number 15, press +10,
then 5.
For track number 20, press +10,
then 10.
For track number 32, press +10,
+10, +10 then 2.
CD3
Press one of the disc number buttons
(CD 1, CD 2, and CD 3) r, 1 to
select the disc number you want to
play.
Disc number
Ex.:
Random Play
Program Play
To exit from Program play mode, press PROGRAM/
RANDOM v repeatedly again before or after play so that the unit
enters another play mode. (The program you have made is stored in
memory until you erase the program.)
3
PROGRAM
• If a program has been stored in memory, the program is called
up.
11
EN6-17;MX-J777V/PM6
11
Continued
7/8/99, 9:16 AM
To exit from Random play mode, press PROGRAM/RANDOM
v repeatedly again before or after play so that the unit enters another
play mode.
Before playing, you can check the program contents by pressing
1 / 4 0 or ¢ / ¡ ( on the remote control.
• ¢ / ¡: Shows the programmed tracks in the programed order.
• 1 / 4: Shows them in the reverse order.
Even if you press 4 ; (or 1 / 4 0 on
the remote control)
To modify the program
Before play, you can erase the programmed tracks
shown on the display by pressing CANCEL /.
• Each time you press the button, the programmed track
shown on the display is erased from the program.
DEMO
CANCEL
You cannot go back to the previous tracks during Random play.
• If you press ¢ ; (or ¢ / ¡ ( on the remote control), you
can go to next random tracks.
• RANDOM PLAY starts playing from the current tray and then
subsequently to the next tray when all the tracks from the current
tray are finished.
To add tracks in the program before play, simply select the
track numbers you want to add by following step 4 of the programming procedure on page 11.
To erase the entire program before or after play, press
7
z, +.
“PROGRAM” appears on the display.
• Ejecting a CD will also erase the track numbers programmed
from the ejected CD.
Repeating Tracks or CDs — Repeat Play
You can have all the CDs, the program or the individual track
currently playing repeat as many times as you like.
REPEAT
To repeat play, press REPEAT n during or before
playing. To use Repeat play for Program play and
Random play, press the button after starting playback.
• Each time you press the button, Repeat play mode changes as
follows, and the following indicator lights up on the display:
If you try to program a 33rd step
“FULL” will appear on the display.
REPEAT ALL
Cancelled
REPEAT ALL:
You have tried to program a track from an empty tray, or a track
number that does not exist on the CD (for example, selecting track
14 on a CD that only has 12 tracks). Such entries are ignored.
Repeats all the tracks on all the CDs
(continuously or at random), or all the tracks in
the program.
REPEAT 1CD*: Repeats all the tracks on one CD.
REPEAT 1**:
Repeats one track on one CD.
* REPEAT 1CD is not used for Program play and Random play.
**REPEAT 1 is not used for Random play.
Playing at Random — Random Play
The tracks of all loaded CDs will play at random.
• To use Repeat play for Random play, press REPEAT n after
starting Random play.
To cancel Repeat play, press REPEAT n repeatedly until the
REPEAT indicator (REPEAT ALL, REPEAT 1CD, or REPEAT 1)
goes off from the display.
• Repeat play is also cancelled when you select Program play or
Random play.
Prepare CDs.
• If the current playing source is not the CD player, press CD
z, + before going to the next step.
6 y, _, then 7
2
Press PROGRAM/RANDOM v repeatedly
until “RANDOM” appears on the display.
Prohibiting Disc Ejection — Tray Lock
PROGRAM
/ RANDOM
You can prohibit CD ejection from the unit and can lock discs.
• This operation is possible only using the buttons on the unit.
To prohibit disc ejection, press 0 e for any disc tray while
holding 7
z, +. (If there is any disc tray opened, close it first.)
“LOCKED” appears for a while, and the loaded CDs are locked.
1 2 3 4
5 6 7 8
9 10 11 12
RANDOM 13 14
• Each time you press the button, CD play mode changes as
follows:
Program Play
3
Random Play
To cancel the prohibition and unlock the CDs, press 0 e
z, +.
for any disc tray while holding 7
“UNLOCKED” appears for a while, and the loaded CDs are
unlocked.
Continuous Play
Press CD 6 y, _.
The tracks are played at random.
Random play ends when all the tracks are played
once.
CD
To stop during play, press 7
z, +.
• Random play also stops when the current disc tray is opened.
EN6-17;MX-J777V/PM6
12
REPEAT 1
(Continuous play)
If your entry is ignored
1
REPEAT 1CD
If you try to eject CDs
12
“LOCKED” appears to inform you that the Tray Lock is in use.
7/8/99, 9:16 AM
English
To check the program contents
English
Playing Back Video CDs/SVCDs
3
Selecting Video Out
Press 0 e to close the tray.
"CD CLOSE" appears on the display.
To playback images correctly on your TV, select the video out
according to your TV system, select the proper video out using the
buttons on the Unit before you play a disc.
4
1 At standby mode.
2 Press disc number r, 1 button for
more than 2 sec.
Repeat steps 1 to 3 to insert other discs onto the
other trays.
To continue putting discs onto other trays, even if a tray is open,
by pressing the 0 e button of another disc tray, the open tray
will close automatically, and the new disc will slide out.
CD3
CD2
When you place a CD onto the currently selected tray, whose disc
number shown on the CD indicator, reading of the CD starts.After
the reading is completed, the total number of tracks and total playing
time will appear, then the playing time of the first track.
CD3 ............ for NTSC exclusive TV.
CD1
CD2 ............ for Multisystem TV.
Multi detects the formula of the
disc (NTSC/PAL) automatically
and plays the image on the screen correctly.
CD1 ............ for PAL exclusive TV.
\
READING NOW
\
Total number of tracks
and playing time
Playing time of the
1st track
If you place a video CD, "VIDEO CD" will appear before the playing
time of the first track. If the video CD has the Playback Control
function,"VCD PBC" will appear.
• Select the video output mode before you play the disc.
• When you play an NTSC disc in MULTI mode on a PAL exclusive
TV, the image may be distorted. If this happens, change the mode
to PAL.
• When you play an NTSC disc in MULTI mode on a Multisystem
TV, the image may blink for a moment. This symptom is caused
by the Unit detecting the formula of the disc, not by a malfunction
of the unit.
• Only on standby mode.
To put an 8 cm CD onto a tray, insert it so that it is aligned with the
groove in the tray's center.
If a tray is open when the System switches to the standby mode, the
tray will close automatically.
Playing a Video CD
You can play video CDs either with or without the PBC function.
Placing CDs
1 Press 0 e on the CD Player you want to insert the 1
disc onto the tray.
"CD OPEN" appears on the display and the disc tray slides out.
Turn on the TV and select the video input so that
you can view the pictures from the CD player.
Refer also to the manual supplied for your TV.
2
Compu Play
Prepare a CD.
Refer to "Placing CDs" in this page.
When 0 e is pressed while the power is on standby, the power is
automatically turned on.
3
Start playback of the CD
Press CD 6 y, _ to start playback of the currently selected
CD, or press CD 1-3 r, 1 to select the disc and start play.
When you play a Video CD, "VIDEO CD" appears on the display.
When you play a Super VCD, "SVCD" appears on the display.
2 Place a CD, with its label side up, onto the tray.
ATTENTION: To avoid malfunctions when you play a CD , set
the CD in the right place at the center of the tray.
Compu Play
When CD 6 y, _ or press CD 1-3 r, 1 is pressed while the
power is on standby, the power is automatically turned on.
CORRECT
INCORRECT
To stop during play, pressed 7
z, +.
To stop play and remove the disc, press 0 e for the disc
being played.
13
EN6-17;MX-J777V/PM6
13
Continued
7/8/99, 9:16 AM
This System provides a Playback Control (PBC) function which
utilizes a procedure (menu selection) programmed in a video CD.
The playback operation procedure may differ depending on the disc
you use.
Turn on the TV and select the video input so that
you can view the pictures from the CD Player.
Refer also to the manual supplied for your TV.
2
Prepare a CD
Refer to "Placing CDs" on page 13.
3
For Menu Play, use the folowings buttons:
Start playback of the CD.
Press CD 6 y , _ to start play of the currently selected CD,
or press CD 1-3 r, 1 to select the disc and start play. "VCD
PBC" appears on the display.
On the unit:
NEXT (¢ ) ................ for viewing the unshown portion of the
menu
PREV (4 ) ................ for viewing the previously shown portion
of the menu
VCD NUMBER +, – ..... for selecting an item
SELECT (CD 6) ....... for starting playback of the selected item
7
.............................. for going back to the previous menu
4
Select the item you want to view.
On the unit:
Press VCD NUMBER + . to select larger item numbers, or
press VCD NUMBER – . to select smaller item number. Then
press CD 6 y, _ to start the disc.
On the remote control:
NEXT (¢/¡) .......... for viewing the unshown portion of the menu
PREV (1/4) .......... for viewing the previously shown portion of the menu
NUMBER BUTTONS .. for selecting and starting playback of an item
SELECT (6) ............. for starting playback of the selected item
7
.............................. for going back to the previous menu
On the remote control:
Press the number buttons & to select and play the item you
want.
To stop the track being played and return to the menu,
press 7
z, + button.
To stop Menu Play, press and hold 7
z, + for more than 2
seconds. A blue screen appears on the TV.
Basic Concept of the PBC function
The PBC(Playback Control) function allows you to enjoy menu -driven operation and high resolution still images having a resolution four
times greater than video pictures.
Menu-driven playback
High -resolution still image display
You can interact with the screen using a menu display to select and
play an entry.
You can display high-quality images four times clearer than video
pictures.
TV Screen
Concept of PBC Flow
Main menu
1. ......
2. ......
3. ......
1. Sub menu
1. Sub-sub menu
3. Sub menu
3. Sub menu
1. ......
4. ......
2. ......
5. ......
3. ......
3. ......
6. ......
2. Still Picture
Playback
1. ......
2. Still Picture
2. ......
1. ...... 4. ......
Playback
4. Moving
3. Moving
Pictures
Pictures
2. ......
3. ......
Basic flow of Menu Play Operation
A selection menu is shown when you start playing a video CD with
the PBC function. The menu shows a list of items to select. Some
disc may show moving pictures or a divided screen.
• When a list of items appears, you can select a number of the item
you want to play back.
• When moving pictures appear, you can select a moving picture
by pressing 1/4 0 / ¢/¡ ( or number buttons & while
the moving picture you want to view is being played back.
• When the menu appears after the item you have selected finishes
playing, you can select another number of the item you want to
view next.
• After playback, press 7
z, + to go back to the previous
screen. Each time you press the button, you can go back to the
previous screen one by one.
• If you want to stop Menu Play, press and hold 7
z, + for
more than 2 seconds. Some discs may return you to the menu
screen before playback.
14
EN6-17;MX-J777V/PM6
14
Continued
7/8/99, 9:16 AM
English
1
Playing Video CDs/SVCDs with PBC Function- Menu Play
English
2
Press CD 6 y, _ button to continue playback
from the last scene that you have stop.
• When a menu is shown for about 10 minutes, the screen
background automatically fades out to prevent screen burn-in
while the setting is suspended.
NOTE:
1 Resume play will not work when the CD tray has been opened.
2 It is advisable to turn off the PBC function to use resuming play
if not it will resume at PBC menu.
Playing Video CDs/SVCDs without the PBC function Continous Play
Special Plays for a Video CD
You can use the following special play modes for video CDs both
with and without PBC function. The following functions can only
be executed with the buttons on the remote control.
Even if a video CD has PBC function, you can cancel the PBC
function and play the disc without using menu screen, as if it were
without the PBC function.
1
Frame-by-Frame Playback
Turn on the TV and select the video input so that
you can view the pictures from the CD Player.
CD
Press CD 6 y, _ then ¢ ;, ( during
playback.
When you press the button first, play pauses and you
see a still picture on the TV screen. Then each time
you press the button, still pictures advance by one frame.
PRESET
During frame-by- frame playback, no sound comes
out.
NEXT
PREV
Refer also to the manual supplied for your TV.
2
Prepare a CD
REPEAT
Refer to "Placing CDs" on page 13.
3
4
Press REPEAT n on the unit to select
either "REPEAT 1 ", "REPEAT ALL "
or "REPEAT 1CD".
To resume normal playback, press CD 6 y, _ .
Viewing Operating Status
Usually, the following information of the track being played are
shown on the TV screen during playback : the disc number, the
track number, and the playing time.
Start playback of the CD.
On the unit:
Press CD 6 y or CD 1-3 r of the disc you want to play. The
selected video CD starts playback from the first track.
OR
Press the number button & of the track you want to start playing
with. The playback starts from the selected track of the currently
selected disc.
To stop during play, press 7
ON SCREEN
Press ON SCREEN.
Each time you press the button,the display of operation
status turns on and off. When the display of operation status
turns on, the following information of the track being played appear
on the TV screen briefly: MPX mode and key control.
The TV screen will show the below:
z, +.
To restore the PBC function, press REPEAT
n repeatedly until the REPEAT indicator goes out.
Then press current CD1, CD2 or CD3 r, 1 to play
VCD with PBC function.
CD3
CD2
CD1
To cancel the display of operation status, press ON SCREEN
4 "DISP. OFF" appears on the TV sceen briefly and all the
information about the track being played disappear.
Viewing the Video Intro of the Video CD
• After cancelling the PBC function, you can Continously Play of
more than one video CD with the PBC function.
• When the PBC function is cancelled, some images such as still
play pictures may not be played back.
• When change from PBC OFF to PBC ON, if press CD 6 y ,
_ PBC will still remain off.
You can view the contents of a video CD , watching first 5 seconds
of each track on the video CD. Video intro does not work with PBC.
For a video CD with PBC, cancel the PBC function referring to
above.
1
Reminder!
Disconnect your CD OPTICAL DIGITAL OUTPUT when playing
or recording a Video CD or SVCD.
2
Press V.INTRO 5 after a picture
appears on the TV screen.
15
V.INTRO
The video intro play starts and shows in sequence, the
first 5 seconds of nine tracks on the TV screen . If the CD consists
of more than 9 tracks, track above 9 will be shown after the first
9 tracks are shown.
z, +
15
EN6-17;MX-J777V/PM6
CD2
CD1
If you stop a video CD or Super Video CD (SVCD) directly, you
can continue to see the same scene that you have stop before.
During playing a VCD or SVCD, press 7
button to stop playing. (refer page 13)
CD3
Playback starts.
Resuming Play
1
Press CD 1-3 r, 1 for the disc you
want to view the video intro of.
Continued
7/8/99, 9:16 AM
English
The TV screen will show the below:
VIDEO INTRO
3
1
2
3
4
5
6
7
8
9
Press the number button & for
the video intro you want to select.
PRO LOGIC
3 STEREO
• If a highlight scene is not selected while 9 scenes are shown on
the TV, highlight scenes of the next track will appear on the display.
• When a highlight scene is selected, playback starts from the
beginning of the highlight scene, but not from the still image shown
on the display (the part shown is the last part of the highlight
scene, not its beginning)
• During the video intro or highlight play, image shown on the
display may be partially distorted, resulting from noises or
incorrect manufacturing of the disc.
TEST TONE
–
CENTER
LEVEL
+
CENTER MODE
–
REAR
LEVEL
+
DELAY TIME
Playback starts from the selected track.
To stop and cancel the video intro play,
press 7
z, +.
L BALANCE R
Playing a multiplex sound CD
Viewing the Highlights of a Video CD
This function is used for multiplex sound discs. See manuals attached
to discs for detail information.
You can view highlight scenes of the selected track on a video CD
only when PBC is off. These highlights scenes are created by dividing
the track equally into 9 portions and the beginning (5 seconds each)
of those 9 scenes are shown on the display.
Operation
By pressing the MPX l button consecutively, channel multiplexing
modes are cycled as shown below.
MPX
CD3
1
Press CD 1-3 r, 1 and the number
button & for the track you want to
view the highlights of.
CD2
CD1
NORMAL
Playback starts.
2
Press HIGHLIGHT ^ after a picture
appears on the TV screen.
Rch MONO
HIGHLIGHT
When Lch MONO or Rch MONO is selected, display indicates Lch
MONO or Rch MONO respectively.
The highlight play starts and shows in sequence, the
first 5 seconds of nine divided highlight scenes on the TV screen
for 1 minute. If a highlight scene is not selected , it will
automatically start and show highlight of the next track every
one minute.
When playing back a SVCD (Super Video CD):
STEREO 1
MONO 4
2
3
4
5
6
7
8
9
Press the number button & for
the highlight you want to select.
PRO LOGIC
3 STEREO
MONO 3
MONO 2
TEST TONE
–
CENTER
LEVEL
+
CENTER MODE
–
REAR
LEVEL
+
DELAY TIME
Note that you can hear no audible sound at the STEREO 2, MONO
3 and MONO 4 positions if no audio is recorded on STEREO 2.
Initial*: Whenever you change a CD or when you select another
CD tray, MPX will reset to the initial mode.
Playback starts from the selected scene.
To stop and cancel the highlight play,
press 7
z, + button.
MONO 1
Lch MONO: Only the left channel (instrumental parts) is played
back through both right and left speakers.
Rch MONO: Only the right channel (vocal parts) is played back
through both right and left speakers.
NORMAL: Cancel the V. Masking function.
Used for conventional stereo sources.
HIGHLIGHT
1
STEREO 2
initial*
TV screen will show the below:
3
Lch MONO
(Left channel/
right channel)
initial*
L BALANCE R
Using SUBTITLE
Effective only when playing back all SVCD (Super Video CD).
SVCD discs may have up to four subtitles which you can select to
see on the TV screen (as an optional feature). Pressing this button
cycle the subtitle as shown below:
SUBTITLE 1
SUBTITLE 2
SUBTITLE 3
OFF
(Cancelled)
16
EN6-17;MX-J777V/PM6
16
7/8/99, 9:16 AM
SUBTITLE 4
English
Listening to FM and AM Broadcasts
Tuning in a Station
SEA CONTROL
2
Press SET k.
3
Press PRESET – / + ; to select a preset
number.
SET
On the unit ONLY:
1
Press FM/AM u.
The unit automatically turns on and tunes in the
previously tuned station (either FM or AM). The
Powered Rolling Panel automatically opens.
• Each time you press the button, the band
alternates between FM and AM.
2
PRESET
NEXT
PREV
FM / AM
Press and hold TUNING – / + x for more
than 1 second.
4
SEA CONTROL
Press SET k again.
SET
TUNING
The unit starts searching for stations and stops when
a station of sufficient signal strength is tuned in.
If a program is broadcast in stereo, the STEREO indicator lights
up.
The tuned station in step 1 is stored in the preset number selected
in step 3.
• Storing a new station on a used number erases the previously
stored one.
To stop during searching, press TUNING – / + x.
When you unplug the AC power cord or if a
power failure occurs
When you press TUNING – / + x briefly and
repeatedly
The preset stations will be erased in a few days. If this happens,
preset the stations again.
The frequency changes step by step.
To change the FM reception mode
When an FM stereo broadcast is hard to receive or noisy,
press FM MODE * on the remote control so that the
MONO indicator lights up on the display. Reception
improves.
FM MODE
Tuning in a Preset Station
1
Press FM/AM u.
The unit automatically turns on and tunes in the
previously tuned station (either FM or AM). The
Powered Rolling Panel automatically opens.
• Each time you press the button, the band
alternates between FM and AM.
To restore the stereo effect, press FM MODE * again so that
the MONO indicator goes off.
In this stereo mode, you can hear stereo sounds when a program is
broadcast in stereo.
2
Presetting Stations
FM / AM
Select a preset number.
On the unit:
PRESET
Press PRESET – / + ;.
You can preset 30 FM and 15 AM stations.
In some cases, test frequencies have been already memorized for
the tuner since the factory examined the tuner preset function before
shipment. This is not a malfunction. You can preset the stations you
want into memory by following the presetting method.
• There is a time limit in doing the following steps. If the setting is
cancelled before you finish, start from step 1 again.
1
On the remote control:
Press the number buttons &.
For preset number 5, press 5.
For preset number 15, press +10, then 5.
For preset number 20, press +10, then 10.
For preset number 25, press +10, +10, then
5.
Tune in the station you want to preset.
MHz
17
17
PRO LOGIC
3 STEREO
7/8/99, 9:16 AM
TEST TONE
–
CENTER
LEVEL
+
CENTER MODE
–
REAR
LEVEL
+
DELAY TIME
L BALANCE R
• See “Tuning in a Station” above.
EN6-17;MX-J777V/PM6
NEXT
PREV
English
Playing Back Tapes
To play both sides repeatedly — Reverse Mode
You can play back type I, type II and type IV tapes without changing
any settings.
Reverse Mode works for both decks at the same time.
When it is in use, the tape automatically reverses at the end of a side
and the unit starts playing the other side of the tape, and repeats the
same process.
Playing Back a Tape
1
To use Reverse Mode, press REVERSE MODE a so REVERSE
MODE
that the Reverse Mode indicator on the display lights up
like —
Press EJECT (0) w/o for the deck you want to
use.
To cancel Reverse Mode, press the button again so that the
Reverse Mode indicator on the display lights up like —
For Deck B
When Reverse Mode is on with cassettes in both
decks A and B
After the reverse (2) side of the tape finishes playing, the tape in
the other deck starts playing.
For Deck A
2
Put a cassette in, with the exposed part of the tape
down.
Locating the Beginning of a Song — Music Scan
You can use Music Scan to locate the beginning of a song. Music
Scan searches for blank portions that usually separate recorded songs,
then plays the next song.
To find the beginning of the current song
3
Close the cassette holder gently.
If you put cassettes in both decks A and B, the last deck you
have put a cassette into is selected.
To operate the other deck, press DECK A/B g (or TAPE A 6
or TAPE B 7 on the remote control).
4
Searching stops automatically at the beginning of the current song,
and the current song starts automatically.
Press TAPE 2 3 7, =.
TAPE
The tape play starts and the tape direction
indicator (2 3 ) starts flashing slowly to indicate
the tape running direction.
• Each time you press the button, the tape direction changes.
3 : plays the front side.
2 : plays the reverse side.
To find the beginning of the next song
During play, press 1 / ¡ x (1 / 4 0 or
¢ / ¡ ( on the remote control) in the same
direction as the tape play.
The tape direction indicator of the same direction as the tape play
starts flashing slowly and quickly alternately.
When the tape plays to the end, the deck automatically stops if the
Reverse Mode is not on. (See “To play both sides repeatedly —
Reverse Mode.”)
To stop during play, press 7
Searching stops automatically at the beginning of the next song,
and the next song starts automatically.
z, +.
Music Scan works by detecting a 4-second long
blank between each song, so it will not work
well in the following cases
To operate the other deck, press DECK A/B g (or TAPE A 6
or TAPE B 7 on the remote control), then TAPE 2 3 7, =.
• No blank at the beginning of a song.
• Noise (often caused by much use or poor quality dubbing) which
fills the blank.
• Long, very soft passages or pauses in a song.
To fast wind to the left or to the right, press 1 / ¡ x
(1 / 4 0 or ¢ / ¡ ( on the remote control) while the tape
is not running.
The tape direction indicator (2 3 ) starts flashing quickly on the
display.
The use of the C-120 or thinner tape is not
recommended, since characteristic deterioration
may occur and this tape easily jams in the pinchrollers and the capstans.
To remove the cassette, press 0 EJECT w for deck A or EJECT
0 o for deck B.
18
EN18-20;MX-J777V/PM6
18
TUNING
During play, press 1 / ¡ x (1 / 4 0 or
¢ / ¡ ( on the remote control) in the opposite
direction to the tape play.
The tape direction indicator of the opposite direction to the tape
play starts flashing slowly and quickly alternately.
7/8/99, 9:13 AM
English
Using Dolby Surround
Preparing for Dolby Surround
Dolby Surround has been developed to reproduce the important
elements of the acoustic surround at home.
To listen to the sound of video software bearing the mark
DOLBY SURROUND * which includes the same encoded surround
information as found in Dolby Stereo films, the unit can provide
you with Dolby Surround decoder.
This unit features two ways to decode a Dolby Surround encoded
signal, Dolby Pro Logic and Dolby 3 Stereo.
Dolby Pro Logic can be used when the front speakers and rear
speakers are connected to this unit (regardless of the center speaker
connection).
Dolby 3 Stereo can be used when left, center, and right speakers are connected, but no rear speaker is used.
Once you have finished adjustments for Dolby Surround, you can
use the same adjustments every time you want to use each Dolby
Surround mode — Dolby Pro Logic and Dolby 3 Stereo.
On the remote control ONLY:
1
Press and hold SHIFT 9 until the
following procedure is finished.
2
Press PRO LOGIC c or 3 STEREO c
whichever you want to use.
Speaker configuration
Front
speaker
TV
Center speaker
SHIFT
3 STEREO
PRO LOGIC
The PRO LOGIC c or 3 STEREO c indicator
lights up on the display
• Each time you press the button, the indicator turns on and off.
(Respective Dolby Surround also turns on and off.)
Front
speaker
PRO LOGIC
3 STEREO
Rear
speaker
R
A
PR
RA
Rear
speaker
• When Dolby Surround is activated, the sound mode is canceled
temporarily.
You can use Dolby Pro Logic (or Dolby 3 Stereo if you want)
with this speaker configuration.
Front
speaker
TV
3
Press CENTER MODE repeatedly to
select the proper center mode.
CENTER MODE
• Each time you press the button, the center mode
changes as follows.
Front
speaker
PHANTOM
** NORMAL
WIDE
OFF
Rear
speaker
PHANTOM: Select this mode when you do not use a center
speaker. The center speaker channel signals are
output through the front speakers.
** “PHANTOM” appears only when using
Dolby Pro Logic.
NORMAL: Select this mode when the center speaker cannot
reproduce the bass better than the front speakers.
The bass portions of the center channel signals
are output through the front speakers.
WIDE:
Select this mode when the center speaker can
reproduce the bass better than the front speakers.
All signals of the center channel are output through
the center speaker.
OFF:
Select this mode when shut off the center channel
signals.
Rear
speaker
You can use Dolby Pro Logic in Center Phantom mode with
this speaker configuration.
Front
speaker
TV
Center speaker
Front
speaker
* Manufactured under license from Dolby Laboratories
Licensing Corporation. DOLBY, the double-D symbol, and
“PRO LOGIC” are trademarks of Dolby Laboratories
Licensing Corporation.
You can use Dolby 3 Stereo with this speaker configuration.
19
EN18-20;MX-J777V/PM6
19
Continued
7/8/99, 9:13 AM
ONLY FOR “PRO LOGIC”
Press DELAY TIME repeatedly to select
the proper delay time of the rear speaker
output.
Enjoying Playback with Dolby Surround
DELAY TIME
You can use the settings you have already stored in memory.
On the unit:
• Each time you press the button, the delay time changes as
follows.
DELAY1
DELAY2
DELAY4
DELAY3
1
Press TEST TONE to check the speaker
output balance.
(Center speaker)
SURROUND
RIGHT
(Rear speakers)
(Right front speaker)
3 STEREO
R
A
PR
RA
• Each time you press the button, the Dolby Surround modes
changes as follows:
PRO LOGIC
TEST TONE
7
• When Dolby Surround is activated, the sound mode is
cancelled temporarily.
2
On the remote control:
If necessary, adjust the speaker output balance so
that the output level from center and rear speakers
is almost equal to that from the front speakers:
–
CENTER
LEVEL
–
REAR
LEVEL
Press TEST TONE again to stop the test
tone.
9
Release SHIFT 9.
Press and hold SHIFT 9 until the following
procedure is finished.
SHIFT
2
Press PRO LOGIC or 3 STEREO
c whichever you want to use.
3 STEREO
• When Dolby Surround is activated, the sound mode is
cancelled temporarily.
3
+
Select and play a sound source encoded with Dolby
DOLBY SURROUND
Surround. (with the
mark).
To cancel the Dolby Surround mode, press PRO LOGIC
or 3 STEREO (the same button you have pressed to activate Dolby
Surround in step 1 above) so that neither PRO LOGIC nor 3 STEREO
indicator remains lit on the display.
TEST TONE
* Manufactured under license from Dolby Laboratories
Licensing Corporation. DOLBY, the double-D symbol, and
“PRO LOGIC” are trademarks of Dolby Laboratories
Licensing Corporation.
20
EN18-20;MX-J777V/PM6
20
PRO LOGIC
The PRO LOGIC or 3 STEREO indicator
lights up on the display.
• You cannot adjust the right and left speaker
output levels separately.
• You cannot adjust the rear speaker output level
when using Dolby 3 Stereo.
8
1
+
LEVEL – / +.
• You cannot adjust the center speaker output level
when you select “PHANTOM” or “OFF” for the center mode.
To adjust the rear speaker output level
(from –10 to +10), press REAR LEVEL – / +.
Select and play a sound source encoded with Dolby
DOLBY SURROUND
Surround. (with the
mark).
To cancel the Dolby Surround mode, press PRO LOGIC /
3 STEREO repeatedly until neither PRO LOGIC nor
3 STEREO indicator remains lit on the display.
Press VOLUME + / – ™ to adjust the
test tone volume to a proper level.
To adjust the center speaker output
level (from –10 to +10), press CENTER
3 STEREO
Cancelled
* “CENTER” does not appear when selecting “PHANTOM”
or “OFF” for the center mode, and no test tone comes out of
the center speaker.
6
PRO LOGIC
/ 3 STEREO
PRO LOGIC
A test tone comes out of the speakers in the following
order:
LEFT
CENTER *
(Left front speaker)
Press PRO LOGIC/3 STEREO c button to
select the Dolby Surround mode you want.
The PRO LOGIC or 3 STEREO indicator lights up
on the display.
DELAY1: Select this when the distance from you to your rear
(15 m Sec) speakers is greater than that to the front speakers.
DELAY2: Select this when the distance from you to your rear
(20 m Sec) speakers is almost equal to that to the front speakers.
DELAY3: Select this when the distance from you to your rear
(25 m Sec) speakers is less than that to the front speakers.
DELAY4: Select this when the distance from you to your rear
(30 m Sec) speakers is much less than that to the front speakers.
5
English
4
7/8/99, 9:13 AM
English
Recording
IMPORTANT:
Recording Tapes on Deck B
• It may be unlawful to record or play back copyrighted
material without the consent of the copyright owner.
• The recording level is automatically set correctly, so it is not
affected by the VOLUME control. Thus, during recording you
can adjust the sound you are actually listening to without affecting
the recording level.
• While recording, you can hear sound modes and/or the Signal
Adaptive Bass effect through the speaker or headphones.
However, the sound is recorded without these effect (see page
8).
• If recording you have made have excesssive noise or static, the
unit may be too close to a TV. Increase the distance between the
TV and the unit.
• You can use type I and II tapes for recording.
To protect your recording
Cassettes have two small tabs on
the back to protect unexpected
erasure or re-recording.
To protect your recording, remove
these tabs.
To re-record on a protected tape, cover the holes with adhesive tape.
When using type II tape, be careful not to cover the holes used to
detect the tape type.
1
Press EJECT 0 o for the deck B.
2
Put in a recordable cassette, with the exposed part
of the tape down.
3
Close the cassette holder gently.
4
Check the tape direction of deck B.
• If the tape direction is not correct, press TAPE 2 3 7, =
twice then 7
z, + to change the tape direction.
5
To keep the best recording and playback sound quality
Start playing the source — FM, AM*, CD player,
deck A or auxiliary equipment connected to AUX
jacks.
• When the source is CD, you can also use CD Direct Recording
(see page 22) and Auto Edit Recording (see page 23).
• When the source is deck A, you can also use the dubbing
method. (See “Dubbing Tapes” on page 22.)
If the heads, capstant, and pinch rollers of the cassette decks become
dirty, the following will occur:
• Impaired sound quality
• Discontinuous sound
• Fading
• Incomplete erasure
• Difficulty in recording
* See “To record an AM station — Beat Cut” on page 22.
6
To clean the heads, capstants and pinch rollers
Use a cotton swab moistened with alcohol.
Start recording.
On the unit:
Press REC START/STOP s.
REC
START/STOP
The
indicator lights up on the display and
recording starts.
Pinch rollers
Capstans
On the remote control:
1) Press REC PAUSE 8.
The
indicator starts flashing on the display.
2) Press TAPE 2 3 = .
The
indicator stops flashing and remains
lit, and recording starts.
REC PAUSE
To stop during recording, press REC START/STOP s again
(or 7
+ on the remote control).
Heads
To demagnetize the heads
To stop recording temporarily (except when the
playback source is deck A), press REC PAUSE 8
on the
remote control.
To resume recording, press TAPE 2 3 7, =.
Turn off the unit, and use a head demagnetizer (available at
electronics and record shops).
REC PAUSE
To remove the cassette, press EJECT 0 o for deck B.
21
EN21-25;MX-J777V/PM6
21
Continued
7/8/99, 9:14 AM
CD Direct Recording
REVERSE
MODE
Press REVERSE MODE a so that the Reverse Mode
indicator lights up as —
Everything on the CD goes onto the tape in the order it is on the CD,
or according to the order you have made for Program play.
• When using the Reverse Mode for recording, start recording in
the forward (3) direction first. Otherwise, recording will stop
when recording is done only on one side (reverse) of the tape.
To cancel Reverse Mode, press the button again so that the
Reverse Mode indicator lights up as —
To record an AM station — Beat Cut
While recording an AM broadcast, beats may be heard (which are
never heard when listening to the broadcast without recording it).
If this occurs, press PROGRAM/RANDOM v PROGRAM
/ RANDOM
repeatedly, while recording, until the beats are reduced.
• Each time you press the button, the display changes
to show the following:
CUT1
CUT2
English
To record on both sides — Reverse Mode
1
Put a recordable cassette into deck B.
2
Place a disc correctly on the circle of the disc tray,
with its label side up.
3
Press one of the disc number buttons
(CD 1 to CD 3) r, 1 to select the
disc, then 7 z, +.
4
CUT3
CD3
CD2
CD1
CD REC START
Press CD REC START f.
“CD REC” appears, and the
indicator
lights up on the display.
Deck B starts recording and the CD player starts playing.
When the recording is done, “CD REC FINISHED” appears on
the display, and the CD player and deck B stop.
Dubbing Tapes
It is preferable that the tape type (type I or II) you record from be
the same as the tape type you record onto when dubbing tapes.
To stop during CD Direct Recording, press 7
1
Press TAPE 2 3 7, =, then 7
To remove the cassette, press EJECT 0 o for deck B.
2
Put the source cassette in deck A, and a recordable
cassette into deck B.
z, +.
To record on both sides — Reverse Mode
Press REVERSE MODE a so that the Reverse Mode indicator
lights up as —
• Put the cassettes in both decks so that the tapes will run in the
forward (3) direction.
3
• When using the Reverse Mode for CD Direct Recording, start
recording in the forward (3) direction first. When the tape reaches
its end while recording a song in the forward direction (3), the
last song will be recorded at the beginning of the reverse side
(2).
If you start recording on the reverse side (2), recording will stop
when recording is done only on one side (reverse) of the tape.
DUBBING
Press DUBBING d.
Dubbing starts.
To stop during dubbing, press 7
z, +.
z, +.
To remove the cassette, press 0 w EJECT for deck A and
EJECT 0 o for deck B.
To cancel Reverse Mode, press the button again so that the
Reverse Mode indicator lights up as —
To record on both sides — Reverse Mode
Press REVERSE MODE a so that the Reverse Mode indicator
lights up as —
To cancel Reverse Mode, press the button again so that the
Reverse Mode indicator lights up as —
22
EN21-25;MX-J777V/PM6
22
Continued
7/8/99, 9:14 AM
English
Auto Edit Recording
4
By using Auto Edit Recording, you can record the CD tracks to fit
the tape. Auto Edit Recording makes a program by selecting the CD
tracks in numerical order. However, to prevent the end of the last
track on the front side from being cut off, the last track is selected so
as to fit on the remaining tape length.
Put a recordable cassette of appropriate length into
deck B.
5
Press REVERSE MODE a so that the Reverse Mode
indicator lights up as
.
• Without turning on the Reverse Mode (
), recording will
stop when the front side of the tape is recorded.
On the unit ONLY:
1
6
Place a disc correctly on the circle of the disc tray,
with its label side up.
• If the current playing source is not the CD player, press CD
6 y, _, then 7
z, + before going to the next step.
2
EDIT
Press EDIT b.
1
2
Press CD REC START f.
The
indicator lights up on the display.
Deck B starts recording then, about 10 second later, the CD player
starts playing.
When the recording is done, “CD REC FINISHED” appears on
the display, and the CD player and deck B stop.
• If a tape has not been rewind, deck B will rewind the tape
before it starts recording.
• A 10-second blank portion is automatically created at the
beginning of each side of the tape.
3
To stop during Auto Edit Recording
1
2
Press 7
z, + or REC START/STOP s so that a 4-second
blank portion is created on the recorded tape. (Remember a 4-second
blank is important when using Music Scan — see page 18.)
3
To cancel Auto Edit Recording
Note: Auto edit can only be applied for current playing CD.
• Press PROGRAM/RANDOM v before or after play. (The unit
enters Program, Random or Continuous Play mode.)
OR
• Press 0 e for the disc you have selected.
To change the tape length manually
To remove the cassette, press EJECT 0 o for deck B.
The optimum tape length for the disc appears.
If the tape length selected is not satisfactory, you can change the
tape length by pressing 4 ; or ¢ ;.
You can select the tape length among the following — 40, 46, 50,
54, 60, 64, 70, 74, 80, 84 and 90.
3
Press SET k.
1
2
3
8
9 10 11 12
13 14
Tracks to be recorded on
the reverse side (SIDE-B)
appear.
• Each time you press the button, the tracks to be recorded on
the front side (SIDE-A) and on the reverse side (SIDE-B)
alternate.
23
EN21-25;MX-J777V/PM6
23
7/8/99, 9:14 AM
You can enjoy singing along and microphone mixing by using two
microphones.
• The MIC LEVEL 8 control adjustment is valid for both
microphone connected the MIC 1 9 and MIC 2 9 jacks.
If howling or squealing (feedback) occurs while
using the microphone(s)
Take the following actions to prevent these noises.
• Adjust the MIC LEVEL 8 and VOLUME t controls.
• Avoid pointing the microphone(s) towards the speakers.
• When two microphones are connected, turn off the On/Off switch
on the unused microphone.
IMPORTANT:
• Always set the MIC LEVEL 8 to MIN when connecting or
disconnecting the microphone.
• When you do not use the microphone, keep the microphones
unconnected.
If you use the following sources as the playing
source for Vocal Masking, you cannot get the
satisfactory results
Singing Along
• Radio programs — a radio signal is not as reliable as the signals
coming from a tape or CD.
• Monaural sources.
• Poorly dubbed tapes.
• Sources recorded with duets, strong echo, a chorus, or only a few
instruments.
• Poorly prerecorded tape or CD.
• Multiplex Karaoke CD.
Vocal Masking
Vocal Masking reduces the lead vocal of the playing source, and
allows you to replace it by singing into the microphones as the music
plays.
On the unit ONLY:
1
MIC LEVEL
Rotate the MIC LEVEL 8 to MIN.
Singing Along with Multiplex Karaoke Discs (MPX)
MIN
MAX
2
Connect the microphone(s) (not supplied) by
plugging it into the MIC 1 9 and/or MIC 2 9 jack.
3
Press VOCAL MASKING 3 on the remote
control.
If the source you are going to play is a multiplex karaoke disc, you
can use the following two functions by using the buttons on the unit
- Multiplex sound.
VOCAL
MASKING
What is Multiplex Sound?
In a multiplex karaoke disc, the instrumental parts are recorded on
the left channel. With this system, you can select the playback sound
with your voice through the microphone.
The ( ) indicator also lights up on the display.
4
Start playing the source — CD, tape, or other
connected component.
On the unit ONLY:
Rotate the MIC LEVEL 8 and VOLUME t
controls as you sing into the
+
microphone(s).
MIN
1
Turn down MIC LEVEL 8 and VOLUME t
fully.
–
To apply an echo to your voice
Press ECHO $ on the remote control so that the echo ( ) indicator
lights up on the display.
Each time you press the button, the echo indicator turns on (ECHO
ON) and off (ECHO OFF).
• By pressing REC START/STOP s, you can record your singing
along if you want. (For more details, see page 21.)
24
MIC
2
2
Connect the microphone (not supplied) into the MIC
1 9 and/or MIC 2 9 jack on the front panel.
3
Play the source - CD.
4
Press MPX l to select the output
sound.
MPX
Please refer to page 16.
24
EN21-25;MX-J777V/PM6
MAX
1
MAX
VOLUME
• By pressing REC START/STOP s, you
can record your singing along if you
want. (For more details, see page 21.)
MIC LEVEL
MIN
MIC LEVEL
5
English
Using the Microphones
Continued
7/8/99, 9:14 AM
English
5
6
Turn MIC LEVEL 8 and VOLUME t to adjust the
microphone level and the speaker output level.
Microphone mixing
Sing into the microphone.
On the unit ONLY:
To apply echo to your voice, see " To apply an echo to your
voice" in this page.
To adjust the music key, see " Adjust the Music Key Control"
in this page.
To record your singing along, see "Microphone Mixing" in
this page.
When finish singing
restore the stereo effect by pressing MPX until "NORMAL" appears
on the display.
Follow the steps in "Singing Along with the
Multiplex Karaoke Discs" in page 24.
Follow the steps in "Recording Tapes on Deck B"
On page 22 to record your singing.
2
Connect the microphone(s) (not supplied) by
plugging it into the MIC 1 9 and/or MIC 2 9 jack.
3
Start playing the source — CD, tape or other
connected component.
4
Rotate the MIC LEVEL 8 and VOLUME t
controls as you sing into the
microphone(s).
You can add echo to your voice.
MIN
Press ECHO $ button on the remote
control.
Press KEY CONTROL I - / i ) to
adjust the music key.
MIC LEVEL
MIN
MAX
1 Rotate the MIC LEVEL 8 to MIN.
2 Connect the microphone(s) (not supplied)
by plugging it into the MIC 1 9 and/or
MIC 2 9 jack.
3 Press CD 6 y, _, then 7
z, +.
No background sound will be heard.
ECHO
KEY CONTROL
To lower the key, press KEY CONTROL I -.
To raise the key, press KEY CONTROL i ).
To cancel the key adjustment, press KEY CONTROL I - or
i ) until "KEY 0" appears on the display
Adjust the music key each time you sing along
a song with playing CD
• Once the CD play is stopped, the key level returns to key 0.
• When the next track is selected or the next tray is selected, the
key level also returns to key 0.
• The music key cannot be changed while recording.
• Once the source is changed, the key level returns to key 0.
• The Sound Mode will be cancelled if the Multiplex sound is
selected.
25
EN21-25;MX-J777V/PM6
MAX
Without any background sound, you can use your microphone(s),
and record it if you want.
Adjust the Music Key Control (for CD play only)
1
MIC LEVEL
25
VOLUME
+
–
4 Rotate the MIC LEVEL 8 and VOLUME t controls as you
sing or speak into the microphone(s).
• By pressing REC START/STOP s, you can record your
singing along if you want. (For more details, see page 21.)
To apply an echo to your voice
1
Rotate the MIC LEVEL 8 to MIN.
To use microphone only
You can adjust the music key by using the remote control.
2
1
• By pressing REC START/STOP s, you can record your
singing along if you want. (For more details, see page 21.)
Recording Your Singing
1
When you sing along with CDs, follow the procedure below:
7/8/99, 9:14 AM
3
There are three timers available — Recording Timer, Daily Timer,
and Sleep Timer.
PRESET
Set the on-time you want the unit to
turn on.
Using Daily Timer
4
With Daily Timer, you can wake to your favourite music or radio
program.
The unit automatically turns on, set the volume level to the preset
level, and starts playing the specified source when the on-time comes
(the
indicator flashes just before the on-time, and continues
flashing while the timer is operating). Then, when the off-time comes
(“OFF” flashes just before the off-time), the unit automatically turns
off (Standby).
The timer setting remains in memory until you change it.
• There is a time limit in doing the following steps. If the setting is
cancelled before you finish, start from step 1 again.
• If you have made a mistake while setting timer, press CANCEL
/. (However, this does not always work. If CANCEL does not
work, press TIMER/CLOCK h repeatedly and start from step 1
again.)
5
TIMER
/CLOCK
Press 4 ; or ¢ ; to select the
source to play, then press SET k.
Clock
setting
REC
ON TIME
(See page 7.)
2
Press TIMER/CLOCK h again.
PRESET
NEXT
PREV
TAPE
TUNER AM
– CD – – –
SEA CONTROL
SET
TUNER FM: tunes into a specified preset FM station. = go to
step 6.
TUNER AM: tunes into a specified preset AM station.
= go to step 6.
– CD – – –: plays a disc from a specified track of a specified
disc. = go to step 6.
• Make sure there is a CD on the selected disc
number tray.
TAPE:
plays a tape in deck A or B. = go to step 7.
• Make sure that a tape is in the deck whose deck
indicator (A or B) is lit on the display.
• Make sure that the tape direction is correct.
AUX:
plays an external source. = go to step 7.
• To use this setting, the external component has
to be equipped with the timer function.
The DAILY indicator also starts flashing on the display.
• Each time you press the button, the timer setting modes change
as follows:
Cancelled
SET
• Each time you press 4 ; or ¢ ;, the source
changes as follows:
DAILY
ON TIME
SEA CONTROL
A
P
R
On the unit ONLY:
DAILY
NEXT
PREV
DAILY
AUX
Press TIMER/CLOCK h until “DAILY”
appears on the display.
SET
PRESET
Set the off-time you want the unit to
turn off (on standby).
TUNER FM
1
SEA CONTROL
1) Press 4 ; or ¢ ; to set the hour, then
press SET k.
2) Press 4 ; or ¢ ; to set the minute, then
press SET k.
The unit enters source selecting mode.
How Daily Timer actually works
NEXT
PREV
1) Press 4 ; or ¢ ; to set the hour, then
press SET k.
2) Press 4 ; or ¢ ; to set the minute, then
press SET k.
“OFF TIME” appears for 2 seconds, then the unit
enters off-time setting mode.
Before using the timers, you need to set the clock built in the unit.
(See page 7.)
TIMER
/CLOCK
“ON TIME” appears for 2 seconds, then the unit
enters on-time setting mode.
DAILY
DAILY
26
EN26-33;MX-J777V/PM6
26
English
Using the Timers
Continued
7/8/99, 9:15 AM
English
6
1) Press 4 ; or ¢ ; to select the disc
number, then press SET k.
2) Press 4 ; or ¢ ; to set the track number,
then press SET k.
The unit enters volume setting mode.
Using Recording Timer
PRESET
When selecting “– CD – – –”.
NEXT
PREV
With Recording Timer, you can make a tape of a radio broadcast
automatically.
How Recording Timer actually works
SEA CONTROL
SET
The unit automatically turns on, tunes into the specified station,
sets the volume level to “0,” and starts recording when the on-time
comes (the b indicator flashes just before the on-time, and continues
flashing while the timer is operating). Then, when the off-time comes
(“OFF” appears just before the off-time), the unit automatically turns
off (stands by).
The timer setting remains in memory until you change it.
• There is a time limit in doing the following steps. If the setting is
cancelled before you finish, start from step 1 again.
• If you have made a mistake while setting the timer, press CANCEL
/. (However, this does not always work. If CANCEL does not
work, press TIMER/CLOCK h repeatedly and start from step 1
again.)
When selecting “TUNER FM” or “TUNER AM”
Press 4 ; or ¢ ; to select the preset station number, then
press SET k.
The unit enters volume setting mode.
7
Press 4 ; or ¢ ; to set the
volume level.
PRESET
PREV
NEXT
• You can select the volume level from among
four levels. If you select “ VOL – – –,” the volume is set to the last level when the unit has been turned off.
On the unit ONLY:
DAILY
8
Press SET k to complete the Daily Timer
setting.
1
Put a recordable cassette into deck B.
2
Press TIMER/CLOCK h until “REC”
appears on the display.
SEA CONTROL
The REC indicator also starts flashing on the display.
SET
The DAILY indicator stops flashing and remains lit.
The setting you have done are shown on the display in sequence.
9
TIMER
/CLOCK
REC
STANDBY
Press
2, @ to turn off the unit
(on standby) if you have set the Daily
Timer with the unit turned on.
• Each time you press the button, the timer setting modes change
as follows:
DAILY
Cancelled
To turn on or off Daily Timer after its setting is done
1. Press TIMER/CLOCK h repeatedly until "DAILY"
appears on the display.
2. To turn off the Daily Timer, press CANCEL /.
The DAILY indicator goes off from the display.
The Daily Timer is cancelled, but the setting for the
Daily Timer remains in memory.
To turn on the Daily Timer, press SET k.
The DAILY indicator lights up on the display.
The setting you have done are shown on the display in
sequence for your confirmation.
ON TIME
Clock
setting
REC
ON TIME
(See page 7.)
TIMER
/CLOCK
3
TIMER
/CLOCK
Press TIMER/CLOCK h again.
“ON TIME” appears for 2 seconds, then the unit
enters on-time setting mode.
DEMO
CANCEL
REC
SEA CONTROL
SET
If the unit is turned on when the timer-on timer
come
REC
Daily Timer does not work.
27
EN26-33;MX-J777V/PM6
27
Continued
7/8/99, 9:15 AM
PRESET
Set the on-time you want the unit to
turn on.
PREV
1) Press 4 ; or ¢ ; to set the hour, then
press SET k.
2) Press 4 ; or ¢ ; to set the minute, then
press SET k.
“OFF TIME” appears for 2 seconds, then the unit
enters off-time setting mode.
Using Sleep Timer
NEXT
With Sleep Timer, you can fall asleep to music.
You can set Sleep Timer when the unit is turned on.
How Sleep Timer actually works
SEA CONTROL
SET
The unit automatically turns off after the specified time length passes.
PRESET
5
Set the off-time you want the unit to
turn off (on standby).
PREV
On the remote control ONLY:
NEXT
1
1) Press 4 ; or ¢ ; to set the hour, then
press SET k.
2) Press 4 ; or ¢ ; to set the minute, then
press SET k.
The unit enters preset station selecting mode.
The time length until the shut-off time appears and
the SLEEP indicator starts flashing on the display.
• Each time you press the button, the time length changes as
follows:
SEA CONTROL
SET
10
PREV
20
2
120
Wait for about 5 seconds after specifying the time
length.
To check the remaining time until the shut-off time,
press
SLEEP # once so that the remaining time until the shut-off time
appears for about 5 seconds.
To change the shut-off time, press SLEEP # repeatedly until
the desired time length appears on the display.
Press
2, @ to turn off the unit (on
standby) if necessary.
To cancel the setting, press SLEEP # repeatedly so that the
SLEEP indicator goes off.
• Sleep Timer is also cancelled when you turn off the unit.
If you want to listen to another source while
recording
Timer Priority
Press REC START/STOP s to stop recording. Without stopping it,
you cannot change the source.
Since each timer can be set separately, you may wonder what happens
if the setting for these timers overlaps.
Here are examples.
To turn on or off Recording Timer after its setting
is done
To turn on the Recording Timer, press SET k.
The REC indicator lights up on the display.
The settings you have done are shown on the display in
sequence for your confirmation.
90
The SLEEP indicator stops flashing and remains lit.
STANDBY
2. To turn off the Recording Timer, press CANCEL /.
The REC indicator goes off from the display.
The Recording Timer is cancelled, but the setting for
the Recording Timer remains in memory.
60
NEXT
Select the preset station.
1. Press TIMER/CLOCK h repeatedly until “REC”
appears on the display.
30
Cancelled
1) Press 4 ; or ¢ ; to select the band
(“TUNER FM” or “TUNER AM”), then press
SET k.
SEA CONTROL
2) Press 4 ; or ¢ ; to select a preset channel SET
number, then press SET k.
The REC indicator stops flashing and remains
lit. The settings you have done are shown on the
display in sequence.
7
SLEEP
Press SLEEP #.
PRESET
6
English
4
• Recording Timer has priority over Daily Timer and Sleep
Timer.
If Daily Timer is set to come on while Recording Timer is
operating, Daily Timer will not come on at all.
TIMER
/CLOCK
DEMO
6:00
CANCEL
6:30
7:00
7:30
Recording Timer
Daily Timer
SEA CONTROL
SET
does not work.
If Recording Timer is set to come on while Sleep Timer is
operating, Sleep Timer will not work (the SLEEP indicator does
not go off).
6:00
6:30
7:00
7:30
Recording Timer
Sleep Timer
does not work.
28
EN26-33;MX-J777V/PM6
28
7/8/99, 9:15 AM
English
Maintenance
To get the best performance of the unit, keep your discs, tapes, and mechanism clean.
Handling discs
Handling cassette tapes
• Remove the disc from its case by holding it at
the edge while pressing the center hole lightly.
• Do not touch the shiny surface of the disc,
or bend the disc.
• Put the disc back in its case after use to
prevent warping.
• If the tape is loose in its cassette, take up
the slack by inserting a pencil in one of the
reels and rotating.
• If the tape is loose, it may get stretched,
cut, or caught in the cassette.
• Be careful not to touch the tape surface.
• Be careful not to scratch the surface of the
disc when placing it back in its case.
• Avoid exposure to direct sunlight,
temperature extremes, and moisture.
• Avoid the following places to store the
tape:
— In dusty places
— In direct sunlight or heat
— In moist areas
— Near a magnet
To clean the disc
Wipe the disc with a soft cloth in a straight
line from center to edge.
DO NOT use any solvent — such as conventional
record cleaner, spray, thinner, or benzine — to
clean the disc.
Troubleshooting
If you are having a problem with your unit, check this list for a possible solution before calling for service.
If you cannot solve the problem from the hints given here, or the unit has been physically damaged, call a qualified person, such as your
dealer, for service.
Symptom
Cause
No sound is heard.
Connections are incorrect or loose.
Hard to listen to broadcasts because of
noise.
• Antennas are disconnected.
• The AM loop antenna is too close to the
unit.
• The FM antenna is not properly
extended and positioned.
The disc is scratched or dirty.
• The AC power cord is not plugged in.
• Trays are locked.
The disc is placed upside down.
Power supply from the AC power cord
has been cut off while the tape was
running.
Small tabs on the back of the cassette are
removed.
The built-in microprocessor may
malfunction due to external electrical
interference.
• The path between the remote control
unit and the remote sensor on the unit is
blocked.
• The batteries are exhausted.
The disc sound is discontinuous.
The disc tray does not open or close.
The disc does not play.
The cassette holders cannot be opened.
Impossible to record.
Operations are disabled.
Unable to operate the unit from the remote
control unit.
Action
Check all connections and make
corrections. (See pages 3 to 6.)
• Reconnect the antennas correctly and securely.
• Change the position and direction of the
AM loop antenna.
• Extend the FM antenna at the best
position.
Clean or replace the disc. (See above.)
• Plug the AC power cord.
• Unlock the trays. (See page 12.)
Place the disc with the label side up.
Turn on the unit.
Cover the holes with adhesive tape.
Unplug the AC power cord and then plug
it back in.
• Remove the obstruction.
• Replace the batteries.
29
EN26-33;MX-J777V/PM6
29
7/8/99, 9:15 AM
Remote Control
1 Disc number buttons (CD 1, CD 2,
and CD 3) (10–11, 13–16, 22–23)
Pressing one of these buttons also
turns on the unit.
1
2 SOUND MODE button (8)
2
3 VOCAL MASKING button (24) 3
4 ON SCREEN button (15)
4
5
5 V.INTRO button (15)
6
6 TAPE A button (18)
7
7 TAPE B button (18)
8 REC PAUSE button (21)
8
9 SHIFT button (8, 19–20)
9
0 1 / 4 (fast left/reverse search)
0
button (11–12, 14, 18)
- KEY CONTROL I button (25)
=
= TAPE 2 3 button (7, 18, 21–22)
~
Pressing this button also turns on the
!
unit.
~ FADE MUTING button (8)
! AUX button (5, 7)
Pressing this button also turns on the
unit.
SOUND
MODE
VOCAL
MASKING
ECHO
@
#
$
%
^
SLEEP
ON SCREEN V.INTRO HIGHTLIGHT SUBTITLE
TAPE A
TAPE B
PRO LOGIC
3 STEREO
TEST TONE
–
CENTER
LEVEL
+
CENTER MODE
–
REAR
LEVEL
+
DELAY TIME
&
REC PAUSE
SHIFT
PREV
L BALANCE R
@
#
$
%
^
&
*
(
)
_
FM MODE
*
(
) +
_
+ ¡
¡
NEXT
KEY CONTROL
+
SELECT/STILL
FADE
MUTING
–
™ ™
RM–SMXJ777U REMOTE CONTROL
(standby/on) button (7, 27–28)
SLEEP button (28)
ECHO button (24–25)
SUBTITLE button (17)
HIGHLIGHT button (16)
Number buttons (11, 14–17)
FM MODE button (17)
¢ / ¡ (forward search/fast right)
button (11–12, 14, 18)
KEY CONTROL i button (23, 25)
CD 6 button (7, 10–15, 21, 23)
Pressing this button also turns on the
unit.
7
(stop) button (7, 10–16, 18–21,
25)
FM/AM button (7, 17)
Pressing this button also turns on the
unit.
VOLUME + / – button (8)
Remote Sensor
CD3
STANDBY
COMPACT
CD2
CD 3
SUPER VIDEO
CD 2
CD1
CD 1
PLAY & EXCHANGER
VOLUME
NTSC / PAL COMPATIBILITY
+
_
PHONES
PANEL
OPEN / CLOSE
COMPACT COMPONENT SYSTEM
MIC LEVEL
MIN
SELECT
TAPE
CD
AUX
FM / AM
MAX
1
MIC
2
PLAY
REC/PLAY
AUTO REVERSE
AUTO REVERSE
EJECT
EJECT
When using the remote control, point it at the remote sensor on the front panel.
30
EN26-33;MX-J777V/PM6
30
7/8/99, 9:15 AM
English
Location of the Buttons and Controls
English
Display Window
1 2
3
4
5
SOUND MODE
PRO LOGIC
3 STEREO
1
2
REPEAT
ALL 1CD
PROGRAM
RANDOM
1
5
9
13
3
SLEEP
DAILY REC
STEREO MONO
A B REC
kHz
MHz
q
p
9
8
7
2
6
10
14
3
7
11
15
4
8
12
16
6
See pages in the parentheses for details.
Front Panel
1 Disc trays
(standby/on) button and STANDBY lamp (7, 27–
2
28)
3 Display window
4 Remote sensor
5 PANEL OPEN/CLOSE button (7)
Pressing this button also turns on the unit.
6 PHONES jack (8)
7 TAPE 2 3 button and lamp (7, 18, 23–24)
Pressing this button also turns on the unit.
8 MIC LEVEL control (24–25)
9 MIC 1 and MIC 2 jacks (24–25)
p AUX button and lamp (5, 7)
Pressing this button also turns on the unit.
q Deck A cassette holder (18)
w 0 EJECT button for deck A (18, 24)
e 0 (CD tray open/close) buttons (10, 12–13, 18, 23)
Pressing this button also turns on the unit.
r Disc number buttons and lamps (CD 1, CD 2, and CD 3)
(10–11, 13–16, 24)
Pressing this button also turns on the unit.
t VOLUME control (8, 24–25)
y CD 6 (play/pause) button and lamp (7, 10, 12–15, 23,
25, 27)
Pressing this button also turns on the unit.
u FM/AM button and lamp (7, 17)
Pressing this button also turns on the unit.
i Deck B cassette holder (18)
o EJECT 0 button for deck B (21–25)
Powered Rolling Panel
; PRESET – / + buttons (17)
4 / ¢ (reverse search/forward search) buttons
(7, 9, 11–12, 15, 23, 25, 26, 28–30)
a REVERSE MODE button (18, 23–25)
s REC START/STOP button (21–22, 24–27, 30)
d DUBBING button (24)
f CD REC START button (22–25)
g DECK A/B button (18)
h TIMER/CLOCK button (7, 26–30)
EN26-33;MX-J777V/PM6
31
j SUBTITLE button (16)
k SET button (7, 11, 17, 25–30)
SEA CONTROL button (9)
l MPX button (16, 24, 26)
/ CANCEL button (7, 12, 26–27)
DEMO button (6)
z 7 (stop) button (7, 10–13, 18, 24–25, 27)
x TUNING – / + buttons (17)
1 / ¡ (fast left/fast right) buttons (9, 11, 18)
c PRO LOGIC/3 STEREO button (19)
v PROGRAM/RANDOM button (11, 22–23)
b EDIT button (12, 25)
n REPEAT button (11–13)
m S. A. BASS (Signal Adaptive Bass) button and lamp (8)
, SOUND MODE button (8)
. – VCD NUMBER + button (14)
Display window
1 Timer indicators
• b SLEEP, REC, and DAILY indicators
2 Surround mode indicators
• PRO LOGIC and 3 STEREO indicators
3 Audio level indicator
SEA (Sound Effect Amplifier) pattern indicator
4 SOUND MODE indicator
5 Disc indicators
6 CD track number indicators
7 CD play mode indicators
• REPEAT (ALL/1CD/1), PROGRAM and RANDOM
indicators
8 Main display
• Shows the source name, frequency, etc.
9 Echo (
) indicators
p Tape operation indicators
• A/B (operating deck),
,
(reverse mode) and
2 3 (tape direction) indicators
q Tuner operation indicators
• STEREO and MONO indicators
31
7/8/99, 9:15 AM
English
Become familiar with the buttons and controls on your unit.
Powered Rolling Panel
;
a
z
x
c
PANEL
OPEN / CLOSE
PRESET
REC
TUNING
PROGRAM
/ RANDOM
START/STOP
s
DUBBING
REVERSE
MODE
SEA CONTROL
TIMER
/CLOCK
d
CD REC START
DECK A/B
Press PANEL OPEN/CLOSE f
5 to open the panel.
g
To close the panel, press
h
the button again.
v
NEXT
PREV
SET
SUBTITLE
j
MPX
PRO LOGIC
/ 3 STEREO
DEMO
SOUND
MODE
CANCEL
–
kl
EDIT
VCD NUMBER
+
b
S. A. BASS
REPEAT
n
m
,
.
/
1
e
CD3
STANDBY
2
COMPACT
CD2
CD 3
SUPER VIDEO
r
CD 2
3
CD1
CD 1
PLAY & EXCHANGER
4
NTSC / PAL COMPATIBILITY
5
VOLUME
+
t
6
PHONES
–
PANEL
OPEN / CLOSE
7
8
COMPACT COMPONENT SYSTEM
MIC LEVEL
MIN
9
SELECT
TAPE
CD
AUX
FM / AM
y
MAX
1
MIC
2
u
p
REC/PLAY
PLAY
q
i
AUTO REVERSE
AUTO REVERSE
EJECT
EJECT
o
w
32
EN26-33;MX-J777V/PM6
32
7/8/99, 9:15 AM
English
Specifications
Center unit section – CA-MXJ777V/MXJ787V
CD player
CD Capacity:
Dynamic range:
Signal-to-noise ratio:
Wow and flutter:
Amplifier
Output Power
Front:
75 watts per channel, min. RMS, both channels driven into 6
ohms at 1 kHz with no more than 0.9% total harmonic
distortion.
Center:
25 watts, min. RMS, driven into 8 ohms at 1 kHz with no more
than 0.9% total harmonic distortion.
Rear:
12.5 watts per channel, min. RMS, both channels driven into
16 ohms at 1 kHz with no more than 0.9% total harmonic
distortion.
Cassette deck
Frequency response
Normal (type I):
CrO2 (type II):
Metal (type IV):
50 – 14,000 Hz
50 – 14,000 Hz
50 – 14,000 Hz (only for playback)
Wow and flutter:
0.15% (WRMS)
General
Power requirement:
AC 110/127/220/230-240 V
(adjustable with the voltage selector),
50 / 60 Hz
Power consumption:
140 watts (at operation)
14 watts (at standby mode)
Maximum power consumption (for Taiwan only): 450 watts
Dimensions (approx.):
265 x 315 x 341 mm (W/H/D)
(10 7/16 x 12 7/16 x 13 7/16 in.)
Mass (approx.):
9.8 kg (21.6 lbs)
Audio input sensitivity/Impedance (at 1 kHz)
AUX:
380 mV/50 kohms
MIC 1/2:
2.5 mV/5 kohms
Audio output level:
AUX:
300 mV
Digital output: CD OPTICAL DIGITAL OUTPUT
Signal wave length: 660 nm
Output level:
–21 to –15 dBm
Speakers/Impedance:
Front:
6 – 16 ohms
Center:
8 – 16 ohms
Rear:
16 – 32 ohms
Colour
CA-MXJ777V
CA-MXJ787V
Tuner
FM tuning range:
AM tuning range:
For Saudi Arabia:
At 9 kHz intervals :
At 10 kHz intervals :
For other countries:
At 9 kHz intervals :
At 10 kHz intervals :
3 CDs
85 dB
90 dB
Immeasurable
Silver colour model
Gold colour model
Supplied accessories
87.50 – 108.00 MHz
See page 3.
531 – 1,602 kHz
530 – 1,600 kHz
Design and specifications are subject to change without notice.
531 – 1,710 kHz
530 – 1,710 kHz
33
EN26-33;MX-J777V/PM6
33
7/8/99, 9:15 AM
Mains (AC) Line Instruction (not applicable for Europe, U.S.A., Canada,
Australia, and U.K.)
CD OPTICAL
DIGITAL
OUTPUT
VIDEO
OUT
ANTENNA
AM LOOP
AM EXT
VOLTAGE
SELECTOR
110V
220V
FM
FM
(75 )
230V
-240V
127V
AUX
RIGHT
LEFT
IN
SUB WOOFER
OUT
OUT
SPEAKERS
RIGHT
LEFT
CAUTION:
SPEAKER IMPEDANCE
6 ~ 16
RIGHT
LEFT
REAR
CENTER
VOLTAGE
SELECTOR
110V
220V
230V
-240V
127V
IMPORTANT for mains (AC) line
BEFORE PLUGGING IN, do check that your mains
(AC) line voltage corresponds with the position of the
voltage selector switch provided on the outside of this
equipment and, if different, reset the voltage selector
switch, to prevent from a damage or risk of fire/
electric shock.
VICTOR COMPANY OF JAPAN, LIMITED
V 0699RRDFLEJEM
J
EN, CH, AR
Cover-MX-J777V/f
2
6/23/99, 5:30 PM
C